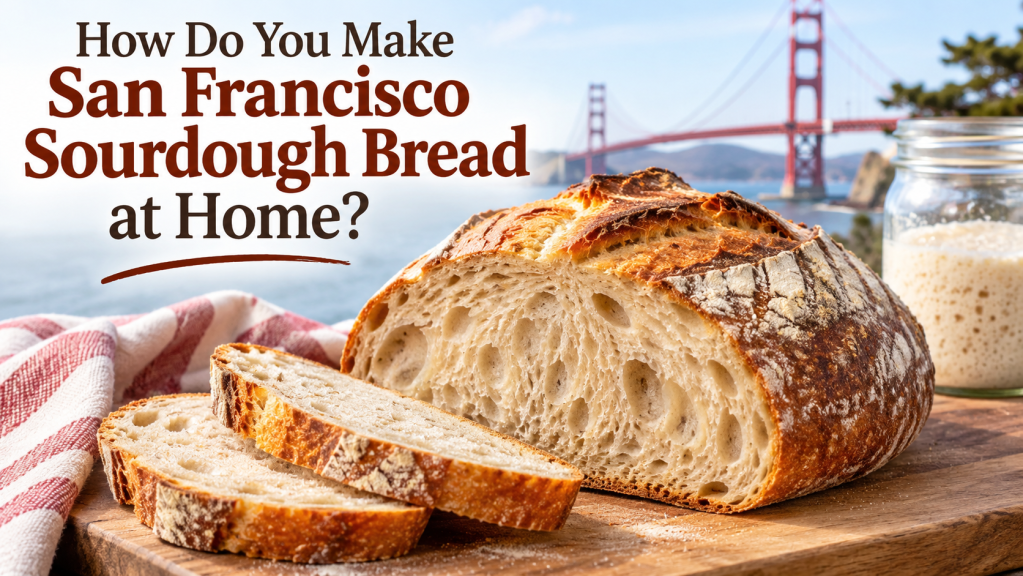
San Francisco sourdough bread is one of the most recognizable breads in America. Known for its tangy flavor, thick golden crust, chewy texture, and soft, airy interior, this traditional bread has been a staple of San Francisco bakeries for generations.
Unlike ordinary homemade bread, San Francisco-style sourdough relies on a naturally fermented starter rather than commercial yeast. This fermentation process gives the bread its distinctive flavor and helps create the texture that makes authentic sourdough so popular.
The good news is that you do not need to live in San Francisco or own professional baking equipment to make delicious sourdough bread at home. With a healthy sourdough starter, a few simple ingredients, and some patience, you can recreate much of the flavor and texture of traditional San Francisco bakery bread in your own kitchen.
This guide explains how to make San Francisco sourdough bread from scratch, including preparing your starter, mixing the dough, developing gluten, fermenting, shaping, and baking the perfect loaf.
What Makes San Francisco Sourdough Bread Different?
San Francisco sourdough bread is famous for its distinctive tangy flavor and chewy texture.
Its character comes from natural fermentation involving wild yeasts and lactic acid bacteria living together in a sourdough starter.
These microorganisms ferment the flour and water, producing gases that help the bread rise and acids that contribute to its flavor.
Several characteristics distinguish San Francisco-style sourdough from ordinary bread.
Tangy flavor: Traditional sourdough develops a noticeable acidity during fermentation. San Francisco-style loaves are often associated with a pronounced sour taste.
Thick, crispy crust: A properly baked loaf has a deep golden-brown crust that crackles as it cools.
Chewy interior: The crumb should be tender but pleasantly chewy, with irregular air pockets throughout.
Natural fermentation: Instead of relying on packaged yeast, sourdough uses a living starter to leaven the bread.
Simple ingredients: Traditional sourdough requires only flour, water, salt, and an active starter.
Although San Francisco has a long sourdough tradition, the city’s climate and local microorganisms are not the only factors responsible for its famous bread. Starter maintenance, flour selection, fermentation temperature, and baking techniques all influence the finished loaf.
Ingredients for Homemade San Francisco Sourdough Bread
This recipe makes one medium-to-large round sourdough loaf.
Recipe overview
1 loaf · Approximately 12 slices
Preparation
30 minutes active
Fermentation
12–20 hours
Baking
40–45 minutes
Difficulty
Intermediate
Ingredients
-
500 grams bread flour (approximately 4 cups, depending on how it is measured)
-
350 grams water, preferably filtered
-
100 grams active sourdough starter at 100% hydration
-
10 grams fine sea salt (approximately 1¾ teaspoons, depending on the salt)
-
Additional flour for dusting
The starter should be bubbly, active, and recently fed before mixing the dough.
Equipment Needed
You do not need an expensive bread-making setup, but a few basic tools make the process easier.
-
Large mixing bowl
-
Digital kitchen scale
-
Dough scraper
-
Clean kitchen towel
-
Proofing basket or towel-lined bowl
-
Dutch oven with a lid
-
Sharp knife or bread lame
-
Cooling rack
A Dutch oven is particularly useful because it traps steam during the beginning of baking, helping the loaf expand and develop a crisp crust.
How Do You Make San Francisco Sourdough Bread Step by Step?
Making sourdough bread takes longer than baking ordinary yeast bread, but most of that time involves waiting for natural fermentation.
Follow these steps to produce a flavorful homemade loaf.
Step 1: Prepare Your Sourdough Starter
Before making the dough, your sourdough starter needs to be healthy and active.
Feed your starter approximately 4–8 hours before mixing, depending on the temperature of your kitchen and how quickly your starter rises.
For example, combine:
-
25 grams established sourdough starter
-
50 grams bread flour
-
50 grams water
Mix thoroughly and place in a clean jar.
Cover loosely and leave at room temperature.
Your starter should rise noticeably, become bubbly, and develop a pleasantly tangy aroma.
For best results, use it when it is near its peak rise, before it begins collapsing significantly.
If you do not already have an established starter, you will need to create one over several days, often a week or longer, before attempting this recipe.
Step 2: Mix the Flour and Water
In a large mixing bowl, combine 500 grams of bread flour with 325 grams of the water.
Reserve the remaining 25 grams for mixing with the salt later.
Stir until no dry flour remains.
The dough will look rough and slightly sticky.
Cover the bowl and allow it to rest for 30–60 minutes.
This resting period, called an autolyse, allows the flour to absorb water and begins gluten development.
The result is dough that becomes easier to stretch and handle.
Step 3: Add the Starter and Salt
After the resting period, add 100 grams of active sourdough starter to the dough.
Mix thoroughly by squeezing and folding the dough until the starter is evenly incorporated.
Dissolve the 10 grams of salt in the remaining 25 grams of water.
Add this mixture to the dough and continue mixing until everything is combined.
The dough may initially feel slippery or loose, but it will gradually become smoother as you work with it.
Cover the bowl and let it rest for approximately 30 minutes.
Step 4: Develop Gluten With Stretch and Folds
Instead of traditional kneading, sourdough bread can develop gluten through a technique called stretching and folding.
With slightly wet hands, grab one edge of the dough.
Stretch it upward gently, then fold it over the center.
Rotate the bowl approximately one-quarter turn and repeat.
Continue until you have completed four folds around the dough.
Cover the bowl and rest for 30 minutes.
Repeat this process three or four times during the first two hours of bulk fermentation.
As gluten develops, the dough should become smoother, stronger, and more elastic.
Avoid pulling so aggressively that the dough tears.
Step 5: Allow the Dough to Ferment
After completing the stretch-and-fold sessions, leave the dough covered at room temperature.
Bulk fermentation commonly takes approximately 4–7 hours total from the time the starter is added, depending on the temperature and starter activity.
At around 75–78°F, look for the dough to increase in volume by approximately 40–60%, become slightly domed, and show bubbles along its sides.
Cooler kitchens may require additional time.
The dough should feel airy and somewhat jiggly when the bowl is moved.
Do not rely on the clock alone. Learning to recognize properly fermented dough is one of the most important sourdough baking skills.
Step 6: Shape the Sourdough Loaf
Lightly flour your work surface and gently turn out the fermented dough.
Be careful not to press out all the trapped air.
Fold the edges toward the center to create a loose round shape.
Turn the dough seam-side down and allow it to rest for approximately 20–30 minutes.
After resting, perform the final shaping.
Gently tighten the dough into a round loaf by drawing it toward you across the work surface.
The goal is to create surface tension without tearing the dough.
A properly shaped loaf should hold its form rather than spreading into a flat puddle.
Step 7: Refrigerate for Cold Fermentation
Dust a proofing basket or towel-lined bowl with flour.
Place the shaped dough inside with the seam facing upward.
Cover the basket and refrigerate for approximately 8–16 hours.
This overnight fermentation helps develop the bread’s flavor and makes the dough easier to score before baking.
Cold fermentation is especially useful when trying to achieve the tangy character associated with San Francisco sourdough.
However, longer refrigeration does not automatically produce better bread. The dough can still overproof if left too long.
Step 8: Preheat Your Dutch Oven
The next day, place your Dutch oven and lid inside the oven.
Preheat to 475°F for approximately 30–45 minutes.
A thoroughly heated Dutch oven helps create rapid oven spring, allowing the dough to expand before the crust hardens.
Use caution when handling the Dutch oven because both the pot and lid will be extremely hot.
Step 9: Score the Bread
Remove the dough from the refrigerator.
Carefully turn it onto a piece of parchment paper suitable for the baking temperature.
The smooth side should now face upward.
Using a sharp knife or bread lame, make one long slash approximately ½ inch deep across the top.
Scoring allows the bread to expand in a controlled direction during baking.
Without scoring, the crust may split unpredictably.
Step 10: Bake the Sourdough Bread
Carefully transfer the dough into the preheated Dutch oven.
Cover with the lid.
Reduce the oven temperature to 450°F.
Bake covered for approximately 20 minutes.
Then remove the lid and continue baking for another 20–25 minutes.
The bread should develop a deep golden-brown crust.
For a darker, more traditional bakery-style crust, you may bake a few minutes longer while watching carefully to prevent burning.
The internal temperature of a fully baked loaf is commonly around 205–210°F.
Step 11: Cool Before Slicing
Remove the bread from the Dutch oven and place it on a cooling rack.
Allow it to cool for at least 1–2 hours before slicing.
Although freshly baked sourdough smells irresistible, cutting into the loaf too early can produce a gummy interior.
Cooling allows moisture to redistribute and the crumb to finish setting.
Once cooled, slice with a serrated bread knife and enjoy.
How Do You Make San Francisco Sourdough Bread More Sour?
One of the most common questions about homemade sourdough is how to develop a stronger tangy flavor.
The acidity of sourdough depends on several factors, including fermentation temperature, starter maintenance, flour composition, and fermentation time.
If you prefer a more pronounced sour flavor, consider the following techniques.
Use a Longer Cold Fermentation
Refrigerating shaped dough overnight can encourage additional flavor development.
Some bakers extend cold fermentation to 18–24 hours, provided the dough has enough fermentation tolerance.
However, excessive fermentation can weaken gluten and produce a flat loaf.
Experiment With Whole-Grain Flour
Replacing approximately 5–10% of the bread flour with whole wheat or rye flour can encourage fermentation and create a more complex flavor.
Whole-grain flours provide additional nutrients for sourdough microorganisms.
Maintain a Healthy Starter
A mature, consistently fed starter generally produces more reliable results than a weak or neglected starter.
Different feeding schedules can influence acidity, but allowing a starter to become excessively acidic can reduce its leavening performance.
Control Fermentation Temperature
Temperature influences how yeast and bacteria behave during fermentation.
Warmer and cooler fermentation conditions can produce different balances of acids and flavor compounds.
There is no single temperature that guarantees the most sour bread.
For beginners, consistent fermentation and a healthy starter should take priority over maximizing acidity.
Why Does San Francisco Sourdough Have Such a Thick Crust?
The thick crust associated with traditional sourdough comes from a combination of high baking temperatures, steam, and sufficient baking time.
Steam is particularly important during the first stage of baking.
When moisture surrounds the dough, the surface remains flexible long enough for the loaf to expand.
As baking continues and the surface dries, the crust becomes firm and eventually develops a deep brown color.
A Dutch oven recreates some of the conditions found in professional steam-injected bakery ovens.
Removing the lid during the second half of baking allows moisture to escape, helping the crust become crisp.
For an especially crunchy crust, allow the bread to cool uncovered on a wire rack.
Can You Make San Francisco Sourdough Without a Dutch Oven?
Yes. A Dutch oven is helpful, but it is not absolutely necessary.
You can bake sourdough on a preheated baking stone, baking steel, or heavy baking sheet.
To encourage crust development, place a separate heat-safe metal pan on a lower oven rack during preheating.
When loading the bread, carefully add hot water to the lower pan to generate steam.
Avoid pouring water directly onto the oven floor or glass door.
Steam can cause serious burns, so use appropriate oven mitts and follow your oven manufacturer’s instructions.
Bake the loaf at approximately 450°F until it develops a golden-brown crust and reaches the proper internal temperature.
The results may differ slightly from Dutch oven baking, but you can still produce excellent homemade sourdough.
What Is the Best Flour for San Francisco Sourdough Bread?
Bread flour is generally the best starting point for homemade San Francisco-style sourdough.
It contains more protein than many all-purpose flours, which helps create the gluten structure needed for chewy bread.
Strong gluten development allows the dough to trap fermentation gases and maintain its shape during baking.
All-purpose flour can also work, although the dough may be somewhat softer and the finished loaf less chewy.
For a traditional-style loaf, start with bread flour before experimenting with other varieties.
You can also blend bread flour with small amounts of whole wheat or rye flour to create additional flavor complexity.
Why Is My Homemade Sourdough Bread Flat?
Flat sourdough bread is a common problem, particularly for beginners.
Several factors may be responsible.
Weak starter: If your starter is not active enough, the dough may fail to rise properly.
Overfermentation: Dough that ferments too long can lose strength and collapse.
Underfermentation: Dough that has not fermented enough may lack sufficient gas and structure.
Insufficient gluten development: Without adequate strength, the dough may spread instead of rising.
Poor shaping: A loosely shaped loaf may lack the surface tension needed to hold its form.
Excessive hydration: Dough containing too much water for the flour and baker’s skill level can become difficult to handle.
For better results, use an active starter, monitor fermentation carefully, and develop enough gluten before shaping.
Why Is My Sourdough Bread Gummy Inside?
A gummy interior does not necessarily mean the bread is underbaked.
Several issues can contribute to this texture.
One common cause is slicing the bread before it has cooled completely.
Another possibility is insufficient fermentation, which can produce a dense, sticky crumb.
Excessive fermentation may also weaken the dough and contribute to poor texture.
Finally, baking for too little time can leave excessive moisture in the center.
Use an instant-read thermometer when necessary and allow the loaf to cool thoroughly before slicing.
How Long Does Homemade San Francisco Sourdough Bread Last?
Homemade sourdough typically stays at its best for approximately 2–3 days at room temperature, although storage conditions can affect freshness.
Store the bread in a bread box, paper bag, or clean kitchen towel.
For longer storage, freeze individual slices in an airtight freezer-safe bag or container.
Frozen sourdough generally maintains good quality for approximately 2–3 months.
Avoid refrigerating bread for routine storage because refrigeration accelerates starch retrogradation, causing bread to become stale faster.
If the crust softens, briefly warming the bread in the oven can help restore some crispness.
Never eat bread that has developed mold.
What Can You Serve With San Francisco Sourdough Bread?
San Francisco sourdough is extremely versatile and pairs well with many dishes.
Its tangy flavor complements rich soups, savory fillings, and simple spreads.
Some popular ways to enjoy homemade sourdough include:
-
Toasted sourdough with butter
-
Grilled cheese sandwiches
-
Sourdough avocado toast
-
Garlic bread
-
Clam chowder
-
Tomato soup
-
Turkey and cheese sandwiches
-
Sourdough French toast
-
Breakfast egg sandwiches
-
Toasted bread with olive oil
One of the most famous San Francisco combinations is sourdough bread served alongside creamy clam chowder.
While making an edible sourdough bread bowl requires a different shaping approach and usually smaller individual loaves, this recipe works beautifully as sliced bread served with chowder.
Frequently Asked Questions About San Francisco Sourdough Bread
Do You Need San Francisco Water to Make Authentic Sourdough?
No. You do not need water from San Francisco to make excellent sourdough bread.
Although water quality can affect fermentation, the starter, flour, temperature, and fermentation process have a much greater influence on the finished loaf.
Filtered water is a good option if your tap water contains high levels of chlorine or has an unpleasant taste.
Is San Francisco Sourdough Made Without Yeast?
Traditional sourdough does not require added commercial yeast.
However, sourdough starter naturally contains wild yeasts.
These yeasts work alongside lactic acid bacteria to ferment the dough and help it rise.
Therefore, sourdough is not technically yeast-free.
Can You Make Sourdough Bread in One Day?
You can make some sourdough recipes in a single day if your starter is very active and fermentation conditions are favorable.
However, traditional-style sourdough often benefits from an overnight cold fermentation.
For the recipe described here, plan to mix and shape the dough on the first day and bake it the following morning.
Why Does My Sourdough Taste Too Sour?
Excessive acidity may develop when dough ferments too long or when the starter becomes overly acidic.
Try using a freshly peaked starter, shortening the cold fermentation, or adjusting your starter feeding schedule.
A balanced sourdough should have pleasant acidity without an overpowering sour taste.
Can Beginners Make San Francisco Sourdough Bread?
Yes. Beginners can successfully make sourdough bread at home.
The most challenging parts are maintaining an active starter, recognizing proper fermentation, and shaping the dough.
With practice, these steps become easier.
Using a digital scale and keeping your kitchen temperature consistent can significantly improve results.
How Long Does It Take to Make San Francisco Sourdough Bread From Scratch?
Once you have an established starter, the process usually takes approximately 12–24 hours, including fermentation and baking.
Actual hands-on preparation time is relatively short.
If you are creating a starter from flour and water for the first time, allow an additional week or longer until it reliably rises after feeding.
Tips for Making the Best Homemade San Francisco Sourdough
Consistency is the secret to excellent sourdough bread.
Rather than changing several ingredients or techniques at once, focus on mastering a reliable basic recipe.
Weigh ingredients whenever possible because measuring flour by volume can produce inconsistent results.
Use your starter when it is active and capable of reliably raising dough.
Pay attention to dough temperature because fermentation speeds up in warmer conditions and slows down in cooler environments.
Do not rush the bulk fermentation stage, but avoid allowing the dough to rise so much that it loses structure.
Develop gluten gradually through stretching and folding.
Shape the dough firmly enough to create surface tension without squeezing out all the air.
Finally, bake until the crust develops a rich color and allow the bread to cool completely before slicing.
Each loaf teaches you something about your starter, your kitchen, and the fermentation process.
Final Thoughts: Making San Francisco Sourdough Bread at Home
Learning how to make San Francisco sourdough bread at home is a rewarding experience that combines simple ingredients with traditional bread-making techniques.
The process requires patience, but the result is worth the effort.
A well-made sourdough loaf offers a crisp golden crust, chewy interior, complex flavor, and the satisfying aroma of freshly baked bread.
You do not need a professional bakery, special San Francisco water, or expensive equipment to achieve excellent results.
What matters most is maintaining a healthy starter, allowing the dough to ferment properly, developing sufficient gluten, and baking at the right temperature.
Whether you enjoy it toasted with butter, served with homemade soup, or used for a hearty sandwich, homemade San Francisco-style sourdough brings a classic Bay Area baking tradition into your kitchen.
With practice and patience, you can bake sourdough bread that rivals the flavor and texture of your favorite neighborhood bakery.
Leave a Reply