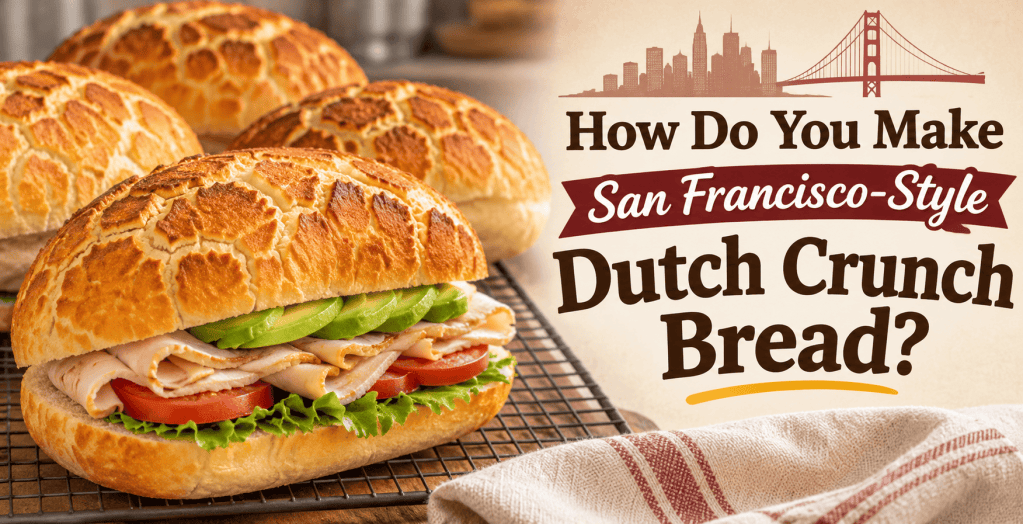
San Francisco is famous for its sourdough bread, but another Bay Area favorite deserves just as much attention: Dutch Crunch bread. Known for its distinctive crackled crust, golden appearance, and soft, fluffy interior, Dutch Crunch has become a staple of sandwich shops throughout San Francisco and the surrounding Bay Area.
If you have ever ordered a sandwich from a Bay Area deli, you may have encountered this unique bread. Its crunchy exterior provides a satisfying contrast to the tender bread underneath, making it especially popular for hearty sandwiches filled with turkey, roast beef, pastrami, and fresh vegetables.
The good news is that you do not need to visit a San Francisco bakery to enjoy it. With a few basic ingredients, a little patience, and a special rice flour topping, you can make authentic Bay Area-style Dutch Crunch bread in your own kitchen.
This guide explains what makes Dutch Crunch special, how to prepare it from scratch, and the techniques that help create its signature crispy, crackled crust.
What Is San Francisco-Style Dutch Crunch Bread?
Dutch Crunch is a soft yeast bread covered with a thin rice flour paste before baking. As the bread rises and expands in the oven, the topping dries, cracks, and develops a distinctive pattern resembling a tiger’s stripes.
That is why this bread is also commonly called tiger bread.
Although Dutch Crunch has roots in Dutch baking traditions, it became especially popular in the San Francisco Bay Area, where sandwich shops embraced its combination of a crunchy crust and soft interior.
Unlike traditional San Francisco sourdough, Dutch Crunch does not depend on a sourdough starter or long fermentation to develop its flavor.
Instead, its appeal comes from three important characteristics:
- A crispy, golden, crackled exterior
- A soft, slightly sweet interior
- A distinctive rice flour topping that creates its signature appearance
These qualities make Dutch Crunch particularly well suited for sandwiches because it offers texture without being excessively dense or chewy.
Why Is Dutch Crunch Bread So Popular in San Francisco?
Dutch Crunch has become closely associated with Bay Area sandwich culture.
Throughout San Francisco, Oakland, Berkeley, and surrounding communities, delis and sandwich shops have served sandwiches on Dutch Crunch rolls for decades.
Its popularity comes from the balance between texture and flavor.
The crunchy topping adds character to every bite, while the soft bread underneath makes sandwiches easier to eat than those made with particularly tough or chewy crusts.
Dutch Crunch also works well with both hot and cold fillings.
A freshly baked roll can hold everything from deli turkey and avocado to hot pastrami, melted cheese, and grilled vegetables.
For many Bay Area residents, Dutch Crunch is more than another bread option. It is a familiar part of the region’s sandwich tradition.
Ingredients for Homemade San Francisco-Style Dutch Crunch Bread
This recipe makes approximately 8 sandwich rolls.
Preparation time: 25 minutes
Rising time: 1 hour 45 minutes to 2 hours 15 minutes
Baking time: 20–25 minutes
Total time: Approximately 2 hours 30 minutes to 3 hours
Yield: 8 rolls
Ingredients for the Bread Dough
- 4 cups bread flour (approximately 480 grams)
- 1 cup warm water (240 milliliters)
- ½ cup warm whole milk (120 milliliters)
- 2¼ teaspoons active dry yeast
- 2 tablespoons granulated sugar
- 2 tablespoons unsalted butter, softened
- 1½ teaspoons salt
Ingredients for the Dutch Crunch Topping
- ¾ cup white rice flour (approximately 110 grams)
- ½ cup warm water, plus a little more if needed
- 1 tablespoon granulated sugar
- 1 tablespoon vegetable oil
- 2 teaspoons active dry yeast
- ¼ teaspoon salt
Important: The rice flour topping is what makes Dutch Crunch different from ordinary sandwich bread. Regular wheat flour cannot create the same characteristic crackled crust.
How to Make San Francisco-Style Dutch Crunch Bread Step by Step
Step 1: Activate the Yeast
Pour the warm water and warm milk into a large mixing bowl.
The liquids should be approximately 105–110°F, warm enough to activate the yeast without damaging it.
Add the sugar and active dry yeast.
Stir gently and allow the mixture to sit for approximately 5–10 minutes.
The yeast should become foamy, indicating that it is active.
If the mixture does not foam, the yeast may be expired or the liquid temperature may have been incorrect.
Starting with active yeast helps ensure the bread rises properly.
Step 2: Prepare the Bread Dough
Add the softened butter and salt to the yeast mixture.
Gradually stir in the bread flour, adding approximately one cup at a time.
Continue mixing until a soft dough forms.
The dough should be slightly tacky but manageable.
If it feels excessively sticky, add a small amount of flour, one tablespoon at a time.
Avoid adding too much flour because that can make the finished bread dense rather than soft.
Step 3: Knead the Dough
Transfer the dough to a lightly floured work surface.
Knead for approximately 8–10 minutes until the dough becomes smooth, elastic, and slightly springy.
If using a stand mixer fitted with a dough hook, knead on low to medium-low speed for approximately 6–8 minutes.
Proper kneading develops the gluten structure that gives Dutch Crunch its soft but sturdy interior.
To check whether the dough is ready, stretch a small piece between your fingers.
If it stretches into a thin membrane before tearing, the gluten has developed sufficiently.
Step 4: Let the Dough Rise
Lightly grease a large bowl with oil or butter.
Place the dough inside and turn it once to coat the surface.
Cover the bowl with plastic wrap or a clean kitchen towel.
Allow the dough to rise in a warm, draft-free location for approximately 60–90 minutes, or until doubled in size.
The exact rising time depends on the room temperature and yeast activity.
A warmer kitchen generally produces a faster rise.
Step 5: Shape the Sandwich Rolls
Once the dough has doubled, gently press it down to release excess gas.
Transfer it to a lightly floured surface.
Divide the dough into eight equal portions.
Shape each portion into an oval sandwich roll approximately 5–6 inches long.
To create smooth rolls, gently flatten each piece, fold the edges toward the center, and pinch the seam closed.
Roll the dough lightly to achieve the desired length.
Place the shaped rolls on parchment-lined baking sheets, leaving several inches between them.
The rolls need room to expand during their second rise and baking.
Step 6: Prepare the Dutch Crunch Topping
While the shaped rolls begin their second rise, prepare the special topping.
In a medium bowl, combine:
- White rice flour
- Warm water
- Sugar
- Vegetable oil
- Active dry yeast
- Salt
Stir until the mixture forms a smooth, thick paste.
The consistency should resemble thick pancake batter.
It should be spreadable but not so thin that it runs off the rolls.
Add a teaspoon or two of water if the mixture is too stiff.
Cover the bowl loosely and allow the topping to rest for approximately 15–20 minutes.
During this time, the yeast becomes active and the mixture may develop small bubbles.
This topping is responsible for the characteristic cracked appearance of Dutch Crunch bread.
Step 7: Apply the Topping
Allow the shaped rolls to rise until noticeably puffy, approximately 30–45 minutes in total.
Preheat the oven to 375°F during the final part of the rise.
Once the rolls are nearly ready to bake, gently spread the rice flour topping over the upper surface of each roll.
Use a spoon, small spatula, or pastry brush to apply a generous, even coating.
The topping should be approximately ⅛ inch thick.
Do not spread it too thinly.
A coating that is too thin may brown without developing the large, distinctive cracks associated with Dutch Crunch.
However, an excessively thick layer can become heavy and may separate from the bread.
Aim for a consistent coating across the tops and upper sides of the rolls.
Step 8: Bake Until Golden and Crackled
Place the baking sheets in the preheated oven.
Bake for approximately 20–25 minutes, until the rolls are golden brown and the topping has developed a crackled appearance.
If baking two sheets at once, rotate their positions halfway through baking to promote even browning.
The finished rolls should have a firm, crispy topping and a soft interior.
For additional accuracy, check the internal temperature with an instant-read thermometer.
The bread should reach approximately 190–200°F in the center.
Remove the rolls from the oven and transfer them to a wire rack.
Step 9: Cool Before Slicing
Allow the rolls to cool for at least 20–30 minutes before cutting.
Cooling helps the interior finish setting and prevents the bread from becoming gummy when sliced.
The crust will also become more defined as the rolls cool.
Once ready, slice the rolls horizontally and fill them with your favorite sandwich ingredients.
What Makes Dutch Crunch Bread Crack on Top?
The signature cracked crust comes from the difference between the rice flour topping and the wheat-based bread dough underneath.
Rice flour does not contain the gluten-forming proteins found in wheat flour.
As the bread expands during baking, the rice flour coating cannot stretch in the same way as the underlying dough.
Instead, it dries, separates, and cracks.
This creates the distinctive golden pattern associated with Dutch Crunch.
Several factors influence how the crust develops.
Topping thickness: A moderately thick coating encourages larger, more noticeable cracks.
Dough expansion: Properly risen dough expands in the oven, helping separate the topping.
Rice flour consistency: A smooth, spreadable paste produces more even coverage.
Oven temperature: Adequate heat allows the topping to dry and develop a crisp surface.
Topping moisture: Too much water may prevent the topping from setting properly.
The combination of these factors determines whether the finished bread has the characteristic tiger-like appearance.
What Is the Best Flour for Dutch Crunch Bread?
Bread flour is generally the best choice for the dough because its higher protein content helps develop a strong gluten structure.
This gives the rolls enough strength to hold sandwich fillings while maintaining a soft interior.
All-purpose flour can also work, although the finished rolls may have a slightly different texture.
For the topping, white rice flour is essential.
Do not confuse white rice flour with glutinous rice flour, also known as sweet rice flour.
Despite its name, glutinous rice flour does not contain gluten, but its starch properties differ from those of ordinary white rice flour.
Using regular white rice flour provides a more reliable crackled topping.
Brown rice flour may produce a different texture and appearance, so white rice flour is recommended when trying to recreate classic Bay Area Dutch Crunch.
How Do You Keep Dutch Crunch Bread Soft Inside?
One of the defining qualities of good Dutch Crunch bread is the contrast between its crunchy exterior and tender interior.
Several techniques help maintain that balance.
Use Milk and Butter
Milk adds richness and contributes to a softer crumb.
Butter helps tenderize the dough and provides additional flavor.
Together, they create a sandwich roll that is softer than many lean breads made with only flour, water, yeast, and salt.
Avoid Excess Flour
Adding too much flour during kneading can produce dry, dense rolls.
The dough should remain slightly tacky rather than becoming stiff.
Allow Proper Rising Time
Underproofed dough may produce dense bread with limited oven expansion.
Allow the dough to rise until it has visibly increased in volume.
Do Not Overbake
Baking too long removes excessive moisture from the interior.
Remove the rolls once they are fully baked and golden.
Cool on a Wire Rack
A wire rack allows air to circulate around the bread.
This prevents moisture from collecting underneath the rolls while preserving the crust.
What Are the Best Sandwiches to Make With Dutch Crunch Bread?
Dutch Crunch is especially popular because it complements a wide variety of sandwich fillings.
Here are several combinations inspired by Bay Area sandwich shops.
1. Turkey, Bacon, and Avocado
Layer sliced turkey, crispy bacon, ripe avocado, lettuce, tomato, and mayonnaise on a Dutch Crunch roll.
The creamy avocado and crunchy bread create an excellent contrast.
2. Hot Pastrami and Swiss
Fill a sliced roll with warm pastrami, Swiss cheese, mustard, and pickles.
The bread provides enough structure to hold the hot filling without becoming excessively tough.
3. Roast Beef and Horseradish
Combine thinly sliced roast beef, provolone cheese, red onion, lettuce, and creamy horseradish sauce.
The savory beef and sharp horseradish pair well with the slightly sweet bread.
4. California Chicken Sandwich
Use grilled chicken breast, avocado, tomato, lettuce, Monterey Jack cheese, and a light garlic aioli.
This combination highlights familiar California ingredients.
5. Italian Deli Sandwich
Layer salami, ham, provolone, shredded lettuce, tomato, pepperoncini, and Italian dressing.
Dutch Crunch adds a distinctive texture to this classic deli combination.
6. Vegetarian Avocado Sandwich
Fill the roll with avocado, cucumber, tomato, sprouts, roasted peppers, and hummus.
The crunchy crust complements the fresh vegetables and creamy spread.
Common Mistakes When Making Dutch Crunch Bread
Even experienced home bakers can encounter problems when making Dutch Crunch for the first time.
Understanding the most common mistakes can help improve the results.
The Topping Does Not Crack
If the topping remains smooth, it may have been applied too thinly or mixed with too much water.
Use a thicker paste and apply an even coating.
Insufficient oven expansion can also reduce cracking.
The Crust Is Too Hard
An excessively thick topping or overbaking can produce a crust that is unpleasantly hard.
Reduce the topping thickness slightly and check the rolls near the end of the recommended baking time.
The Bread Is Too Dense
Dense bread often results from insufficient kneading, underproofing, or adding too much flour.
Make sure the dough is elastic and has enough time to rise.
The Topping Falls Off
A very thick coating may separate from the bread after baking.
Apply the topping evenly and avoid disturbing the rolls once coated.
The Rolls Spread Instead of Rising
If the dough spreads excessively, it may be too wet, insufficiently kneaded, or overproofed.
Proper gluten development and careful shaping help the rolls maintain their structure.
Can You Make Dutch Crunch Bread Without a Stand Mixer?
Yes. Dutch Crunch bread can be made entirely by hand.
A stand mixer makes kneading easier, but it is not necessary.
Simply combine the ingredients in a large bowl and knead the dough on a lightly floured surface.
Hand kneading generally takes approximately 8–10 minutes, depending on the dough’s consistency and your technique.
The important goal is developing a smooth, elastic dough that can stretch without tearing immediately.
Home bakers have made yeast bread by hand for generations, and Dutch Crunch is no exception.
Can You Make Dutch Crunch Bread Ahead of Time?
Yes. Dutch Crunch rolls can be prepared ahead, although they are at their crispiest on the day they are baked.
For the best flavor and texture, bake the rolls several hours before serving.
Once completely cooled, store them in a bread bag or airtight container at room temperature for approximately 1–2 days.
The crust will gradually soften during storage.
To restore some of its crunch, warm the rolls in a 350°F oven for approximately 5–8 minutes.
Avoid refrigerating bread unless necessary because refrigeration generally accelerates staling.
Can You Freeze Homemade Dutch Crunch Bread?
Dutch Crunch bread freezes well when stored properly.
Allow the rolls to cool completely before freezing.
Wrap each roll tightly in plastic wrap or place it in a freezer-safe bag, removing as much air as possible.
For the best quality, use frozen rolls within approximately 2–3 months.
To serve, thaw the rolls at room temperature.
Then warm them in a 350°F oven for approximately 5–10 minutes, until heated through and lightly crisp.
Freezing is especially convenient when preparing a large batch of sandwich rolls.
Is Dutch Crunch Bread the Same as Tiger Bread?
Dutch Crunch and tiger bread are generally two names for the same style of bread.
Both use a rice flour-based topping that cracks during baking.
The name tiger bread refers to the striped appearance of the crust.
In the San Francisco Bay Area, however, the name Dutch Crunch is especially common.
The bread is frequently shaped into individual sandwich rolls rather than large loaves.
Although recipes vary by bakery, the essential characteristics remain the same: a soft yeast bread with a crisp, crackled rice flour topping.
Is Dutch Crunch Bread Sourdough?
No. Traditional Dutch Crunch bread and San Francisco sourdough are different styles of bread.
San Francisco sourdough is known for its naturally fermented dough, tangy flavor, and chewy texture.
Dutch Crunch typically uses commercial yeast and has a milder, slightly sweet flavor.
Its signature feature is the rice flour crust rather than sourdough fermentation.
However, it is possible to combine the two techniques.
A baker can make a sourdough-based roll and apply a Dutch Crunch topping before baking.
The result would have sourdough flavor with a crackled exterior.
That variation is not required for traditional Bay Area-style Dutch Crunch sandwich rolls.
Frequently Asked Questions About Dutch Crunch Bread
Why is Dutch Crunch bread called Dutch Crunch?
The name reflects its association with Dutch-style tiger bread and its distinctively crunchy topping. The term became especially familiar in Bay Area sandwich shops.
What gives Dutch Crunch bread its unique flavor?
The bread itself has a mild, slightly sweet yeast-bread flavor. The toasted rice flour topping adds a distinctive crisp texture and subtle toasted taste.
Can you use all-purpose flour instead of bread flour?
Yes. All-purpose flour can produce good results, although bread flour generally provides a slightly stronger structure and chewier texture.
Why does Dutch Crunch bread use rice flour?
Rice flour creates the brittle coating that cracks as the bread expands during baking. Wheat flour does not produce the same effect because of its gluten-forming properties.
Is Dutch Crunch bread supposed to be hard?
The topping should be crisp and crunchy, but the bread underneath should remain soft. A crust that is excessively hard may indicate overbaking or an overly thick topping.
Can Dutch Crunch be made as a full loaf?
Yes. The dough can be shaped into a larger loaf instead of individual sandwich rolls. Baking time will need to increase depending on the loaf’s size and shape.
What is the best way to reheat Dutch Crunch bread?
Warm the bread in a 350°F oven for approximately 5–8 minutes. This helps restore the crispness of the topping without excessively drying the interior.
Is Dutch Crunch bread good for sandwiches?
Yes. Dutch Crunch is especially well suited for sandwiches because its soft interior holds fillings comfortably while its crackled crust adds texture.
Final Thoughts: Making Authentic Bay Area Dutch Crunch Bread at Home
San Francisco-style Dutch Crunch bread is one of the Bay Area’s most recognizable sandwich traditions.
While sourdough often receives most of the attention, Dutch Crunch offers something different: a soft, flavorful sandwich roll topped with a crispy, golden crust that cracks into its signature pattern during baking.
The secret is not an unusual baking technique or expensive equipment. It is the combination of properly prepared yeast dough and a rice flour topping applied just before baking.
With patience, careful shaping, and the right topping consistency, you can recreate the familiar texture of Bay Area deli bread in your own kitchen.
Whether you use it for a classic turkey and avocado sandwich, hot pastrami, roast beef, or a fresh California-style vegetarian sandwich, homemade Dutch Crunch brings a little piece of San Francisco sandwich culture to the table.
And once you experience the combination of a freshly baked, crunchy crust and a soft, warm interior, it is easy to understand why Dutch Crunch has remained a Bay Area favorite for generations.
Leave a Reply