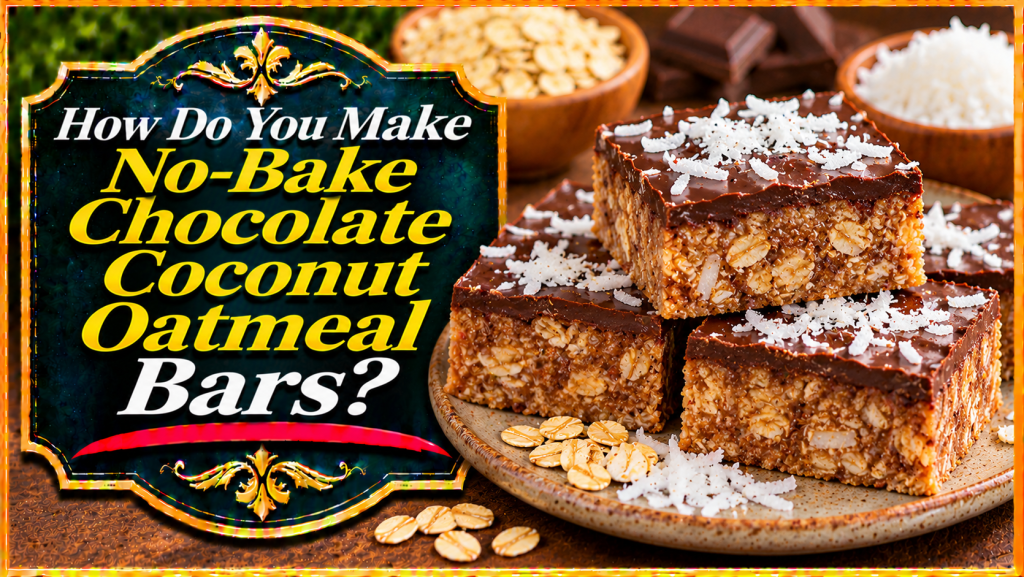
No-bake chocolate coconut oatmeal bars combine rolled oats, shredded coconut, peanut butter and a smooth chocolate topping in an easy refrigerated dessert. The oats provide a chewy texture, while the nut butter and maple syrup bind the ingredients together without baking. A thin layer of melted chocolate gives each square a rich finish. These bars are particularly convenient when you want to prepare a dessert ahead of time without turning on the oven. The key is to press the oat mixture firmly into the pan and allow the chocolate and filling to set completely before slicing.
Recipe at a Glance
Yield: 16 small bars. Preparation time: approximately 20 minutes. Refrigeration time: at least two hours. Equipment: an eight-inch square pan, parchment paper, large mixing bowl, microwave-safe bowl or double boiler, spatula and sharp knife. Although this recipe requires no baking, you will need to gently melt the chocolate. The bars are best served chilled or allowed to soften briefly before eating.
Ingredients for the Chocolate Coconut Oatmeal Base
Gather 2 cups old-fashioned rolled oats, ¾ cup unsweetened shredded coconut, ¾ cup creamy peanut butter, ⅓ cup pure maple syrup, 2 tablespoons unsweetened cocoa powder, 1 teaspoon vanilla extract and ¼ teaspoon fine salt. Choose a peanut butter that is smooth and well mixed. If it contains added salt, reduce or omit the extra salt. For the topping, prepare ¾ cup semisweet chocolate chips, 2 teaspoons coconut oil and 2 tablespoons additional shredded coconut for sprinkling. A small pinch of flaky sea salt is optional.
Choosing the Right Oats
Old-fashioned rolled oats create a noticeable chewy texture without requiring a lengthy cooking process. Select commercially packaged oats suitable for uncooked preparations, following any cooking instructions on the label. Quick oats may also work, but they tend to produce a softer and slightly denser bar. Steel-cut oats are not recommended because they are much harder and will not soften sufficiently in this mixture. If your oats require cooking before consumption, choose a different ready-to-eat oat product or use an equivalent amount of ready-to-eat plain oat cereal, recognizing that the texture may differ.
Which Coconut Should You Use?
Unsweetened shredded coconut provides a mild tropical flavor and allows you to control the sweetness of the finished dessert. Finely shredded coconut distributes more evenly through the base than large coconut flakes. Sweetened coconut can be substituted, but the bars will taste sweeter and may have a slightly different texture. If you enjoy a toasted flavor, use commercially toasted, unsweetened coconut for part of the mixture. Coconut flour is not a direct substitute for shredded coconut because it absorbs significantly more moisture and may make the base too dry.
Step 1: Prepare the Pan
Line an eight-inch square pan with parchment paper, leaving an overhang along two opposite sides. This makes it easier to lift the chilled bars out of the pan before cutting. Smooth the paper into the corners so the mixture forms a relatively even square. There is usually no need to grease the pan heavily because the parchment creates a barrier between the filling and the pan. Set the prepared pan on a stable surface.
Step 2: Combine the Dry Ingredients
Place the rolled oats, shredded coconut, cocoa powder and salt in a large mixing bowl. Stir with a spoon or whisk until the cocoa powder is evenly distributed. Breaking up any lumps at this stage helps prevent pockets of dry cocoa in the finished bars. Reserve the additional coconut for the chocolate topping. If you plan to include chopped nuts or other optional additions, keep the quantity modest so the mixture will still hold its shape.
Step 3: Make the Binding Mixture
In a separate microwave-safe bowl, combine the peanut butter and maple syrup. If the peanut butter is very firm, microwave the mixture in short ten- to fifteen-second intervals, stirring between each interval, until it becomes easier to mix. Alternatively, warm the ingredients gently in a small saucepan over low heat. Remove from the heat and stir in the vanilla extract. The mixture should be smooth and thick rather than very hot or runny. Avoid boiling it because excessive heat is unnecessary for this recipe.
Step 4: Mix and Press the Oat Base
Pour the peanut butter mixture over the dry ingredients and stir thoroughly until the oats and coconut are evenly coated. The mixture should feel sticky and hold together when a small portion is compressed with a spoon. If it remains crumbly after thorough mixing, stir in an additional tablespoon of peanut butter. If it is excessively wet, add a tablespoon of oats. Transfer the mixture to the prepared pan. Spread it evenly and press it firmly into the corners using the back of a spatula or the flat bottom of a clean measuring cup lined with parchment. A well-compacted base is less likely to crumble when sliced.
Step 5: Melt the Chocolate
Place the chocolate chips and coconut oil in a dry microwave-safe bowl. Microwave in twenty-second intervals, stirring thoroughly after each interval. Stop heating when most of the chocolate has melted and continue stirring until the remaining pieces dissolve. Chocolate can scorch if heated for too long, and even a small amount of water can cause it to seize. If using a double boiler, keep the bowl above gently simmering water without allowing the bowl or chocolate to contact the water. The coconut oil helps the topping spread smoothly and makes it somewhat easier to cut after chilling.
Step 6: Add the Chocolate and Chill
Pour the melted chocolate over the pressed oatmeal base. Spread it into a thin, even layer with a spatula. Sprinkle the reserved shredded coconut over the chocolate while it is still soft, adding flaky salt if desired. Cover the pan without allowing the covering to touch the topping and refrigerate for at least two hours, or until the base is firm and the chocolate has set. Avoid leaving the bars near a heat source because the chocolate and nut butter mixture can soften considerably.
Step 7: Slice and Serve
Lift the chilled slab from the pan using the parchment overhang. Allow it to stand for about five to ten minutes if the chocolate is very hard. Use a sharp knife to cut into four rows in each direction, producing sixteen squares. For cleaner edges, warm the knife briefly under warm water and dry it completely before each cut. Press down steadily rather than sawing through the topping. Serve chilled or slightly softened. The bars are rich, so small portions are a practical size for dessert or a lunchbox treat.
How to Prevent Crumbly Oatmeal Bars
Measure the dry ingredients accurately and mix until the oats and coconut are fully coated. Nut butters differ in thickness, especially natural varieties that separate during storage. Stir natural peanut butter well before measuring. If the mixture is too dry, add a small amount of additional nut butter rather than large quantities of water. Compact the base thoroughly and refrigerate until firm. Slicing the bars before they have set can cause the layers to separate.
Easy Recipe Variations
Almond butter or sunflower seed butter can replace peanut butter, although the consistency and flavor may differ. For a darker chocolate flavor, use bittersweet chocolate chips instead of semisweet. Chopped toasted almonds, dried cherries or a small amount of orange zest can provide additional texture and aroma. Choose certified gluten-free oats if needed and check all other ingredient labels. For a dairy-free or vegan version, use chocolate chips explicitly labeled dairy-free or vegan. Peanut, tree nut and coconut ingredients require attention when preparing food for people with allergies; check labels and avoid cross-contact.
Storage and Freezing
Store the sliced bars in a covered container in the refrigerator and use within approximately five days for best quality. Separate layers with parchment to prevent sticking. For longer storage, freeze individual bars in a sealed freezer-safe container for up to two months. Thaw in the refrigerator before serving. Keep the bars chilled when transporting them in warm weather, since the chocolate topping can melt.
Frequently Asked Questions
Can I make these bars without coconut oil?
Yes. Melt the chocolate chips on their own. The topping may be a little firmer and more prone to cracking when cut.
Can I use honey instead of maple syrup?
Yes. Honey has a thicker consistency and a different sweetness, so the base may need a small adjustment. Honey is not vegan and should not be served to infants younger than twelve months.
Can I make the bars without peanut butter?
Yes. A suitable creamy seed butter or other nut butter can be used. Check for relevant allergens and adjust the consistency as necessary.
Final Tips
Use oats suitable for uncooked recipes, stir the filling thoroughly and press it firmly into the pan. Melt the chocolate gently, refrigerate the bars until fully set and slice into small squares for a convenient make-ahead dessert.
Leave a Reply