Category: Recipes

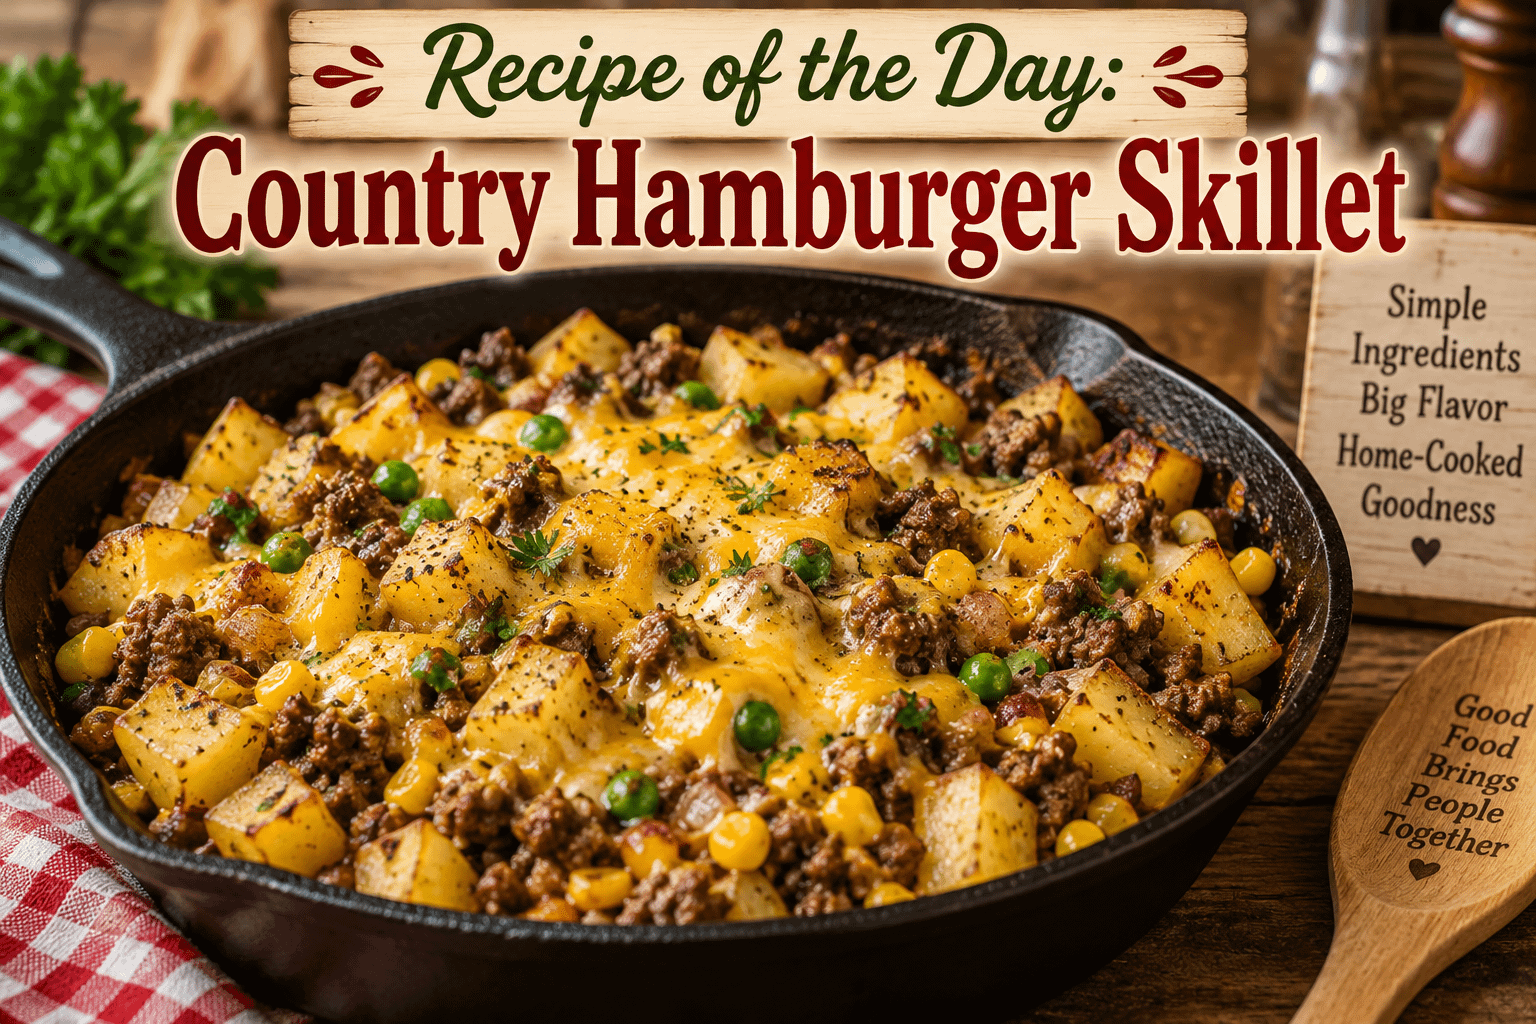
  • Recipe of the Day: Country Hamburger Skillet

    Recipe of the Day: Country Hamburger Skillet

    Advertisements

    Some meals don’t need fancy ingredients or complicated cooking techniques to be memorable. Sometimes the best dinner is the kind that brings together a handful of everyday ingredients in one skillet and turns them into something warm, filling, and comforting.

    Today’s Recipe of the Day: Country Hamburger Skillet is exactly that kind of meal.

    Made with seasoned ground beef, tender potatoes, onions, vegetables, and plenty of melted cheese, this country-style skillet dinner delivers classic comfort food without creating a sink full of dishes. Everything cooks together in one pan, allowing the flavors to blend while keeping preparation and cleanup simple.

    It’s the kind of recipe that works beautifully for a busy weeknight, a casual family dinner, or one of those evenings when you’re hungry and want something substantial without spending hours in the kitchen.

    Why You’ll Love This Country Hamburger Skillet

    There is something satisfying about skillet meals. They’re uncomplicated, adaptable, and usually built around ingredients many people already keep in their kitchens.

    This recipe combines several comfort-food favorites in one dish: hamburger, potatoes, cheese, vegetables, and savory seasonings.

    The ground beef provides richness and protein, while the potatoes make the meal filling enough to stand on its own. Onions and garlic add plenty of savory flavor, and vegetables bring additional color and texture.

    Then comes the finishing touch: melted cheddar cheese.

    Once the cheese melts over the hot beef-and-potato mixture, everything comes together into a hearty skillet dinner that tastes like something you might have enjoyed around the family table growing up.

    Best of all, you can easily customize it depending on what you have available.

    Ingredients

    You’ll need:

    • 1 pound ground beef
    • 4 medium russet or Yukon Gold potatoes
    • 1 medium yellow onion, diced
    • 2 cloves garlic, minced
    • 1 cup frozen corn
    • 1 cup frozen peas
    • 1 cup shredded cheddar cheese
    • 1/2 cup beef broth
    • 1 tablespoon Worcestershire sauce
    • 1 tablespoon olive oil, if needed
    • 1 teaspoon smoked paprika
    • 1 teaspoon garlic powder
    • 1/2 teaspoon onion powder
    • 1/2 teaspoon dried thyme
    • 1/2 teaspoon salt, or to taste
    • 1/2 teaspoon black pepper
    • 2 tablespoons chopped fresh parsley, optional

    Preparing the Potatoes

    Start by washing the potatoes thoroughly.

    You can peel them if you prefer, but leaving the skins on adds texture and saves preparation time.

    Cut the potatoes into small cubes, approximately 1/2-inch pieces. Keeping the pieces relatively small and similar in size helps them cook evenly and more quickly.

    If your potato cubes are too large, the beef may be finished long before the potatoes become tender.

    Brown the Ground Beef

    Place a large, deep skillet over medium-high heat.

    Add the ground beef and diced onion.

    Cook for approximately 6 to 8 minutes, breaking the hamburger into smaller pieces with a wooden spoon or spatula as it cooks.

    Continue cooking until the beef is browned and the onions have softened.

    Drain excess grease if necessary.

    If you’re using particularly lean ground beef and the skillet becomes dry, add a small amount of olive oil.

    Add the minced garlic and cook for another 30 to 60 seconds, stirring frequently.

    Garlic burns quickly, so it doesn’t need much time.

    Season the Beef

    Add the Worcestershire sauce, smoked paprika, garlic powder, onion powder, dried thyme, salt, and black pepper.

    Stir until the seasonings are evenly distributed throughout the hamburger.

    This seasoning mixture gives the skillet its savory country-style flavor.

    Worcestershire sauce is especially helpful because it adds another layer of savory depth without overpowering the other ingredients.

    Add the Potatoes

    Add the diced potatoes to the skillet.

    Pour in the beef broth and stir everything together.

    Bring the liquid to a gentle simmer, then reduce the heat to medium-low.

    Cover the skillet and cook for approximately 15 to 20 minutes, stirring occasionally.

    Cooking time will vary depending on the size and type of potatoes you’re using.

    The potatoes should become fork-tender but shouldn’t completely fall apart.

    If the skillet becomes too dry before the potatoes are tender, add another splash of beef broth or water.

    Add the Vegetables

    Once the potatoes are almost completely tender, stir in the corn and peas.

    Continue cooking uncovered for approximately 4 to 5 minutes.

    Because frozen vegetables cook quickly, they don’t need to be added until near the end. This helps prevent them from becoming overly soft.

    Taste the skillet and adjust the seasonings if necessary.

    You may want another pinch of salt, black pepper, garlic powder, or smoked paprika depending on your preference.

    Bring on the Cheese

    Reduce the heat to low.

    Sprinkle the shredded cheddar evenly over the hamburger, potatoes, and vegetables.

    Cover the skillet for approximately 2 to 3 minutes, or until the cheese has completely melted.

    Remove the lid and finish with chopped parsley if desired.

    Your Country Hamburger Skillet is ready to serve.

    Serving Suggestions

    One of the best things about this recipe is that it can be a complete dinner by itself.

    You’ve already got beef, potatoes, vegetables, and cheese in the skillet.

    However, you can turn it into an even bigger country-style dinner by serving it alongside a few simple additions.

    Try it with:

    • Warm dinner rolls
    • Buttermilk biscuits
    • Cornbread
    • Garlic bread
    • Green salad
    • Steamed green beans
    • Roasted broccoli
    • Coleslaw

    A warm biscuit is particularly good because you can use it to scoop up the beef, melted cheese, and savory juices left on the plate.

    Make It Even More Country-Style

    Want to take this recipe another step toward classic country comfort food?

    Add bacon.

    Cook 4 to 6 strips of bacon until crispy before preparing the hamburger. Remove the bacon, crumble it, and set it aside.

    Leave a small amount of bacon grease in the skillet and use it to cook the ground beef and onions.

    Then sprinkle the crumbled bacon over the finished skillet along with the cheese.

    Ground beef, potatoes, cheddar, and bacon make an especially hearty combination.

    Add Bell Peppers

    Bell peppers are another easy addition.

    Dice one green, red, yellow, or orange bell pepper and cook it with the onions.

    Green peppers give the skillet a stronger, slightly earthy flavor, while red and yellow peppers provide more sweetness.

    You can also add diced jalapeños if you want some heat.

    Turn It Into a Spicy Hamburger Skillet

    For anyone who prefers dinner with a kick, this recipe can easily become spicy.

    Add:

    • 1 diced jalapeño
    • 1/4 teaspoon cayenne pepper
    • Crushed red pepper flakes
    • Pepper Jack cheese
    • Hot sauce

    You can use just one of these ingredients or combine several depending on how spicy you want your skillet.

    Try Different Cheeses

    Cheddar is a classic choice, but there’s no reason you have to stop there.

    Try using:

    Pepper Jack for a spicy version.

    Monterey Jack for an especially creamy melt.

    Colby Jack for a mild family-friendly option.

    Smoked Gouda for a deeper smoky flavor.

    You can even combine two or three cheeses.

    Sharp cheddar and Monterey Jack make an excellent combination.

    Mushroom and Hamburger Skillet Variation

    Mushrooms work especially well with ground beef.

    Slice approximately 8 ounces of mushrooms and sauté them with the onions before browning the hamburger.

    The mushrooms absorb the beef juices and seasonings as everything cooks.

    For an even richer version, add a small splash of heavy cream near the end of cooking before adding the cheese.

    That transforms the dish into something closer to a creamy hamburger-and-potato skillet.

    Can You Use Ground Turkey?

    Absolutely.

    Ground turkey or ground chicken can replace the hamburger if you want a lighter variation.

    Because these meats contain less fat than many types of ground beef, you may need to add a tablespoon of olive oil while cooking.

    Ground sausage is another delicious alternative.

    Breakfast sausage creates an especially flavorful country skillet and could even turn this recipe into a hearty brunch dish.

    What Kind of Potatoes Work Best?

    Russet potatoes are inexpensive, widely available, and become wonderfully tender as they cook.

    Yukon Gold potatoes are another excellent choice. They have a naturally buttery flavor and hold their shape particularly well in skillet dishes.

    Red potatoes can also work.

    Whatever variety you choose, the most important thing is cutting the potatoes into consistently sized pieces.

    Smaller cubes cook more quickly and evenly.

    Don’t Rush the Potatoes

    The potatoes are one of the stars of this recipe, so give them enough time to cook properly.

    If you turn the heat too high, the outside of the potatoes may brown or burn while the centers remain hard.

    Using a moderate temperature and covering the skillet helps trap steam, allowing the potatoes to soften.

    Stir occasionally so nothing sticks to the bottom.

    Make It Creamy

    Country Hamburger Skillet is delicious as written, but you can also make a creamy variation.

    Once the potatoes are tender, reduce the heat and stir in approximately:

    • 1/2 cup sour cream
    • 4 ounces softened cream cheese

    Stir until creamy before adding the shredded cheddar.

    The result is an incredibly rich hamburger-and-potato skillet that’s somewhere between a casserole and a stovetop dinner.

    Add a Gravy

    Another country-inspired variation is adding brown gravy.

    Prepare approximately 1 cup of brown gravy and stir it into the skillet after the potatoes are tender.

    Let everything simmer together for several minutes before topping with cheese.

    You can also skip the cheese entirely when making the gravy variation.

    Hamburger, potatoes, onions, and brown gravy make a simple but incredibly satisfying combination.

    What About Leftovers?

    Country Hamburger Skillet makes excellent leftovers.

    Allow any remaining food to cool before transferring it into an airtight container.

    Refrigerate promptly and use within 3 to 4 days.

    When you’re ready to eat it again, reheat individual portions in the microwave or warm the skillet gently on the stove.

    If reheating on the stovetop, adding a tablespoon or two of beef broth can help restore moisture.

    Meal-Prep Possibilities

    This recipe can also be partially prepared ahead of time.

    You can dice the onions and prepare the seasonings in advance.

    The hamburger can also be cooked ahead, refrigerated, and added back to the skillet when you’re ready to make dinner.

    If cutting potatoes ahead of time, keep them submerged in cold water in the refrigerator so they don’t discolor. Drain and dry them before cooking.

    A little preparation can make an already simple weeknight dinner even easier.

    A Budget-Friendly Family Dinner

    One reason hamburger-and-potato recipes have remained popular for generations is their affordability.

    Ground beef can stretch surprisingly far when combined with potatoes and vegetables.

    Instead of requiring several pounds of meat, a single pound of hamburger becomes the foundation of an entire skillet meal.

    Potatoes provide inexpensive bulk, while frozen vegetables are convenient and can often be purchased economically.

    If you’re feeding a larger family, add another potato or two and increase the vegetables.

    A little extra beef broth and cheese can help bring the larger batch together.

    Why One-Pan Meals Are So Convenient

    Nobody wants to finish dinner and discover that every pot and pan in the kitchen needs washing.

    That’s where skillet meals shine.

    The beef browns in the same pan where the potatoes cook. The vegetables go directly into that mixture, and the cheese melts right over the top.

    One skillet.

    One complete dinner.

    And considerably less cleanup afterward.

    That’s difficult to beat on a busy evening.

    Old-Fashioned Comfort Food With Room for Creativity

    Country cooking has never been about making food unnecessarily complicated.

    Some of the most memorable meals come from taking ordinary ingredients and cooking them well.

    Ground beef.

    Potatoes.

    Onions.

    Vegetables.

    Seasonings.

    Cheese.

    None of those ingredients are particularly unusual on their own. Put them together in a hot skillet, however, and you have something filling, flavorful, and comforting.

    That’s also what makes this recipe so adaptable.

    You don’t need to follow every ingredient exactly.

    Have green beans instead of peas? Use them.

    Have leftover roasted corn? Toss it in.

    Have half an onion and some bell pepper waiting in the refrigerator? Add both.

    Have mozzarella instead of cheddar? It’ll still be delicious.

    A good skillet recipe should work with your kitchen rather than against it.

    Recipe at a Glance

    Prep Time: 15 minutes
    Cook Time: 30 minutes
    Total Time: Approximately 45 minutes
    Servings: 4–6

    Ingredients

    1 pound ground beef
    4 medium potatoes, diced
    1 medium onion, diced
    2 cloves garlic, minced
    1 cup corn
    1 cup peas
    1 cup shredded cheddar cheese
    1/2 cup beef broth
    1 tablespoon Worcestershire sauce
    1 teaspoon smoked paprika
    1 teaspoon garlic powder
    1/2 teaspoon onion powder
    1/2 teaspoon dried thyme
    1/2 teaspoon salt
    1/2 teaspoon black pepper
    Fresh parsley, optional

    Directions

    1. Brown the ground beef and onion in a large skillet over medium-high heat.
    2. Drain excess grease if necessary.
    3. Add garlic and cook for 30 to 60 seconds.
    4. Stir in Worcestershire sauce and seasonings.
    5. Add diced potatoes and beef broth.
    6. Cover and simmer over medium-low heat for 15 to 20 minutes, stirring occasionally, until the potatoes are tender.
    7. Stir in corn and peas.
    8. Cook uncovered for another 4 to 5 minutes.
    9. Sprinkle cheddar cheese over the skillet.
    10. Cover and cook on low for 2 to 3 minutes or until the cheese melts.
    11. Garnish with parsley and serve hot.

    Final Thoughts

    Country Hamburger Skillet proves that a satisfying dinner doesn’t need to be complicated.

    It’s hearty enough for hungry appetites, simple enough for an ordinary weeknight, and flexible enough that you can adjust the ingredients based on whatever happens to be in your refrigerator or pantry.

    The combination of savory hamburger, tender potatoes, onions, vegetables, and melted cheddar brings everything people love about country-style comfort food into one easy skillet.

    Serve it straight from the pan while the cheese is still bubbling and melted. Add some warm biscuits or cornbread on the side, gather everyone around the table, and enjoy a dinner built around simple ingredients and big comfort.

    Sometimes the simplest meals are the ones worth making again and again.

    What’s your favorite ingredient to add to a hamburger skillet?

  • Breakfast of the Day: Meat Lover’s Casserole

    Advertisements

    If your idea of a great breakfast includes plenty of bacon, sausage, ham, eggs, and melted cheese, today’s Breakfast of the Day: Meat Lover’s Casserole is made for you.

    This is the kind of breakfast that doesn’t leave anyone wondering where the main course is. Every slice is packed with savory breakfast meats, fluffy eggs, golden potatoes, and plenty of cheese. It combines many of the best parts of a traditional American breakfast into one warm, satisfying casserole.

    Even better, most of the preparation can be done ahead of time. That makes Meat Lover’s Casserole an excellent choice for busy mornings, weekend breakfasts, family brunches, holidays, potlucks, or any occasion when you need to feed several hungry people without standing over the stove cooking individual plates.

    Why You’ll Love This Meat Lover’s Casserole

    There is something comforting about a big breakfast casserole coming out of the oven. The cheese is bubbling, the edges are golden, and the smell of bacon and sausage fills the kitchen.

    This recipe delivers all of that while remaining surprisingly simple to prepare.

    The combination of sausage, bacon, and ham gives the casserole layers of smoky and savory flavor. Eggs hold everything together, potatoes make it hearty, and melted cheddar creates the cheesy finish that brings the entire dish together.

    It is also easy to customize. You can change the meats, add vegetables, experiment with different cheeses, or add some heat.

    Think of this recipe as a starting point for creating your own ultimate breakfast casserole.

    Meat Lover’s Casserole Recipe

    Prep Time: 20 minutes
    Cook Time: 45–55 minutes
    Total Time: About 1 hour 15 minutes
    Servings: 8–10

    Ingredients

    • 1 pound breakfast sausage
    • 8 slices bacon
    • 1 1/2 cups diced ham
    • 6 cups frozen shredded or diced hash browns, thawed
    • 10 large eggs
    • 1 cup whole milk
    • 1/2 cup heavy cream
    • 2 cups shredded cheddar cheese, divided
    • 1 cup shredded Monterey Jack cheese
    • 1/2 cup diced onion
    • 1/2 teaspoon garlic powder
    • 1/2 teaspoon onion powder
    • 1/2 teaspoon smoked paprika
    • 1/4 teaspoon black pepper
    • Salt to taste
    • 2 tablespoons sliced green onions, optional
    • Cooking spray or butter for the baking dish

    How to Make Meat Lover’s Casserole

    Step 1: Prepare the Oven and Baking Dish

    Preheat your oven to 375°F.

    Lightly grease a 9-by-13-inch baking dish with cooking spray or butter. Make sure you cover the bottom and sides so the casserole releases easily when it is time to serve.

    Step 2: Cook the Bacon

    Cook the bacon in a skillet over medium heat until it reaches your preferred level of crispness.

    Transfer it to a paper-towel-lined plate and allow it to cool slightly. Once cool enough to handle, crumble or chop the bacon into bite-sized pieces.

    Set it aside.

    Step 3: Brown the Sausage

    Using the same skillet, cook the breakfast sausage over medium heat.

    Break the sausage into small crumbles as it cooks. Continue cooking until it is completely browned and no pink remains.

    Drain away excess grease.

    Step 4: Cook the Onion

    Add the diced onion to the skillet and cook for about 3–4 minutes, or until it begins to soften.

    If you enjoy a stronger onion flavor, you can add slightly more. If onions aren’t your thing, simply leave them out.

    Step 5: Build the Potato Layer

    Spread the thawed hash browns evenly across the bottom of your prepared baking dish.

    Season lightly with salt and black pepper.

    The potatoes create a hearty base for the casserole and absorb some of the flavors from the meats, cheese, and egg mixture while baking.

    Step 6: Add the Meat

    Evenly distribute the cooked sausage, crumbled bacon, and diced ham over the potatoes.

    Try to spread everything across the entire casserole so each serving gets a little of all three meats.

    Step 7: Add the Cheese

    Sprinkle about 1 1/2 cups of cheddar cheese and the Monterey Jack cheese over the meat.

    Save the remaining cheddar for the top.

    Step 8: Prepare the Egg Mixture

    In a large mixing bowl, whisk together:

    • Eggs
    • Milk
    • Heavy cream
    • Garlic powder
    • Onion powder
    • Smoked paprika
    • Black pepper

    Whisk until the eggs are completely blended with the milk and cream.

    Pour the mixture slowly and evenly over the casserole.

    Give the baking dish a gentle shake to help the egg mixture settle between the potatoes, meat, and cheese.

    Step 9: Add the Final Cheese Layer

    Sprinkle the remaining cheddar cheese over the top.

    This final layer creates that irresistible golden, cheesy surface.

    Step 10: Bake

    Place the casserole in the preheated oven and bake uncovered for approximately 45–55 minutes.

    The casserole is finished when the center is set and no longer appears runny.

    If the cheese begins browning too quickly, loosely cover the casserole with aluminum foil for the final portion of baking.

    Step 11: Rest Before Serving

    Remove the casserole from the oven and allow it to rest for approximately 10 minutes.

    This step is important because it allows the egg mixture to finish setting and makes the casserole easier to slice.

    Top with sliced green onions if desired.

    Then cut into squares and serve warm.

    Three Meats, One Incredible Breakfast

    The real star of this casserole is obviously the meat.

    Instead of choosing between sausage, bacon, or ham, we’re using all three.

    Breakfast Sausage

    Sausage gives the casserole its traditional breakfast flavor and adds richness throughout every layer.

    Regular breakfast sausage works perfectly, but you can also experiment with hot sausage, maple sausage, sage sausage, turkey sausage, or chicken breakfast sausage.

    Bacon

    Bacon contributes a smoky, salty crunch.

    Cooking the bacon until slightly crisp before adding it to the casserole helps prevent it from becoming overly soft during baking.

    Thick-cut bacon is particularly good if you want larger pieces throughout the casserole.

    Ham

    Ham adds another layer of smoky flavor while giving the casserole substantial pieces of meat.

    This recipe is also a great way to use leftover ham after a holiday dinner.

    Dice it into small cubes and toss it right into the casserole.

    Don’t Forget the Potatoes

    Meat and eggs might dominate the recipe, but potatoes help turn this casserole into a complete meal.

    Frozen hash browns are convenient because they eliminate the need to peel, shred, or dice potatoes.

    You can use shredded hash browns for a softer texture or diced breakfast potatoes if you prefer more noticeable pieces.

    For an extra-crispy potato layer, bake the hash browns by themselves for about 10–15 minutes before adding the remaining ingredients.

    Make It Even Cheesier

    Cheddar and Monterey Jack are a dependable combination because cheddar provides bold flavor while Monterey Jack melts beautifully.

    But there are plenty of other cheeses that work well.

    Try pepper Jack for heat, mozzarella for extra stretchiness, Colby Jack for a mild flavor, smoked Gouda for deeper smoky notes, or a Mexican cheese blend for a Southwestern-inspired casserole.

    You could even sprinkle Parmesan across the top before baking.

    There isn’t one correct cheese combination.

    Use whatever sounds good to you.

    Turn Up the Heat

    If you enjoy spicy breakfasts, Meat Lover’s Casserole is incredibly easy to kick up a notch.

    Replace regular breakfast sausage with hot sausage and add diced jalapeños.

    You can also mix crushed red pepper flakes or cayenne pepper into the egg mixture.

    Another option is adding pepper Jack cheese.

    Serve each portion with hot sauce, salsa, or sliced fresh jalapeños for anyone who wants additional heat.

    Add Some Vegetables

    Calling it Meat Lover’s Casserole doesn’t mean vegetables aren’t welcome.

    Adding vegetables can introduce more flavor, color, and texture.

    Good additions include:

    • Bell peppers
    • Mushrooms
    • Spinach
    • Tomatoes
    • Jalapeños
    • Green onions
    • Broccoli
    • Diced green chiles

    Cook vegetables that release a lot of moisture before adding them to the casserole. Mushrooms and spinach, for example, can release considerable water while cooking.

    Removing that excess moisture beforehand helps prevent a watery casserole.

    Make It the Night Before

    One of the best things about breakfast casseroles is how well they work as make-ahead meals.

    Prepare the casserole as directed, but don’t bake it.

    Cover the baking dish tightly and refrigerate overnight.

    The next morning, remove it from the refrigerator while your oven preheats.

    Then bake as directed.

    Because the casserole will be cold, you may need to add several minutes to the baking time.

    This approach is especially convenient for Christmas morning, Easter brunch, family gatherings, overnight guests, or busy weekends.

    Instead of preparing an entire breakfast first thing in the morning, you can simply put the casserole into the oven.

    What to Serve With Meat Lover’s Casserole

    Because this dish is so rich and hearty, lighter sides make excellent companions.

    Try serving it with fresh berries, sliced melon, grapes, oranges, or a simple fruit salad.

    Toast, biscuits, English muffins, or croissants are great if you’re feeding an especially hungry crowd.

    For toppings and condiments, put out several choices and let everyone customize their serving.

    Some good options include salsa, hot sauce, sour cream, avocado, chopped green onions, ketchup, and country gravy.

    And, of course, don’t forget the coffee.

    Meat Lover’s Casserole With Country Gravy

    Want to take an already indulgent breakfast to another level?

    Add country gravy.

    Prepare your favorite sausage or peppered white gravy and spoon it over each serving immediately before eating.

    The creamy gravy works especially well with the potatoes, sausage, bacon, and eggs.

    You can even serve gravy on the side so everyone can decide how much they want.

    Turn Leftovers Into Breakfast Burritos

    Leftover Meat Lover’s Casserole doesn’t have to be served exactly the same way the next morning.

    Warm a portion of casserole and break it into smaller pieces.

    Place it inside a large flour tortilla with extra shredded cheese and a spoonful of salsa.

    Add avocado or hot sauce if desired.

    Roll everything into a burrito and lightly toast it in a skillet.

    Suddenly yesterday’s casserole has become today’s breakfast burrito.

    Storing Leftovers

    Allow leftover casserole to cool before transferring it to an airtight container.

    Store it in the refrigerator and enjoy within about 3–4 days.

    Individual portions can be reheated in the microwave for a quick breakfast.

    For a texture closer to freshly baked casserole, reheat portions in the oven or toaster oven until warmed through.

    Can You Freeze Meat Lover’s Casserole?

    Yes.

    Breakfast casseroles can be convenient freezer meals.

    After baking, allow the casserole to cool completely.

    Cut it into individual portions and wrap or package them separately before freezing. Individual portions are useful because you can reheat exactly what you need instead of thawing the entire casserole.

    For best quality, use frozen portions within a couple of months.

    Thaw overnight in the refrigerator before reheating, or reheat from frozen with additional cooking time.

    Perfect for Feeding a Crowd

    Cooking breakfast for several people can quickly become complicated.

    You might have one skillet cooking bacon, another cooking eggs, potatoes somewhere else, and toast going into the toaster.

    By the time everything is ready, half the food may already be cold.

    A casserole simplifies the process.

    Everything cooks together, everyone gets served at roughly the same time, and cleanup is easier.

    That makes Meat Lover’s Casserole particularly useful for brunches, holiday breakfasts, family reunions, church gatherings, potlucks, game-day mornings, and overnight guests.

    Create a Breakfast Casserole Bar

    If you’re serving this recipe at a party or brunch, turn it into a breakfast casserole bar.

    Bake the casserole and place different toppings nearby.

    Guests can choose from salsa, hot sauce, sour cream, avocado, jalapeños, green onions, diced tomatoes, shredded cheese, country gravy, or fresh herbs.

    It is an easy way to make one main dish feel customizable for a crowd.

    A Breakfast Worth Waking Up For

    Some mornings call for yogurt and fruit.

    Other mornings call for bacon, sausage, ham, eggs, potatoes, and enough melted cheese to make you forget about lunch for a while.

    Meat Lover’s Casserole is definitely the second kind of breakfast.

    It’s hearty without being complicated, customizable without requiring a long list of specialty ingredients, and easy to prepare ahead of time.

    The combination of smoky bacon, savory sausage, diced ham, seasoned potatoes, fluffy eggs, and melted cheese creates everything you could want from a comfort-food breakfast in a single baking dish.

    Serve it fresh from the oven for a relaxed Sunday breakfast. Prepare it the night before Christmas morning. Bring it to your next brunch or potluck. Or bake a batch and keep individual portions ready for busy mornings throughout the week.

    However you serve it, Meat Lover’s Casserole proves that sometimes choosing between bacon, sausage, and ham isn’t necessary.

    You can have them all.

    Would you keep this Meat Lover’s Casserole loaded with bacon, sausage, and ham, or what other breakfast meat would you add?

  • Dessert of the Day: Apple Pie Cheesecake

    Advertisements

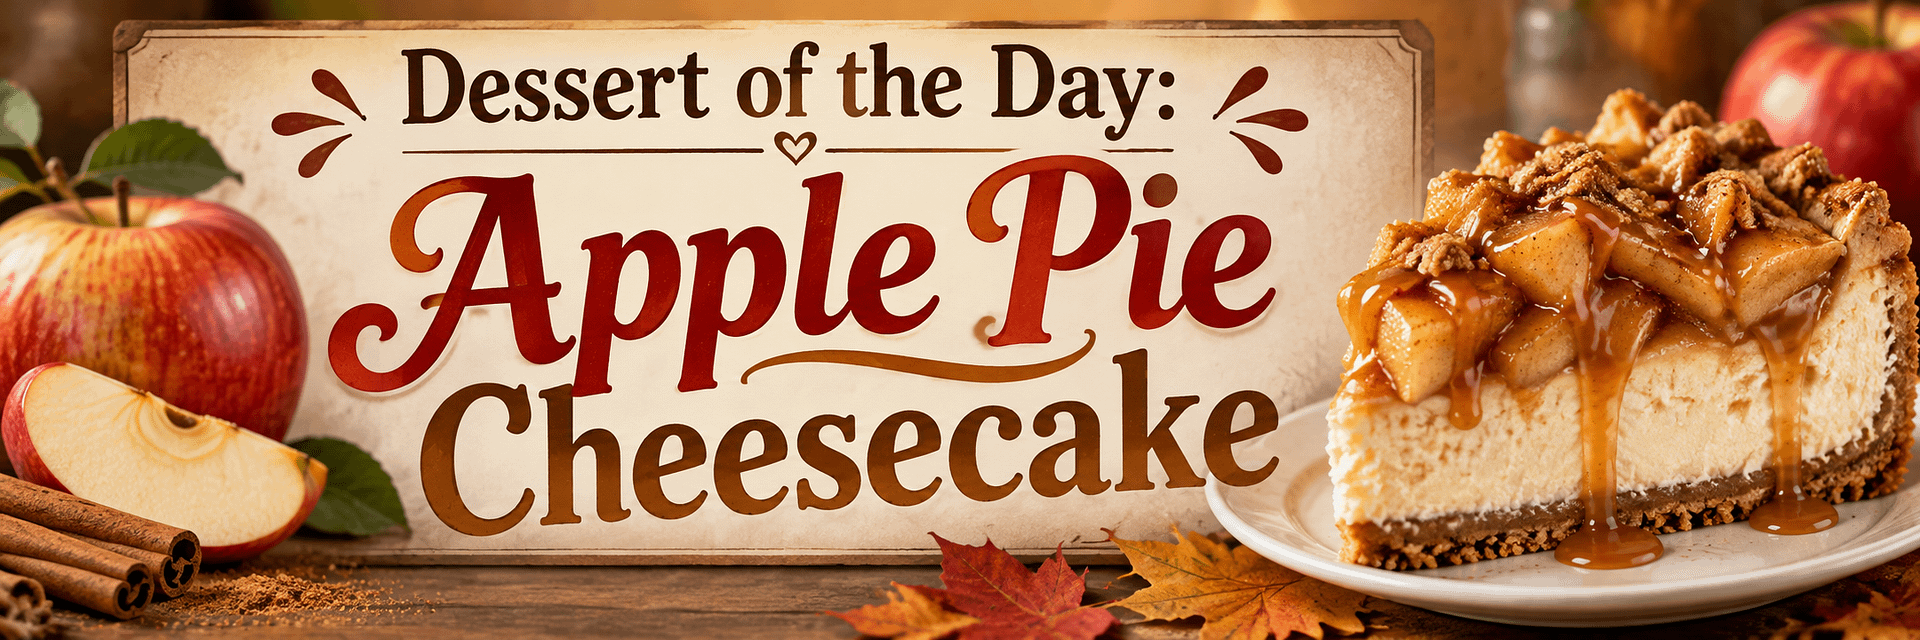
    There are desserts that feel elegant, desserts that feel nostalgic, and desserts that simply make people stop what they are doing and ask for another slice. Apple Pie Cheesecake manages to be all three.

    This dessert brings together two classics that already have devoted followings: creamy cheesecake and warm, cinnamon-spiced apple pie. Instead of choosing between them, you get the best parts of both in one unforgettable dessert.

    The cheesecake layer is rich, smooth, and slightly tangy. The apple topping is sweet, buttery, and filled with cinnamon flavor. A graham cracker crust adds just enough crunch underneath, while an optional crumble topping gives the dessert even more of that traditional apple-pie feeling.

    If you are looking for a dessert that feels comforting enough for a family dinner but impressive enough for Thanksgiving, Christmas, birthdays, potlucks, or special occasions, Apple Pie Cheesecake deserves a place on your menu.

    Why Apple Pie Cheesecake Works So Well

    Apple pie and cheesecake may seem very different, but their flavors complement each other beautifully.

    Traditional cheesecake is rich and creamy, which means it benefits from something bright, fruity, and slightly tart. Apples provide exactly that balance.

    The cinnamon-spiced apples bring warmth and sweetness, while the cream cheese mixture provides a smooth contrast. Graham cracker crumbs add texture, and a buttery streusel topping can make the finished cheesecake feel almost like a bakery-style apple crumble.

    Every bite gives you several different textures at once: creamy cheesecake, tender apples, crisp crust, and crumbly topping.

    It is the kind of dessert that tastes familiar while still feeling special.

    Apple Pie Cheesecake Recipe

    Ingredients

    For the Graham Cracker Crust

    • 2 cups graham cracker crumbs
    • 1/4 cup granulated sugar
    • 1/2 teaspoon ground cinnamon
    • 6 tablespoons unsalted butter, melted

    For the Apple Pie Filling

    • 3 medium apples, peeled, cored, and diced
    • 2 tablespoons unsalted butter
    • 1/3 cup brown sugar
    • 1 teaspoon ground cinnamon
    • 1/4 teaspoon ground nutmeg
    • 1 teaspoon lemon juice
    • 1 teaspoon cornstarch
    • 1 tablespoon water

    For the Cheesecake Filling

    • 24 ounces cream cheese, softened
    • 3/4 cup granulated sugar
    • 1 teaspoon vanilla extract
    • 1/2 teaspoon ground cinnamon
    • 3 large eggs
    • 1/2 cup sour cream
    • 1 tablespoon all-purpose flour

    Optional Streusel Topping

    • 1/2 cup all-purpose flour
    • 1/3 cup brown sugar
    • 1/2 teaspoon cinnamon
    • 4 tablespoons cold butter, cubed
    • 1/3 cup old-fashioned oats

    Optional Garnishes

    • Caramel sauce
    • Whipped cream
    • Chopped pecans
    • Extra cinnamon
    • Vanilla ice cream

    Choosing the Best Apples

    The apples are one of the most important parts of this dessert.

    You want an apple that holds its shape reasonably well during cooking. Extremely soft apples can become mushy and disappear into the topping.

    Some excellent choices include:

    Granny Smith apples are tart and firm. Their acidity balances the sweetness of the cheesecake beautifully.

    Honeycrisp apples are crisp, juicy, and naturally sweet.

    Pink Lady apples provide a pleasant mixture of sweetness and tartness.

    Braeburn apples work well because they maintain their texture when cooked.

    You can also combine two varieties. Mixing Granny Smith with Honeycrisp, for example, gives you both tartness and sweetness.

    Step 1: Prepare the Crust

    Preheat your oven to 350°F.

    In a medium bowl, combine the graham cracker crumbs, sugar, cinnamon, and melted butter.

    Mix until the crumbs resemble wet sand.

    Press the mixture firmly into the bottom of a 9-inch springform pan. You can use the bottom of a measuring cup or drinking glass to press everything evenly.

    Bake the crust for about 8 to 10 minutes.

    Remove it from the oven and allow it to cool slightly while you prepare the other components.

    Reduce the oven temperature to 325°F.

    Pre-baking the crust helps keep it firm underneath the cheesecake instead of becoming overly soft.

    Step 2: Make the Apple Pie Filling

    Melt the butter in a skillet over medium heat.

    Add the diced apples, brown sugar, cinnamon, nutmeg, and lemon juice.

    Cook for approximately 5 to 7 minutes, stirring occasionally.

    You want the apples to begin softening while still maintaining some texture.

    In a small bowl, stir the cornstarch and water together until smooth.

    Add the mixture to the apples and continue cooking for another minute or two.

    The sauce should thicken slightly and coat the apples.

    Remove the skillet from the heat.

    Allow the apple mixture to cool while you prepare the cheesecake filling.

    This step is important because adding extremely hot apples directly to the cheesecake mixture could affect its texture.

    Step 3: Prepare the Cheesecake Filling

    Place the softened cream cheese in a large mixing bowl.

    Beat it until smooth and creamy.

    Add the sugar and continue mixing until combined.

    Add the vanilla extract, cinnamon, sour cream, and flour.

    Mix just until smooth.

    Add the eggs one at a time, mixing gently after each addition.

    Avoid excessively beating the cheesecake after adding the eggs. Too much air can cause the cheesecake to rise dramatically in the oven and then collapse or crack while cooling.

    Your goal is a smooth, creamy filling rather than an overly whipped one.

    Step 4: Assemble the Cheesecake

    Pour approximately half of the cheesecake filling over the prepared crust.

    Spoon about half of the cooked apple mixture over the cheesecake layer.

    Pour the remaining cheesecake filling over the apples.

    Gently smooth the top.

    Add the remaining apple mixture across the surface.

    You can leave the apples scattered naturally or arrange them more evenly depending on the appearance you prefer.

    Step 5: Make the Streusel Topping

    The streusel is optional, but it gives the cheesecake another delicious layer of texture.

    In a small bowl, combine the flour, brown sugar, cinnamon, and oats.

    Add the cold butter.

    Using your fingers or a pastry cutter, work the butter into the dry ingredients until coarse crumbs form.

    Sprinkle the streusel lightly over the apple topping.

    Do not pack it down.

    The goal is to create small buttery crumbs that become lightly golden during baking.

    Step 6: Bake the Cheesecake

    Place the cheesecake in the oven and bake for approximately 55 to 70 minutes.

    The outside edges should look set while the center should still have a slight jiggle.

    Do not wait until the entire cheesecake becomes completely firm in the oven.

    Cheesecake continues setting as it cools.

    Turn off the oven.

    Crack the oven door slightly and allow the cheesecake to remain inside for approximately 30 minutes.

    Gradual cooling can help reduce the likelihood of cracking.

    Remove the cheesecake and allow it to cool to room temperature.

    Then refrigerate it for at least 6 hours, although overnight is even better.

    Cheesecake develops its best texture after being thoroughly chilled.

    The Importance of Patience

    Apple Pie Cheesecake is not a dessert that should be rushed.

    The temptation to slice into a freshly baked cheesecake can be strong, especially when your kitchen smells like cinnamon, apples, and butter.

    However, cheesecake needs time to cool.

    If you cut into it while it is still warm, the center can be overly soft and messy.

    Once chilled, the cream cheese filling becomes firm enough to hold beautiful slices while remaining smooth and creamy.

    Making the cheesecake the day before you plan to serve it is often the easiest strategy.

    Not only does this reduce stress on the day of your gathering, but the flavors also have additional time to blend together.

    Add Caramel for an Extra Treat

    One of the easiest ways to make this dessert even more indulgent is adding caramel sauce.

    Just before serving, drizzle warm caramel lightly across each slice.

    The caramel pairs naturally with apples, cinnamon, brown sugar, and cream cheese.

    For an even more impressive presentation, add:

    • A swirl of whipped cream
    • Chopped pecans
    • Caramel drizzle
    • A small sprinkle of cinnamon

    You will end up with something that looks like it came straight from a restaurant dessert menu.

    Serve It With Vanilla Ice Cream

    Cheesecake is already rich, so ice cream is definitely optional.

    Still, if you are serving the cheesecake slightly closer to room temperature, a small scoop of vanilla ice cream beside it can be incredible.

    The combination creates the flavor of warm apple pie à la mode mixed with creamy cheesecake.

    For holidays or dinner parties, you can serve slightly smaller cheesecake slices with ice cream so the dessert does not feel overwhelmingly rich.

    Tips for Making the Best Cheesecake

    Start With Room-Temperature Cream Cheese

    Cold cream cheese tends to create lumps.

    Allow the cream cheese to soften before mixing so your filling becomes smooth.

    Do Not Overmix the Eggs

    Mixing too aggressively after the eggs have been added introduces excess air into the batter.

    That can increase the chances of cracking.

    Dice the Apples Evenly

    Try to cut your apples into similar-sized pieces.

    This helps them cook at approximately the same rate.

    Let the Apples Cool

    Warm apples are fine, but extremely hot apple filling should not be poured directly into cheesecake batter.

    Chill the Cheesecake Completely

    Six hours is good.

    Overnight is better.

    Use a Sharp Knife

    For clean slices, run a sharp knife under warm water, wipe it dry, and slice.

    Clean the knife between cuts.

    This creates those beautiful bakery-style pieces.

    How to Store Apple Pie Cheesecake

    Because cheesecake contains cream cheese, eggs, and sour cream, it should be refrigerated.

    Store leftover cheesecake covered in the refrigerator for approximately 4 to 5 days.

    If possible, keep strong-smelling foods covered nearby because cheesecake can sometimes absorb refrigerator odors.

    You can also freeze individual slices.

    Wrap each slice carefully with plastic wrap and place it inside an airtight freezer-safe container.

    Frozen cheesecake can usually be kept for approximately 1 to 2 months for the best quality.

    Allow frozen slices to thaw overnight in the refrigerator before serving.

    A Perfect Fall Dessert

    Apple Pie Cheesecake feels especially appropriate during autumn.

    Once cooler weather arrives, desserts featuring cinnamon, apples, pumpkin, caramel, maple, pecans, and warm spices start appearing everywhere.

    Apple Pie Cheesecake fits perfectly into that seasonal atmosphere.

    Imagine serving it after a fall dinner with coffee, hot apple cider, or chai tea.

    The cinnamon aroma alone immediately creates that cozy feeling associated with autumn.

    However, there is absolutely no reason to limit this cheesecake to fall.

    Apples are available year-round, making it an excellent dessert whenever you want something comforting.

    A Great Thanksgiving Alternative

    Pumpkin pie may dominate many Thanksgiving tables, but not everyone loves pumpkin.

    Apple Pie Cheesecake gives guests another option while still fitting beautifully into a traditional holiday dessert spread.

    It combines familiar apple pie flavors with something richer and more decadent.

    You could serve it alongside pumpkin pie, pecan pie, cookies, brownies, or other holiday desserts.

    Because cheesecake is so rich, even one cheesecake can provide plenty of servings when sliced into smaller pieces.

    Turn It Into Mini Cheesecakes

    If you are serving a party, consider making mini Apple Pie Cheesecakes instead.

    Line muffin tins with cupcake liners.

    Add a spoonful of graham cracker crust mixture to each liner and press it firmly.

    Add cheesecake batter and finish with apple topping.

    Reduce the baking time significantly compared with a full-sized cheesecake.

    Mini cheesecakes are convenient because guests can simply grab individual portions.

    They are perfect for:

    Birthday parties, holiday gatherings, office parties, school events, potlucks, bridal showers, baby showers, and dessert tables.

    They also eliminate the need to slice a cheesecake while people are waiting.

    Make Apple Pie Cheesecake Bars

    Another variation is turning the recipe into cheesecake bars.

    Instead of using a springform pan, prepare the dessert in a rectangular baking pan lined with parchment paper.

    Once chilled, lift the cheesecake from the pan and cut it into squares.

    Bars are easier to transport than traditional cheesecake slices, making them a great choice when bringing dessert somewhere.

    You can make smaller pieces for large gatherings or larger pieces when serving them as a plated dessert.

    Additional Flavor Ideas

    One of the best things about Apple Pie Cheesecake is how easily the recipe can be customized.

    Salted Caramel Apple Cheesecake

    Add salted caramel sauce over the finished cheesecake.

    The slight saltiness balances the sweetness.

    Pecan Apple Cheesecake

    Add chopped toasted pecans to the apple mixture or streusel topping.

    Maple Apple Cheesecake

    Replace part of the sugar with pure maple syrup for a deeper autumn flavor.

    Bourbon Apple Cheesecake

    Adults may enjoy adding a very small amount of bourbon to the cooked apple mixture.

    Cinnamon Roll Apple Cheesecake

    Swirl a cinnamon and brown sugar mixture through the cheesecake batter before baking.

    Apple Crisp Cheesecake

    Increase the streusel topping and add additional oats for a stronger apple-crisp texture.

    Why Homemade Cheesecake Is Worth the Effort

    Cheesecake sometimes has a reputation for being difficult.

    In reality, the basic process is straightforward.

    Most problems come from rushing.

    Allow ingredients to reach the proper temperature, avoid overmixing, bake gradually, and give the cheesecake enough time to cool.

    Once you understand those basic principles, homemade cheesecake becomes far less intimidating.

    The reward is also worth it.

    A homemade cheesecake has a dense, creamy texture that is difficult to duplicate with many store-bought desserts.

    Adding homemade cinnamon apples takes it to another level entirely.

    The Smell Alone Is Worth Making It

    Few aromas make a home feel as welcoming as apples cooking with cinnamon and brown sugar.

    That smell can instantly bring back memories of kitchens, holidays, family dinners, county fairs, bakeries, and homemade desserts.

    When Apple Pie Cheesecake is baking, the entire kitchen fills with those familiar comforting aromas.

    Sometimes food is about more than flavor.

    Certain desserts remind us of people, places, seasons, and moments in our lives.

    Apple pie is one of those desserts.

    Cheesecake is another.

    Combining them gives you something that feels both nostalgic and new.

    Dessert of the Day

    Today’s Dessert of the Day proves that sometimes you do not need to choose between two favorites.

    Apple Pie Cheesecake gives you creamy cheesecake, cinnamon apples, buttery graham cracker crust, and optional streusel all in one slice.

    Make it for Thanksgiving.

    Serve it at Christmas.

    Bring it to a potluck.

    Prepare it for someone’s birthday.

    Or simply make it because you want an incredible homemade dessert waiting in the refrigerator.

    Add a little caramel sauce and whipped cream before serving, and it becomes the kind of dessert people will remember long after the plates have been cleared.

    Sometimes the best recipes come from combining foods we already love.

    Apple Pie Cheesecake is a perfect example.

    Creamy.

    Buttery.

    Cinnamon-spiced.

    Loaded with apples.

    Comforting enough to remind you of homemade apple pie and decadent enough to feel like a special-occasion cheesecake.

    If apple pie and cheesecake are both favorites in your house, this may quickly become one of those recipes people start requesting again and again.

    Would you serve your Apple Pie Cheesecake plain, topped with caramel, or with a scoop of vanilla ice cream?

  • Healthy Recipe of the Day: Garlic Chicken Quesadillas

    Advertisements

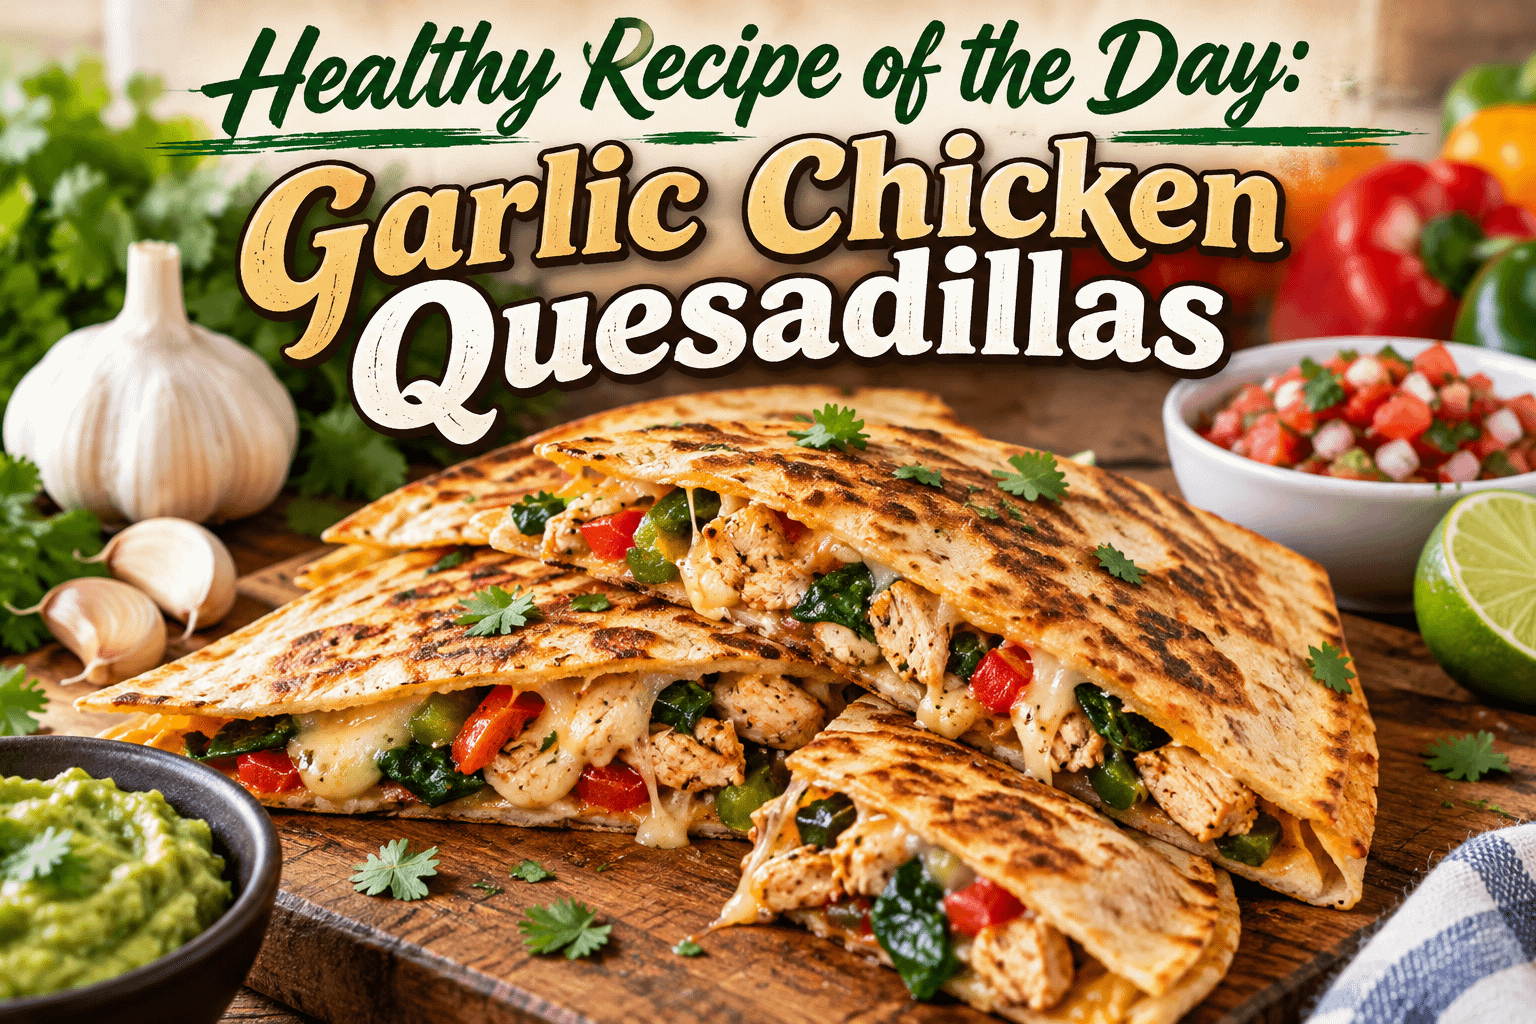
    When you are trying to eat healthier, you do not have to give up the foods you enjoy. Sometimes the best approach is to take a familiar favorite and make a few simple changes that add protein, vegetables, and better ingredients without sacrificing flavor.

    Today’s Healthy Recipe of the Day is Garlic Chicken Quesadillas, a quick and satisfying meal filled with seasoned chicken, fresh garlic, colorful vegetables, and just enough melted cheese to bring everything together.

    Quesadillas often get labeled as an indulgence because restaurant versions can contain large amounts of cheese, oil, sour cream, and other high-calorie additions. But homemade quesadillas give you complete control over what goes inside them.

    With lean chicken breast, whole-wheat tortillas, vegetables, moderate cheese, and very little added oil, you can turn this comfort-food favorite into a balanced meal that works for lunch, dinner, or meal prep.

    Why Garlic Chicken Quesadillas Make a Great Healthy Meal

    One of the best things about quesadillas is their versatility. You can adjust the ingredients according to your nutritional goals, what you have available, or simply what you enjoy eating.

    Chicken provides plenty of satisfying protein, while vegetables add flavor, texture, vitamins, minerals, and fiber. Whole-wheat tortillas can provide more fiber than traditional refined-flour tortillas, and using cheese in moderation gives you the flavor and texture you expect without overwhelming the meal.

    Then there is the garlic.

    Fresh garlic gives these quesadillas their signature flavor. When garlic hits a warm skillet with chicken, onions, and peppers, the aroma alone makes you ready for dinner.

    The result is a quesadilla that tastes like comfort food but contains ingredients you can feel good about serving.

    Ingredients

    For the Garlic Chicken

    • 1 pound boneless, skinless chicken breast
    • 3–4 cloves fresh garlic, minced
    • 1 tablespoon olive oil, divided
    • 1 teaspoon smoked paprika
    • 1 teaspoon ground cumin
    • 1/2 teaspoon chili powder
    • 1/2 teaspoon onion powder
    • 1/2 teaspoon dried oregano
    • Salt and black pepper to taste
    • Juice of 1/2 lime

    For the Quesadillas

    • 4 large whole-wheat tortillas
    • 1 cup shredded reduced-fat Monterey Jack, mozzarella, or Mexican-blend cheese
    • 1 bell pepper, thinly sliced
    • 1/2 medium onion, thinly sliced
    • 1 cup fresh spinach, roughly chopped
    • 2 tablespoons chopped fresh cilantro
    • Cooking spray or a small amount of olive oil

    Optional Toppings

    • Plain Greek yogurt
    • Fresh salsa or pico de gallo
    • Diced avocado
    • Chopped tomatoes
    • Fresh cilantro
    • Lime wedges
    • Sliced jalapeños

    How to Make Healthy Garlic Chicken Quesadillas

    Step 1: Prepare the Chicken

    Cut the chicken breast into small bite-sized pieces or thin strips. Smaller pieces cook quickly and make it easier to distribute the chicken evenly throughout each quesadilla.

    Place the chicken in a bowl and season it with smoked paprika, cumin, chili powder, onion powder, oregano, salt, and black pepper.

    Toss everything together until the chicken is evenly coated.

    Step 2: Cook the Garlic Chicken

    Heat about half of the olive oil in a large nonstick skillet over medium-high heat.

    Add the seasoned chicken and cook for approximately 5–7 minutes, stirring occasionally, until the chicken is cooked through and has developed some golden-brown color.

    Chicken should reach an internal temperature of 165°F for safe consumption.

    Reduce the heat slightly and add the minced garlic during the final minute or two of cooking. Cooking the garlic toward the end helps prevent it from burning and becoming bitter.

    Squeeze fresh lime juice over the chicken, stir, and transfer the chicken to a plate.

    Step 3: Cook the Vegetables

    Add the remaining olive oil to the same skillet.

    Add the sliced bell pepper and onion and sauté for about 3–5 minutes. You want the vegetables tender but still slightly crisp.

    Add the spinach during the final minute and cook just until wilted.

    Combining several vegetables inside the quesadilla is an easy way to increase the amount of produce in your meal without making it feel like you are eating a plate of vegetables.

    Step 4: Assemble the Quesadillas

    Place one whole-wheat tortilla on a clean surface.

    Sprinkle a light layer of shredded cheese over half of the tortilla.

    Add some garlic chicken, sautéed peppers, onions, spinach, and fresh cilantro.

    Sprinkle another small amount of cheese over the filling.

    Fold the empty half of the tortilla over the filling.

    Repeat with the remaining tortillas.

    Do not overfill them. A heavily stuffed quesadilla can be difficult to flip and may fall apart while cooking.

    Step 5: Cook Until Crispy

    Wipe out the skillet if necessary and lightly coat it with cooking spray.

    Place a quesadilla in the skillet over medium heat.

    Cook for approximately 2–3 minutes on the first side or until the tortilla becomes golden and crispy.

    Carefully flip and cook for another 2–3 minutes.

    The cheese should be melted and the tortilla crisp on both sides.

    Repeat with the remaining quesadillas.

    Step 6: Slice and Serve

    Allow each quesadilla to rest for a minute before slicing. This gives the melted cheese a little time to settle and helps keep the filling inside.

    Cut each quesadilla into wedges and serve with your favorite healthy toppings.

    Make the Garlic the Star

    If you love garlic, there is no reason to be shy with it.

    Freshly minced garlic gives you a stronger and more aromatic flavor than garlic powder alone. The key is adding it toward the end of cooking so it becomes fragrant without burning.

    You can also roast a head of garlic ahead of time and mash a small amount into the chicken mixture. Roasted garlic has a sweeter, milder flavor that works beautifully with chicken and melted cheese.

    For an extra burst of freshness, combine minced garlic with Greek yogurt, lime juice, cilantro, and a little black pepper to make a simple dipping sauce.

    Why Use Whole-Wheat Tortillas?

    Traditional flour tortillas are perfectly acceptable in moderation, but whole-wheat tortillas can be a useful choice when you want to increase fiber.

    Fiber can contribute to fullness and digestive health, and pairing a higher-fiber tortilla with protein-rich chicken and vegetables creates a meal with more staying power.

    When shopping for tortillas, check the nutrition label because products vary significantly in size, sodium, calories, and fiber.

    A product marketed as “healthy” is not automatically the best option. Comparing labels can help you choose the tortilla that best fits your needs.

    Don’t Eliminate the Cheese

    One mistake people sometimes make when creating healthier versions of comfort foods is removing every ingredient that makes the original enjoyable.

    You do not necessarily need to eliminate cheese.

    Instead, use enough to provide the flavor and texture you want.

    A strongly flavored cheese can also help because a smaller amount can still deliver plenty of flavor. Monterey Jack, pepper Jack, sharp cheddar, mozzarella, and Mexican-style cheese blends can all work well.

    The goal is balance rather than turning the quesadilla into nothing more than melted cheese inside a tortilla.

    Add Even More Vegetables

    The recipe already includes bell pepper, onion, and spinach, but you can easily add more.

    Try mushrooms, zucchini, corn, tomatoes, poblano peppers, kale, or finely chopped broccoli.

    You can also add black beans for additional fiber and plant-based protein.

    If you have leftover roasted vegetables in the refrigerator, quesadillas are a great way to use them.

    Greek Yogurt Instead of Sour Cream

    If you normally enjoy sour cream with quesadillas, plain Greek yogurt is an easy alternative.

    It has the creamy, slightly tangy quality that pairs beautifully with spicy chicken while also providing additional protein.

    Mix plain Greek yogurt with lime juice, cilantro, garlic, and a pinch of cumin for a quick homemade sauce.

    You can spoon it over the quesadillas or serve it on the side for dipping.

    Healthy Garlic-Lime Yogurt Sauce

    For an easy dipping sauce, combine:

    • 1/2 cup plain Greek yogurt
    • 1 small garlic clove, finely minced
    • Juice of 1/2 lime
    • 1 tablespoon chopped cilantro
    • Pinch of cumin
    • Black pepper to taste

    Stir everything together and refrigerate for about 10–15 minutes before serving if you have time.

    It adds a cool, creamy contrast to the warm garlic chicken.

    What to Serve With Garlic Chicken Quesadillas

    You can turn these quesadillas into a complete meal with a simple side.

    Try serving them with a green salad, black beans, roasted vegetables, fresh fruit, cilantro-lime cauliflower rice, corn salad, or a small serving of brown rice.

    Fresh salsa is another excellent choice because tomatoes, onions, peppers, cilantro, and lime provide a lot of flavor without requiring a heavy sauce.

    Meal Prep Option

    Garlic chicken quesadillas can also work well for meal preparation.

    Cook the garlic chicken and vegetables ahead of time and store them separately in airtight containers in the refrigerator.

    When you are ready to eat, assemble a fresh quesadilla and cook it in the skillet.

    Preparing the filling ahead of time means you can have a hot meal ready within minutes.

    If you cook the quesadillas completely in advance, allow them to cool before refrigerating. Reheat them in a skillet, toaster oven, or air fryer when possible to help restore the crispy exterior.

    Easy Recipe Variations

    Once you know the basic recipe, you can change it according to what you are craving.

    For Spicy Garlic Chicken Quesadillas, add jalapeños, crushed red pepper, cayenne, or hot sauce.

    For Garlic Chicken and Black Bean Quesadillas, add rinsed and drained black beans to increase fiber and make the filling even more substantial.

    For Garlic Chicken Fajita Quesadillas, increase the amount of peppers and onions and add fajita seasoning.

    For Garlic Chicken Avocado Quesadillas, add sliced avocado after cooking or serve fresh avocado on top.

    For Mediterranean Garlic Chicken Quesadillas, use spinach, tomatoes, chicken, garlic, a little feta, and mozzarella.

    There are countless ways to make the recipe your own.

    Tips for Making the Best Healthy Quesadillas

    Keep the skillet around medium heat. If it is too hot, the tortilla may burn before the cheese melts.

    Avoid adding too much oil. A good nonstick skillet needs very little oil to create a crispy tortilla.

    Use plenty of vegetables. They add volume, flavor, nutrients, and texture.

    Do not overdo the cheese. You want enough to hold the filling together without making cheese the entire meal.

    Season the chicken well. Healthy food does not have to mean bland food.

    And use fresh lime at the end. A little acidity can brighten the entire dish.

    A Healthier Meal Can Still Be Comforting

    Healthy eating does not have to mean surviving on salads, plain chicken breast, or foods you do not actually enjoy.

    Meals become easier to maintain when they are satisfying.

    That is what makes these Garlic Chicken Quesadillas such a useful recipe.

    You still get the crispy tortilla.

    You still get melted cheese.

    You still get tender, flavorful chicken.

    But you are also getting vegetables, protein, garlic, and the opportunity to customize the meal around your own nutritional goals.

    Small ingredient changes can make a meaningful difference without taking away everything you love about a dish.

    Healthy Recipe of the Day: Garlic Chicken Quesadillas

    These Garlic Chicken Quesadillas prove that healthier cooking does not need to be complicated.

    A few everyday ingredients can create a filling meal in about 30 minutes. The combination of juicy seasoned chicken, fragrant garlic, sautéed vegetables, melted cheese, and a crisp whole-wheat tortilla makes every bite satisfying.

    Serve them with fresh salsa, avocado, lime, or homemade garlic Greek yogurt sauce for a meal that feels like comfort food while still including plenty of nutritious ingredients.

    And perhaps the best part is how easy they are to customize.

    Add more vegetables. Make them spicy. Add black beans. Change the cheese. Prepare the chicken ahead of time. Make one for lunch or enough for the entire family.

    Healthy eating becomes much easier when the food on your plate is something you genuinely look forward to eating.

    What healthy ingredient would you add to your perfect Garlic Chicken Quesadilla?

  • Recipe of the Day: Chicken Parmigiana Skillet

    Advertisements

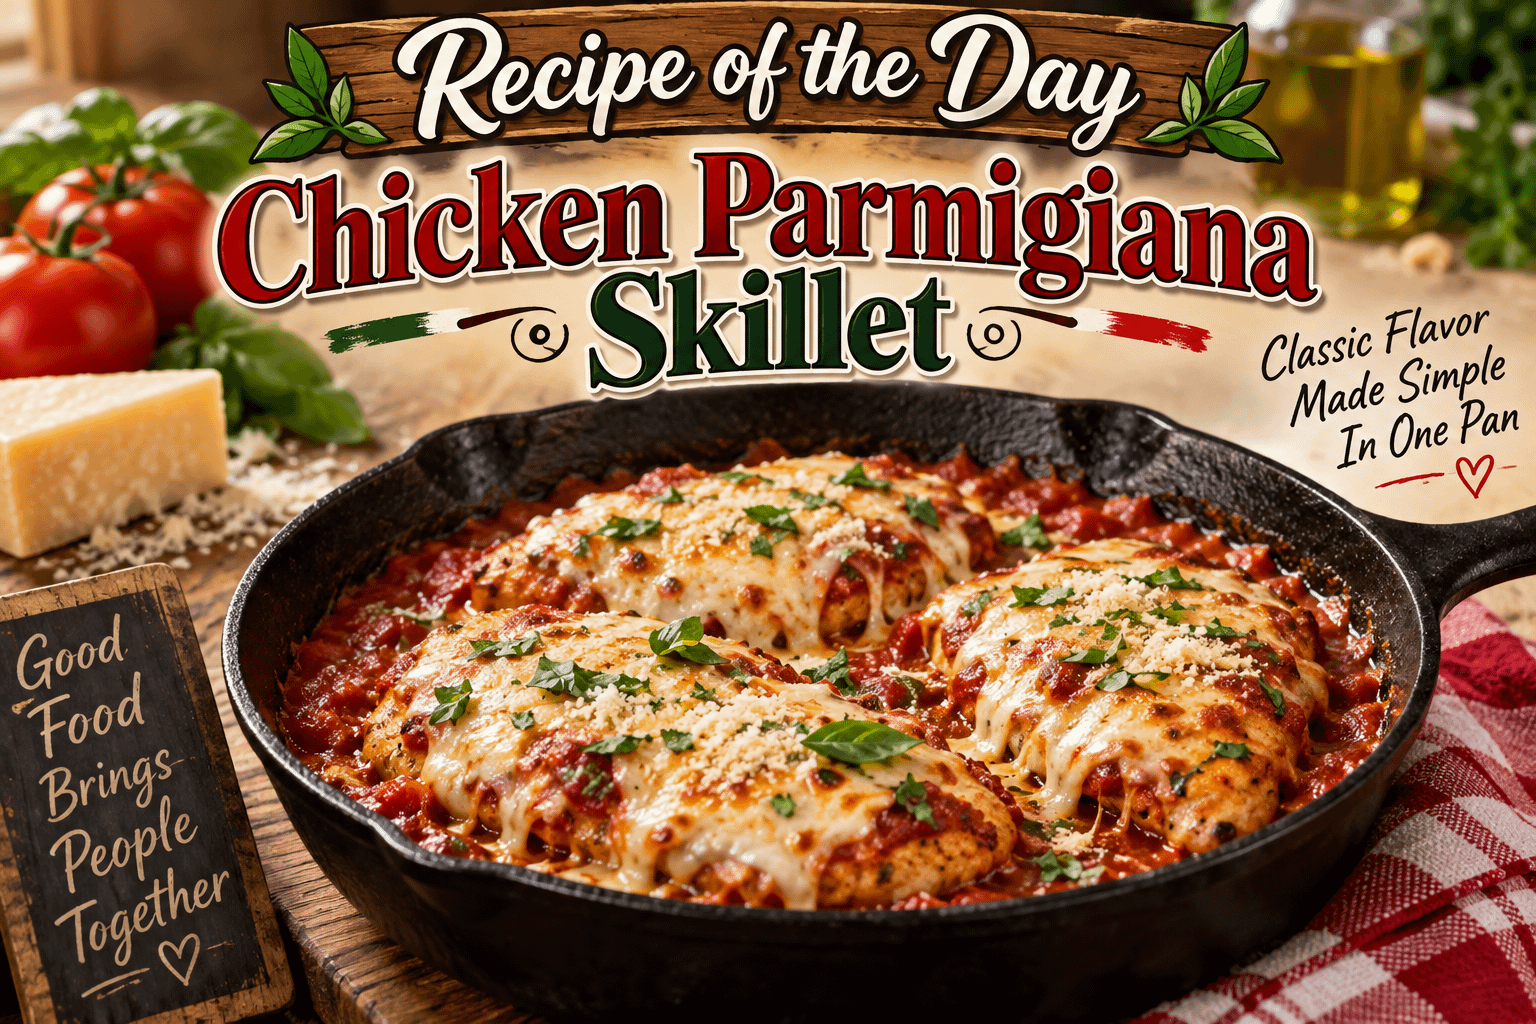
    There are some meals that immediately feel like comfort food, and Chicken Parmigiana is definitely one of them. Tender chicken, rich tomato sauce, melted mozzarella, Parmesan cheese, garlic, and Italian seasonings come together to create a meal that is hearty, satisfying, and packed with flavor.

    Traditional Chicken Parmigiana can involve breading and frying chicken, preparing sauce, transferring everything to a baking dish, and then finishing it in the oven. It is delicious, but sometimes you want those same flavors without turning dinner into a major project.

    That is where Chicken Parmigiana Skillet comes in.

    This recipe takes inspiration from classic Chicken Parmigiana and transforms it into a convenient skillet dinner. Everything comes together in one pan, giving you juicy chicken surrounded by savory marinara sauce and topped with plenty of bubbling, melted cheese.

    Serve it with pasta for a traditional Italian-American-style dinner, spoon it over vegetables for something lighter, or simply add some garlic bread and a salad.

    Why You’ll Love Chicken Parmigiana Skillet

    One of the best things about this recipe is how much flavor you can create without an overly complicated cooking process.

    The chicken is seasoned and browned first, developing a flavorful exterior while keeping the inside tender. Garlic and marinara sauce are then added to the skillet, allowing all those browned bits from the chicken to become part of the sauce.

    Finally, mozzarella and Parmesan are added over the chicken and melted until everything becomes wonderfully cheesy.

    The finished dish delivers many of the things people love about Chicken Parmigiana:

    • Tender chicken
    • Savory tomato sauce
    • Melted mozzarella
    • Parmesan cheese
    • Italian herbs
    • Garlic
    • A hearty, comforting finish

    And because most of the cooking happens in one skillet, cleanup is considerably easier.

    Ingredients

    For approximately 4 servings, you will need:

    For the Chicken

    • 4 boneless, skinless chicken breasts
    • 1 teaspoon Italian seasoning
    • 1 teaspoon garlic powder
    • 1/2 teaspoon onion powder
    • 1/2 teaspoon salt
    • 1/4 teaspoon black pepper
    • 2 tablespoons olive oil

    For the Sauce

    • 3 cloves garlic, minced
    • 3 cups marinara sauce
    • 1/2 teaspoon dried basil
    • 1/2 teaspoon dried oregano
    • Pinch of red pepper flakes, optional

    For the Cheese Topping

    • 1 1/2 cups shredded mozzarella cheese
    • 1/2 cup freshly grated Parmesan cheese

    Optional Garnishes

    • Fresh basil
    • Fresh parsley
    • Additional Parmesan cheese
    • Crushed red pepper flakes

    How to Make Chicken Parmigiana Skillet

    Step 1: Prepare the Chicken

    If your chicken breasts are especially thick, slice them horizontally into thinner cutlets or gently pound them to an even thickness.

    This helps the chicken cook more evenly and prevents the outside from becoming overcooked before the center is finished.

    Pat the chicken dry with paper towels.

    Season both sides with Italian seasoning, garlic powder, onion powder, salt, and black pepper.

    Step 2: Brown the Chicken

    Heat the olive oil in a large skillet over medium-high heat.

    Once the oil is hot, carefully place the chicken into the skillet.

    Cook for approximately 4 to 5 minutes on the first side without constantly moving it. You want the chicken to develop some nice browning.

    Flip and cook for another 3 to 4 minutes.

    The chicken does not necessarily need to be completely cooked at this point because it will continue cooking in the sauce.

    Transfer the browned chicken to a plate.

    Step 3: Add the Garlic

    Reduce the heat to medium.

    Add the minced garlic to the same skillet and cook for about 30 seconds, stirring frequently.

    Be careful not to burn the garlic.

    The garlic will pick up some of the flavor left behind from browning the chicken, creating an excellent foundation for the sauce.

    Step 4: Add the Marinara Sauce

    Pour the marinara sauce into the skillet.

    Add the basil, oregano, and red pepper flakes if you want a little heat.

    Stir everything together.

    Allow the sauce to simmer gently for approximately 2 to 3 minutes.

    Step 5: Return the Chicken

    Place the browned chicken back into the skillet, nestling each piece into the marinara sauce.

    Spoon a little sauce over the top of each chicken breast.

    Reduce the heat to medium-low, cover the skillet, and allow the chicken to simmer until it is cooked through.

    Depending on the thickness of your chicken, this will usually take another 5 to 10 minutes.

    For food safety, chicken should reach an internal temperature of 165°F (74°C) at its thickest point.

    Step 6: Add the Cheese

    Now comes the part that transforms this skillet into serious comfort food.

    Sprinkle mozzarella generously over each piece of chicken.

    Follow with grated Parmesan.

    Cover the skillet again and cook over low heat for approximately 2 to 4 minutes, or until the mozzarella has completely melted.

    If you are using an oven-safe skillet and want a browned, bubbly cheese topping, you can place the skillet briefly under the broiler.

    Watch it carefully because cheese can go from beautifully browned to burned very quickly.

    Step 7: Garnish and Serve

    Remove the skillet from the heat.

    Sprinkle fresh basil or parsley over the top.

    Add another little dusting of Parmesan if desired.

    Your Chicken Parmigiana Skillet is ready to serve.

    What to Serve With Chicken Parmigiana Skillet

    The obvious choice is pasta.

    Cook spaghetti, linguine, fettuccine, penne, or your favorite pasta and spoon some of the marinara sauce from the skillet over it.

    Place the cheesy chicken on top and finish everything with Parmesan.

    You can also serve this dish with:

    Garlic bread: Perfect for soaking up the extra marinara sauce.

    Caesar salad: The crisp lettuce and tangy dressing provide a refreshing contrast to the rich chicken.

    Roasted vegetables: Broccoli, zucchini, asparagus, peppers, or Brussels sprouts all work nicely.

    Mashed potatoes: Not traditional, but incredibly comforting.

    Polenta: Creamy polenta makes a delicious base for the tomato sauce and chicken.

    Zucchini noodles: A lighter alternative to traditional pasta.

    Roasted spaghetti squash: Another vegetable-based option that pairs naturally with marinara sauce.

    Want Crispy Chicken?

    This skillet version skips traditional breading to keep preparation simple, but you can absolutely add it.

    Place approximately 1/2 cup flour in one shallow bowl.

    Beat 2 eggs in another.

    In a third bowl, combine:

    • 1 cup Italian-seasoned breadcrumbs
    • 1/3 cup grated Parmesan

    Coat each chicken cutlet lightly in flour, dip it into the egg, and then press it into the breadcrumb mixture.

    Pan-fry the breaded chicken in olive oil until golden before continuing with the recipe.

    This gives you more of the crispy exterior associated with traditional Chicken Parmigiana while still allowing you to finish everything in the skillet.

    Add Pasta Directly to the Skillet

    You can take this recipe another step and turn it into a Chicken Parmigiana pasta skillet.

    Prepare approximately 8 ounces of penne, rigatoni, rotini, or another short pasta until just al dente.

    After the chicken has cooked, temporarily remove it from the skillet.

    Stir the cooked pasta into the marinara sauce.

    Return the chicken to the pan, add mozzarella and Parmesan, and melt the cheese.

    Now you have chicken, pasta, sauce, and cheese together in one incredibly satisfying skillet.

    Make It Spicy

    Chicken Parmigiana does not normally need much heat, but a spicy version can be excellent.

    Add additional crushed red pepper flakes to the marinara sauce.

    You could also season the chicken with a small amount of cayenne pepper or use a spicy marinara sauce.

    Finish the dish with more red pepper flakes just before serving.

    Add More Vegetables

    Another advantage of skillet meals is how easily vegetables can be incorporated.

    Before adding the garlic and marinara sauce, sauté vegetables such as:

    • Mushrooms
    • Bell peppers
    • Spinach
    • Zucchini
    • Onions
    • Broccoli

    Cook them until they begin to soften, then continue preparing the sauce.

    This adds more flavor, texture, and vegetables without requiring another side dish.

    Choosing the Right Marinara Sauce

    Because marinara is one of the main flavors in this dish, choose one you genuinely enjoy.

    A good marinara should have a balance of tomatoes, garlic, herbs, acidity, and a little natural sweetness.

    If using store-bought sauce, taste it before adding additional salt because sodium levels vary significantly between brands.

    You can also use homemade marinara if you have some available.

    Don’t Overcook the Chicken

    One of the biggest mistakes with chicken breast recipes is cooking the meat too long.

    Chicken breasts are relatively lean, so they can dry out when overcooked.

    Browning the chicken first and then gently finishing it in marinara helps protect it from drying out.

    An instant-read meat thermometer is extremely useful. Once the thickest portion reaches a safe internal temperature of 165°F, the chicken is ready.

    Mozzarella Makes the Difference

    For maximum cheesy goodness, use a mozzarella that melts well.

    Low-moisture shredded mozzarella is convenient and creates that familiar stretchy cheese topping.

    Fresh mozzarella can also be used. Slice it into thin rounds and place them over the chicken before covering the skillet.

    Combining mozzarella with Parmesan is particularly important because the two cheeses contribute different flavors.

    Mozzarella gives you creaminess and stretch.

    Parmesan provides a salty, nutty bite.

    Together, they create the signature Chicken Parmigiana experience.

    Storing Leftovers

    Allow leftover Chicken Parmigiana Skillet to cool before transferring it to an airtight container.

    Store it in the refrigerator for approximately 3 to 4 days.

    Keep extra pasta separate when possible. Pasta stored directly in sauce will continue absorbing moisture and can become softer over time.

    How to Reheat It

    For the best results, place leftover chicken and sauce in a covered skillet over low heat.

    Add a spoonful of water or additional marinara if the sauce has become too thick.

    Heat gently until the chicken is warmed through.

    You can also reheat individual portions in the microwave.

    If the cheese needs refreshing, sprinkle a small amount of additional mozzarella over the chicken before reheating.

    An Easy Dinner That Feels Special

    Chicken Parmigiana is the kind of meal that can make an ordinary dinner feel a little more special.

    There is something undeniably comforting about cutting into tender chicken covered with warm marinara and melted cheese. Add pasta and garlic bread, and you have the kind of dinner that invites everyone to sit down, slow down, and enjoy the meal.

    The skillet approach makes that experience much easier to create.

    You don’t need an elaborate ingredient list or multiple pans. You simply build layers of flavor in the same skillet—seasoned chicken, garlic, marinara, herbs, mozzarella, and Parmesan.

    Sometimes the best recipes aren’t the most complicated ones.

    They’re the meals that deliver plenty of flavor while still being realistic enough to make on a busy evening.

    And this Chicken Parmigiana Skillet does exactly that.

    Recipe of the Day

    If you’re looking for a comforting dinner filled with Italian-inspired flavors, give Chicken Parmigiana Skillet a try.

    Serve it over spaghetti for a classic combination, pair it with roasted vegetables for something lighter, or grab some warm garlic bread and use it to soak up every last bit of tomato sauce.

    However you serve it, make sure you don’t hold back on that melted mozzarella and Parmesan.

    What would you serve with your Chicken Parmigiana Skillet—pasta, garlic bread, vegetables, or all three?

  • Breakfast of the Day: Hashbrown Breakfast Casserole

    Advertisements

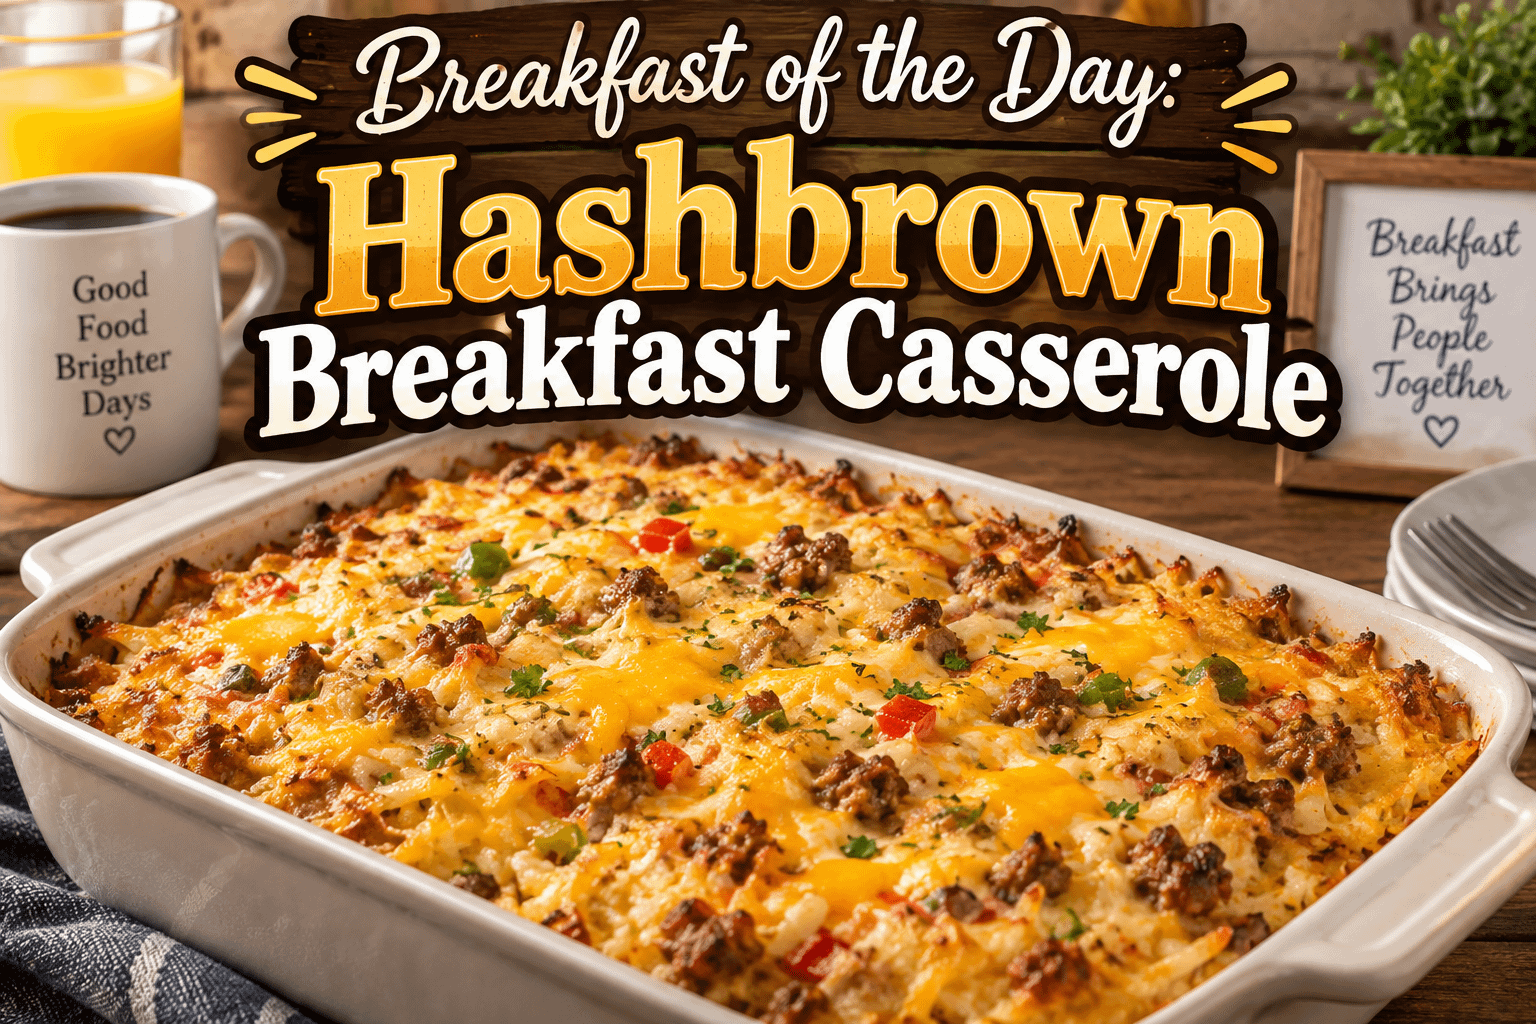
    There is something especially comforting about waking up to the smell of a warm breakfast baking in the oven. When that breakfast combines crispy hash browns, savory sausage, fluffy eggs, melted cheese, and a few simple seasonings, you have the kind of meal that can bring everyone to the table.

    Today’s Breakfast of the Day is Hashbrown Breakfast Casserole, a hearty, satisfying dish that works just as well for a quiet weekend morning as it does for a big family breakfast, holiday brunch, potluck, or special gathering.

    One of the best things about a breakfast casserole is its simplicity. Instead of standing over the stove preparing eggs, potatoes, sausage, and cheese separately, everything comes together in one baking dish. You can even assemble much of it ahead of time and put it in the oven when you are ready to eat.

    The result is a golden, cheesy breakfast packed with familiar flavors and plenty of comfort.

    Why Hashbrown Breakfast Casserole Is So Good

    Breakfast casseroles have been popular for generations because they solve one of the biggest problems with preparing a large breakfast: timing.

    When you’re cooking several breakfast foods separately, something always seems to get cold before everything else is ready. The eggs finish before the potatoes. The potatoes are ready before the sausage. Someone is waiting for toast while everyone else has already started eating.

    A casserole eliminates much of that juggling.

    Everything cooks together, giving you layers of flavor in every serving.

    Hash browns form the potato base. Breakfast sausage provides richness and seasoning. Eggs hold everything together while creating the classic breakfast flavor. Cheese melts throughout the casserole and develops a beautiful golden layer across the top.

    It is simple food, but sometimes simple food is exactly what makes breakfast memorable.

    Ingredients

    For approximately 8 servings, you will need:

    • 1 pound breakfast sausage
    • 1 package (about 30 ounces) frozen shredded hash browns, thawed
    • 8 large eggs
    • 2 cups shredded cheddar cheese, divided
    • 1 1/2 cups milk
    • 1/2 cup diced onion
    • 1/2 cup diced bell pepper
    • 1 teaspoon garlic powder
    • 1/2 teaspoon onion powder
    • 1/2 teaspoon smoked paprika
    • 1/2 teaspoon salt
    • 1/4 teaspoon black pepper
    • 2 tablespoons butter, melted
    • Chopped green onions or parsley for garnish, optional

    You can easily adjust the ingredients depending on what you have available. That flexibility is another reason this casserole is worth keeping in your breakfast rotation.

    How to Make Hashbrown Breakfast Casserole

    Step 1: Preheat the Oven

    Preheat your oven to 375°F.

    Lightly grease a 9-by-13-inch baking dish with cooking spray or butter.

    Step 2: Cook the Sausage

    Place the breakfast sausage in a large skillet over medium heat.

    Break it into smaller pieces with a spatula while it cooks. Continue cooking until the sausage is browned and completely cooked through.

    Drain excess grease and set the sausage aside.

    Step 3: Prepare the Hash Browns

    Place the thawed hash browns in a large bowl.

    Pour the melted butter over them and season lightly with salt, pepper, and a little garlic powder.

    Spread the hash browns evenly across the bottom of your prepared baking dish.

    For additional texture, press them down gently to create an even potato layer.

    Step 4: Add the Sausage and Vegetables

    Sprinkle the cooked sausage over the hash browns.

    Add the diced onions and bell peppers.

    Try to distribute everything evenly so every serving contains a little bit of sausage, potato, vegetables, eggs, and cheese.

    Sprinkle approximately 1 cup of shredded cheddar cheese over the mixture.

    Step 5: Prepare the Egg Mixture

    Crack the eggs into a large mixing bowl.

    Add the milk, garlic powder, onion powder, smoked paprika, salt, and black pepper.

    Whisk everything together until the eggs and milk are thoroughly combined.

    Pour the egg mixture evenly over the casserole.

    Give the baking dish a gentle shake to help the egg mixture settle between the potatoes, sausage, and vegetables.

    Step 6: Add the Cheese

    Sprinkle the remaining shredded cheddar cheese across the top.

    And if you are someone who believes there is almost no such thing as too much cheese on a breakfast casserole, adding a little extra certainly won’t hurt.

    Step 7: Bake

    Place the casserole in the preheated oven.

    Bake for approximately 40 to 50 minutes, or until the center is set and the cheese on top is melted and lightly golden.

    Cooking times can vary slightly depending on your oven and the depth of your baking dish.

    To check the casserole, insert a knife near the center. If the eggs appear fully set rather than runny, it is ready.

    Step 8: Rest Before Serving

    Remove the casserole from the oven and allow it to rest for approximately 5 to 10 minutes.

    This short resting period helps the casserole firm up and makes it much easier to cut into clean portions.

    Garnish with chopped green onions or parsley if desired.

    Then serve it warm.

    Make It the Night Before

    One of the greatest advantages of Hashbrown Breakfast Casserole is that you can prepare it ahead of time.

    This is especially helpful for Christmas morning, Easter brunch, family gatherings, overnight guests, or mornings when you simply don’t want to spend much time preparing breakfast.

    Cook the sausage and assemble the casserole the evening before.

    Cover the baking dish tightly and refrigerate it overnight.

    The next morning, remove it from the refrigerator while the oven preheats.

    Because the casserole will be cold, it may require several additional minutes of baking.

    Always make sure the center is completely cooked before serving.

    Instead of spending your morning chopping, mixing, and frying, most of the work has already been completed.

    Ways to Customize Your Breakfast Casserole

    The basic recipe is delicious, but breakfast casseroles are incredibly easy to personalize.

    Bacon Hashbrown Breakfast Casserole

    Replace some or all of the sausage with cooked, crumbled bacon.

    You can also use both.

    Sausage and bacon together create an especially hearty breakfast.

    Ham and Cheese

    Have leftover ham in the refrigerator?

    Dice it into small pieces and substitute it for the sausage.

    Ham works especially well with cheddar, Swiss, Monterey Jack, or a combination of cheeses.

    Spicy Breakfast Casserole

    For anyone who likes a little heat in the morning, add diced jalapeños, pepper jack cheese, crushed red pepper flakes, or your favorite hot sauce.

    Spicy breakfast sausage is another easy substitution.

    Loaded Hashbrown Casserole

    Take inspiration from loaded baked potatoes.

    Add bacon, cheddar cheese, green onions, and a spoonful of sour cream when serving.

    Vegetable Hashbrown Breakfast Casserole

    You don’t necessarily need meat.

    Try adding mushrooms, spinach, tomatoes, onions, bell peppers, broccoli, or another favorite vegetable.

    If using vegetables with a high water content, cooking them briefly before adding them to the casserole can help prevent excess moisture.

    What to Serve With It

    Hashbrown Breakfast Casserole is filling enough to be the centerpiece of breakfast, but adding a few sides can transform it into a complete brunch.

    Fresh fruit provides a refreshing contrast to the rich potatoes, sausage, eggs, and cheese.

    You could serve sliced strawberries, blueberries, grapes, melon, pineapple, or a simple mixed fruit salad.

    Toast, biscuits, English muffins, or croissants are also easy additions.

    For a larger brunch, consider adding pancakes, waffles, cinnamon rolls, yogurt, or muffins.

    And, of course, don’t forget the coffee.

    Orange juice, apple juice, milk, tea, and hot chocolate are also great options, particularly when feeding a crowd.

    Getting the Best Hash Brown Texture

    One of the keys to a great hashbrown casserole is controlling moisture.

    If frozen hash browns contain too much water, the casserole can become softer than intended.

    Allow your frozen hash browns to thaw and remove excess moisture before assembling the dish. You can gently press them between clean kitchen towels or paper towels.

    If you prefer a crispier potato layer, bake the buttered hash browns by themselves for approximately 10 to 15 minutes before adding the remaining ingredients.

    That extra step isn’t required, but it can produce a more noticeable contrast between the crispy potatoes and soft egg filling.

    Choosing the Right Cheese

    Cheddar is a classic choice because it melts beautifully and provides plenty of flavor.

    But you don’t have to stop there.

    Monterey Jack gives the casserole a mild, creamy texture.

    Pepper Jack introduces some spice.

    Mozzarella creates plenty of melted-cheese goodness without overpowering the other ingredients.

    Colby Jack gives you a nice balance of creaminess and flavor.

    You can also combine several cheeses.

    A cheddar and Monterey Jack mixture is particularly good with sausage and potatoes.

    Freshly shredded cheese generally melts more smoothly than packaged pre-shredded cheese, although either will work when convenience is the priority.

    Storing Leftovers

    If you have leftovers, allow the casserole to cool before placing it in an airtight container.

    Refrigerate promptly and use within about 3 to 4 days.

    Individual portions can be reheated in the microwave, making this casserole useful for quick breakfasts during the week.

    For larger portions, reheating in the oven can help maintain a better texture.

    You can also portion the casserole into individual servings before storing it. That way, breakfast is ready whenever you need it.

    A Great Breakfast for Feeding a Crowd

    Some breakfasts are best prepared for one or two people.

    Hashbrown Breakfast Casserole is almost the opposite.

    This recipe shines when there are several hungry people waiting for breakfast.

    One large baking dish provides multiple servings without requiring you to continuously cook individual portions.

    That makes it perfect for:

    Family breakfasts, holiday mornings, church gatherings, weekend brunches, potlucks, overnight guests, birthday breakfasts, office breakfasts, game-day mornings, and family reunions.

    Set the casserole on the table with a few simple sides and allow everyone to serve themselves.

    Breakfast doesn’t have to be complicated to feel special.

    Why Breakfast Casseroles Are Comfort Food

    There is something nostalgic about a bubbling casserole coming out of the oven.

    Maybe it reminds you of weekend mornings growing up.

    Maybe it reminds you of Christmas breakfast with family.

    Maybe it simply represents slowing down long enough to enjoy a warm meal instead of rushing out the door with nothing but coffee.

    Food can become connected to memories surprisingly quickly.

    The smell of sausage cooking in a skillet, potatoes browning in the oven, or cheese melting over eggs can bring us back to another kitchen, another morning, or another time in our lives.

    That’s part of what makes traditional breakfast dishes so special.

    They aren’t necessarily fancy.

    They are familiar.

    And familiar food has a way of making people feel at home.

    Final Thoughts

    Hashbrown Breakfast Casserole brings together many of the foods people already love for breakfast and turns them into one warm, cheesy, satisfying dish.

    You get crispy potatoes, savory sausage, fluffy eggs, vegetables, seasonings, and plenty of melted cheese in every serving.

    Better yet, the recipe is easy to modify.

    Use bacon instead of sausage. Add ham. Toss in extra vegetables. Make it spicy. Experiment with different cheeses. Prepare it the night before or bake it fresh in the morning.

    There really isn’t just one way to make a great breakfast casserole.

    Whether you’re preparing breakfast for your family, feeding guests during the holidays, bringing something to a brunch, or simply looking for a filling weekend meal, this is one recipe worth keeping.

    Sometimes the best breakfasts aren’t complicated.

    They’re warm, hearty, homemade, and meant to be shared.

    What would you add to your perfect Hashbrown Breakfast Casserole—sausage, bacon, ham, extra cheese, vegetables, or a little bit of everything?

  • Dessert of the Day: Chocolate and Cheesecake Twister

    Advertisements

    There are desserts that satisfy a sweet craving, and then there are desserts that make you stop after the first bite and wonder why chocolate and cheesecake are not combined more often.

    Today’s Dessert of the Day — Chocolate and Cheesecake Twister brings together two dessert favorites in one rich, creamy, chocolate-filled creation. Imagine layers of smooth cheesecake filling twisted together with deep chocolate flavor, a chocolate cookie crust underneath, and a beautiful swirl running through every slice.

    It is decadent without being overly complicated, impressive enough for a celebration, and comforting enough to make simply because you deserve something sweet.

    The name “Twister” comes from the dramatic swirls of chocolate and cheesecake throughout the dessert. No two slices look exactly alike, making each serving a little different while delivering the same combination of creamy cheesecake and rich chocolate.

    Whether you are serving this at a birthday party, family gathering, holiday dinner, potluck, or simply enjoying a quiet dessert at home, Chocolate and Cheesecake Twister is the kind of recipe chocolate lovers will remember.

    Why Chocolate and Cheesecake Work So Well Together

    Chocolate and cheesecake are individually wonderful, but combining them creates something even better.

    Cheesecake provides a creamy, slightly tangy base that balances the sweetness of chocolate. Chocolate contributes richness, depth, and that unmistakable flavor people crave when they want a truly indulgent dessert.

    Instead of one flavor overpowering the other, they complement each other.

    The cheesecake layer is smooth and velvety.

    The chocolate is bold and luxurious.

    The cookie crust adds texture.

    And the swirling effect creates little pockets where one flavor may be stronger before blending back into the other.

    Every forkful becomes slightly different.

    Chocolate and Cheesecake Twister Recipe

    Ingredients

    For the Chocolate Cookie Crust

    • 2 cups chocolate sandwich cookie crumbs
    • 5 tablespoons unsalted butter, melted
    • 1 tablespoon granulated sugar

    For the Cheesecake Filling

    • 24 ounces cream cheese, softened
    • 1 cup granulated sugar
    • 3 large eggs
    • 1 cup sour cream
    • 2 teaspoons vanilla extract
    • 2 tablespoons all-purpose flour
    • 1/4 teaspoon salt

    For the Chocolate Swirl

    • 1 cup semisweet chocolate chips
    • 1/2 cup heavy whipping cream
    • 1 tablespoon unsalted butter

    Optional Toppings

    • Chocolate sauce
    • Whipped cream
    • Chocolate curls
    • Mini chocolate chips
    • Crushed chocolate cookies
    • Fresh strawberries
    • Chocolate-covered strawberries
    • Caramel drizzle

    Step 1: Prepare the Pan

    Preheat your oven to 325°F.

    Lightly grease a 9-inch springform pan.

    For additional protection against leaks, wrap the outside bottom of the pan with a couple layers of aluminum foil, especially if you plan to bake the cheesecake using a water bath.

    Set the prepared pan aside.

    Step 2: Make the Chocolate Cookie Crust

    Place the chocolate cookie crumbs in a medium mixing bowl.

    Add the melted butter and sugar.

    Mix until the crumbs resemble wet sand and hold together when pressed.

    Pour the mixture into the bottom of the springform pan.

    Use the bottom of a drinking glass or measuring cup to firmly press the crust into an even layer.

    Bake for approximately 8 to 10 minutes.

    Remove the crust from the oven and allow it to cool slightly while you prepare the filling.

    Step 3: Prepare the Cheesecake Filling

    Place the softened cream cheese into a large mixing bowl.

    Using an electric mixer, beat the cream cheese until smooth and creamy.

    Add the sugar and continue mixing until everything is incorporated.

    Add the eggs one at a time, mixing gently after each addition.

    Avoid overmixing once the eggs have been added. Too much air can cause the cheesecake to rise dramatically during baking and then crack as it cools.

    Add the sour cream, vanilla extract, flour, and salt.

    Mix on low speed until the batter becomes smooth and creamy.

    Set aside.

    Step 4: Make the Chocolate Ganache Swirl

    Place the chocolate chips in a heat-safe bowl.

    Heat the heavy cream in a small saucepan until it is hot but not boiling.

    Pour the hot cream over the chocolate chips.

    Allow the mixture to sit for approximately two minutes.

    Add the butter.

    Stir slowly until the chocolate becomes completely melted, smooth, and glossy.

    Let the ganache cool for several minutes.

    Step 5: Create the Twister Effect

    Pour approximately half of the cheesecake batter over the prepared chocolate crust.

    Spoon several portions of chocolate ganache over the cheesecake mixture.

    Pour the remaining cheesecake batter over the top.

    Add additional spoonfuls of ganache across the surface.

    Now comes the fun part.

    Take a butter knife, skewer, or toothpick and gently drag it through the chocolate and cheesecake mixture.

    Create sweeping curves, circles, or figure-eight patterns.

    The goal is to create beautiful chocolate ribbons throughout the cheesecake without completely mixing the two batters together.

    Do not over-swirl.

    You want visible streaks of chocolate and cheesecake.

    This twisting pattern is what gives the Chocolate and Cheesecake Twister its signature appearance.

    Step 6: Bake the Cheesecake

    Place the cheesecake in the oven and bake for approximately 55 to 70 minutes.

    The edges should look set while the center should still have a slight wobble.

    Turn the oven off.

    Crack the oven door open slightly and allow the cheesecake to remain inside for approximately 30 minutes.

    This gradual cooling process helps prevent cracking.

    Remove the cheesecake from the oven.

    Allow it to cool completely at room temperature.

    Then refrigerate for at least 6 hours, although overnight refrigeration produces the best texture.

    Cheesecake needs time to fully set.

    Trying to slice it too early can result in a softer filling that does not hold its shape properly.

    Decorating Your Chocolate and Cheesecake Twister

    Once the cheesecake has completely chilled, remove it from the springform pan.

    You could serve it exactly as it is because the chocolate swirl already creates an impressive appearance.

    However, toppings can take this dessert to another level.

    Drizzle warm chocolate sauce across the top.

    Add small swirls of whipped cream around the edge.

    Sprinkle chocolate curls over the center.

    You could also crush several chocolate sandwich cookies and scatter the crumbs around the top.

    For something especially impressive, place chocolate-covered strawberries around the outside of the cheesecake.

    The combination of strawberries, chocolate, and cheesecake is difficult to resist.

    Creating the Perfect Cheesecake Texture

    One of the biggest secrets to great cheesecake is starting with room-temperature ingredients.

    Cold cream cheese does not blend as smoothly and can leave small lumps throughout the batter.

    Take the cream cheese, eggs, and sour cream out of the refrigerator ahead of time.

    Room-temperature ingredients blend together much more easily.

    You should also avoid aggressively beating the batter after adding your eggs.

    Cheesecake does not need lots of air whipped into it.

    Slow, gentle mixing helps create the dense and creamy texture associated with bakery-quality cheesecake.

    The Water Bath Option

    Professional bakers often bake cheesecake in a water bath.

    A water bath provides gentle heat and moisture inside the oven.

    To use one, wrap the bottom of your springform pan securely with aluminum foil.

    Place the cheesecake inside a larger roasting pan.

    Pour hot water into the roasting pan until it reaches approximately halfway up the sides of the springform pan.

    Carefully place everything inside the oven.

    The steam created by the water keeps the cheesecake moist and helps regulate the baking temperature.

    A water bath is optional, but it can produce an exceptionally smooth cheesecake.

    Chocolate Choices

    Semisweet chocolate works especially well because it provides strong chocolate flavor without making the cheesecake overwhelmingly sweet.

    However, there are several alternatives.

    Milk chocolate creates a sweeter and softer chocolate flavor.

    Dark chocolate adds deeper cocoa flavor and makes the dessert taste slightly more sophisticated.

    White chocolate can also be incorporated into part of the batter for a triple-chocolate variation.

    You could even combine multiple chocolates.

    Imagine dark chocolate swirls on one side and milk chocolate swirls on the other.

    Suddenly your Chocolate and Cheesecake Twister becomes a completely different dessert.

    Add a Brownie Layer

    If you want to make this dessert even richer, add a thin brownie layer above the cookie crust.

    Prepare approximately half a batch of brownie batter.

    Spread it over the crust and partially bake it before adding the cheesecake mixture.

    The final dessert will contain chocolate cookie crust, brownie, cheesecake, and chocolate ganache.

    It becomes almost impossible to classify.

    Is it cheesecake?

    Brownie?

    Chocolate cake?

    The correct answer may simply be delicious.

    Chocolate Peanut Butter Twister

    Chocolate and peanut butter lovers can easily transform this recipe.

    Warm approximately half a cup of creamy peanut butter until slightly softened.

    Alternate spoonfuls of peanut butter and chocolate ganache throughout the cheesecake batter.

    Swirl everything together.

    The result becomes a Chocolate Peanut Butter Cheesecake Twister filled with ribbons of chocolate, peanut butter, and creamy cheesecake.

    Salted Caramel Chocolate Twister

    Another delicious variation uses caramel.

    Drizzle caramel sauce between the cheesecake layers along with the chocolate.

    After baking and chilling, finish the cheesecake with additional chocolate sauce, caramel sauce, and a light sprinkle of flaky sea salt.

    Salt intensifies both chocolate and caramel flavors.

    That small finishing touch creates a dessert that tastes incredibly luxurious.

    Cookies and Cream Version

    Chocolate sandwich cookies already appear in the crust, so why not bring them into the cheesecake?

    Roughly chop several cookies and fold them into part of the cheesecake batter.

    Then add the chocolate swirl normally.

    Top the finished cheesecake with whipped cream and additional cookie pieces.

    You now have a Cookies and Cream Chocolate Cheesecake Twister.

    Strawberry Chocolate Cheesecake Twister

    Fresh strawberries are another excellent addition.

    Create a quick strawberry sauce using strawberries, sugar, and a little lemon juice.

    Allow the mixture to cool.

    Add alternating spoonfuls of strawberry sauce and chocolate ganache across the cheesecake batter.

    Swirl everything together.

    The finished cheesecake will contain ribbons of white cheesecake, chocolate, and bright red strawberry.

    It looks beautiful when sliced.

    How to Slice Cheesecake Cleanly

    For bakery-style slices, use a long sharp knife.

    Dip the knife into hot water.

    Dry it with a clean towel.

    Make one slice.

    Clean the knife again before making the next slice.

    Repeating this process creates smooth, clean edges instead of dragging cheesecake filling across each piece.

    It takes slightly longer, but the presentation is worth it.

    Serving Suggestions

    Chocolate and Cheesecake Twister is rich, so smaller slices usually work best.

    Serve it slightly chilled rather than frozen cold.

    Allowing the cheesecake to sit at room temperature for approximately 10 to 15 minutes before serving can help the flavors become more noticeable.

    Pair each slice with:

    • Fresh strawberries
    • Raspberries
    • Hot coffee
    • Cold milk
    • Espresso
    • Vanilla ice cream
    • Chocolate ice cream
    • Fresh whipped cream

    A little fruit can provide a refreshing contrast to the richness of the chocolate cheesecake.

    How to Store Chocolate and Cheesecake Twister

    Keep leftover cheesecake covered in the refrigerator.

    It should stay fresh for approximately 4 to 5 days.

    For longer storage, cheesecake freezes surprisingly well.

    Slice the cheesecake first.

    Wrap individual slices tightly in plastic wrap.

    Place them inside a freezer-safe container or bag.

    Freeze for up to approximately two months.

    When you want dessert, transfer a slice to the refrigerator and allow it to thaw overnight.

    Having individual slices available can be dangerously convenient.

    Make It Ahead for Parties

    One reason cheesecake works so well for entertaining is that it actually benefits from being made ahead.

    Prepare the cheesecake the day before your gathering.

    Allow it to chill overnight.

    Then decorate it shortly before your guests arrive.

    You eliminate the stress of baking dessert at the last minute while still serving something that looks impressive.

    For holidays, birthdays, family dinners, potlucks, anniversaries, or special celebrations, this recipe can easily become the centerpiece of the dessert table.

    Why This Dessert Deserves a Spot on Your Table

    Chocolate and Cheesecake Twister checks nearly every box a great dessert should.

    It looks impressive.

    It tastes indulgent.

    It can be prepared ahead of time.

    It can be customized.

    And most importantly, it combines two beloved desserts into one.

    Chocolate lovers get the rich cocoa flavor they want.

    Cheesecake lovers get smooth, creamy filling.

    Cookie lovers get the crunchy chocolate crust.

    And anyone who enjoys beautifully presented desserts gets the dramatic swirl running throughout every piece.

    Dessert of the Day Final Thoughts

    Some desserts are designed to be simple.

    Others are designed to be unforgettable.

    Chocolate and Cheesecake Twister falls comfortably into the second category.

    The chocolate cookie crust provides the foundation. The creamy cheesecake creates the rich center. Chocolate ganache twists throughout the filling, producing ribbons of chocolate in every slice.

    Then you can customize it with whipped cream, berries, chocolate curls, caramel, peanut butter, cookies, or anything else your sweet tooth suggests.

    It works for holidays.

    It works for birthdays.

    It works for dinner parties.

    And sometimes it works perfectly on an ordinary evening when you simply want an extraordinary dessert.

    Because every once in a while, choosing between chocolate and cheesecake should not be necessary.

    Why choose one when you can twist them together?

    Would you top your Chocolate and Cheesecake Twister with extra chocolate, strawberries, caramel, or whipped cream?

  • Healthy Recipe of the Day: Chicken and Bacon Pizza

    Advertisements

    Pizza is one of those foods that can instantly make dinner feel a little more exciting. The combination of a warm crust, melted cheese, savory toppings, and fresh herbs is hard to resist. But traditional pizza can also become heavy quickly, especially when it is loaded with processed meats, extra cheese, and rich sauces.

    That doesn’t mean pizza needs to disappear when you’re trying to eat healthier.

    Today’s Healthy Recipe of the Day is Chicken and Bacon Pizza, a lighter homemade pizza that combines lean chicken, crispy bacon, vegetables, mozzarella, and a flavorful tomato sauce on a whole-wheat crust.

    The result is a pizza that still tastes comforting and satisfying while offering more protein, vegetables, and nutritional balance than many traditional versions.

    Why Chicken and Bacon Work So Well Together

    Chicken and bacon are a classic combination because they bring two very different flavors to the pizza.

    Chicken provides a mild, hearty source of protein that takes on the flavors of whatever seasonings and sauce you use. Bacon adds a salty, smoky flavor, meaning you don’t need very much of it to make an impact.

    The secret to making this combination healthier is changing the proportions.

    Instead of covering the pizza in bacon, we’re using chicken as the primary protein and bacon as a flavorful accent. A few pieces of crispy bacon scattered across the pizza provide plenty of smoky flavor without overwhelming everything else.

    Add vegetables, tomato sauce, and a moderate amount of cheese, and you have a pizza that feels indulgent without needing to be excessively heavy.

    Healthy Chicken and Bacon Pizza

    Prep Time: 15 minutes
    Cook Time: 12–16 minutes
    Total Time: About 30 minutes
    Servings: 4

    Ingredients

    For the Pizza

    • 1 whole-wheat pizza crust or whole-wheat pizza dough
    • 1 cup cooked chicken breast, chopped or shredded
    • 3 slices bacon, cooked until crisp and crumbled
    • 3/4 cup part-skim shredded mozzarella cheese
    • 1/2 cup pizza sauce or low-sodium tomato sauce
    • 1/2 cup sliced bell peppers
    • 1/3 cup sliced red onion
    • 1/2 cup sliced mushrooms
    • 1 cup fresh baby spinach
    • 1 teaspoon Italian seasoning
    • 1/2 teaspoon garlic powder
    • 1/4 teaspoon crushed red pepper flakes, optional
    • Fresh basil or parsley for garnish

    Optional Toppings

    You can customize the pizza with additional vegetables such as:

    • Cherry tomatoes
    • Broccoli
    • Zucchini
    • Jalapeños
    • Artichoke hearts
    • Arugula
    • Roasted red peppers
    • Fresh garlic

    The more vegetables you add, the easier it becomes to create a filling pizza without relying on large amounts of cheese or meat.

    How to Make Chicken and Bacon Pizza

    Step 1: Preheat the Oven

    Preheat your oven to 425°F.

    If you’re using refrigerated or homemade pizza dough, prepare it according to the package or recipe instructions.

    For an especially crispy crust, place your pizza pan, baking sheet, or pizza stone in the oven while it preheats.

    Step 2: Prepare the Chicken

    If you don’t already have cooked chicken available, season a boneless, skinless chicken breast lightly with garlic powder, black pepper, paprika, and Italian seasoning.

    Cook it thoroughly, allow it to rest for several minutes, and then slice or chop it into bite-sized pieces.

    Leftover grilled or roasted chicken works perfectly for this recipe and can significantly reduce preparation time.

    Step 3: Cook the Bacon

    Cook the bacon until crisp.

    Transfer it to a paper towel-lined plate and allow excess grease to drain before crumbling it into smaller pieces.

    You only need a few slices because bacon has such a concentrated smoky flavor.

    Step 4: Prepare the Vegetables

    Slice the bell pepper, red onion, and mushrooms thinly.

    Smaller pieces cook more evenly and distribute the vegetables throughout the pizza, so every slice gets a mixture of toppings.

    Step 5: Build Your Pizza

    Place your pizza crust on a baking sheet, pizza pan, or piece of parchment paper.

    Spread the tomato sauce evenly across the crust, leaving a small border around the outside.

    Sprinkle approximately half of the mozzarella over the sauce.

    Next, evenly distribute the chicken, bacon, peppers, onions, mushrooms, and spinach.

    Finish with the remaining mozzarella.

    Sprinkle Italian seasoning and garlic powder over the top.

    If you enjoy a little heat, add crushed red pepper flakes.

    Step 6: Bake

    Bake for approximately 12–16 minutes, depending on the thickness of your crust.

    The pizza is ready when the crust is golden and crisp around the edges and the cheese has melted and begun to brown slightly.

    Step 7: Let It Rest

    This part is easy to overlook.

    Allow the pizza to rest for approximately 3–5 minutes before slicing.

    Resting helps the cheese and toppings settle, making the pizza easier to cut and eat.

    Finish with fresh basil or parsley before serving.

    What Makes This Pizza a Healthier Choice?

    Calling something “healthy” doesn’t mean it needs to contain unusual ingredients or sacrifice flavor.

    Often, healthier cooking is simply about creating better balance.

    This pizza does that in several ways.

    Lean Chicken Provides Protein

    Chicken breast is the primary protein in this pizza.

    Protein can help make meals more satisfying, which is especially useful when you’re trying to create a meal that doesn’t leave you searching for another snack an hour later.

    Instead of making bacon the star of the pizza, we’re allowing chicken to provide most of the protein.

    Bacon Is Used for Flavor

    Bacon doesn’t have to be completely eliminated from a balanced diet.

    The important thing is portion size.

    Three slices spread across an entire pizza can provide smoky bacon flavor in nearly every bite without turning the pizza into a bacon-heavy meal.

    Think of bacon almost like a seasoning.

    A little goes a long way.

    Whole-Wheat Crust Adds Fiber

    Using a whole-wheat crust is an easy substitution that can increase the fiber content compared with many refined-flour crusts.

    If you prefer traditional pizza dough, that’s perfectly fine too. You can still make the overall meal more balanced by paying attention to the toppings and portion size.

    Vegetables Add Volume

    One of the easiest ways to make homemade pizza more nutritious is to pile on vegetables.

    Bell peppers, mushrooms, onions, and spinach add flavor, texture, color, and nutrients without requiring large amounts of additional cheese or meat.

    You can also change the vegetables based on whatever you already have in the refrigerator.

    Part-Skim Mozzarella Keeps the Classic Pizza Experience

    Cheese is part of what makes pizza pizza.

    There’s no need to remove it completely.

    Using part-skim mozzarella and keeping the quantity moderate gives you the familiar melted-cheese experience while helping keep the overall pizza lighter.

    Try a Thin-Crust Version

    If you prefer a crispier pizza, use a thin whole-wheat crust.

    Thin crust lets the chicken, bacon, vegetables, sauce, and cheese become the focus of each bite rather than having the toppings overwhelmed by a thick layer of dough.

    You can also use whole-wheat flatbread for an extremely quick version.

    Spread the sauce across the flatbread, add the toppings, sprinkle with cheese, and bake until everything is hot and the edges are crispy.

    This can turn Chicken and Bacon Pizza into a dinner that takes less than 20 minutes.

    Make Individual Pizzas

    Another fun option is making individual pizzas.

    Use small whole-wheat flatbreads or pita breads and allow everyone to choose their own toppings.

    Set out bowls containing:

    Chicken, bacon, mushrooms, peppers, onions, spinach, tomatoes, mozzarella, and other vegetables.

    Everyone can build their own pizza before putting them into the oven.

    This is especially useful when different people in the household have different preferences.

    Add Even More Vegetables

    Don’t be afraid to turn this into a vegetable-packed pizza.

    Try combining chicken and bacon with:

    Spinach and mushrooms: A simple combination with plenty of earthy flavor.

    Peppers and onions: Adds sweetness and texture.

    Broccoli and tomatoes: A colorful combination that works surprisingly well with chicken.

    Jalapeños and peppers: Great for anyone who enjoys spicy pizza.

    Arugula: Add fresh arugula after the pizza comes out of the oven for a peppery finish.

    You can easily put two or three cups of vegetables across a large pizza.

    BBQ Chicken and Bacon Variation

    Want something different from traditional tomato sauce?

    Turn this into a healthier BBQ Chicken and Bacon Pizza.

    Replace the pizza sauce with a thin layer of your favorite barbecue sauce. Look for one with less added sugar if that’s important to you.

    Top it with:

    • Chicken
    • Crumbled bacon
    • Red onion
    • Bell peppers
    • Mozzarella
    • Fresh cilantro

    The combination of smoky bacon, chicken, barbecue sauce, and red onion creates an entirely different pizza using essentially the same basic recipe.

    Spicy Chicken and Bacon Pizza

    For anyone who loves heat, add:

    • Sliced jalapeños
    • Crushed red pepper
    • Cayenne pepper
    • Hot sauce
    • Banana peppers

    You can also season the chicken with smoked paprika and cayenne before adding it to the pizza.

    The heat works especially well against the smoky bacon and melted mozzarella.

    Ranch Chicken and Bacon Pizza

    Chicken, bacon, and ranch are another classic combination.

    Instead of covering the pizza in ranch dressing, keep the tomato base and drizzle a small amount of light ranch over the finished pizza.

    This gives you the familiar ranch flavor while keeping the amount controlled.

    Fresh green onions make an excellent finishing touch.

    What to Serve With Chicken and Bacon Pizza

    Pizza can easily become a complete meal on its own, but adding a vegetable-heavy side can make dinner even more balanced.

    Try serving your pizza with a large green salad containing lettuce, spinach, cucumbers, tomatoes, carrots, and a light vinaigrette.

    You could also serve it alongside:

    Roasted broccoli, steamed green beans, grilled zucchini, roasted Brussels sprouts, cucumber salad, tomato salad, or a simple bowl of fresh fruit.

    Rather than thinking of pizza as the entire meal, think of it as one part of the plate.

    Great for Meal Prep

    Chicken and Bacon Pizza can also work well for meal preparation.

    Cook the chicken and bacon ahead of time and store them separately in the refrigerator.

    Slice your vegetables in advance.

    When you’re ready for dinner, all you need to do is assemble and bake the pizza.

    This can make homemade pizza almost as convenient as ordering takeout.

    Leftover pizza can also be refrigerated in an airtight container and reheated for lunch the next day.

    For the best texture, reheat it in an oven, toaster oven, or skillet rather than the microwave. This helps bring back some of the crispness in the crust.

    Portion Size Matters

    Even when you make a healthier pizza, portions still matter.

    Instead of automatically eating until the pizza is gone, start with a couple of slices alongside a large salad or vegetables.

    Eat slowly and give yourself time to determine whether you’re actually still hungry.

    A meal doesn’t need to be perfect to support healthier eating habits. What matters more is what you do consistently over time.

    Healthy Eating Doesn’t Mean Giving Up Your Favorite Foods

    One reason people struggle with healthier eating is the belief that they must permanently give up everything they enjoy.

    Pizza.

    Burgers.

    Tacos.

    Pasta.

    Dessert.

    That approach can make healthier eating feel like punishment.

    A more sustainable approach is learning how to modify your favorite foods.

    Instead of asking:

    “Can I eat pizza?”

    Try asking:

    “How can I make my pizza more balanced?”

    That small change in thinking opens up a lot of possibilities.

    Choose leaner proteins.

    Add more vegetables.

    Use cheese intentionally instead of excessively.

    Experiment with whole-grain crusts.

    Pay attention to portions.

    Pair pizza with vegetables or salad.

    Suddenly, pizza isn’t something that has to be reserved for a “cheat day.” It can simply be dinner.

    Final Thoughts

    Today’s Healthy Recipe of the Day: Chicken and Bacon Pizza proves that comfort food and healthier eating don’t have to be opposites.

    You still get everything people love about pizza—a crispy crust, savory sauce, melted mozzarella, juicy chicken, smoky bacon, and plenty of flavorful toppings.

    The difference comes from balance.

    Chicken provides the primary protein. Bacon provides concentrated smoky flavor. Vegetables add volume, texture, and nutrients. Whole-wheat crust adds another opportunity for fiber, while a reasonable amount of mozzarella keeps the pizza satisfying.

    Best of all, the recipe is extremely customizable.

    Make it spicy. Turn it into BBQ pizza. Add extra vegetables. Use flatbread. Make individual pizzas. Change the toppings according to whatever you already have available.

    Healthy eating doesn’t have to mean eating meals you don’t enjoy.

    Sometimes it simply means taking something you already love and finding a better way to make it.

    What vegetables would you add to your Chicken and Bacon Pizza?

  • Recipe of the Day: Cowboy Lasagna

    Advertisements

    There are nights when a light dinner simply isn’t going to cut it. You want something hearty, cheesy, meaty, comforting, and filling enough to satisfy everyone around the table. That is exactly where Cowboy Lasagna comes riding in.

    Cowboy Lasagna takes everything people love about traditional lasagna and gives it a bold, rustic twist. Instead of relying only on the familiar combination of pasta, tomato sauce, ricotta, and mozzarella, this version loads the dish with seasoned ground beef, smoky sausage, beans, tomatoes, plenty of cheese, and a touch of Southwestern flavor.

    The result is somewhere between classic lasagna, cowboy chili, and a bubbling Tex-Mex casserole.

    It is big.

    It is cheesy.

    It is packed with flavor.

    And it is exactly the kind of meal you want when you need serious comfort food.

    What Is Cowboy Lasagna?

    There isn’t one strict definition of Cowboy Lasagna. The name is commonly used for hearty lasagna-style casseroles that combine traditional pasta layers with ingredients associated with Southwestern or cowboy cooking.

    For this version, we’re using ground beef and smoked sausage as the foundation. Kidney or pinto beans make the filling even heartier, while tomatoes, onions, garlic, chili powder, cumin, and smoked paprika bring in those warm Southwestern flavors.

    Then everything is layered between lasagna noodles with ricotta, cheddar, and mozzarella.

    When it comes out of the oven, you get a bubbling casserole with crispy cheese around the edges, tender noodles underneath, and layers of rich meat sauce throughout.

    Cowboy Lasagna Recipe

    Prep Time: 25 minutes
    Cook Time: 45 minutes
    Resting Time: 10–15 minutes
    Total Time: About 1 hour 25 minutes
    Servings: 8–10

    Ingredients

    For the cowboy meat sauce:

    • 1 pound ground beef
    • 12 ounces smoked sausage, sliced into thin rounds
    • 1 medium yellow onion, diced
    • 3 cloves garlic, minced
    • 1 can (15 ounces) kidney or pinto beans, drained and rinsed
    • 1 can (14.5 ounces) diced tomatoes, undrained
    • 1 can (10 ounces) diced tomatoes with green chiles
    • 1 can (15 ounces) tomato sauce
    • 2 tablespoons tomato paste
    • 1 tablespoon chili powder
    • 1 teaspoon ground cumin
    • 1 teaspoon smoked paprika
    • 1 teaspoon dried oregano
    • ½ teaspoon garlic powder
    • ½ teaspoon onion powder
    • ½ teaspoon salt, or to taste
    • ¼ teaspoon black pepper
    • ¼ teaspoon cayenne pepper, optional

    For the cheese filling:

    • 15 ounces ricotta cheese
    • 1 large egg
    • ½ cup grated Parmesan cheese
    • 1 teaspoon dried parsley
    • ½ teaspoon garlic powder

    For assembling:

    • 9–12 lasagna noodles
    • 2 cups shredded mozzarella cheese
    • 2 cups shredded cheddar cheese
    • Chopped green onions or fresh parsley for garnish, optional

    Step 1: Prepare the Lasagna Noodles

    Bring a large pot of salted water to a boil.

    Add the lasagna noodles and cook according to the package directions until they are just tender. You don’t want to overcook them because they will continue cooking while the lasagna bakes.

    Drain the noodles and carefully lay them flat so they don’t stick together.

    If you’re using oven-ready lasagna noodles, you can skip this step. Just make sure there is plenty of sauce surrounding the noodles so they have enough moisture to soften properly in the oven.

    Step 2: Brown the Beef and Sausage

    Place a large skillet or Dutch oven over medium-high heat.

    Add the ground beef and cook until browned, breaking it into small crumbles as it cooks.

    Once the beef is nearly cooked through, add the sliced smoked sausage.

    Continue cooking for several minutes until the sausage begins to brown around the edges.

    That little bit of browning makes a big difference. It deepens the smoky flavor of the sausage and gives the finished lasagna more character.

    Drain excessive grease from the pan if necessary.

    Step 3: Add the Onion and Garlic

    Add the diced onion to the skillet.

    Cook for approximately 4–5 minutes, stirring occasionally, until the onion begins to soften.

    Add the minced garlic and cook for another 30–60 seconds.

    Don’t let the garlic burn. You’re simply looking for it to become fragrant.

    At this point, your kitchen should already smell incredible.

    Step 4: Build the Cowboy Sauce

    Add the diced tomatoes, tomatoes with green chiles, tomato sauce, tomato paste, and beans.

    Stir everything together.

    Now add the chili powder, cumin, smoked paprika, oregano, garlic powder, onion powder, salt, black pepper, and optional cayenne.

    Bring the mixture to a gentle simmer.

    Reduce the heat and allow the sauce to cook for approximately 10–15 minutes, stirring occasionally.

    The sauce should thicken slightly but remain loose enough to spread easily between the lasagna layers.

    Taste before assembling the lasagna.

    Want more heat? Add additional cayenne or chili powder.

    Want more smokiness? Add another pinch of smoked paprika.

    Prefer it mild? Leave the cayenne out completely.

    Step 5: Prepare the Ricotta Mixture

    In a medium bowl, combine:

    Ricotta cheese, egg, Parmesan cheese, dried parsley, and garlic powder.

    Mix until everything is evenly incorporated.

    The ricotta layer adds a creamy contrast to the spicy, smoky cowboy meat sauce.

    Step 6: Assemble the Cowboy Lasagna

    Preheat your oven to 375°F.

    Lightly grease a 9-by-13-inch baking dish.

    Spread a thin layer of cowboy meat sauce across the bottom of the baking dish.

    Place a layer of lasagna noodles over the sauce.

    Spread approximately one-third of the ricotta mixture over the noodles.

    Spoon a generous layer of cowboy meat sauce over the ricotta.

    Sprinkle mozzarella and cheddar over the sauce.

    Then repeat.

    Noodles → ricotta → cowboy meat sauce → cheese.

    Continue layering until your ingredients are used, finishing with meat sauce and a generous amount of mozzarella and cheddar across the top.

    Don’t be shy with that final cheese layer.

    This is Cowboy Lasagna.

    It is supposed to be hearty.

    Step 7: Bake

    Cover the baking dish loosely with aluminum foil.

    Bake for approximately 25 minutes.

    Remove the foil and continue baking for another 15–20 minutes, or until the sauce is bubbling and the cheese is completely melted.

    For a slightly browned top, place the lasagna under the broiler for 1–2 minutes at the very end.

    Watch it carefully because cheese can go from golden brown to burned surprisingly quickly.

    Don’t Skip the Resting Time

    When that bubbling pan of Cowboy Lasagna comes out of the oven, you’re going to want to cut into it immediately.

    Try to resist.

    Let the lasagna rest for 10–15 minutes before slicing.

    Resting allows the cheese and sauce to settle so your pieces hold together better.

    Cut it too early and you’ll probably end up with delicious Cowboy Lasagna sliding all over your plate.

    Still delicious—but considerably messier.

    Why Smoked Sausage Makes This Lasagna Different

    Ground beef gives the dish its hearty base, but smoked sausage is what really pushes the recipe into cowboy territory.

    The sausage adds saltiness, smokiness, and another layer of meaty flavor.

    You can use traditional smoked sausage, beef sausage, kielbasa, or even a spicy smoked sausage.

    For an extra Southwestern flavor, try using a smoked jalapeño or cheddar sausage.

    Just remember that some sausages are already fairly salty, so taste your sauce before adding additional salt.

    What Beans Should You Use?

    Beans are optional if you’re committed to a more traditional lasagna texture, but they work extremely well in Cowboy Lasagna.

    Pinto beans provide a softer, creamier texture and classic Southwestern character.

    Kidney beans hold their shape particularly well and give the casserole a chili-inspired feel.

    Black beans are another excellent option.

    You could even use a combination.

    The beans stretch the meal farther, add texture, and make an already substantial casserole even more satisfying.

    Turn Up the Heat

    The basic recipe has plenty of flavor without being overwhelmingly spicy.

    But Cowboy Lasagna is easy to customize.

    For additional heat, try adding:

    • Fresh diced jalapeños
    • Pickled jalapeños
    • Hot diced green chiles
    • Crushed red pepper
    • Cayenne pepper
    • Chipotle peppers in adobo
    • Pepper Jack cheese

    Chipotle peppers are especially good because they add both heat and smokiness.

    Start small. A little chipotle goes a long way.

    Add Some Corn

    Want another Southwestern element?

    Add approximately 1 cup of corn to the meat sauce.

    Fresh, frozen, or drained canned corn will work.

    Corn adds little bursts of sweetness that balance the richness of the beef, sausage, tomatoes, and cheese.

    Fire-roasted corn is even better if you can find it.

    Make It Extra Cheesy

    Two cheeses are already working overtime in this recipe: mozzarella provides the classic melted-cheese stretch while cheddar gives Cowboy Lasagna its sharper flavor.

    But nobody says you have to stop there.

    Try combining:

    Mozzarella + cheddar + Monterey Jack

    or

    Mozzarella + cheddar + Pepper Jack

    A Mexican-style shredded cheese blend also works perfectly.

    For an especially cheesy version, sprinkle additional cheese between every layer.

    What to Serve With Cowboy Lasagna

    Cowboy Lasagna is substantial enough to be dinner all by itself, but a few simple sides can turn it into a complete meal.

    Try serving it with:

    • Garlic bread
    • Texas toast
    • Cornbread
    • Green salad
    • Roasted vegetables
    • Grilled corn
    • Coleslaw
    • Avocado slices
    • Pico de gallo

    Cornbread is particularly good because its slight sweetness complements the smoky, savory flavors of the lasagna.

    For toppings, place bowls of sour cream, sliced jalapeños, green onions, diced avocado, salsa, and chopped cilantro on the table and let everyone customize their own serving.

    Make-Ahead Cowboy Lasagna

    This is an excellent recipe for preparing ahead of time.

    Assemble the entire lasagna but don’t bake it.

    Cover tightly and refrigerate for up to 24 hours.

    When you’re ready for dinner, remove it from the refrigerator while the oven preheats.

    Because the casserole will be cold, you may need to add approximately 10–15 minutes to the covered baking time.

    That makes Cowboy Lasagna especially useful for busy days when you know you won’t have time to prepare dinner from scratch.

    Leftovers May Be Even Better

    Like chili, spaghetti sauce, and traditional lasagna, Cowboy Lasagna can taste even better the next day.

    After spending the night in the refrigerator, the flavors have more time to mingle.

    Store leftovers in an airtight container in the refrigerator and reheat individual servings in the microwave or oven.

    For oven reheating, cover the lasagna so it doesn’t dry out.

    If it seems a little dry, spoon a tablespoon or two of tomato sauce around the serving before reheating.

    Freezing Cowboy Lasagna

    Cowboy Lasagna is also freezer-friendly.

    You can freeze the entire casserole or divide leftovers into individual portions.

    Individual portions are particularly convenient because you can pull out exactly what you need for lunch or dinner without defrosting an entire pan.

    Wrap portions tightly and place them inside freezer-safe containers.

    For the best quality, enjoy frozen Cowboy Lasagna within about 2–3 months.

    Easy Cowboy Lasagna Variations

    Once you’ve made the basic recipe, there are plenty of ways to change it.

    Bacon Cowboy Lasagna: Add cooked, crumbled bacon to the meat mixture.

    BBQ Cowboy Lasagna: Stir a small amount of barbecue sauce into the tomato sauce for a sweet, smoky variation.

    Spicy Cowboy Lasagna: Add jalapeños, Pepper Jack, cayenne, and hot green chiles.

    Three-Meat Cowboy Lasagna: Combine ground beef, smoked sausage, and bacon.

    Loaded Cowboy Lasagna: Add corn, black beans, jalapeños, bell peppers, and extra cheddar.

    Extra-Smoky Cowboy Lasagna: Use smoked cheddar and a little chipotle pepper in the sauce.

    The recipe is forgiving, so don’t be afraid to experiment with what you already have in your refrigerator or pantry.

    The Secret to Great Cowboy Lasagna

    The biggest mistake you can make is thinking more ingredients automatically mean more flavor.

    What really makes this casserole work is balance.

    The beef provides richness.

    The sausage provides smoke.

    The tomatoes provide acidity.

    The beans provide heartiness.

    The spices provide warmth.

    The ricotta provides creaminess.

    And the cheddar and mozzarella bring everything together.

    Each layer should contribute something without completely overpowering the others.

    Also, don’t make your sauce too dry. Lasagna noodles absorb moisture while baking, so a slightly saucy filling produces a much better finished casserole.

    A Hearty Dinner Made for Sharing

    There is something satisfying about carrying a giant bubbling casserole to the dinner table.

    Cowboy Lasagna isn’t fancy food.

    It isn’t delicate.

    And it definitely isn’t one of those dinners that leaves you wondering what you’re going to eat an hour later.

    This is unapologetic comfort food.

    It takes the familiar idea of homemade lasagna and gives it a smoky, hearty Southwestern personality with ground beef, sausage, beans, tomatoes, spices, and plenty of melted cheese.

    Make it for Sunday dinner.

    Bring it to a potluck.

    Serve it while watching the game.

    Prepare it for a family gathering.

    Or make a pan simply because you’ve had a long day and want something warm, cheesy, and satisfying waiting for you at dinner.

    However you serve it, don’t be surprised when someone goes back for seconds.

    And possibly thirds.

    Would you keep your Cowboy Lasagna classic with beef and sausage, or load it up with bacon, jalapeños, corn, and extra cheese?

  • Breakfast of the Day: Country Fried Steak and Eggs

    Advertisements

    Some breakfasts are light and simple. Others are meant to stick with you, warm you from the inside out, and make the morning feel like something special. Country Fried Steak and Eggs definitely belongs in that second category.

    Crispy, golden-brown country fried steak covered in creamy peppered country gravy, served alongside freshly cooked eggs and your favorite breakfast sides—it is the kind of hearty meal that has been filling breakfast plates for generations.

    Whether you are making a big weekend breakfast, feeding a hungry family, or simply craving some old-fashioned comfort food, Country Fried Steak and Eggs delivers everything you could want from a satisfying morning meal.

    Why Country Fried Steak Makes Such a Great Breakfast

    Country fried steak brings together several things that make comfort food irresistible: crispy breading, tender beef, creamy gravy, and plenty of savory flavor.

    Add eggs to the plate, and you have a classic diner-style breakfast that feels like something you would order at a roadside café or country restaurant.

    The contrast is part of what makes this meal so good. The outside of the steak becomes crunchy and seasoned while the inside stays tender. Then the gravy adds richness and moisture.

    A couple of eggs provide another layer of flavor, especially when they’re cooked sunny-side up or over easy and the yolks mix with the gravy.

    Serve everything with hash browns, breakfast potatoes, biscuits, or toast, and you have a breakfast worth slowing down for.

    Country Fried Steak and Eggs Recipe

    Servings: 4
    Prep Time: 20 minutes
    Cook Time: 30 minutes
    Total Time: About 50 minutes

    Ingredients

    For the country fried steak:

    • 4 cube steaks
    • 1 1/2 cups all-purpose flour
    • 1 teaspoon salt
    • 1 teaspoon black pepper
    • 1 teaspoon garlic powder
    • 1 teaspoon onion powder
    • 1/2 teaspoon smoked paprika
    • 2 large eggs
    • 3/4 cup milk
    • Vegetable oil for frying

    For the country gravy:

    • 1/4 cup reserved frying oil or butter
    • 1/4 cup all-purpose flour
    • 2 1/2 cups whole milk
    • 1/2 teaspoon salt, or to taste
    • 1 teaspoon freshly ground black pepper, or to taste
    • Pinch of garlic powder, optional

    For the eggs:

    • 8 large eggs
    • Butter or cooking oil
    • Salt and black pepper to taste

    Optional Sides

    Complete your breakfast with:

    • Hash browns
    • Country potatoes
    • Biscuits
    • Buttered toast
    • Fresh fruit
    • Sliced tomatoes
    • Bacon or sausage

    How to Make Country Fried Steak and Eggs

    Step 1: Prepare the Steaks

    Remove the cube steaks from the refrigerator and pat them dry with paper towels.

    If the steaks are particularly thick, gently pound them until they’re roughly 1/4-inch thick. This helps them cook quickly and remain tender.

    Season both sides lightly with salt and pepper.

    Step 2: Make the Breading

    In a shallow bowl, combine the flour, salt, black pepper, garlic powder, onion powder, and smoked paprika.

    In another shallow bowl, whisk together the eggs and milk.

    Take each steak and coat it thoroughly in the seasoned flour. Shake off the excess.

    Dip the steak into the egg mixture, allowing the excess to drip away.

    Return it to the flour mixture and coat it again.

    That second coating is important. It creates the thick, craggy breading that gives country fried steak its signature crunchy exterior.

    Place the breaded steaks on a plate and allow them to rest for approximately 5 minutes before frying. This gives the coating time to adhere to the meat.

    Step 3: Fry Until Golden Brown

    Pour enough vegetable oil into a large skillet to generously cover the bottom.

    Heat the oil over medium to medium-high heat.

    Once the oil is hot, carefully add the steaks without overcrowding the skillet. Depending on the size of your pan, you may need to cook them in batches.

    Fry each steak for approximately 3–4 minutes per side, or until the coating is deep golden brown and the beef is cooked through.

    Transfer the steaks to a wire rack or paper towel-lined plate while you prepare the gravy.

    Step 4: Make the Country Gravy

    Country gravy transforms a good fried steak into something unforgettable.

    Carefully drain most of the frying oil from your skillet, leaving approximately 1/4 cup behind along with some of the flavorful browned bits.

    You can also use butter if you prefer.

    Sprinkle 1/4 cup flour into the skillet and whisk continuously for about 1–2 minutes. The flour should combine with the fat to create a smooth roux.

    Slowly pour in the milk while whisking constantly.

    Continue cooking over medium heat until the gravy begins to thicken.

    Season generously with black pepper and add salt to taste. A small amount of garlic powder can also be added for additional flavor.

    If the gravy becomes too thick, whisk in a splash of milk.

    If it seems too thin, continue simmering for another minute or two.

    The finished gravy should be thick enough to coat the steak while still being easy to pour.

    Step 5: Cook the Eggs

    While the gravy finishes, prepare your eggs however you like them.

    Country Fried Steak and Eggs works especially well with sunny-side-up or over-easy eggs because the runny yolk creates another rich sauce for the steak.

    However, there are no rules here.

    Scrambled eggs are excellent if you want something soft and fluffy. Over-medium eggs provide a slightly firmer yolk, while over-hard eggs work well for anyone who doesn’t enjoy runny eggs.

    Heat a skillet with a little butter and cook two eggs per serving.

    Season lightly with salt and black pepper.

    Step 6: Build the Breakfast Plate

    Place one crispy country fried steak onto each plate.

    Spoon warm peppered country gravy generously over the top.

    Add two freshly cooked eggs alongside the steak.

    Finish the plate with hash browns, country potatoes, biscuits, toast, or whatever breakfast sides you enjoy most.

    Serve immediately while everything is hot.

    The Secret to Crispy Country Fried Steak

    The difference between average country fried steak and great country fried steak often comes down to the breading.

    One trick is using the double-dredge method.

    Flour.

    Egg mixture.

    Flour again.

    The second layer of flour creates more texture on the outside of the steak.

    Another important step is allowing the breaded steak to rest briefly before frying. If you move it directly from the flour mixture into the skillet, some of the breading can separate from the meat.

    Give it about five minutes to settle before frying.

    Finally, make sure your oil is properly heated before adding the steak. Oil that isn’t hot enough can make the coating greasy rather than crispy.

    Don’t Forget the Black Pepper

    Country gravy isn’t supposed to be bland.

    Freshly ground black pepper is one of the defining flavors of traditional white country gravy. You should be able to see those little flecks of pepper throughout the sauce.

    Start with about a teaspoon and adjust according to your preference.

    If you love a strongly seasoned gravy, add a little more.

    Best Eggs for Country Fried Steak

    There really isn’t a wrong answer, but over-easy eggs are hard to beat.

    Cut into the yolk and allow it to run across the crispy steak, gravy, and potatoes.

    Suddenly you’ve got creamy gravy and egg yolk mixing together into one incredibly rich sauce.

    If runny yolks aren’t your thing, scrambled eggs make an excellent alternative. Cook them gently with butter so they remain soft rather than becoming dry.

    Turn It Into a Complete Country Breakfast

    Country Fried Steak and Eggs can easily become the centerpiece of a huge weekend breakfast.

    Imagine a plate filled with:

    Golden country fried steak covered in pepper gravy, two eggs cooked over easy, crispy hash browns, and a warm biscuit with butter.

    Add a cup of hot coffee and you’ve got a breakfast that wouldn’t feel out of place at an old-fashioned country diner.

    For something slightly fresher, add sliced tomatoes, berries, melon, or another serving of fruit alongside the heavier components.

    Make Homemade Biscuits to Go With It

    If you’re making country gravy anyway, biscuits are a natural addition.

    Split a warm biscuit in half and spoon some of the extra gravy over it.

    Now you’ve essentially added biscuits and gravy to your Country Fried Steak and Eggs breakfast.

    Is it a light breakfast?

    Absolutely not.

    But sometimes breakfast isn’t supposed to be light.

    Sometimes you want the kind of meal that makes you sit back afterward and realize you’re probably not going to need lunch anytime soon.

    Country Fried Steak vs. Chicken Fried Steak

    The names are often used interchangeably, and exactly what each term means can depend on where you live.

    Generally, both involve tenderized beef that is breaded and fried similarly to fried chicken.

    Chicken fried steak is frequently associated with a crispier coating and creamy white gravy, while some versions of country fried steak use a slightly different breading or brown gravy.

    But regional traditions vary considerably.

    For today’s breakfast, we’re going with the crispy breaded steak and creamy peppered gravy combination because it pairs beautifully with eggs.

    Tips for the Best Country Fried Steak and Eggs

    A few simple techniques can make a noticeable difference.

    Season every layer. Don’t rely entirely on the gravy for flavor. Season the beef, flour mixture, eggs, and gravy appropriately.

    Don’t overcrowd the skillet. Adding too many steaks at once lowers the oil temperature and can prevent the coating from becoming crispy.

    Keep cooked steaks warm. If you’re frying several batches, place finished steaks on a wire rack over a baking sheet in a low oven.

    Make the gravy last. Country gravy thickens as it sits, so prepare it close to serving time.

    Serve immediately. Country fried steak is at its best when the coating is still crispy and the gravy is hot.

    Leftovers and Reheating

    If you have leftover country fried steak, store it separately from the gravy whenever possible.

    Keeping them separate prevents the breading from becoming completely soggy.

    Refrigerate leftovers in airtight containers and use them within a few days.

    For reheating, an oven or air fryer is generally better than a microwave if you want to restore some of the steak’s crispiness.

    Warm the gravy separately over low heat. Since refrigerated gravy will usually become very thick, add a small splash of milk while reheating and whisk until smooth.

    Cook fresh eggs when you’re ready to serve the leftovers.

    A Breakfast Made for Slow Mornings

    There is something comforting about a breakfast that takes a little time to prepare.

    Country Fried Steak and Eggs isn’t the meal you throw together while running out the door.

    It’s a breakfast for a Saturday or Sunday morning when you have time to heat the skillet, fry the steak, whisk together homemade gravy, cook some eggs, and actually sit down at the table.

    The smell alone will probably bring people into the kitchen before you ever call them.

    And once that plate arrives—with crispy steak disappearing beneath creamy pepper gravy and eggs sitting alongside it—you know you’re about to eat something substantial.

    Breakfast of the Day

    Today’s Breakfast of the Day: Country Fried Steak and Eggs celebrates old-fashioned comfort food at its best.

    You get crispy breading, tender beef, creamy peppered gravy, buttery eggs, and endless possibilities for sides.

    Make it simple with steak, gravy, and eggs, or go all out with hash browns, biscuits, fresh fruit, and coffee.

    Either way, this isn’t a breakfast you’re likely to forget five minutes after eating it.

    It’s hearty.

    It’s comforting.

    And it’s exactly the kind of breakfast that makes getting out of bed a little easier.

    How would you order your Country Fried Steak and Eggs—over easy, scrambled, sunny-side up, or another way?

Exit mobile version