Category: Recipes

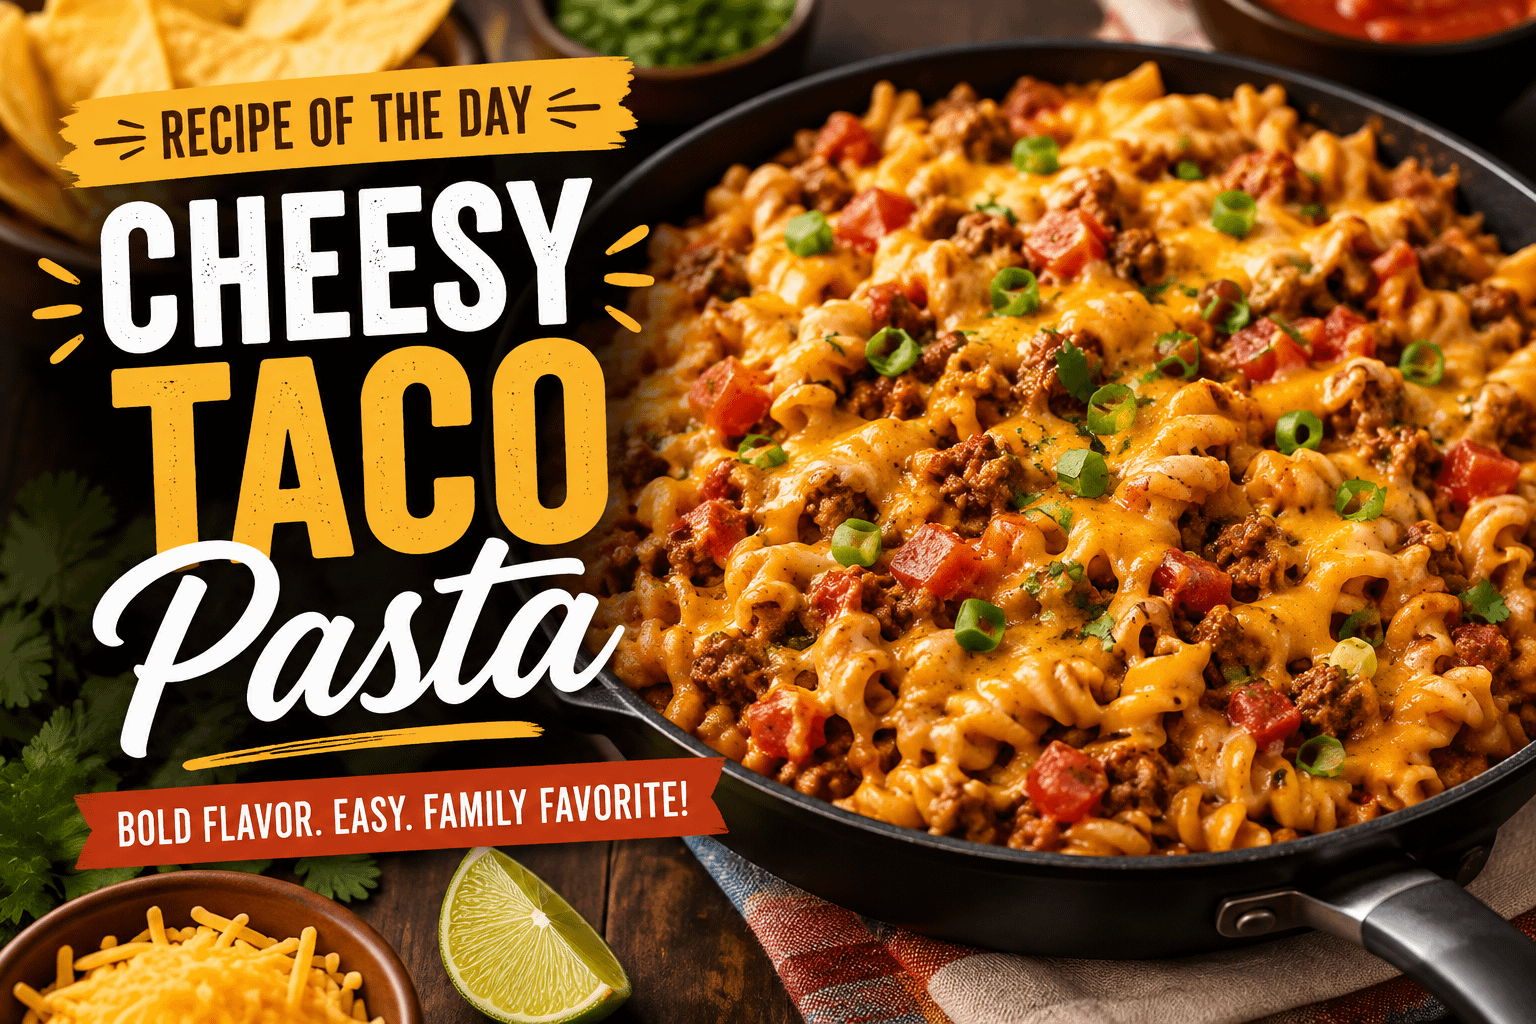
  • Recipe of the Day: Cheesy Taco Pasta

    Recipe of the Day: Cheesy Taco Pasta

    Advertisements

    There are nights when you crave tacos. There are other nights when nothing sounds better than a big bowl of warm, cheesy pasta. But what happens when you can’t decide between the two?

    You make Cheesy Taco Pasta.

    Today’s Recipe of the Day brings together two comfort-food favorites in one hearty dish. Tender pasta is tossed with seasoned ground beef, onions, garlic, tomatoes, salsa, cream cheese, cheddar, and Monterey Jack to create a creamy dinner packed with taco-inspired flavor.

    Every forkful delivers a little bit of everything: savory beef, tender pasta, melted cheese, tomatoes, spices, and creamy sauce.

    And then come the toppings.

    Sour cream, avocado, cilantro, jalapeños, crushed tortilla chips, green onions, salsa, and even more cheese can transform a simple bowl of pasta into a loaded taco-night feast.

    Cheesy Taco Pasta is also easy enough for an ordinary weeknight dinner. Most of the ingredients are inexpensive pantry and refrigerator staples, and the recipe can be adjusted depending on what you already have available.

    If you’re looking for an easy dinner that’s filling, customizable, and loaded with flavor, this one deserves a try.


    Why Taco Pasta Works So Well

    Tacos and pasta might come from very different culinary traditions, but they have something important in common: both provide the perfect foundation for bold flavors.

    Pasta absorbs sauces and seasonings beautifully.

    Tacos are all about layers of flavor—seasoned meat, cheese, tomatoes, salsa, herbs, peppers, creamy toppings, and crunchy textures.

    Combine those ideas and you get a dish that’s difficult to resist.

    Instead of placing taco-seasoned beef inside a tortilla, we’re mixing it with pasta and turning those familiar flavors into a creamy cheese sauce.

    It’s basically taco night with a fork.


    Why You’ll Love This Cheesy Taco Pasta

    This recipe checks a lot of boxes when you’re trying to figure out what to make for dinner.

    It’s Easy

    You don’t need complicated cooking techniques or unusual ingredients.

    Brown the beef, build the sauce, add the pasta, melt in the cheese, and dinner is ready.

    It’s Family-Friendly

    The basic recipe is flavorful without being overwhelmingly spicy.

    Anyone who wants extra heat can add jalapeños, hot sauce, or spicy salsa to their individual serving.

    It’s Budget-Friendly

    Ground beef, pasta, canned tomatoes, cheese, and seasonings can create a generous amount of food without requiring an expensive ingredient list.

    It’s Customizable

    Change the meat.

    Change the cheese.

    Change the pasta.

    Add vegetables.

    Make it spicy.

    Make it mild.

    Load it with toppings.

    You can easily adapt the recipe to your family’s preferences.

    It Makes Great Leftovers

    The taco flavors continue developing while the pasta sits in the refrigerator, making leftovers something you may actually look forward to eating.


    Ingredients

    For the Cheesy Taco Pasta

    • 12 ounces rotini, penne, shells, or elbow macaroni
    • 1 pound ground beef
    • 1 small onion, diced
    • 2 cloves garlic, minced
    • 1 packet taco seasoning, approximately 1 ounce
    • 1 can diced tomatoes with green chilies, 10 ounces
    • 1 cup salsa
    • 1/2 cup beef broth
    • 4 ounces cream cheese, softened
    • 1 1/2 cups shredded cheddar cheese
    • 1 cup shredded Monterey Jack cheese
    • Salt to taste
    • Freshly ground black pepper to taste

    Optional Toppings

    • Sour cream
    • Diced avocado
    • Guacamole
    • Chopped cilantro
    • Sliced green onions
    • Diced tomatoes
    • Sliced jalapeños
    • Black olives
    • Extra shredded cheese
    • Salsa
    • Hot sauce
    • Crushed tortilla chips
    • Fresh lime wedges

    Understanding the Ingredients

    Simple ingredients can produce a fantastic dinner when each one has a purpose.

    Pasta

    Short pasta shapes work best because they’re easy to mix with the beef and cheese sauce.

    Rotini is one of my favorite choices because its spiral shape catches the sauce.

    Shells are another excellent option. Little pieces of seasoned beef and melted cheese can settle inside each shell.

    Penne, rigatoni, bow ties, and elbow macaroni also work.

    Use what you have.

    Ground Beef

    Ground beef provides the hearty base of the recipe.

    An 85/15 or 90/10 blend works especially well because you get plenty of beef flavor without an excessive amount of grease.

    If you’re using a fattier blend, simply drain the excess grease after browning.

    Onion

    Onion adds sweetness and depth.

    Cooking the onion with the beef allows it to soften while absorbing some of the savory flavors from the meat.

    Garlic

    A couple cloves of fresh garlic give the sauce another layer of flavor.

    If you’re a serious garlic lover, adding an extra clove certainly won’t hurt.

    Taco Seasoning

    This is where much of the taco flavor comes from.

    A typical taco seasoning blend includes spices such as chili powder, cumin, paprika, garlic, onion, oregano, and sometimes cayenne.

    Use mild, medium, or spicy seasoning depending on your preference.

    Tomatoes With Green Chilies

    Tomatoes provide acidity and moisture while green chilies add another Southwestern-inspired flavor.

    For a milder pasta, use regular diced tomatoes instead.

    Salsa

    Salsa brings several flavors together in one ingredient.

    Tomatoes, onions, peppers, herbs, and spices all contribute to the sauce.

    The salsa you choose can also dramatically change the final dish.

    Try mild salsa for a family-friendly dinner or medium/hot salsa when you want additional heat.

    Beef Broth

    A small amount of broth helps loosen the sauce and allows the taco seasoning to spread throughout the pasta.

    You can always add another splash later if the sauce becomes too thick.

    Cream Cheese

    Cream cheese is one of the ingredients that transforms ordinary taco pasta into creamy Cheesy Taco Pasta.

    It creates a smooth base that balances the acidity from the tomatoes and salsa.

    Cheddar Cheese

    Sharp cheddar brings plenty of classic cheesy flavor.

    Freshly shredded cheddar usually melts more smoothly than packaged shredded cheese.

    Monterey Jack

    Monterey Jack is an excellent melting cheese.

    Combining it with cheddar gives you both strong cheese flavor and a wonderfully creamy texture.


    How to Make Cheesy Taco Pasta

    Step 1: Bring the Pasta Water to a Boil

    Fill a large pot with water and bring it to a rolling boil.

    Season the water with salt.

    Adding salt to the cooking water gives the pasta itself more flavor instead of relying entirely on the sauce.


    Step 2: Cook the Pasta

    Add 12 ounces of pasta.

    Cook according to the package instructions until the pasta reaches al dente.

    Al dente means the pasta should be tender but still have a slight bite.

    This is particularly important because the pasta will continue absorbing moisture once it’s mixed into the hot taco sauce.

    Drain the pasta and set it aside.


    Step 3: Brown the Ground Beef

    While the pasta cooks, place a large skillet over medium-high heat.

    Add the ground beef and diced onion.

    Cook for approximately 6 to 8 minutes.

    Use a wooden spoon or spatula to break the beef into small pieces while it cooks.

    Continue cooking until:

    • The beef is completely browned.
    • The onion is tender.
    • No pink remains in the meat.

    Drain excess grease if necessary.


    Step 4: Add the Garlic

    Add the minced garlic to the skillet.

    Cook for approximately 30 seconds to 1 minute.

    You only need enough time for the garlic to become fragrant.

    Avoid cooking it too long because burned garlic can become bitter.


    Step 5: Season the Beef

    Sprinkle the taco seasoning over the ground beef.

    Stir thoroughly so the spices evenly coat the meat.

    Allow the seasoning to cook with the beef for about 30 seconds.

    This short cooking period helps wake up the spices and deepen their flavor.


    Step 6: Add the Tomatoes and Salsa

    Pour in the diced tomatoes with green chilies.

    Add the salsa and beef broth.

    Stir everything together.

    Bring the mixture to a gentle simmer.

    Allow it to cook for approximately 3 to 5 minutes.

    At this point, your kitchen should start smelling like taco night.


    Step 7: Create the Creamy Sauce

    Reduce the heat to low.

    Add the softened cream cheese.

    Stir until it completely melts into the tomato and beef mixture.

    This may take a couple of minutes.

    Be patient and keep stirring.

    Eventually, the sauce will transform from a tomato-based mixture into something much creamier.


    Step 8: Add the Pasta

    Add your drained pasta directly to the skillet.

    Gently toss everything together.

    Make sure the beef and sauce are distributed throughout the pasta.

    Every piece should get some of that creamy taco sauce.


    Step 9: Add the Cheese

    Now comes the best part.

    Add:

    • 1 1/2 cups cheddar
    • 1 cup Monterey Jack

    Stir slowly over low heat until the cheese melts.

    Avoid turning the heat too high.

    High temperatures can cause cheese sauces to become greasy or separate.

    Low and slow is the way to go.


    Step 10: Check the Consistency

    Take a look at your pasta.

    Is the sauce creamy enough?

    If it seems too thick, add a splash of beef broth.

    If it seems too thin, allow it to sit over low heat for another minute or two.

    Remember that the sauce will naturally thicken slightly as it cools.


    Step 11: Taste Before Serving

    Taste the pasta before adding additional salt.

    This is important.

    Taco seasoning, broth, salsa, and cheese all contain salt, so you may discover that the pasta doesn’t need any additional seasoning.

    Add black pepper and adjust the other seasonings as necessary.


    Step 12: Add Your Favorite Taco Toppings

    Spoon the pasta into bowls and start building.

    Try adding:

    Sour cream for extra creaminess.

    Avocado for richness and freshness.

    Jalapeños for heat.

    Cilantro for freshness.

    Green onions for a little bite.

    Crushed tortilla chips for crunch.

    Fresh lime juice for acidity.

    Extra cheese because sometimes there’s no such thing as too much cheese.


    Make a Cheesy Taco Pasta Bar

    If you’re serving several people, turn dinner into a build-your-own taco pasta bar.

    Place the skillet of Cheesy Taco Pasta in the center of the table and surround it with small bowls containing different toppings.

    Try offering:

    • Sour cream
    • Guacamole
    • Diced avocado
    • Shredded lettuce
    • Tomatoes
    • Jalapeños
    • Green onions
    • Cilantro
    • Black olives
    • Corn
    • Black beans
    • Salsa
    • Pico de gallo
    • Hot sauce
    • Crushed tortilla chips
    • Extra cheese

    Everyone gets to customize their own bowl.

    This is especially useful when you’re feeding people with different preferences.

    One person can keep things simple with cheese and sour cream.

    Another can pile on jalapeños and hot sauce.

    Someone else can load their bowl with vegetables.

    One dinner, many possibilities.


    How to Make It Spicier

    The basic recipe doesn’t have to be extremely spicy.

    But if you’re someone who believes taco night should bring the heat, there are plenty of options.

    Try adding:

    • Hot salsa
    • Hot taco seasoning
    • Diced jalapeños
    • Serrano peppers
    • Pepper Jack cheese
    • Cayenne pepper
    • Chipotle peppers
    • Crushed red pepper
    • Hot sauce

    You can also sauté fresh jalapeños with the onions and ground beef.

    For smoky heat, finely chop a chipotle pepper in adobo sauce and stir it into the sauce.

    Start small.

    You can always add more heat, but it’s difficult to take it away.


    How to Make It Milder

    Cooking for children or someone who doesn’t enjoy spicy food?

    That’s easy.

    Use:

    • Mild taco seasoning
    • Regular diced tomatoes
    • Mild salsa
    • Cheddar and Monterey Jack

    Skip the green chilies and jalapeños.

    Then put hot sauce and spicy toppings on the table for anyone who wants them.


    Add Black Beans

    Black beans are one of the easiest additions you can make.

    Drain and rinse one can of black beans and stir them into the skillet when you add the tomatoes.

    They add texture, fiber, and heartiness while stretching the meal further.

    This is also an excellent trick when you’re feeding a larger group.


    Add Corn

    Corn adds a subtle sweetness that contrasts beautifully with the savory taco seasoning.

    Fresh, frozen, or canned corn will work.

    For even more flavor, try using fire-roasted corn.


    Add Bell Peppers

    Dice red, green, yellow, or orange bell peppers and cook them with the onions.

    Bell peppers add color, texture, and sweetness.

    For a Southwest-style version, combine peppers, black beans, and corn.


    Add More Vegetables

    This recipe is extremely flexible when it comes to vegetables.

    Other options include:

    • Zucchini
    • Mushrooms
    • Spinach
    • Roasted peppers
    • Tomatoes
    • Green chilies
    • Poblanos

    It’s a great opportunity to use vegetables sitting in your refrigerator before they go to waste.


    Cheesy Chicken Taco Pasta

    Ground beef isn’t required.

    Cooked chicken makes an excellent alternative.

    You can use:

    • Shredded chicken
    • Diced grilled chicken
    • Ground chicken
    • Rotisserie chicken

    Rotisserie chicken is particularly convenient.

    Prepare the onions, garlic, taco seasoning, tomatoes, salsa, and sauce normally.

    Then add approximately 2 to 3 cups of shredded cooked chicken before adding the pasta.


    Ground Turkey Taco Pasta

    Ground turkey is another simple substitution.

    Because turkey is leaner than beef, you may want to add a teaspoon of olive oil when browning it.

    Otherwise, follow the recipe exactly as written.


    Sausage Taco Pasta

    Want something a little different?

    Try combining half ground beef and half spicy sausage.

    The sausage adds additional seasoning and richness.

    This isn’t traditional taco flavor, but it can be incredibly satisfying.


    Vegetarian Cheesy Taco Pasta

    Skip the meat entirely.

    Use a combination of:

    • Black beans
    • Pinto beans
    • Corn
    • Bell peppers
    • Onions
    • Tomatoes

    You can also substitute your favorite plant-based ground meat alternative.

    The cream cheese and shredded cheeses will still provide plenty of richness.


    Turn It Into Taco Mac and Cheese

    Use elbow macaroni and increase the cheddar.

    The result falls somewhere between traditional macaroni and cheese and taco pasta.

    For an especially cheesy version, add another cup of shredded cheddar.

    Top with crushed tortilla chips before serving.


    Loaded Nacho Taco Pasta

    This variation is all about the toppings.

    Prepare the pasta normally.

    Then top each bowl with:

    • Crushed tortilla chips
    • Jalapeños
    • Sour cream
    • Guacamole
    • Salsa
    • Tomatoes
    • Black olives
    • Green onions
    • Extra cheddar

    You get the flavors and textures of loaded nachos combined with creamy pasta.


    Baked Cheesy Taco Pasta

    You can also turn this skillet dinner into a baked casserole.

    Prepare the recipe as directed but reserve about 1 cup of shredded cheese.

    Transfer the finished pasta to a lightly greased baking dish.

    Sprinkle the reserved cheese over the top.

    Bake at 375°F for approximately 15 to 20 minutes, or until everything is hot and bubbly.

    For additional texture, sprinkle crushed tortilla chips over the top during the final few minutes.


    What Cheese Works Best?

    Cheddar and Monterey Jack are an excellent combination, but they’re certainly not your only options.

    Experiment with:

    Sharp Cheddar

    Strong, classic cheese flavor.

    Monterey Jack

    Mild and exceptionally creamy when melted.

    Pepper Jack

    Perfect when you want additional spice.

    Colby Jack

    Mild, creamy, and family-friendly.

    Mexican-Style Cheese Blend

    Convenient and designed to melt easily.

    You can also combine several cheeses.


    Freshly Shredded vs. Pre-Shredded Cheese

    When possible, shred your own cheese from a block.

    Packaged shredded cheeses often contain anti-caking ingredients that prevent the pieces from sticking together.

    Those ingredients can sometimes make the cheese melt less smoothly.

    Pre-shredded cheese will still work, especially when you’re trying to save time, but freshly shredded cheese can give you an even smoother sauce.


    Don’t Overcook the Pasta

    This is one of the most important tips.

    Cook your pasta only until al dente.

    Once it enters the skillet, it continues absorbing sauce.

    Pasta that starts out too soft may become mushy.

    Slightly firm pasta holds up much better.


    Don’t Overheat the Cheese

    Another common mistake is turning up the heat because you want the cheese to melt faster.

    Resist the temptation.

    Cheese generally behaves better over low heat.

    Excessive heat can cause the fat and proteins to separate, leaving you with an oily sauce instead of a smooth one.

    Reduce the heat before adding your cream cheese and shredded cheese.


    What If My Taco Pasta Is Too Thick?

    Easy fix.

    Add a little:

    • Beef broth
    • Chicken broth
    • Milk
    • Pasta cooking water

    Start with a couple tablespoons.

    Stir and check the consistency.

    Continue adding small amounts until the sauce reaches the texture you want.


    What If My Taco Pasta Is Too Thin?

    Give it time.

    Allow the pasta to simmer gently over low heat for a couple of minutes.

    The pasta will absorb some of the liquid.

    The melted cheese will also help thicken the sauce.

    Avoid dumping in large amounts of additional cheese immediately because the sauce can become overly heavy.


    What to Serve With Cheesy Taco Pasta

    This dish is filling enough to stand alone, but adding a side can round out dinner.

    Simple Green Salad

    A crisp salad offers a refreshing contrast to the rich cheese sauce.

    Mexican Street Corn

    Sweet corn with creamy, tangy, and spicy flavors pairs wonderfully with taco pasta.

    Garlic Bread

    Not exactly traditional taco-night food—but delicious anyway.

    Garlic bread is perfect for scooping up any sauce left behind.

    Tortilla Chips and Salsa

    Put a basket of tortilla chips on the table alongside salsa, queso, or guacamole.

    Roasted Vegetables

    Roasted zucchini, peppers, corn, or broccoli can add color and balance.

    Fresh Fruit

    A simple bowl of watermelon, pineapple, mango, or berries provides a refreshing finish.


    How to Store Leftover Cheesy Taco Pasta

    Have leftovers?

    You’re in luck.

    Allow the pasta to cool before transferring it to an airtight container.

    Refrigerate and enjoy within 3 to 4 days.

    The pasta will absorb additional sauce while refrigerated, so don’t be surprised if it looks thicker the next day.

    That’s completely normal.


    How to Reheat Cheesy Taco Pasta

    Place an individual serving in a microwave-safe bowl.

    Add a small splash of:

    • Milk
    • Beef broth
    • Chicken broth
    • Water

    Cover loosely and microwave until heated through, stirring partway through.

    For larger portions, reheat the pasta in a skillet over medium-low heat.

    Add a splash of liquid and stir occasionally until warmed through.

    Add a little fresh shredded cheese at the end if you want to restore some of that just-cooked cheesiness.


    Meal Prep Cheesy Taco Pasta

    This recipe can work wonderfully for meal prep.

    Prepare the pasta and divide it among individual containers.

    Keep fresh toppings in separate containers.

    When it’s time to eat, reheat the pasta and then add your toppings.

    Keeping ingredients such as avocado, sour cream, cilantro, and tortilla chips separate prevents them from becoming soggy.


    Budget-Friendly Dinner Tip

    If you’re trying to stretch your grocery budget, this recipe gives you plenty of options.

    Instead of adding more ground beef, bulk up the dish with:

    • Black beans
    • Pinto beans
    • Corn
    • Extra pasta
    • Bell peppers

    A pound of ground beef can go a surprisingly long way when combined with pasta, beans, vegetables, and cheese.


    Double the Recipe for a Crowd

    Cheesy Taco Pasta is also a good choice for casual gatherings.

    Double the ingredients and prepare everything in a large pot or Dutch oven.

    Serve it alongside a topping bar and allow guests to customize their bowls.

    It’s easy, filling, and doesn’t require individually assembling tacos for everyone.


    Perfect for Taco Tuesday

    Taco Tuesday doesn’t always have to mean traditional tacos.

    Sometimes changing things up keeps dinner interesting.

    One week you might make crunchy tacos.

    The next week might be enchiladas.

    Then quesadillas.

    And when you’re craving serious comfort food, bring out the Cheesy Taco Pasta.

    You still get many of those familiar taco-night flavors in an entirely different meal.


    Why This Recipe Belongs in Your Dinner Rotation

    The best weeknight recipes don’t necessarily need to be fancy.

    They need to be dependable.

    You want something that tastes good, fills everyone up, doesn’t require a huge shopping list, and can be adapted when you don’t have every ingredient.

    Cheesy Taco Pasta does all of those things.

    Have ground turkey instead of beef?

    Use it.

    Only have cheddar?

    That’s fine.

    No rotini?

    Grab the penne.

    Want more vegetables?

    Throw them in.

    Want it hotter?

    Bring on the jalapeños.

    Want it mild?

    Skip them.

    Recipes like this become regular dinner favorites because they’re flexible enough to change with your needs.


    Final Thoughts: Recipe of the Day — Cheesy Taco Pasta

    Some recipes are all about elegance and presentation.

    Cheesy Taco Pasta is all about comfort.

    It’s the kind of dinner you make when you want something warm, filling, cheesy, flavorful, and satisfying.

    You’ve got tender pasta.

    Seasoned ground beef.

    Tomatoes and salsa.

    Creamy cheese sauce.

    Melted cheddar and Monterey Jack.

    And then there’s an entire world of toppings waiting to be piled on top.

    Add avocado and cilantro for freshness.

    Spoon on sour cream for extra creaminess.

    Scatter jalapeños over your bowl when you want some heat.

    Finish everything with crushed tortilla chips for that irresistible crunch.

    That’s the beauty of this recipe.

    You can make it exactly the way you want it.

    So the next time you find yourself trying to decide between taco night and pasta night, don’t choose.

    Make both.

    Put a big skillet of Cheesy Taco Pasta on the table, set out everyone’s favorite taco toppings, and enjoy a comforting dinner that brings two classic favorites together in one delicious meal.

    Recipe of the Day: Cheesy Taco Pasta — because sometimes the best dinner ideas happen when two comfort foods become one.


    Read More Recipes

  • Breakfast of the Day: Maple Sausage Breakfast Sliders

    Advertisements

    There are mornings when a simple bowl of cereal will do—and then there are mornings when you want something warm, cheesy, savory, sweet, and completely satisfying. Maple Sausage Breakfast Sliders are made for those mornings.

    Imagine soft Hawaiian-style sweet rolls layered with savory breakfast sausage, fluffy scrambled eggs, and plenty of melted cheese. Then picture the tops brushed with a warm mixture of melted butter and maple syrup before the entire pan is baked until golden brown.

    The result is a tray of warm breakfast sliders with an irresistible combination of sweet and savory flavors.

    These sliders are perfect for a relaxed weekend breakfast, Sunday brunch, holiday morning, family gathering, potluck, tailgate, or anytime you’re feeding several hungry people.

    Instead of standing at the stove assembling individual breakfast sandwiches, you can prepare an entire tray at once.

    Slice.

    Layer.

    Brush.

    Bake.

    Serve.

    Breakfast doesn’t have to be complicated to feel special.

    Why Maple Sausage Breakfast Sliders Are So Good

    One of the best things about breakfast is the combination of flavors you can put together on the same plate.

    Sausage and eggs are already a classic pairing. Add melted cheese and you’ve created one of America’s favorite breakfast sandwiches.

    But then comes the maple syrup.

    Maple syrup adds just enough sweetness to balance the salty, savory flavors of the sausage and cheese. When mixed with melted butter and brushed over soft sweet rolls, it creates a lightly sticky, golden topping that takes these sliders to another level.

    Every bite gives you a little bit of everything:

    Sweet maple syrup.

    Savory sausage.

    Fluffy eggs.

    Melted cheese.

    Soft, buttery rolls.

    It’s breakfast comfort food packed into a small sandwich.

    And because they’re sliders, eating two is practically expected.

    Ingredients for Maple Sausage Breakfast Sliders

    This recipe makes approximately 12 breakfast sliders.

    For the Sliders

    • 12 Hawaiian-style sweet rolls
    • 1 pound breakfast sausage
    • 8 large eggs
    • 2 tablespoons milk
    • 1 tablespoon butter
    • Salt, to taste
    • Black pepper, to taste
    • 6 slices cheddar cheese
    • 6 slices American, Colby Jack, or Monterey Jack cheese

    For the Maple Butter Topping

    • 4 tablespoons butter, melted
    • 2 tablespoons pure maple syrup
    • 1 teaspoon Dijon mustard, optional
    • 1/2 teaspoon garlic powder, optional
    • Small pinch of salt

    Optional Additions

    You can also add:

    • Cooked bacon
    • Sliced jalapeños
    • Hot sauce
    • Caramelized onions
    • Sautéed bell peppers
    • Hash browns
    • Pepper Jack cheese
    • Maple breakfast sausage

    One of the advantages of sliders is that they’re incredibly easy to customize.

    Choosing the Right Breakfast Sausage

    The sausage is one of the stars of this recipe, so choose a flavor you enjoy.

    Traditional breakfast sausage works perfectly because its blend of savory seasonings pairs naturally with maple syrup.

    You can use:

    • Mild breakfast sausage
    • Hot breakfast sausage
    • Sage sausage
    • Maple sausage
    • Turkey breakfast sausage
    • Chicken breakfast sausage

    Bulk sausage is probably the easiest option because you can brown and crumble it directly in a skillet.

    Another option is using sausage patties.

    Cook the patties completely, then arrange them across the rolls. Depending on their size, you may need to cut the patties so each slider receives approximately the same amount.

    For an extra maple-forward breakfast, maple-flavored sausage is an excellent choice.

    Step 1: Preheat the Oven

    Preheat your oven to 350°F.

    Lightly grease a 9-by-13-inch baking dish with cooking spray or butter.

    You can also line the dish with parchment paper if you’d like easier cleanup.

    Step 2: Cook the Breakfast Sausage

    Place the breakfast sausage into a large skillet over medium heat.

    Use a wooden spoon or spatula to break the sausage into small pieces as it cooks.

    Continue cooking until the sausage is completely browned and no pink remains.

    Drain away excess grease.

    This step is important.

    Too much grease can soak into the bottom of the rolls and make them soggy.

    Once drained, set the sausage aside while you prepare the eggs.

    Step 3: Make Fluffy Scrambled Eggs

    Crack 8 eggs into a medium mixing bowl.

    Add 2 tablespoons of milk and season lightly with salt and black pepper.

    Whisk until the yolks and whites are completely combined.

    Melt 1 tablespoon of butter in a skillet over medium-low heat.

    Pour in the eggs.

    Allow them to cook briefly before gently pushing them toward the center of the skillet with a spatula.

    Continue folding the eggs until they’re mostly cooked but still slightly soft.

    Remove them from the heat.

    Don’t Overcook the Eggs

    This is one of the most important tips for making great breakfast sliders.

    Remember that the eggs will spend additional time in the oven.

    If they’re completely dry before you assemble the sliders, they can become overcooked during baking.

    Slightly soft scrambled eggs will stay much more tender.

    Step 4: Slice the Rolls

    Remove the Hawaiian-style rolls from the package.

    Do not pull them apart.

    Instead, use a long serrated bread knife to carefully slice horizontally through the entire group of rolls.

    You should now have one large top section and one large bottom section.

    Place the bottom half into your prepared baking dish.

    Keeping the rolls together makes assembling the sliders much faster.

    Step 5: Add the First Layer of Cheese

    Place approximately six slices of cheese across the bottom half of the rolls.

    Try to cover as much of the bread as possible.

    This first layer of cheese does more than add flavor.

    As the cheese melts, it can also help create a barrier between the rolls and the wetter ingredients, helping prevent the bread from becoming overly soggy.

    Cheddar works beautifully here, but American, Colby Jack, Monterey Jack, or Pepper Jack are all excellent alternatives.

    Step 6: Add the Sausage

    Spread the cooked breakfast sausage evenly over the cheese.

    Make sure the sausage reaches all the way to the edges.

    You want every slider to contain plenty of sausage.

    Gently press the sausage into an even layer.

    Step 7: Add the Scrambled Eggs

    Spoon the scrambled eggs evenly over the sausage.

    Again, spread everything from edge to edge.

    Try not to pack the eggs down too firmly. Keeping them slightly loose helps preserve their fluffy texture.

    Step 8: Add More Cheese

    Place another layer of cheese over the eggs.

    This second cheese layer helps hold everything together when the sliders are baked.

    It also ensures you get melted cheese throughout every bite.

    For an especially flavorful combination, use two different cheeses.

    Try cheddar on the bottom and American cheese on top.

    Or combine cheddar with Pepper Jack for a little heat.

    Step 9: Add the Tops of the Rolls

    Carefully place the top section of rolls over the cheese.

    Press down very gently.

    At this point, your breakfast sliders are assembled and ready for the ingredient that makes them especially delicious—the maple butter topping.

    Making the Maple Butter Topping

    In a small bowl, combine:

    • 4 tablespoons melted butter
    • 2 tablespoons pure maple syrup
    • 1 teaspoon Dijon mustard
    • 1/2 teaspoon garlic powder
    • Small pinch of salt

    Whisk until everything is well combined.

    The Dijon mustard and garlic powder are optional, but they provide a subtle savory contrast to the sweetness of the maple syrup.

    If you want a sweeter slider, you can skip both and simply use maple syrup and butter.

    Brush the Rolls

    Slowly brush the maple butter mixture across the tops of the rolls.

    Be generous.

    Make sure the mixture reaches the edges and settles slightly into the spaces between the individual rolls.

    As the sliders bake, the butter and maple syrup will soak slightly into the bread while helping the tops become beautifully golden.

    Baking the Sliders

    Cover the baking dish loosely with aluminum foil.

    Place it into the preheated oven.

    Bake covered for approximately 15 minutes.

    Remove the foil.

    Continue baking uncovered for another 5–10 minutes, or until:

    • The cheese is completely melted
    • The filling is heated through
    • The tops are golden brown
    • The maple butter is bubbling slightly around the edges

    Keep a close eye on the sliders during the final few minutes.

    Hawaiian-style sweet rolls contain sugar and can brown relatively quickly.

    Remove the sliders from the oven and allow them to rest for approximately 5 minutes.

    Then use a sharp knife to cut along the lines between the rolls.

    Serve warm.

    The Secret Is the Sweet and Savory Balance

    Sweet and savory combinations work particularly well at breakfast.

    Think about pancakes served next to sausage.

    Or bacon dipped into maple syrup.

    Or chicken and waffles.

    Maple Sausage Breakfast Sliders use the same idea.

    The maple syrup doesn’t need to overwhelm the sandwich. Instead, it should provide just enough sweetness to complement the salty sausage and rich cheese.

    That’s why pure maple syrup is especially good for this recipe.

    Its deeper flavor adds sweetness without simply tasting like sugar.

    Combined with butter, it creates a rich glaze that complements the savory ingredients inside.

    Best Cheese for Breakfast Sliders

    You aren’t limited to one type of cheese.

    Different cheeses can completely change the personality of these sliders.

    Cheddar

    Sharp cheddar provides bold flavor and works beautifully with sausage.

    American Cheese

    American cheese melts exceptionally well and creates the classic breakfast sandwich experience.

    Colby Jack

    Mild, creamy, and easy to melt, Colby Jack is an excellent family-friendly choice.

    Pepper Jack

    Want some heat? Pepper Jack adds a subtle kick.

    Monterey Jack

    A mild cheese with excellent melting qualities.

    Smoked Gouda

    For a more sophisticated version, smoked Gouda adds a delicious smoky richness.

    Swiss

    Swiss provides a slightly nutty flavor that works especially well if you add ham.

    You can also mix cheeses.

    Try sharp cheddar and American cheese for a combination of strong flavor and creamy texture.

    Add Crispy Bacon

    Sausage is already delicious.

    Sausage plus bacon?

    Now you’re talking.

    Cook 6–8 slices of bacon until crispy.

    Drain the bacon on paper towels and either leave the slices whole or crumble them.

    Add the bacon between the sausage and egg layers.

    The smoky bacon combined with sweet maple syrup creates another classic sweet-and-savory combination.

    Make Maple Sausage Bacon Breakfast Sliders

    For the ultimate breakfast slider, use:

    • Breakfast sausage
    • Crispy bacon
    • Scrambled eggs
    • Cheddar cheese
    • American cheese
    • Maple butter topping

    They’re rich, hearty, and perfect for a special weekend breakfast.

    Add Hash Browns

    Want to make your breakfast sliders even heartier?

    Add crispy hash browns.

    Cook frozen hash brown patties according to the package instructions until crispy.

    Arrange them over the sausage before adding the eggs.

    The crispy potatoes add another texture while turning these sliders into an entire breakfast packed between two pieces of bread.

    Turn Up the Heat

    Sweet and spicy flavors work incredibly well together.

    There are several ways to give Maple Sausage Breakfast Sliders some heat.

    Try adding:

    • Hot breakfast sausage
    • Pepper Jack cheese
    • Jalapeño slices
    • Crushed red pepper
    • Cayenne pepper
    • Hot honey
    • Your favorite hot sauce

    A few drops of hot sauce combined with the sweet maple topping can completely transform the recipe.

    Make a Meat Lovers Version

    Can’t decide between sausage, bacon, and ham?

    Don’t.

    Use all three.

    Layer cooked breakfast sausage, crispy bacon, and thinly sliced ham with scrambled eggs and cheese.

    Finish everything with the maple butter topping.

    These sliders are especially good when you’re serving people with big appetites.

    Make a Vegetarian Version

    You don’t necessarily need sausage to enjoy breakfast sliders.

    For a vegetarian version, replace the sausage with sautéed vegetables.

    Try a combination of:

    • Bell peppers
    • Mushrooms
    • Onions
    • Spinach
    • Tomatoes
    • Jalapeños

    Cook the vegetables first to remove excess moisture before adding them to the sliders.

    Then layer the vegetables with scrambled eggs and cheese.

    You can still use the maple butter topping for a hint of sweetness.

    What to Serve With Maple Sausage Breakfast Sliders

    These sliders are filling enough to serve alone, but adding a few side dishes turns them into a complete breakfast or brunch.

    Breakfast Potatoes

    Crispy seasoned breakfast potatoes are one of the best sides for sliders.

    Hash Browns

    Serve shredded hash browns or crispy hash brown patties alongside the sandwiches.

    Fresh Fruit

    Fresh fruit provides a refreshing contrast to the rich sausage and cheese.

    Try:

    • Strawberries
    • Blueberries
    • Raspberries
    • Pineapple
    • Watermelon
    • Grapes
    • Orange slices

    Yogurt

    Greek yogurt topped with berries and granola creates a lighter side dish.

    Cinnamon Apples

    Warm cinnamon apples pair especially well with maple flavors.

    Fresh Coffee

    A hot cup of coffee is practically mandatory with a warm breakfast sandwich.

    Orange Juice

    Cold orange juice provides acidity and sweetness that balances the richness of the sliders.

    Build a Breakfast Slider Bar

    If you’re hosting brunch, consider turning these sliders into part of a larger breakfast spread.

    Prepare the sliders and set out additional toppings such as:

    • Hot sauce
    • Maple syrup
    • Salsa
    • Jalapeños
    • Avocado
    • Bacon
    • Extra cheese
    • Ketchup
    • Honey mustard

    Guests can customize their sliders however they like.

    Perfect for Holiday Breakfasts

    Holiday mornings can be busy.

    You’re opening presents, preparing dinner, visiting family, watching parades, attending church, or simply trying to enjoy time together.

    Breakfast shouldn’t require an hour standing over the stove.

    That’s where breakfast sliders shine.

    Much of the preparation can be completed ahead of time, and an entire tray can feed several people.

    Maple Sausage Breakfast Sliders would be perfect for:

    Christmas morning

    Prepare some of the ingredients the night before so breakfast comes together quickly after opening presents.

    Easter brunch

    Serve alongside fresh fruit, pastries, and coffee.

    Mother’s Day

    Pair them with fruit, flowers, and her favorite morning drink.

    Father’s Day

    Make a hearty meat-lovers version with sausage and bacon.

    Thanksgiving morning

    Serve something filling before the long day of cooking begins.

    New Year’s Day

    A warm, hearty breakfast can be exactly what everyone needs after staying up until midnight.

    Great for Game Day Too

    Breakfast sliders aren’t limited to breakfast.

    If you’re hosting an early football game or tailgate, these are an easy handheld food that guests can grab from the tray.

    Cut them apart, place them on a serving platter, and provide maple syrup or hot sauce for dipping.

    They’re small enough for snacking but substantial enough to keep everyone satisfied.

    Can You Prepare Breakfast Sliders Ahead of Time?

    Yes.

    That’s another reason this recipe is so useful.

    You can cook the sausage and scramble the eggs the night before.

    Store both separately in airtight containers in the refrigerator.

    You can also prepare the maple butter mixture ahead of time and refrigerate it.

    The next morning:

    1. Slice the rolls.
    2. Layer the cheese, sausage, eggs, and additional cheese.
    3. Replace the tops.
    4. Brush with maple butter.
    5. Bake.

    Breakfast can be ready without much morning preparation.

    How to Store Leftovers

    Allow leftover sliders to cool completely.

    Transfer them to an airtight container or wrap individual sliders tightly.

    Refrigerate for up to 3–4 days.

    Individual portions make convenient grab-and-go breakfasts throughout the week.

    How to Reheat Breakfast Sliders

    There are several ways to reheat them.

    Microwave

    Microwave an individual slider for approximately 30–60 seconds, depending on your microwave.

    Oven

    Place sliders in a baking dish, cover loosely with foil, and heat at 325°F until warmed through.

    Air Fryer

    Place one or two sliders in the air fryer and heat at a moderate temperature for several minutes.

    The air fryer can help restore some crispness to the outside of the rolls.

    Can You Freeze Breakfast Sliders?

    Yes.

    Breakfast sliders can be frozen for convenient future breakfasts.

    Allow the cooked sliders to cool completely.

    Wrap individual sliders tightly in plastic wrap or foil and place them into a freezer-safe container or bag.

    Freeze them for approximately 1–2 months for the best quality.

    When you’re ready to eat one, thaw it overnight in the refrigerator and reheat.

    This can be an excellent way to prepare breakfasts ahead for busy mornings.

    Tips for Perfect Maple Sausage Breakfast Sliders

    Drain the Sausage

    Excess grease can make the bread soggy.

    Don’t Overcook the Eggs

    Slightly soft eggs stay tender during baking.

    Use Plenty of Cheese

    Cheese adds flavor and helps hold the sliders together.

    Keep the Rolls Connected

    Don’t separate the rolls before assembling. Keeping them together makes everything easier.

    Cover Before Browning

    Cover the sliders during the first portion of baking to prevent the tops from becoming too dark.

    Use Pure Maple Syrup

    Real maple syrup provides a deeper, more complex flavor.

    Let Them Rest

    Wait about five minutes before cutting the sliders. They’ll be easier to separate and serve.

    More Breakfast Slider Ideas

    Once you’ve mastered this recipe, try creating your own breakfast slider combinations.

    Bacon, Egg & Cheddar Sliders

    Crispy bacon, scrambled eggs, and sharp cheddar.

    Ham, Egg & Swiss Sliders

    Thinly sliced ham, eggs, and melted Swiss cheese.

    Spicy Sausage Sliders

    Hot sausage, Pepper Jack cheese, eggs, jalapeños, and maple butter.

    Western Breakfast Sliders

    Ham, eggs, cheddar, peppers, and onions.

    Meat Lovers Breakfast Sliders

    Sausage, bacon, ham, eggs, and two kinds of cheese.

    Hash Brown Breakfast Sliders

    Sausage, crispy hash browns, eggs, and cheddar.

    Biscuits and Gravy-Inspired Sliders

    Sausage, eggs, cheese, and a small spoonful of thick sausage gravy.

    Why Breakfast Sliders Are Worth Adding to Your Recipe Collection

    Some breakfast recipes are delicious but require too much work for an ordinary morning.

    Breakfast sliders give you the best of both worlds.

    They look impressive when they come out of the oven, but they’re surprisingly simple to prepare.

    One pan can feed several people.

    They’re customizable.

    They’re portable.

    They can be prepared partially ahead of time.

    Leftovers reheat well.

    And most importantly, they’re delicious.

    You don’t need complicated ingredients or advanced cooking skills.

    Sometimes all you need is sausage, eggs, cheese, rolls, butter, and maple syrup.

    Breakfast of the Day

    There’s something special about waking up to the smell of breakfast sausage cooking in a skillet.

    Add scrambled eggs and melting cheese, and everyone suddenly seems to find their way into the kitchen.

    Then you pull a tray of golden breakfast sliders from the oven, their tops glistening with warm maple butter.

    That’s the kind of breakfast that makes people want to sit around the table a little longer.

    Maple Sausage Breakfast Sliders combine familiar breakfast favorites in a fun, easy-to-share dish that works just as well for an ordinary weekend as it does for a holiday brunch.

    You get savory sausage.

    Fluffy eggs.

    Melted cheese.

    Soft rolls.

    Sweet maple butter.

    And when everything comes together in one warm bite, you understand exactly why sweet and savory breakfast combinations never go out of style.

    Make a pan for the family this weekend.

    Just don’t be surprised if you need to make two.

    Read More Recipes

  • Dessert of the Day: Chocolate Cake with Orange

    Advertisements

    Chocolate cake is already one of the most beloved desserts in the world, but adding the bright, fragrant flavor of fresh orange takes this classic treat in an entirely different direction. Rich cocoa, moist cake, creamy frosting, and refreshing citrus come together to create a dessert that is decadent without feeling one-dimensional.

    Today’s Dessert of the Day is Chocolate Cake with Orange, a beautiful combination of deep chocolate flavor and fresh citrus.

    Imagine cutting into a thick slice of moist chocolate cake covered in silky chocolate-orange frosting. The first bite delivers everything you expect from a great chocolate cake—rich cocoa, sweetness, and a soft texture. Then the orange appears, adding a fresh citrus note that balances the chocolate beautifully.

    It’s a dessert that feels familiar while still being special enough for celebrations.

    Whether you’re planning a birthday dinner, hosting friends, preparing a holiday dessert table, or simply looking for an excuse to bake something delicious, Chocolate Cake with Orange deserves a try.

    Why Chocolate and Orange Are Such a Great Combination

    Some flavor combinations simply seem made for each other.

    Chocolate and peanut butter.

    Strawberries and cream.

    Apples and cinnamon.

    And, of course, chocolate and orange.

    Chocolate provides richness and intensity, while orange brings brightness, acidity, sweetness, and fragrance. Instead of competing with each other, the two flavors create balance.

    The citrus can also prevent a rich chocolate dessert from becoming overwhelmingly sweet.

    Fresh orange zest is especially valuable because the peel contains aromatic oils. Even a relatively small amount can perfume an entire cake with citrus.

    The result isn’t simply chocolate cake with orange juice added to it. When properly balanced, chocolate and orange become one unified flavor experience.

    A Dessert That Looks as Good as It Tastes

    Chocolate Cake with Orange also has another advantage: presentation.

    Deep brown chocolate frosting looks beautiful against bright orange slices, curls of orange zest, candied orange peel, or small pieces of chocolate.

    You don’t need complicated cake-decorating skills.

    Place several thin orange slices around the top of the cake, sprinkle chocolate shavings in the center, and finish with fresh orange zest.

    Suddenly, an ordinary homemade cake looks like something you’d find behind the glass at a bakery.

    Chocolate Cake with Orange Recipe

    Prep Time: 20 minutes
    Bake Time: 30–35 minutes
    Cooling Time: 45–60 minutes
    Decorating Time: 15 minutes
    Total Time: About 2 hours
    Servings: 10–12

    Ingredients for the Chocolate Orange Cake

    • 1¾ cups all-purpose flour
    • ¾ cup unsweetened cocoa powder
    • 1¾ cups granulated sugar
    • 1½ teaspoons baking powder
    • 1½ teaspoons baking soda
    • 1 teaspoon salt
    • 2 large eggs
    • 1 cup milk
    • ½ cup vegetable oil
    • 2 teaspoons vanilla extract
    • 1 tablespoon finely grated fresh orange zest
    • ½ cup freshly squeezed orange juice
    • ½ cup hot brewed coffee or hot water

    Ingredients for the Chocolate Orange Frosting

    • 1 cup unsalted butter, softened
    • 3½ cups powdered sugar
    • ¾ cup unsweetened cocoa powder
    • 1 teaspoon vanilla extract
    • 1 tablespoon finely grated orange zest
    • 2–4 tablespoons fresh orange juice
    • Pinch of salt

    Optional Garnishes

    • Thin fresh orange slices
    • Orange zest
    • Chocolate curls
    • Chocolate shavings
    • Candied orange peel
    • Fresh raspberries
    • Fresh strawberries
    • Mini chocolate pieces
    • Cocoa powder
    • Powdered sugar
    • Melted dark chocolate

    Choosing the Best Oranges

    Because orange is one of the main flavors in this dessert, using good fruit makes a difference.

    Choose oranges that feel relatively heavy for their size. This often indicates that they’re juicy.

    The skin should be fragrant and brightly colored because you’ll be using the zest as well as the juice.

    Navel oranges are an excellent everyday choice because they’re widely available and easy to work with.

    Valencia oranges are another good option, particularly when you want plenty of juice.

    Blood oranges can provide an interesting variation. Their flavor can be slightly more complex, and their beautiful color makes them especially attractive as a garnish.

    Whatever variety you choose, wash and dry the orange thoroughly before zesting.

    How to Zest an Orange Properly

    Orange zest provides some of the strongest citrus flavor in this cake.

    Use a fine grater or microplane to remove only the colored outer layer of the peel.

    Try not to grate deeply into the white layer underneath. That portion, known as the pith, can be bitter.

    A useful trick is to zest your oranges before cutting and juicing them. It’s considerably easier to zest a whole orange than one that’s already been cut and squeezed.

    Step 1: Prepare Your Oven and Cake Pans

    Preheat your oven to 350°F (175°C).

    Grease two 9-inch round cake pans.

    For easier removal, line the bottoms with circles of parchment paper. Lightly grease the parchment as well.

    You can dust the pans with flour, although cocoa powder is a great alternative for chocolate cakes because it won’t leave white flour marks along the outside.

    Step 2: Mix the Dry Ingredients

    In a large mixing bowl, whisk together:

    Flour, cocoa powder, sugar, baking powder, baking soda, and salt.

    Whisking helps distribute the leavening agents throughout the flour so your cake rises evenly.

    If your cocoa powder contains lumps, sift it before adding it to the mixture.

    Step 3: Add the Wet Ingredients

    Add the eggs, milk, vegetable oil, vanilla extract, orange zest, and freshly squeezed orange juice.

    Mix until everything is combined.

    Then beat the batter for approximately 2 minutes on medium speed.

    Scrape down the sides and bottom of the bowl to make sure there are no pockets of dry ingredients remaining.

    At this point, you should already begin smelling the combination of cocoa and fresh citrus.

    Step 4: Add the Hot Coffee

    Slowly stir in ½ cup hot coffee.

    Coffee is one of those ingredients that can make chocolate cake taste even more chocolatey.

    It doesn’t necessarily make the cake taste like coffee. Instead, coffee enhances the natural roasted flavors of cocoa.

    If you don’t drink coffee or don’t want to use it, substitute an equal amount of hot water.

    The batter may look thin after adding the hot liquid.

    That’s expected.

    Don’t add extra flour.

    Step 5: Divide the Batter

    Pour the batter evenly between your two prepared cake pans.

    Try to put roughly the same amount into each pan so the layers bake at approximately the same rate.

    Gently tap each pan against the counter once or twice to release large air bubbles.

    Step 6: Bake the Cakes

    Bake for approximately 30–35 minutes.

    Begin checking around the 30-minute mark.

    Insert a toothpick into the center of the cake. If it comes out clean or with a few moist crumbs, the cake is ready.

    Avoid waiting until the toothpick is completely dry.

    Overbaking is one of the most common reasons homemade chocolate cake becomes dry.

    Step 7: Cool Completely

    Remove the cakes from the oven and allow them to cool in their pans for approximately 10 minutes.

    Carefully run a thin knife around the edges if necessary.

    Turn the cakes onto wire racks and remove the parchment.

    Allow them to cool completely.

    This step requires patience.

    Frosting a warm cake can cause the butter in your frosting to melt, resulting in a slippery mess.

    Making the Chocolate Orange Frosting

    While your cakes are cooling, prepare the frosting.

    Place softened butter in a large mixing bowl and beat until creamy.

    Gradually add the powdered sugar and cocoa powder.

    Begin mixing at low speed to avoid creating a cocoa-and-sugar cloud in your kitchen.

    Once incorporated, add vanilla extract, orange zest, a pinch of salt, and approximately 2 tablespoons of orange juice.

    Beat until light, smooth, and fluffy.

    Add additional orange juice one tablespoon at a time if necessary.

    You’re looking for frosting that’s soft enough to spread but firm enough to stay on the cake.

    Taste Your Frosting Before Decorating

    This is where you can customize the orange intensity.

    Want more citrus?

    Add a little more fresh zest.

    Want chocolate to dominate?

    Leave the frosting as it is.

    Just remember that zest adds a much stronger orange aroma than juice, so add additional zest gradually.

    Assemble the Cake

    Place the first chocolate cake layer onto your serving plate or cake stand.

    Spread a thick, even layer of chocolate-orange frosting across the top.

    Place the second layer carefully over the frosting.

    Add frosting to the top of the cake and spread it toward the edges.

    Then frost the sides.

    Don’t worry if your frosting isn’t perfectly smooth.

    Homemade cakes can look beautiful with textured swirls created using the back of a spoon or an offset spatula.

    Add Orange Marmalade Between the Layers

    Want to intensify the orange flavor?

    Orange marmalade makes an excellent filling.

    Spread a very thin layer of orange marmalade over the first cake layer before adding your frosting.

    Don’t add too much because the layers can become slippery.

    The marmalade provides small bursts of citrus that complement the chocolate beautifully.

    Add Chocolate Ganache

    For serious chocolate lovers, add chocolate ganache.

    A basic ganache can be made by pouring warm heavy cream over chopped chocolate and stirring until smooth.

    Allow the ganache to cool slightly before pouring it over the finished cake.

    Let some of the chocolate slowly drip down the sides.

    Finish with fresh orange zest or candied orange peel.

    Now you’ve transformed a homemade cake into a dramatic celebration dessert.

    Dark Chocolate Orange Cake Variation

    Prefer desserts that aren’t overly sweet?

    Use dark cocoa powder in the cake and dark chocolate in your ganache.

    Dark chocolate’s slight bitterness works exceptionally well with sweet citrus.

    You can also reduce the sweetness of the frosting slightly and emphasize the fresh orange zest.

    The result is a more sophisticated dessert that’s perfect alongside coffee or espresso.

    Chocolate Orange Bundt Cake

    You don’t have to make this dessert as a layer cake.

    Prepare the batter and pour it into a properly greased Bundt pan.

    Because Bundt pans vary considerably in size and shape, baking time may need to be increased.

    Instead of traditional frosting, finish the cooled cake with chocolate ganache or a simple orange glaze.

    For an orange glaze, combine powdered sugar with fresh orange juice until you have a thick but pourable consistency.

    Drizzle it across the top and finish with orange zest.

    Chocolate Orange Cupcakes

    Chocolate-orange cupcakes are perfect for parties, potlucks, and family gatherings.

    Line muffin tins with cupcake liners.

    Fill each approximately two-thirds full.

    Bake at 350°F for approximately 18–22 minutes, or until a toothpick inserted into the center comes out with a few moist crumbs.

    Allow them to cool completely before adding chocolate-orange frosting.

    Top each cupcake with a tiny piece of candied orange peel, chocolate shaving, or sprinkle of orange zest.

    Chocolate Orange Sheet Cake

    Need dessert for a larger crowd?

    Turn the recipe into a sheet cake.

    A rectangular chocolate-orange cake is easier to transport and serve than a layer cake, making it ideal for potlucks, parties, workplace gatherings, and family celebrations.

    Spread chocolate-orange frosting generously over the cooled cake and decorate with orange zest and chocolate shavings.

    Then simply slice into squares.

    Candied Orange Peel Makes a Beautiful Garnish

    Candied orange peel can add both flavor and texture.

    Thin strips of orange peel are simmered in sugar syrup until tender and then allowed to dry.

    Some versions are rolled in sugar.

    For an even more decadent garnish, dip part of each candied orange strip into melted dark chocolate.

    Place several pieces on top of the cake.

    It’s simple, elegant, and completely matches the flavors inside.

    Add Fresh Berries

    Chocolate, orange, and berries work wonderfully together.

    Try decorating the cake with:

    • Raspberries
    • Strawberries
    • Blackberries
    • Blueberries

    Raspberries are especially good because their tartness complements both the citrus and rich chocolate.

    A few berries around the top or base of the cake can add natural color without complicated decorating.

    What Ice Cream Goes Best with Chocolate Orange Cake?

    If you’re serving the cake slightly warm or at room temperature, adding ice cream can make it even more indulgent.

    Vanilla ice cream is the classic choice because it doesn’t compete with the cake.

    Chocolate ice cream turns dessert into an intensely chocolate experience.

    Orange sherbet emphasizes the citrus side.

    Coffee ice cream pairs beautifully with chocolate.

    You could even serve small slices with a scoop of vanilla ice cream and drizzle chocolate sauce across the plate.

    Drinks to Serve with Chocolate Orange Cake

    A rich dessert is even better with the right drink.

    Coffee is one of the easiest choices.

    Try:

    • Freshly brewed coffee
    • Espresso
    • Cappuccino
    • Café latte
    • Cold brew
    • Hot chocolate
    • Cold milk
    • Black tea
    • Earl Grey tea

    Earl Grey is an especially interesting pairing because its bergamot flavor naturally complements citrus.

    Make the Cake Ahead of Time

    Chocolate Cake with Orange is a good choice when you need to prepare dessert ahead of an event.

    Bake the cake layers the day before.

    Once completely cooled, wrap each layer tightly and store it at room temperature overnight.

    Prepare the frosting and assemble the cake the following day.

    Breaking the process into two days can make decorating much less stressful.

    How to Keep Chocolate Cake Moist

    There are several things you can do to help your cake stay soft and moist.

    First, measure the flour carefully.

    Too much flour creates a heavier, drier cake.

    Second, don’t overbake.

    Even an extra five or ten minutes can dramatically affect moisture.

    Third, keep the finished cake covered.

    Exposing cut cake to air causes it to dry quickly.

    After cutting the first slice, cover the exposed portion with plastic wrap or transfer leftovers into an airtight container.

    Can You Freeze Chocolate Orange Cake?

    Yes.

    For the best results, freeze the cake layers before frosting.

    Allow them to cool completely.

    Wrap each layer tightly in plastic wrap and then wrap again with aluminum foil or place it inside a freezer-safe container.

    Freeze for up to approximately 2–3 months.

    Allow the layers to thaw before frosting and decorating.

    You can also freeze individual slices of finished cake, although the texture of the frosting may change slightly after thawing.

    How to Store Leftover Cake

    Keep your Chocolate Cake with Orange covered so it doesn’t dry out.

    At room temperature, enjoy it within approximately 1–2 days.

    For longer storage, refrigerate for approximately 4–5 days.

    Refrigerated butter-based frosting becomes firm, so allow your slice to sit at room temperature for about 20–30 minutes before serving.

    You’ll notice that both the cake and frosting become softer and more flavorful as they warm slightly.

    Common Mistakes to Avoid

    Adding Too Much Orange Juice

    More orange juice doesn’t necessarily mean better orange flavor.

    Adding excessive liquid can affect the cake’s structure or make frosting too thin.

    Use zest when you want stronger flavor without additional liquid.

    Overmixing the Batter

    Once everything is incorporated, avoid unnecessarily beating the batter for extended periods.

    Overmixing can contribute to a tougher cake.

    Overbaking

    Check your cake early.

    You can always bake it for another two minutes, but you can’t undo an overbaked cake.

    Frosting a Warm Cake

    Allow the layers to cool completely before decorating.

    Using Bottled Juice When Fresh Is Available

    Freshly squeezed orange juice and fresh zest create a noticeably brighter flavor.

    Easy Decorating Idea

    Not everyone wants to spend an hour decorating a cake.

    You don’t have to.

    Frost the cake with chocolate-orange frosting.

    Create swirls across the top using the back of a spoon.

    Place several thin orange slices along one side.

    Sprinkle chocolate shavings over the center.

    Finish with fresh orange zest.

    That’s it.

    The bright orange against the dark chocolate does most of the decorating work for you.

    Turn It Into a Celebration Cake

    Chocolate Cake with Orange is sophisticated enough for special occasions but familiar enough to please a crowd.

    Consider serving it for:

    Birthdays, anniversaries, Valentine’s Day, Mother’s Day, Father’s Day, Easter gatherings, Thanksgiving, Christmas, dinner parties, family reunions, or weekend celebrations.

    For birthdays, add chocolate decorations and candles.

    For holidays, use candied orange peel and dark chocolate curls for a more elegant presentation.

    Why Homemade Cake Is Worth the Effort

    Buying a cake from the store is certainly convenient.

    But there’s something different about putting a homemade cake on the table.

    You choose the ingredients.

    You control the flavors.

    You get to decide how much orange goes into the cake and how much frosting goes between the layers.

    And your kitchen smells incredible while it’s baking.

    There’s also something satisfying about slicing into a cake you made yourself and seeing those layers for the first time.

    It doesn’t have to look perfect.

    It just needs to taste good.

    The Aroma Is Part of the Experience

    Dessert begins before you ever take the first bite.

    While this cake is baking, cocoa, vanilla, and orange fill the kitchen.

    Then you prepare frosting with fresh zest, releasing even more citrus aroma.

    Smell plays an enormous role in how we experience food, and chocolate-orange desserts make the most of that connection.

    It’s one reason this cake feels especially inviting when served fresh.

    A Little Orange Makes Chocolate Feel New Again

    Chocolate cake doesn’t need much help.

    It’s been a favorite dessert for generations for good reason.

    But sometimes changing one familiar ingredient or introducing one new flavor can completely refresh a classic recipe.

    Orange does exactly that.

    It doesn’t replace the chocolate.

    It complements it.

    You still get the rich cocoa flavor that makes chocolate cake comforting, but every bite also has a little brightness.

    That’s what makes Chocolate Cake with Orange so appealing.

    It gives you something familiar and something unexpected at the same time.

    Make It Your Own

    One of the best parts of baking is experimenting.

    You can keep this recipe simple or turn it into something elaborate.

    Add orange marmalade.

    Pour chocolate ganache over the top.

    Decorate it with candied orange.

    Add berries.

    Turn it into cupcakes.

    Make a Bundt cake.

    Bake it as a sheet cake.

    Add dark chocolate.

    Serve it with vanilla ice cream.

    The basic chocolate-and-orange combination gives you plenty of room to create your own version.

    Dessert of the Day: Chocolate Cake with Orange

    Today’s Dessert of the Day: Chocolate Cake with Orange proves that a small twist can transform a classic dessert.

    Rich chocolate cake provides comfort and indulgence, while fresh orange zest and juice add brightness and fragrance. Finish everything with creamy chocolate-orange frosting, and you’ve got a dessert that’s equally appropriate for an ordinary weekend or an important celebration.

    It’s rich without being boring.

    Sweet without being one-dimensional.

    Familiar without feeling ordinary.

    And perhaps best of all, it’s a dessert that’s just as enjoyable to make as it is to eat.

    So grab a few fresh oranges, pull out the cocoa powder, preheat the oven, and give this chocolate-citrus combination a try.

    You might discover that chocolate cake didn’t need to be reinvented.

    It just needed a little orange.

    Engagement Question: 🍫🍊 Would you try Chocolate Cake with Orange, or do you prefer your chocolate cake completely classic? What would you add on top—orange slices, chocolate ganache, fresh berries, or a big scoop of vanilla ice cream?

    Read More Recipes

  • Healthy Recipe of the Day: Creamy Chicken Garlic Parmesan Casserole

    Advertisements

    There is something incredibly comforting about pulling a hot, bubbling casserole from the oven. The aroma fills the kitchen, melted cheese covers the top, and underneath is a hearty dinner ready to be served.

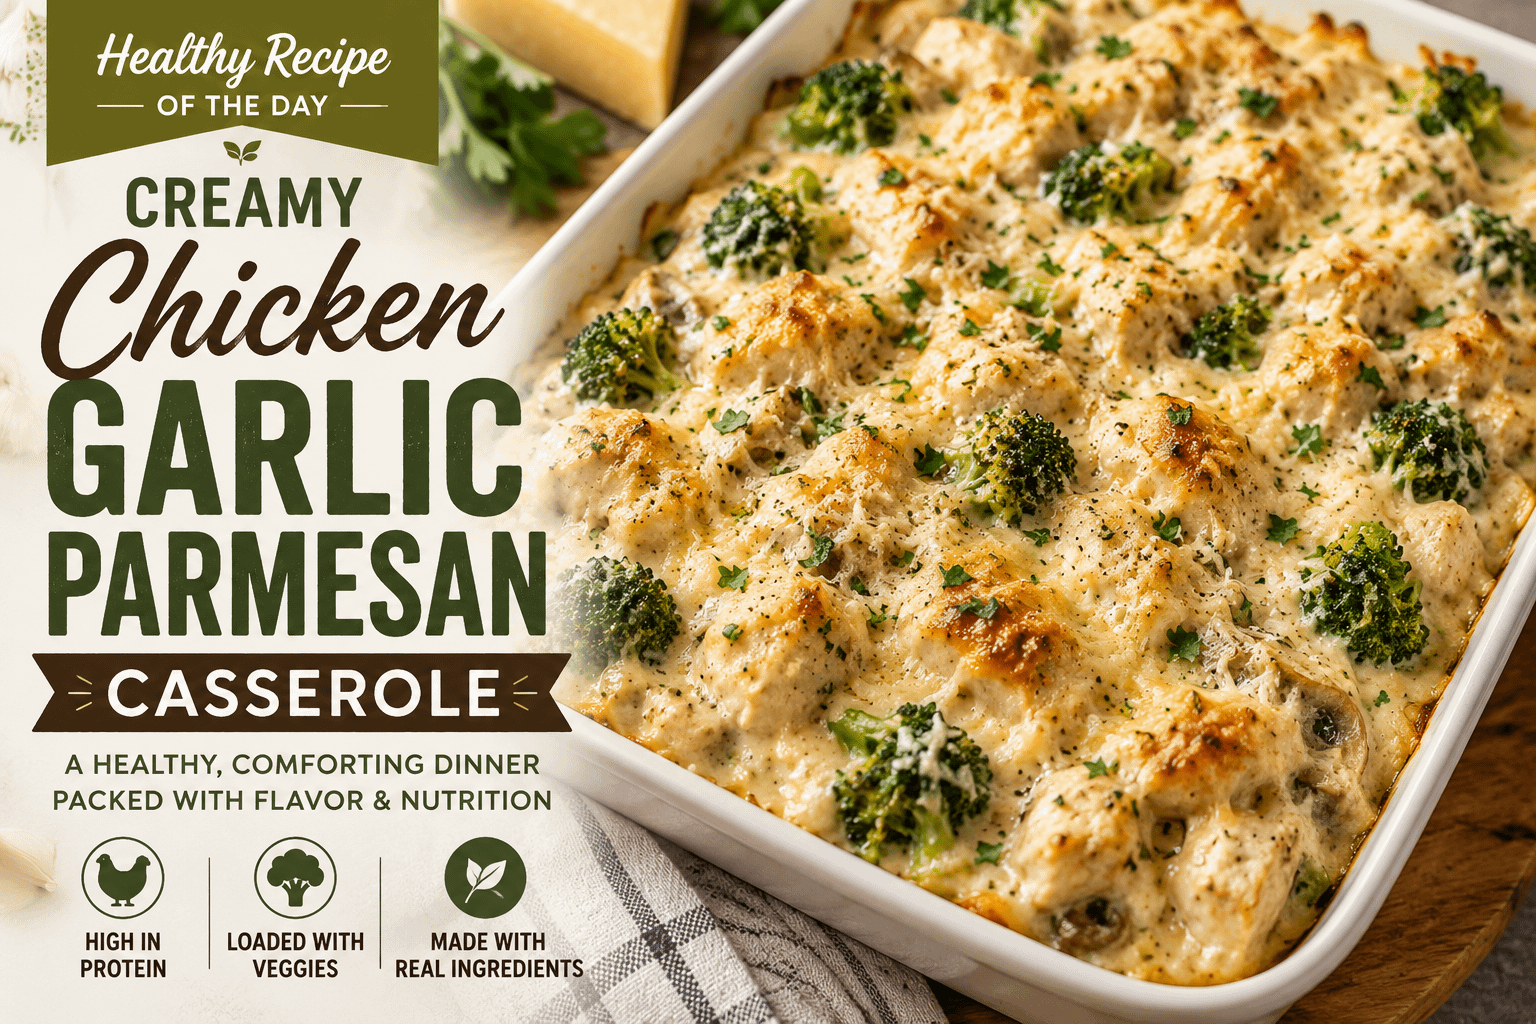
    Today’s Healthy Recipe of the Day: Creamy Chicken Garlic Parmesan Casserole delivers that comfort while taking a lighter approach to the traditional creamy chicken casserole.

    Tender chicken breast is combined with fresh broccoli, mushrooms, onions, garlic, Parmesan cheese, and a creamy Greek yogurt-based sauce. Everything is baked together until hot and bubbly, creating a satisfying meal that’s loaded with flavor.

    And if you’re a garlic lover, this recipe is definitely for you.

    Garlic and Parmesan are one of those classic combinations that rarely disappoint. Garlic brings a deep savory flavor while Parmesan adds its distinctive salty, nutty richness. Combined with chicken and vegetables, they transform a relatively simple casserole into something you’ll look forward to making again.

    Whether you’re preparing dinner for your family, cooking for one and saving leftovers, or trying to plan meals for a busy week, this casserole is an easy recipe to keep in your rotation.


    Why You’ll Love This Creamy Chicken Casserole

    Healthy recipes sometimes have an unfair reputation for being bland or leaving you hungry shortly after eating.

    This casserole is designed to be the opposite.

    It combines lean protein, vegetables, creamy sauce, cheese, and plenty of seasonings to create a satisfying dinner.

    You’ll love this recipe because it’s:

    • High in protein
    • Loaded with vegetables
    • Creamy and comforting
    • Packed with garlic flavor
    • Easy to customize
    • Family-friendly
    • Excellent for meal prep
    • Great for using leftover chicken
    • Easy enough for weeknight cooking
    • Delicious reheated the next day

    It also doesn’t require canned cream soup, which gives you greater control over the ingredients and seasoning.


    Ingredients

    For the Chicken Casserole

    • 3 cups cooked boneless, skinless chicken breast, chopped or shredded
    • 3 cups fresh broccoli florets
    • 1 cup sliced mushrooms
    • 1 small yellow onion, diced
    • 4 cloves fresh garlic, minced
    • 1 tablespoon extra-virgin olive oil
    • 1 cup low-sodium chicken broth
    • 1 cup plain Greek yogurt
    • 1/2 cup milk
    • 3/4 cup freshly grated Parmesan cheese, divided
    • 1/2 cup shredded part-skim mozzarella cheese
    • 1 teaspoon Italian seasoning
    • 1/2 teaspoon garlic powder
    • 1/2 teaspoon onion powder
    • 1/4 teaspoon freshly ground black pepper
    • Salt to taste
    • 1 tablespoon chopped fresh parsley, optional

    Optional Crispy Topping

    • 1/3 cup whole-wheat breadcrumbs
    • 2 tablespoons grated Parmesan cheese
    • 1 teaspoon olive oil

    How to Make Creamy Chicken Garlic Parmesan Casserole

    Step 1: Preheat Your Oven

    Preheat your oven to 375°F.

    Lightly coat a 9-by-13-inch baking dish with cooking spray or brush the inside with a small amount of olive oil.

    Preparing your baking dish beforehand makes assembly much easier once your ingredients are ready.


    Step 2: Prepare the Chicken

    If you’re cooking chicken specifically for this recipe, season boneless, skinless chicken breasts lightly with black pepper, garlic powder, and Italian seasoning.

    Bake, grill, poach, or sauté until fully cooked.

    Allow the chicken to rest briefly before chopping or shredding it.

    You’ll need approximately 3 cups of cooked chicken.

    This is also a fantastic recipe for leftover chicken.

    You can use:

    • Grilled chicken
    • Baked chicken breast
    • Poached chicken
    • Rotisserie chicken
    • Leftover roasted chicken

    If you’re using rotisserie chicken, removing the skin will help keep the casserole lighter.


    Step 3: Prepare the Broccoli

    Cut your broccoli into relatively even bite-sized florets.

    Steam or blanch the broccoli for approximately 2–3 minutes.

    The goal isn’t to completely cook it.

    You simply want to give the broccoli a head start before it goes into the oven.

    Drain it thoroughly.

    This is important because excess water can make your casserole sauce thinner than intended.


    Step 4: Sauté the Onion and Mushrooms

    Heat one tablespoon of olive oil in a large skillet over medium heat.

    Add the diced onion and sliced mushrooms.

    Cook for approximately 4–5 minutes, stirring occasionally.

    The onions should become slightly translucent while the mushrooms begin to soften and release some of their moisture.

    Cooking the vegetables before adding them to the casserole helps develop their flavor while reducing excess moisture.


    Step 5: Add the Garlic

    Add the minced garlic to the skillet.

    Cook for approximately 30–60 seconds, stirring constantly.

    Once you can smell that wonderful garlic aroma, you’re ready for the next step.

    Avoid cooking garlic for too long because burnt garlic can become bitter.


    Making the Creamy Garlic Parmesan Sauce

    This sauce is what brings the entire casserole together.

    Instead of relying on heavy cream or canned cream soup, we’re using Greek yogurt, milk, chicken broth, and Parmesan cheese.

    Add the chicken broth and milk to the skillet and stir.

    Allow the mixture to warm slightly.

    Remove the skillet from direct heat before adding the Greek yogurt.

    Stir until smooth.

    Next, add approximately 1/2 cup Parmesan cheese along with:

    • Italian seasoning
    • Garlic powder
    • Onion powder
    • Black pepper
    • A small pinch of salt

    Stir everything together until creamy.

    If the sauce seems extremely thick, add another splash of chicken broth.

    If it seems slightly thin, don’t panic. The Parmesan and other ingredients will help everything come together while the casserole bakes and rests.


    Why Greek Yogurt Works So Well

    Plain Greek yogurt is one of the easiest ways to add creaminess to certain recipes without relying entirely on heavy cream.

    It also provides additional protein.

    The key is avoiding extremely high heat once the yogurt has been added.

    Adding Greek yogurt to a violently boiling sauce may cause it to separate.

    That’s why removing the skillet from direct heat before stirring it in is helpful.

    Use plain, unsweetened Greek yogurt.

    Vanilla yogurt definitely doesn’t belong in your garlic Parmesan casserole!


    Assemble the Casserole

    Place the cooked chicken and broccoli in your prepared baking dish.

    Add the sautéed onions and mushrooms.

    Pour the creamy garlic Parmesan sauce over everything.

    Gently stir until the ingredients are evenly distributed and coated with sauce.

    Spread everything into an even layer.

    Sprinkle the shredded mozzarella and remaining Parmesan cheese over the top.

    At this point, your casserole is ready to bake.

    But if you’re a fan of crispy casserole toppings, there’s one more optional step.


    Make the Crispy Parmesan Topping

    Combine:

    • 1/3 cup whole-wheat breadcrumbs
    • 2 tablespoons Parmesan cheese
    • 1 teaspoon olive oil

    Mix until the breadcrumbs are lightly coated.

    Sprinkle evenly over the casserole.

    This gives the finished dish a wonderful contrast between the creamy filling and lightly crunchy topping.

    You can skip the breadcrumbs if you prefer a lower-carbohydrate casserole.


    Bake the Casserole

    Bake uncovered at 375°F for approximately 20–25 minutes.

    Because the chicken is already cooked, you’re primarily heating the casserole through, finishing the vegetables, and melting the cheese.

    The casserole is ready when the sauce is bubbling around the edges and the cheese has melted.

    For a slightly browned top, turn on your oven’s broiler for approximately 1–2 minutes.

    Keep a close eye on it.

    Cheese and breadcrumbs can go from beautifully golden to burnt surprisingly quickly.


    Let Your Casserole Rest

    It’s tempting to immediately scoop into a bubbling casserole, but give it approximately 5 minutes after removing it from the oven.

    Resting gives the sauce a chance to settle and slightly thicken.

    Finish with chopped fresh parsley if desired.

    Then serve and enjoy.


    Why Chicken Is a Great Protein Choice

    Chicken breast is popular in healthier recipes because it provides substantial protein while being relatively lean.

    Protein can also help make meals more satisfying.

    Chicken has another major advantage: versatility.

    Its mild flavor means it absorbs the seasonings and sauces around it beautifully.

    In this casserole, the chicken takes on the flavors of garlic, Parmesan, Italian herbs, mushrooms, and the creamy sauce.


    Garlic: Small Ingredient, Huge Flavor

    Four cloves might look like a lot of garlic, but remember that this recipe makes several servings.

    Cooking fresh garlic also mellows some of its sharpness.

    Garlic provides a tremendous amount of flavor without needing to add large amounts of butter or salt.

    If you absolutely love garlic, increase the amount to five or six cloves.

    For a milder flavor, reduce it to two or three.

    You could even use roasted garlic for a sweeter and softer garlic flavor.


    Parmesan Makes a Difference

    Parmesan is another ingredient where a relatively modest amount can deliver a lot of flavor.

    Freshly grated Parmesan is particularly good for this casserole.

    It melts nicely into the sauce while giving you that distinctive savory, nutty Parmesan flavor.

    Parmesan naturally contains sodium, so wait until the sauce is assembled before deciding whether additional salt is necessary.

    Between the chicken broth and Parmesan, you may find that very little extra salt is needed.


    Don’t Forget the Vegetables

    Chicken and cheese may get most of the attention, but the vegetables are an important part of this meal.

    Broccoli provides texture, color, fiber, and valuable nutrients.

    Mushrooms bring an earthy savory quality that pairs especially well with garlic.

    Onions add sweetness and depth as they cook.

    Together, they make the casserole more interesting and help turn it into a more complete meal.


    More Vegetables You Can Add

    This recipe is extremely flexible.

    If you have vegetables sitting in your refrigerator that need to be used, this casserole may be the perfect place for them.

    Try adding:

    Spinach

    Fresh spinach is easy to incorporate because it wilts quickly.

    Add several handfuls to the skillet after cooking your mushrooms and onions.

    Cauliflower

    Cauliflower is an excellent substitute for some or all of the broccoli.

    Zucchini

    Chopped zucchini adds another serving of vegetables, although sautéing it first will help prevent excess moisture.

    Bell Peppers

    Red, yellow, or orange bell peppers can add color and subtle sweetness.

    Asparagus

    Chopped asparagus works especially well during spring.

    Green Beans

    Cooked green beans can also be folded into the casserole.


    Turn It Into a Complete One-Dish Dinner

    The basic casserole is relatively low in starch.

    If you’d like something even more substantial, add a healthy grain or pasta directly to the casserole.

    Good options include:

    • Brown rice
    • Quinoa
    • Wild rice
    • Whole-wheat pasta
    • Chickpea pasta

    Add approximately 1–2 cups cooked.

    Because grains and pasta absorb sauce, you may want to increase the amount of chicken broth and Greek yogurt slightly.


    Low-Carb Version

    For a lower-carbohydrate meal, keep the recipe essentially as written and skip the breadcrumb topping.

    Serve it alongside:

    • Roasted cauliflower
    • Green salad
    • Steamed asparagus
    • Sautéed zucchini
    • Green beans

    You’ll still get plenty of satisfying chicken, vegetables, cheese, and creamy sauce.


    Make It Spicy

    Garlic Parmesan doesn’t have to be mild.

    For some heat, add:

    • Crushed red pepper flakes
    • Cayenne pepper
    • Chopped jalapeño
    • Hot paprika

    Start small and adjust according to your preference.

    Crushed red pepper flakes are especially good because they provide heat without overpowering the garlic Parmesan flavor.


    Make It Extra Herby

    Italian seasoning keeps things simple, but fresh herbs can make this casserole even better.

    Try adding:

    • Fresh basil
    • Fresh parsley
    • Oregano
    • Thyme
    • Rosemary

    A combination of parsley and basil sprinkled over the finished casserole adds both color and freshness.


    What to Serve With Chicken Garlic Parmesan Casserole

    Although this casserole can be served by itself, side dishes can turn it into an even more complete dinner.

    Fresh Garden Salad

    A simple salad is one of the best choices.

    Try mixed greens, tomatoes, cucumbers, red onion, and a light vinaigrette.

    The fresh acidity contrasts beautifully with the creamy casserole.

    Roasted Asparagus

    Season asparagus lightly with olive oil, garlic powder, and black pepper before roasting.

    Green Beans

    Steamed or roasted green beans keep the meal simple and vegetable-focused.

    Brussels Sprouts

    Roasted Brussels sprouts develop crispy edges and a slightly nutty flavor that pairs nicely with Parmesan.

    Brown Rice

    Brown rice makes the meal more filling while adding whole grains.

    Quinoa

    Quinoa is another excellent option if you’re looking for something hearty and nutritious.

    Whole-Grain Bread

    Sometimes you just need a little bread for soaking up the leftover garlic Parmesan sauce.


    Perfect for Meal Prep

    One reason casseroles remain so popular is that they make planning ahead easier.

    You can prepare several parts of this recipe in advance.

    Cook and chop your chicken.

    Cut your broccoli.

    Slice the mushrooms.

    Dice the onion.

    Grate the Parmesan.

    Store everything separately in airtight containers.

    When you’re ready to cook dinner, much of the preparation is already finished.

    You can also assemble the entire casserole ahead of time, cover it tightly, and refrigerate it.

    When you’re ready to eat, remove it from the refrigerator while the oven preheats and then bake.

    A refrigerated casserole may require several additional minutes in the oven.


    Great for Leftovers

    This may be one of those dinners that tastes even better the next day.

    As the casserole sits, the garlic, herbs, Parmesan, chicken, and vegetables have more time to mingle.

    Divide leftovers into individual containers so you have ready-to-go lunches or dinners.

    Pair each portion with salad, fruit, or additional vegetables for an easy meal.


    How to Store Creamy Chicken Garlic Parmesan Casserole

    Allow leftovers to cool before placing them in an airtight container.

    Refrigerate and use within approximately 3–4 days.

    For best results, only reheat the amount you plan to eat rather than repeatedly reheating the entire casserole.


    How to Reheat It

    Microwave

    Place an individual serving on a microwave-safe plate.

    Heat in short intervals until thoroughly warmed.

    Oven

    Place the casserole in an oven-safe dish.

    Cover loosely with foil and warm at approximately 350°F until heated through.

    If the casserole seems dry after refrigeration, add a small splash of milk or chicken broth before reheating.

    This can help bring the creamy consistency back.


    Can You Freeze This Casserole?

    You can freeze chicken casseroles, but dairy-based sauces may change texture slightly after freezing and thawing.

    Greek yogurt can sometimes separate.

    For the best texture, this particular casserole is generally better prepared fresh or refrigerated for several days.

    If you do freeze it, portion it into airtight freezer-safe containers.

    Thaw overnight in the refrigerator before reheating.


    Can You Use Rotisserie Chicken?

    Absolutely.

    Rotisserie chicken is one of the easiest shortcuts for this recipe.

    Simply remove the skin, take the meat from the bones, and shred or chop approximately three cups.

    Rotisserie chicken can be saltier than chicken cooked at home, so use low-sodium chicken broth and taste your sauce before adding additional salt.


    Can You Use Frozen Broccoli?

    Yes.

    Frozen broccoli makes this recipe even more convenient.

    Thaw the broccoli first and drain it extremely well.

    Removing as much moisture as possible is important because frozen vegetables can release significant water during cooking.

    You don’t necessarily need to blanch frozen broccoli before assembling the casserole.


    Can You Make It Without Mushrooms?

    Definitely.

    If you don’t like mushrooms, simply leave them out.

    You can replace them with additional broccoli, cauliflower, spinach, zucchini, or bell peppers.

    Recipes should work for your household, so don’t be afraid to customize them.


    Approximate Nutrition Information

    Exact nutritional information depends on your ingredient brands, serving size, cheese quantities, and any optional additions.

    A serving of the basic casserole may contain approximately:

    Calories: 330–400
    Protein: 35–40 grams
    Carbohydrates: 12–18 grams
    Fat: 14–18 grams
    Fiber: 3–5 grams

    Treat these numbers as estimates rather than exact nutritional calculations.

    Adding pasta, rice, breadcrumbs, extra cheese, or other ingredients will change the nutritional profile.


    Tips for Making the Best Chicken Garlic Parmesan Casserole

    Don’t Overcook Your Chicken

    Remember that the cooked chicken will spend additional time in the oven.

    Starting with moist chicken helps prevent the finished casserole from becoming dry.

    Use Fresh Garlic

    Garlic powder is helpful for seasoning, but fresh minced garlic provides the signature flavor.

    Using both gives you layers of garlic flavor.

    Freshly Grate Your Parmesan

    Fresh Parmesan generally melts more smoothly and gives the sauce excellent flavor.

    Drain Your Vegetables

    Water is one of the biggest enemies of creamy casseroles.

    Drain broccoli and other vegetables thoroughly before adding them.

    Don’t Boil the Greek Yogurt

    Gentle heat helps keep the sauce smooth.

    Taste Before Salting

    Parmesan and broth already contain sodium.

    Taste your sauce before adding extra salt.

    Don’t Skip the Resting Time

    Those five minutes after baking help the casserole settle.


    Healthy Eating Doesn’t Have to Feel Restrictive

    One of the biggest misconceptions about healthier eating is that you have to abandon your favorite comfort foods.

    You don’t.

    Instead, look for ways to build meals around lean proteins, vegetables, whole foods, reasonable portions, and ingredients that deliver lots of flavor.

    That’s exactly what this casserole does.

    Rather than eliminating cheese, we use flavorful Parmesan and a sensible amount of mozzarella.

    Rather than giving up creamy sauce, we create one using Greek yogurt.

    Rather than serving plain chicken, we surround it with garlic, herbs, vegetables, and cheese.

    Healthy eating becomes much easier to maintain when you actually enjoy the food you’re preparing.


    A Dinner the Whole Family Can Enjoy

    Preparing separate meals for everyone in the house can quickly become exhausting.

    That’s another advantage of recipes like this one.

    The creamy texture, familiar chicken, melted cheese, and mild Italian flavors make this casserole approachable for a wide range of tastes.

    If some family members don’t like broccoli, experiment with vegetables they do enjoy.

    If someone wants more heat, keep crushed red pepper flakes at the table.

    If someone wants extra carbohydrates, serve their portion over rice or alongside bread.

    The basic casserole provides a foundation everyone can customize.


    Make Healthy Cooking Easier on Busy Nights

    Healthy eating often becomes hardest when you’re tired.

    After a long day, convenience usually wins.

    That’s why having simple recipes and ingredients ready can make such a big difference.

    Keep cooked chicken, frozen vegetables, Greek yogurt, Parmesan, and basic seasonings available, and you’re already halfway toward a satisfying dinner.

    You don’t need every meal to be elaborate.

    You simply need meals that are realistic enough to make consistently.

    This Creamy Chicken Garlic Parmesan Casserole fits that goal beautifully.


    Comfort Food With a Healthier Twist

    There is room for comfort food in a balanced lifestyle.

    The goal doesn’t have to be making every recipe as low-calorie as possible.

    Instead, think about balance.

    Add more vegetables.

    Choose lean protein.

    Use strongly flavored ingredients wisely.

    Pay attention to portion sizes.

    Pair richer foods with fresh vegetables and salads.

    Make substitutions when they improve a recipe without ruining what you love about it.

    Those small choices can add up over time.


    Final Thoughts

    Today’s Healthy Recipe of the Day: Creamy Chicken Garlic Parmesan Casserole proves that a healthier dinner can still be creamy, cheesy, hearty, and full of comfort.

    Tender chicken provides plenty of satisfying protein. Broccoli, mushrooms, onions, and garlic bring vegetables and layers of flavor. Greek yogurt creates a creamy base, while Parmesan and mozzarella provide the cheesy finish that makes a casserole feel like true comfort food.

    Perhaps best of all, this is a recipe that can fit into real life.

    You can use leftover chicken.

    You can substitute vegetables.

    You can prepare it ahead of time.

    You can turn leftovers into tomorrow’s lunch.

    You can add brown rice or quinoa when you want something heartier or skip the breadcrumbs when you want to keep things lighter.

    That’s what makes a great healthy recipe.

    It doesn’t just look good on paper—it works in your kitchen.

    So preheat the oven, grab the garlic and Parmesan, and turn tonight’s chicken dinner into something warm, creamy, flavorful, and satisfying.

    Sometimes healthier eating isn’t about eating less of everything you love.

    It’s about finding better ways to put delicious food on your plate.

    Read More Recipes

  • Recipe of the Day: BBQ Bacon Meatloaf

    Advertisements

    Few dinners represent classic American comfort food quite like a homemade meatloaf. It’s hearty, affordable, satisfying, and capable of bringing everyone to the table when its aroma starts filling the kitchen. Today’s Recipe of the Day: BBQ Bacon Meatloaf takes that familiar favorite and gives it a smoky, savory upgrade.

    Imagine a tender, juicy meatloaf packed with seasoned ground beef, crispy bacon, onions, garlic, Worcestershire sauce, and barbecue sauce. Then picture the entire loaf covered with a sweet, smoky, tangy BBQ glaze that caramelizes as it bakes.

    That’s what makes this version special.

    Instead of simply topping traditional meatloaf with ketchup, we’re leaning into barbecue flavors from beginning to end. BBQ sauce is mixed directly into the meat, bacon adds smoky richness throughout, and another layer of barbecue glaze finishes everything off.

    The result is a meatloaf that’s familiar enough to feel nostalgic but different enough to make dinner exciting again.

    Serve it alongside creamy mashed potatoes and green beans for a classic comfort-food dinner, or turn the meal into a backyard-barbecue-inspired feast with macaroni and cheese, corn, baked beans, and coleslaw.

    Either way, this is one meatloaf recipe you’ll want to keep.


    Why BBQ Bacon Meatloaf Works So Well

    Meatloaf might seem like a simple dish, but great meatloaf is all about balance.

    Ground beef provides the hearty foundation. Breadcrumbs help hold moisture inside the loaf. Eggs bind everything together. Milk keeps the texture tender. Onion and garlic build savory flavor. Worcestershire sauce adds depth.

    Then come the two ingredients that transform this version:

    Bacon and barbecue sauce.

    Bacon provides saltiness, smokiness, richness, and little bursts of flavor throughout every slice.

    Barbecue sauce brings sweetness, acidity, smoke, spices, and tanginess.

    Together, they create the kind of sweet-and-savory combination that makes you want another bite.

    And because barbecue sauces vary so much, this recipe can taste slightly different every time you make it.

    Use a smoky sauce for deeper flavor.

    Choose a honey BBQ sauce for additional sweetness.

    Try a spicy barbecue sauce if you like some heat.

    Or use a bold hickory-style sauce for a classic backyard barbecue flavor.


    BBQ Bacon Meatloaf Recipe

    Ingredients

    For the Meatloaf

    • 2 pounds ground beef
    • 6 slices bacon, cooked until crisp and crumbled
    • 1 cup breadcrumbs
    • 2 large eggs
    • 1/2 cup milk
    • 1 small onion, finely diced
    • 2 cloves garlic, minced
    • 1/2 cup barbecue sauce
    • 1 tablespoon Worcestershire sauce
    • 1 teaspoon smoked paprika
    • 1 teaspoon garlic powder
    • 1 teaspoon onion powder
    • 1 teaspoon salt
    • 1/2 teaspoon freshly ground black pepper

    For the BBQ Glaze

    • 1/2 cup barbecue sauce
    • 2 tablespoons brown sugar
    • 1 tablespoon Worcestershire sauce
    • 1 teaspoon Dijon mustard

    Optional Garnishes

    • Additional crispy bacon
    • Chopped parsley
    • Sliced green onions
    • Freshly cracked black pepper
    • Additional barbecue sauce

    How to Make BBQ Bacon Meatloaf

    Step 1: Preheat the Oven

    Preheat your oven to 375°F (190°C).

    Line a rimmed baking sheet with parchment paper or aluminum foil for easier cleanup.

    You can also use a traditional loaf pan, but forming the meatloaf on a baking sheet has an advantage: more of the exterior is exposed to the oven’s heat.

    That means more caramelized edges.

    And when barbecue sauce is involved, those sticky, caramelized edges are some of the best bites.


    Step 2: Cook the Bacon

    Place the bacon in a skillet over medium heat and cook until crispy.

    Transfer the cooked bacon to a paper-towel-lined plate to remove excess grease.

    Once it has cooled enough to handle, crumble or finely chop it.

    You’ll mix most of the bacon into the meatloaf, but consider reserving a small amount for the top.

    That extra sprinkle of bacon gives the finished dish even more smoky flavor and makes it look especially inviting.


    Step 3: Prepare the Onion and Garlic

    Finely dice your onion and mince the garlic.

    If you prefer a softer onion texture, sauté the onion and garlic for a few minutes in a skillet before adding them to the meatloaf mixture.

    This isn’t required, but sautéing them first mellows their flavor and ensures they’re completely tender.

    Allow cooked onions and garlic to cool slightly before mixing them with the raw ground beef.


    Step 4: Build the Meatloaf Mixture

    Place the ground beef into a large mixing bowl.

    Add:

    • Crumbled bacon
    • Breadcrumbs
    • Eggs
    • Milk
    • Onion
    • Garlic
    • BBQ sauce
    • Worcestershire sauce
    • Smoked paprika
    • Garlic powder
    • Onion powder
    • Salt
    • Black pepper

    Now gently combine everything.

    Clean hands are often the easiest tool for mixing meatloaf because you can feel when everything is evenly distributed.

    But there’s an important rule:

    Don’t overmix the meat.

    The more aggressively ground beef is worked, the denser the finished meatloaf can become.

    Mix just until the ingredients are evenly incorporated.


    Why Milk and Breadcrumbs Matter

    It might seem strange to add milk to ground beef, but there’s a reason traditional meatloaf recipes often include both milk and breadcrumbs.

    Breadcrumbs absorb the milk and some of the juices released by the meat during cooking.

    That absorbed moisture helps prevent the meatloaf from becoming dry and crumbly.

    Without enough moisture, a meatloaf can easily become dense.

    The combination of breadcrumbs, milk, and eggs helps create a loaf that’s sturdy enough to slice while remaining tender.


    Step 5: Shape the Meatloaf

    Transfer the meat mixture onto your prepared baking sheet.

    Gently form it into a loaf approximately 9 inches long and 4–5 inches wide.

    Try to keep the thickness relatively even so the meat cooks consistently.

    Avoid compressing the mixture too tightly.

    You want the meatloaf to hold together, but you don’t want to pack it into a brick.


    Making the BBQ Glaze

    The glaze is where this recipe really begins to look irresistible.

    In a small bowl, combine:

    • 1/2 cup barbecue sauce
    • 2 tablespoons brown sugar
    • 1 tablespoon Worcestershire sauce
    • 1 teaspoon Dijon mustard

    Stir everything together until smooth.

    The barbecue sauce provides the primary flavor.

    Brown sugar encourages caramelization and adds sweetness.

    Worcestershire sauce contributes savory depth.

    Dijon mustard provides acidity and a subtle sharpness that balances the sweetness.

    The finished glaze should taste sweet, tangy, smoky, and savory.


    Step 6: Add the First Layer of BBQ Glaze

    Spread approximately half of the glaze over the top and sides of the meatloaf.

    Don’t use all of it yet.

    Adding the glaze in stages helps build layers of flavor without allowing all the sauce to overcook during the full baking time.


    Step 7: Bake the Meatloaf

    Place the meatloaf in your preheated oven.

    Bake for approximately 45 minutes.

    Carefully remove it from the oven and spread the remaining BBQ glaze over the top.

    Return the meatloaf to the oven for another 15–25 minutes.

    The meatloaf is ready when the center reaches 160°F (71°C) on an instant-read thermometer.

    Always check the temperature in the thickest part of the loaf.

    Cooking time can vary depending on the exact shape and thickness of your meatloaf, the type of baking dish you’re using, and your individual oven.


    Don’t Guess When Meatloaf Is Done

    Meatloaf can look completely cooked on the outside before the center has reached a safe temperature.

    That’s why an instant-read meat thermometer is one of the most useful tools for this recipe.

    Insert the thermometer into the thickest part of the meatloaf without touching the baking sheet or pan.

    For ground beef, you’re looking for an internal temperature of 160°F.

    Once you’ve reached that temperature, remove the meatloaf from the oven.


    Step 8: Let the Meatloaf Rest

    Resist the temptation to slice into it immediately.

    Let the meatloaf rest for approximately 10 minutes.

    During cooking, juices move throughout the meat. Giving the loaf time to rest allows some of those juices to redistribute.

    If you cut it immediately, more moisture can run onto your cutting board instead of remaining in the meat.

    Resting also helps the meatloaf firm slightly, which makes cleaner slices possible.


    Step 9: Garnish and Serve

    Once the meatloaf has rested, sprinkle reserved crispy bacon over the top.

    Add chopped parsley or green onions if desired.

    Slice the loaf into thick portions and serve with extra BBQ sauce on the side.

    Now comes the best part: deciding what goes next to it.


    The Best Side Dishes for BBQ Bacon Meatloaf

    Because this meatloaf is rich and flavorful, you can pair it with traditional comfort-food sides or lighter vegetables.

    Creamy Mashed Potatoes

    It’s difficult to beat the combination of meatloaf and mashed potatoes.

    Make your potatoes extra creamy with butter, milk, cream, sour cream, or cream cheese.

    A little BBQ glaze running onto the mashed potatoes isn’t a problem—it’s a bonus.


    Macaroni and Cheese

    If this is going to be comfort-food night, you might as well commit.

    Creamy macaroni and cheese pairs beautifully with smoky bacon and barbecue sauce.

    Sharp cheddar works particularly well because its stronger flavor can stand up to the meatloaf.


    Green Beans

    Green beans bring freshness and color to the plate.

    Try them sautéed with garlic and butter, roasted in the oven, or slowly cooked Southern-style.


    Roasted Brussels Sprouts

    Roasted Brussels sprouts develop crispy edges and a slightly sweet flavor.

    That caramelization pairs naturally with BBQ sauce.


    Corn on the Cob

    Corn and barbecue flavors belong together.

    Brush hot corn with butter and season with salt, pepper, smoked paprika, or your favorite barbecue seasoning.


    Coleslaw

    A cool, crunchy coleslaw provides contrast to the warm, rich meatloaf.

    A vinegar-based slaw can be especially good because the acidity cuts through the richness of the bacon and beef.


    Baked Beans

    Want to take the barbecue theme all the way?

    Serve BBQ Bacon Meatloaf with baked beans.

    The sweet and smoky flavors complement each other beautifully.


    Dinner Rolls

    Warm dinner rolls are perfect for soaking up any BBQ glaze left on your plate.

    And if you happen to tuck a small piece of meatloaf inside one of those rolls, nobody is going to complain.


    How to Make Your Meatloaf Even Better

    Great meatloaf isn’t difficult, but a few small techniques can make a noticeable difference.

    Choose Ground Beef With Some Fat

    Extremely lean beef can result in dry meatloaf.

    A ground beef blend around 80/20 or 85/15 provides enough fat to help keep the loaf juicy and flavorful.

    If you’re using leaner beef, pay extra attention to moisture and avoid overcooking.


    Finely Dice the Onion

    Large chunks of onion can interfere with slicing and may remain slightly firm.

    Finely diced onion distributes more evenly throughout the meatloaf.


    Taste-Test the Seasoning

    Obviously, don’t taste raw meatloaf mixture.

    Instead, take a tablespoon of the mixture and cook it in a small skillet.

    Taste the cooked sample.

    Need more salt?

    More pepper?

    More BBQ flavor?

    A little heat?

    Make your adjustments before baking the entire loaf.


    Don’t Pack the Meat Too Tightly

    Think gentle.

    You want enough pressure to create a loaf that holds together, but not so much that the ground beef becomes compacted.


    Use Two Layers of Glaze

    Adding BBQ glaze at two different points during baking creates a thicker, richer coating.

    The first layer cooks into the meatloaf.

    The second layer stays closer to the surface and becomes sticky and caramelized.


    BBQ Bacon Meatloaf Variations

    Once you’ve made the basic recipe, there are plenty of ways to customize it.

    Cheddar BBQ Bacon Meatloaf

    Add 1 cup of shredded sharp cheddar cheese to the meat mixture.

    Or create a cheese-filled center.

    Flatten the meat mixture slightly, place shredded cheddar down the middle, then carefully form the meat around the cheese.

    When you slice the finished meatloaf, you’ll discover a warm, cheesy center.


    Spicy BBQ Bacon Meatloaf

    Add:

    • Diced jalapeños
    • Cayenne pepper
    • Crushed red pepper
    • Hot sauce
    • Pepper Jack cheese

    You can also use a spicy BBQ sauce.

    Start with a little heat and increase it according to your preference.


    Smoky BBQ Meatloaf

    For even stronger barbecue flavor, increase the smoked paprika slightly and use a hickory or mesquite-style BBQ sauce.

    A small amount of liquid smoke can also intensify the smoky flavor, but use it sparingly because it can quickly become overpowering.


    Bacon-Wrapped BBQ Meatloaf

    Want even more bacon?

    Instead of putting all the bacon inside the meat mixture, lay strips of uncooked bacon across the top of the shaped loaf.

    Brush the bacon with BBQ glaze and bake.

    The bacon cooks over the meatloaf, allowing some of its flavor to drip into the beef while creating an impressive presentation.

    Depending on the thickness of the bacon, you may want to briefly broil the meatloaf at the end to crisp the bacon. Watch it carefully because sugary BBQ sauce can burn quickly under a broiler.


    BBQ Turkey Meatloaf

    Ground turkey can be substituted for beef for a different version.

    Because turkey is generally leaner, maintaining moisture becomes especially important.

    Don’t reduce the milk or eggs, and be careful not to overcook the loaf.

    Ground poultry should reach 165°F (74°C) internally.


    Can You Prepare Meatloaf Ahead of Time?

    Absolutely.

    That’s one reason meatloaf is useful for busy families.

    Prepare the meat mixture and shape it into a loaf.

    Cover tightly and refrigerate for up to approximately 24 hours before baking.

    When you’re ready for dinner, add the glaze and bake.

    Because the meatloaf will be cold from the refrigerator, it may require slightly more time in the oven.

    Always rely on internal temperature rather than cooking time alone.


    How to Store Leftover BBQ Bacon Meatloaf

    Allow leftovers to cool before transferring them to an airtight container.

    Refrigerate for 3–4 days.

    You can store the loaf whole, but sliced portions are usually more convenient because they make reheating individual servings easier.

    Keep some extra barbecue sauce nearby. Adding a spoonful before reheating helps restore moisture and flavor.


    Can You Freeze BBQ Bacon Meatloaf?

    Yes.

    Meatloaf freezes very well.

    You can freeze the entire cooked loaf or individual slices.

    For individual portions, wrap each cooled slice tightly and place the wrapped pieces in a freezer-safe container or freezer bag.

    Individual portions are convenient because you can thaw only what you need.

    For best quality, use frozen meatloaf within a few months.

    Thaw frozen meatloaf safely in the refrigerator before reheating.


    How to Reheat Meatloaf Without Drying It Out

    The oven works well when reheating several portions.

    Place meatloaf slices in a baking dish.

    Spoon a little barbecue sauce over each piece and add a small splash of water or broth to the bottom of the dish if desired.

    Cover with foil.

    Heat at 325°F until warmed through.

    The foil traps steam, while the sauce provides additional moisture.

    For individual portions, the microwave is faster. Cover the meatloaf loosely and heat in shorter intervals until hot.


    Leftover BBQ Bacon Meatloaf Sandwich

    Here’s one reason you might secretly hope there are leftovers.

    Take a thick slice of refrigerated meatloaf and warm it in a skillet.

    Let each side develop a lightly browned crust.

    Toast two slices of sturdy bread or a brioche bun.

    Then build your sandwich with:

    • BBQ Bacon Meatloaf
    • Cheddar cheese
    • BBQ sauce
    • Pickles
    • Crispy onions
    • Coleslaw

    The warm meatloaf, melted cheese, tangy pickles, smoky BBQ sauce, and crunchy onions make an incredible next-day lunch.


    BBQ Bacon Meatloaf Melt

    Another option is turning leftovers into a meatloaf melt.

    Place sliced meatloaf on toasted bread.

    Add cheddar, Monterey Jack, or Pepper Jack cheese.

    Drizzle with barbecue sauce.

    Place under the broiler just long enough for the cheese to melt and bubble.

    Finish with crispy bacon or fried onions.


    Meatloaf Breakfast Hash

    Yes, meatloaf can even become breakfast.

    Dice leftover BBQ Bacon Meatloaf into small pieces.

    Cook diced potatoes in a skillet until crispy, then add onion, peppers, and chopped meatloaf.

    Cook until everything is hot and browned around the edges.

    Top with a fried egg.

    It’s hearty, smoky, and a great way to transform leftovers instead of simply reheating yesterday’s dinner.


    Mini BBQ Bacon Meatloaves

    Want something different?

    Divide the meat mixture into individual mini loaves instead of making one large loaf.

    Mini meatloaves cook faster and provide more exterior surface area for BBQ glaze.

    They’re also excellent for portion control and meal preparation.

    Because they’re smaller, begin checking the internal temperature earlier than you would for a full-sized meatloaf.


    BBQ Bacon Meatloaf Muffins

    You can take the mini idea even further by preparing meatloaf portions in a muffin pan.

    Divide the mixture among greased muffin cups.

    Brush BBQ glaze over each portion and bake until the centers reach the proper temperature.

    These are great for family dinners, meal prep, and lunches because the portions are already divided.

    Kids may also enjoy the individual presentation.


    A Great Meal for Feeding a Crowd

    Meatloaf is practical when you’re feeding several people because the recipe can easily be doubled.

    Instead of making one enormous meatloaf—which could cook unevenly—make two separate loaves.

    That allows the heat to reach the center more efficiently and gives you twice as much delicious BBQ-glazed surface area.

    You can even make one mild loaf and one spicy loaf.


    Building the Ultimate BBQ Bacon Meatloaf Dinner

    If you want to turn today’s recipe into a complete comfort-food feast, try this menu:

    Main Course: BBQ Bacon Meatloaf

    Side #1: Creamy mashed potatoes

    Side #2: Garlic butter green beans

    Side #3: Homemade macaroni and cheese

    Bread: Warm buttery dinner rolls

    Optional Extra: Coleslaw or baked beans

    It’s hearty, filling, and perfect for a family dinner or weekend gathering.

    For a lighter plate, pair a smaller slice of meatloaf with roasted vegetables and a fresh garden salad.


    Frequently Asked Questions

    Why Does My Meatloaf Fall Apart?

    Meatloaf can crumble when there aren’t enough binding ingredients.

    Eggs and breadcrumbs help hold the meat together.

    It can also fall apart if you try slicing it immediately after removing it from the oven.

    Allowing it to rest makes slicing easier.


    Why Is My Meatloaf Dry?

    Dry meatloaf is usually caused by one or more of these problems:

    • Beef that is extremely lean
    • Too few moisture-retaining ingredients
    • Overmixing
    • Overcooking

    Use a meat thermometer so you can remove the meatloaf when it reaches the correct internal temperature rather than leaving it in the oven unnecessarily.


    Can I Use Different Ground Meats?

    Yes.

    You can use ground turkey, chicken, pork, or a combination of meats.

    Keep in mind that different meats have different fat levels and safe internal cooking temperatures.

    A combination of ground beef and pork can produce an especially rich meatloaf.


    Can I Leave Out the Bacon?

    Certainly.

    You’ll lose some of the smoky flavor, but the BBQ meatloaf will still be delicious.

    Consider adding a little extra smoked paprika if you want to replace some of that smoky character.


    Can I Make This Without Onion?

    Yes.

    Leave the fresh onion out and slightly increase the onion powder if desired.

    This is also useful for anyone who prefers a smoother meatloaf texture.


    Can I Use Crackers Instead of Breadcrumbs?

    Crushed crackers can work as a substitute.

    Crush them finely before adding them to the mixture.

    Traditional saltine crackers are particularly popular in old-fashioned meatloaf recipes.


    Why Meatloaf Remains a Comfort-Food Favorite

    Meatloaf isn’t flashy.

    It doesn’t require complicated cooking equipment or hard-to-find ingredients.

    And maybe that’s exactly why generations of families continue making it.

    Meatloaf is the kind of meal that feels like home.

    It’s the aroma coming from the kitchen while dinner cooks.

    It’s mashed potatoes waiting beside it.

    It’s everyone sitting down together for a warm meal after a long day.

    And perhaps best of all, it’s incredibly adaptable.

    Every family seems to have its own version.

    Some use ketchup.

    Some use brown gravy.

    Some add cheese.

    Some use crackers instead of breadcrumbs.

    Some add peppers.

    Some wrap the entire loaf in bacon.

    Today’s version celebrates that flexibility by combining traditional meatloaf with flavors inspired by backyard barbecue.


    Sweet, Smoky, Savory, and Satisfying

    What really makes BBQ Bacon Meatloaf stand apart is the combination of flavors in every bite.

    You get the savory richness of ground beef.

    Then comes smoky, salty bacon.

    The onion and garlic provide depth.

    Worcestershire sauce brings umami.

    Smoked paprika reinforces the barbecue character.

    And finally, that sticky BBQ glaze adds sweetness and tanginess across the top.

    Serve everything with creamy potatoes or mac and cheese and you’ve got serious comfort food.


    Recipe at a Glance

    Recipe: BBQ Bacon Meatloaf

    Prep Time: Approximately 20 minutes

    Cooking Time: Approximately 60–70 minutes

    Resting Time: 10 minutes

    Total Time: Approximately 1 hour 40 minutes

    Servings: 6–8

    Difficulty: Easy

    Internal Temperature: 160°F for ground beef

    Best For: Family dinners, weekend comfort food, meal prep, and leftovers

    Great Side Dishes: Mashed potatoes, mac and cheese, green beans, roasted vegetables, corn, coleslaw, baked beans, or dinner rolls


    Final Thoughts

    Today’s Recipe of the Day: BBQ Bacon Meatloaf is proof that you don’t have to completely reinvent a classic to make it exciting.

    Start with everything people already love about traditional meatloaf: tender ground beef, breadcrumbs, eggs, onion, garlic, and savory seasonings.

    Then bring in smoky bacon.

    Add barbecue sauce.

    Finish the entire loaf with a sticky, sweet-and-tangy BBQ glaze.

    Suddenly, ordinary meatloaf becomes something you’ll be thinking about before dinner even starts.

    This recipe works just as well for a casual weeknight meal as it does for a big Sunday dinner. It’s easy to customize, simple to prepare ahead of time, freezer-friendly, and possibly even better when transformed into a leftover meatloaf sandwich the following day.

    Pile a thick slice next to creamy mashed potatoes, add your favorite vegetable, spoon a little extra barbecue sauce over the top, and you’ve got the kind of dinner that doesn’t need to be complicated to be memorable.

    Sometimes the best recipes aren’t about fancy ingredients or elaborate techniques.

    They’re about taking familiar food, adding a little extra flavor, and creating something that makes people excited to sit down at the table.

    And with smoky bacon, juicy beef, and caramelized BBQ glaze in every slice, this BBQ Bacon Meatloaf does exactly that.

    Recipe of the Day: BBQ Bacon Meatloaf — classic comfort food with a smoky barbecue twist.

  • Breakfast of the Day: Loaded Veggie Breakfast Burrito

    Advertisements

    There is something incredibly satisfying about starting the morning with a warm breakfast burrito packed with fluffy eggs, crispy potatoes, colorful vegetables, melted cheese, creamy avocado, and fresh salsa.

    Today’s Breakfast of the Day is the Loaded Veggie Breakfast Burrito, a hearty meat-free breakfast that proves vegetables deserve a place at the breakfast table.

    Wrapped inside a warm flour tortilla, this burrito combines classic breakfast comfort food with an assortment of vegetables that provide plenty of flavor, texture, and color. Every bite brings something different—from tender scrambled eggs and crispy potatoes to sautéed peppers, onions, mushrooms, and spinach.

    Best of all, breakfast burritos are incredibly customizable.

    You can make yours mild or spicy, add extra vegetables, swap cheeses, include beans, use whole-wheat tortillas, or prepare several ahead of time for busy mornings.

    Whether you’re preparing breakfast before work, feeding your family on the weekend, or looking for an easy meal-prep option, the Loaded Veggie Breakfast Burrito is worth adding to your breakfast rotation.

    Why Breakfast Burritos Are So Satisfying

    Breakfast burritos have become a morning favorite because they bring several breakfast foods together in one convenient package.

    Instead of preparing eggs, potatoes, vegetables, and toast separately, you can wrap everything inside a tortilla.

    That means you get contrasting flavors and textures in practically every bite.

    A great breakfast burrito can include:

    • Soft scrambled eggs
    • Crispy potatoes
    • Tender vegetables
    • Melted cheese
    • Creamy avocado
    • Fresh salsa
    • Spicy hot sauce
    • Fresh herbs

    The tortilla holds everything together, making the meal easier to eat whether you’re sitting down at the breakfast table or taking breakfast with you.

    Why You’ll Love This Loaded Veggie Breakfast Burrito

    This isn’t a breakfast burrito where vegetables are simply tossed in as an afterthought.

    The vegetables are an important part of the meal.

    Bell peppers provide sweetness and crunch. Onions become slightly caramelized as they cook. Mushrooms add an earthy flavor and satisfying texture. Spinach wilts into the scrambled eggs and blends beautifully with the other ingredients.

    Add crispy potatoes, eggs, cheese, avocado, and salsa, and you have a breakfast that feels substantial without needing breakfast sausage or bacon.

    Another advantage is flexibility.

    You don’t need every vegetable listed in the recipe. Breakfast burritos are perfect for using whatever vegetables happen to be waiting in your refrigerator.

    Loaded Veggie Breakfast Burrito Ingredients

    Makes approximately 4 large breakfast burritos

    For the Burritos

    • 4 large burrito-size flour tortillas
    • 6 large eggs
    • 2 tablespoons milk
    • 1 tablespoon olive oil
    • 1 cup diced potatoes
    • 1/2 red bell pepper, diced
    • 1/2 green bell pepper, diced
    • 1/2 small yellow or red onion, diced
    • 1 cup sliced mushrooms
    • 1 cup fresh spinach
    • 1 cup shredded cheddar or Mexican-blend cheese
    • 1 ripe avocado, sliced or diced
    • 1/2 cup salsa
    • Salt to taste
    • Freshly ground black pepper to taste

    For Seasoning the Potatoes

    • 1/2 teaspoon garlic powder
    • 1/2 teaspoon smoked paprika
    • 1/4 teaspoon onion powder
    • 1/4 teaspoon ground cumin
    • Salt and black pepper to taste

    Optional Toppings and Additions

    • Hot sauce
    • Sour cream
    • Plain Greek yogurt
    • Guacamole
    • Chopped cilantro
    • Chopped green onions
    • Jalapeño slices
    • Pico de gallo
    • Black beans
    • Pinto beans
    • Corn
    • Pepper Jack cheese

    Step 1: Prepare Your Ingredients

    Breakfast burritos come together much more smoothly when everything is prepared before cooking begins.

    Dice the potatoes into small, evenly sized cubes.

    Chop the bell peppers and onion.

    Slice the mushrooms.

    Wash and dry the spinach.

    Shred your cheese if you’re using a block rather than pre-shredded cheese.

    Finally, slice the avocado shortly before assembling the burritos.

    Having everything ready allows you to move directly from cooking the potatoes to sautéing the vegetables and scrambling the eggs.

    Step 2: Make Crispy Breakfast Potatoes

    Heat olive oil in a large skillet over medium heat.

    Add the diced potatoes.

    Season them with garlic powder, smoked paprika, onion powder, cumin, salt, and black pepper.

    Stir until the potatoes are evenly coated.

    Cook for approximately 10–15 minutes, stirring occasionally.

    You want the potatoes tender in the center while developing a golden, slightly crispy exterior.

    If the potatoes are browning too quickly before becoming tender, lower the heat slightly and cover the skillet for a few minutes. The trapped steam will help soften the centers.

    Once they’re tender and golden, transfer the potatoes to a plate.

    The Secret to Better Breakfast Potatoes

    The size of your potato cubes matters.

    Large chunks take much longer to cook and can leave you with potatoes that are browned outside but still firm inside.

    Aim for cubes approximately 1/2 inch in size.

    Another important tip is avoiding constant stirring.

    Allow the potatoes to remain against the hot skillet for a couple of minutes between turns. This helps them develop those delicious golden edges.

    Step 3: Sauté the Vegetables

    Return the skillet to medium heat.

    If necessary, add another small drizzle of olive oil.

    Add the onion, red bell pepper, green bell pepper, and mushrooms.

    Cook for approximately 4–6 minutes, stirring occasionally.

    The vegetables should become tender while retaining some texture.

    Add the spinach during the final minute or two of cooking.

    Fresh spinach cooks quickly, so there’s no reason to add it earlier.

    Once the spinach has wilted, you’re ready for the eggs.

    Step 4: Prepare Fluffy Scrambled Eggs

    Crack the eggs into a medium bowl.

    Add the milk along with a small pinch of salt and black pepper.

    Whisk until the yolks and whites are completely combined.

    Reduce the skillet heat to medium-low.

    Pour the eggs over the cooked vegetables.

    Allow the eggs to sit for several seconds before gently moving them around the skillet with a spatula.

    Continue folding and stirring slowly until soft curds form.

    Remove the skillet from the heat while the eggs still look slightly soft. They’ll continue cooking from the residual heat.

    Overcooked eggs can become rubbery, especially after being reheated inside a burrito.

    Step 5: Warm Your Tortillas

    Never underestimate this step.

    A cold tortilla can crack when you try to roll it around a generous amount of filling.

    Warm each tortilla for approximately 15–20 seconds in the microwave or heat it briefly in a clean skillet.

    You want it warm and flexible, not crispy.

    Step 6: Build the Loaded Veggie Breakfast Burrito

    Place one warm tortilla on a clean work surface.

    Begin with a layer of crispy seasoned potatoes.

    Add the vegetable scrambled eggs.

    Sprinkle shredded cheese over the warm eggs.

    Next, add avocado and salsa.

    Finish with any additional toppings you want, such as cilantro, green onions, jalapeños, or hot sauce.

    Keep the filling concentrated around the center and lower third of the tortilla.

    This makes rolling much easier.

    How to Fold a Breakfast Burrito

    Folding a burrito can become challenging when there’s too much filling.

    First, fold the left and right sides of the tortilla inward.

    Next, lift the bottom edge over the filling.

    Gently tuck everything together.

    Continue rolling the tortilla forward while keeping it reasonably tight.

    Place the finished burrito seam-side down.

    If the burrito keeps opening, placing the seam against the skillet during the next step will help seal it.

    Step 7: Toast Your Burrito

    You could eat your burrito immediately, but this final step makes it even better.

    Heat a clean skillet over medium heat.

    Place the burrito seam-side down.

    Cook for approximately 1–2 minutes until golden.

    Flip carefully and toast the opposite side.

    The tortilla develops a slightly crispy exterior while the cheese inside becomes warm and melty.

    Slice the burrito diagonally and serve immediately.

    Build the Ultimate Veggie Combination

    You don’t have to stop with peppers, onions, mushrooms, and spinach.

    Breakfast burritos are one of the easiest recipes for experimenting with vegetables.

    Try adding:

    • Zucchini
    • Broccoli
    • Kale
    • Tomatoes
    • Cherry tomatoes
    • Corn
    • Jalapeños
    • Serrano peppers
    • Poblano peppers
    • Sweet potatoes
    • Green onions
    • Roasted cauliflower
    • Asparagus
    • Artichoke hearts
    • Roasted red peppers

    Just remember that vegetables containing a lot of water should be cooked thoroughly enough that excess moisture evaporates.

    Too much liquid can create a soggy breakfast burrito.

    Add Black Beans

    Black beans pair especially well with eggs, peppers, avocado, cheese, and salsa.

    Drain and rinse canned black beans before warming them in a skillet.

    Season them with a little cumin, chili powder, garlic powder, salt, and pepper.

    Add a spoonful to each burrito.

    This is an easy way to make the meal even more substantial while keeping it vegetarian.

    Try Refried Beans

    Another option is spreading a thin layer of warm refried beans directly onto the tortilla.

    Then add potatoes, eggs, vegetables, and cheese.

    The refried beans add a creamy texture and help hold some of the smaller ingredients together.

    Make It Spicy

    Some people want breakfast to wake them up in more ways than one.

    For a spicy Loaded Veggie Breakfast Burrito, add:

    • Fresh jalapeños
    • Pickled jalapeños
    • Serrano peppers
    • Pepper Jack cheese
    • Spicy salsa
    • Chipotle sauce
    • Cayenne pepper
    • Crushed red pepper
    • Your favorite hot sauce

    You can also sauté jalapeños directly with the bell peppers and onions.

    For a smoky heat rather than sharp heat, chipotle peppers or chipotle sauce are excellent additions.

    Make It Extra Cheesy

    Cheese lovers can easily turn this into an extra-cheesy breakfast burrito.

    Instead of using only cheddar, combine several cheeses.

    A mixture of cheddar and Monterey Jack provides both flavor and excellent melting.

    Pepper Jack adds heat.

    Other options include:

    • Colby Jack
    • Monterey Jack
    • Queso fresco
    • Mexican cheese blend
    • Mozzarella
    • Oaxaca cheese

    Add some cheese underneath the hot filling and another small handful over the top.

    Add Fresh Avocado

    Avocado provides a cool, creamy contrast to the warm eggs and crispy potatoes.

    Choose an avocado that’s ripe but still firm enough to slice.

    You can add sliced avocado directly to the burrito or mash it with lime juice and salt to create a quick guacamole.

    If you’re meal-prepping burritos, however, consider leaving the avocado out and adding it after reheating.

    Fresh avocado usually tastes and looks better than reheated avocado.

    Salsa Makes a Difference

    The salsa you choose can completely change the personality of your breakfast burrito.

    Try:

    Pico de gallo for something fresh and chunky.

    Roasted tomato salsa for deeper flavor.

    Salsa verde for a bright, tangy finish.

    Chipotle salsa for smoky heat.

    Mango salsa for something sweet and spicy.

    Restaurant-style salsa for a familiar classic.

    If your salsa contains a lot of liquid, drain some of it before adding it inside the tortilla.

    You can always serve additional salsa on the side.

    Make a Southwest Veggie Breakfast Burrito

    Give the original recipe a Southwestern twist by adding black beans, corn, jalapeños, avocado, cilantro, and Pepper Jack cheese.

    Season the potatoes with chili powder, cumin, smoked paprika, and garlic powder.

    Finish with salsa verde or chipotle sauce.

    Make a Mediterranean Breakfast Burrito

    Breakfast burritos don’t always have to follow Southwestern flavors.

    Try filling your tortilla with eggs, spinach, mushrooms, tomatoes, roasted red peppers, and feta cheese.

    Finish with avocado or a spoonful of plain Greek yogurt.

    It’s a completely different take on the same basic breakfast concept.

    Sweet Potato Veggie Breakfast Burrito

    Swap regular potatoes for sweet potatoes.

    Dice them into small cubes and season with smoked paprika, garlic powder, cumin, salt, and pepper.

    Roast or sauté until tender.

    Sweet potatoes pair especially well with black beans, avocado, spinach, eggs, and salsa.

    Don’t Like Eggs?

    You can still enjoy a veggie breakfast burrito.

    Try replacing the scrambled eggs with seasoned tofu scramble.

    Crumble firm tofu into a skillet and cook it with your vegetables and preferred seasonings.

    You can also make the burrito primarily from potatoes, beans, vegetables, avocado, and cheese.

    Make It Vegan

    A few substitutions can turn this recipe into a completely plant-based breakfast.

    Replace the eggs with tofu scramble, use dairy-free cheese, and make sure your tortilla doesn’t contain animal-derived ingredients.

    Then load it with potatoes, beans, peppers, onions, spinach, mushrooms, avocado, salsa, and hot sauce.

    Make It Lighter

    You can also adjust the recipe if you want a lighter breakfast.

    Use a smaller tortilla and increase the vegetable-to-potato ratio.

    You could also use less cheese or substitute a smaller amount of a strongly flavored cheese.

    Another option is serving the filling as a breakfast bowl instead of wrapping it in a tortilla.

    Turn It Into a Breakfast Bowl

    No tortilla?

    No problem.

    Place the seasoned potatoes in a bowl.

    Top with scrambled eggs and vegetables.

    Add cheese, avocado, salsa, cilantro, and hot sauce.

    You get many of the same flavors without needing to wrap anything.

    Breakfast bowls are also helpful when serving a group because everyone can customize their own toppings.

    Breakfast Burrito Bar

    Hosting brunch?

    Create a build-your-own breakfast burrito station.

    Set out bowls containing:

    • Scrambled eggs
    • Crispy potatoes
    • Bell peppers
    • Onions
    • Mushrooms
    • Spinach
    • Black beans
    • Cheese
    • Avocado
    • Salsa
    • Pico de gallo
    • Sour cream
    • Cilantro
    • Jalapeños
    • Hot sauce

    Keep tortillas warm under a clean kitchen towel.

    Then allow everyone to build their perfect breakfast burrito.

    It’s easy, interactive, and especially useful when guests have different preferences.

    What to Serve With a Loaded Veggie Breakfast Burrito

    The burrito can certainly stand on its own, but several side dishes work beautifully with it.

    Try serving it with:

    • Fresh strawberries
    • Blueberries
    • Melon
    • Orange slices
    • Mixed fruit salad
    • Yogurt
    • Additional breakfast potatoes
    • Sliced avocado
    • Guacamole
    • Salsa
    • Pico de gallo

    For brunch, add coffee, tea, orange juice, or a fresh fruit smoothie.

    Perfect for Busy Mornings

    Breakfast burritos are particularly useful because they can be eaten with minimal utensils.

    Instead of trying to prepare several breakfast items during a busy morning, you can have eggs, vegetables, potatoes, and cheese wrapped together.

    Prepare some of the ingredients the night before and breakfast becomes even faster.

    Chop the vegetables.

    Dice the potatoes.

    Shred the cheese.

    Prepare your salsa.

    In the morning, all you need to do is cook and assemble.

    Make-Ahead Loaded Veggie Breakfast Burritos

    Want breakfast ready for several mornings?

    Prepare a batch of burritos ahead of time.

    Cook the potatoes, vegetables, and eggs.

    Allow all cooked ingredients to cool before assembling the burritos.

    This is important because wrapping steaming-hot ingredients immediately can create condensation inside the tortilla.

    Assemble each burrito without avocado, sour cream, or excessively watery salsa.

    Wrap them individually and store them in the refrigerator.

    When breakfast time arrives, reheat until the center is thoroughly hot and add your fresh toppings afterward.

    Freezer Breakfast Burritos

    These burritos can also be frozen for longer storage.

    Prepare and cool your ingredients.

    Assemble the burritos using potatoes, eggs, vegetables, beans if desired, and cheese.

    Avoid freezing them with avocado, fresh tomatoes, sour cream, or watery salsa because these ingredients may affect texture when thawed.

    Wrap each burrito tightly.

    Place the wrapped burritos inside a freezer-safe bag or container.

    When you’re ready for breakfast, thaw a burrito overnight in the refrigerator or reheat it from frozen, making sure it’s heated thoroughly before eating.

    How to Prevent a Soggy Breakfast Burrito

    Nobody wants a soggy tortilla.

    The biggest culprit is excess moisture.

    Cook mushrooms long enough for much of their moisture to evaporate.

    Drain salsa before adding it.

    Don’t add large quantities of fresh tomatoes unless you’ve removed some of their liquid.

    Allow hot ingredients to cool slightly before wrapping burritos for meal prep.

    Finally, consider serving salsa and sour cream on the side instead of inside.

    How to Reheat Your Breakfast Burrito

    For the best texture, reheat refrigerated burritos in a skillet, toaster oven, or conventional oven until heated through.

    A microwave is faster, although the tortilla will remain softer.

    One approach is reheating the burrito in the microwave first and then placing it in a skillet briefly to crisp the exterior.

    That gives you speed without sacrificing the toasted tortilla.

    Why Vegetables Belong at Breakfast

    Vegetables are often associated with lunch and dinner, but there’s no reason they can’t appear first thing in the morning.

    Breakfast is another opportunity to incorporate vegetables into your meals.

    Eggs are especially versatile because they pair naturally with spinach, peppers, onions, mushrooms, tomatoes, zucchini, potatoes, and many other vegetables.

    A breakfast burrito makes combining several of those ingredients incredibly easy.

    A Colorful Start to the Morning

    There’s something appealing about opening a breakfast burrito and seeing bright peppers, green spinach, golden potatoes, eggs, avocado, cheese, and salsa.

    Food doesn’t have to be complicated to be exciting.

    Sometimes it’s simply about combining familiar ingredients in a way that makes breakfast more enjoyable.

    The Loaded Veggie Breakfast Burrito does exactly that.

    Tips for the Best Loaded Veggie Breakfast Burrito

    Cut your vegetables evenly. Similar-sized pieces cook more consistently.

    Don’t overcrowd the skillet. Too many vegetables at once can cause them to steam rather than sauté.

    Season throughout the cooking process. Don’t wait until the burrito is assembled to add all your seasoning.

    Keep scrambled eggs soft. They’ll continue cooking slightly after leaving the skillet.

    Warm the tortillas before rolling. Flexible tortillas are less likely to tear.

    Don’t overfill the burrito. More filling doesn’t necessarily mean a better burrito.

    Control moisture. Drain watery ingredients whenever possible.

    Add avocado after reheating. This is especially important for meal-prepped burritos.

    Toast the finished burrito. That crispy exterior makes a big difference.

    Serve extra salsa on the side. You get plenty of flavor without making the tortilla soggy.

    Breakfast Doesn’t Have to Be Boring

    It’s easy to fall into a breakfast routine.

    Toast.

    Cereal.

    Coffee.

    Maybe some eggs.

    There’s nothing wrong with simple breakfasts, but occasionally it’s fun to make something more substantial.

    The Loaded Veggie Breakfast Burrito transforms basic ingredients into something that feels like a complete breakfast experience.

    You get warm eggs, seasoned potatoes, sautéed vegetables, melted cheese, avocado, and salsa all wrapped together.

    And because the recipe is so flexible, tomorrow’s version doesn’t have to taste exactly like today’s.

    Use different vegetables.

    Change the cheese.

    Add beans.

    Make it spicy.

    Swap potatoes for sweet potatoes.

    Turn it into a bowl.

    That’s the beauty of this breakfast.

    Final Thoughts

    The Loaded Veggie Breakfast Burrito is everything a satisfying breakfast should be: warm, hearty, colorful, customizable, and packed with flavor.

    Fluffy scrambled eggs create the foundation.

    Crispy seasoned potatoes provide heartiness.

    Bell peppers, onions, mushrooms, and spinach bring color and texture.

    Melted cheese adds richness.

    Avocado provides creaminess.

    And salsa ties everything together with freshness and flavor.

    Whether you enjoy it immediately from the skillet, prepare several for the week ahead, or set up a breakfast burrito bar for weekend brunch, this recipe can easily become a morning favorite.

    Breakfast doesn’t have to be complicated to feel special.

    Sometimes all you need is a warm tortilla, a skillet full of delicious ingredients, and a few minutes to put everything together.

    So heat the skillet, scramble the eggs, sauté those vegetables, crisp up the potatoes, and roll everything into one seriously satisfying breakfast.

    Breakfast of the Day: Loaded Veggie Breakfast Burrito — colorful vegetables, fluffy eggs, crispy potatoes, melted cheese, creamy avocado, and fresh salsa wrapped into one delicious way to start the day.

    Read More Recipes

  • Dessert of the Day: M&M Chocolate Chip Cookies

    Advertisements

    There are few desserts that bring people together quite like a fresh batch of homemade cookies. Soft in the center, lightly crisp around the edges, and packed with melted chocolate, M&M Chocolate Chip Cookies are a colorful twist on a timeless classic. By combining rich chocolate chips with crunchy candy-coated M&M’s, these cookies offer the perfect balance of texture, sweetness, and fun.

    Whether you’re baking for a birthday party, a family movie night, a holiday celebration, a school bake sale, or simply because you’re craving something sweet, these cookies never disappoint. Their vibrant colors make them visually appealing, while their buttery, chewy texture keeps everyone reaching for another.

    If you’re looking for a dessert that’s easy to make, loved by all ages, and guaranteed to disappear quickly, you’ve found it.

    Why M&M Chocolate Chip Cookies Are So Popular

    Chocolate chip cookies have long been considered America’s favorite homemade cookie. Adding M&M candies takes that beloved recipe to another level. The candy shells provide a gentle crunch that contrasts beautifully with the soft cookie, while the colorful appearance makes every batch feel festive.

    These cookies are incredibly versatile. You can make them year-round using traditional M&M’s or switch to seasonal colors for holidays like Christmas, Easter, Halloween, Valentine’s Day, Independence Day, or fall celebrations.

    They’re also one of the easiest desserts to customize, making them perfect for beginner bakers and experienced home chefs alike.

    What Makes These Cookies So Good?

    The secret is balancing ingredients correctly.

    Using brown sugar adds moisture and chewiness, while granulated sugar creates lightly crisp edges. Butter provides a rich flavor, vanilla enhances the sweetness, and plenty of chocolate chips ensure every bite is loaded with melted chocolate.

    The M&M candies not only add color but also a satisfying crunch that complements the soft cookie texture.

    When baked just until the edges begin to brown, the centers remain perfectly soft. As the cookies cool, they continue baking slightly on the hot pan, creating the ideal chewy consistency.

    Ingredients

    • 2¼ cups all-purpose flour
    • 1 teaspoon baking soda
    • ½ teaspoon salt
    • 1 cup unsalted butter, softened
    • ¾ cup packed brown sugar
    • ½ cup granulated sugar
    • 2 large eggs
    • 2 teaspoons vanilla extract
    • 1½ cups semi-sweet chocolate chips
    • 1 cup M&M candies
    • Extra M&M candies for topping

    Optional Add-Ins

    • ½ cup chopped walnuts
    • ½ cup chopped pecans
    • White chocolate chips
    • Peanut butter chips
    • Mini marshmallows
    • Toffee bits
    • Flaky sea salt for topping

    Step-by-Step Instructions

    Step 1: Prepare the Oven

    Preheat your oven to 350°F (175°C).

    Line two baking sheets with parchment paper or silicone baking mats to prevent sticking and encourage even baking.

    Step 2: Mix the Dry Ingredients

    In a medium bowl, whisk together:

    • Flour
    • Baking soda
    • Salt

    Set aside.

    Step 3: Cream Butter and Sugars

    Using a stand mixer or hand mixer, beat the softened butter with the brown sugar and granulated sugar for 2–3 minutes until light and fluffy.

    Creaming introduces air into the dough, helping create soft cookies.

    Step 4: Add Eggs and Vanilla

    Beat in the eggs one at a time.

    Add vanilla extract and continue mixing until smooth.

    Step 5: Combine Everything

    Slowly add the dry ingredients into the butter mixture.

    Mix only until the flour disappears.

    Avoid overmixing, which can make cookies tough.

    Step 6: Fold in the Chocolate

    Using a spatula, gently stir in:

    • Chocolate chips
    • M&M candies

    Reserve a handful of M&M’s for pressing into the tops before baking.

    Step 7: Chill the Dough

    Although optional, chilling the dough for 30 minutes helps:

    • Prevent spreading
    • Intensify flavor
    • Produce thicker cookies
    • Improve texture

    Professional bakeries often chill cookie dough overnight for even better results.

    Step 8: Scoop the Dough

    Use a medium cookie scoop or about 2 tablespoons of dough.

    Place cookies approximately 2 inches apart.

    Press several additional M&M candies onto each cookie before baking for that bakery-style appearance.

    Step 9: Bake

    Bake for 10–12 minutes.

    The cookies are done when:

    • The edges are lightly golden.
    • The centers still appear slightly underbaked.

    This ensures they’ll stay soft after cooling.

    Step 10: Cool

    Leave cookies on the baking sheet for 5 minutes.

    Transfer to a cooling rack to finish cooling completely.

    Baking Tips for Bakery-Style Cookies

    Use Room Temperature Ingredients

    Soft butter and room-temperature eggs combine more evenly, creating a smoother dough.

    Don’t Overbake

    Many people bake cookies too long.

    Removing them while the centers still look slightly soft gives them their signature chewy texture.

    Add Extra Chocolate

    Sprinkle additional chocolate chips and M&M’s onto the cookies immediately after baking while they’re still warm.

    This gives them the beautiful homemade bakery look.

    Measure Flour Correctly

    Too much flour creates dry cookies.

    Instead of scooping directly with the measuring cup, spoon flour into the cup and level it off.

    Fun Variations

    One reason these cookies remain so popular is how easy they are to customize.

    Peanut Butter Lovers

    Replace half the chocolate chips with peanut butter chips.

    Double Chocolate

    Add cocoa powder to the dough for rich chocolate cookies loaded with M&M’s.

    Holiday Cookies

    Use seasonal M&M colors:

    • Red and green for Christmas
    • Orange and black for Halloween
    • Red and pink for Valentine’s Day
    • Pastel colors for Easter
    • Red, white, and blue for Independence Day

    Cookie Sandwiches

    Spread vanilla buttercream or chocolate frosting between two cookies for an extra-special dessert.

    Ice Cream Cookie Sandwiches

    Place vanilla ice cream between two cookies and freeze for an unforgettable summer treat.

    Serving Ideas

    M&M Chocolate Chip Cookies are delicious on their own but pair wonderfully with:

    • Cold milk
    • Coffee
    • Espresso
    • Hot chocolate
    • Vanilla ice cream
    • Chocolate milk
    • Salted caramel ice cream

    They’re perfect for:

    • Birthday parties
    • School lunches
    • Holiday cookie trays
    • Family gatherings
    • Potlucks
    • Bake sales
    • Office celebrations
    • Weekend baking with children

    How to Store the Cookies

    Store cooled cookies in an airtight container at room temperature for up to five days.

    To keep them extra soft, place a slice of bread inside the container. The cookies absorb moisture from the bread while the bread becomes stale.

    For longer storage, freeze baked cookies for up to three months.

    Cookie dough can also be frozen in individual scoops, making it easy to bake only as many fresh cookies as you need.

    Frequently Asked Questions

    Can I use mini M&M’s?

    Yes! Mini M&M’s distribute more evenly throughout the dough, giving every bite a little extra crunch and chocolate.

    Why did my cookies spread too much?

    This usually happens if the butter was too warm or the dough wasn’t chilled. Refrigerating the dough before baking helps the cookies hold their shape.

    Can I make these gluten-free?

    Absolutely. Substitute a quality 1-to-1 gluten-free baking flour designed for cookies.

    Can I make the dough ahead of time?

    Yes. The dough can be refrigerated for up to 72 hours before baking, and many bakers find the flavor improves after resting.

    A Cookie That Brings Smiles

    Few desserts inspire as much nostalgia as homemade cookies fresh from the oven. M&M Chocolate Chip Cookies capture everything people love about classic chocolate chip cookies while adding a playful burst of color and crunch. They’re easy enough for first-time bakers, fun to make with kids, and impressive enough to serve at parties or holiday gatherings.

    Whether you’re baking to celebrate a special occasion or simply treating yourself after a long day, these cookies are a reminder that some of life’s sweetest moments come from sharing homemade treats with the people you love.

    Final Thoughts

    Sometimes the best desserts are the simplest ones. With buttery dough, gooey chocolate chips, and colorful M&M candies, these cookies deliver comfort, joy, and plenty of smiles in every bite. They fill your kitchen with an irresistible aroma, create lasting memories around the table, and disappear almost as fast as they come out of the oven.

    Today’s Dessert of the Day: M&M Chocolate Chip Cookies is more than just a recipe—it’s an invitation to slow down, bake something delicious, and share a little happiness one cookie at a time.

    Read More Recipes

  • Healthy Recipe of the Day: Creamy Chicken Noodle Soup with Rotisserie Chicken

    Advertisements

    When life gets busy, there’s nothing quite like a bowl of homemade soup to slow things down. Warm, comforting, and packed with wholesome ingredients, chicken noodle soup has been a family favorite for generations. This healthier version of Creamy Chicken Noodle Soup with Rotisserie Chicken offers everything you love about the classic recipe while making preparation easier and the nutrition even better.

    Using a store-bought rotisserie chicken is one of the best kitchen shortcuts available. It saves time, reduces food waste, and provides tender, flavorful chicken that’s ready to use the moment you get home. Combined with fresh vegetables, whole wheat noodles, a savory broth, and a light creamy finish made from Greek yogurt and milk, this soup delivers satisfying comfort without relying on heavy cream or excessive butter.

    Whether you’re preparing dinner after a long workday, looking for a cozy weekend lunch, meal prepping for the week ahead, or making a nourishing meal for someone recovering from illness, this recipe fits every occasion. It’s hearty enough to satisfy hungry appetites while remaining balanced enough to fit into a healthy lifestyle.


    Why This Soup Is a Healthier Choice

    Traditional creamy chicken noodle soups often contain large amounts of heavy cream, butter, and sodium. While delicious, those ingredients can quickly increase calories and saturated fat.

    This healthier version makes several smart substitutions without sacrificing flavor.

    Lean Rotisserie Chicken

    Removing the skin from rotisserie chicken keeps the protein high while significantly reducing fat. Rotisserie chicken also adds incredible flavor because it’s already seasoned and roasted.

    Greek Yogurt Instead of Heavy Cream

    Plain Greek yogurt provides:

    • More protein
    • Less saturated fat
    • Natural creaminess
    • Probiotics that support gut health

    When mixed properly, it creates a silky texture that rivals traditional cream-based soups.

    Whole Wheat Noodles

    Whole wheat noodles contain more fiber than regular pasta, helping you stay fuller longer while supporting healthy digestion.

    Plenty of Vegetables

    Carrots, celery, onions, and garlic create the traditional flavor base while adding vitamins, minerals, antioxidants, and natural sweetness.


    Ingredients

    Soup Base

    • 1 tablespoon olive oil
    • 1 medium yellow onion, diced
    • 2 large carrots, sliced
    • 2 celery stalks, sliced
    • 3 cloves garlic, minced

    Broth

    • 6 cups low-sodium chicken broth
    • 1 teaspoon dried thyme
    • 1 teaspoon dried parsley
    • ½ teaspoon black pepper
    • ½ teaspoon salt (or to taste)

    Main Ingredients

    • 2–3 cups shredded rotisserie chicken (skin removed)
    • 2 cups whole wheat egg noodles

    Creamy Finish

    • 1 cup low-fat milk
    • ½ cup plain nonfat Greek yogurt
    • 1 tablespoon cornstarch
    • 2 tablespoons cold water

    Optional Garnishes

    • Fresh parsley
    • Fresh cracked black pepper
    • Lemon wedges
    • Parmesan cheese (light sprinkle)

    Step-by-Step Instructions

    Step 1: Build the Flavor

    Heat the olive oil in a large Dutch oven or soup pot over medium heat.

    Add the diced onion, carrots, and celery.

    Cook for approximately 7–8 minutes until the vegetables soften and the onions become translucent.

    Add the garlic and stir for another minute.

    The aroma at this stage is the foundation of the soup’s incredible flavor.


    Step 2: Add the Broth

    Pour in the chicken broth.

    Add:

    • Thyme
    • Parsley
    • Salt
    • Pepper

    Bring everything to a gentle boil before reducing slightly to a simmer.

    Allow the vegetables to cook another 8–10 minutes until they become fork tender.


    Step 3: Cook the Noodles

    Add the whole wheat noodles.

    Cook according to package directions until just tender.

    Avoid overcooking because the noodles will continue absorbing broth as the soup sits.


    Step 4: Add the Chicken

    Stir in the shredded rotisserie chicken.

    Since the chicken is already cooked, it only needs about 5 minutes to heat through.

    This keeps it juicy instead of drying out.


    Step 5: Thicken the Soup

    Mix together:

    • Cornstarch
    • Cold water

    Whisk until smooth.

    Slowly stir the slurry into the simmering soup.

    Within several minutes the broth will become slightly thicker.


    Step 6: Make It Creamy

    In a separate bowl combine:

    • Milk
    • Greek yogurt

    Whisk until completely smooth.

    To prevent curdling, slowly stir several spoonfuls of hot broth into the yogurt mixture before adding it back into the soup.

    Reduce the heat to low.

    Never allow the soup to boil after adding the yogurt.

    Simply heat until warm and creamy.


    Step 7: Serve

    Ladle into bowls.

    Top with:

    • Fresh parsley
    • Fresh cracked pepper
    • Optional Parmesan cheese

    Serve immediately.


    Why Rotisserie Chicken Works So Well

    Rotisserie chicken is one of the healthiest conveniences available at the grocery store.

    It provides:

    • Tender meat
    • Rich roasted flavor
    • High-quality protein
    • Less preparation time
    • Less cleanup

    Most rotisserie chickens yield approximately four cups of shredded meat, making them perfect for several meals.

    Use leftover chicken for:

    • Salads
    • Wraps
    • Sandwiches
    • Casseroles
    • Tacos
    • Enchiladas
    • Grain bowls

    Nothing goes to waste.


    Nutrition Benefits

    Chicken

    Chicken is an excellent source of lean protein, which helps:

    • Build muscle
    • Repair tissue
    • Keep you feeling full
    • Support metabolism

    Carrots

    Carrots are packed with:

    • Vitamin A
    • Beta-carotene
    • Potassium
    • Antioxidants

    They support healthy vision, skin, and immune function.


    Celery

    Celery contributes:

    • Fiber
    • Vitamin K
    • Hydration
    • Natural minerals

    It also gives classic chicken soup its unmistakable flavor.


    Garlic

    Garlic has long been recognized for its potential health benefits.

    It contains compounds that may support:

    • Heart health
    • Immune function
    • Healthy blood pressure
    • Antioxidant protection

    Greek Yogurt

    Instead of heavy cream, Greek yogurt offers:

    • High protein
    • Calcium
    • Probiotics
    • Lower fat

    The result is a creamy soup that’s much lighter.


    Ways to Customize This Soup

    One of the best things about homemade soup is how easily it can be adapted to your family’s tastes.

    Add More Vegetables

    Consider adding:

    • Spinach
    • Kale
    • Green beans
    • Corn
    • Mushrooms
    • Broccoli
    • Zucchini
    • Sweet potatoes
    • Peas

    Every vegetable adds more nutrition and color.

    Add Beans

    White beans or chickpeas increase:

    • Protein
    • Fiber
    • Creaminess

    Make It Gluten-Free

    Replace the noodles with:

    • Gluten-free pasta
    • Brown rice
    • Wild rice
    • Quinoa

    Lower the Carbohydrates

    Skip the noodles entirely and substitute:

    • Cauliflower
    • Zucchini noodles
    • Cabbage
    • Extra vegetables

    Add Herbs

    Fresh herbs make the soup taste even brighter.

    Try:

    • Dill
    • Parsley
    • Rosemary
    • Chives
    • Basil

    Serving Suggestions

    Pair this soup with:

    • Whole-grain dinner rolls
    • Fresh sourdough bread
    • Whole wheat biscuits
    • Garden salad
    • Caesar salad
    • Roasted vegetables
    • Fresh fruit

    For a lighter meal, simply enjoy a generous bowl on its own.


    Meal Prep Tips

    This recipe is ideal for meal prep.

    To keep the noodles from becoming soft:

    • Store the noodles separately.
    • Add them when reheating.

    The soup itself actually develops even more flavor overnight.


    Storage

    Refrigerator

    Store in airtight containers for up to 4 days.

    Freezer

    Freeze the soup without noodles for up to 3 months.

    Prepare fresh noodles when reheating.


    Approximate Nutrition

    Per serving:

    • Calories: 320
    • Protein: 30g
    • Carbohydrates: 24g
    • Fat: 10g
    • Fiber: 4g
    • Calcium: 18% Daily Value
    • Vitamin A: 95% Daily Value

    Nutritional values vary depending on ingredients used.


    Frequently Asked Questions

    Can I use leftover chicken instead of rotisserie chicken?

    Absolutely. Any cooked chicken breast, thighs, or leftover roasted chicken works perfectly.

    Can I make this dairy-free?

    Yes. Substitute the milk with unsweetened almond milk or oat milk and use a dairy-free plain yogurt alternative.

    Can I freeze creamy soup?

    Yes, but freezing before adding the noodles gives the best results. Add freshly cooked noodles when serving.

    Can I use egg noodles instead of whole wheat?

    Yes. Traditional egg noodles work beautifully if you aren’t concerned about additional fiber.

    Is this soup good for meal prep?

    Definitely. It’s one of those recipes that tastes even better the next day after the flavors have blended together.


    Final Thoughts

    Comfort food and healthy eating don’t have to be opposites. This Healthy Creamy Chicken Noodle Soup with Rotisserie Chicken proves that you can enjoy a rich, satisfying meal while making smart nutritional choices. Every bowl is filled with tender chicken, colorful vegetables, hearty whole wheat noodles, and a creamy broth that’s both wholesome and delicious.

    Whether you’re cooking for your family, preparing meals for the week, or simply craving something warm and comforting, this recipe is one you’ll return to again and again. It’s easy to make, budget-friendly, packed with protein and vegetables, and full of the homemade flavor that turns an ordinary dinner into something truly comforting.

    Healthy eating is often about making small, sustainable choices—and swapping heavy ingredients for lighter, nutrient-rich alternatives is one simple change that can make a big difference. With this creamy chicken noodle soup, you can enjoy every comforting spoonful knowing you’re nourishing both your body and your soul.

    Read More Recipes

  • Recipe of the Day: Creamy Sausage Tortellini Soup

    Advertisements

    There are few meals more comforting than a steaming bowl of homemade soup, especially when it’s filled with savory sausage, tender cheese tortellini, fresh vegetables, and a rich, creamy broth. Creamy Sausage Tortellini Soup is the kind of recipe that brings everyone to the table. It’s hearty enough to be a complete meal, easy enough for a busy weeknight, and delicious enough to serve to guests.

    This comforting Italian-inspired soup combines the bold flavors of seasoned sausage with pillowy cheese-filled tortellini and a silky broth that is both rich and satisfying. Fresh spinach adds color and nutrition, while aromatic herbs tie all the ingredients together into a meal that tastes like it simmered for hours.

    Whether you’re looking for the perfect fall or winter dinner, a rainy-day comfort food, or simply a recipe that everyone in the family will enjoy, this soup checks every box.


    Why You’ll Love This Recipe

    Creamy Sausage Tortellini Soup has become a favorite because it offers everything people love about comfort food while remaining surprisingly simple to prepare.

    You’ll love this recipe because it is:

    • Ready in about 35 minutes
    • Rich, creamy, and incredibly satisfying
    • Loaded with hearty ingredients
    • Perfect for meal prep
    • Easy to customize with your favorite vegetables
    • Great for family dinners
    • Ideal for leftovers
    • A one-pot meal with minimal cleanup

    Every spoonful is packed with comforting flavors that make this soup taste like something from your favorite Italian restaurant.


    Ingredients

    For the Soup

    • 1 pound Italian sausage (mild or spicy)
    • 1 tablespoon olive oil (optional)
    • 1 small yellow onion, diced
    • 3 cloves garlic, minced
    • 2 medium carrots, sliced
    • 2 celery stalks, diced
    • 1 teaspoon Italian seasoning
    • ½ teaspoon dried basil
    • ½ teaspoon dried oregano
    • ¼ teaspoon crushed red pepper flakes (optional)
    • 4 cups chicken broth
    • 1 (14.5-ounce) can diced tomatoes with juices
    • 1 cup heavy cream
    • 1 (9-ounce) package refrigerated cheese tortellini
    • 2 cups baby spinach
    • Salt and black pepper to taste

    Optional Garnishes

    • Fresh grated Parmesan cheese
    • Fresh parsley
    • Fresh basil
    • Cracked black pepper
    • Garlic croutons

    Step-by-Step Instructions

    Step 1: Brown the Sausage

    Heat a large Dutch oven or soup pot over medium heat.

    Add the Italian sausage and cook for about 6–8 minutes, breaking it into bite-sized crumbles as it cooks.

    Once browned and fully cooked, remove excess grease if necessary while leaving a little behind for flavor.


    Step 2: Sauté the Vegetables

    Add the diced onion, carrots, and celery directly into the pot.

    Cook for approximately 5–6 minutes until they begin to soften.

    Stir in the minced garlic along with:

    • Italian seasoning
    • Basil
    • Oregano
    • Crushed red pepper flakes

    Cook for another minute until fragrant.

    Your kitchen should begin smelling incredible at this point.


    Step 3: Build the Soup Base

    Pour in:

    • Chicken broth
    • Diced tomatoes with their juices

    Stir everything together.

    Bring the soup to a gentle boil before reducing the heat to medium-low.

    Allow it to simmer for about 10 minutes so the vegetables become tender and the flavors develop.


    Step 4: Cook the Tortellini

    Add the refrigerated cheese tortellini directly into the simmering broth.

    Cook according to the package directions, usually between 5–7 minutes.

    The tortellini should become tender while remaining slightly firm.

    Avoid overcooking, as they can become too soft.


    Step 5: Make It Creamy

    Lower the heat to low.

    Slowly pour in the heavy cream while stirring continuously.

    Adding the cream slowly helps create a smooth, silky broth without separating.

    Next, stir in the fresh spinach.

    Cook another 2–3 minutes until the spinach wilts.

    Taste the soup and season with salt and freshly ground black pepper.


    Step 6: Serve

    Ladle the soup into bowls.

    Top each serving with:

    • Fresh Parmesan cheese
    • Chopped parsley
    • Fresh basil
    • Cracked black pepper

    Serve immediately with:

    • Garlic bread
    • Crusty artisan bread
    • Dinner rolls
    • Caesar salad
    • Italian salad

    Tips for the Best Creamy Sausage Tortellini Soup

    Use Quality Sausage

    Italian sausage provides most of the flavor.

    Choose a high-quality mild or spicy sausage depending on your preference.

    Don’t Overcook the Tortellini

    Since tortellini continue cooking slightly in the hot broth, remove the soup from the heat once they’re tender.

    Fresh Spinach Works Best

    Fresh baby spinach wilts quickly while maintaining excellent texture.

    Frozen spinach can also be used if thawed and drained well.

    Add Cream Last

    Never boil the soup after adding the heavy cream.

    Keeping the heat low ensures a smooth, rich broth.


    Delicious Variations

    Spicy Version

    Use hot Italian sausage and increase the crushed red pepper flakes.

    Chicken Tortellini Soup

    Replace the sausage with shredded rotisserie chicken.

    Mushroom Lovers

    Add sliced mushrooms while sautéing the onions.

    Extra Vegetable Soup

    Include:

    • Zucchini
    • Bell peppers
    • Green beans
    • Kale

    Three Cheese Version

    Stir in:

    • Parmesan
    • Mozzarella
    • Romano cheese

    for an even richer broth.


    What to Serve with Creamy Sausage Tortellini Soup

    This soup is filling on its own but pairs wonderfully with:

    • Garlic bread
    • Homemade breadsticks
    • Focaccia
    • Grilled cheese sandwiches
    • Caesar salad
    • Caprese salad
    • Roasted vegetables
    • Bruschetta

    Make-Ahead Tips

    This soup is excellent for meal prep.

    If making it ahead:

    • Prepare the soup without the tortellini.
    • Refrigerate for up to three days.
    • Add fresh tortellini while reheating for the best texture.

    This prevents the pasta from becoming overly soft.


    Storage

    Refrigerator

    Store in an airtight container for up to 3 days.

    The tortellini will absorb some of the broth over time.

    Simply stir in a little chicken broth or milk when reheating.

    Freezing

    The soup base freezes well for up to 3 months.

    For best results, freeze before adding the cream and tortellini.

    When ready to serve:

    • Thaw overnight
    • Reheat
    • Stir in fresh cream
    • Cook fresh tortellini
    • Add spinach

    This keeps the soup tasting freshly made.


    Nutrition Highlights

    Although wonderfully comforting, this soup also includes several nutritious ingredients.

    Spinach provides vitamins A, C, and K along with iron and antioxidants.

    Carrots contribute beta-carotene and fiber.

    Celery and onions add flavor while supplying important nutrients.

    Italian sausage offers protein that helps keep you satisfied.

    Cheese tortellini makes the soup hearty and filling, perfect for cold evenings or family dinners.


    Frequently Asked Questions

    Can I use frozen tortellini?

    Yes. Frozen tortellini works beautifully. Simply cook it a few minutes longer according to the package instructions.

    Can I make it lighter?

    Absolutely. Substitute half-and-half or whole milk for the heavy cream, though the broth won’t be quite as rich.

    Is this soup spicy?

    Not unless you choose spicy Italian sausage or add extra crushed red pepper flakes.

    Can I use kale instead of spinach?

    Yes. Kale is an excellent substitute and adds a heartier texture.

    Can I make it gluten-free?

    Yes. Use gluten-free tortellini if available and verify that your sausage and broth are gluten-free.


    Final Thoughts

    Creamy Sausage Tortellini Soup is everything comfort food should be—warm, hearty, creamy, and packed with flavor. The savory Italian sausage, tender cheese tortellini, colorful vegetables, and rich broth come together to create a satisfying meal that feels both rustic and indulgent.

    Whether you’re preparing dinner for your family, hosting friends, or simply craving a cozy bowl of homemade goodness, this recipe is sure to earn a permanent place in your meal rotation. Pair it with warm garlic bread, sprinkle on plenty of Parmesan cheese, and enjoy a comforting dish that’s guaranteed to bring smiles with every spoonful.

    Read More Recipes

  • Breakfast of the Day: Cinnamon Apple Overnight Oats

    Advertisements

    Mornings can be hectic, but that doesn’t mean breakfast has to be skipped or sacrificed. Breakfast of the Day: Cinnamon Apple Overnight Oats is a simple, nutritious, and delicious meal that is prepared the night before, allowing you to wake up to a ready-to-eat breakfast packed with wholesome ingredients. Combining creamy oats, crisp apples, warm cinnamon, and protein-rich Greek yogurt, this breakfast delivers the comforting flavors of homemade apple pie in a healthier form.

    Whether you’re heading to work, getting the kids ready for school, or simply enjoying a quiet morning at home, Cinnamon Apple Overnight Oats provide the perfect balance of convenience, nutrition, and flavor.


    Why Overnight Oats Have Become So Popular

    Overnight oats have become a breakfast favorite because they require almost no morning preparation. Instead of cooking oats on the stovetop, they soak overnight in milk and yogurt, allowing the oats to soften naturally. This creates a creamy texture while preserving many of the nutrients found in whole grain oats.

    They’re also incredibly versatile. You can prepare several jars at once, customize them with different fruits and toppings, and enjoy them straight from the refrigerator or warmed slightly if you prefer a cozy breakfast.

    For busy families, students, and professionals, overnight oats make healthy eating much easier.


    The Comforting Flavor of Apples and Cinnamon

    Few flavor combinations feel as comforting as apples and cinnamon. The sweetness of fresh apples pairs perfectly with the warm spice of cinnamon, creating a breakfast that feels both nourishing and satisfying.

    Every bite offers:

    • Sweet, juicy apple pieces
    • Creamy oats
    • Rich vanilla flavor
    • Gentle cinnamon spice
    • A hint of maple sweetness
    • Crunchy nuts if desired

    The result is a breakfast that tastes indulgent while still being packed with nutrients.


    Ingredients

    Base Ingredients

    • 1 cup old-fashioned rolled oats
    • 1 cup milk (whole, low-fat, almond, oat, or soy)
    • ½ cup plain Greek yogurt
    • 1 medium apple, diced
    • 1 tablespoon maple syrup or honey
    • 1 teaspoon ground cinnamon
    • ½ teaspoon vanilla extract
    • Pinch of salt

    Optional Mix-Ins

    Customize your oats with any combination of:

    • Chia seeds
    • Ground flaxseed
    • Hemp hearts
    • Chopped walnuts
    • Pecans
    • Sliced almonds
    • Raisins
    • Dried cranberries
    • Unsweetened coconut flakes
    • Protein powder

    Toppings

    Before serving, add extra flavor with:

    • Fresh apple slices
    • Cinnamon sprinkle
    • Chopped pecans
    • Toasted walnuts
    • Granola
    • Pumpkin seeds
    • Drizzle of maple syrup
    • Spoonful of almond butter

    Step-by-Step Instructions

    Step 1: Combine the Ingredients

    In a mason jar or airtight container, combine:

    • Oats
    • Milk
    • Greek yogurt
    • Maple syrup
    • Vanilla
    • Cinnamon
    • Salt

    Mix thoroughly until everything is well blended.


    Step 2: Add the Apples

    Fold in the diced apples, saving a few pieces for garnish if desired.

    For an even richer flavor, lightly sauté the apples in a small skillet with cinnamon for about five minutes before adding them to the oats.


    Step 3: Refrigerate Overnight

    Cover the container and refrigerate for at least six hours.

    Overnight is ideal because it allows the oats to fully absorb the liquid and develop a wonderfully creamy texture.


    Step 4: Stir and Enjoy

    In the morning:

    • Stir the oats.
    • Add a splash of milk if they’re thicker than you’d like.
    • Top with additional apples, nuts, and cinnamon.

    Serve chilled or microwave for 30–60 seconds if you prefer them warm.


    Health Benefits of Oats

    Oats are one of the healthiest whole grains available.

    They provide:

    Long-Lasting Energy

    The complex carbohydrates found in oats digest slowly, helping provide steady energy throughout the morning instead of causing a quick spike and crash.

    High Fiber

    Oats contain beta-glucan, a type of soluble fiber that may:

    • Support heart health
    • Help lower cholesterol
    • Promote healthy digestion
    • Keep you feeling full longer

    Naturally Filling

    Because oats digest slowly, they’re an excellent breakfast choice for reducing mid-morning hunger.


    Why Apples Are a Breakfast Superfood

    Apples offer much more than natural sweetness.

    They’re packed with:

    • Vitamin C
    • Potassium
    • Fiber
    • Antioxidants
    • Water for hydration

    The fiber in apples also helps support digestive health while adding satisfying texture to the oats.


    The Benefits of Cinnamon

    Cinnamon does more than provide warm flavor.

    Research suggests cinnamon may help:

    • Support healthy blood sugar levels
    • Provide antioxidants
    • Reduce inflammation
    • Enhance the natural sweetness of foods without adding sugar

    A small amount goes a long way toward creating a comforting breakfast.


    Protein That Keeps You Satisfied

    Greek yogurt transforms overnight oats from a simple breakfast into a protein-rich meal.

    Protein helps:

    • Build and maintain muscle
    • Keep you feeling full longer
    • Reduce unnecessary snacking
    • Support post-workout recovery

    For even more protein, stir in a scoop of vanilla protein powder or add chopped nuts.


    Meal Prep Made Easy

    One of the biggest advantages of overnight oats is how well they work for meal prep.

    Simply prepare several jars on Sunday evening and store them in the refrigerator.

    They’ll stay fresh for up to four days, making breakfast effortless throughout the week.

    Try preparing different flavors such as:

    • Blueberry Almond
    • Peach Cobbler
    • Strawberry Cheesecake
    • Banana Peanut Butter
    • Pumpkin Spice
    • Chocolate Banana
    • Mixed Berry
    • Maple Pecan

    Tips for Perfect Overnight Oats

    • Use rolled oats rather than instant oats for the best texture.
    • Don’t skip the pinch of salt—it enhances every flavor.
    • Dice apples into small, bite-sized pieces.
    • Taste before serving and adjust sweetness if needed.
    • Stir well before eating.
    • Add crunchy toppings just before serving so they stay crisp.

    Variations You’ll Love

    Apple Pie Overnight Oats

    Add:

    • Nutmeg
    • Cloves
    • Pecans

    It tastes just like apple pie.


    Caramel Apple Version

    Add:

    • Sugar-free caramel syrup
    • Toasted pecans
    • Cinnamon

    Apple Walnut Crunch

    Mix in:

    • Chopped walnuts
    • Chia seeds
    • Ground flaxseed

    High-Protein Version

    Add:

    • Vanilla protein powder
    • Extra Greek yogurt
    • Hemp hearts

    Perfect after a morning workout.


    Approximate Nutrition

    One serving typically contains:

    • Calories: 350–450
    • Protein: 18–22 grams
    • Fiber: 8–10 grams
    • Healthy fats: 8–12 grams
    • Complex carbohydrates for sustained energy
    • Calcium, potassium, and vitamin C

    Nutrition will vary depending on your milk, yogurt, and optional toppings.


    Perfect for Every Lifestyle

    Cinnamon Apple Overnight Oats are ideal for:

    • Busy professionals
    • Students
    • Parents
    • Meal preppers
    • Athletes
    • Anyone looking to eat healthier
    • Those trying to increase fiber intake
    • People who enjoy make-ahead breakfasts

    Whether eaten at home, packed for work, or enjoyed after a morning workout, they’re a simple way to nourish your body.


    Final Thoughts

    Breakfast of the Day: Cinnamon Apple Overnight Oats is proof that healthy eating can be both easy and delicious. With hearty whole-grain oats, crisp apples, creamy Greek yogurt, and the comforting warmth of cinnamon, this breakfast delivers lasting energy, balanced nutrition, and satisfying flavor in every spoonful.

    Because it’s prepared the night before, you’ll spend less time in the kitchen and more time enjoying your morning. It’s a breakfast that fits busy schedules without compromising on taste or health.

    Whether you’re beginning a new healthy habit or simply looking for a breakfast you’ll look forward to each morning, Cinnamon Apple Overnight Oats deserve a regular spot in your meal rotation.

    Read More Recipes

Exit mobile version