Category: Recipes

  • Recipe of the Day: Chicken Alfredo Pasta

    Recipe of the Day: Chicken Alfredo Pasta

    Advertisements

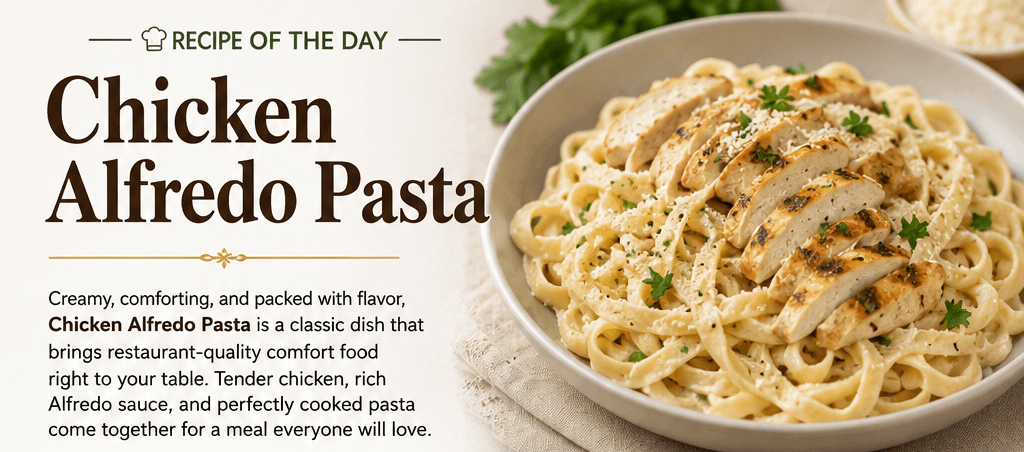
    Creamy, comforting, and packed with flavor, Chicken Alfredo Pasta has become one of the most beloved pasta dishes around the world. Combining tender chicken, rich Alfredo sauce, and perfectly cooked pasta, this classic recipe delivers restaurant-quality comfort food right from your own kitchen. Whether you are preparing a cozy family dinner or impressing guests with a satisfying homemade meal, Chicken Alfredo Pasta is always a winning choice.

    The History Behind Alfredo Pasta

    Alfredo sauce traces its roots back to Rome, where a simple combination of butter and Parmesan cheese was first created. Over time, the dish evolved in the United States into the creamy Alfredo sauce many people know today, often made with heavy cream, garlic, and Parmesan cheese. Adding seasoned chicken turned it into the hearty and filling favorite we now call Chicken Alfredo Pasta.

    Why People Love Chicken Alfredo Pasta

    Chicken Alfredo Pasta stands out because it perfectly balances rich flavors and comforting textures. The creamy sauce coats every bite of pasta while juicy chicken adds protein and savory flavor. It is also highly customizable, allowing you to add vegetables like broccoli, spinach, mushrooms, or sun-dried tomatoes for even more flavor and nutrition.

    Ingredients
    2 boneless skinless chicken breasts
    12 ounces fettuccine pasta
    2 tablespoons olive oil
    3 tablespoons butter
    4 cloves garlic, minced
    2 cups heavy cream
    1 ½ cups freshly grated Parmesan cheese
    Salt and black pepper to taste
    1 teaspoon Italian seasoning
    Fresh parsley for garnish
    Directions
    Step 1: Cook the Pasta

    Bring a large pot of salted water to a boil and cook the fettuccine according to package instructions until al dente. Reserve about 1 cup of pasta water before draining.

    Step 2: Prepare the Chicken

    Season the chicken breasts with salt, pepper, and Italian seasoning. Heat olive oil in a large skillet over medium heat. Cook the chicken for about 5–6 minutes per side until fully cooked and golden brown. Remove from the skillet and slice into strips.

    Step 3: Make the Alfredo Sauce

    In the same skillet, melt the butter and sauté the garlic for about 1 minute until fragrant. Pour in the heavy cream and let it simmer gently for 3–4 minutes. Slowly whisk in the Parmesan cheese until the sauce becomes smooth and creamy.

    Step 4: Combine Everything

    Add the cooked pasta to the sauce and toss until fully coated. If the sauce becomes too thick, add a little reserved pasta water. Top with sliced chicken and garnish with fresh parsley and extra Parmesan cheese.

    Tips for the Perfect Chicken Alfredo
    Use freshly grated Parmesan cheese for the smoothest sauce.
    Avoid overheating the sauce to prevent separation.
    Season the pasta water generously for extra flavor.
    Let the chicken rest before slicing to keep it juicy.
    Perfect Pairings

    Chicken Alfredo Pasta pairs beautifully with garlic bread, Caesar salad, roasted vegetables, or a glass of white wine. For a lighter version, you can substitute half-and-half for heavy cream or use grilled chicken instead of pan-fried.

    Final Thoughts

    Few dishes offer the same level of comfort and satisfaction as Chicken Alfredo Pasta. Rich, creamy, and packed with flavor, it is a timeless meal that continues to bring families together around the dinner table. Whether you enjoy it as a quick weeknight dinner or a special weekend meal, this classic pasta dish never disappoints.

    Read More Recipes

  • Recipe of the Day: Strawberry Avocado Salad

    Advertisements

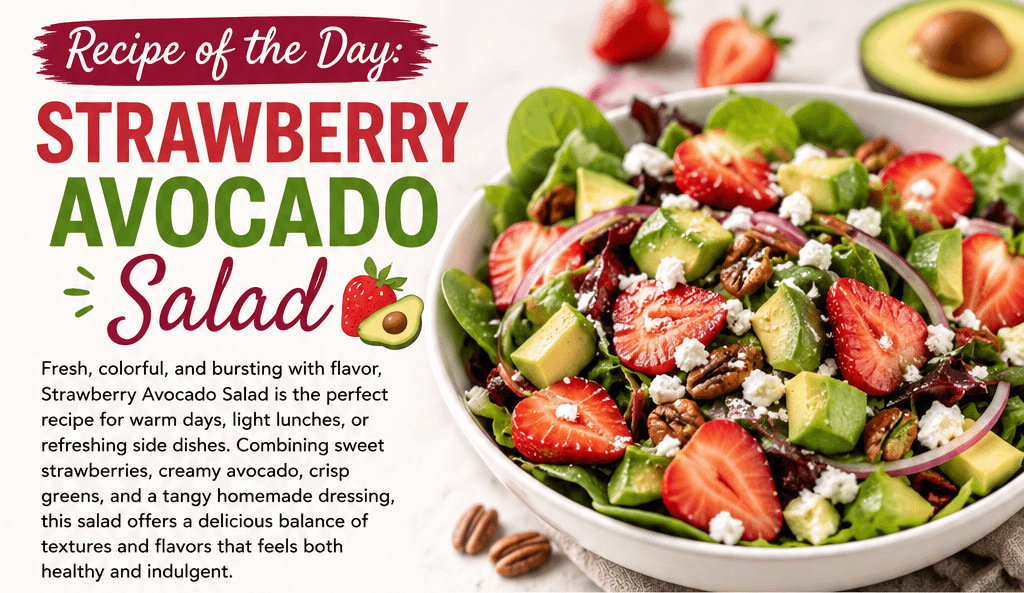
    Fresh, colorful, and bursting with flavor, Strawberry Avocado Salad is the perfect recipe for warm days, light lunches, or refreshing side dishes. Combining sweet strawberries, creamy avocado, crisp greens, and a tangy homemade dressing, this salad offers a delicious balance of textures and flavors that feels both healthy and indulgent. resh, colorful, and bursting with flavor, Strawberry Avocado Salad is the perfect recipe for warm days, light lunches, or refreshing side dishes. Combining sweet strawberries, creamy avocado, crisp greens, and a tangy homemade dressing, this salad offers a delicious balance of textures and flavors that feels both healthy and indulgent.

    Whether you’re preparing a quick weekday meal, hosting a backyard gathering, or looking for a vibrant addition to your dinner table, this salad delivers freshness in every bite.

    Why Strawberry Avocado Salad Is So Popular

    Strawberries bring natural sweetness and bright flavor, while avocados add a rich, buttery texture packed with healthy fats. Together, they create a refreshing contrast that pairs beautifully with leafy greens, nuts, cheese, and a light vinaigrette.

    This salad is loved because it’s:

    Quick and easy to prepare
    Packed with vitamins and nutrients
    Beautifully colorful and presentation-worthy
    Light yet satisfying
    Perfect for spring and summer meals
    Ingredients
    For the Salad
    5 cups mixed greens or spinach
    1½ cups fresh strawberries, sliced
    1 ripe avocado, diced
    ¼ cup red onion, thinly sliced
    ¼ cup crumbled feta cheese
    ¼ cup candied pecans or walnuts
    For the Dressing
    3 tablespoons olive oil
    1 tablespoon balsamic vinegar
    1 teaspoon honey
    1 teaspoon lemon juice
    Salt and black pepper to taste
    Instructions
    Wash and dry the greens thoroughly.
    Arrange greens in a large salad bowl.
    Add sliced strawberries, avocado, red onion, feta cheese, and pecans.
    In a small bowl, whisk together olive oil, balsamic vinegar, honey, lemon juice, salt, and pepper.
    Drizzle dressing over the salad just before serving.
    Toss gently and enjoy immediately.
    Tips for the Best Salad
    Use ripe but firm avocados for the best texture.
    Chill strawberries beforehand for extra freshness.
    Add grilled chicken or shrimp to turn it into a complete meal.
    Goat cheese can replace feta for a creamier flavor.
    Toast nuts lightly to enhance their crunch and aroma.
    A Perfect Dish for Any Occasion

    Strawberry Avocado Salad works beautifully for brunches, picnics, barbecues, or healthy dinners. Its combination of sweet fruit, creamy avocado, and tangy dressing creates a refreshing dish that feels elegant without requiring complicated preparation.

    Simple, wholesome, and packed with flavor, this salad is proof that healthy eating can also be incredibly satisfying.

    Read More Recipes

  • Recipe of the Day: Baked Orange Chicken

    Advertisements

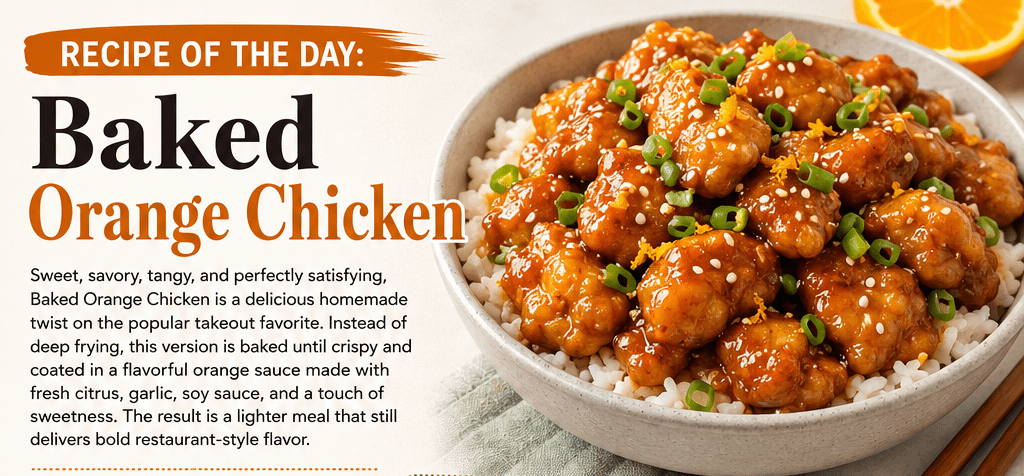
    Sweet, savory, tangy, and perfectly satisfying, Baked Orange Chicken is a delicious homemade twist on the popular takeout favorite. Instead of deep frying, this version is baked until crispy and coated in a flavorful orange sauce made with fresh citrus, garlic, soy sauce, and a touch of sweetness. The result is a lighter meal that still delivers bold restaurant-style flavor.

    Whether you are preparing dinner for your family, meal prepping for the week, or simply craving comfort food with a citrusy kick, Baked Orange Chicken is an easy recipe that feels both comforting and fresh.

    Why People Love Baked Orange Chicken

    Traditional orange chicken is known for its crispy texture and sticky orange glaze. Baking the chicken instead of frying keeps the dish lighter while still creating a satisfying crunch. The bright orange flavor balances beautifully with the savory soy sauce and mild heat from ginger and garlic.

    This recipe pairs perfectly with:

    Steamed rice
    Fried rice
    Chow mein
    Stir-fried vegetables
    Roasted broccoli
    Asian-style salads
    Ingredients
    For the Chicken
    2 pounds boneless chicken breast or thighs, cut into bite-sized pieces
    2 eggs
    1 cup flour
    1 cup breadcrumbs or panko
    Salt and pepper to taste
    Cooking spray or light oil
    For the Orange Sauce
    1 cup orange juice
    Zest of 1 orange
    1/4 cup soy sauce
    1/3 cup brown sugar
    2 tablespoons honey
    2 cloves garlic, minced
    1 teaspoon grated ginger
    2 tablespoons rice vinegar
    1 tablespoon cornstarch mixed with 2 tablespoons water
    Instructions
    Step 1: Prepare the Chicken

    Preheat your oven to 400°F. Line a baking sheet with parchment paper or lightly grease it.

    Season the chicken pieces with salt and pepper. Dip each piece into the beaten eggs, then coat with flour and breadcrumbs.

    Place the coated chicken on the baking sheet and lightly spray with cooking spray or drizzle with oil.

    Step 2: Bake Until Crispy

    Bake for 20–25 minutes, flipping halfway through, until the chicken is golden brown and fully cooked.

    Step 3: Make the Orange Sauce

    While the chicken bakes, combine orange juice, orange zest, soy sauce, brown sugar, honey, garlic, ginger, and rice vinegar in a saucepan over medium heat.

    Bring to a gentle simmer. Stir in the cornstarch mixture and cook until the sauce thickens into a glossy glaze.

    Step 4: Toss and Serve

    Remove the chicken from the oven and toss it in the warm orange sauce until evenly coated.

    Serve immediately over rice and garnish with green onions, sesame seeds, or extra orange zest if desired.

    Tips for the Best Baked Orange Chicken
    Use chicken thighs for extra juicy flavor.
    Panko breadcrumbs create an extra crispy texture.
    Fresh orange juice gives the sauce a brighter flavor than bottled juice.
    Add red pepper flakes for a spicy kick.
    Double the sauce if you like extra glaze for rice or noodles.
    A Homemade Favorite Worth Making

    Baked Orange Chicken delivers everything people love about takeout while giving you the comfort of a homemade meal. The crispy baked chicken combined with the sweet citrus glaze creates a dish that feels indulgent without being overly heavy.

    It is easy enough for a weeknight dinner but flavorful enough to impress guests at the table. One bite of the sticky orange sauce and crispy chicken, and this recipe may quickly become a regular favorite in your kitchen.

    Read More Recipes

  • Recipe of the Day: Devil’s Food Cake

    Advertisements

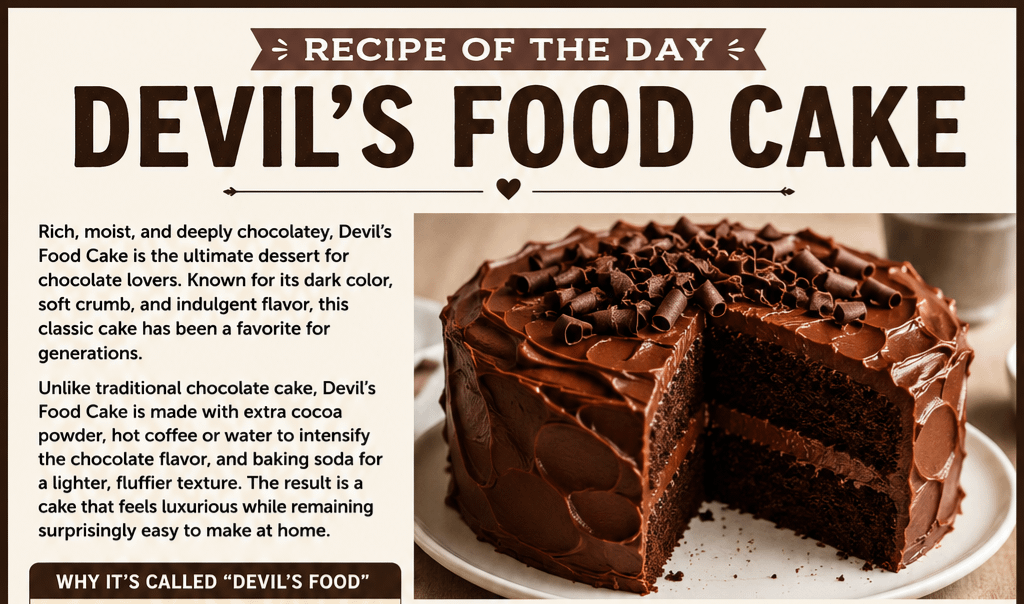
    Rich, moist, and deeply chocolatey, Devil’s Food Cake is the ultimate dessert for chocolate lovers. Known for its dark color, soft crumb, and indulgent flavor, this classic cake has been a favorite for generations. Whether served at birthdays, family gatherings, holidays, or simply as a comforting homemade treat, Devil’s Food Cake delivers pure chocolate decadence in every bite.

    Unlike traditional chocolate cake, Devil’s Food Cake is made with extra cocoa powder, hot coffee or water to intensify the chocolate flavor, and baking soda for a lighter, fluffier texture. The result is a cake that feels luxurious while remaining surprisingly easy to make at home.

    Why It’s Called “Devil’s Food”

    The name “Devil’s Food Cake” dates back to the early 1900s and was created as the rich counterpart to the lighter “Angel Food Cake.” While Angel Food Cake is airy and delicate, Devil’s Food Cake is bold, dark, moist, and indulgent — earning its “sinfully delicious” reputation.

    Ingredients
    For the Cake
    2 cups all-purpose flour
    2 cups sugar
    ¾ cup unsweetened cocoa powder
    2 teaspoons baking soda
    1 teaspoon baking powder
    1 teaspoon salt
    2 eggs
    1 cup buttermilk
    1 cup hot coffee or hot water
    ½ cup vegetable oil
    2 teaspoons vanilla extract
    For the Chocolate Frosting
    1 cup butter, softened
    3 ½ cups powdered sugar
    ¾ cup cocoa powder
    ¼ cup heavy cream or milk
    2 teaspoons vanilla extract
    Directions
    Step 1: Prepare the Cake

    Preheat your oven to 350°F. Grease and flour two 9-inch round cake pans.

    In a large bowl, whisk together flour, sugar, cocoa powder, baking soda, baking powder, and salt.

    Add eggs, buttermilk, oil, and vanilla extract. Mix until smooth. Slowly stir in the hot coffee or water. The batter will be thin, but this helps create the cake’s moist texture.

    Divide the batter evenly between the prepared pans.

    Step 2: Bake

    Bake for 30–35 minutes or until a toothpick inserted into the center comes out clean.

    Allow the cakes to cool in the pans for 10 minutes before transferring them to a wire rack to cool completely.

    Step 3: Make the Frosting

    Beat butter until creamy. Add powdered sugar and cocoa powder gradually. Mix in cream and vanilla until smooth and fluffy.

    Step 4: Assemble

    Spread frosting between the cake layers, then frost the top and sides. For extra decadence, garnish with chocolate shavings or chocolate chips.

    Serving Suggestions

    Devil’s Food Cake pairs beautifully with:

    Cold milk
    Hot coffee
    Vanilla ice cream
    Fresh berries
    Chocolate drizzle

    It’s perfect for birthdays, celebrations, or whenever you need a rich chocolate dessert to brighten your day.

    Final Thoughts

    There’s a reason Devil’s Food Cake remains a timeless favorite. Its rich chocolate flavor, soft texture, and creamy frosting create a dessert that feels comforting, nostalgic, and irresistibly indulgent. One slice is never enough when this classic cake is on the table.

    Read More Recipes

  • Recipe of the Day: Apple Cake

    Advertisements

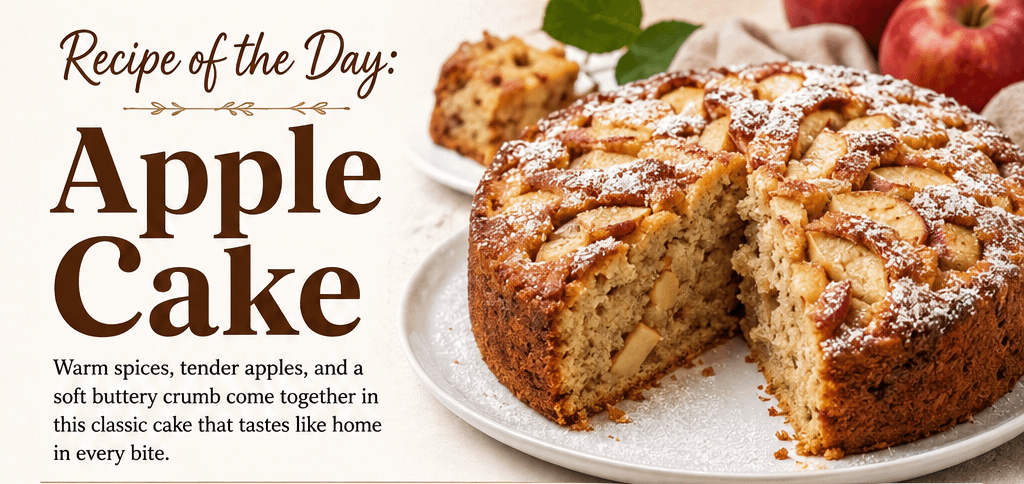
    Few desserts feel as comforting and timeless as a homemade apple cake. Warm spices, tender apples, and a soft buttery crumb come together to create a dessert that tastes like home with every bite. Whether served fresh from the oven on a chilly evening or enjoyed with coffee in the afternoon, apple cake is the kind of recipe that brings people together around the table.

    Apple cake has long been a favorite in kitchens around the world because it is simple, satisfying, and incredibly versatile. Some versions are rich and dense like a coffee cake, while others are light and fluffy with a delicate sweetness. What makes this dessert truly special is the natural flavor of apples baked into every slice, creating a balance of sweetness and warmth that never goes out of style.

    Why Apple Cake Is So Popular

    One reason apple cake remains a classic dessert is because it uses ingredients most people already have at home. Apples, flour, sugar, cinnamon, eggs, and butter combine to create something that feels comforting without being complicated.

    It is also a recipe that works year-round. In the fall, it pairs perfectly with crisp weather and warm drinks. During the holidays, it becomes a cozy addition to family gatherings. In spring and summer, lighter apple cakes served with whipped cream make a refreshing dessert after dinner.

    The aroma alone is enough to make a house feel welcoming. As the apples bake with cinnamon and vanilla, the kitchen fills with a sweet fragrance that instantly creates warmth and comfort.

    Best Apples for Apple Cake

    The best apple cakes usually combine sweet and tart apples for balanced flavor. Great choices include:

    Granny Smith for tartness
    Honeycrisp for sweetness and texture
    Fuji for natural sweetness
    Gala for a softer bite
    Pink Lady for a balanced flavor

    Using fresh apples gives the cake moisture and natural sweetness while adding small bursts of flavor in every bite.

    Classic Apple Cake Recipe
    Ingredients
    2 cups flour
    1 teaspoon baking soda
    1 teaspoon cinnamon
    1/2 teaspoon nutmeg
    1/2 teaspoon salt
    2 eggs
    1 cup sugar
    1/2 cup brown sugar
    3/4 cup vegetable oil or melted butter
    2 teaspoons vanilla extract
    3 cups peeled and chopped apples
    Optional: chopped walnuts or pecans
    Instructions
    Preheat oven to 350°F.
    Grease a baking pan or round cake pan.
    In one bowl, mix flour, baking soda, cinnamon, nutmeg, and salt.
    In another bowl, whisk eggs, sugars, oil, and vanilla.
    Stir dry ingredients into wet ingredients until combined.
    Fold in apples and nuts if desired.
    Pour batter into prepared pan.
    Bake for 40–50 minutes or until a toothpick comes out clean.
    Allow cake to cool before serving.
    Serving Ideas

    Apple cake is delicious on its own, but it becomes even more special with a few simple additions:

    Dust with powdered sugar
    Add caramel drizzle
    Serve warm with vanilla ice cream
    Pair with coffee or hot cider
    Top with whipped cream

    Some families even enjoy apple cake for breakfast alongside a hot cup of coffee because it feels similar to a sweet breakfast bread.

    A Dessert Filled With Comfort

    There is something deeply nostalgic about apple cake. It reminds many people of family kitchens, handwritten recipes, holiday dinners, and quiet evenings at home. Unlike trendy desserts that come and go, apple cake remains beloved because it delivers warmth, simplicity, and comfort every single time.

    Whether you bake it for guests, family gatherings, or simply for yourself, apple cake is more than just dessert — it is a reminder that the best recipes are often the ones that make us feel at home.

    Read More Recipes

  • Recipe of the Day: Chicken Piccata

    Advertisements

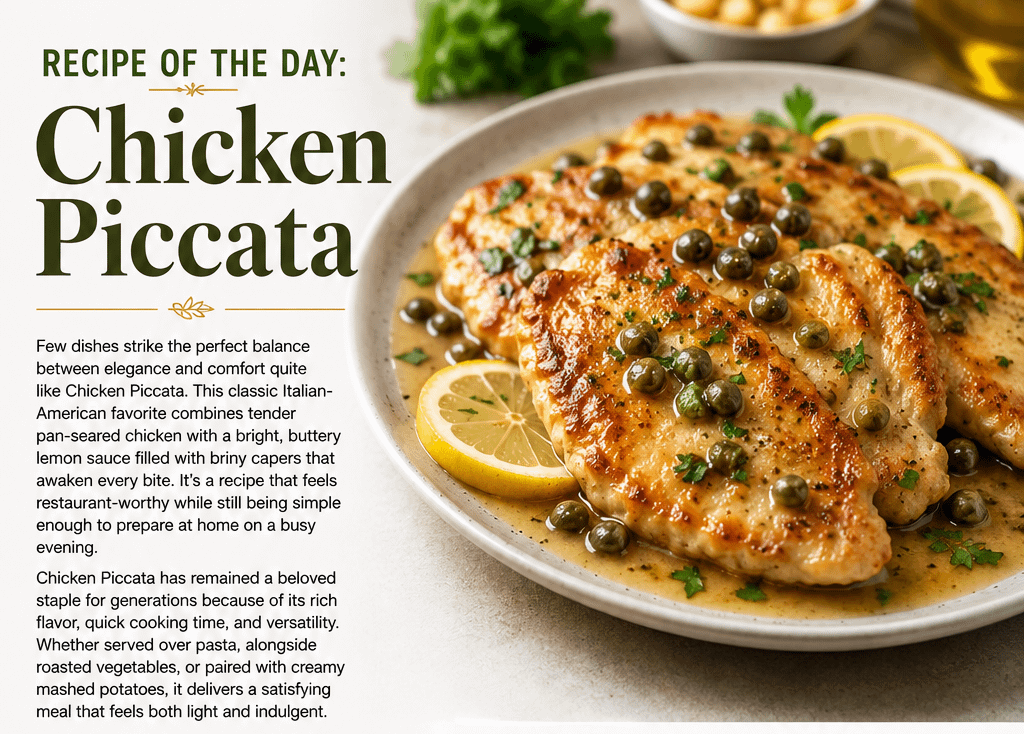
    Few dishes strike the perfect balance between elegance and comfort quite like Chicken Piccata. This classic Italian-American favorite combines tender pan-seared chicken with a bright, buttery lemon sauce filled with briny capers that awaken every bite. It’s a recipe that feels restaurant-worthy while still being simple enough to prepare at home on a busy evening.

    Chicken Piccata has remained a beloved staple for generations because of its rich flavor, quick cooking time, and versatility. Whether served over pasta, alongside roasted vegetables, or paired with creamy mashed potatoes, it delivers a satisfying meal that feels both light and indulgent.

    What Makes Chicken Piccata Special?

    The magic of Chicken Piccata comes from its signature sauce. Fresh lemon juice adds vibrant citrus flavor while butter creates a silky texture that coats the chicken beautifully. Capers provide a salty burst that perfectly balances the richness of the sauce.

    The chicken itself is lightly dredged in flour before being pan-fried, creating a delicate golden crust that helps soak up every drop of the flavorful sauce.

    Ingredients
    2 boneless, skinless chicken breasts
    Salt and black pepper to taste
    1/2 cup all-purpose flour
    2 tablespoons olive oil
    3 tablespoons butter
    1/3 cup fresh lemon juice
    1/2 cup chicken broth
    1/4 cup capers, drained
    Fresh parsley for garnish
    Lemon slices for serving
    Directions
    Slice the chicken breasts in half lengthwise to create thinner cutlets.
    Season both sides with salt and pepper.
    Lightly dredge the chicken in flour, shaking off excess.
    Heat olive oil and 1 tablespoon butter in a large skillet over medium-high heat.
    Cook chicken for about 3–4 minutes per side until golden brown and fully cooked. Remove and set aside.
    In the same skillet, add chicken broth, lemon juice, and capers. Stir while scraping up flavorful browned bits from the pan.
    Reduce heat and whisk in remaining butter until the sauce becomes silky.
    Return chicken to the skillet and spoon sauce over the top.
    Garnish with parsley and lemon slices before serving.
    Serving Suggestions

    Chicken Piccata pairs wonderfully with:

    Angel hair pasta
    Garlic mashed potatoes
    Rice pilaf
    Steamed asparagus
    Roasted broccoli
    Crusty bread to soak up the sauce

    A crisp white wine such as Pinot Grigio also complements the bright lemon flavors beautifully.

    Why People Love This Recipe

    Chicken Piccata delivers bold flavor without requiring complicated ingredients or techniques. The combination of savory chicken, tangy lemon, and buttery richness creates a timeless meal that feels comforting and refreshing at the same time.

    It’s perfect for family dinners, special occasions, or anytime you want to bring a little restaurant-quality flavor into your kitchen.

    Final Thoughts

    If you’re looking for a recipe that is simple, flavorful, and unforgettable, Chicken Piccata deserves a spot on your table. Its bright citrus sauce and tender chicken make it a dish that never goes out of style.

    One bite of this classic comfort meal and it’s easy to understand why Chicken Piccata continues to be a favorite in kitchens around the world.

    Read More Recipes

  • Recipe of the Day: Mimosa Cake

    Advertisements

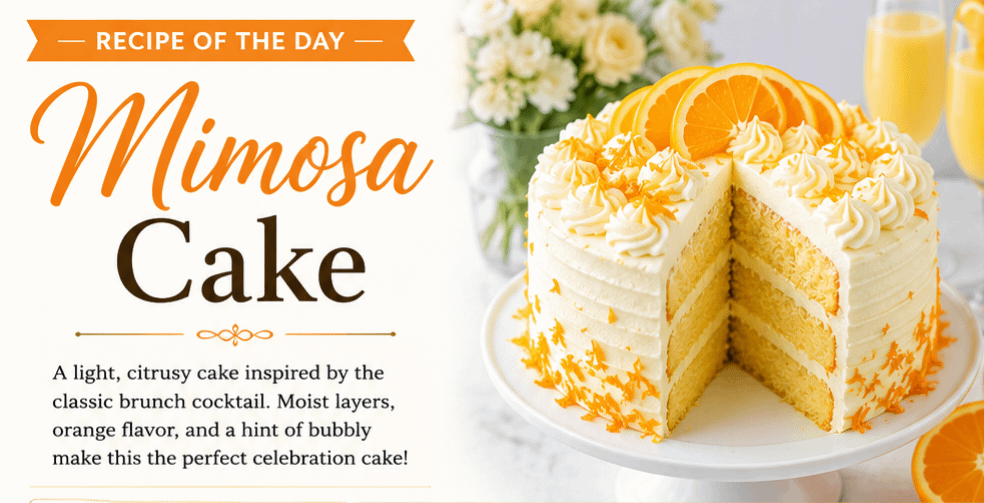
    Few brunch cocktails are as iconic and refreshing as the classic mimosa. With its bright citrus flavor and sparkling charm, it has become a favorite at celebrations, bridal showers, brunches, and weekend gatherings. Now imagine transforming that elegant drink into a soft, citrusy dessert that captures the same joyful flavor in every bite. That is exactly what Mimosa Cake delivers.

    Mimosa Cake combines the sweet taste of orange with light vanilla cake layers and a hint of sparkling flavor inspiration from champagne or prosecco. The result is a dessert that feels festive, refreshing, and perfect for spring and summer occasions. Whether served at a brunch table or as the centerpiece of a celebration, this cake brings sunshine to every slice.

    What Makes Mimosa Cake Special?

    The beauty of Mimosa Cake is its balance. It is sweet without being overwhelming and rich without feeling too heavy. Fresh orange zest and juice give the cake a natural brightness, while fluffy whipped frosting keeps it airy and elegant.

    Many bakers also add champagne or prosecco to the batter, glaze, or frosting to mimic the sparkling cocktail flavor. The alcohol itself is subtle, but it adds depth and sophistication that makes the dessert memorable.

    The cake often features:

    Moist vanilla-orange sponge layers
    Fresh orange filling or curd
    Champagne-infused whipped frosting
    Orange slices or zest for garnish
    A light, fluffy texture perfect for brunch
    Ingredients
    For the Cake
    2 ½ cups all-purpose flour
    2 teaspoons baking powder
    ½ teaspoon salt
    1 cup unsalted butter
    1 ¾ cups sugar
    4 eggs
    1 tablespoon orange zest
    ¾ cup fresh orange juice
    ½ cup champagne or prosecco
    1 teaspoon vanilla extract
    For the Frosting
    2 cups heavy whipping cream
    ½ cup powdered sugar
    2 tablespoons champagne or prosecco
    1 teaspoon orange zest
    Directions
    Preheat your oven to 350°F and grease two round cake pans.
    In a bowl, whisk together flour, baking powder, and salt.
    In another bowl, cream butter and sugar until light and fluffy.
    Add eggs one at a time, mixing well after each addition.
    Stir in orange zest, orange juice, champagne, and vanilla.
    Gradually combine the wet and dry ingredients until smooth.
    Divide batter evenly between pans and bake for 25–30 minutes.
    Allow cakes to cool completely before frosting.
    Whip heavy cream, powdered sugar, champagne, and orange zest until soft peaks form.
    Frost the cake layers and garnish with orange slices or zest.
    Perfect for Celebrations

    Mimosa Cake is ideal for:

    Mother’s Day brunches
    Bridal showers
    Baby showers
    Spring birthdays
    Easter gatherings
    Weekend brunch parties

    Its bright citrus flavor and elegant presentation instantly create a cheerful atmosphere. Pair it with fresh fruit, coffee, or actual mimosas for a complete brunch experience.

    A Dessert That Feels Like Sunshine

    There is something uplifting about citrus desserts. The fresh orange aroma, soft texture, and sparkling inspiration of Mimosa Cake create a dessert that feels lighthearted and joyful. It is the kind of recipe that turns ordinary mornings into special memories shared around the table.

    Whether you are baking for guests or simply treating yourself, Mimosa Cake is a delicious reminder that life’s sweetest moments are often the ones worth celebrating slowly, one slice at a time.

    Read More Recipes

  • Recipe of the Day: Chocolate Cheesecake

    Advertisements

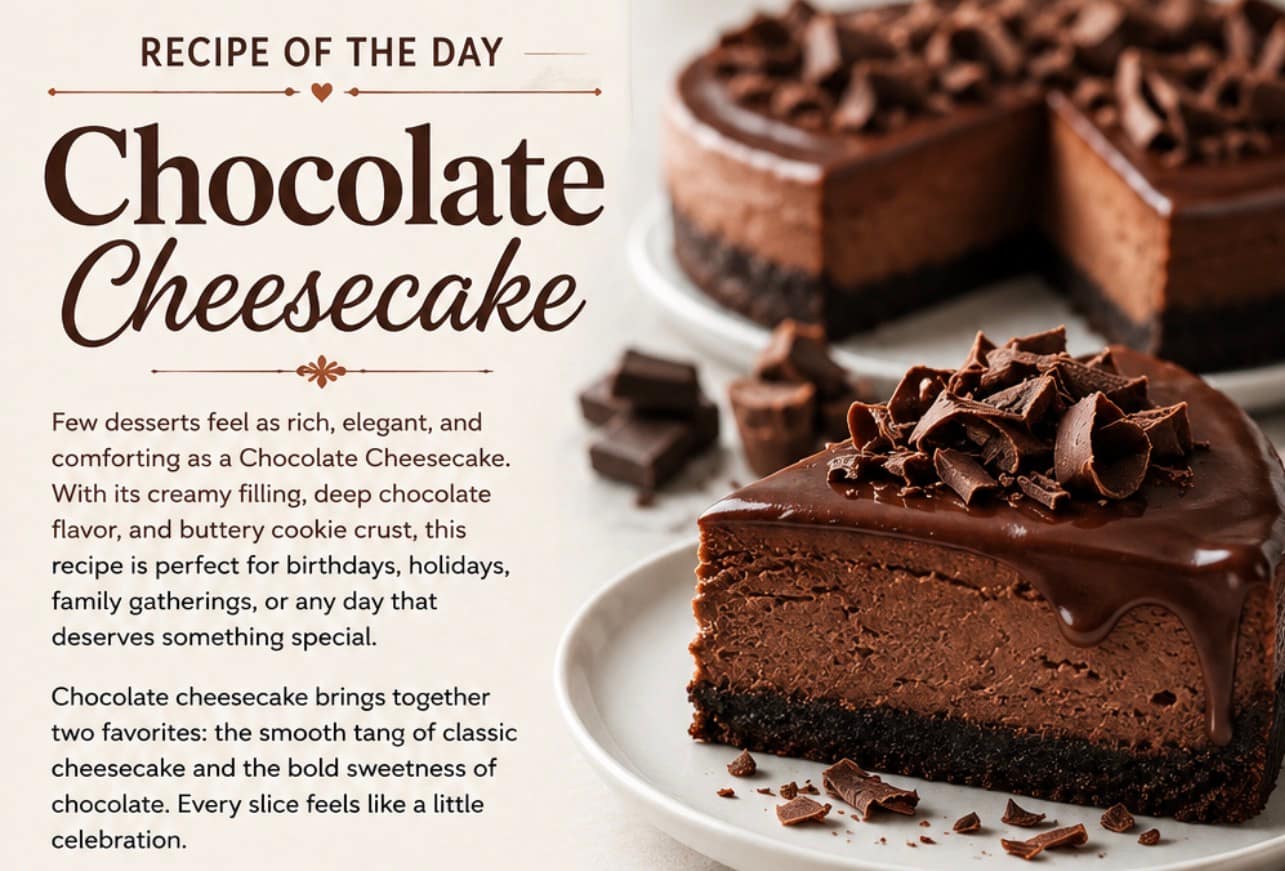
    Few desserts feel as rich, elegant, and comforting as a Chocolate Cheesecake. With its creamy filling, deep chocolate flavor, and buttery cookie crust, this recipe is perfect for birthdays, holidays, family gatherings, or any day that deserves something special.

    Chocolate cheesecake brings together two favorites: the smooth tang of classic cheesecake and the bold sweetness of chocolate. Every slice feels like a little celebration.

    Ingredients

    For the crust:

    * 2 cups chocolate cookie crumbs
    * 5 tablespoons melted butter
    * 2 tablespoons sugar

    For the filling:

    * 24 oz cream cheese, softened
    * 1 cup sugar
    * 3 eggs
    * 1 cup melted semi-sweet chocolate
    * 1/2 cup sour cream
    * 1 teaspoon vanilla extract
    * 2 tablespoons cocoa powder

    Directions

    Preheat oven to 325°F. Mix the chocolate cookie crumbs, melted butter, and sugar together. Press the mixture into the bottom of a springform pan.

    In a large bowl, beat the cream cheese and sugar until smooth. Add eggs one at a time, mixing gently. Stir in melted chocolate, sour cream, vanilla, and cocoa powder until creamy.

    Pour the filling over the crust and smooth the top. Bake for 55–65 minutes, or until the center is almost set. Let it cool, then refrigerate for at least 4 hours or overnight.

    Top with whipped cream, chocolate shavings, ganache, or fresh berries before serving.

    Final Slice

    Chocolate Cheesecake is the kind of dessert that turns an ordinary day into something memorable. Rich, smooth, and full of chocolate flavor, it is a recipe worth sharing with the people you love.

    Read More Recipes

  • Recipe of the Day: Cowboy Biscuits

    Advertisements

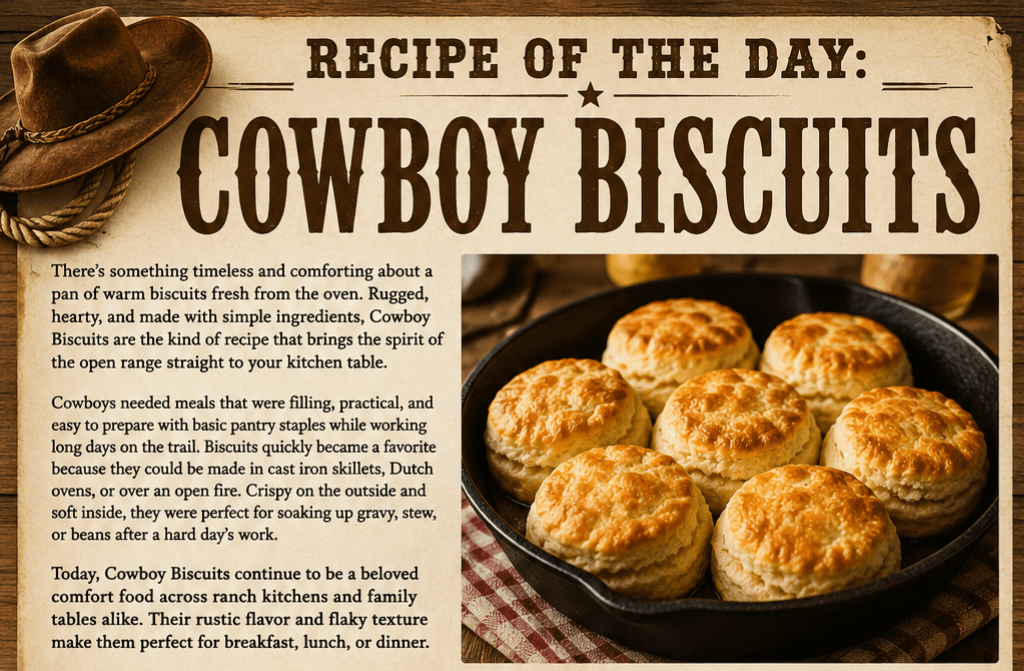
    There’s something timeless and comforting about a pan of warm biscuits fresh from the oven. Rugged, hearty, and made with simple ingredients, Cowboy Biscuits are the kind of recipe that brings the spirit of the open range straight to your kitchen table. Whether served beside a hearty breakfast, alongside a bowl of chili, or eaten warm with butter and honey by the campfire, these biscuits are a true taste of cowboy cooking.

    Cowboys needed meals that were filling, practical, and easy to prepare with basic pantry staples while working long days on the trail. Biscuits quickly became a favorite because they could be made in cast iron skillets, Dutch ovens, or over an open fire. Crispy on the outside and soft inside, they were perfect for soaking up gravy, stew, or beans after a hard day’s work.

    Today, Cowboy Biscuits continue to be a beloved comfort food across ranch kitchens and family tables alike. Their rustic flavor and flaky texture make them perfect for breakfast, lunch, or dinner.

    Classic Cowboy Biscuits Recipe
    Ingredients
    2 cups all-purpose flour
    1 tablespoon baking powder
    1 teaspoon salt
    1 tablespoon sugar
    1/3 cup cold butter or shortening
    3/4 cup milk or buttermilk
    Instructions
    Preheat your oven to 425°F.
    In a large bowl, mix the flour, baking powder, salt, and sugar.
    Cut in the cold butter or shortening until the mixture resembles coarse crumbs.
    Slowly stir in the milk until a soft dough forms.
    Turn the dough onto a floured surface and gently knead a few times.
    Roll or pat the dough to about 1-inch thick and cut with a biscuit cutter or glass.
    Place biscuits on a greased baking sheet or cast iron skillet.
    Bake for 12–15 minutes or until golden brown.
    Serve warm with butter, jam, gravy, or honey.
    Why People Love Cowboy Biscuits

    Cowboy Biscuits are more than just bread — they represent warmth, tradition, and gathering around the table with family and friends. Their simplicity is part of their charm. You can customize them with cheddar cheese, jalapeños, bacon bits, or herbs for extra flavor while still keeping that rustic cowboy feel.

    These biscuits also pair perfectly with:

    Country gravy
    Scrambled eggs and bacon
    Beef stew
    Chili
    BBQ meals
    Fried chicken

    Whether you’re cooking on the ranch, camping outdoors, or simply craving homemade comfort food, Cowboy Biscuits are a recipe worth keeping close at hand.

    A Taste of Cowboy Tradition

    In a fast-paced world, recipes like Cowboy Biscuits remind us to slow down and appreciate simple homemade meals. The smell of fresh biscuits baking in the oven has a way of bringing people together and creating memories that last for generations.

    So today, pull out your cast iron skillet, pour yourself a cup of coffee, and enjoy the hearty goodness of Cowboy Biscuits — a recipe built on tradition, hard work, and the comforting flavors of the American West.

    Read More Recipes

  • Recipe of the Day: Maverick Salad

    Advertisements

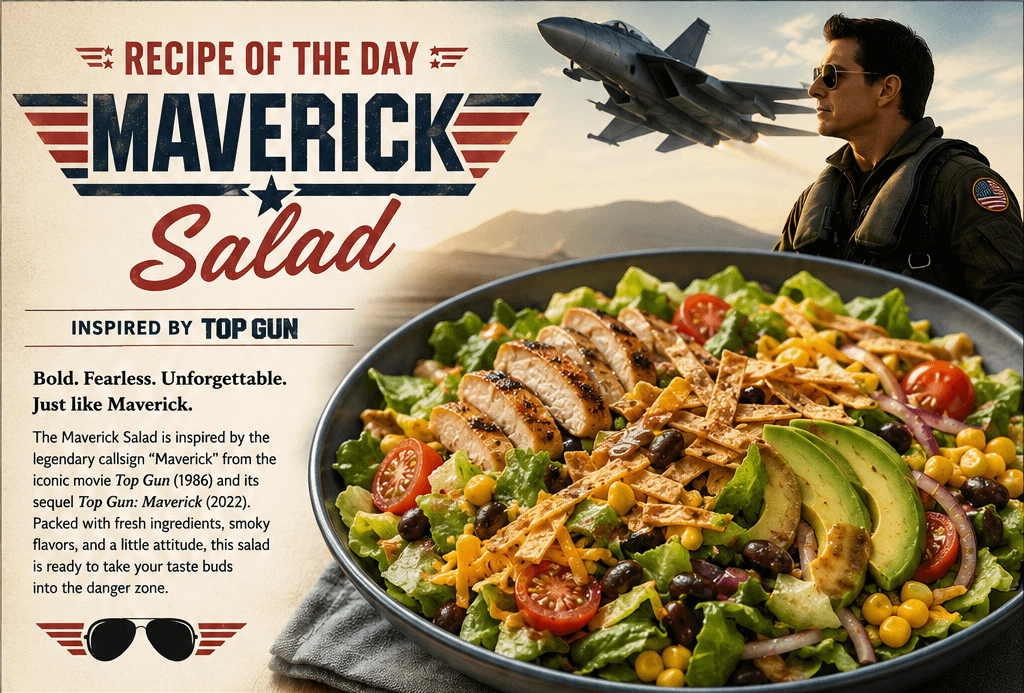
    Fresh, bold, and packed with flavor, the Maverick Salad is the perfect dish for fans of big flavor and classic movie nostalgia. Inspired by the legendary callsign “Maverick” from the iconic movie Top Gun and its sequel Top Gun: Maverick, this salad captures the same adventurous spirit, confidence, and energy that made the films unforgettable.

    Just like Maverick himself, this salad refuses to be ordinary. Loaded with crisp greens, smoky grilled chicken, creamy avocado, crunchy toppings, and a bold smoky lime dressing, the Maverick Salad is hearty enough to stand on its own while still feeling fresh and satisfying.

    Whether you are hosting a movie night, celebrating Top Gun Day, or simply craving a flavorful meal, this recipe brings a little high-flying excitement to the dinner table.

    What Makes the Maverick Salad Special?

    Unlike a basic side salad, the Maverick Salad is designed to be bold, colorful, and full of personality. Inspired by the fearless attitude of Maverick from Top Gun, this recipe combines smoky, savory, creamy, and crunchy ingredients into one unforgettable dish.

    The salad features:

    Crisp romaine and mixed greens
    Grilled chicken or steak
    Sweet corn and black beans
    Fresh avocado
    Cherry tomatoes
    Shredded cheese
    Crunchy tortilla strips
    Smoky lime dressing

    Every bite delivers a balance of freshness and flavor worthy of its movie-inspired name.

    Ingredients
    For the Salad
    4 cups romaine lettuce, chopped
    2 cups mixed greens
    2 grilled chicken breasts, sliced
    1 cup cherry tomatoes, halved
    1 cup corn kernels
    1 cup black beans, rinsed and drained
    1 avocado, sliced
    1/4 cup red onion, thinly sliced
    1 cup shredded cheddar or Mexican blend cheese
    1 cup tortilla strips
    For the Dressing
    1/4 cup olive oil
    2 tablespoons lime juice
    1 tablespoon honey
    1 teaspoon smoked paprika
    1 teaspoon garlic powder
    Salt and pepper to taste
    How to Make Maverick Salad
    Step 1: Prepare the Dressing

    In a small bowl or jar, whisk together olive oil, lime juice, honey, smoked paprika, garlic powder, salt, and pepper until smooth.

    Step 2: Build the Salad

    In a large bowl, combine romaine lettuce and mixed greens. Add grilled chicken, tomatoes, corn, black beans, avocado, red onion, and shredded cheese.

    Step 3: Add the Crunch

    Top with crispy tortilla strips for added texture and flavor.

    Step 4: Dress and Serve

    Drizzle the smoky lime dressing over the salad just before serving. Toss gently and enjoy immediately.

    Tips for the Ultimate Maverick Salad
    Add grilled steak or shrimp for extra protein.
    Spice it up with jalapeños or chipotle seasoning.
    Use fresh grilled corn for smoky flavor.
    Make it vegetarian by swapping the chicken for roasted chickpeas.
    Pair it with iced tea, lemonade, or your favorite summer drink for the perfect movie-night meal.
    Why Fans Love It

    The Maverick Salad combines everything people love about modern comfort food — bold flavor, fresh ingredients, and satisfying textures. The connection to Top Gun adds a fun and nostalgic twist that makes it a conversation starter at gatherings, parties, and themed dinners.

    It is a salad with attitude — adventurous, flavorful, and impossible to ignore.

    Final Thoughts

    Inspired by the fearless energy of Pete , the Maverick Salad is proof that salads can be exciting, filling, and packed with personality. Fresh vegetables, savory grilled chicken, creamy avocado, crunchy tortilla strips, and smoky dressing come together for a meal that feels both healthy and indulgent.

    So cue up Top Gun: Maverick, grab a fork, and enjoy a recipe that is ready to take your taste buds into the danger zone.

    Read More Recipes

Exit mobile version