
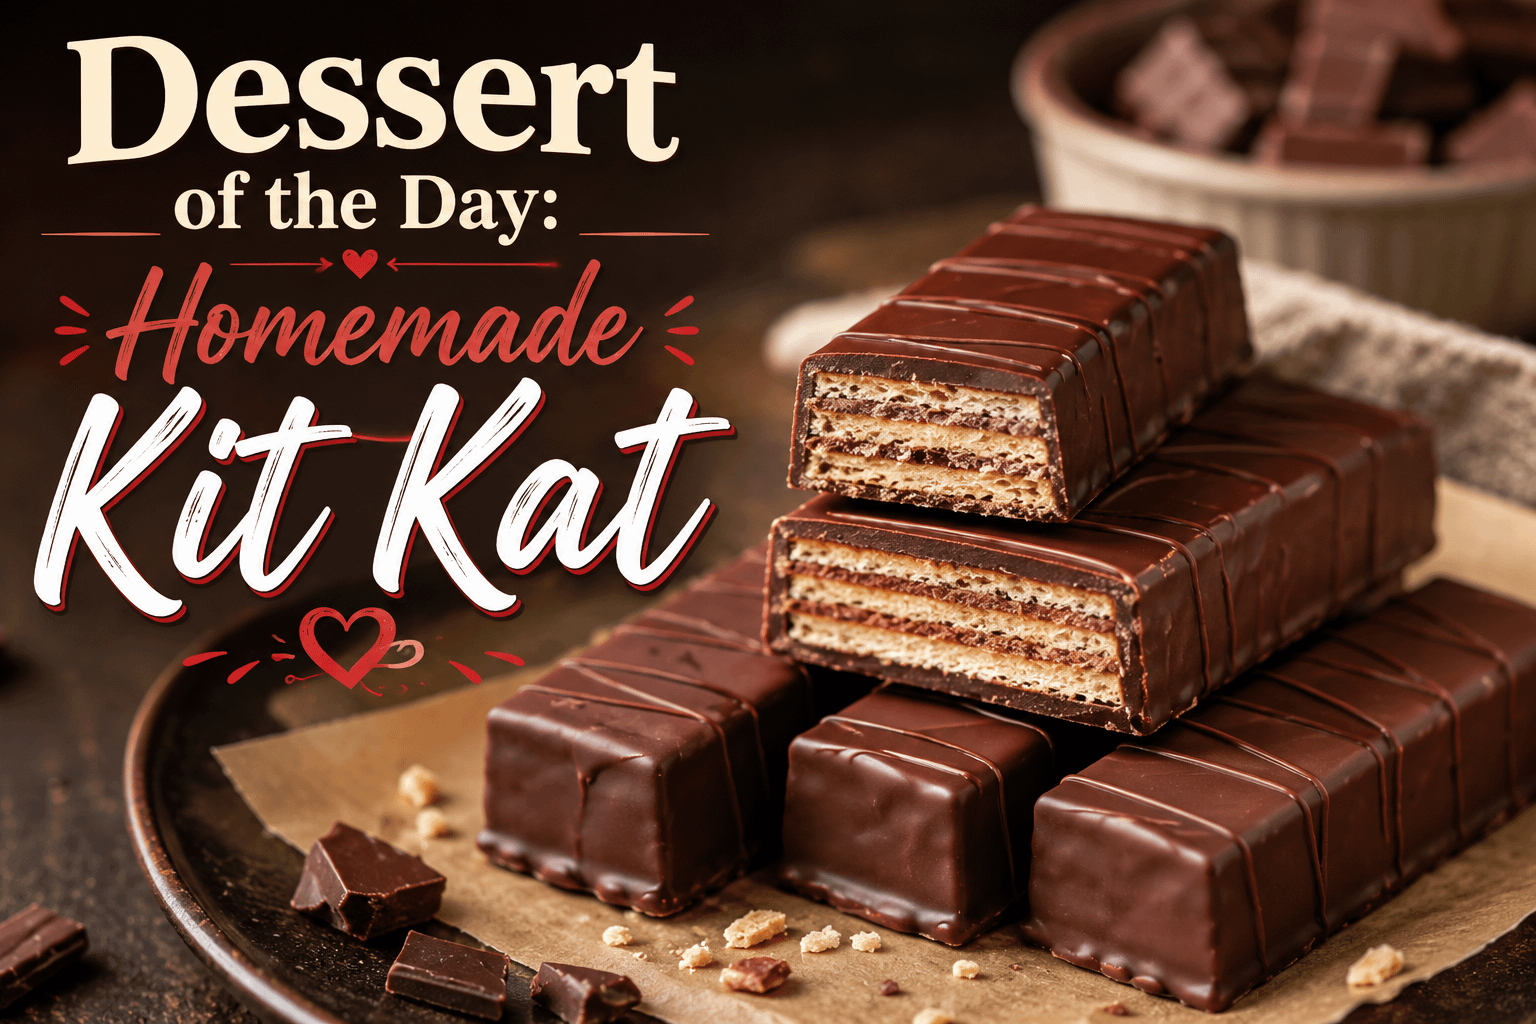
Few candy combinations are as simple—or as satisfying—as crispy wafers covered in smooth, creamy chocolate. That unmistakable crunch followed by melting chocolate has made Kit Kat a favorite for generations. But instead of reaching for a packaged candy bar, today’s Dessert of the Day brings that classic combination into your own kitchen.
Dessert of the Day: Homemade Kit Kat is a fun, easy, no-bake treat made with crisp wafer cookies and a generous coating of chocolate. You don’t need complicated candy-making equipment or professional skills. With just a handful of ingredients, you can create homemade chocolate wafer bars that are perfect for dessert, parties, holidays, movie nights, or whenever a serious chocolate craving arrives.
Making them at home also gives you something the traditional candy bar doesn’t: complete control. Want dark chocolate? Go for it. Prefer extra-thick chocolate? Add another coating. Love peanut butter, caramel, coconut, or sea salt? You can turn the basic recipe into your own signature dessert.
The result is a homemade treat that’s crunchy, chocolatey, nostalgic, and surprisingly simple.
Why Homemade Kit Kats Are Worth Making
There are plenty of desserts that require long ingredient lists, precise measurements, baking temperatures, cooling racks, and hours of preparation.
This isn’t one of them.
Homemade Kit Kats are appealing because they’re uncomplicated. At their most basic, you need crispy wafer cookies and chocolate. Everything else is optional.
They’re also versatile enough to work for almost any occasion. Make a small batch when you’re craving chocolate or prepare several dozen for a party.
They’re especially great for:
- Family dessert nights
- Birthday parties
- Movie nights
- Game-day gatherings
- Potlucks
- Holiday dessert trays
- School celebrations
- Homemade gifts
- Valentine’s Day treats
- Christmas candy boxes
- Halloween parties
- Weekend baking projects with kids
Technically, there’s very little baking involved—which makes them even easier.
What Makes a Kit Kat-Style Bar So Good?
The magic is all about texture.
Chocolate by itself is delicious, but combine it with layers of delicate, crispy wafers and something changes.
Your first bite breaks through the chocolate shell. Then comes the wafer crunch. Finally, everything begins melting together.
You get creamy and crispy at the same time.
That contrast is why choosing the right wafer matters. You want something light, dry, and crisp enough to maintain its crunch after being coated in chocolate.
Ingredients
For the Homemade Kit Kats
- 24 rectangular vanilla wafer cookies
- 2 cups milk chocolate chips or finely chopped milk chocolate
- 1 tablespoon coconut oil or vegetable shortening
- 1/2 teaspoon vanilla extract, optional
Optional Toppings
You can also have a few toppings ready if you’d like to decorate your bars:
- Flaky sea salt
- Crushed peanuts
- Toasted coconut
- Mini chocolate chips
- Crushed cookies
- Colorful sprinkles
- Toffee pieces
- Crushed pretzels
- White chocolate drizzle
- Dark chocolate drizzle
You don’t need any of these for the basic recipe, but they’re an easy way to make every batch different.
Equipment You’ll Need
One reason this dessert is so approachable is that you probably already have everything you need.
Gather:
- Baking sheet
- Parchment or wax paper
- Microwave-safe bowl
- Fork or chocolate dipping tool
- Spoon
- Small spatula
- Sharp knife, if cutting the wafers
- Refrigerator space
A double boiler can also be used if you’d rather melt your chocolate on the stovetop.
How to Make Homemade Kit Kats
Step 1: Prepare Your Work Area
Line a baking sheet with parchment or wax paper.
Make sure you have enough room in your refrigerator for the baking sheet before beginning. You’ll want to transfer the freshly coated bars directly into the refrigerator without rearranging everything afterward.
Set your wafer cookies nearby so they’re ready for dipping.
Step 2: Decide on the Size
You can leave the wafer cookies whole for larger candy bars or cut them into smaller pieces for bite-sized treats.
If your wafers are extremely thin, stack two or three together.
Place a small amount of melted chocolate between each wafer layer to act as an edible glue.
Gently press them together.
Don’t press too hard or you may crack the wafers.
Step 3: Chill the Wafers
Place the assembled wafer bars in the refrigerator for approximately 10 minutes.
This isn’t absolutely necessary, but cooler wafers can make dipping easier and help the chocolate begin setting more quickly.
Step 4: Melt the Chocolate
Place the chocolate chips and coconut oil in a microwave-safe bowl.
Microwave for approximately 20 to 30 seconds.
Remove and stir thoroughly.
Return the bowl to the microwave for another short interval.
Continue heating and stirring until the chocolate is almost completely melted.
At that point, continue stirring rather than microwaving again. The remaining chocolate pieces will often melt from the residual heat.
This reduces the risk of scorching your chocolate.
If desired, stir in the vanilla extract.
Why Add Coconut Oil?
A small amount of coconut oil helps thin the melted chocolate, making it easier to create a smooth coating around the wafers.
You don’t want to add too much.
Excess oil can make the chocolate softer and prevent it from setting properly.
Approximately one tablespoon for two cups of chocolate is usually enough.
Step 5: Dip the Wafers
Drop one wafer bar carefully into the melted chocolate.
Use a fork to turn it until the top, bottom, and sides are completely coated.
Slide the fork underneath the bar and lift it from the bowl.
Hold it above the chocolate for several seconds so the excess coating can drip away.
You can gently tap the fork against the side of the bowl to remove additional chocolate.
Transfer the coated bar to your prepared baking sheet.
Repeat with the remaining wafers.
Step 6: Decorate
If you’re using toppings, add them immediately while the chocolate is still wet.
Try:
Sea salt: Sprinkle a tiny pinch across the top.
Crushed peanuts: Add them for extra crunch.
Sprinkles: Perfect for birthdays and holidays.
Crushed pretzels: Great if you enjoy salty-sweet desserts.
Toasted coconut: Adds another layer of texture.
Cookie crumbs: Turn your homemade Kit Kats into a cookies-and-cream-inspired dessert.
Don’t overload the bars. A small amount of topping is usually enough.
Step 7: Let the Chocolate Set
Transfer the baking sheet to the refrigerator.
Chill for approximately 20 to 30 minutes, or until the chocolate coating is completely firm.
Once the chocolate has hardened, remove the bars from the parchment paper.
Your homemade Kit Kats are ready.
Getting That Perfect Chocolate Coating
A smooth chocolate coating makes homemade candy look much more impressive.
The most important rule is to keep water away from your melted chocolate.
Even a small amount of moisture can cause chocolate to seize and become thick or grainy.
Make sure your bowl, spoon, and dipping utensils are completely dry.
Another important tip is temperature.
Extremely hot chocolate isn’t necessarily better. You want it melted and fluid, not scorching hot.
If your chocolate becomes too thick while you’re dipping the wafers, microwave it for another 10 seconds and stir.
Avoid repeatedly overheating it.
Double-Chocolate Coating
Chocolate lovers can take things one step further.
After the first coating has completely hardened, dip the bars again.
The second layer creates a thicker chocolate shell and makes the dessert considerably richer.
You can even use two different chocolates.
Try a milk chocolate first coating followed by dark chocolate, or coat the bars in milk chocolate and drizzle white chocolate over the finished bars.
Homemade Kit Kat Flavor Ideas
Once you’ve mastered the basic recipe, you can create dozens of variations.
Peanut Butter Kit Kat
Spread a thin layer of creamy peanut butter between two wafers.
Chill briefly before dipping everything in milk chocolate.
The combination of peanut butter, chocolate, and crispy wafers is difficult to beat.
Dark Chocolate Kit Kat
Replace milk chocolate with dark or semisweet chocolate.
This version has a richer flavor and is less sweet than the traditional version.
Finish with a small amount of flaky sea salt for an elevated touch.
White Chocolate Kit Kat
Dip the wafers in melted white chocolate.
These are particularly good for decorating because colorful sprinkles stand out beautifully against the white coating.
Cookies and Cream Kit Kat
Coat the wafers in white chocolate and immediately sprinkle finely crushed chocolate sandwich cookies over the top.
You can also mix a small amount of cookie crumbs directly into the chocolate.
Salted Caramel Kit Kat
Add a very thin layer of caramel between two wafers.
Dip in milk or dark chocolate and finish with flaky sea salt.
Be careful not to add too much caramel because it can squeeze out during dipping.
S’mores Kit Kat
Add a thin layer of marshmallow creme between the wafers before dipping them in chocolate.
Top with crushed graham crackers.
You get chocolate, marshmallow, graham cracker flavor, and crispy wafers all in one bite.
Mint Chocolate Kit Kat
Add a very small amount of peppermint extract to your melted chocolate.
Dip the wafers and finish with dark chocolate drizzle.
Peppermint extract is powerful, so use it carefully.
Espresso Kit Kat
Mix a small amount of instant espresso powder into melted dark chocolate.
Coffee enhances chocolate’s natural richness and creates a more sophisticated candy-bar flavor.
Strawberry Kit Kat
Use strawberry-flavored wafers and cover them with white chocolate.
For extra strawberry flavor, sprinkle freeze-dried strawberry crumbs over the chocolate before it sets.
Coconut Kit Kat
Cover the wafers with milk or dark chocolate and immediately sprinkle toasted coconut over the top.
Chocolate and coconut pair beautifully with the wafer’s crispy texture.
Chocolate Hazelnut Kit Kat
Spread a thin layer of chocolate-hazelnut spread between two wafers before coating them with chocolate.
This creates an especially rich homemade candy.
Pretzel Crunch Kit Kat
Add crushed pretzels between or on top of the wafer layers.
The salty crunch balances the sweetness of the chocolate.
Make Homemade Kit Kat Bites
Full-sized bars aren’t your only option.
Cut the wafers into small rectangles before dipping them in chocolate.
You’ll create bite-sized candies that are perfect for serving in bowls at parties.
Mini Kit Kat-style bites are also convenient because guests can sample one without committing to a large dessert.
Just be warned: it’s very easy to eat another one.
And another.
Build a Homemade Candy Box
If you’re making these around the holidays, homemade Kit Kats can become part of a homemade candy assortment.
Combine them with:
- Chocolate-covered pretzels
- Chocolate-dipped strawberries
- Peanut butter cups
- Chocolate bark
- Caramel popcorn
- Fudge
- Truffles
- Chocolate-covered nuts
- Cookies
- Brownie bites
Place everything in a decorative box lined with parchment paper.
You’ve now turned a simple dessert into a homemade gift.
Holiday Kit Kat Ideas
These bars are easy to customize throughout the year.
Valentine’s Day
Use white chocolate drizzle with red and pink sprinkles.
You can also package two or three bars in clear treat bags tied with red ribbon.
Easter
Use pastel sprinkles over white chocolate.
Mini candy-coated chocolates can also be pressed into the coating before it hardens.
Fourth of July
Decorate white chocolate-covered wafers with red, white, and blue sprinkles.
Halloween
Use milk or dark chocolate and drizzle orange-colored white chocolate over the top.
Candy eyes can turn the bars into fun Halloween treats.
Thanksgiving
Try milk chocolate with caramel drizzle and chopped pecans.
Christmas
Add red and green sprinkles or drizzle alternating white and dark chocolate over the bars.
Arrange them on a holiday candy tray alongside cookies and fudge.
Turn Homemade Kit Kats Into an Ice Cream Sundae
If a homemade Kit Kat is good by itself, imagine it chopped over ice cream.
Start with vanilla or chocolate ice cream.
Add:
- Chopped homemade Kit Kats
- Hot fudge
- Caramel sauce
- Whipped cream
- Chopped peanuts
- Chocolate chips
Finish with another homemade Kit Kat standing upright in the sundae.
It transforms a simple candy bar into a full dessert.
Homemade Kit Kat Milkshake
You can also blend these bars into a milkshake.
Combine vanilla ice cream, milk, chocolate syrup, and chopped homemade Kit Kats in a blender.
Blend until thick and creamy.
Pour into a tall glass and top with whipped cream, chocolate drizzle, and crushed Kit Kat pieces.
Add a full wafer bar on top for presentation.
Use Them as a Cake Decoration
Homemade Kit Kats also make excellent cake decorations.
Bake or purchase your favorite chocolate cake.
Cover it with chocolate frosting and arrange homemade wafer bars around the outside edge.
Tie a decorative ribbon around the cake if desired.
Top the center with chocolate candies, strawberries, or crushed homemade Kit Kats.
It’s an easy way to turn an ordinary chocolate cake into an impressive celebration dessert.
Make a Homemade Kit Kat Cheesecake Topping
Cheesecake and chocolate wafers work surprisingly well together.
Prepare your favorite plain or chocolate cheesecake and scatter chopped homemade Kit Kats across the top just before serving.
Add chocolate drizzle and whipped cream.
The creamy cheesecake paired with crunchy wafers creates another great texture contrast.
Serving Homemade Kit Kats at a Party
For parties, cut the bars into smaller pieces and arrange them on a serving platter.
You can make several varieties and label each one.
For example:
Classic Milk Chocolate
Dark Chocolate Sea Salt
Peanut Butter Chocolate
Cookies and Cream
Salted Caramel
Chocolate Coconut
Guests can try different flavors and choose their favorite.
You could even create a homemade Kit Kat bar where everyone decorates their own chocolate-covered wafer.
A Fun Dessert Activity for Kids
Homemade Kit Kats can become an activity rather than simply dessert.
Adults can handle melting the chocolate, and kids can decorate their own wafers.
Set up small bowls containing toppings such as:
- Sprinkles
- Mini marshmallows
- Cookie crumbs
- Mini chocolate chips
- Coconut
- Pretzel pieces
- Chopped nuts
- Toffee pieces
Let everyone design their own candy bar.
The finished treats can be refrigerated while everyone cleans up.
How to Store Homemade Kit Kats
Once the chocolate has completely hardened, transfer the bars to an airtight container.
Place parchment paper between layers.
If your kitchen remains relatively cool, the bars can be stored at room temperature for several days.
During warm weather, refrigeration is usually better.
The biggest enemy of homemade wafer candy is moisture. Moisture can eventually soften the wafers and take away their signature crunch.
Keeping them tightly sealed helps preserve their texture.
Can Homemade Kit Kats Be Frozen?
Yes.
Place the bars in a freezer-safe airtight container with parchment between layers.
Freeze them for longer storage.
When you’re ready to serve them, allow the bars to thaw gradually while still covered. This helps reduce condensation forming directly on the chocolate.
They may not retain exactly the same texture as freshly made bars, but freezing can be convenient when you’re preparing treats ahead of a large gathering.
Common Mistakes to Avoid
Even an easy dessert has a few potential trouble spots.
Overheating the Chocolate
Chocolate can burn surprisingly quickly.
Use short microwave intervals and stir frequently.
Getting Water in the Chocolate
Make sure everything touching the chocolate is completely dry.
Using Too Much Coconut Oil
A small amount helps thin the chocolate.
Too much can make the coating overly soft.
Adding Too Much Filling
If you’re putting peanut butter, caramel, or marshmallow between wafers, keep the layer thin.
Otherwise, the filling may squeeze out when you dip the bar.
Waiting Too Long to Add Toppings
Sprinkles, nuts, cookie crumbs, and other toppings need to be added while the chocolate is still wet.
Once the coating begins setting, toppings won’t stick as easily.
Skipping the Chilling Time
It can be tempting to eat your homemade Kit Kats immediately.
Give them time to set.
The crisp chocolate shell is part of what makes them so satisfying.
Why No-Bake Desserts Are Great to Have in Your Recipe Collection
Every home cook should have a few easy desserts that can be prepared without turning on the oven.
No-bake desserts are particularly useful during warmer weather or when your oven is already occupied with dinner.
They’re also great when you need dessert quickly.
Homemade Kit Kats fit perfectly into that category.
Most of the preparation involves melting, dipping, decorating, and chilling.
There is very little cleanup compared with many traditional baked desserts.
Homemade vs. Store-Bought
The goal of making homemade Kit Kats isn’t necessarily to create a factory-perfect replica.
It’s about taking the basic idea—crispy wafers surrounded by chocolate—and making it your own.
Homemade bars might be slightly thicker.
The chocolate might be uneven in places.
One bar might have more coating than another.
That’s perfectly fine.
Those little differences are what make homemade desserts special.
You’re creating something in your own kitchen rather than opening a wrapper.
Why Chocolate and Wafers Work So Well Together
Great desserts often depend on contrast.
Think about some familiar combinations:
Warm brownies with cold ice cream.
Soft cookies with crunchy nuts.
Sweet caramel with sea salt.
Creamy cheesecake with a crumbly crust.
Chocolate-covered wafers follow the same principle.
The chocolate provides richness and smoothness, while the wafer brings lightness and crunch.
Neither element has to be complicated because they complement each other so naturally.
Make It Your Signature Dessert
Once you’ve made homemade Kit Kats a few times, experiment until you discover your favorite version.
Maybe yours uses dark chocolate and sea salt.
Perhaps you prefer peanut butter between the wafers.
Maybe you coat them in white chocolate and crushed cookies.
You could even prepare several varieties and let family and friends vote on their favorite.
That’s one of the best things about homemade recipes: they don’t have to stay exactly the same.
Recipes become more memorable when you put your own twist on them.
Frequently Asked Questions
Can I use chocolate chips?
Yes. Milk, semisweet, dark, or white chocolate chips can all work.
Adding a small amount of coconut oil can help make melted chocolate chips easier to use for dipping.
Can I use candy melts?
Yes. Candy melts are particularly convenient when making colorful bars for holidays or parties.
They also tend to set easily.
Do I have to refrigerate them?
Refrigeration helps the chocolate set quickly and keeps the bars firm in warmer environments.
Once set, they may be stored in a cool room in an airtight container.
Can I make them ahead of time?
Absolutely.
They’re a good make-ahead dessert because you can prepare them before a party and store them until needed.
Why did my wafers become soft?
Moisture is usually the problem.
Store finished bars in an airtight container and avoid exposing them to humidity whenever possible.
Can I make them with dark chocolate?
Yes.
Dark chocolate is an excellent choice, especially if you prefer desserts that aren’t overly sweet.
Can I make mini versions?
Definitely.
Cut your wafers before dipping them to create bite-sized candies.
The Perfect Chocolate Treat Doesn’t Have to Be Complicated
Some desserts are impressive because they’re elaborate.
Others are memorable because they’re simple.
Homemade Kit Kats fall into the second category.
You don’t need a complicated ingredient list. You don’t need advanced baking skills. You don’t need to spend your entire afternoon in the kitchen.
You need crispy wafers.
You need chocolate.
And you need enough patience to wait for the chocolate to harden before eating one.
Sometimes that’s all dessert needs to be.
Dessert of the Day: Homemade Kit Kat
Today’s Dessert of the Day: Homemade Kit Kat celebrates one of the simplest and most satisfying combinations in the dessert world—crispy wafers and creamy chocolate.
They’re crunchy on the inside, smooth on the outside, easy to customize, and simple enough for almost anyone to make.
Prepare the classic milk chocolate version or turn the recipe into something completely different with peanut butter, caramel, dark chocolate, white chocolate, coconut, cookies, espresso, or sea salt.
Make them for a party.
Put them on a holiday dessert tray.
Package them as gifts.
Crumble them over ice cream.
Blend them into a milkshake.
Or keep the entire batch in the refrigerator for yourself.
No judgment.
Because when dessert combines crispy wafers, rich chocolate, and homemade goodness, breaking off another piece is pretty hard to resist.
Dessert of the Day: Homemade Kit Kat — a simple homemade candy with a satisfying crunch and plenty of chocolate in every bite.
Leave a ReplyCancel reply