Category: Recipes

  • Healthy Recipe of the Day: Texas Garlic Toast Breakfast Sandwich

    Healthy Recipe of the Day: Texas Garlic Toast Breakfast Sandwich

    Advertisements

    There’s something especially satisfying about starting the morning with a hot breakfast sandwich. Crispy bread, fluffy eggs, melted cheese, and savory breakfast flavors make it the kind of meal that can get you excited about getting out of bed.

    Today’s Healthy Recipe of the Day: Texas Garlic Toast Breakfast Sandwich takes that classic comfort-food idea and gives it a lighter, protein-packed twist.

    Instead of turning breakfast into an overly heavy meal, this sandwich combines eggs, lean protein, vegetables, cheese, and crispy Texas-style garlic toast for a breakfast that feels indulgent while still offering plenty of nutrition.

    Why You’ll Love This Breakfast Sandwich

    Texas toast isn’t exactly known for being subtle. It’s thick, crispy, buttery, and perfect for building a serious breakfast sandwich.

    The trick to making it healthier is balancing the bread with nutritious fillings.

    This sandwich delivers:

    • Protein from eggs and lean breakfast meat
    • Vegetables for extra nutrients and flavor
    • Calcium and protein from cheese
    • A satisfying crunch from garlic toast
    • Plenty of flavor without needing heavy sauces
    • A filling breakfast that can help keep you satisfied throughout the morning

    It proves that eating healthier doesn’t necessarily mean replacing everything you enjoy with plain oatmeal and salads.

    Ingredients

    Makes 2 sandwiches

    • 4 slices whole-grain Texas-style toast or thick-cut whole-grain bread
    • 1 teaspoon olive oil
    • 1 small garlic clove, minced
    • 2 whole eggs
    • 2 egg whites
    • 4 slices lean turkey bacon or 2 lean turkey sausage patties
    • 2 slices reduced-fat cheddar, pepper jack, or American cheese
    • 1/2 cup fresh baby spinach
    • 1 small tomato, sliced
    • 1/4 teaspoon black pepper
    • Pinch of garlic powder
    • Optional red pepper flakes
    • Optional hot sauce

    Make the Healthier Garlic Toast

    Preheat your oven to 400°F.

    Mix the olive oil with the minced garlic. Lightly brush the mixture over one side of each piece of bread.

    Place the bread on a baking sheet and bake for approximately 5–8 minutes, or until the edges become golden and crispy.

    You can also toast the bread in a skillet over medium heat.

    The goal isn’t to soak the bread in butter or oil. A small amount of olive oil and fresh garlic provides plenty of flavor.

    Cook the Breakfast Protein

    Prepare your turkey bacon or turkey sausage according to the package directions.

    Cook until browned and heated through, then transfer it to a plate lined with a paper towel.

    Using leaner breakfast meats can significantly reduce the amount of saturated fat compared with some traditional breakfast sandwiches.

    You could also use grilled chicken, Canadian bacon, leftover lean steak, or skip the meat entirely.

    Cook the Eggs

    Whisk together the whole eggs and egg whites.

    Season with black pepper and a small pinch of garlic powder.

    Lightly coat a nonstick skillet with cooking spray and place it over medium heat.

    Add the spinach and cook briefly until it begins to wilt.

    Pour the egg mixture into the skillet.

    Allow the eggs to cook before gently folding them toward the center. Continue cooking until they’re fluffy and completely cooked.

    Divide the eggs into two portions roughly the size of your bread.

    Assemble Your Texas Garlic Toast Breakfast Sandwich

    Now comes the best part.

    Place one piece of garlic toast on your plate with the toasted side facing down.

    Layer on:

    Egg and spinach mixture

    Turkey bacon or turkey sausage

    Tomato

    One slice of cheese

    Finish with another piece of Texas garlic toast.

    If you want the cheese extra melty, return the assembled sandwich to the warm skillet for about 30–60 seconds on each side.

    Slice diagonally and serve immediately.

    Add More Vegetables

    Breakfast sandwiches are an easy opportunity to sneak additional vegetables into your morning.

    Try adding:

    • Sautéed mushrooms
    • Bell peppers
    • Red onions
    • Avocado
    • Arugula
    • Jalapeños
    • Roasted red peppers
    • Fresh spinach
    • Sliced tomatoes

    A combination of peppers, onions, spinach, and mushrooms can turn a simple sandwich into an incredibly flavorful breakfast.

    Make It Spicy

    If you enjoy a little Texas-sized heat with breakfast, there are plenty of ways to spice things up.

    Add sliced jalapeños, crushed red pepper, cayenne pepper, pepper jack cheese, or your favorite hot sauce.

    You can also mix a little hot sauce directly into the eggs before cooking them.

    Make It Even Higher in Protein

    Want an especially protein-packed breakfast?

    Use additional egg whites.

    For example, prepare each sandwich with one whole egg and two or three egg whites. You can also add another serving of lean turkey sausage, grilled chicken, or Canadian bacon.

    Protein can make breakfast more satisfying, especially when paired with fiber-rich vegetables and whole-grain bread.

    Vegetarian Texas Garlic Toast Breakfast Sandwich

    The meat is completely optional.

    Leave out the turkey bacon or sausage and load your sandwich with eggs, spinach, peppers, onions, tomatoes, mushrooms, avocado, and cheese.

    You can also add black beans for additional protein and fiber.

    A southwestern version with eggs, black beans, avocado, tomato, pepper jack cheese, and jalapeños is particularly good on garlic toast.

    What to Serve With It

    Because this sandwich is already filling, you don’t need a complicated side dish.

    Try serving it with fresh berries, orange slices, melon, grapes, a small fruit salad, Greek yogurt, or roasted breakfast potatoes.

    For something lighter, pair the sandwich with fresh fruit and coffee or unsweetened tea.

    Meal Prep Tip

    Busy mornings don’t have to mean skipping breakfast.

    Prepare your turkey bacon or sausage and vegetables ahead of time and refrigerate them in separate airtight containers.

    In the morning, cook the eggs and toast your bread.

    You can have a hot breakfast sandwich ready in roughly 10 minutes.

    You can also assemble the sandwiches ahead of time without the tomato, wrap them individually, and refrigerate them. Reheat in an air fryer, toaster oven, or skillet and add fresh tomato afterward.

    Air Fryer Option

    An air fryer is excellent for getting the outside of the sandwich extra crispy.

    After assembling the sandwich, place it in the air fryer at approximately 350°F for 3–5 minutes, checking frequently.

    The bread becomes crispy while the cheese melts around the eggs and breakfast meat.

    Just keep an eye on it because thick toast can brown quickly.

    Healthy Swaps

    Small substitutions can make a big difference without sacrificing flavor.

    Choose whole-grain bread when possible instead of heavily buttered frozen Texas toast. Use olive oil and fresh garlic to create the garlic-toast flavor yourself.

    Replace traditional bacon or sausage with turkey bacon, turkey sausage, Canadian bacon, or another lean protein.

    Use a combination of whole eggs and egg whites rather than relying entirely on whole eggs.

    Load up on vegetables.

    And instead of piling on multiple slices of cheese, use one flavorful slice. Sharp cheddar or pepper jack can provide plenty of flavor without needing as much.

    A Breakfast That Doesn’t Feel Like “Diet Food”

    One of the biggest challenges with healthier eating is believing every meal needs to feel restrictive.

    It doesn’t.

    Sometimes the best approach is taking foods you already enjoy and adjusting the ingredients.

    A traditional Texas toast breakfast sandwich can become extremely heavy when loaded with butter, bacon, sausage, multiple eggs, cheese, and creamy sauces.

    But you don’t have to eliminate the sandwich altogether.

    Use leaner protein. Add vegetables. Choose whole grains. Reduce the amount of added fat. Keep portions reasonable.

    You still get that wonderful combination of crispy garlic toast, fluffy eggs, savory breakfast meat, vegetables, and melted cheese.

    Healthy Recipe of the Day

    The Texas Garlic Toast Breakfast Sandwich is proof that a healthier breakfast doesn’t have to be boring.

    It’s crispy on the outside, warm and cheesy inside, packed with protein, and easy to customize with whatever vegetables or lean proteins you have available.

    Whether you’re making a quick weekday breakfast or putting together something special on a Saturday morning, this sandwich brings serious breakfast flavor without needing to turn your entire morning into a cheat meal.

    Serve it hot, add your favorite healthy toppings, and enjoy every crispy, garlicky bite.

    How would you build your perfect Texas garlic toast breakfast sandwich—turkey bacon, sausage, avocado, jalapeños, extra veggies, or something completely different?

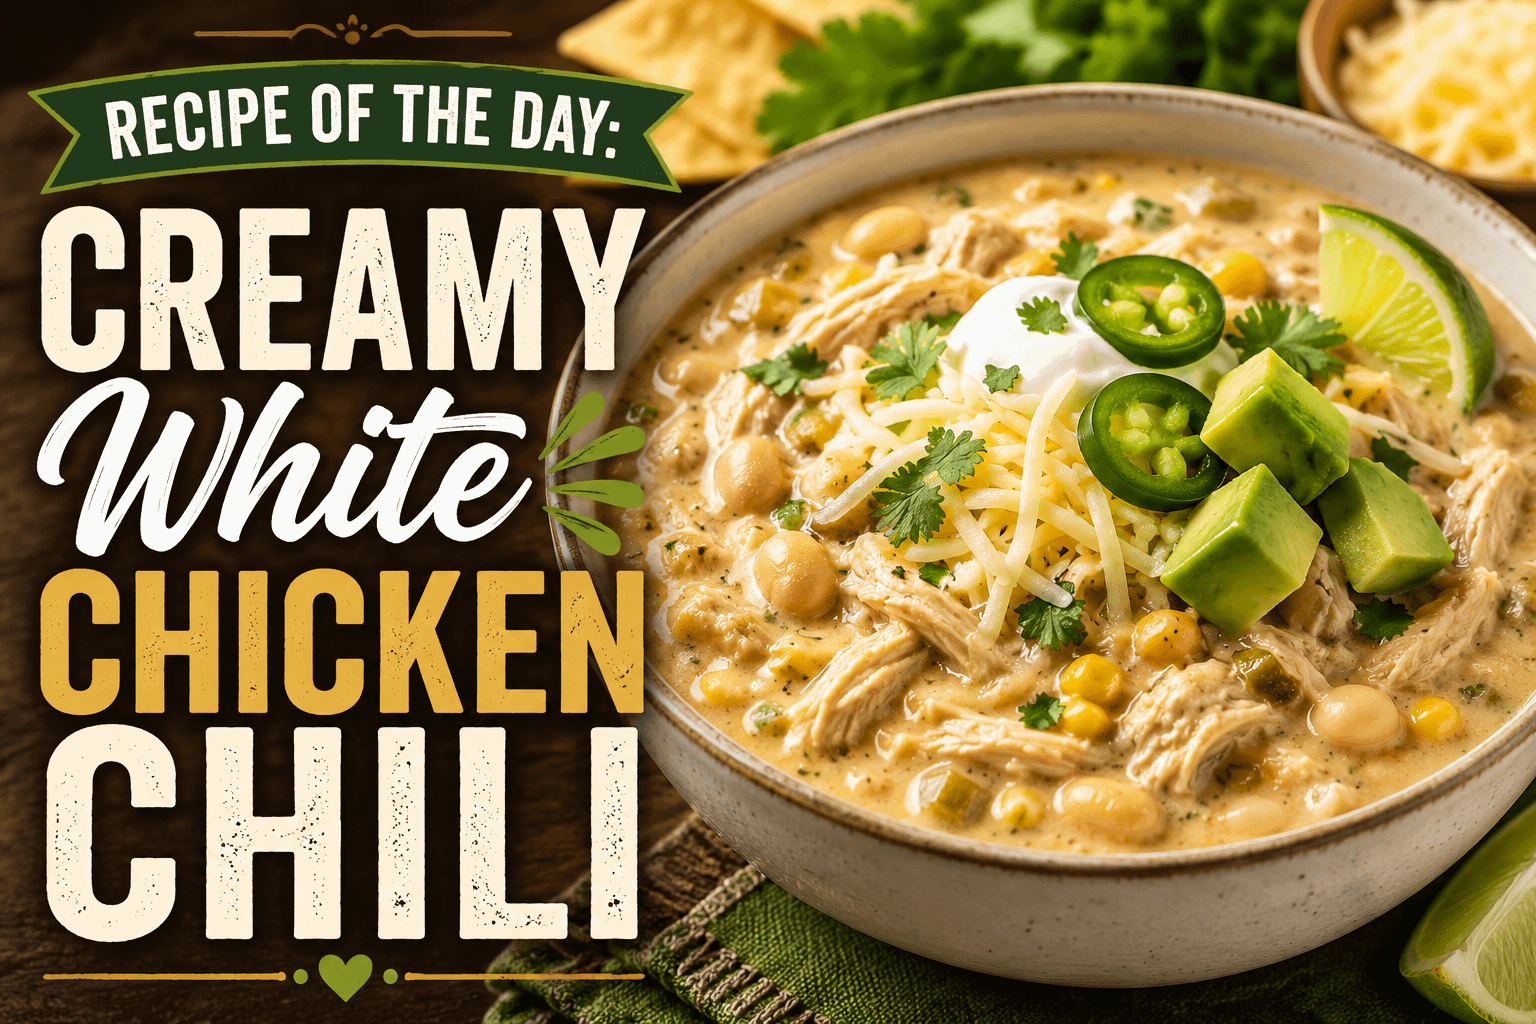
  • Recipe of the Day: Creamy White Chicken Chili

    Advertisements

    When you’re craving something warm, hearty, and comforting, Creamy White Chicken Chili is the kind of meal that hits the spot. Loaded with tender chicken, creamy white beans, green chiles, corn, warm spices, and a rich, velvety broth, this chili delivers big flavor without requiring hours in the kitchen.

    Unlike traditional red chili made with tomatoes and ground beef, white chicken chili has a lighter appearance but is every bit as satisfying. The combination of chicken, beans, cream cheese, and spices creates a thick, creamy bowl that’s perfect for a cozy dinner, game day, family gathering, or easy weeknight meal.

    And don’t forget the toppings. Shredded cheese, avocado, cilantro, jalapeños, sour cream, crushed tortilla chips, and a squeeze of fresh lime can turn a simple bowl of chili into something spectacular.

    Why You’ll Love Creamy White Chicken Chili

    There are plenty of reasons this recipe deserves a place in your regular dinner rotation. It’s comforting without being complicated, packed with protein, easy to customize, and makes fantastic leftovers.

    The creamy broth balances beautifully with the mild heat of the green chiles and chili powder. Meanwhile, white beans give the chili extra body and make every bowl filling enough to serve as a complete meal.

    Best of all, most of the ingredients are pantry and refrigerator staples.

    Ingredients

    • 2 tablespoons olive oil
    • 1 medium yellow onion, diced
    • 3 cloves garlic, minced
    • 1 pound boneless, skinless chicken breasts
    • 2 cans (15 ounces each) white beans, drained and rinsed
    • 1 can (4 ounces) diced green chiles
    • 1 cup corn, frozen or canned and drained
    • 4 cups chicken broth
    • 1 teaspoon ground cumin
    • 1 teaspoon chili powder
    • 1/2 teaspoon smoked paprika
    • 1/2 teaspoon dried oregano
    • 1/4 teaspoon cayenne pepper, optional
    • Salt and black pepper to taste
    • 8 ounces cream cheese, softened and cubed
    • 1/2 cup heavy cream
    • Juice of 1 lime
    • 2 tablespoons chopped fresh cilantro

    Optional Toppings

    • Shredded Monterey Jack or pepper jack cheese
    • Sour cream
    • Sliced avocado
    • Fresh cilantro
    • Sliced jalapeños
    • Green onions
    • Crushed tortilla chips
    • Lime wedges
    • Hot sauce

    Instructions

    Step 1: Sauté the Onion and Garlic

    Heat the olive oil in a large pot or Dutch oven over medium heat.

    Add the diced onion and cook for about 4–5 minutes, stirring occasionally, until softened and translucent.

    Add the minced garlic and cook for another 30–60 seconds, just until fragrant.

    Step 2: Build the Chili

    Place the chicken breasts into the pot.

    Add the white beans, diced green chiles, corn, chicken broth, cumin, chili powder, smoked paprika, oregano, and cayenne pepper.

    Season lightly with salt and black pepper. You can always adjust the seasoning later.

    Stir everything together and bring the mixture to a gentle boil.

    Step 3: Simmer

    Reduce the heat to low, cover, and simmer for approximately 20–25 minutes, or until the chicken is completely cooked through and reaches an internal temperature of 165°F.

    Remove the chicken from the pot and place it on a cutting board or plate.

    Using two forks, shred the chicken into bite-sized pieces.

    Return the shredded chicken to the pot.

    Step 4: Make It Creamy

    Reduce the heat to low.

    Add the softened cream cheese a few pieces at a time, stirring until it melts completely into the broth.

    Pour in the heavy cream and stir until everything is smooth and creamy.

    Avoid rapidly boiling the chili after adding the dairy. A gentle heat helps maintain the smooth texture.

    Step 5: Finish with Lime and Cilantro

    Stir in the fresh lime juice and chopped cilantro.

    Taste the chili and adjust the salt, pepper, cumin, or chili powder as needed.

    Allow everything to simmer gently for another 5 minutes so the flavors can come together.

    How to Make Your Chili Even Thicker

    If you prefer an extra-thick white chicken chili, there’s an easy trick that doesn’t require adding flour or cornstarch.

    Before adding the cream cheese, remove about 1 cup of the white beans and some broth. Mash the beans with a fork or potato masher and stir them back into the pot.

    The mashed beans naturally thicken the broth while keeping the chili rich and hearty.

    You can also use an immersion blender for just a few seconds to partially blend some of the beans directly in the pot. Don’t blend everything—you still want plenty of chicken, beans, and corn in every spoonful.

    Rotisserie Chicken Shortcut

    Need dinner even faster?

    Use a store-bought rotisserie chicken.

    Shred approximately 3 cups of cooked chicken and add it to the chili after the beans and broth have simmered for about 10–15 minutes.

    Because the chicken is already cooked, you’re simply giving it enough time to heat through and absorb the flavors.

    This shortcut can turn Creamy White Chicken Chili into an excellent last-minute dinner.

    Turn Up the Heat

    The basic recipe has a mild-to-medium level of heat, making it suitable for most families.

    For a spicier bowl, add additional cayenne pepper, diced jalapeños, pepper jack cheese, or your favorite hot sauce.

    You can also use hot diced green chiles instead of mild ones.

    If you’re serving people with different spice preferences, keep the chili relatively mild and put jalapeños, crushed red pepper, and hot sauce on the table. Everyone can customize their own bowl.

    Don’t Skip the Lime

    Fresh lime juice may seem like a small addition, but it makes a noticeable difference.

    Cream cheese, beans, chicken, and heavy cream create plenty of richness. The acidity from the lime cuts through that richness and brightens the entire dish.

    Serve extra lime wedges alongside the chili so everyone can add another squeeze if desired.

    The Toppings Make the Bowl

    Half the fun of chili is loading it with toppings.

    Start with shredded Monterey Jack cheese and a spoonful of sour cream. Add sliced avocado for extra creaminess, jalapeños for heat, cilantro for freshness, and crushed tortilla chips for crunch.

    For an impressive family dinner or game-day spread, create a white chicken chili topping bar and let everyone build their perfect bowl.

    Put out small dishes filled with cheese, avocado, sour cream, cilantro, jalapeños, green onions, tortilla strips, hot sauce, and lime wedges.

    What to Serve with Creamy White Chicken Chili

    This chili is filling enough to stand alone, but a few simple sides can make it an even better meal.

    Try serving it with warm cornbread, cheesy garlic bread, tortilla chips, quesadillas, a simple green salad, Mexican-style rice, or roasted vegetables.

    For something especially comforting, serve a thick bowl of chili with warm cornbread and honey butter.

    Slow Cooker Version

    Creamy White Chicken Chili is also easy to prepare in the slow cooker.

    Add the chicken breasts, onion, garlic, beans, green chiles, corn, broth, and seasonings to your slow cooker.

    Cook on LOW for 6–7 hours or HIGH for 3–4 hours, until the chicken reaches 165°F and shreds easily.

    Remove and shred the chicken before returning it to the slow cooker.

    During the final 20–30 minutes, stir in the cream cheese and heavy cream. Finish with lime juice and cilantro before serving.

    Storing Leftovers

    Allow leftover chili to cool before transferring it to an airtight container.

    Store it in the refrigerator for up to 3–4 days.

    Reheat individual portions in the microwave or warm larger amounts gently on the stovetop. If the chili becomes too thick after refrigeration, stir in a splash of chicken broth or milk while reheating.

    Because the recipe contains dairy, gentle reheating works best.

    Make It Your Own

    One of the best things about Creamy White Chicken Chili is how easily you can customize it.

    Try adding poblano peppers for smoky flavor, swapping corn for hominy, using cannellini or Great Northern beans, adding extra green chiles, stirring in spinach, or replacing some of the cream cheese with sour cream.

    You can even serve the leftovers over baked potatoes, rice, or tortilla chips for an entirely different meal the next day.

    Creamy, Cozy, and Packed with Flavor

    Creamy White Chicken Chili brings together everything you want in comfort food: tender chicken, hearty beans, sweet corn, warming spices, mild green chiles, and a wonderfully creamy broth.

    It’s simple enough for a weeknight dinner but satisfying enough for Sunday supper, a fall gathering, or a game-day party.

    Pile on your favorite toppings, squeeze some fresh lime over the top, grab a handful of tortilla chips, and dig in.

    Recipe of the Day: Creamy White Chicken Chili proves that sometimes the best meals are the ones served hot, creamy, and overflowing from a big comforting bowl.

    What’s your must-have topping for white chicken chili—shredded cheese, avocado, sour cream, jalapeños, tortilla chips, or something else?

  • Breakfast of the Day: Bacon Ranch Breakfast Potatoes

    Advertisements

    If you’re looking for a breakfast that’s crispy, cheesy, savory, and loaded with flavor, Bacon Ranch Breakfast Potatoes deserve a spot on your morning menu.

    Golden potatoes are seasoned and roasted until crispy, then combined with smoky bacon, ranch seasoning, melted cheese, and fresh toppings. They’re hearty enough to serve as the centerpiece of breakfast but also work perfectly alongside eggs, sausage, pancakes, or toast.

    Whether you’re preparing a big weekend breakfast, feeding the family, or simply craving something more exciting than ordinary hash browns, these Bacon Ranch Breakfast Potatoes deliver plenty of comfort and flavor.

    Why You’ll Love Bacon Ranch Breakfast Potatoes

    Breakfast potatoes are already one of the best ways to start the morning, but bacon and ranch take them to another level.

    The potatoes become crispy on the outside while remaining soft and fluffy inside. Bacon adds a salty, smoky crunch, while ranch seasoning brings garlic, onion, herbs, and tanginess to every bite. Finish everything with melted cheddar cheese, and you have a breakfast side that might steal the entire meal.

    Another advantage is how easy the recipe is to customize. Add eggs, vegetables, sausage, jalapeños, or extra cheese and turn a simple pan of potatoes into a complete breakfast.

    Ingredients

    For the potatoes:

    • 2 pounds russet or Yukon Gold potatoes
    • 6 slices bacon
    • 2 tablespoons olive oil
    • 1 packet ranch seasoning mix
    • 1 teaspoon garlic powder
    • ½ teaspoon onion powder
    • ½ teaspoon smoked paprika
    • ¼ teaspoon black pepper
    • 1 cup shredded cheddar cheese
    • 2 green onions, sliced

    Optional toppings:

    • Sour cream
    • Ranch dressing
    • Chopped fresh parsley
    • Diced tomatoes
    • Sliced jalapeños
    • Avocado
    • Hot sauce
    • Fried or scrambled eggs

    How to Make Bacon Ranch Breakfast Potatoes

    1. Prepare the Potatoes

    Preheat your oven to 425°F.

    Wash and scrub the potatoes, then cut them into approximately ½- to ¾-inch cubes. Keeping the pieces roughly the same size helps them cook evenly.

    For extra-crispy potatoes, rinse the diced potatoes under cold water to remove some of the surface starch. Dry them thoroughly with paper towels before seasoning.

    2. Cook the Bacon

    Cook the bacon in a skillet over medium heat until crispy.

    Transfer it to a paper towel-lined plate and allow it to cool slightly before crumbling or chopping it into bite-sized pieces.

    For even more bacon flavor, you can substitute a small amount of the olive oil with rendered bacon fat.

    3. Season the Potatoes

    Place the potatoes in a large bowl.

    Add the olive oil, ranch seasoning, garlic powder, onion powder, smoked paprika, and black pepper.

    Toss everything together until the potatoes are evenly coated.

    4. Roast Until Crispy

    Spread the potatoes across a large baking sheet in a single layer.

    Avoid overcrowding the pan. Leaving some space between the potatoes allows hot air to circulate around them, helping create those delicious crispy edges.

    Roast for approximately 30–40 minutes, flipping the potatoes halfway through cooking.

    They’re ready when the outside is golden brown and crispy and the inside is tender.

    5. Add Bacon and Cheese

    Remove the baking sheet from the oven and sprinkle the cooked bacon over the potatoes.

    Top everything with shredded cheddar cheese.

    Return the pan to the oven for another 3–5 minutes, or until the cheese is completely melted.

    6. Add the Finishing Touches

    Sprinkle sliced green onions over the potatoes.

    Serve immediately with sour cream, ranch dressing, hot sauce, or your favorite breakfast toppings.

    Turn Them Into Loaded Breakfast Potatoes

    Want to make this recipe an entire breakfast instead of a side dish?

    Load those potatoes up.

    After roasting, add scrambled eggs, bacon, sausage, cheddar cheese, diced tomatoes, green onions, and avocado. Finish with a drizzle of ranch or hot sauce.

    You could even serve everything in individual bowls for a Bacon Ranch Breakfast Potato Bowl.

    Another delicious option is cracking several eggs directly over the cooked potatoes and returning the pan to the oven until the egg whites are set but the yolks remain slightly runny.

    Try a Breakfast Potato Bar

    Bacon Ranch Breakfast Potatoes are also perfect when you’re feeding a crowd.

    Prepare a large batch of potatoes and place different toppings on the table so everyone can build their own breakfast bowl.

    Try offering:

    • Scrambled eggs
    • Crispy bacon
    • Breakfast sausage
    • Ham
    • Cheddar cheese
    • Pepper Jack cheese
    • Green onions
    • Bell peppers
    • Tomatoes
    • Jalapeños
    • Avocado
    • Sour cream
    • Ranch dressing
    • Salsa
    • Hot sauce

    It’s a fun breakfast idea for weekends, holidays, family gatherings, brunches, or game-day mornings.

    Tips for Extra-Crispy Breakfast Potatoes

    The secret to great breakfast potatoes is getting those crispy golden edges.

    First, make sure your potatoes are dry before adding the oil and seasonings. Excess moisture encourages steaming rather than browning.

    Second, use a large enough baking sheet. Crowded potatoes release moisture and steam each other.

    Finally, don’t constantly move them. Letting the potatoes sit against the hot baking sheet gives them time to develop a crisp crust.

    If you’re making a particularly large batch, divide the potatoes between two baking sheets instead of squeezing everything onto one.

    What to Serve With Bacon Ranch Breakfast Potatoes

    These potatoes pair beautifully with almost every traditional breakfast favorite.

    Serve them alongside fried eggs with runny yolks, fluffy scrambled eggs, breakfast sausage, ham, biscuits and gravy, French toast, pancakes, waffles, or breakfast sandwiches.

    For brunch, pair them with fresh fruit and eggs for a hearty sweet-and-savory spread.

    Make Them Spicy

    If you like a little heat with breakfast, Bacon Ranch Breakfast Potatoes are incredibly easy to spice up.

    Add cayenne pepper or crushed red pepper flakes to the seasoning mixture before roasting. Once they’re finished, top them with sliced jalapeños, Pepper Jack cheese, and your favorite hot sauce.

    A drizzle of spicy ranch is another excellent finishing touch.

    Make-Ahead and Leftover Tips

    You can dice the potatoes ahead of time and keep them submerged in cold water in the refrigerator overnight. Drain and dry them thoroughly before cooking.

    Leftover Bacon Ranch Breakfast Potatoes can be stored in an airtight container in the refrigerator for about 3–4 days.

    For the best texture, reheat them in an oven or air fryer rather than the microwave. This helps bring back some of their original crispiness.

    Leftovers are also fantastic inside breakfast burritos, breakfast tacos, quesadillas, omelets, or egg scrambles.

    Breakfast of the Day

    Bacon Ranch Breakfast Potatoes combine several breakfast favorites in one irresistible dish: crispy potatoes, smoky bacon, tangy ranch seasoning, and plenty of melted cheese.

    They’re simple enough for an everyday breakfast but indulgent enough for a weekend brunch.

    Serve them straight from the oven with eggs on the side, transform them into loaded breakfast bowls, or pile on your favorite toppings and make them your own.

    However you serve them, don’t expect many leftovers.

    Breakfast of the Day: Bacon Ranch Breakfast Potatoes — crispy, cheesy, bacon-loaded comfort food that makes getting out of bed a whole lot easier.

    Question of the Day

    What would you put on your Bacon Ranch Breakfast Potatoes—eggs, extra bacon, jalapeños, avocado, hot sauce, or all of the above?

  • Dessert of the Day: Oreo Avalanche

    Advertisements

    If you believe there is no such thing as too many Oreos, today’s dessert was made for you. Oreo Avalanche is an outrageously creamy, crunchy, chocolate-packed dessert loaded with the unmistakable cookies-and-cream flavor people love.

    Imagine spoonful after spoonful of creamy Oreo filling, chunks of chocolate sandwich cookies, rich chocolate sauce, fluffy whipped topping, and even more crushed Oreos scattered across the top. Every bite combines something smooth, something crunchy, and plenty of chocolate.

    This isn’t the kind of dessert you quietly nibble.

    It’s the kind of dessert you dig into.

    Whether you’re making something special for a family gathering, birthday celebration, summer barbecue, game night, holiday party, or simply because you have a package of Oreos waiting in the pantry, Oreo Avalanche is an easy dessert that delivers big flavor without requiring complicated baking skills.

    And the best part?

    You can customize it with even more chocolate, different Oreo flavors, ice cream, caramel, peanut butter, or practically anything else your sweet tooth can imagine.

    Welcome to today’s Dessert of the Day: Oreo Avalanche.

    What Is an Oreo Avalanche?

    An Oreo Avalanche is exactly what its name suggests—a mountain of cookies-and-cream goodness.

    Rather than focusing on one perfectly structured dessert, the idea is to create layers and textures that almost look like they’re cascading over one another. Crushed Oreos become the foundation, a creamy cookies-and-cream filling provides the richness, and additional cookies and chocolate toppings create the “avalanche.”

    Think of it as somewhere between an Oreo cheesecake dessert, cookies-and-cream parfait, pudding dessert, and an over-the-top sundae.

    There are plenty of ways to make one.

    Today’s version is a no-bake Oreo Avalanche dessert that’s incredibly simple to prepare. It features a buttery Oreo crust topped with a cheesecake-inspired Oreo filling, chocolate pudding, whipped topping, crushed cookies, and chocolate sauce.

    The refrigerator does most of the work.

    That makes it especially convenient when you need dessert for a gathering but don’t want to spend the entire afternoon standing beside the oven.

    Why Oreo Desserts Are So Irresistible

    Few packaged cookies have become as closely associated with dessert recipes as Oreos.

    They’re delicious straight from the package, but they’re also incredibly versatile.

    Crush them and they become a pie crust.

    Fold them into whipped cream and you’ve created cookies-and-cream filling.

    Mix them into ice cream and you have a classic frozen dessert.

    Sprinkle them over pudding and you’ve instantly added crunch.

    Use whole cookies as decoration and suddenly an ordinary dessert looks impressive.

    Oreos also provide several different textures in one ingredient. The chocolate cookies offer a slight crunch and deep cocoa flavor while the creamy centers add sweetness.

    When crushed into larger pieces, they remain crunchy.

    When finely crushed and mixed with butter, they transform into a rich cookie crust.

    And when folded into creamy filling, some pieces soften while others remain slightly crunchy.

    That variety is exactly what makes Oreo Avalanche so much fun to eat.

    Oreo Avalanche Recipe

    Prep Time: 25 minutes
    Chill Time: 4 hours
    Total Time: About 4 hours 25 minutes
    Servings: 10–12

    Ingredients

    For the Oreo Crust

    • 30 Oreo cookies
    • 5 tablespoons unsalted butter, melted

    For the Cookies-and-Cream Cheesecake Layer

    • 8 ounces cream cheese, softened
    • 1 cup powdered sugar
    • 1 teaspoon vanilla extract
    • 8 ounces whipped topping, thawed
    • 10 Oreo cookies, roughly crushed

    For the Chocolate Layer

    • 1 package instant chocolate pudding mix, about 3.9 ounces
    • 2 cups cold milk

    For the Topping

    • 8 ounces whipped topping
    • 10–12 Oreo cookies, roughly crushed
    • Chocolate syrup or hot fudge sauce
    • Mini chocolate chips, optional
    • Whole Oreo cookies for garnish, optional

    Step 1: Make the Oreo Crust

    Place approximately 30 Oreo cookies into a food processor and pulse until they become fine crumbs.

    You don’t need to remove the cream filling. Use the entire cookie.

    If you don’t have a food processor, place the cookies inside a sturdy resealable plastic bag and crush them with a rolling pin.

    Transfer the crumbs into a mixing bowl.

    Pour the melted butter over the Oreo crumbs and stir until everything is evenly coated. The mixture should resemble damp sand and hold together when pressed.

    Transfer the mixture into the bottom of a 9-by-13-inch baking dish.

    Press it firmly into an even layer.

    The back of a measuring cup works especially well for packing the crust tightly.

    Place the crust in the refrigerator while preparing the next layer.

    Step 2: Make the Creamy Oreo Filling

    Add the softened cream cheese to a large mixing bowl.

    Beat until smooth and creamy.

    Gradually add the powdered sugar and continue mixing until completely combined.

    Add the vanilla extract.

    Gently fold in one container of whipped topping.

    You want the mixture to remain light and fluffy, so avoid aggressively stirring after adding the whipped topping.

    Roughly crush about 10 Oreo cookies.

    Unlike the cookies used for the crust, you don’t want these pulverized into fine crumbs. Leave plenty of bite-sized cookie pieces.

    Fold them into the cream cheese mixture.

    Now you’ve created a thick cookies-and-cream cheesecake filling.

    Spread the mixture evenly over the chilled Oreo crust.

    Step 3: Add the Chocolate Pudding Layer

    Pour the cold milk into a mixing bowl.

    Add the instant chocolate pudding mix and whisk according to the package directions until the mixture begins to thicken.

    Allow the pudding to sit for several minutes.

    Once thickened, carefully spread it across the Oreo cheesecake layer.

    This layer adds another level of chocolate flavor without making the dessert overly heavy.

    The combination of chocolate pudding and cookies-and-cream filling is what begins turning an ordinary Oreo dessert into an Oreo Avalanche.

    Step 4: Bring on the Avalanche

    Now comes the fun part.

    Spread the remaining whipped topping across the chocolate pudding.

    You can make it perfectly smooth, but leaving a few swirls and peaks gives the dessert a more dramatic appearance.

    Roughly crush another 10 to 12 Oreo cookies.

    Scatter them generously across the top.

    Don’t worry about making everything perfectly symmetrical.

    This is an avalanche.

    Some areas should have large cookie chunks while others have smaller crumbs.

    Drizzle chocolate syrup or slightly warmed hot fudge sauce over everything.

    For even more chocolate, sprinkle mini chocolate chips over the top.

    Finally, place several whole or halved Oreo cookies around the dessert as garnish.

    Now you’ve officially created an Oreo Avalanche.

    Step 5: Chill Before Serving

    As tempting as it might be to immediately grab a spoon, Oreo Avalanche tastes much better after spending several hours in the refrigerator.

    Cover the dish and refrigerate for at least four hours.

    Overnight is even better.

    Chilling allows the layers to firm up and gives the flavors time to come together.

    When you’re ready to serve, slice the dessert into squares or simply scoop generous portions into dessert bowls.

    Add another drizzle of chocolate sauce right before serving if desired.

    Why Chilling Matters

    No-bake desserts require patience.

    Without oven time, refrigeration performs the important job of helping everything set.

    If you attempt to slice Oreo Avalanche immediately after assembling it, the layers may slide around and become messy.

    Will it still taste delicious?

    Absolutely.

    But allowing several hours of refrigeration creates a firmer dessert that’s easier to portion.

    An overnight chill also slightly softens some of the Oreo pieces inside the filling while the cookies sprinkled over the top retain more of their crunch.

    That contrast is fantastic.

    Turn It Into an Oreo Avalanche Sundae

    Want to make this dessert even more ridiculous?

    Add ice cream.

    Place a generous scoop of Oreo Avalanche into a bowl and add a scoop of vanilla or cookies-and-cream ice cream.

    Drizzle warm hot fudge over everything.

    Add whipped cream.

    Sprinkle additional Oreo crumbs over the top.

    Finish with a whole Oreo cookie.

    You’ve now transformed dessert into an enormous cookies-and-cream sundae.

    It’s definitely indulgent, but sometimes that’s exactly what dessert is supposed to be.

    Try Different Oreo Flavors

    One reason this dessert is so easy to reinvent is the enormous variety of Oreo flavors available.

    Instead of classic Oreos, experiment with different varieties.

    Golden Oreos create a vanilla-forward version.

    Mint Oreos transform the dessert into a chocolate-mint avalanche.

    Peanut Butter Oreos add a salty-sweet peanut butter flavor.

    Double Stuf Oreos make everything even richer.

    Chocolate Creme Oreos dramatically increase the chocolate factor.

    Birthday Cake Oreos can turn this into a fun birthday-party dessert.

    You can even combine two Oreo varieties.

    For example, use classic Oreos for the crust and mint Oreos in the filling.

    Peanut Butter Oreo Avalanche

    Chocolate and peanut butter are practically destined to appear together.

    To make a peanut butter version, beat approximately 1/2 cup creamy peanut butter into the cream cheese mixture before adding the whipped topping.

    Then prepare the dessert normally.

    For the topping, drizzle both chocolate syrup and slightly warmed peanut butter over the whipped topping.

    Add crushed Oreos and chopped peanut butter cups.

    The finished dessert becomes incredibly rich, so smaller servings may be appropriate.

    Although someone will inevitably ask for seconds.

    Chocolate Lover’s Oreo Avalanche

    If ordinary chocolate isn’t enough, go all in.

    Use chocolate Oreos for the crust.

    Add mini chocolate chips to the cream cheese layer.

    Use chocolate pudding for the center.

    Drizzle hot fudge over the top.

    Then add crushed Oreos, chocolate chips, brownie pieces, and chocolate curls.

    You could even serve each piece alongside chocolate ice cream.

    At that point, the word “avalanche” becomes extremely appropriate.

    Strawberry Oreo Avalanche

    Chocolate and strawberries are another classic combination.

    Prepare the recipe as written but add sliced fresh strawberries between the cream cheese and chocolate pudding layers.

    Add additional strawberries to the top immediately before serving.

    You can also drizzle strawberry sauce alongside the chocolate syrup.

    The fruit provides a slightly refreshing contrast to the rich chocolate and cream layers.

    Caramel Oreo Avalanche

    Chocolate and caramel are difficult to resist.

    Drizzle caramel sauce over the pudding layer before adding the final whipped topping.

    Then decorate the top with crushed Oreos, chocolate sauce, and caramel sauce.

    A tiny sprinkle of flaky sea salt can create a salted caramel effect.

    Just remember that a little goes a long way.

    Add Brownies

    There are Oreo desserts.

    There are brownie desserts.

    And then there are desserts that decide choosing between them is completely unnecessary.

    Bake your favorite brownies ahead of time and allow them to cool completely.

    Cut them into small cubes.

    Scatter brownie pieces throughout the Oreo Avalanche or add them across the top.

    Brownies add a dense, fudgy texture that contrasts beautifully with the fluffy whipped layers.

    Add Cookie Dough

    Another fun variation is adding small pieces of edible chocolate chip cookie dough.

    Make sure you’re using cookie dough specifically designed to be eaten without baking.

    Scatter small pieces throughout the cheesecake layer or use them as a topping.

    The combination of Oreos, cookie dough, chocolate pudding, and whipped cream turns this into a dessert that will probably disappear very quickly at a party.

    Make Individual Oreo Avalanche Cups

    Instead of preparing one large dessert, assemble individual portions.

    Clear plastic dessert cups or small glass jars work perfectly.

    Layer:

    Crushed Oreo crust.

    Cookies-and-cream cheesecake filling.

    Chocolate pudding.

    Whipped topping.

    Crushed Oreos.

    Chocolate drizzle.

    Repeat the layers if your cups are tall enough.

    Individual desserts are especially useful for birthdays, showers, graduation celebrations, holiday parties, potlucks, and other gatherings.

    Guests can simply grab a cup and enjoy.

    No slicing required.

    Make It Look Amazing

    Oreo Avalanche doesn’t require professional decorating skills.

    In fact, slightly messy decoration fits the theme perfectly.

    The secret is abundance.

    Use large Oreo chunks instead of only fine crumbs.

    Let chocolate sauce drip slightly across the whipped topping.

    Stand halved Oreos vertically in the whipped cream.

    Scatter mini chocolate chips between the cookies.

    You want the dessert to look as though Oreos are tumbling across the top.

    A combination of whole cookies, halves, chunks, and crumbs provides the best presentation.

    The Secret to a Great Oreo Crust

    A good cookie crust should hold together without becoming greasy.

    Finely crushing the cookies is important because large pieces won’t pack together properly.

    Once the melted butter has been incorporated, firmly press the mixture into the dish.

    Then chill it.

    The cold butter will begin solidifying and help bind the cookie crumbs together.

    For particularly neat slices, refrigerate the crust for approximately 20 minutes before adding the cream cheese layer.

    Don’t Overmix the Whipped Topping

    When adding whipped topping to the cream cheese mixture, fold it in gently.

    The goal is to preserve the air inside the whipped topping.

    Aggressive mixing can cause the filling to become denser.

    Using softened cream cheese also makes the process easier.

    Cold cream cheese can create lumps that are difficult to remove without overmixing everything else.

    Set the cream cheese on the counter ahead of time and allow it to soften naturally.

    Make It Ahead

    Oreo Avalanche is an excellent make-ahead dessert.

    In fact, making it the night before you plan to serve it can improve the texture.

    Prepare the crust, cream cheese layer, pudding layer, and whipped topping.

    Cover the dessert tightly and refrigerate overnight.

    For maximum crunch, consider waiting until shortly before serving to add the final Oreo pieces.

    Then add the chocolate drizzle and garnishes.

    You’ll have a dessert that looks freshly assembled without having to prepare everything while guests are arriving.

    Storing Leftovers

    Cover leftover Oreo Avalanche tightly and store it in the refrigerator.

    For the best texture, enjoy it within approximately three to four days.

    The Oreo pieces will gradually soften as they absorb moisture from the filling, but that isn’t necessarily a bad thing.

    Some people actually prefer the softer cookies after the dessert has been refrigerated overnight.

    Just don’t leave a cream-based dessert sitting at room temperature for extended periods.

    Perfect for Parties

    One of the best things about Oreo Avalanche is that it works for practically any casual celebration.

    Serve it for:

    • Birthday parties
    • Family dinners
    • Summer cookouts
    • Graduation celebrations
    • Game nights
    • Movie nights
    • Potlucks
    • Holiday gatherings
    • Super Bowl parties
    • Backyard barbecues
    • Sleepovers
    • Office celebrations

    It’s particularly useful when you need something that feeds several people without requiring individually decorated desserts.

    Put one large dish on the dessert table, provide a serving spoon, and watch what happens.

    A Dessert Kids Can Help Make

    Oreo Avalanche is also a great recipe for getting kids involved in the kitchen because there isn’t much complicated cooking involved.

    They can help crush the cookies.

    They can stir the Oreo crumbs and butter.

    They can sprinkle cookie pieces over the top.

    And perhaps most importantly, they can help decide exactly how many Oreos qualify as an avalanche.

    Just be prepared for a few cookies to mysteriously disappear during preparation.

    Oreo Avalanche for Birthdays

    Forget an ordinary birthday cake.

    An Oreo lover might prefer an Oreo Avalanche.

    Decorate the top with whole Oreos arranged around the outside edge and add colorful birthday sprinkles.

    You could even place candles directly into the dessert.

    For individual birthday portions, prepare the dessert in cups and place one Oreo vertically into each serving.

    It’s simple, fun, and different from traditional cake.

    What to Serve With Oreo Avalanche

    Because this dessert is rich, beverages that balance its sweetness work particularly well.

    Try serving it with:

    • Cold milk
    • Hot coffee
    • Iced coffee
    • Espresso
    • Unsweetened iced tea
    • Hot chocolate

    A tall glass of cold milk might be the ultimate pairing.

    After all, Oreos and milk have always belonged together.

    Why This Dessert Works

    Great desserts aren’t only about flavor.

    Texture matters just as much.

    Oreo Avalanche delivers several textures simultaneously.

    The crust is dense and slightly crunchy.

    The cream cheese layer is smooth and fluffy.

    The crushed cookies provide crunch.

    The chocolate pudding is silky.

    The whipped topping is light.

    The chocolate drizzle adds richness.

    Then another layer of cookies finishes everything.

    Every spoonful can be slightly different depending on which layer you hit.

    That’s what makes the dessert interesting from the first bite to the last.

    A Celebration of Cookies and Cream

    There is something nostalgic about cookies-and-cream desserts.

    For many people, Oreos bring back memories of childhood snacks, glasses of milk, lunchboxes, birthday parties, and late-night cookie raids.

    Oreo Avalanche takes those familiar flavors and turns them into something worthy of the dessert table.

    It’s uncomplicated.

    It’s indulgent.

    It’s customizable.

    And it doesn’t pretend to be anything other than what it is—a giant celebration of Oreos.

    Sometimes the best desserts don’t need fancy ingredients or complicated techniques.

    Sometimes you simply need chocolate cookies, creamy filling, pudding, whipped cream, and enough Oreo pieces to cover practically everything in sight.

    Final Thoughts

    Today’s Dessert of the Day: Oreo Avalanche is for anyone who believes dessert should occasionally be completely over the top.

    A crunchy Oreo crust forms the foundation. Fluffy cookies-and-cream cheesecake filling adds richness. Chocolate pudding brings another layer of chocolate flavor. Whipped topping keeps everything light and creamy. Then crushed Oreos and chocolate sauce come tumbling across the top.

    It’s easy enough for a weeknight dessert but impressive enough for a celebration.

    Make the classic version first.

    Then experiment.

    Add peanut butter.

    Throw in brownie pieces.

    Drizzle caramel over the top.

    Add strawberries.

    Turn it into individual parfait cups.

    Or serve it alongside a giant scoop of cookies-and-cream ice cream.

    There really isn’t a wrong way to build an Oreo Avalanche—as long as you don’t run out of Oreos.

    Would you make your Oreo Avalanche with extra chocolate, peanut butter, caramel, or keep it classic cookies and cream?

  • Healthy Recipe of the Day: Chicken Parmesan Lasagna

    Advertisements

    There are some meals that instantly feel like comfort food. Chicken Parmesan is one of them. Lasagna is another. Put the two together, and you have a hearty Italian-inspired dinner filled with tender chicken, rich tomato sauce, creamy cheese, and layers of pasta.

    Today’s Healthy Recipe of the Day: Chicken Parmesan Lasagna takes everything people love about these two classics and combines them into one satisfying casserole while making a few thoughtful changes to keep the meal lighter and more balanced.

    Instead of breading and frying the chicken, this recipe uses lean, simply seasoned chicken breast. Part-skim cheeses help deliver the creamy, cheesy layers you expect from lasagna without making the dish unnecessarily heavy. A flavorful marinara sauce brings everything together, while optional vegetables can add even more nutrition.

    The result is a comforting family dinner that proves eating healthier doesn’t have to mean giving up the foods you love.

    Why Chicken Parmesan and Lasagna Work So Well Together

    Traditional chicken Parmesan usually consists of breaded chicken topped with marinara sauce and melted mozzarella and Parmesan cheese. Lasagna features many of those same flavors—tomato sauce, mozzarella, Parmesan, pasta, herbs, and plenty of savory goodness.

    That makes combining the two surprisingly natural.

    In this recipe, chicken becomes part of the lasagna filling rather than being fried and placed on top. Each slice contains layers of pasta, seasoned chicken, ricotta, marinara, mozzarella, and Parmesan.

    You still get that recognizable Chicken Parmesan flavor, but in a warm, layered casserole that’s perfect for sharing.

    It’s especially good when you want something that feels indulgent without turning dinner into an overly heavy meal.

    Healthy Chicken Parmesan Lasagna Recipe

    Prep Time: 25 minutes
    Cook Time: 45–50 minutes
    Resting Time: 10–15 minutes
    Total Time: About 1 hour 25 minutes
    Servings: 8

    Ingredients

    For the Chicken

    • 1½ pounds boneless, skinless chicken breasts
    • 1 tablespoon olive oil
    • 1 teaspoon Italian seasoning
    • ½ teaspoon garlic powder
    • ½ teaspoon onion powder
    • ¼ teaspoon black pepper
    • ¼ teaspoon salt

    For the Lasagna

    • 9 whole-wheat or regular lasagna noodles
    • 3 cups marinara sauce, preferably lower in added sugar and sodium
    • 15 ounces part-skim ricotta cheese
    • 1 large egg
    • 2 cups shredded part-skim mozzarella cheese, divided
    • ½ cup freshly grated Parmesan cheese, divided
    • 1 teaspoon Italian seasoning
    • ½ teaspoon garlic powder
    • 2 tablespoons chopped fresh parsley
    • Fresh basil for serving, optional

    Optional Vegetable Additions

    • 2 cups fresh spinach
    • 1 cup finely chopped mushrooms
    • 1 small zucchini, diced
    • ½ cup diced bell pepper

    Step 1: Prepare the Chicken

    Preheat the oven to 375°F.

    Pat the chicken breasts dry and season both sides with Italian seasoning, garlic powder, onion powder, black pepper, and salt.

    Heat the olive oil in a large skillet over medium heat.

    Add the chicken and cook for approximately 5–7 minutes per side, depending on thickness, until the chicken is fully cooked and reaches an internal temperature of 165°F.

    Remove it from the skillet and allow it to rest for several minutes.

    Once it is cool enough to handle, chop or shred the chicken into bite-sized pieces.

    Using unbreaded chicken is one of the biggest differences between this recipe and traditional chicken Parmesan. You eliminate the frying step while keeping plenty of Italian flavor.

    Step 2: Prepare the Lasagna Noodles

    Bring a large pot of water to a boil.

    Cook the lasagna noodles according to the package directions until they are just al dente.

    Don’t overcook them because they’ll continue cooking in the oven.

    Drain the noodles and carefully arrange them on a clean surface so they don’t stick together.

    You can also use oven-ready lasagna noodles if you prefer. Just make sure there is enough sauce in the casserole to provide the moisture they need while baking.

    Step 3: Make the Ricotta Mixture

    In a medium bowl, combine:

    • Ricotta cheese
    • Egg
    • ¼ cup Parmesan
    • ½ cup mozzarella
    • Italian seasoning
    • Garlic powder
    • Fresh parsley

    Mix until everything is evenly combined.

    This creamy mixture creates the classic lasagna texture between the layers.

    Using part-skim ricotta and mozzarella is an easy way to lighten the recipe while still keeping that satisfying cheesy flavor.

    Step 4: Add Vegetables if Desired

    Vegetables aren’t required, but they’re an excellent addition.

    Spinach is especially easy.

    If using fresh spinach, place it in a skillet over medium heat for a few minutes until wilted. Remove any excess moisture before adding it to your lasagna.

    Mushrooms, zucchini, onions, and bell peppers can also be sautéed before being added.

    Adding vegetables is a great way to increase the volume of the meal while incorporating more nutrients and fiber.

    Step 5: Begin Layering the Lasagna

    Lightly coat a 9-by-13-inch baking dish with cooking spray.

    Spread approximately ½ cup marinara sauce across the bottom.

    Place three lasagna noodles over the sauce.

    Spread approximately one-third of the ricotta mixture over the noodles.

    Add approximately one-third of the chicken.

    If you’re using vegetables, scatter some over the chicken.

    Spoon approximately ¾ cup marinara sauce over everything.

    Sprinkle lightly with mozzarella.

    Step 6: Repeat the Layers

    Add another three noodles.

    Repeat the layers:

    Ricotta mixture.

    Chicken.

    Vegetables, if using.

    Marinara.

    Mozzarella.

    Add the final three lasagna noodles.

    Spread the remaining marinara sauce across the top.

    Finish with the remaining mozzarella and Parmesan cheese.

    You should now have a beautiful casserole ready for the oven.

    Step 7: Bake

    Cover the baking dish loosely with aluminum foil.

    Bake at 375°F for approximately 30 minutes.

    Remove the foil and continue baking for another 15–20 minutes, or until the cheese is melted and bubbling and the casserole is heated completely through.

    For a slightly golden cheese topping, you can broil the lasagna for a minute or two at the end. Watch it carefully because cheese can go from golden to burned very quickly.

    Step 8: Let It Rest

    This might be the hardest part.

    Don’t immediately cut into the lasagna.

    Allow it to rest for approximately 10–15 minutes after removing it from the oven.

    Resting gives the layers time to settle and makes the lasagna much easier to slice.

    Garnish with chopped parsley or fresh basil before serving.

    What Makes This Chicken Parmesan Lasagna Healthier?

    Calling something “healthy” doesn’t have to mean removing every ingredient that makes it enjoyable.

    A healthier recipe can simply be about making smarter substitutions, improving nutritional balance, and paying attention to portions.

    This Chicken Parmesan Lasagna does exactly that.

    Lean Chicken Breast

    Chicken breast provides plenty of protein without requiring large amounts of added fat.

    More importantly, we’re skipping the traditional breading and frying process associated with chicken Parmesan.

    The chicken gets its flavor from herbs and seasonings instead.

    Part-Skim Cheese

    Cheese is still an important part of this recipe.

    After all, it’s lasagna!

    Using part-skim mozzarella and ricotta allows you to keep the creamy texture and melted cheese experience while making the dish somewhat lighter than versions loaded with full-fat cheese.

    Tomato-Based Sauce

    Marinara provides rich tomato flavor without requiring a heavy cream-based sauce.

    When shopping for marinara, check the nutrition label. Some varieties contain significant amounts of added sugar and sodium.

    A simple tomato sauce with tomatoes, herbs, garlic, and spices is often an excellent choice.

    Whole-Wheat Pasta

    Whole-wheat lasagna noodles are optional, but they can provide additional fiber compared with traditional refined pasta.

    If your family strongly prefers regular lasagna noodles, use them.

    Healthy eating doesn’t require perfection.

    It’s more important to create meals you enjoy and can realistically continue making.

    Extra Vegetables

    Adding spinach, mushrooms, zucchini, bell peppers, or other vegetables is an easy way to increase the nutritional value of the meal.

    You can even combine several vegetables.

    For example, chicken, spinach, mushrooms, and marinara make an excellent combination.

    Don’t Forget About Portion Size

    Lasagna is delicious enough that it’s easy to keep cutting “just one more little piece.”

    One of the simplest approaches to enjoying comfort foods as part of a balanced lifestyle is being mindful of portions.

    Instead of filling your entire plate with lasagna, serve a reasonable slice alongside vegetables or salad.

    You’ll still enjoy everything you love about the meal while creating a more balanced dinner.

    What to Serve with Chicken Parmesan Lasagna

    Because the lasagna itself is filling, simple side dishes work best.

    A large garden salad is one of my favorite options.

    Try mixed greens with tomatoes, cucumbers, red onions, carrots, and a light vinaigrette.

    Roasted vegetables are another great choice.

    Broccoli, asparagus, Brussels sprouts, green beans, zucchini, and cauliflower all pair nicely with the Italian flavors in the lasagna.

    You could also serve steamed broccoli seasoned with garlic and black pepper.

    If you want bread, consider a small piece of garlic bread or toasted whole-grain bread rather than turning the side dish into another major portion of the meal.

    Easy Spinach Chicken Parmesan Lasagna

    If you want to add vegetables without dramatically changing the flavor, spinach is probably the easiest option.

    Add about 2 cups of fresh spinach to a skillet and cook until wilted.

    Remove excess moisture.

    Then simply distribute the spinach between the layers along with the chicken.

    Spinach works particularly well with ricotta, mozzarella, marinara, and chicken.

    It’s such a natural combination that even people who aren’t enthusiastic about vegetables may enjoy it.

    Make It Even More Vegetable-Packed

    Want to take things further?

    Try combining:

    • Spinach
    • Mushrooms
    • Zucchini
    • Bell peppers
    • Onion

    Sauté the vegetables before assembling the lasagna.

    This is important because vegetables such as zucchini and mushrooms release water during cooking. Adding them raw can potentially make the finished lasagna watery.

    Cook them first, drain any excess liquid, and then layer them into the casserole.

    Can You Make Chicken Parmesan Lasagna Ahead of Time?

    Absolutely.

    Lasagna is one of the best make-ahead dinners.

    Assemble the entire casserole according to the recipe, but don’t bake it.

    Cover the baking dish tightly and refrigerate it.

    When you’re ready for dinner, remove it from the refrigerator while the oven preheats.

    Because the lasagna will be cold, it may require additional baking time.

    This makes Chicken Parmesan Lasagna particularly useful for busy weekdays.

    Prepare it the night before, refrigerate it, and you’ve already completed most of tomorrow’s dinner.

    Storing Leftovers

    Allow leftover Chicken Parmesan Lasagna to cool before transferring it to airtight containers.

    Store it in the refrigerator and enjoy within about 3–4 days.

    Individual portions are convenient because you can reheat only what you need.

    Add a fresh salad or vegetables, and yesterday’s dinner becomes an easy lunch.

    Can You Freeze Chicken Parmesan Lasagna?

    Yes.

    Lasagna generally freezes very well.

    You can freeze the entire casserole or individual portions.

    Individual portions are particularly convenient.

    Wrap each cooled serving securely and place it in a freezer-safe container. Label it with the date so you know when it was prepared.

    When you’re ready to eat it, thaw it safely in the refrigerator before reheating thoroughly.

    Having homemade meals waiting in the freezer can make healthier choices much easier on nights when you don’t have the energy or time to cook.

    Meal Prep Tip

    If you’re already cooking chicken for this recipe, consider preparing extra.

    Cook several chicken breasts at once and save the additional chicken for other meals during the week.

    You can use it for:

    • Chicken salads
    • Wraps
    • Grain bowls
    • Chicken tacos
    • Pasta dishes
    • Soups
    • Sandwiches
    • Breakfast scrambles

    A little preparation can make several future meals easier.

    A High-Protein Comfort Food Dinner

    One reason Chicken Parmesan Lasagna can be so satisfying is the combination of protein, carbohydrates, and fat.

    Chicken provides substantial protein, while ricotta, mozzarella, and Parmesan contribute additional protein.

    That makes this more than simply pasta covered in sauce.

    Adding vegetables and serving it with a salad can turn one slice into a well-rounded dinner.

    How to Get More Flavor Without More Calories

    Healthy food doesn’t need to taste boring.

    Herbs and spices are some of the easiest ways to add flavor.

    Try experimenting with:

    Garlic: Fresh garlic or garlic powder works beautifully with chicken and tomatoes.

    Basil: Fresh basil added after baking gives the dish an unmistakable Italian-inspired freshness.

    Oregano: A little oregano adds another layer of flavor to the marinara.

    Crushed red pepper: If you enjoy some heat, sprinkle a small amount into the sauce.

    Parsley: Fresh parsley brightens the finished casserole.

    Black pepper: Freshly cracked black pepper can make a surprisingly big difference.

    Flavor doesn’t always have to come from additional butter, oil, cheese, or salt.

    Homemade Marinara Option

    If you have extra time, homemade marinara is another way to control exactly what goes into your dinner.

    Start with crushed tomatoes and add garlic, onion, basil, oregano, black pepper, and a small amount of olive oil.

    Allow everything to simmer until the flavors come together.

    You don’t necessarily need sugar. Good tomatoes develop a naturally rich flavor as the sauce simmers.

    Homemade sauce can also be made in large batches and frozen for future dinners.

    A Family-Friendly Healthy Dinner

    One of the challenges of trying to eat healthier is finding meals everyone actually wants to eat.

    Nobody wants to prepare one “healthy meal” for themselves and an entirely separate dinner for everyone else.

    That’s where healthier versions of familiar comfort foods can be especially useful.

    Chicken Parmesan is familiar.

    Lasagna is familiar.

    Combining them gives you something slightly different without becoming so unusual that picky eaters immediately reject it.

    You can also customize different sections of the casserole.

    Add extra vegetables to one side, more chicken to another, or a little crushed red pepper to the sauce for people who enjoy heat.

    Great for Sunday Dinner

    This Chicken Parmesan Lasagna makes an excellent Sunday dinner.

    There’s something comforting about placing a bubbling casserole in the center of the table and letting everyone gather around.

    Serve it with a big salad, roasted vegetables, and sparkling water with lemon.

    You have a complete meal that feels special without requiring restaurant-level cooking skills.

    Better yet, there’s a good chance you’ll have leftovers for Monday.

    That’s always a win.

    Comfort Food Can Still Fit a Healthier Lifestyle

    Sometimes people believe healthy eating means abandoning everything they enjoy.

    No pasta.

    No cheese.

    No casseroles.

    No comfort food.

    That approach can make eating healthier feel like punishment.

    A more realistic approach is finding ways to modify your favorite meals.

    Maybe you bake instead of fry.

    Maybe you use leaner protein.

    Maybe you add vegetables.

    Maybe you reduce the amount of cheese without eliminating it.

    Maybe you serve a smaller portion with a large salad.

    Those changes may seem small individually, but together they can make a meaningful difference.

    And most importantly, you still get to enjoy your dinner.

    Healthy Recipe of the Day

    Today’s Healthy Recipe of the Day: Chicken Parmesan Lasagna proves that comfort food and healthier eating don’t have to live in completely different worlds.

    Tender seasoned chicken replaces heavily breaded fried chicken. Marinara provides plenty of rich tomato flavor. Ricotta, mozzarella, and Parmesan create the cheesy layers every good lasagna needs, while whole-wheat noodles and vegetables can provide additional fiber and nutrients.

    The finished casserole is warm, cheesy, filling, and packed with familiar Italian-inspired flavors.

    It’s perfect for family dinner, meal prep, Sunday supper, or those evenings when you want something comforting waiting for you at the table.

    Most importantly, it’s the kind of healthier recipe that doesn’t constantly remind you that you’re eating a healthier recipe.

    Sometimes the best way to build better eating habits isn’t to eliminate your favorite foods.

    It’s to find better ways to make them.

    Would you add spinach, mushrooms, or another vegetable to your Chicken Parmesan Lasagna, or would you keep it all about the chicken and cheese?

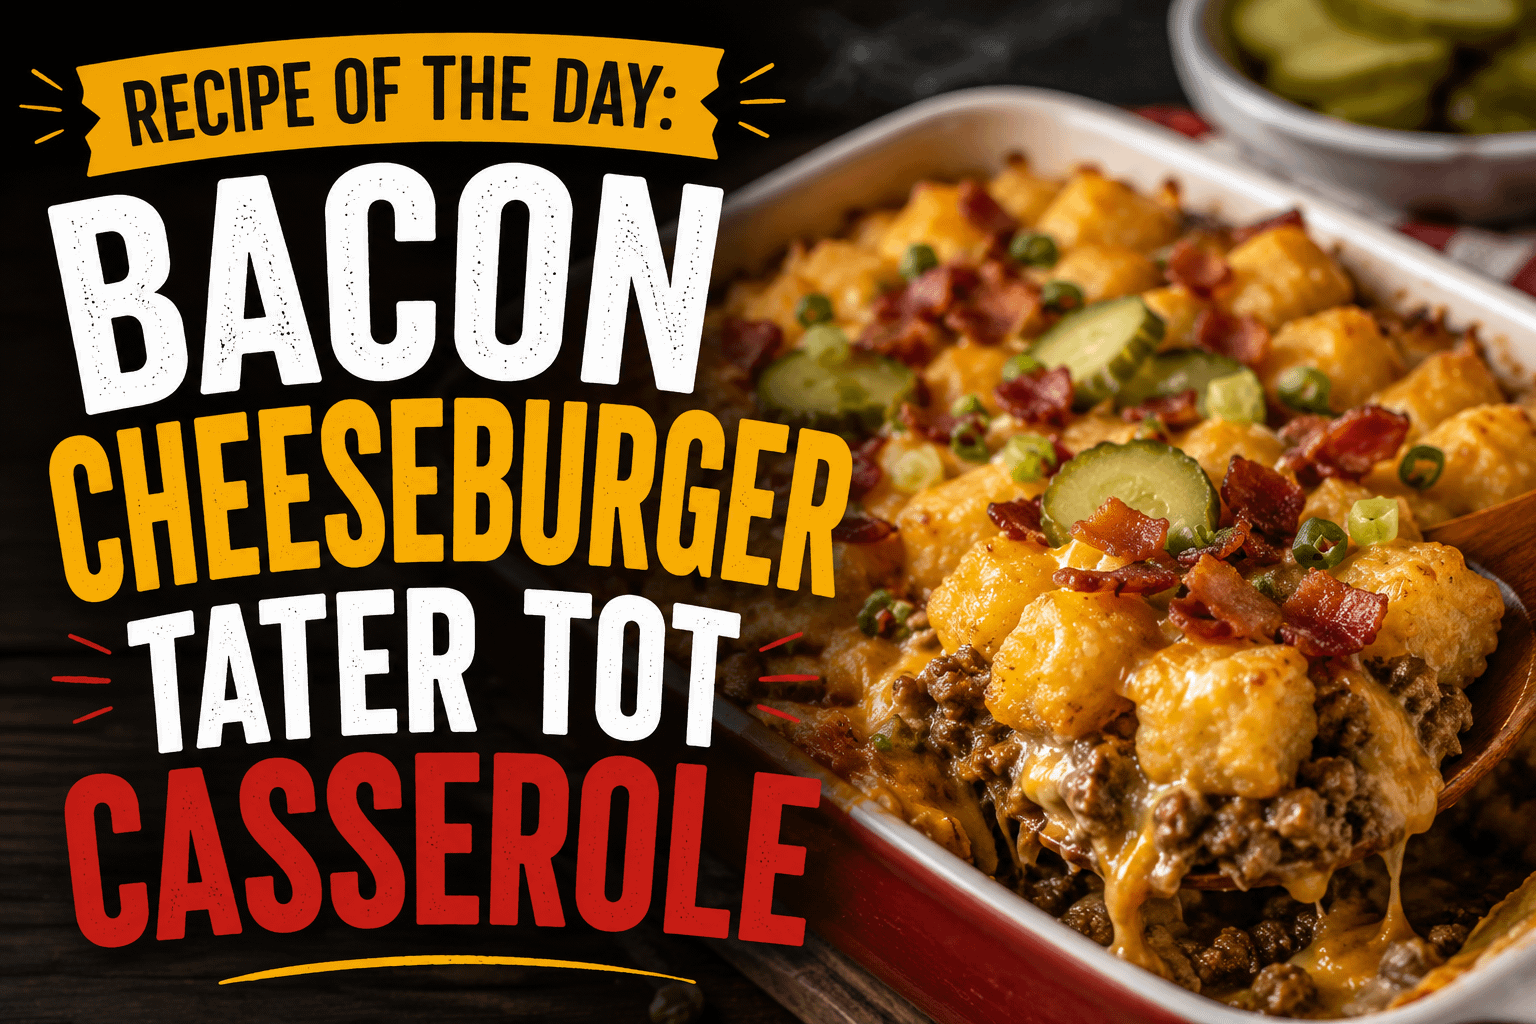
  • Recipe of the Day: Bacon Cheeseburger Tater Tot Casserole

    Advertisements

    There are some meals that simply know how to make everyone at the table happy. They’re warm, filling, cheesy, flavorful, and familiar—the kind of food that feels like comfort from the very first bite.

    Today’s Recipe of the Day: Bacon Cheeseburger Tater Tot Casserole takes everything people love about a classic bacon cheeseburger and transforms it into an easy, family-friendly casserole topped with crispy golden tater tots.

    Imagine seasoned ground beef mixed with smoky bacon, onions, plenty of melted cheese, and a creamy cheeseburger-inspired sauce. Then picture all of that covered with a layer of crispy tater tots and baked until everything underneath is hot, bubbling, and delicious.

    It’s part cheeseburger, part loaded fries, and part old-fashioned comfort-food casserole.

    Best of all, it’s easy enough for an ordinary weeknight while still being fun enough for a casual weekend gathering, game night, potluck, or family get-together.

    If your family loves burgers, bacon, cheese, and potatoes, this is one dinner worth putting into the regular rotation.

    Why Bacon Cheeseburger Tater Tot Casserole Works So Well

    The magic of this casserole comes from combining familiar flavors in a completely different format.

    A great bacon cheeseburger already gives you several irresistible components: savory beef, smoky bacon, melted cheese, onions, tangy condiments, and sometimes pickles.

    Then there are tater tots.

    Instead of putting everything between hamburger buns, we’re building those flavors into a hearty casserole and covering the entire thing with crispy potatoes.

    The contrast is especially good. Underneath the tots is a rich, cheesy beef mixture, while the top becomes crispy and golden in the oven.

    Every spoonful gives you a little bit of both.

    It’s also wonderfully customizable. You can keep it simple for picky eaters or load it with additional burger-inspired toppings for people who want the full experience.

    Ingredients

    For approximately 6–8 servings, you will need:

    For the Cheeseburger Filling

    • 1 1/2 pounds ground beef
    • 8 slices bacon
    • 1 small yellow onion, diced
    • 2 cloves garlic, minced
    • 1 teaspoon salt
    • 1/2 teaspoon black pepper
    • 1 teaspoon smoked paprika
    • 1 tablespoon Worcestershire sauce
    • 2 tablespoons ketchup
    • 1 tablespoon yellow mustard
    • 1 can (10.5 ounces) condensed cheddar cheese soup
    • 1/2 cup sour cream
    • 1 1/2 cups shredded cheddar cheese

    For the Topping

    • 1 bag (approximately 28–32 ounces) frozen tater tots
    • 1 cup shredded cheddar cheese
    • 2 slices cooked bacon, crumbled, optional

    Optional Cheeseburger Toppings

    • Chopped dill pickles
    • Diced tomatoes
    • Chopped green onions
    • Shredded lettuce
    • Diced red onion
    • Ketchup
    • Yellow mustard
    • Burger sauce
    • Pickled jalapeños

    Step 1: Prepare the Bacon

    Preheat your oven to 400°F.

    Cook the bacon in a large skillet over medium heat until it reaches your preferred level of crispness.

    Transfer the cooked bacon to a paper towel-lined plate and allow it to cool slightly. Once cool enough to handle, crumble or chop it into small pieces.

    You can leave approximately a tablespoon of bacon grease in the skillet before cooking the beef and onions. This adds another layer of smoky bacon flavor to the casserole.

    Discard the remaining grease carefully.

    Step 2: Brown the Ground Beef

    Add the diced onion to the skillet and cook for approximately 2–3 minutes.

    Add the ground beef.

    Cook the beef over medium-high heat, breaking it apart with a wooden spoon or spatula as it cooks.

    Continue cooking until the beef is completely browned and the onions are tender.

    Add the minced garlic and cook for approximately another 30–60 seconds.

    Drain any excess grease from the skillet.

    This step is important because too much grease can make the finished casserole unnecessarily oily.

    Return the skillet to the stove.

    Step 3: Build the Cheeseburger Flavor

    Season the ground beef with salt, black pepper, and smoked paprika.

    Then stir in the Worcestershire sauce, ketchup, and yellow mustard.

    These ingredients might seem simple, but together they create the unmistakable flavor of a classic cheeseburger.

    The Worcestershire sauce adds savory depth, while the ketchup contributes sweetness and acidity. Mustard gives the mixture the tangy bite you expect from a good burger.

    Stir everything together until the beef is evenly coated.

    Step 4: Make It Creamy and Cheesy

    Reduce the heat to low.

    Add the condensed cheddar cheese soup and sour cream to the beef mixture.

    Stir until everything is thoroughly combined.

    Add 1 1/2 cups shredded cheddar cheese and continue stirring until the cheese begins melting into the beef mixture.

    Finally, fold most of the cooked bacon into the filling, reserving a little for garnishing the casserole if desired.

    At this point, you should have a thick, creamy, cheesy beef mixture packed with bacon cheeseburger flavor.

    Taste the mixture and adjust the seasoning if necessary.

    Step 5: Assemble the Casserole

    Lightly grease a 9×13-inch baking dish.

    Spread the bacon cheeseburger mixture evenly across the bottom.

    Now comes the fun part.

    Arrange the frozen tater tots over the top.

    You can simply scatter them across the casserole, but arranging them neatly in rows gives the finished dish a particularly satisfying appearance.

    Try to create a single layer covering as much of the beef mixture as possible.

    Don’t thaw the tater tots first. Using them directly from the freezer helps them become crispy while the casserole cooks.

    Step 6: Bake Until Golden

    Place the casserole in the preheated oven.

    Bake uncovered for approximately 30–35 minutes, or until the tater tots are golden brown and crispy and the filling is bubbling around the edges.

    Cooking times can vary slightly depending on the brand and size of your tater tots, so use their appearance as your guide.

    You want those potatoes genuinely crispy.

    Nobody gets excited about soggy tater tots.

    Step 7: Add More Cheese

    Carefully remove the casserole from the oven.

    Sprinkle approximately 1 cup of shredded cheddar cheese over the crispy tater tots.

    Return the casserole to the oven for another 5–10 minutes, or until the cheese has completely melted.

    For an extra-crispy, browned cheese topping, you can turn on the broiler for the final minute or two.

    Watch it carefully because cheese can go from beautifully browned to burned very quickly.

    Step 8: Finish with Your Favorite Burger Toppings

    Remove the casserole from the oven and allow it to rest for approximately 5–10 minutes.

    Sprinkle the reserved bacon over the top.

    Now you can serve it exactly as it is or turn it into the ultimate loaded cheeseburger casserole.

    Try adding chopped dill pickles, diced tomatoes, green onions, red onions, or sliced jalapeños.

    You can also drizzle ketchup, mustard, or burger sauce across the top.

    If you’re serving a group, another great option is creating a small toppings station and allowing everyone to customize their own portion.

    Don’t Skip the Pickles

    Pickles might sound unusual on a casserole, but if you enjoy them on hamburgers, give them a chance here.

    The casserole itself is rich.

    You’ve got beef, bacon, cheddar cheese, creamy sauce, and potatoes.

    A few chopped dill pickles provide acidity that cuts through all that richness and makes the entire dish taste more balanced.

    For maximum crunch, add them after baking rather than mixing them into the casserole.

    Turn It Into a Bacon Cheeseburger Deluxe

    Think about what you normally order on a cheeseburger.

    Almost anything you enjoy on a burger can inspire a variation of this casserole.

    Try sautéed mushrooms and Swiss cheese for a mushroom burger version.

    Add diced jalapeños and pepper jack cheese for extra heat.

    Mix barbecue sauce into the beef and add crispy fried onions for a BBQ bacon cheeseburger casserole.

    You could even use caramelized onions for a richer, slightly sweeter variation.

    Once you understand the basic recipe, there are countless ways to make it your own.

    What to Serve with Bacon Cheeseburger Tater Tot Casserole

    Because this casserole is hearty, you don’t need many side dishes.

    A simple green salad makes an excellent companion because its freshness balances the richness of the casserole.

    You could also serve:

    • Steamed broccoli
    • Roasted green beans
    • Corn on the cob
    • Coleslaw
    • Cucumber and tomato salad
    • Fresh fruit
    • Pickles
    • Mixed vegetables

    If you’re serving it for a party or game night, you can embrace the comfort-food theme with onion rings, mozzarella sticks, chicken wings, or additional dipping sauces.

    Make It Ahead

    Another advantage of casseroles is their convenience.

    You can prepare the cheeseburger filling ahead of time and refrigerate it in an airtight container.

    When you’re ready for dinner, spread the filling into the baking dish, add the frozen tater tots, and bake.

    If the beef mixture is cold from the refrigerator, you may need to add several extra minutes to the baking time.

    For the crispiest result, I recommend waiting until you’re ready to bake before adding the frozen tater tots.

    Storing Leftovers

    Allow leftovers to cool before transferring them to an airtight container.

    Refrigerate for approximately 3–4 days.

    The casserole can be reheated in the microwave, but the tater tots will lose some of their crispiness.

    For better results, reheat portions in the oven or air fryer until warmed through.

    An air fryer is especially useful for bringing some crunch back to leftover tater tots.

    Can You Freeze It?

    Yes, although the texture of the potatoes can change slightly after freezing and reheating.

    For meal preparation, consider freezing the cooked beef mixture separately.

    Then thaw the filling in the refrigerator, place it into your casserole dish, cover it with fresh frozen tater tots, and bake according to the recipe.

    That method generally produces a better crispy potato topping.

    Choosing the Right Ground Beef

    Ground beef with some fat usually provides the best burger flavor.

    An 80/20 or 85/15 ground beef works well, provided you drain excess grease after browning.

    You can use leaner ground beef if preferred.

    Ground turkey or ground chicken can also work, although the finished dish won’t have quite the same classic cheeseburger flavor.

    If using lean poultry, consider adding a little extra Worcestershire sauce or seasoning to boost the savory flavor.

    Cheese Options

    Cheddar is the natural choice because it delivers that familiar cheeseburger flavor.

    Sharp cheddar provides a stronger cheese flavor, while mild cheddar makes the casserole a little more kid-friendly.

    But you aren’t limited to cheddar.

    Try:

    • Colby Jack
    • Monterey Jack
    • Pepper Jack
    • American cheese
    • Mozzarella
    • Swiss
    • A cheddar and Monterey Jack blend

    You can even combine two or three cheeses.

    Freshly shredded cheese generally melts more smoothly than packaged pre-shredded cheese, although either will work when convenience is the priority.

    The Secret to Crispy Tater Tots

    The tater tot topping is one of the best parts of this dish, so don’t rush it.

    First, don’t thaw the tots.

    Second, bake the casserole uncovered.

    Third, don’t overcrowd them unnecessarily. A relatively even single layer allows hot air to circulate around more of the potatoes.

    And finally, give them enough time.

    If the filling is hot but your tots still look pale, continue baking for several minutes.

    You’re looking for a beautiful golden exterior with crispy edges.

    That crunchy potato topping against the creamy cheeseburger filling is what makes this casserole special.

    A Great Meal for Feeding a Crowd

    Bacon Cheeseburger Tater Tot Casserole is particularly useful when you need something filling without making individual burgers for everyone.

    Instead of standing over a grill or skillet cooking hamburger patties in batches, you can prepare one large casserole and bring the entire dish to the table.

    That makes it excellent for:

    Family dinners, potlucks, game nights, casual parties, football weekends, birthday gatherings, movie nights, or simply those evenings when everyone wants something comforting.

    Double the recipe and prepare two casserole dishes if you’re feeding a larger group.

    Just don’t expect many leftovers.

    Why Kids May Love This Dinner

    Let’s consider what we’re working with here.

    Cheeseburgers.

    Bacon.

    Cheese.

    Tater tots.

    That’s already a pretty convincing combination.

    For children who don’t like onions or other noticeable vegetables, finely dice the onion so it practically disappears into the ground beef.

    You can also keep the base casserole relatively simple and allow adults to add pickles, onions, jalapeños, and other toppings individually.

    Sometimes customizable meals are the easiest way to satisfy a table full of different preferences.

    Bacon Cheeseburger Tater Tot Casserole Variations

    Once you’ve made the original recipe, experiment with different versions.

    BBQ Bacon Cheeseburger: Replace some of the ketchup with barbecue sauce and finish with crispy fried onions.

    Spicy Jalapeño Cheeseburger: Add chopped jalapeños to the beef and use pepper jack cheese.

    Mushroom Swiss Burger: Sauté sliced mushrooms with the onions and substitute Swiss cheese for some of the cheddar.

    Double Bacon Version: Increase the bacon and sprinkle additional crispy bacon over the finished casserole.

    Loaded Burger Version: Finish individual servings with lettuce, tomatoes, pickles, onions, and burger sauce.

    Garlic Cheeseburger: Increase the garlic and add garlic powder to the beef seasoning.

    The basic recipe is really a starting point.

    Homemade Burger Sauce

    Want to take the cheeseburger experience even further?

    Make a quick burger sauce by combining:

    • 1/2 cup mayonnaise
    • 2 tablespoons ketchup
    • 1 tablespoon yellow mustard
    • 1 tablespoon finely chopped dill pickles or relish
    • 1 teaspoon pickle juice
    • 1/2 teaspoon garlic powder
    • 1/2 teaspoon smoked paprika

    Mix everything together and refrigerate until serving.

    Drizzle a little over each portion of casserole.

    That creamy, tangy sauce combined with beef, bacon, cheese, and crispy potatoes takes the burger theme to another level.

    A Comfort-Food Dinner Worth Sharing

    Not every dinner needs to be complicated.

    Sometimes you simply want something warm coming out of the oven that makes people eager to grab a plate.

    Bacon Cheeseburger Tater Tot Casserole delivers exactly that.

    It’s familiar without being boring, indulgent without requiring complicated cooking techniques, and customizable enough to become several different meals depending on the toppings and ingredients you choose.

    You get savory seasoned ground beef, smoky bacon, creamy cheese, crispy potatoes, and all those familiar cheeseburger flavors packed into one baking dish.

    Bring the casserole to the table while the cheese is still bubbling, put out bowls of pickles and burger toppings, and let everyone build their perfect serving.

    It might not replace a freshly grilled bacon cheeseburger forever—but on a busy evening when you want comfort food that feeds the entire family, it comes pretty close.

    Would you top your Bacon Cheeseburger Tater Tot Casserole with pickles, extra bacon, burger sauce—or all three?

  • Breakfast of the Day: Breakfast Nachos

    Advertisements

    When you think of nachos, you probably picture a big platter loaded with cheese, meat, salsa, and all your favorite toppings—the kind of meal you might enjoy while watching a game or sharing food with friends. But nachos don’t have to wait until lunch or dinner. With a few breakfast-inspired ingredients, you can transform this familiar favorite into an incredible way to start the morning.

    Today’s Breakfast of the Day is Breakfast Nachos, a hearty combination of crispy tortilla chips, fluffy scrambled eggs, melted cheese, savory breakfast sausage or bacon, and fresh toppings such as tomatoes, avocado, green onions, and salsa.

    It is essentially everything you love about a loaded breakfast burrito served nacho-style.

    Breakfast Nachos are also wonderfully flexible. You can make a large platter for the entire family, prepare individual servings, load them with vegetables, turn up the heat with jalapeños and hot sauce, or pile on the meat and cheese for an indulgent weekend breakfast.

    If you’re tired of eating the same eggs and toast every morning, this is one breakfast worth trying.

    Why Breakfast Nachos Deserve a Place at the Breakfast Table

    Breakfast doesn’t always have to follow the traditional formula.

    Pancakes, waffles, cereal, eggs, bacon, sausage, and toast are classics for a reason, but sometimes you want something completely different. Breakfast Nachos take familiar morning ingredients and present them in a fun new way.

    Instead of putting scrambled eggs, sausage, cheese, and salsa inside a tortilla, everything is layered over crispy tortilla chips.

    Every bite can be slightly different.

    One chip might be covered with scrambled eggs and melted cheddar. Another could have sausage, avocado, and salsa. The next might have a little bit of everything.

    That variety is part of what makes a platter of Breakfast Nachos so enjoyable.

    They are especially good for weekends when you have a little more time to sit down and enjoy breakfast rather than rushing out the door.

    Breakfast of the Day: Breakfast Nachos

    Prep Time: 15 minutes
    Cook Time: 15 minutes
    Total Time: 30 minutes
    Servings: 4–6

    Ingredients

    • 1 large bag sturdy tortilla chips
    • 8 large eggs
    • 1 tablespoon butter
    • 1/4 cup milk
    • 1/2 teaspoon salt
    • 1/4 teaspoon black pepper
    • 1 pound breakfast sausage
    • 2 cups shredded cheddar cheese
    • 1 cup shredded Monterey Jack cheese
    • 1/2 cup diced tomatoes
    • 1/3 cup sliced green onions
    • 1 avocado, diced
    • 1/4 cup sliced jalapeños, optional
    • 1/2 cup salsa
    • 1/2 cup sour cream
    • Chopped fresh cilantro, optional
    • Hot sauce, optional

    You can also substitute cooked and crumbled bacon, diced ham, chorizo, or another favorite breakfast meat for the sausage.

    Step 1: Prepare the Breakfast Sausage

    Preheat your oven to 375°F.

    Place a large skillet over medium heat.

    Add the breakfast sausage and cook, breaking it into small pieces with a spatula or wooden spoon.

    Continue cooking until the sausage is completely browned and cooked through.

    Drain away any excess grease and transfer the cooked sausage to a plate.

    If you prefer bacon, cook approximately 8–10 strips until crispy and crumble them into bite-sized pieces.

    For an especially hearty platter, you can even use a combination of sausage and bacon.

    Step 2: Make the Scrambled Eggs

    Crack the eggs into a medium bowl.

    Add the milk, salt, and black pepper.

    Whisk everything together until the yolks and whites are completely combined.

    Melt the butter in a nonstick skillet over medium-low heat.

    Pour in the egg mixture.

    Allow the eggs to cook briefly before gently moving them around the pan with a spatula.

    Continue cooking until the eggs are softly scrambled but still slightly moist.

    Avoid overcooking them.

    Remember that the eggs will spend a few additional minutes in the oven once you assemble the nachos.

    Remove the eggs from the heat.

    Step 3: Build Your Breakfast Nachos

    Line a large baking sheet with parchment paper or lightly coat it with cooking spray.

    Spread the tortilla chips across the baking sheet.

    Try to create a relatively even layer while allowing some of the chips to overlap.

    Sprinkle approximately half of the cheddar and Monterey Jack cheeses over the chips.

    Next, distribute the scrambled eggs evenly across the platter.

    Sprinkle the cooked breakfast sausage over the eggs.

    Add the remaining cheese.

    If you’re using jalapeños, you can add some before baking or wait until afterward.

    The goal is to distribute the ingredients rather than placing everything in the center. Good nachos should have toppings throughout the entire platter.

    Nobody wants to reach the bottom and discover a pile of completely plain chips.

    Step 4: Bake Until Cheesy

    Place the baking sheet into the preheated oven.

    Bake for approximately 5–8 minutes, or until the cheese has completely melted.

    Keep an eye on the nachos because tortilla chips can begin browning quickly.

    Once the cheese is hot and bubbly, remove the baking sheet from the oven.

    Now comes the best part: the toppings.

    Step 5: Add the Fresh Toppings

    Scatter the diced tomatoes, avocado, green onions, and optional cilantro over the warm nachos.

    Add sliced jalapeños if you enjoy some heat.

    Serve the salsa and sour cream on the side or spoon small amounts across the platter.

    Finish everything with a few dashes of your favorite hot sauce if desired.

    Serve immediately while the cheese is still melted and the tortilla chips remain crispy.

    The Secret to Really Good Breakfast Nachos

    Great nachos depend on balance.

    You need enough toppings to make every bite interesting, but adding too many wet ingredients can quickly turn crispy tortilla chips soggy.

    That is why ingredients such as salsa, sour cream, avocado, and fresh tomatoes are best added shortly before serving.

    You can also serve the salsa and sour cream separately so everyone can add their own.

    Another important consideration is your choice of tortilla chips.

    Look for thick, sturdy chips capable of supporting eggs, sausage, cheese, and toppings without immediately breaking.

    Thin tortilla chips might taste great with salsa, but they can struggle under the weight of fully loaded Breakfast Nachos.

    Turn Them Into Bacon Breakfast Nachos

    Breakfast sausage is delicious, but bacon is another excellent choice.

    Cook bacon until crispy, drain it on paper towels, and crumble it across the nachos before adding the final layer of cheese.

    Bacon works particularly well with cheddar cheese, eggs, avocado, tomatoes, and green onions.

    You could also use both bacon and sausage if you’re preparing Breakfast Nachos for a special occasion or particularly hungry crowd.

    Try Chorizo Breakfast Nachos

    For a spicier variation, replace traditional breakfast sausage with Mexican-style chorizo.

    Cook the chorizo thoroughly and drain excess grease before adding it to the nachos.

    Pair it with scrambled eggs, Monterey Jack or pepper Jack cheese, jalapeños, pico de gallo, avocado, cilantro, and salsa.

    A little hot sauce can bring everything together.

    You can even add black beans for additional flavor and texture.

    Make Them With Potatoes

    Want an even heartier breakfast?

    Add crispy breakfast potatoes.

    Dice potatoes into small pieces and cook them until golden brown before adding them to your nachos.

    Potatoes work beautifully with eggs, sausage, bacon, cheddar cheese, and salsa.

    You can also use crispy hash browns.

    Imagine a tortilla chip topped with melted cheese, scrambled egg, sausage, crispy potato, salsa, and sour cream.

    That is a serious breakfast.

    Make a Breakfast Nacho Bar

    Breakfast Nachos are fantastic for entertaining because everyone can customize their plate.

    Instead of preparing one fully loaded platter, make the basic nachos with chips, eggs, meat, and cheese.

    Then arrange different toppings nearby.

    You could offer:

    • Salsa
    • Pico de gallo
    • Sour cream
    • Guacamole
    • Diced avocado
    • Tomatoes
    • Jalapeños
    • Green onions
    • Cilantro
    • Black beans
    • Hot sauce
    • Queso
    • Bacon
    • Sausage
    • Chorizo

    Everyone can build their perfect combination.

    This is especially fun for weekend brunches, family gatherings, birthdays, holidays, or game-day mornings.

    Vegetarian Breakfast Nachos

    Breakfast Nachos don’t need meat to be satisfying.

    Simply leave out the sausage and replace it with vegetables or beans.

    Try scrambled eggs with black beans, sautéed bell peppers, onions, mushrooms, tomatoes, avocado, cheese, and salsa.

    You could also add roasted corn.

    For additional protein, increase the eggs or add extra beans.

    The result is colorful, filling, and packed with different flavors.

    Turn Up the Heat

    If you enjoy spicy breakfasts, Breakfast Nachos provide plenty of opportunities to bring the heat.

    Use pepper Jack cheese instead of Monterey Jack.

    Add fresh or pickled jalapeños.

    Include spicy chorizo.

    Drizzle hot sauce over the finished nachos.

    You could even add thinly sliced serrano peppers if you want something considerably hotter.

    The richness of the eggs, cheese, avocado, and sour cream helps balance the heat.

    Keep It Mild for the Family

    Not everyone wants spicy food first thing in the morning.

    For a family-friendly version, use scrambled eggs, mild breakfast sausage, cheddar cheese, tomatoes, avocado, and sour cream.

    Keep jalapeños, hot sauce, and spicy salsa on the side.

    That allows everyone to customize their serving.

    Children may especially enjoy Breakfast Nachos because they’re familiar, easy to eat, and fun to customize.

    Don’t Forget the Cheese

    Cheese is one of the ingredients holding everything together—literally.

    Cheddar provides a familiar sharp and savory flavor, while Monterey Jack melts beautifully.

    Using both gives you a great combination of flavor and texture.

    Other cheeses worth trying include:

    Pepper Jack: Great if you want extra spice.

    Colby Jack: Mild, creamy, and excellent for melting.

    Mexican cheese blend: An easy option that works perfectly for nachos.

    Queso: Drizzle warm queso across the platter for incredibly cheesy Breakfast Nachos.

    You can even combine shredded cheese with a little queso for an over-the-top version.

    What to Serve With Breakfast Nachos

    Breakfast Nachos can easily serve as the main event, especially when they’re loaded with eggs and breakfast meat.

    If you’re serving them as part of a larger brunch, consider pairing them with fresh fruit.

    Watermelon, strawberries, blueberries, pineapple, oranges, or grapes provide a refreshing contrast to the salty, cheesy nachos.

    A simple fruit salad works particularly well.

    For beverages, serve coffee, orange juice, apple juice, iced tea, or a fruit smoothie.

    If you’re hosting an adult brunch, Breakfast Nachos can also pair nicely with classic brunch cocktails.

    Perfect for Weekend Breakfast

    Weekday mornings are often about convenience.

    You might grab cereal, toast, oatmeal, or something you can eat quickly before starting your day.

    Weekends give us an opportunity to slow things down.

    Breakfast Nachos feel like weekend food.

    They’re casual, comforting, colorful, and meant to be enjoyed rather than rushed.

    Put a large platter in the middle of the table and allow everyone to dig in.

    There doesn’t need to be anything fancy about it.

    Sometimes the most memorable meals are the ones where everyone gathers around the same plate.

    Breakfast Nachos for Game Day

    Breakfast Nachos are also perfect when your favorite team has an early game.

    Traditional nachos are already one of the ultimate game-day foods, so giving them a breakfast makeover makes perfect sense.

    Prepare a huge tray with eggs, sausage, bacon, cheese, jalapeños, salsa, and avocado.

    Put it on the table before kickoff and let everyone grab what they want.

    If you’re serving a larger crowd, prepare several trays and customize them differently.

    One could be sausage and cheddar.

    Another could feature bacon and Monterey Jack.

    A third could have chorizo, pepper Jack, and jalapeños.

    Suddenly breakfast becomes part of the game-day celebration.

    Don’t Be Afraid to Get Creative

    One of the best things about nachos is that there really isn’t one correct way to make them.

    Think about your favorite breakfast ingredients and find a way to incorporate them.

    Love ham?

    Add diced ham.

    Love breakfast potatoes?

    Throw some crispy potatoes on top.

    Love queso?

    Drizzle it everywhere.

    Love avocado?

    Add plenty.

    You can even add a fried egg to the center of the platter for an impressive finishing touch.

    When the yolk breaks over the warm chips, meat, and cheese, it creates an incredibly rich sauce.

    A Breakfast Worth Sharing

    Food has a way of bringing people together, and Breakfast Nachos practically demand to be shared.

    Instead of everyone having a separate plate of eggs and toast, you can place one big platter in the middle of the table.

    People reach in, grab a few nachos, add some salsa or sour cream, and keep coming back for more.

    It creates a casual and relaxed atmosphere that is perfect for weekend mornings.

    And if you’re eating breakfast alone?

    Make a smaller batch.

    There is absolutely nothing wrong with having your own personal tray of Breakfast Nachos.

    Tips for the Best Breakfast Nachos

    Use thick tortilla chips so they can support all those delicious toppings.

    Don’t overcook your scrambled eggs because they’ll cook slightly more in the oven.

    Drain sausage or bacon well to prevent excess grease from making the chips soggy.

    Layer your ingredients instead of piling everything on top. Cheese between the layers helps ensure you don’t end up with plain chips underneath.

    Add wet toppings such as salsa and sour cream immediately before eating.

    Serve the nachos as soon as possible after they come out of the oven.

    And most importantly, customize them.

    A recipe like this is really just a starting point.

    Make Breakfast Fun Again

    It’s easy for breakfast to become repetitive.

    You wake up, pour another bowl of cereal, make another piece of toast, or scramble the same eggs you’ve made countless times before.

    There is nothing wrong with those breakfasts.

    But occasionally, breakfast should be something you genuinely look forward to.

    Breakfast Nachos accomplish that.

    They’re crispy.

    They’re cheesy.

    They’re savory.

    They’re customizable.

    And they combine some of the best parts of breakfast with one of the world’s most enjoyable shareable foods.

    Whether you make them with sausage, bacon, chorizo, vegetables, potatoes, or a combination of everything, you can create a platter that matches exactly what you’re craving.

    Final Thoughts

    Today’s Breakfast of the Day: Breakfast Nachos proves that breakfast doesn’t have to be predictable.

    A layer of crispy tortilla chips becomes the foundation for fluffy scrambled eggs, savory breakfast sausage, melted cheddar and Monterey Jack cheeses, tomatoes, avocado, green onions, salsa, and sour cream.

    Every bite brings something different.

    They’re easy enough for a casual weekend morning but impressive enough to serve at brunch, family gatherings, holiday breakfasts, or game-day parties.

    Best of all, there are almost endless ways to customize them.

    Make them spicy with chorizo and jalapeños.

    Load them with bacon and potatoes.

    Keep them vegetarian with beans and sautéed vegetables.

    Cover them with queso.

    Add guacamole.

    Finish them with hot sauce.

    Or simply stick with eggs, sausage, and plenty of melted cheese.

    However you build your Breakfast Nachos, one thing is certain: breakfast just became a lot more interesting.

    What would you put on your ultimate plate of Breakfast Nachos?

  • Inspiration of the Day: Live Each Day with Purpose

    Advertisements

    Every morning brings something incredibly valuable: another day of life.

    Another opportunity to learn. Another opportunity to love. Another opportunity to help someone. Another opportunity to improve yourself, strengthen a relationship, chase a dream, forgive someone, create a memory, or simply appreciate the life happening around you.

    Yet it is surprisingly easy to move through our days without truly thinking about how we are spending them.

    We wake up, check our phones, handle responsibilities, go to work, run errands, answer messages, prepare meals, worry about tomorrow, and eventually go to sleep. Then we wake up and repeat the process.

    Days can quickly become weeks.

    Weeks become months.

    Months become years.

    Before we realize it, we may wonder where all that time went.

    That is why today’s inspiration is a simple but powerful reminder:

    Live each day with purpose.

    Living with purpose does not mean every day must be extraordinary. It doesn’t mean you need to accomplish something enormous every morning or constantly chase another achievement.

    Purpose is about intention.

    It is about recognizing that your time matters and deciding to use the life you have been given in ways that mean something to you.

    You Have Today

    We spend a lot of time thinking about tomorrow.

    Tomorrow, I’ll start exercising.

    Tomorrow, I’ll call someone I’ve been meaning to talk to.

    Tomorrow, I’ll work on that dream.

    Tomorrow, I’ll spend more time with the people I love.

    Tomorrow, I’ll slow down.

    Tomorrow, I’ll appreciate life more.

    But tomorrow has never been guaranteed.

    The only day we can actually live is the one happening right now.

    Today.

    That doesn’t mean we shouldn’t plan for the future. Planning is important. Goals give us direction, and dreams can motivate us to keep moving forward.

    But we cannot become so focused on the future that we forget to live in the present.

    Your life isn’t waiting somewhere down the road.

    Your life is happening right now.

    It is happening while you drink your morning coffee.

    It is happening during conversations with people you care about.

    It is happening while you’re driving to work.

    It is happening during quiet evenings at home.

    It is happening during ordinary moments you might barely notice.

    Those moments are your life.

    Treat them accordingly.

    Purpose Doesn’t Have to Be Something Huge

    Sometimes people hear the word “purpose” and immediately imagine discovering one enormous mission that defines their entire existence.

    But purpose doesn’t always look like that.

    Purpose can be much simpler.

    Your purpose today might be encouraging someone who is struggling.

    It might be working hard at your job because people depend on you.

    It might be spending quality time with your children.

    It might be calling an aging parent.

    It might be improving your health.

    It might be learning something new.

    It might be creating something that could help another person.

    It might be showing kindness to a stranger.

    It might even be taking time to rest because your body and mind desperately need it.

    A purposeful life is often built through thousands of seemingly ordinary decisions.

    The important question isn’t always, “What is my one great purpose in life?”

    Sometimes the better question is:

    “What meaningful thing can I do with the day in front of me?”

    Answer that question every morning, and eventually those days begin creating a meaningful life.

    Decide What Truly Matters to You

    One of the greatest challenges in modern life is distraction.

    Everyone wants our attention.

    Phones buzz.

    Notifications appear.

    Social media constantly refreshes.

    News never stops.

    Advertisements tell us what we supposedly need.

    Other people’s opinions tell us how we should live.

    If we aren’t careful, we can spend enormous amounts of time reacting to everything around us instead of intentionally deciding what deserves our attention.

    Living with purpose requires knowing what matters.

    Ask yourself:

    What people matter most to me?

    What values do I want to live by?

    What kind of person do I want to become?

    What dreams are important enough to pursue?

    What relationships deserve more of my attention?

    What would I regret neglecting?

    The answers can help you decide where your time belongs.

    Because your calendar often reveals your priorities better than your words do.

    We may say family matters, but are we making time for family?

    We may say health matters, but are we caring for ourselves?

    We may say our dreams matter, but are we taking steps toward them?

    Purpose begins when our actions start matching the things we claim are important.

    Stop Waiting for the Perfect Moment

    There is another trap that prevents people from living purposefully.

    Waiting.

    We wait until we have more money.

    We wait until we have more confidence.

    We wait until life becomes less complicated.

    We wait until Monday.

    We wait until next month.

    We wait until January.

    We wait until everything feels perfectly aligned.

    But perfect moments rarely arrive.

    Life is usually messy.

    There will always be responsibilities, uncertainty, setbacks, bills, worries, and unexpected problems.

    Sometimes you have to begin anyway.

    Start writing the book.

    Apply for the opportunity.

    Take the class.

    Make the phone call.

    Begin improving your health.

    Reconnect with someone.

    Create the business.

    Start helping people.

    Take the trip when circumstances allow.

    Tell someone you love them.

    Do something today that moves you closer to the life you want to live.

    Even a small step matters.

    Make Someone’s Day Better

    Purpose isn’t only about personal achievement.

    Some of the most meaningful moments in life happen when we make life better for someone else.

    You may never know how much a small act of kindness means to another person.

    A sincere compliment.

    A supportive message.

    Holding a door open.

    Checking on someone.

    Listening without interrupting.

    Buying someone a meal.

    Helping a neighbor.

    Sharing encouraging words.

    Thanking someone who rarely receives recognition.

    These actions might take only minutes, but their impact can last much longer.

    There are people walking around carrying struggles they rarely discuss.

    Your kindness may arrive exactly when they need it.

    If you’re ever unsure what your purpose should be today, start with this:

    Leave someone feeling a little better because they crossed your path.

    That alone can make a day meaningful.

    Tell People What They Mean to You

    We often assume people know how much we care about them.

    Maybe they do.

    But tell them anyway.

    Say “I love you.”

    Say “I appreciate you.”

    Say “I’m proud of you.”

    Say “Thank you for always being there.”

    Say “I’m glad you’re part of my life.”

    Don’t save meaningful words for special occasions.

    Some of the most important things we can say should be said during ordinary days.

    Relationships are one of life’s greatest treasures, yet they can easily become something we take for granted.

    We become busy.

    We assume there will always be another conversation.

    Another dinner.

    Another birthday.

    Another holiday.

    Another opportunity.

    Living purposefully means recognizing the value of the people around us while we still have opportunities to show them.

    Make the call.

    Send the message.

    Give the hug.

    Spend the time.

    Create the memory.

    Be Present for the Ordinary Moments

    Not every meaningful moment announces itself.

    Sometimes life’s greatest memories begin as completely ordinary days.

    A family dinner.

    A drive somewhere.

    A conversation in the kitchen.

    Laughing over something ridiculous.

    Sitting outside watching the sunset.

    Listening to someone’s story.

    Sharing breakfast.

    Taking a walk.

    You may not realize how meaningful those moments are until years later.

    That’s why being present matters.

    Put the phone down sometimes.

    Look around.

    Listen carefully.

    Notice the people sitting beside you.

    Notice the weather.

    Notice the laughter.

    Notice the little moments happening around you.

    You don’t have to photograph every memory.

    Sometimes you simply need to experience it.

    Your Difficult Days Can Still Have Purpose

    Living with purpose does not mean pretending every day is wonderful.

    Some days are difficult.

    Some days bring disappointment.

    Some days bring loneliness.

    Some days bring grief.

    Some days bring exhaustion.

    Some days you may simply be trying to make it through.

    Those days still matter.

    Purpose during difficult seasons might look different.

    Sometimes your purpose is simply to keep going.

    Sometimes it is allowing yourself to rest.

    Sometimes it is reaching out for support.

    Sometimes it is learning how to carry something you never wanted to carry.

    Sometimes surviving the day is enough.

    We should never measure every day by productivity.

    You are allowed to have slow days.

    You are allowed to recover.

    You are allowed to feel.

    You are allowed to admit that something hurts.

    Living purposefully means respecting the season you’re currently experiencing rather than constantly demanding that you perform as though nothing is wrong.

    Turn Your Pain Into Something Meaningful

    Life changes us through both joy and pain.

    The difficult experiences we survive often teach us things we never would have chosen to learn.

    Pain can teach compassion.

    Loss can teach appreciation.

    Failure can teach humility.

    Disappointment can teach patience.

    Hardship can reveal strength.

    None of that means painful experiences were necessary or deserved. It simply means we have the ability to decide what we do with the lessons they leave behind.

    Sometimes one of the most powerful forms of purpose is helping another person through something you understand.

    Your experience may become someone else’s encouragement.

    Your story may remind someone that they aren’t alone.

    Your survival may become proof that another person can survive too.

    You may not be able to change what happened yesterday.

    But you can decide what you do with today.

    Stop Comparing Your Purpose to Someone Else’s

    Another person’s life may look impressive from the outside.

    Their career may appear more successful.

    Their house may be larger.

    Their social media may look happier.

    Their accomplishments may seem bigger.

    Their journey may appear easier.

    But you aren’t living their life.

    You’re living yours.

    Comparison can steal enormous amounts of time and happiness because it convinces us that our lives aren’t meaningful unless they look like someone else’s.

    Purpose is personal.

    One person’s purpose might involve building a company.

    Another person’s might involve raising a family.

    Someone else might teach.

    Someone might create.

    Someone might serve their community.

    Someone might care for a loved one.

    Someone might encourage people through their words.

    Someone might simply become the person their family can always depend on.

    There is no universal scoreboard.

    Live according to your values, not someone else’s expectations.

    Give Your Best to What Is in Front of You

    We cannot control everything that happens.

    But we can control how we approach many of the things placed in front of us.

    If you’re working, work with integrity.

    If you’re spending time with someone, give them your attention.

    If you’re learning, stay curious.

    If you’re resting, allow yourself to truly rest.

    If you’re helping someone, help sincerely.

    If you’re pursuing a goal, take another step.

    Purpose often comes from doing ordinary things with extraordinary intention.

    You don’t always need a different life.

    Sometimes you simply need to become more present in the life you already have.

    Don’t Let Fear Decide How You Live

    Fear can quietly steal years.

    Fear of failure.

    Fear of rejection.

    Fear of embarrassment.

    Fear of judgment.

    Fear of making the wrong decision.

    Fear convinces us that staying comfortable is safer than trying.

    But comfort can become a cage.

    Imagine reaching the end of your life and realizing you spent years avoiding things you deeply wanted because you were afraid.

    That possibility should concern us more than failure.

    Failure can teach you.

    Rejection can redirect you.

    Mistakes can help you grow.

    But opportunities you never take can become lifelong questions.

    You don’t need to eliminate fear before moving forward.

    Sometimes courage simply means saying:

    “I’m afraid, but I’m going to try anyway.”

    Let Your Values Guide Your Decisions

    Purpose becomes clearer when you know what you stand for.

    Maybe you value kindness.

    Faith.

    Family.

    Honesty.

    Loyalty.

    Compassion.

    Hard work.

    Generosity.

    Growth.

    Service.

    Whatever your values are, allow them to guide your daily choices.

    You won’t always make the perfect decision.

    Nobody does.

    But when your decisions consistently reflect your values, you begin creating a life that feels authentic.

    And authenticity brings a different kind of peace.

    You stop constantly wondering whether you’re living according to everyone else’s expectations.

    Instead, you know you’re trying to become the person you believe you should be.

    Appreciate What You Have While Building What You Want

    Ambition and gratitude can exist together.

    You can want more from life while still appreciating what you already have.

    You can pursue bigger dreams while being thankful for today’s blessings.

    You can work toward tomorrow without ignoring today.

    Sometimes we become so focused on the next goal that we forget we once prayed, hoped, or worked for things we now consider ordinary.

    Take a moment to notice what is already good.

    A person who cares about you.

    A place you call home.

    Food on your table.

    A friend who checks on you.

    A beautiful morning.

    A favorite song.

    A memory that still makes you smile.

    A second chance.

    Another sunrise.

    Gratitude doesn’t mean everything is perfect.

    It means recognizing that even imperfect lives can contain meaningful things.

    Create Something That Outlives the Moment

    Purpose often grows when we think beyond ourselves.

    What are you leaving behind?

    Not necessarily financially.

    Think about your influence.

    Your kindness.

    Your lessons.

    Your stories.

    Your encouragement.

    Your example.

    People remember how we made them feel.

    They remember who showed up.

    They remember who listened.

    They remember who believed in them.

    They remember who offered encouragement when life was difficult.

    Your legacy is being created during ordinary days.

    Every interaction contributes something to it.

    Live in a way that leaves good things behind.

    A Simple Way to Live With Purpose

    You don’t need to completely redesign your life tomorrow morning.

    Start small.

    When you wake up, ask yourself three questions:

    What matters most today?

    Who can I help or encourage today?

    What is one thing I can do today that moves my life in a meaningful direction?

    Then act on the answers.

    Maybe you spend thirty minutes working toward a goal.

    Maybe you call someone.

    Maybe you exercise.

    Maybe you write.

    Maybe you pray.

    Maybe you forgive.

    Maybe you rest.

    Maybe you tell someone how much they mean to you.

    Small purposeful actions accumulate.

    A meaningful life is rarely created through one dramatic decision.

    It is created through thousands of intentional choices.

    Tonight, Ask Yourself One More Question

    At the end of the day, take a quiet moment and ask:

    “Did I use today well?”

    Not perfectly.

    Well.

    Did you love someone?

    Did you learn something?

    Did you help someone?

    Did you take care of yourself?

    Did you make progress?

    Did you appreciate something?

    Did you create a memory?

    Did you keep going when life was difficult?

    If the answer is yes to even one of those questions, your day had meaning.

    And if the answer is no, don’t spend the night attacking yourself for it.

    Tomorrow morning, if you’re fortunate enough to receive another day, you can try again.

    Your Life Is Being Written Right Now

    We often think about our lives as if the important chapters are somewhere ahead.

    Someday I’ll become the person I want to be.

    Someday I’ll do meaningful things.

    Someday I’ll start living differently.

    But this is the story.

    Today is one of the pages.

    The decisions you make today are becoming part of your life story whether they feel significant or not.

    So write today’s page intentionally.

    Fill it with kindness.

    Fill it with courage.

    Fill it with gratitude.

    Fill it with effort.

    Fill it with love.

    Fill it with faith.

    Fill it with moments that matter.

    You don’t need to change the entire world today.

    You simply need to make good use of the small piece of the world you’ve been given.

    Inspiration of the Day

    Live each day with purpose because your time is one of the most valuable gifts you will ever receive.

    Don’t wait for a perfect life before you start appreciating the life you have.

    Don’t wait for someday to tell people you love them.

    Don’t wait until you’re fearless to pursue something meaningful.

    Don’t wait until everything becomes easy before you start moving forward.

    Wake up each morning knowing that another blank page has been placed in front of you.

    You decide what you will write on it.

    Some pages will contain victories.

    Some will contain struggles.

    Some will contain laughter.

    Some will contain tears.

    Some will be exciting.

    Some will seem completely ordinary.

    But every page matters because every page is part of your story.

    So be present.

    Love deeply.

    Help people.

    Take chances.

    Learn from mistakes.

    Appreciate small moments.

    Keep growing.

    Keep believing.

    Keep moving forward.

    And when the day eventually comes to an end, try to be able to look back and know that you didn’t simply exist through another twenty-four hours.

    You lived them.

    You gave something.

    You learned something.

    You loved someone.

    You moved forward.

    You made the day count.

    Because ultimately, a purposeful life isn’t something you suddenly discover.

    It is something you build—one meaningful day at a time.

    What is one thing you can do today that will make your day more meaningful?

  • Dessert of the Day: Homemade Banana Split Sundae

    Advertisements

    Few desserts bring back the fun, excitement, and nostalgia of an old-fashioned ice cream shop quite like a banana split. With scoops of creamy ice cream nestled between a fresh banana and covered with chocolate, strawberry, pineapple, whipped cream, nuts, and cherries, the banana split is more than dessert—it is an experience.

    Today’s Dessert of the Day is the Homemade Banana Split Sundae, a classic treat that proves sometimes the best desserts are the ones that don’t need to be reinvented.

    There is something special about placing a beautiful banana split on the table. Maybe it is the towering whipped cream. Maybe it is the colorful sauces. Maybe it is that bright red cherry sitting proudly on top. Whatever the reason, a banana split has a way of making an ordinary day feel like a celebration.

    The best part is that you don’t need an old-fashioned soda fountain or ice cream parlor to enjoy one. With a few simple ingredients, you can build an incredible banana split right in your own kitchen.

    A Classic Dessert Worth Bringing Back

    The banana split is one of those desserts almost everyone recognizes immediately.

    Traditionally, a banana is sliced lengthwise and arranged around three scoops of ice cream—usually vanilla, chocolate, and strawberry. Each scoop receives its own topping before the entire dessert is finished with whipped cream, chopped nuts, and maraschino cherries.

    It is colorful, indulgent, and wonderfully over-the-top.

    Unlike complicated cakes, pies, or pastries, a banana split doesn’t require baking. There is no dough to prepare, cake to cool, or frosting to perfect. Most of the fun comes from assembling everything.

    That makes it perfect for family dessert nights, birthday parties, summer cookouts, sleepovers, movie nights, celebrations, or those evenings when you simply want something sweet.

    And when you make one at home, you are completely in control.

    Want extra chocolate?

    Add it.

    Love strawberries?

    Pile them on.

    Don’t like nuts?

    Leave them off.

    Want five cherries instead of three?

    Nobody is stopping you.

    That freedom is part of what makes homemade banana splits so much fun.

    Ingredients

    For one large banana split, you will need:

    • 1 ripe but firm banana
    • 1 large scoop vanilla ice cream
    • 1 large scoop chocolate ice cream
    • 1 large scoop strawberry ice cream
    • 2 tablespoons chocolate syrup or hot fudge
    • 2 tablespoons strawberry topping
    • 2 tablespoons pineapple topping
    • Whipped cream
    • 2 tablespoons chopped peanuts, walnuts, or pecans
    • 3 maraschino cherries
    • Colorful sprinkles, optional

    Optional Homemade Chocolate Sauce

    • 1/2 cup semi-sweet chocolate chips
    • 1/4 cup heavy cream
    • 1 teaspoon butter

    Optional Fresh Strawberry Topping

    • 1 cup chopped fresh strawberries
    • 2 tablespoons granulated sugar
    • 1 teaspoon lemon juice

    Optional Homemade Pineapple Topping

    • 1 cup crushed pineapple with juice
    • 1 tablespoon brown sugar
    • 1 teaspoon cornstarch
    • 1 tablespoon water

    How to Make a Homemade Banana Split Sundae

    Step 1: Prepare the Serving Dish

    Traditionally, banana splits are served in long, narrow dishes sometimes called banana boats.

    If you don’t have one, don’t worry. A shallow bowl, small serving platter, or even a dinner plate with raised edges will work.

    If possible, place your serving dish in the freezer for about 10 to 15 minutes before assembling the sundae. A cold dish helps keep the ice cream from melting as quickly.

    Step 2: Prepare the Banana

    Peel one banana and carefully slice it lengthwise from top to bottom.

    Place the two banana halves along opposite sides of your serving dish, leaving enough room in the middle for the ice cream.

    Choose a banana that is ripe enough to be naturally sweet but still firm. An extremely ripe banana can become too soft and difficult to arrange.

    Step 3: Add the Ice Cream

    Place three generous scoops of ice cream between the banana halves.

    The classic combination is:

    Vanilla

    Chocolate

    Strawberry

    Arrange them in a row.

    Of course, there is no rule saying you have to stick with the traditional flavors. One of the advantages of making your banana split at home is being able to use whatever ice cream you love.

    Step 4: Add the Classic Toppings

    Now comes the fun part.

    Drizzle chocolate syrup or hot fudge over the chocolate ice cream.

    Spoon strawberry topping over the strawberry ice cream.

    Add pineapple topping over the vanilla ice cream.

    You don’t have to be precise. If you want chocolate sauce over everything, go for it.

    The combination of chocolate, strawberries, pineapple, banana, and ice cream creates the unmistakable flavor associated with a traditional banana split.

    Step 5: Add the Whipped Cream

    Place a generous swirl of whipped cream over each scoop of ice cream.

    This isn’t the dessert for a tiny dab of whipped cream.

    Go big.

    A classic banana split should look impressive, and tall clouds of whipped cream are part of the presentation.

    Step 6: Add Nuts and Sprinkles

    Sprinkle chopped peanuts, walnuts, or pecans over the entire sundae.

    The nuts provide an important crunchy contrast to the soft banana, creamy ice cream, and silky sauces.

    For even more color and fun, scatter rainbow sprinkles or chocolate sprinkles across the whipped cream.

    Step 7: Don’t Forget the Cherries

    Finish your banana split with maraschino cherries.

    Place one cherry on each mound of whipped cream.

    The bright red cherries are the finishing touch that transforms a bowl of ice cream into a true banana split sundae.

    Serve immediately and enjoy.

    Make Your Own Chocolate Sauce

    Store-bought chocolate syrup makes this recipe incredibly easy, but homemade chocolate sauce can take your sundae to another level.

    Place the chocolate chips and heavy cream in a microwave-safe bowl.

    Microwave in short intervals, stirring between each one, until the chocolate has completely melted.

    Stir in the butter until smooth and glossy.

    Allow the sauce to cool slightly before pouring it over your ice cream.

    You want it warm enough to be silky but not so hot that it instantly melts your scoops.

    Make Fresh Strawberry Topping

    Fresh strawberry sauce adds incredible flavor to a homemade banana split.

    Combine chopped strawberries, sugar, and lemon juice in a small saucepan.

    Cook over medium-low heat for approximately 5 to 8 minutes, stirring occasionally.

    As the strawberries warm, they will release their juices and begin creating a naturally sweet sauce.

    Gently mash some of the berries while leaving others in small pieces.

    Remove the mixture from the heat and allow it to cool completely before spooning it over the ice cream.

    The result is bright, fruity, and delicious.

    Make Homemade Pineapple Topping

    Pineapple topping adds a tropical sweetness that pairs beautifully with bananas and vanilla ice cream.

    Add the crushed pineapple and brown sugar to a small saucepan.

    Combine the cornstarch and water separately until smooth, then stir the mixture into the pineapple.

    Cook over medium-low heat until slightly thickened.

    Remove from the heat and cool completely.

    You now have a homemade pineapple topping that can be refrigerated until you’re ready to build your sundae.

    Why Banana Splits Are So Much Fun

    A banana split is not supposed to be elegant or restrained.

    It is supposed to be fun.

    You have cold ice cream, sweet bananas, warm or cool sauces, fluffy whipped cream, crunchy nuts, colorful sprinkles, and cherries all competing for space in the same dish.

    Some bites might contain chocolate and banana.

    Others might have strawberry ice cream and pineapple.

    Then you get that perfect spoonful containing a little bit of everything.

    Every bite can taste slightly different.

    That variety makes the banana split especially enjoyable.

    Build a Banana Split Bar

    If you’re serving dessert to a group, turn this recipe into a banana split bar.

    Instead of preparing individual sundaes ahead of time, place all the ingredients on a table and let everyone create their own.

    Offer several ice cream flavors, such as:

    • Vanilla
    • Chocolate
    • Strawberry
    • Cookies and cream
    • Butter pecan
    • Chocolate chip
    • Mint chocolate chip
    • Rocky road
    • Coffee
    • Birthday cake

    Then provide plenty of toppings.

    Try:

    • Hot fudge
    • Chocolate syrup
    • Caramel sauce
    • Strawberry sauce
    • Pineapple topping
    • Crushed cookies
    • Mini chocolate chips
    • Brownie pieces
    • Chopped peanuts
    • Chopped pecans
    • Coconut flakes
    • Gummy candies
    • Sprinkles
    • Fresh berries
    • Whipped cream
    • Maraschino cherries

    Set out bananas and bowls, and let everyone build the dessert of their dreams.

    A banana split bar is especially fun for birthdays, family gatherings, summer parties, and backyard cookouts.

    Try Different Ice Cream Combinations

    The traditional vanilla, chocolate, and strawberry combination will always be a classic, but homemade banana splits are perfect for experimentation.

    Chocolate Lover’s Banana Split

    Use chocolate, chocolate fudge, and chocolate chip ice cream.

    Top everything with hot fudge, chocolate chips, brownie pieces, whipped cream, and cherries.

    Peanut Butter Banana Split

    Use vanilla, chocolate, and peanut butter ice cream.

    Drizzle with warm peanut butter sauce and chocolate fudge.

    Finish with chopped peanuts, whipped cream, and cherries.

    Strawberry Banana Split

    Use strawberry, vanilla, and strawberry cheesecake ice cream.

    Add fresh strawberries, strawberry sauce, crushed graham crackers, whipped cream, and cherries.

    Caramel Pecan Banana Split

    Use vanilla, butter pecan, and caramel ice cream.

    Drizzle generously with caramel sauce and sprinkle with toasted pecans.

    Cookies and Cream Banana Split

    Use cookies and cream ice cream for all three scoops.

    Top with chocolate sauce, crushed chocolate sandwich cookies, whipped cream, and cherries.

    S’mores Banana Split

    Use chocolate and vanilla ice cream.

    Add hot fudge, crushed graham crackers, mini marshmallows, and small pieces of chocolate.

    Finish with whipped cream and a cherry.

    Add Fresh Fruit

    The banana doesn’t have to be the only fresh fruit in your sundae.

    Try adding:

    • Strawberries
    • Blueberries
    • Raspberries
    • Blackberries
    • Pineapple
    • Peaches
    • Mango
    • Cherries

    Fresh fruit adds additional flavor and texture while creating an even more colorful dessert.

    Strawberries and bananas are particularly good together, while pineapple gives the dessert a tropical twist.

    Toast the Nuts for More Flavor

    This small step can make a surprisingly big difference.

    Instead of adding nuts straight from the package, lightly toast them first.

    Place chopped peanuts, pecans, or walnuts in a dry skillet over medium-low heat.

    Toast for a few minutes while stirring frequently.

    Once they become fragrant, remove them from the pan and let them cool.

    Toasting intensifies their flavor and gives them an even better crunch.

    Just make sure the nuts are completely cool before adding them to the ice cream.

    The Secret to a Picture-Perfect Banana Split

    If you’re making your banana split for a celebration—or simply want it to look great in a photo—organization matters.

    Start with a chilled dish.

    Position the banana halves neatly along each side.

    Use an ice cream scoop dipped briefly in warm water to create clean, round scoops.

    Place your three scoops evenly down the center.

    Add toppings without completely burying the different ice cream flavors.

    Pipe or spoon whipped cream onto each scoop.

    Then add nuts, sprinkles, and bright red cherries.

    Serve immediately.

    Ice cream waits for nobody.

    Make Mini Banana Splits

    A traditional banana split can be enormous, especially after a large meal.

    Mini banana splits are an easy alternative.

    Use half a banana and one or two smaller scoops of ice cream.

    Add smaller portions of your favorite sauces, whipped cream, nuts, and a single cherry.

    Kids may especially enjoy having their own individual mini banana splits.

    They are also great when you’re serving several desserts and want everyone to be able to sample a little of everything.

    Turn It Into a Banana Split Milkshake

    Have leftover banana split ingredients?

    Turn them into a milkshake.

    Blend together:

    • 1 banana
    • 1 scoop vanilla ice cream
    • 1 scoop chocolate ice cream
    • 1 scoop strawberry ice cream
    • 1/2 to 3/4 cup milk
    • 1 tablespoon chocolate syrup
    • 1 tablespoon strawberry topping

    Blend until creamy.

    Pour into a tall glass and top with whipped cream, chopped nuts, chocolate drizzle, and a cherry.

    You get many of the same classic flavors in drinkable form.

    Make Banana Split Ice Cream Nachos

    Here’s another fun variation.

    Slice waffle cones into pieces or break waffle bowls into large chips.

    Arrange them on a platter.

    Add banana slices and small scoops of ice cream.

    Drizzle everything with chocolate, strawberry, caramel, and pineapple toppings.

    Finish with whipped cream, chopped nuts, sprinkles, and cherries.

    Everyone can grab a piece and dig in.

    It is messy, colorful, and perfect for sharing.

    What to Serve With a Banana Split

    A banana split is substantial enough to stand alone, but it also works wonderfully as the grand finale to a casual meal.

    It is especially good after:

    Burgers and fries.

    Homemade pizza.

    Barbecue chicken.

    Hot dogs.

    Grilled steaks.

    Sandwiches.

    Summer cookout favorites.

    The old-fashioned ice cream parlor feeling makes it particularly fitting after classic American comfort foods.

    A Dessert Filled With Nostalgia

    Part of the appeal of a banana split isn’t simply how it tastes.

    It is how it makes you feel.

    Banana splits remind many people of childhood trips to ice cream parlors, family vacations, birthday celebrations, diners, fairs, and warm summer evenings.

    There was something exciting about watching an enormous sundae arrive at the table.

    Three scoops.

    Two banana halves.

    Whipped cream everywhere.

    And those cherries sitting on top.

    Even as adults, desserts can bring those memories rushing back.

    Food has an incredible ability to connect us with moments from our past, and classic desserts often carry some of the strongest memories.

    Homemade Makes It Even Better

    Going to an ice cream shop for a banana split is fun, but making one at home has its own charm.

    Everyone gathers in the kitchen.

    Someone grabs the bananas.

    Someone else gets the ice cream.

    Another person brings out every topping they can find.

    Before long, the counter is covered with chocolate sauce, sprinkles, whipped cream, cherries, and bowls of toppings.

    That becomes part of the experience.

    Dessert isn’t simply something you eat.

    It becomes something you create together.

    And sometimes those ordinary moments in the kitchen become the memories we hold onto.

    Tips for the Best Homemade Banana Split

    Use bananas that are ripe but still firm. You want sweetness without mushiness.

    Chill your serving dishes before assembling the sundaes.

    Have all your toppings prepared before removing the ice cream from the freezer.

    Use good-quality ice cream since it is the star of the dessert.

    Don’t be afraid to experiment with flavors.

    Toast your nuts for additional crunch and flavor.

    Use homemade fruit sauces when you have time.

    Serve immediately after assembling.

    And most importantly, don’t worry about making it perfect.

    Banana splits are supposed to be a little messy.

    Dessert of the Day

    Today’s Homemade Banana Split Sundae is proof that some classics never need to disappear.

    A fresh banana, three scoops of ice cream, colorful sauces, whipped cream, crunchy nuts, and cherries come together to create one of the most recognizable desserts ever made.

    You can keep things traditional with vanilla, chocolate, and strawberry ice cream, or completely reinvent your banana split with your favorite flavors and toppings.

    Make one for yourself.

    Build smaller versions for the kids.

    Set up a banana split bar for your next party.

    Or make an enormous sundae and share it with someone special.

    Dessert doesn’t always need to be complicated.

    Sometimes all you need is a banana, a few scoops of ice cream, plenty of toppings, and permission to have a little fun.

    What are the three ice cream flavors you would choose for your perfect homemade banana split sundae?

  • Healthy Recipe of the Day: Homemade Chicken Pot Pie

    Advertisements

    There is something incredibly comforting about a warm chicken pot pie coming straight out of the oven. With its golden crust, tender chicken, colorful vegetables, and creamy filling, chicken pot pie is the kind of meal that immediately feels like home.

    Traditional chicken pot pie can be delicious, but it can also be loaded with butter, heavy cream, sodium, and calories. The good news is that you don’t have to give up this classic comfort food when you’re trying to make healthier choices.

    Today’s Healthy Recipe of the Day: Homemade Chicken Pot Pie keeps everything we love about the traditional dish while making a few simple adjustments to create a lighter, more balanced dinner.

    Tender chicken provides plenty of protein, vegetables bring color and nutrients, and a creamy homemade sauce ties everything together beneath a flaky golden crust. Instead of relying on canned cream soups or an extremely rich filling, this recipe builds its flavor from chicken broth, milk, herbs, vegetables, and a modest amount of butter.

    The result is wholesome comfort food that doesn’t taste like you’re sacrificing anything.

    Why Homemade Chicken Pot Pie Is Worth Making

    Chicken pot pie has been a comfort-food favorite for generations, and it’s easy to understand why. Every serving brings together several different flavors and textures.

    You get juicy pieces of chicken, tender vegetables, savory gravy, herbs, and crisp pastry in every bite.

    Making chicken pot pie at home also gives you control over what goes into your meal. Many frozen or commercially prepared pot pies can contain significant amounts of sodium and saturated fat. When you prepare one yourself, you can adjust the ingredients according to your needs.

    You can use lean chicken breast, add more vegetables, choose reduced-sodium chicken broth, control the amount of salt, and use milk instead of heavy cream.

    Homemade doesn’t necessarily mean complicated, either. Once the chicken and vegetables are prepared, the creamy filling comes together quickly. Add the crust, bake until golden, and dinner is ready.

    Ingredients

    For the Chicken and Vegetable Filling

    • 2 tablespoons olive oil
    • 1 small yellow onion, diced
    • 2 medium carrots, peeled and diced
    • 2 celery stalks, diced
    • 2 cloves garlic, minced
    • 3 cups cooked boneless, skinless chicken breast, chopped or shredded
    • 1 cup frozen peas
    • 1 cup frozen corn
    • 1 teaspoon dried thyme
    • 1/2 teaspoon dried rosemary
    • 1/2 teaspoon dried parsley
    • 1/2 teaspoon black pepper
    • 1/4 teaspoon salt, or to taste

    For the Creamy Sauce

    • 2 tablespoons unsalted butter
    • 1/4 cup all-purpose flour
    • 2 cups reduced-sodium chicken broth
    • 1 cup low-fat milk
    • 1 teaspoon Dijon mustard, optional

    For the Crust

    • 1 refrigerated pie crust or homemade pie dough
    • 1 egg
    • 1 tablespoon water

    Instructions

    Step 1: Preheat the Oven

    Preheat your oven to 400°F.

    Lightly coat a 9-inch pie dish or similar baking dish with cooking spray and set it aside.

    If you’re using refrigerated pie dough, allow it to sit at room temperature for several minutes so it’s easier to work with.

    Step 2: Cook the Vegetables

    Heat the olive oil in a large skillet over medium heat.

    Add the diced onion, carrots, and celery.

    Cook for approximately 6 to 8 minutes, stirring occasionally, until the vegetables begin to soften.

    Add the minced garlic and cook for another 30 to 60 seconds. Garlic can burn quickly, so you only need to cook it until it becomes fragrant.

    At this point, your kitchen should already begin smelling like homemade comfort food.

    Step 3: Make the Creamy Sauce

    Reduce the heat slightly and add the butter.

    Once the butter melts, sprinkle the flour over the vegetables.

    Stir continuously for about 1 to 2 minutes. Cooking the flour briefly helps remove its raw flavor and creates the base for your sauce.

    Slowly pour in the chicken broth while stirring.

    Add the milk and continue stirring until everything is well combined.

    Allow the mixture to simmer gently for several minutes. As it cooks, the sauce will gradually thicken.

    You’re looking for a creamy consistency that coats the back of a spoon without becoming overly thick.

    If you’re using Dijon mustard, stir it into the sauce now. It won’t make the filling taste strongly of mustard. Instead, it adds another subtle layer of savory flavor.

    Step 4: Add the Chicken and Vegetables

    Add the cooked chicken, frozen peas, and corn.

    Stir in the thyme, rosemary, parsley, black pepper, and salt.

    Allow everything to simmer together for another 3 to 5 minutes.

    Taste the filling and adjust the seasoning if necessary.

    Remember that chicken broth can already contain sodium, even when you’re using a reduced-sodium variety. It’s usually better to start with less salt and add more only if needed.

    Remove the skillet from the heat.

    Step 5: Assemble the Pot Pie

    Transfer the chicken mixture into your prepared pie dish.

    Carefully place the pie crust over the filling.

    Trim away any excess dough around the edges, leaving enough to seal the crust around the dish.

    Crimp the edges with your fingers or a fork.

    Using a sharp knife, cut several small slits in the center of the crust. These openings allow steam to escape during baking.

    Step 6: Add the Egg Wash

    Whisk together one egg and one tablespoon of water.

    Lightly brush the mixture over the top of the crust.

    This optional step helps create that beautiful golden-brown finish that makes homemade chicken pot pie look especially inviting.

    Step 7: Bake

    Place the chicken pot pie onto a baking sheet in case any filling bubbles over.

    Bake for approximately 30 to 35 minutes, or until the crust is golden brown and the filling is bubbling around the edges.

    If the crust begins browning too quickly, loosely cover the edges with aluminum foil.

    Step 8: Let It Rest

    This might be the hardest step.

    Once you pull that beautiful golden chicken pot pie from the oven, resist the temptation to immediately cut into it.

    Allow it to rest for approximately 10 to 15 minutes.

    Resting gives the creamy filling time to thicken slightly and makes the pot pie much easier to serve.

    Then slice, serve, and enjoy.

    What Makes This Chicken Pot Pie Healthier?

    Calling something “healthy” doesn’t have to mean stripping away everything that makes it enjoyable.

    A healthier recipe can simply mean finding a better balance.

    This chicken pot pie does exactly that.

    Lean Chicken Provides Protein

    Boneless, skinless chicken breast is an excellent foundation for this recipe because it provides plenty of protein without requiring large amounts of additional fat.

    Protein is also important for maintaining muscle and helping meals feel satisfying.

    If you prefer dark meat, cooked boneless, skinless chicken thighs can also work. They will provide a slightly richer flavor.

    Plenty of Vegetables

    Carrots, celery, onions, peas, and corn aren’t just included for appearance.

    They add flavor, texture, fiber, vitamins, minerals, and natural sweetness.

    One of the easiest ways to make comfort food more nutritious is simply to increase the amount and variety of vegetables.

    You can take this idea even further by adding mushrooms, green beans, spinach, broccoli, cauliflower, or other vegetables you enjoy.

    A Lighter Cream Sauce

    Traditional chicken pot pie recipes sometimes use heavy cream or condensed cream soup to create the filling.

    Neither ingredient is automatically “bad,” but they can make an already hearty meal considerably richer.

    This recipe instead uses chicken broth and low-fat milk to create a creamy sauce.

    A small amount of butter still provides the familiar richness we expect from pot pie without overwhelming the rest of the ingredients.

    Reduced-Sodium Broth

    Using reduced-sodium chicken broth allows you to control the salt yourself.

    This is particularly useful because the flavors from garlic, onion, herbs, vegetables, and chicken mean you don’t need excessive salt to make the filling taste good.

    One Crust Instead of Two

    Many traditional chicken pot pies have both a bottom and top crust.

    This version uses only a top crust.

    You still get flaky pastry with practically every bite, but you eliminate an entire layer of dough.

    It’s a simple change that keeps the character of the dish intact.

    Easy Ways to Add Even More Vegetables

    Chicken pot pie is one of those recipes where you can quietly load the filling with vegetables.

    Try adding:

    • Mushrooms
    • Green beans
    • Broccoli
    • Cauliflower
    • Spinach
    • Sweet potatoes
    • Green peas
    • Bell peppers
    • Zucchini

    Just remember that vegetables contain different amounts of water.

    Watery vegetables such as zucchini or spinach should generally be cooked before they’re added so they don’t release too much moisture into the filling.

    You can also use a frozen vegetable blend to make preparation easier.

    What Chicken Should You Use?

    This recipe is incredibly flexible.

    If you’re preparing everything from scratch, cook several chicken breasts ahead of time and either dice or shred them.

    But leftover chicken works beautifully.

    If you roasted chicken for dinner the night before, this recipe is a great way to transform the leftovers into something completely different.

    A store-bought rotisserie chicken is another convenient option. Remove the skin and shred the meat before adding it to your filling. Because rotisserie chicken can contain more sodium, you may want to reduce the additional salt in the recipe.

    You can even prepare extra chicken during your weekly meal prep specifically for recipes like this.

    Can You Make Chicken Pot Pie Without a Traditional Pie Crust?

    Absolutely.

    While traditional pastry gives chicken pot pie its classic appearance, there are plenty of alternatives.

    You could top the filling with thinly rolled whole-wheat dough.

    You could use phyllo dough for an especially crisp, light topping.

    You could even skip traditional pastry entirely and spoon mashed potatoes or mashed cauliflower over the filling for something closer to a chicken shepherd’s pie.

    Another option is baking the filling without a crust and serving it alongside a whole-grain biscuit.

    The best choice depends on your personal preferences and nutritional goals.

    Make Individual Chicken Pot Pies

    Want to make dinner feel a little more special?

    Divide the filling between individual oven-safe ramekins.

    Cut the pie dough into circles slightly larger than the tops of your dishes, place one piece over each ramekin, cut a steam vent, and brush with egg wash.

    Bake until golden and bubbling.

    Individual pot pies are especially helpful for portion control because each person receives their own serving.

    They also make a wonderful presentation for family dinners or casual gatherings.

    Meal Prep Tip

    You can prepare the filling ahead of time.

    Cook the vegetables, make the sauce, add the chicken and seasonings, and allow the mixture to cool.

    Transfer it into an airtight container and refrigerate.

    When you’re ready to make dinner, place the filling into your baking dish, add the crust, and bake.

    Because refrigerated filling starts colder than freshly prepared filling, you may need to add several minutes to the baking time.

    This can turn homemade chicken pot pie into a realistic weeknight dinner instead of something you only prepare when you have extra time.

    What to Serve With Homemade Chicken Pot Pie

    Chicken pot pie already contains protein, vegetables, carbohydrates, and fat, so it can easily stand on its own as a complete meal.

    However, lighter side dishes pair especially well with it.

    Try serving it with a simple green salad dressed with lemon juice and olive oil.

    Roasted Brussels sprouts are another excellent choice.

    Steamed broccoli, asparagus, roasted green beans, or a cucumber and tomato salad can provide additional vegetables without making dinner overly heavy.

    Fresh fruit can also be a refreshing accompaniment.

    Because the pot pie itself is rich and savory, simple sides are usually best.

    How to Store Leftovers

    Allow leftover chicken pot pie to cool before covering it and placing it in the refrigerator.

    For best quality, enjoy refrigerated leftovers within about 3 to 4 days.

    You can reheat individual portions in the microwave, although the pastry may become softer.

    For a crispier crust, reheat the pot pie in the oven or toaster oven until the filling is hot throughout.

    Chicken pot pie also makes an excellent next-day lunch.

    Sometimes it tastes even better after the flavors have had additional time to come together.

    Can Homemade Chicken Pot Pie Be Frozen?

    Yes.

    Chicken pot pie can be a convenient freezer meal.

    One option is preparing the filling and freezing it separately. Once cooled, place the filling into a freezer-safe container. When you’re ready to make the pot pie, thaw the filling in the refrigerator, transfer it to your baking dish, add fresh pastry, and bake.

    You can also assemble the entire pie and freeze it before baking.

    If you regularly cook for a busy household, consider preparing two pot pies at once—one for tonight and one for the freezer.

    You’re already chopping the vegetables and preparing the chicken, so doubling the recipe doesn’t require twice the effort.

    Future you may be very grateful when there’s a homemade dinner waiting in the freezer.

    Healthy Cooking Doesn’t Mean Giving Up Comfort Food

    People sometimes assume eating healthier requires replacing every favorite meal with salads, grilled chicken, and steamed vegetables.

    It doesn’t.

    Healthy eating is often more sustainable when familiar foods remain part of the picture.

    The difference is how they’re prepared.

    Chicken pot pie is a perfect example.

    Instead of eliminating it, you can adjust it.

    Use lean chicken.

    Add plenty of vegetables.

    Choose reduced-sodium broth.

    Make the sauce yourself.

    Use milk instead of heavy cream.

    Use one crust instead of two.

    Pay attention to portions.

    Those small decisions can make a meaningful difference while still allowing you to sit down to a warm, comforting meal you genuinely enjoy.

    A Classic Dinner Made Better at Home

    There are certain foods that seem to bring comfort before you’ve even taken the first bite.

    Chicken pot pie is one of them.

    Maybe it’s the smell coming from the oven.

    Maybe it’s seeing the golden crust covering the bubbling filling.

    Maybe it’s the combination of creamy chicken and vegetables underneath flaky pastry.

    Whatever the reason, homemade chicken pot pie has a way of turning an ordinary dinner into something that feels special.

    And making a healthier version doesn’t mean losing that experience.

    This Healthy Recipe of the Day: Homemade Chicken Pot Pie gives you tender chicken, colorful vegetables, creamy gravy, fragrant herbs, and a beautifully golden crust while making thoughtful ingredient choices along the way.

    It’s proof that comfort food and balanced eating don’t have to exist in separate worlds.

    Sometimes healthy cooking isn’t about completely changing what you eat.

    It’s about taking the foods you already love and finding simple ways to make them work a little better for you.

    So when you’re craving a warm, hearty dinner, skip the frozen pot pie and try making your own.

    Pull it from the oven when the crust is beautifully golden, give the filling a few minutes to settle, and then serve yourself a warm slice of homemade comfort.

    What’s your favorite vegetable to add to homemade chicken pot pie?

Exit mobile version