Category: Recipes

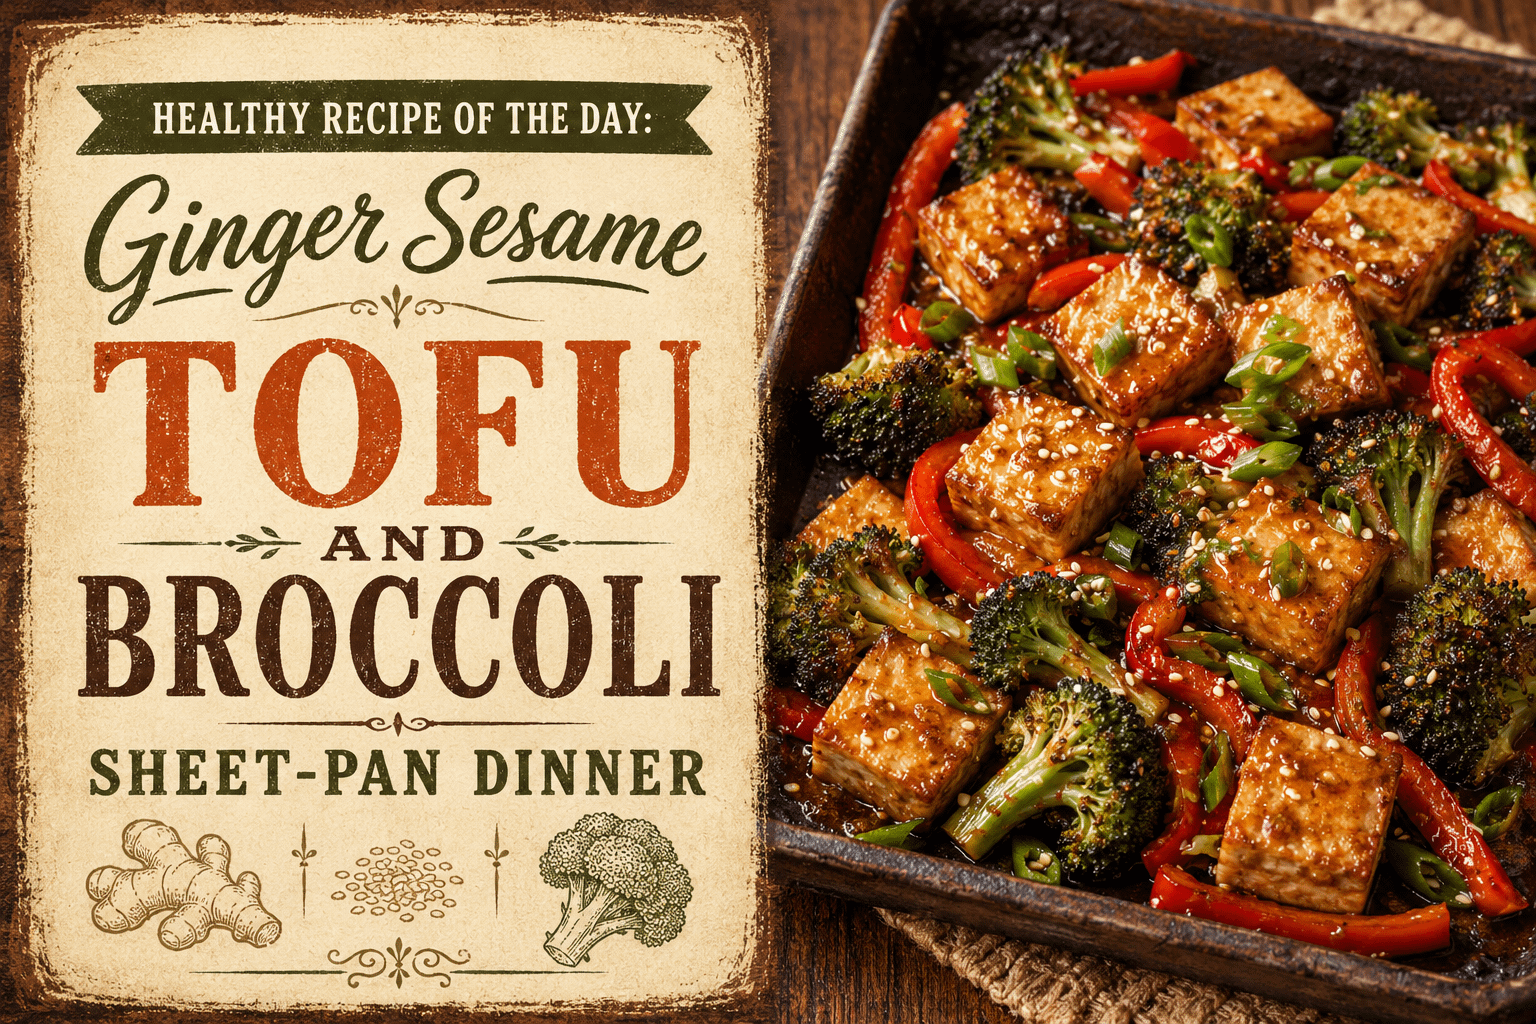
  • Healthy Recipe of the Day: Ginger Sesame Tofu and Broccoli Sheet-Pan Dinner

    Healthy Recipe of the Day: Ginger Sesame Tofu and Broccoli Sheet-Pan Dinner

    Advertisements

    A satisfying dinner does not need to depend on heavy sauces, large amounts of cheese, or complicated preparation. Sometimes the most enjoyable meals begin with a handful of simple ingredients, a dependable sheet pan, and a flavorful homemade sauce.

    This Ginger Sesame Tofu and Broccoli Sheet-Pan Dinner brings together golden tofu, roasted broccoli, sweet red bell pepper, fresh ginger, garlic, and a glossy sesame sauce. The tofu develops lightly crisp edges in the oven while remaining tender inside. The vegetables become caramelized around the edges, and the ginger-sesame sauce adds the perfect balance of savory, sweet, tangy, and aromatic flavors.

    The result is a colorful plant-based dinner that feels substantial without being excessively heavy.

    It is also wonderfully adaptable. Serve the tofu and vegetables over brown rice for a complete grain bowl, spoon them over quinoa, pair them with noodles, or enjoy them as they are for a lighter meal. You can change the vegetables, adjust the sweetness, add extra heat, or substitute another protein when desired.

    Best of all, the oven handles most of the cooking. While the tofu and vegetables roast, you can prepare the sauce and any sides you plan to serve. That makes this healthy sheet-pan dinner especially practical for busy evenings.

    What Makes This Recipe Special?

    Tofu sometimes has an unfair reputation for being bland. On its own, it does have a mild flavor, but that is one of its greatest advantages. It readily takes on the seasonings and sauces paired with it.

    The secret is preparing it properly.

    Pressing the tofu removes excess moisture, allowing the surface to brown more effectively. A light coating of cornstarch helps create crisp edges without requiring deep-frying. Giving the tofu room on the sheet pan allows hot air to circulate instead of trapping steam.

    The ginger-sesame sauce supplies layers of flavor:

    • Reduced-sodium soy sauce provides the savory foundation.
    • Fresh ginger adds warmth and brightness.
    • Garlic contributes a deep aromatic quality.
    • Rice vinegar adds acidity and prevents the sauce from tasting overly sweet.
    • Pure maple syrup or honey rounds out the salty and tangy ingredients.
    • Toasted sesame oil provides a rich, nutty finish.
    • Cornstarch thickens the sauce so it lightly coats the roasted tofu and vegetables.

    Broccoli is an ideal vegetable for this recipe because roasting transforms its texture and flavor. The stems become tender, the florets develop crisp tips, and the natural flavor becomes more concentrated. Red bell pepper adds sweetness, color, and another tender-crisp texture.

    Together, these ingredients create a dinner with enough contrast to keep every bite interesting.

    Why You’ll Love This Ginger Sesame Tofu Dinner

    This recipe offers several practical advantages:

    • It is naturally meatless.
    • It contains plenty of vegetables.
    • The tofu provides satisfying plant-based protein.
    • Most of the cooking happens on one sheet pan.
    • The sauce is easy to prepare with familiar pantry ingredients.
    • You can adjust the sweetness, saltiness, and spice level.
    • The leftovers work well for lunch.
    • It can be served with rice, quinoa, noodles, or additional vegetables.
    • The ingredients are available in most supermarkets.
    • It delivers the flavor of takeout-inspired food with greater control over the ingredients.

    This is also a useful recipe for anyone who wants to include more plant-based meals without preparing something that feels incomplete. The combination of tofu, vegetables, and an optional whole-grain side produces a filling dinner with plenty of flavor and texture.

    Practical Recipe Details

    Preparation time: 20 minutes
    Optional tofu pressing time: 20 to 30 minutes
    Cooking time: 30 to 35 minutes
    Total time: Approximately 55 minutes
    Servings: 4
    Cooking method: Oven-roasted sheet-pan dinner
    Oven temperature: 425°F

    Helpful Equipment

    • Large rimmed sheet pan
    • Parchment paper
    • Clean kitchen towel or paper towels
    • Cutting board
    • Sharp knife
    • Large mixing bowl
    • Small saucepan
    • Whisk
    • Measuring cups and spoons
    • Silicone spatula or large spoon

    Using a sufficiently large sheet pan is important. If the tofu and vegetables are crowded together, they will release moisture and steam instead of developing properly roasted edges.

    Ingredients

    For the Tofu and Vegetables

    • 1 package extra-firm tofu, approximately 14 to 16 ounces
    • 6 cups broccoli florets, cut into similar-sized pieces
    • 1 large red bell pepper, seeded and sliced
    • 2 tablespoons avocado oil or olive oil, divided
    • 2 tablespoons cornstarch
    • 1/2 teaspoon garlic powder
    • 1/4 teaspoon ground black pepper
    • 1/8 teaspoon salt, optional

    For the Ginger-Sesame Sauce

    • 1/4 cup reduced-sodium soy sauce or tamari
    • 3 tablespoons water
    • 2 tablespoons unseasoned rice vinegar
    • 1 1/2 tablespoons pure maple syrup or honey
    • 2 teaspoons toasted sesame oil
    • 1 tablespoon freshly grated ginger
    • 2 cloves garlic, finely minced
    • 2 teaspoons cornstarch
    • 1 teaspoon sriracha or chili-garlic sauce, optional

    For Finishing

    • 2 green onions, thinly sliced
    • 2 teaspoons sesame seeds
    • Lime wedges, optional

    Optional Serving Suggestions

    • Cooked brown rice
    • Steamed jasmine rice
    • Quinoa
    • Cauliflower rice
    • Soba noodles
    • Rice noodles

    How to Make Ginger Sesame Tofu and Broccoli

    Step 1: Press the Tofu

    Drain the tofu and remove it from its package.

    Wrap the block in a clean kitchen towel or several layers of paper towels. Place it on a plate or shallow dish, then position a heavy skillet, cutting board, or several canned goods on top.

    Allow the tofu to press for 20 to 30 minutes.

    Pressing removes water from inside the tofu. This improves its texture and helps it brown rather than steam in the oven.

    If you have a dedicated tofu press, follow its instructions. You can also purchase vacuum-packed extra-firm tofu, which sometimes contains less water and requires less pressing.

    Step 2: Preheat the Oven

    Preheat the oven to 425°F.

    Line a large rimmed sheet pan with parchment paper. The parchment prevents sticking and makes cleanup easier.

    If you prefer slightly deeper browning, you can roast directly on a lightly oiled metal sheet pan. Just be prepared to loosen the tofu carefully with a thin spatula when turning it.

    Step 3: Cut and Season the Tofu

    After pressing, cut the tofu into cubes approximately 3/4 to 1 inch wide.

    Try to keep the cubes similar in size so they cook evenly.

    Place the tofu in a large mixing bowl. Drizzle it with 1 tablespoon of the oil and gently toss. Sprinkle the cornstarch, garlic powder, black pepper, and optional salt over the tofu.

    Fold everything together carefully until the tofu is lightly and evenly coated. Avoid stirring too aggressively because the cubes can crumble.

    The tofu should not have a heavy white coating. The goal is simply to apply a thin layer of cornstarch that will help the exterior become lightly crisp.

    Step 4: Begin Roasting the Tofu

    Arrange the tofu cubes in a single layer on one side of the prepared sheet pan. Leave a little space between the pieces.

    Bake for 15 minutes.

    Remove the pan from the oven and carefully turn the tofu cubes. They may not look completely golden yet, but the bottoms should be beginning to set and develop color.

    Starting the tofu before adding the vegetables gives it additional time to brown.

    Step 5: Prepare the Vegetables

    While the tofu begins roasting, cut the broccoli into medium florets. Very large florets may remain too firm, while extremely small ones can burn before the tofu is ready.

    Slice the red bell pepper into strips of approximately equal thickness.

    Place the broccoli and bell pepper in the same mixing bowl used for the tofu. Drizzle with the remaining tablespoon of oil and toss until lightly coated.

    You can add a small amount of black pepper, but avoid adding much salt because the ginger-sesame sauce already contains soy sauce.

    Step 6: Add the Vegetables

    After turning the tofu, spread the broccoli and red bell pepper over the empty portion of the sheet pan.

    Keep everything in a relatively even layer. Some overlap is fine, but avoid piling the vegetables on top of one another.

    Return the sheet pan to the oven and roast for another 15 to 20 minutes.

    Turn the vegetables once during cooking if you want more even browning. The dinner is ready for the sauce when the tofu is golden around the edges, the broccoli is tender with lightly charred tips, and the pepper has softened while retaining some texture.

    Step 7: Make the Ginger-Sesame Sauce

    While the tofu and vegetables finish roasting, combine the reduced-sodium soy sauce, water, rice vinegar, maple syrup or honey, toasted sesame oil, ginger, garlic, cornstarch, and optional sriracha in a small saucepan.

    Whisk thoroughly before turning on the heat. The cornstarch blends more easily while the liquid is still cool.

    Place the saucepan over medium heat. Cook while whisking frequently until the mixture begins to simmer and thicken, approximately 2 to 4 minutes.

    Once the sauce is glossy and thick enough to coat the back of a spoon, remove it from the heat.

    Do not walk away from the saucepan. The sauce can move from thin to thick very quickly.

    If it becomes too thick, whisk in another tablespoon of water. If it remains thin after simmering, continue cooking for another minute.

    Step 8: Combine Everything

    Remove the sheet pan from the oven.

    Drizzle approximately two-thirds of the ginger-sesame sauce over the hot tofu and vegetables. Toss gently on the pan until everything is lightly coated.

    Add more sauce as needed, or reserve the remaining sauce for serving.

    Return the pan to the oven for 2 to 3 minutes. This brief final roasting time helps the sauce cling to the tofu and vegetables.

    Avoid leaving the coated ingredients in the oven too long. The maple syrup or honey in the sauce can burn under high heat.

    Step 9: Garnish and Serve

    Remove the finished sheet-pan dinner from the oven.

    Sprinkle sliced green onions and sesame seeds over the top. Serve immediately with lime wedges if you enjoy a bright citrus finish.

    Spoon the tofu and vegetables over brown rice, quinoa, noodles, or your preferred base. Drizzle each serving with any reserved ginger-sesame sauce.

    Tips for Perfectly Roasted Tofu

    Start With Extra-Firm Tofu

    Extra-firm tofu holds its shape better than soft or silken varieties. Soft tofu contains more water and is likely to break apart during tossing and roasting.

    Firm tofu can work, but it generally needs additional pressing.

    Do Not Skip Pressing

    Pressing tofu may seem like an unnecessary extra step, but it makes a noticeable difference. Excess moisture prevents browning and can dilute the seasonings.

    Even 15 minutes of pressing is better than none when time is limited.

    Use a Light Hand When Tossing

    Tofu becomes more delicate after it is cut. Use a silicone spatula or your hands to fold the oil and cornstarch around the cubes.

    A vigorous stirring motion can turn neat cubes into small broken pieces.

    Give the Tofu Space

    Proper roasting depends on dry heat circulating around the food. Tofu cubes packed tightly together will trap steam.

    Use two sheet pans if your primary pan is small. It is better to wash an additional pan than to end up with soggy tofu and vegetables.

    Sauce the Tofu Near the End

    Adding the sauce at the beginning may seem convenient, but the maple syrup, garlic, ginger, and soy sauce can become excessively dark during a long roasting time.

    Roast the tofu until crisp first, then add the sauce near the end. This preserves the texture and prevents the glaze from burning.

    How to Prevent Soggy Broccoli

    Broccoli contains a significant amount of water, so a few details can improve the roasted texture.

    Wash the broccoli in advance and dry it thoroughly. Water clinging to the florets creates steam in the oven.

    Cut the florets into similar sizes. Leave some flat surfaces where you slice through larger florets. Placing those flat sides against the hot pan encourages caramelization.

    Use just enough oil to coat the broccoli lightly. Too little oil can make the florets dry, but too much may leave them greasy.

    Finally, do not overcrowd the pan. Spread the vegetables out as much as possible.

    Substitutions and Variations

    Make It Gluten-Free

    Use certified gluten-free tamari instead of traditional soy sauce. Check the labels on any chili sauce and serving noodles as well.

    Add More Vegetables

    This recipe can accommodate many vegetables, including:

    • Sliced carrots
    • Snow peas
    • Sugar snap peas
    • Mushrooms
    • Zucchini
    • Cauliflower
    • Green beans
    • Baby corn
    • Thinly sliced red onion

    Consider the cooking time of each vegetable. Firm vegetables such as carrots should be cut thinly or added earlier. Fast-cooking vegetables such as snow peas can be added during the final several minutes.

    Make It Spicier

    Add extra sriracha, chili-garlic sauce, or crushed red pepper flakes to the sauce.

    You can also finish each serving with chili crisp, but remember that some prepared chili oils can add considerable sodium.

    Make It Less Sweet

    Reduce the maple syrup or honey to 2 teaspoons. The sauce will taste more savory and tangy but will still coat the ingredients.

    Replace the Tofu

    If tofu is not your preference, use bite-sized pieces of chicken breast or boneless chicken thighs.

    Chicken must be cooked to a safe internal temperature of 165°F. Because raw chicken requires careful handling, use a separate bowl and utensils when seasoning it.

    Tempeh is another plant-based alternative. Cut it into small triangles or cubes and follow a similar roasting method.

    Try a Different Sauce Finish

    For a citrus variation, add fresh orange zest and replace one tablespoon of the water with orange juice.

    For a peanut-sesame version, whisk one tablespoon of natural peanut butter into the sauce. You may need another tablespoon of water to maintain a pourable consistency.

    Serving Ideas

    For a balanced grain bowl, place cooked brown rice in each bowl and top it with the ginger-sesame tofu, broccoli, and bell pepper. Add shredded cabbage or cucumber for a cool, crisp contrast.

    Quinoa is another practical option. Its mild, nutty flavor works well with sesame and ginger.

    For a noodle dinner, serve the mixture over soba noodles, whole-wheat spaghetti, or rice noodles. Prepare a little extra sauce so there is enough to coat the noodles.

    For a lighter meal, use cauliflower rice or serve the tofu and vegetables over mixed greens. Allow the roasted ingredients to cool slightly before placing them on delicate lettuce.

    You can also serve this meal family-style. Place the sheet pan in the center of the table with bowls of rice, sliced green onions, sesame seeds, lime wedges, and extra sauce. Everyone can assemble a serving according to their preferences.

    Make-Ahead Guidance

    Several parts of this recipe can be prepared ahead of time.

    Press and cube the tofu up to one day in advance. Store it in a covered container in the refrigerator. Wait to add the cornstarch until shortly before roasting.

    Cut the broccoli and bell pepper one or two days ahead. Keep them dry and refrigerated in separate airtight containers.

    The ginger-sesame sauce can be prepared up to four days in advance. Store it in the refrigerator and gently reheat it before using. The chilled sauce may become thicker, so whisk in a teaspoon or two of water as it warms.

    Rice or quinoa can also be cooked ahead, cooled promptly, and refrigerated in a shallow covered container.

    With these components prepared, the dinner can be assembled and roasted with very little active work.

    Storage and Reheating

    Allow leftovers to cool before transferring them to an airtight container.

    Store the tofu and vegetables in the refrigerator for up to four days. Keep cooked rice or noodles in a separate container when possible. Separating the components helps maintain their textures and makes reheating easier.

    The tofu will soften in the refrigerator, but it will still taste delicious.

    For the best reheated texture, spread the leftovers on a sheet pan and warm them in a 375°F oven for approximately 8 to 12 minutes. An air fryer also works well.

    You can use a microwave when convenience matters most. Heat individual portions in short intervals, stirring between each one. The tofu will not be as crisp, but the meal will remain flavorful.

    Freezing is possible, although tofu changes texture after being frozen and thawed. Some people enjoy its firmer, more porous consistency, while others prefer freshly cooked tofu. The broccoli may also become softer after freezing.

    For the most dependable quality, refrigerating rather than freezing is recommended.

    A Colorful Dinner for Busy Evenings

    Ginger Sesame Tofu and Broccoli Sheet-Pan Dinner proves that a meatless meal can be flavorful, filling, and approachable.

    The tofu brings satisfying substance, the roasted vegetables provide color and texture, and the homemade ginger-sesame sauce ties everything together. Because the ingredients can be prepared ahead and customized easily, the recipe works just as well for weekly meal preparation as it does for a relaxed family dinner.

    Serve it over a warm grain, pair it with noodles, or enjoy it straight from the sheet pan. However you build your plate, you will have a wholesome dinner filled with crisp edges, tender vegetables, fresh aromatics, and a delicious balance of savory and sweet flavors.

    Would you serve this Ginger Sesame Tofu and Broccoli Sheet-Pan Dinner with brown rice, quinoa, noodles, or extra roasted vegetables?

  • Recipe of the Day: Crispy Coconut-Lime Chicken with Mango Salsa

    Advertisements

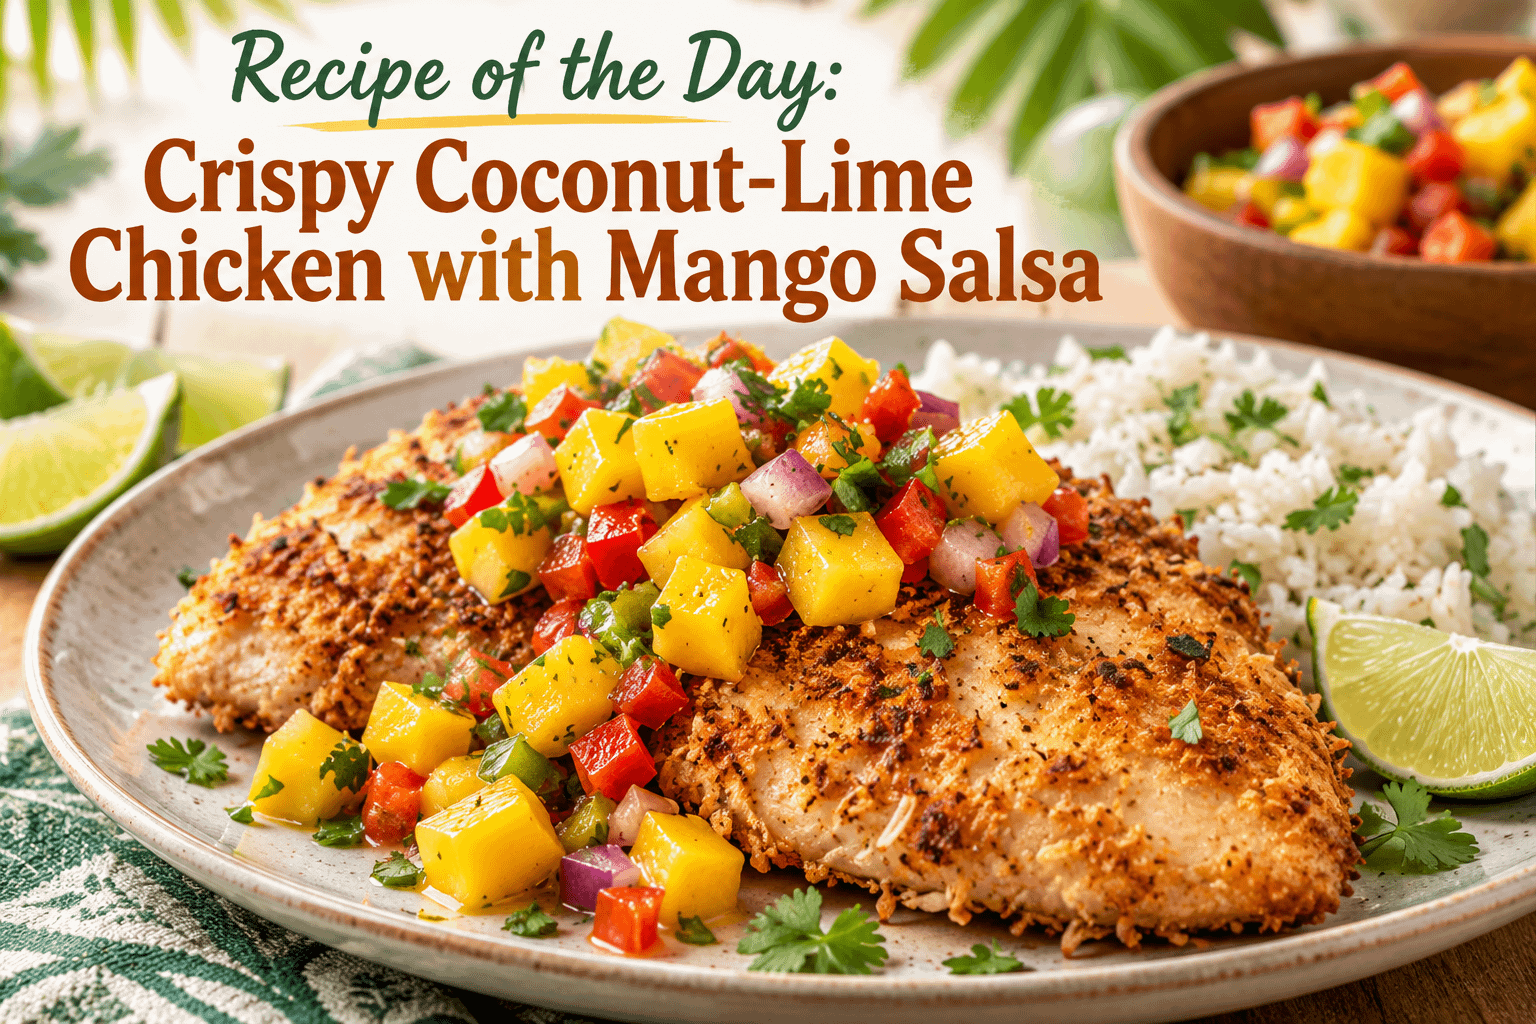
    Golden coconut-crusted chicken and colorful mango salsa create a dinner that looks impressive, tastes vibrant, and remains practical enough for an ordinary weeknight. The chicken has a crunchy toasted coating seasoned with lime, garlic, and gentle spices, while the fresh salsa brings sweetness, acidity, and a touch of heat.

    Each bite offers an appealing contrast: juicy chicken beneath a crisp coconut crust, ripe mango against tangy lime, and fresh cilantro alongside savory seasonings. Although the finished plate feels restaurant-worthy, everything can be prepared with familiar ingredients and straightforward techniques.

    Serve this crispy coconut-lime chicken with coconut rice for a tropical-inspired meal, tuck sliced pieces into warm tortillas, or pair it with a simple salad when you want something lighter. It is an adaptable recipe that can become a relaxed family dinner, a colorful weekend meal, or an inviting centerpiece for casual entertaining.

    What Makes This Coconut-Lime Chicken Special?

    The best recipes bring contrasting flavors and textures into balance. This dish accomplishes that through three main elements.

    First, the chicken is coated with a combination of panko breadcrumbs and shredded coconut. Panko creates a light, airy crunch, while the coconut adds texture, sweetness, and rich toasted flavor.

    Second, fresh lime appears throughout the recipe. Lime zest seasons the coating without adding moisture, and lime juice brightens the mango salsa. Its acidity keeps the coconut and fruit from making the dish taste overly sweet.

    Finally, the homemade mango salsa offers a cool, juicy contrast to the warm chicken. Ripe mango, red bell pepper, red onion, jalapeño, cilantro, and lime create a topping that is simultaneously sweet, tart, fresh, and lightly spicy.

    The chicken is baked instead of deep-fried, making preparation and cleanup easier. A wire rack allows hot air to circulate beneath each cutlet, helping the bottom remain crisp without requiring a skillet full of oil.

    Recipe Details

    • Prep time: 25 minutes
    • Cook time: 18–22 minutes
    • Resting time: 5 minutes
    • Total time: Approximately 50 minutes
    • Yield: 4 servings
    • Cooking method: Oven-baked
    • Recommended internal temperature: 165°F in the thickest part of the chicken

    Equipment You Will Need

    • Large rimmed baking sheet
    • Oven-safe wire rack
    • Three shallow bowls or plates
    • Cutting board
    • Sharp knife
    • Meat mallet or rolling pin
    • Instant-read thermometer
    • Medium mixing bowl
    • Whisk or fork
    • Nonstick cooking spray

    The wire rack is helpful but not essential. If you do not have one, place the chicken directly on a parchment-lined baking sheet and carefully turn each piece halfway through cooking.

    Ingredients

    For the Mango Salsa

    • 2 medium ripe mangoes, peeled and cut into ¼-inch cubes
    • ½ cup finely diced red bell pepper
    • ¼ cup finely diced red onion
    • 1 small jalapeño, seeded and finely minced
    • ¼ cup loosely packed fresh cilantro, chopped
    • 2 tablespoons freshly squeezed lime juice
    • 1 teaspoon finely grated lime zest
    • ¼ teaspoon kosher salt
    • ⅛ teaspoon freshly ground black pepper

    For the Coconut-Lime Chicken

    • 2 large boneless, skinless chicken breasts, approximately 1½ pounds total
    • ¾ teaspoon kosher salt, divided
    • ½ teaspoon freshly ground black pepper
    • ½ cup all-purpose flour
    • 1 teaspoon garlic powder
    • ½ teaspoon smoked paprika
    • 2 large eggs
    • 1 tablespoon freshly squeezed lime juice
    • ¾ cup unsweetened shredded coconut
    • ¾ cup panko breadcrumbs
    • 2 teaspoons finely grated lime zest
    • 2 tablespoons neutral cooking oil or melted coconut oil
    • Nonstick cooking spray

    Optional Garnishes

    • Fresh cilantro leaves
    • Thinly sliced green onions
    • Lime wedges
    • Additional diced mango
    • Thinly sliced jalapeño

    Selecting the Best Mangoes

    A properly ripened mango gives the salsa its juicy texture and natural sweetness. Gently press the fruit near the stem. It should yield slightly without feeling mushy. A hard mango will be difficult to cut and may taste sour, while an extremely soft one can become watery when mixed.

    Color is not always a reliable indication of ripeness because different varieties develop different shades. Texture and aroma are better guides. A ripe mango often has a sweet, fruity fragrance near the stem.

    If your mangoes are still firm, leave them at room temperature for a day or two. Placing them inside a loosely closed paper bag can help speed the ripening process.

    How to Make Crispy Coconut-Lime Chicken with Mango Salsa

    Step 1: Prepare the Mango Salsa

    Combine the diced mango, red bell pepper, red onion, jalapeño, cilantro, lime juice, lime zest, salt, and black pepper in a medium bowl.

    Fold the ingredients together gently so the mango retains its shape. Taste and adjust the seasoning as needed. Depending on the sweetness of the fruit, you may want another small squeeze of lime or pinch of salt.

    Cover the bowl and refrigerate the salsa while preparing the chicken. This brief resting period allows the flavors to blend.

    Step 2: Heat the Oven and Prepare the Pan

    Preheat the oven to 425°F.

    Place an oven-safe wire rack on a rimmed baking sheet. Coat the rack lightly with nonstick cooking spray. The elevated rack exposes more of the coating to circulating heat, producing a crispier result.

    If you are baking the chicken directly on the pan, line the baking sheet with parchment paper and lightly coat it with cooking spray.

    Step 3: Prepare the Chicken Cutlets

    Slice each chicken breast horizontally through the center to create four thinner cutlets.

    Place one cutlet between two sheets of parchment paper or plastic wrap. Use the flat side of a meat mallet or a rolling pin to gently pound it to an even ½-inch thickness. Repeat with the remaining pieces.

    Uniform thickness is important because it helps every cutlet cook at approximately the same speed. Pat the chicken dry with paper towels, then season both sides with ½ teaspoon of the salt and all the black pepper.

    Step 4: Arrange the Breading Station

    Place three shallow bowls in a row.

    In the first bowl, combine the flour, garlic powder, smoked paprika, and remaining ¼ teaspoon salt.

    In the second bowl, whisk the eggs with 1 tablespoon of lime juice until completely blended.

    In the third bowl, combine the shredded coconut, panko breadcrumbs, and lime zest. Drizzle the oil over the mixture and toss thoroughly. Coating the crumbs with a little oil encourages even browning in the oven.

    Step 5: Bread the Chicken

    Working with one cutlet at a time, dredge the chicken in the seasoned flour. Turn it until both sides are lightly coated, then shake away the excess.

    Dip the floured chicken into the egg mixture, allowing any extra egg to drip back into the bowl.

    Place the chicken in the coconut-panko mixture. Press the crumbs gently onto both sides and around the edges. Set the coated cutlet on the prepared rack and repeat with the remaining chicken.

    Wash your hands and sanitize any utensils or surfaces that contacted raw chicken before proceeding.

    Step 6: Bake Until Golden and Crisp

    Lightly mist the top of each cutlet with cooking spray.

    Bake for 10 minutes, then carefully turn the chicken using a thin spatula or tongs. Spray the second side lightly and continue baking for 8–12 minutes.

    The exact cooking time depends on the thickness of the cutlets and your oven. The coating should appear deeply golden, and the chicken must reach an internal temperature of 165°F at its thickest point.

    If the chicken reaches the proper temperature before the coating is as brown as desired, broil it for 30–60 seconds. Watch continuously because coconut can darken quickly under direct heat.

    Step 7: Rest and Serve

    Transfer the chicken to a clean platter and let it rest for five minutes. Resting helps preserve the juices when the cutlets are sliced.

    Spoon some mango salsa over or beside the chicken immediately before serving. Garnish with cilantro and lime wedges, if desired. Keep extra salsa at the table so everyone can add their preferred amount.

    Tips for the Crispiest Coconut Coating

    Pat the Chicken Dry

    Excess surface moisture prevents the flour from adhering properly. Thoroughly drying the cutlets creates a better foundation for the egg and crumb layers.

    Maintain Even Thickness

    A thick center may still be undercooked when the coating is ready, while thin edges can become dry. Pounding the cutlets to approximately ½ inch gives you more predictable results.

    Use Unsweetened Coconut

    Sweetened coconut can cause the coating to taste dessert-like and may brown too quickly. Unsweetened shredded coconut supplies natural richness and subtle sweetness without overwhelming the savory seasonings.

    Press the Coating Firmly

    Do not simply drop the chicken into the crumbs and immediately remove it. Gently pressing the coconut mixture onto every surface creates more complete coverage and helps prevent loose patches.

    Add Oil to the Crumbs

    A small quantity of oil improves color and texture without deep-frying. Toss until the oil is distributed rather than concentrated in a few damp spots.

    Avoid Crowding the Pan

    Leave space between the cutlets. Crowding traps steam, which softens the coating and interferes with browning.

    Measure Temperature, Not Color

    A golden exterior does not guarantee that the center is fully cooked. Use an instant-read thermometer and test the thickest section of every cutlet.

    Adjusting the Heat

    The jalapeño makes the salsa gently spicy, but its heat level can vary considerably.

    For a mild salsa, remove the seeds and white interior membranes before mincing the pepper. You can also use only half of the jalapeño or omit it completely.

    For more heat, leave some seeds in the salsa or replace the jalapeño with a minced serrano pepper. A pinch of cayenne can also be added to the coconut coating.

    When serving people with different heat preferences, prepare the salsa without jalapeño and offer sliced peppers or hot sauce separately.

    Ingredient Substitutions

    Chicken Thighs

    Boneless, skinless chicken thighs can replace the breasts. Pound them only enough to create an even thickness and expect the cooking time to vary. They still need to reach at least 165°F internally.

    Regular Breadcrumbs

    Traditional breadcrumbs work when panko is unavailable, although the coating will be finer and slightly less crunchy.

    Gluten-Free Option

    Replace the flour with a gluten-free all-purpose blend and use certified gluten-free panko or crushed rice cereal. Check every packaged seasoning for ingredients that do not meet your needs.

    Pineapple Salsa

    Replace one or both mangoes with finely diced fresh pineapple. Pineapple creates a more acidic, tropical salsa that pairs especially well with coconut.

    Peach Salsa

    Ripe peaches provide a softer texture and floral sweetness. They are an excellent seasonal substitute when fresh mangoes are unavailable.

    Cilantro Alternative

    If you do not enjoy cilantro, use chopped flat-leaf parsley. Fresh mint or basil can also work, although either herb will change the character of the salsa.

    Air-Fryer Method

    Preheat the air fryer to 390°F. Arrange the breaded cutlets in a single layer, leaving space between them. Cook for approximately 10–14 minutes, turning halfway through, until crisp and cooked to 165°F. Work in batches if necessary.

    Delicious Recipe Variations

    Coconut-Lime Chicken Tacos

    Slice the cooked chicken into narrow strips and place them in warmed corn or flour tortillas. Add mango salsa, shredded cabbage, avocado, and a drizzle of lime crema.

    Tropical Chicken Bowls

    Build bowls with coconut rice, sliced chicken, mango salsa, black beans, shredded lettuce, and avocado. Finish them with lime juice and toasted coconut.

    Coconut-Lime Chicken Sandwiches

    Serve the chicken on toasted brioche buns with lettuce, mango salsa, and chili-lime mayonnaise. Choose thinner cutlets so the sandwiches are easy to eat.

    Bite-Sized Coconut Chicken

    Cut the chicken into strips or nuggets before breading. Reduce the baking time and check the pieces early because smaller portions cook faster. Serve them with mango salsa or a sweet chili dipping sauce.

    Macadamia-Coconut Chicken

    Replace ¼ cup of the panko with finely chopped roasted macadamia nuts. The nuts add buttery flavor and additional crunch.

    What to Serve with Coconut-Lime Chicken

    Coconut Rice

    Cook jasmine rice with a combination of water and unsweetened coconut milk. Its creamy texture complements the crunchy coating without competing with the mango salsa.

    Cilantro-Lime Rice

    For something lighter, stir lime juice, lime zest, cilantro, and a pinch of salt into freshly cooked rice.

    Black Beans

    Simply seasoned black beans add protein and make the meal more filling. Flavor them with cumin, garlic, and lime.

    Roasted Vegetables

    Roasted zucchini, bell peppers, asparagus, or broccoli offer a warm and savory contrast to the fruit salsa.

    Crisp Green Salad

    Mixed greens with cucumber, avocado, and a lime vinaigrette make a refreshing side. Keep the dressing tart and light so the meal remains balanced.

    Grilled Corn

    Fresh corn develops a smoky sweetness on the grill. Finish it with lime juice, chili powder, and a light sprinkle of salt.

    Preparing the Recipe Ahead

    The mango salsa can be prepared up to four hours before serving. Refrigerate it in a covered container and stir gently before bringing it to the table. Preparing it too far ahead may cause the mango to soften and release excess liquid.

    The chicken can be trimmed, sliced, and pounded one day in advance. Store it in an airtight container in the refrigerator. Mix the dry flour seasoning and coconut-panko coating separately, but wait to bread the chicken until shortly before baking.

    Breading the cutlets too early allows moisture from the chicken and egg to soak into the crumbs, reducing their crunch.

    Storing Leftovers

    Allow leftover chicken to cool, then refrigerate it in a shallow airtight container within two hours. Store it for up to three or four days.

    Keep the mango salsa in a separate container. It is best within two days because the fruit and vegetables gradually release liquid.

    The cooked chicken may be frozen without the salsa. Arrange cooled cutlets on a parchment-lined tray and freeze until firm. Transfer them to a freezer-safe container with parchment between the layers and freeze for up to two months.

    Thaw frozen chicken overnight in the refrigerator before reheating.

    How to Reheat Coconut Chicken

    The oven or air fryer will restore more of the original crunch than the microwave.

    To use the oven, place the chicken on a wire rack over a baking sheet and heat it at 375°F for approximately 10–15 minutes, or until thoroughly hot.

    In an air fryer, reheat the chicken at 350°F for approximately 4–6 minutes.

    A microwave is convenient, but it will soften the coconut coating. If you use one, heat the chicken in short intervals to avoid drying it out.

    Always add cold mango salsa after the chicken has been reheated.

    A Colorful Dinner Worth Sharing

    Crispy Coconut-Lime Chicken with Mango Salsa transforms familiar chicken breasts into something bright, crunchy, and memorable. The baked coconut-panko coating provides the satisfying texture of fried chicken without the inconvenience of deep-frying, while lime keeps every component fresh and balanced.

    The mango salsa is more than a garnish. Its juicy sweetness, crisp vegetables, herbs, and acidity complete the dish, bringing contrast to the warm coconut crust. Together, the chicken and salsa create a meal that feels tropical without requiring unusual equipment or difficult techniques.

    Serve it with rice and vegetables for a complete dinner, turn it into tacos for a casual gathering, or prepare colorful chicken bowls for an easy meal. However it reaches the table, this recipe delivers abundant flavor, inviting color, and plenty of possibilities for customization.

    Would you serve this crispy coconut-lime chicken with rice, in tacos, or as part of a fresh tropical bowl?

  • Breakfast of the Day: Apple Cheddar Scones

    Advertisements

    There is something especially inviting about a breakfast that brings sweet and savory flavors together. These Apple Cheddar Scones do exactly that, combining tender pieces of fresh apple, sharp cheddar cheese, cold butter, and a lightly seasoned dough in one warm, flaky breakfast pastry.

    The apples add gentle sweetness and moisture without turning the scones into dessert. The cheddar brings a rich, savory flavor that becomes even better as the edges of the cheese toast in the oven. A touch of brown sugar and cinnamon rounds everything out, while the buttery layers give each scone the tender, crumbly texture that makes a freshly baked scone so satisfying.

    These homemade apple cheddar scones are special enough for a weekend breakfast or holiday brunch, but they are also practical enough to prepare ahead for a busy morning. You can serve them warm with butter, drizzle them with honey, pair them with eggs, or enjoy one alongside a hot cup of coffee. They are filling without being too heavy, familiar without being ordinary, and easy to customize depending on what you already have in the kitchen.

    If you are looking for a breakfast recipe that feels comforting, seasonal, and just a little different, Apple Cheddar Scones deserve a place at your table.

    What Makes Apple Cheddar Scones Special?

    Apple and cheddar may sound like an unexpected combination if you have never tried them together, but the pairing has a wonderful balance. Crisp apples bring brightness and natural sweetness, while sharp cheddar adds a salty richness. Neither flavor needs to overpower the other. When the ingredients are used in the right proportions, they create a scone that works equally well with sweet or savory breakfast foods.

    The texture also makes this recipe memorable. Small pieces of cold butter create steam as the scones bake, helping form tender pockets and flaky layers. Finely diced apple softens in the oven while still giving the crumb a little texture. Shredded cheddar melts throughout the dough and creates crisp, golden spots along the edges.

    Unlike a sugary bakery scone covered in icing, this version is only lightly sweetened. That means you can serve it with maple butter or apple preserves when you want something sweeter, or pair it with bacon, sausage, or eggs when you want a hearty savory breakfast.

    This recipe is also pleasantly simple. You do not need yeast, a mixer, or special baking equipment. A bowl, a pastry cutter or fork, a baking sheet, and a few basic ingredients are enough to make a batch.

    Choosing the Best Apples and Cheddar

    The best apples for these scones are firm varieties that hold their shape when baked. Honeycrisp, Pink Lady, Braeburn, Fuji, and Granny Smith are all good choices. A tart apple such as Granny Smith creates a stronger contrast with the cheese, while Honeycrisp or Fuji gives the scones a slightly sweeter flavor.

    Avoid apples that are especially soft or mealy because they may release too much moisture and disappear into the dough. Peel the apple if you want the most tender texture, then dice it into small pieces about one-quarter inch wide. Large chunks can make the scones difficult to shape and may create wet pockets in the crumb.

    For the cheese, use a sharp or extra-sharp cheddar. Mild cheddar will melt nicely, but its flavor can get lost beside the apple and butter. White or yellow cheddar both work well. For the best texture, shred the cheese from a block rather than using packaged preshredded cheese. Freshly shredded cheese melts more evenly because it does not contain the same anti-caking coating.

    Ingredients for Apple Cheddar Scones

    This recipe makes 8 generous scones.

    • 2 1/2 cups all-purpose flour
    • 1/4 cup packed light brown sugar
    • 1 tablespoon baking powder
    • 1/2 teaspoon ground cinnamon
    • 1/2 teaspoon fine salt
    • 1/4 teaspoon ground black pepper, optional
    • 1/2 cup cold unsalted butter, cut into small cubes
    • 1 cup shredded sharp cheddar cheese, divided
    • 1 cup peeled and finely diced firm apple
    • 2 large eggs, divided
    • 2/3 cup cold heavy cream, plus more if needed
    • 1 teaspoon pure vanilla extract
    • 1 teaspoon Dijon mustard, optional
    • 1 tablespoon coarse sugar for topping, optional

    Optional Maple Butter

    • 4 tablespoons softened salted butter
    • 1 tablespoon pure maple syrup
    • Pinch of cinnamon

    The black pepper and Dijon mustard are optional, but both ingredients quietly deepen the savory side of the scones. They should not make the scones spicy or taste strongly of mustard. Instead, they help the cheddar stand out.

    How to Make Apple Cheddar Scones

    1. Prepare the Baking Sheet and Oven

    Line a large baking sheet with parchment paper. Set it aside, but do not preheat the oven yet if your kitchen is warm. Giving the shaped scones a short chill before baking helps the butter remain cold and improves their texture.

    2. Combine the Dry Ingredients

    In a large mixing bowl, whisk together the flour, brown sugar, baking powder, cinnamon, salt, and black pepper. Break up any lumps of brown sugar so the mixture is evenly combined.

    Do not add extra flour simply because the dough will eventually feel a little sticky. Too much flour is one of the most common reasons homemade scones turn out dry.

    3. Cut in the Cold Butter

    Add the cold butter cubes to the flour mixture. Use a pastry cutter, two forks, or your fingertips to work the butter into the dry ingredients until the mixture resembles coarse crumbs. Some pieces of butter should be very small, while a few should remain about the size of peas.

    Those visible butter pieces are important. They melt in the oven and release steam, which helps create a tender, flaky crumb. If the butter begins to soften while you work, place the bowl in the refrigerator for 10 minutes before continuing.

    4. Add the Apple and Cheese

    Reserve about 1/4 cup of the shredded cheddar for the tops. Add the remaining cheddar and the finely diced apple to the bowl. Toss gently until the apple and cheese are coated with the flour mixture. Coating the apple in flour helps distribute it more evenly and limits the amount of moisture that gathers in one spot.

    5. Mix the Wet Ingredients

    In a separate small bowl or measuring cup, whisk one whole egg with the heavy cream, vanilla, and Dijon mustard, if using. Keep the second egg refrigerated because it will be used to brush the tops.

    Pour the cream mixture over the dry ingredients. Use a fork or flexible spatula to stir just until a shaggy dough begins to form. If dry flour remains at the bottom of the bowl, add extra cream one teaspoon at a time. The dough should hold together when pressed but should not look wet or smooth.

    6. Shape the Dough

    Turn the dough onto a lightly floured work surface. Gently press the loose pieces together. Fold the dough over itself two or three times to help create layers, but do not knead it as you would bread dough.

    Shape the dough into a round disk about 7 inches wide and 1 inch thick. Use a sharp knife or bench scraper to cut the disk into 8 equal wedges. Press straight down rather than sawing through the dough, which can compress the edges.

    Arrange the wedges on the prepared baking sheet, leaving about 2 inches between them.

    7. Chill the Scones

    Place the baking sheet in the refrigerator for 20 to 30 minutes. Meanwhile, preheat the oven to 400 degrees Fahrenheit.

    Chilling is a small step with a big payoff. It firms the butter, relaxes the dough, and helps the scones rise upward instead of spreading outward.

    8. Add the Topping

    Whisk the remaining egg with 1 teaspoon of water. Brush a thin layer over the top of each chilled scone. Sprinkle the reserved cheddar over the tops. If you enjoy a more noticeable sweet-and-savory contrast, add a light sprinkle of coarse sugar as well.

    Keep the egg wash mainly on the tops. If it runs heavily down the cut sides, it can seal the layers and limit the rise.

    9. Bake Until Golden

    Bake the scones for 18 to 23 minutes, or until the tops are deeply golden and the centers look set. Because ovens vary, begin checking after 17 minutes. A toothpick inserted into the center should come out without wet dough, although it may pick up melted cheese or soft apple.

    Let the scones cool on the pan for 5 minutes, then transfer them to a wire rack. They are best served warm, after the crumb has had a few minutes to settle.

    How to Make Maple Butter

    While the scones bake, stir the softened salted butter, maple syrup, and cinnamon together in a small bowl. Mix until creamy and uniform. Taste and add a little more maple syrup if you prefer a sweeter spread.

    The maple butter is optional, but it complements both the apple and the cheddar. Spread a small amount over a warm scone so it melts into the flaky center. Regular salted butter, whipped honey butter, or apple butter are also excellent choices.

    Tips for Tender, Flaky Scones

    Keep Everything Cold

    Cold butter is the key to a flaky scone. Use butter directly from the refrigerator and cold cream and eggs. If your kitchen is warm, chill the flour mixture and mixing bowl for 10 minutes before starting.

    Measure the Flour Carefully

    Spoon flour into the measuring cup and level it with a knife instead of scooping directly from the bag. Scooping can pack too much flour into the cup, producing a dense or dry scone. A kitchen scale is even more accurate; 2 1/2 cups of all-purpose flour weighs approximately 300 grams.

    Dice the Apple Small

    Small apple pieces distribute more evenly and soften at the same rate as the dough bakes. After dicing, blot especially juicy apples with a paper towel. Do not grate the apple unless you squeeze out excess moisture, as grated apple can make the dough sticky.

    Handle the Dough Gently

    Stir only until the ingredients come together, then shape the dough with a light touch. Overmixing develops gluten and warms the butter, which can make the scones tough instead of tender.

    Do Not Skip the Chill

    Even 20 minutes in the refrigerator can improve the finished shape. If you need to keep the scones chilled longer, cover them loosely and refrigerate for up to 8 hours before baking.

    Use a Hot Oven

    Make sure the oven is fully preheated before the baking sheet goes in. The initial heat encourages a strong rise and quickly begins browning the cheese and butter.

    Substitutions and Variations

    One advantage of this apple cheddar scone recipe is how easily it can be adapted.

    Change the Cheese

    Sharp cheddar gives the best classic flavor, but smoked cheddar adds a deeper savory note. Gruyère provides a nutty flavor, while Monterey Jack makes the scones milder. You can also use half cheddar and half Parmesan for a saltier finish.

    Add Bacon or Ham

    Fold in 1/3 cup of cooked, crumbled bacon or finely diced ham for a heartier breakfast. Make sure the meat is cool and fairly dry before adding it to the dough.

    Add Fresh Herbs

    Finely chopped chives, rosemary, or thyme pair beautifully with apple and cheddar. Start with 1 tablespoon of chives or 1 teaspoon of rosemary or thyme because stronger herbs can quickly dominate the flavor.

    Try a Different Fruit

    Firm pear can replace the apple for a softer, more delicate sweetness. Dried cranberries also work well, especially when paired with orange zest. If using dried fruit, reduce the amount to about 2/3 cup.

    Make Them More Savory

    Reduce the brown sugar to 2 tablespoons, omit the vanilla and coarse sugar, and add another pinch of pepper. A small amount of garlic powder or smoked paprika can also be added.

    Make Them Sweeter

    Increase the brown sugar to 1/3 cup and add 1/4 teaspoon of nutmeg. After baking, drizzle the cooled scones with a simple glaze made from powdered sugar and apple cider. Keep the glaze light so the cheddar flavor still comes through.

    Make Mini Scones

    Divide the dough into two smaller disks and cut each disk into 6 wedges. Begin checking the 12 mini scones after 13 minutes. Mini scones are useful for brunch buffets, family gatherings, and grab-and-go breakfasts.

    Serving Ideas

    Apple Cheddar Scones can be the centerpiece of breakfast or part of a larger spread. For a simple morning meal, serve a warm scone with maple butter and coffee or tea. Add fresh berries, grapes, or orange slices for a little color and freshness.

    For a more filling breakfast, pair the scones with softly scrambled eggs, a vegetable omelet, bacon, breakfast sausage, or sliced ham. The sweet apple and sharp cheddar also go particularly well with a bowl of creamy tomato soup if you want to serve the scones for brunch or lunch.

    For a fall brunch board, arrange the scones with apple slices, cheddar cubes, toasted pecans, hard-boiled eggs, preserves, honey, and softened butter. Let everyone choose whether to take the sweeter or more savory route.

    You can also split a warm scone and fill it with a folded egg and a thin slice of ham. Because the scones are more delicate than biscuits, open them gently with a serrated knife and avoid overfilling.

    Make-Ahead Instructions

    There are several convenient ways to prepare these scones ahead of time.

    The dry ingredients can be whisked together and stored in an airtight container at room temperature for up to one week. You can also cut the butter into the dry mixture, cover the bowl, and refrigerate it overnight. Add the apple, cheese, and wet ingredients when you are ready to shape the dough.

    For freshly baked scones in the morning, shape the wedges, arrange them on the lined baking sheet, cover them, and refrigerate overnight. Add the egg wash and cheese topping immediately before baking. They may need one or two additional minutes in the oven because they are starting very cold.

    The unbaked scones can also be frozen. Freeze the shaped wedges on a baking sheet until solid, then transfer them to a freezer-safe bag for up to two months. Bake them directly from frozen at 400 degrees, adding approximately 4 to 7 minutes to the baking time. Apply the egg wash and cheese topping just before they go into the oven.

    Storage and Reheating

    Let leftover scones cool completely before storing them. Keep them in an airtight container at room temperature for up to two days or in the refrigerator for up to five days. Refrigeration preserves them longer, but it can make the crumb feel firmer.

    For the best texture, reheat a scone in a 325-degree oven or toaster oven for 6 to 10 minutes. The exterior will become lightly crisp again while the interior warms. A microwave works in a hurry, but use short 10- to 15-second intervals so the scone does not become rubbery.

    Baked scones can be frozen for up to two months. Wrap each cooled scone individually, place the wrapped scones in a freezer-safe container, and thaw them overnight in the refrigerator or for about an hour at room temperature. Reheat before serving.

    Store the maple butter separately in a covered container in the refrigerator for up to one week. Let it soften at room temperature before spreading.

    Why This Recipe Belongs in Your Breakfast Rotation

    Apple Cheddar Scones offer something different from the usual pancakes, eggs, cereal, or toast without requiring difficult techniques. The ingredients are familiar, the method is approachable, and the finished scones feel special enough to brighten an ordinary morning.

    They also provide plenty of flexibility. You can make them sweeter for a cozy weekend treat, add bacon or herbs for a savory brunch, freeze the unbaked wedges for later, or turn one into a simple breakfast sandwich. The basic recipe gives you a dependable starting point, while the apple-and-cheddar combination keeps every bite interesting.

    Most importantly, these scones are at their best when shared warm. Set out the butter, pour the coffee, and let everyone enjoy the crisp golden tops, flaky centers, soft apples, and melted cheddar while the batch is fresh from the oven.

    Would you serve your Apple Cheddar Scones with maple butter, apple preserves, or alongside eggs and bacon?

  • Dessert of the Day: Brown Butter Maple Pecan Blondies

    Advertisements

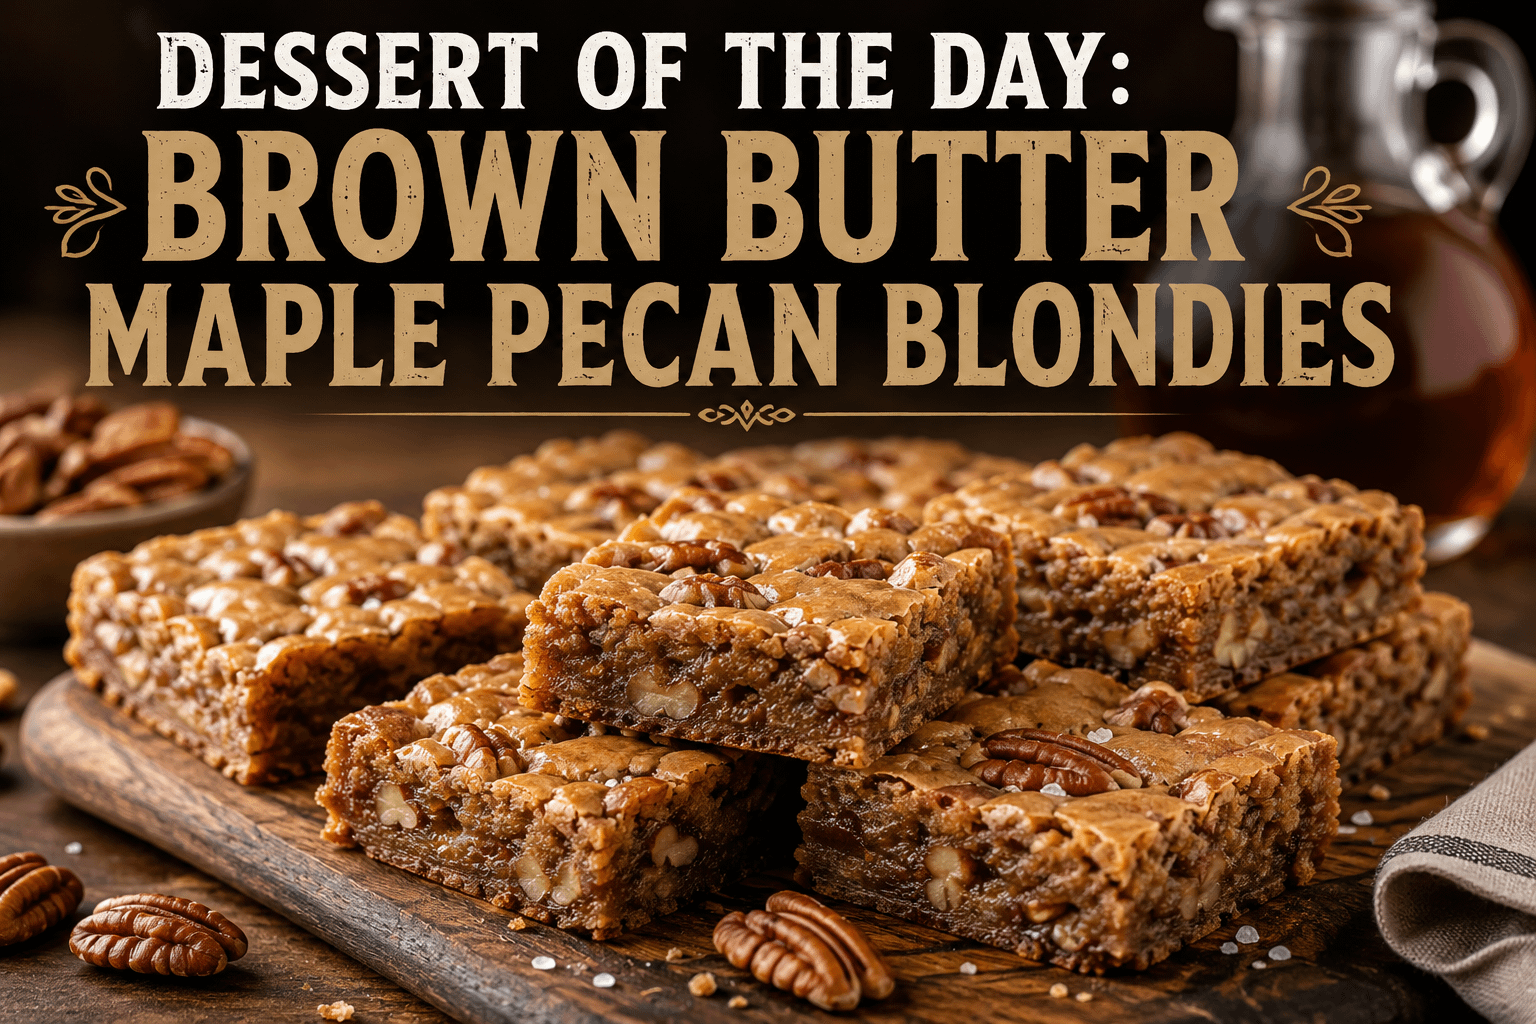
    There is something irresistible about a dessert that fills the kitchen with the warm aromas of toasted butter, maple, brown sugar, vanilla, and roasted pecans. Brown Butter Maple Pecan Blondies bring all of those comforting flavors together in one rich, chewy dessert bar.

    Unlike traditional brownies, blondies don’t rely on cocoa or melted chocolate for their signature flavor. Instead, brown sugar, butter, and vanilla take center stage. For today’s Dessert of the Day, we’re taking that classic blondie foundation and giving it an extra layer of flavor with nutty brown butter, pure maple syrup, and crunchy pecans.

    The result is a dessert with lightly crisp edges, a soft and chewy center, caramel-like sweetness, and toasted pecans in nearly every bite.

    These blondies are also wonderfully practical. You don’t need to decorate them, assemble multiple layers, or spend hours in the kitchen. Everything comes together in one pan, making them a great choice for family gatherings, holiday dessert tables, potlucks, parties, or simply enjoying at home with a cup of coffee.

    If you’re looking for a homemade dessert that’s easy enough for an ordinary evening but flavorful enough for a special occasion, Brown Butter Maple Pecan Blondies deserve a place on your baking list.

    What Makes Brown Butter Maple Pecan Blondies Special?

    The secret begins with the butter.

    Regular melted butter will certainly make a good blondie, but browning the butter transforms its flavor. As butter cooks, its milk solids begin to toast, producing an unmistakably nutty, caramelized aroma.

    Those toasted flavors pair beautifully with maple syrup and brown sugar.

    Then come the pecans.

    Pecans have a naturally buttery flavor that becomes even more pronounced when they’re lightly toasted. Scattered throughout the blondie batter, they provide a pleasant crunch against the soft, chewy texture of the bars.

    Finally, a little maple syrup ties everything together.

    The goal isn’t to make the blondies taste overwhelmingly like pancake syrup. Instead, maple adds another layer of warm sweetness that complements the brown butter and pecans.

    The finished dessert tastes familiar yet a little more special than an everyday blondie.

    Ingredients

    For approximately 16 blondies, you’ll need:

    • 1 cup unsalted butter
    • 1 3/4 cups packed light brown sugar
    • 1/4 cup pure maple syrup
    • 2 large eggs
    • 1 large egg yolk
    • 2 teaspoons vanilla extract
    • 2 cups all-purpose flour
    • 1 teaspoon baking powder
    • 1/2 teaspoon salt
    • 1 teaspoon ground cinnamon
    • 1 cup chopped pecans
    • 1/2 cup white chocolate chips, optional
    • Flaky sea salt for finishing, optional

    For an Optional Maple Glaze

    • 1 cup powdered sugar
    • 2 tablespoons pure maple syrup
    • 1 to 2 tablespoons milk or heavy cream
    • 1/2 teaspoon vanilla extract
    • Pinch of salt

    The blondies are delicious without the glaze, but adding a thin maple drizzle makes them especially attractive for a dessert table or holiday gathering.

    Choosing the Right Maple Syrup

    Pure maple syrup provides the best flavor for this recipe.

    Maple-flavored pancake syrup is usually made primarily from corn syrup or other sweeteners and doesn’t have the same depth as genuine maple syrup.

    Because maple is one of the featured flavors in these blondies, using pure maple syrup makes a noticeable difference.

    You don’t need a large amount. A quarter cup in the batter adds sweetness and maple character without making the blondies overly wet or sugary.

    Toast the Pecans for More Flavor

    You can add pecans directly from the package, but toasting them first makes them considerably more flavorful.

    Spread the chopped pecans on a baking sheet and bake them at 350°F for approximately 5 to 8 minutes.

    Watch them closely.

    Nuts can go from perfectly toasted to burned surprisingly quickly.

    Once you begin smelling their rich, nutty aroma, they’re probably ready.

    Remove them from the oven and allow them to cool while preparing the blondie batter.

    How to Brown Butter

    If you’ve never browned butter before, don’t be intimidated. It’s a simple technique that can dramatically improve the flavor of baked goods.

    Place the butter in a light-colored saucepan or skillet over medium heat.

    A light-colored pan makes it easier to see when the milk solids begin turning brown.

    Allow the butter to melt completely.

    Continue cooking while stirring or swirling the pan occasionally.

    The butter will begin bubbling and foaming. After several minutes, you’ll notice small golden-brown specks developing along the bottom of the pan.

    You’ll also notice the aroma changing.

    Instead of simply smelling like melted butter, it will begin smelling toasted and nutty.

    Once the milk solids are golden brown, immediately remove the pan from the heat.

    Don’t walk away during this process. Brown butter can turn into burned butter quickly.

    Pour the browned butter into a heat-safe mixing bowl, making sure you scrape all those flavorful browned bits from the bottom of the pan.

    Allow it to cool for about 10 to 15 minutes before continuing.

    Step-by-Step Directions

    Step 1: Prepare the Baking Pan

    Preheat your oven to 350°F.

    Line a 9-by-9-inch baking pan with parchment paper, leaving a little extra parchment hanging over two sides.

    This creates handles that make removing the finished blondies much easier.

    Lightly grease the parchment paper.

    Step 2: Brown the Butter

    Brown the butter following the method above.

    Once browned, transfer it to a large mixing bowl and let it cool slightly.

    The butter can still be warm, but it shouldn’t be extremely hot when the eggs are added.

    Step 3: Add the Brown Sugar and Maple Syrup

    Add the brown sugar to the browned butter.

    Whisk until thoroughly combined.

    Pour in the maple syrup and whisk again.

    At this point, the mixture should look thick, glossy, and caramel-like.

    Step 4: Add the Eggs

    Add the two whole eggs and additional egg yolk.

    The extra yolk helps create the rich, chewy texture that makes a great blondie so satisfying.

    Whisk until smooth.

    Add the vanilla extract and mix again.

    Step 5: Combine the Dry Ingredients

    In a separate bowl, whisk together:

    • Flour
    • Baking powder
    • Salt
    • Cinnamon

    Cinnamon is intentionally subtle in this recipe. It shouldn’t turn the dessert into a cinnamon bar. Instead, it provides a warm background flavor that complements the maple and pecans.

    Step 6: Make the Batter

    Gradually fold the dry ingredients into the wet ingredients.

    Don’t overmix.

    Stop once you can no longer see streaks of dry flour.

    Overmixing develops additional gluten and can make the blondies tougher instead of soft and chewy.

    Step 7: Add the Pecans

    Fold approximately three-quarters of the toasted pecans into the batter.

    If you’re using white chocolate chips, fold those in now as well.

    White chocolate adds creamy sweetness, but it’s completely optional.

    Step 8: Fill the Pan

    Spread the batter evenly into your prepared baking pan.

    The batter will be relatively thick, so use a spatula to gently push it into the corners.

    Sprinkle the remaining pecans over the top.

    If desired, add a very light sprinkle of flaky sea salt.

    The contrast between sweet maple blondies and tiny bursts of salt can be fantastic.

    Step 9: Bake

    Bake for approximately 25 to 32 minutes.

    Start checking around the 25-minute mark.

    The edges should look set and lightly golden, while the center should still appear slightly soft.

    Insert a toothpick into the center. You’re looking for moist crumbs rather than completely wet batter.

    Don’t wait until the toothpick is perfectly clean.

    Blondies continue cooking slightly as they cool, and overbaking is one of the easiest ways to lose their desirable chewy texture.

    Step 10: Cool Completely

    Allow the blondies to cool in the pan for approximately 20 minutes.

    Then use the parchment-paper handles to carefully lift them from the pan.

    Transfer them to a cooling rack and let them cool completely before slicing.

    Waiting can be difficult when your kitchen smells like brown butter and maple, but cooling allows the blondies to set properly.

    Make the Optional Maple Glaze

    If you want an additional maple finish, prepare a quick glaze.

    Combine powdered sugar, maple syrup, vanilla, and a pinch of salt.

    Add one tablespoon of milk or cream.

    Whisk until smooth.

    If the glaze is too thick, add additional milk a teaspoon at a time.

    If it becomes too thin, add a little more powdered sugar.

    Drizzle the glaze over completely cooled blondies.

    Allow it to set for approximately 15 to 20 minutes before cutting and serving.

    The Secret to Chewy Blondies

    A great blondie should have a noticeably different texture from ordinary cake.

    The edges can be slightly crisp, but the center should remain dense, soft, and chewy.

    Several parts of this recipe help accomplish that.

    Brown sugar contains more moisture than granulated sugar and contributes to the chewy texture.

    The additional egg yolk adds richness without introducing as much additional liquid as another whole egg.

    Most importantly, don’t overbake the blondies.

    If you’re uncertain whether they’re finished, it’s usually better to remove them when they’re slightly underdone rather than wait until the entire center feels firm.

    They’ll continue setting as they cool.

    Don’t Overmix the Batter

    Once flour enters the bowl, mix only until everything is combined.

    This rule applies to many cookies, brownies, blondies, muffins, and quick breads.

    Aggressively mixing flour encourages gluten development. That’s useful when you’re making chewy bread, but it’s usually undesirable when you’re trying to create tender dessert bars.

    A spatula works particularly well for the final mixing stage because you can gently fold the ingredients together.

    Delicious Variations

    One of the advantages of a basic blondie recipe is how easily it can be customized.

    Maple Walnut Blondies

    Replace the pecans with chopped walnuts.

    Walnuts have a slightly earthier flavor but work wonderfully with maple.

    Maple White Chocolate Blondies

    Increase the white chocolate chips to approximately one cup.

    This creates a sweeter and creamier version.

    Chocolate Chip Maple Blondies

    Add 3/4 cup semisweet chocolate chips.

    Chocolate and maple might not be the first combination that comes to mind, but the bittersweet chocolate balances the sweetness nicely.

    Cinnamon Maple Blondies

    Increase the cinnamon to 1 1/2 teaspoons and add a tiny pinch of nutmeg.

    This creates an especially cozy version for fall.

    Salted Maple Pecan Blondies

    Skip the glaze and finish the bars with flaky sea salt immediately after baking.

    The salt makes the caramel and maple flavors stand out.

    Bourbon Maple Pecan Blondies

    For an adults-only flavor variation, a small splash of bourbon can be added alongside the vanilla.

    Keep the amount modest so you don’t dramatically alter the liquid ratio of the batter.

    Serving Ideas

    Brown Butter Maple Pecan Blondies are excellent served at room temperature, but warming them transforms the experience.

    Heat an individual blondie for about 10 to 15 seconds in the microwave.

    Serve it with a scoop of vanilla ice cream.

    As the ice cream begins melting over the warm blondie, it creates a simple dessert that’s difficult to beat.

    For an even more indulgent presentation, add a drizzle of caramel sauce and a few chopped toasted pecans.

    You could also serve the blondies alongside:

    • Fresh whipped cream
    • Maple ice cream
    • Butter pecan ice cream
    • Vanilla bean ice cream
    • Fresh sliced apples
    • Hot coffee
    • Espresso
    • Hot chocolate
    • Cold milk

    Perfect for Fall — But Delicious All Year

    Maple and pecan naturally make people think of autumn.

    These blondies would be right at home beside pumpkin pie, apple crisp, or pecan pie on a fall dessert table.

    But there’s really no reason to save them for one season.

    They make an easy dessert for birthdays, family dinners, potlucks, cookouts, game nights, office parties, or weekend baking throughout the year.

    Their portability is another advantage.

    Unlike frosted cakes or cream-filled desserts, blondies travel easily. Place them in a covered container and they’re ready for almost any gathering.

    Turn Them Into a Holiday Dessert

    For Thanksgiving or Christmas, cut the blondies into smaller squares and arrange them on a large dessert platter.

    Drizzle them with maple glaze and garnish each square with a small pecan half.

    You can also dust the platter lightly with powdered sugar immediately before serving.

    They’re especially useful on holiday dessert tables because they can be prepared ahead of time, leaving your oven available for other dishes on the day of the celebration.

    Make-Ahead Instructions

    These blondies are actually a great make-ahead dessert.

    Prepare them the evening before you plan to serve them.

    Allow them to cool completely before covering.

    You can leave the blondies uncut overnight and slice them the following day.

    Keeping the entire slab intact until serving can help preserve moisture.

    If you’re using maple glaze, you can add it after the blondies cool or shortly before serving.

    How to Store Brown Butter Maple Pecan Blondies

    Place leftover blondies in an airtight container.

    They’ll generally stay fresh at room temperature for approximately 3 to 4 days.

    If your home is particularly warm, refrigeration can extend their freshness.

    Keep in mind that refrigeration will make them firmer.

    Let refrigerated blondies sit at room temperature for 15 to 20 minutes before eating, or warm one briefly in the microwave.

    Can You Freeze Blondies?

    Absolutely.

    Blondies freeze extremely well.

    For best results, freeze them without the glaze.

    Allow the bars to cool completely and cut them into individual portions.

    Wrap each blondie tightly in plastic wrap, then place the wrapped pieces inside a freezer-safe container or freezer bag.

    They can be frozen for approximately 2 to 3 months.

    When you’re ready to enjoy one, let it thaw at room temperature.

    A quick 10-second trip through the microwave can restore some of that fresh-from-the-oven softness.

    Why Brown Butter Is Worth the Extra Step

    It would certainly be easier to simply melt the butter and continue with the recipe.

    But those extra few minutes spent browning it make a significant difference.

    Brown butter develops toasted, nutty, almost caramel-like notes as the milk solids cook.

    It’s especially effective in recipes where butter is already a major flavor component.

    Cookies, blondies, cakes, frostings, pancakes, and even certain savory dishes can benefit from brown butter.

    In today’s dessert, it works especially well because every other major ingredient supports those flavors.

    Brown sugar brings caramel notes.

    Maple provides deep sweetness.

    Pecans contribute nuttiness.

    Vanilla ties everything together.

    Instead of competing flavors, they build on one another.

    A Simple Dessert That Feels Special

    Some of the best desserts don’t require elaborate decorating or complicated techniques.

    Brown Butter Maple Pecan Blondies are a perfect example.

    They’re familiar enough to feel comforting but different enough to stand out from ordinary brownies or chocolate chip cookies.

    Browning the butter takes only a few additional minutes, yet it transforms the flavor of the entire dessert. Maple syrup adds warmth and richness, while toasted pecans provide the crunch needed to balance the soft center.

    Add the optional maple glaze and they become even more decadent.

    Serve them plain with coffee for an afternoon treat, warm them and add vanilla ice cream after dinner, or cut them into bite-sized squares for a party.

    However you serve them, don’t be surprised if people reach for a second piece.

    Dessert of the Day: Brown Butter Maple Pecan Blondies

    Today’s Dessert of the Day proves that you don’t need a complicated recipe to make something memorable.

    Start with butter and cook it until beautifully browned and nutty. Combine it with brown sugar, pure maple syrup, vanilla, and eggs. Fold in flour and toasted pecans, then bake everything until the edges are golden and the middle remains wonderfully chewy.

    The final result delivers a little bit of everything you could want from a homemade dessert: crisp edges, a soft center, buttery richness, caramel sweetness, maple flavor, and crunchy pecans.

    And if you happen to serve one warm with a melting scoop of vanilla ice cream on top?

    Even better.

    Would you enjoy these Brown Butter Maple Pecan Blondies plain, topped with maple glaze, or served warm with a scoop of vanilla ice cream?

  • Healthy Recipe of the Day: Mediterranean Turkey Stuffed Zucchini Boats

    Advertisements

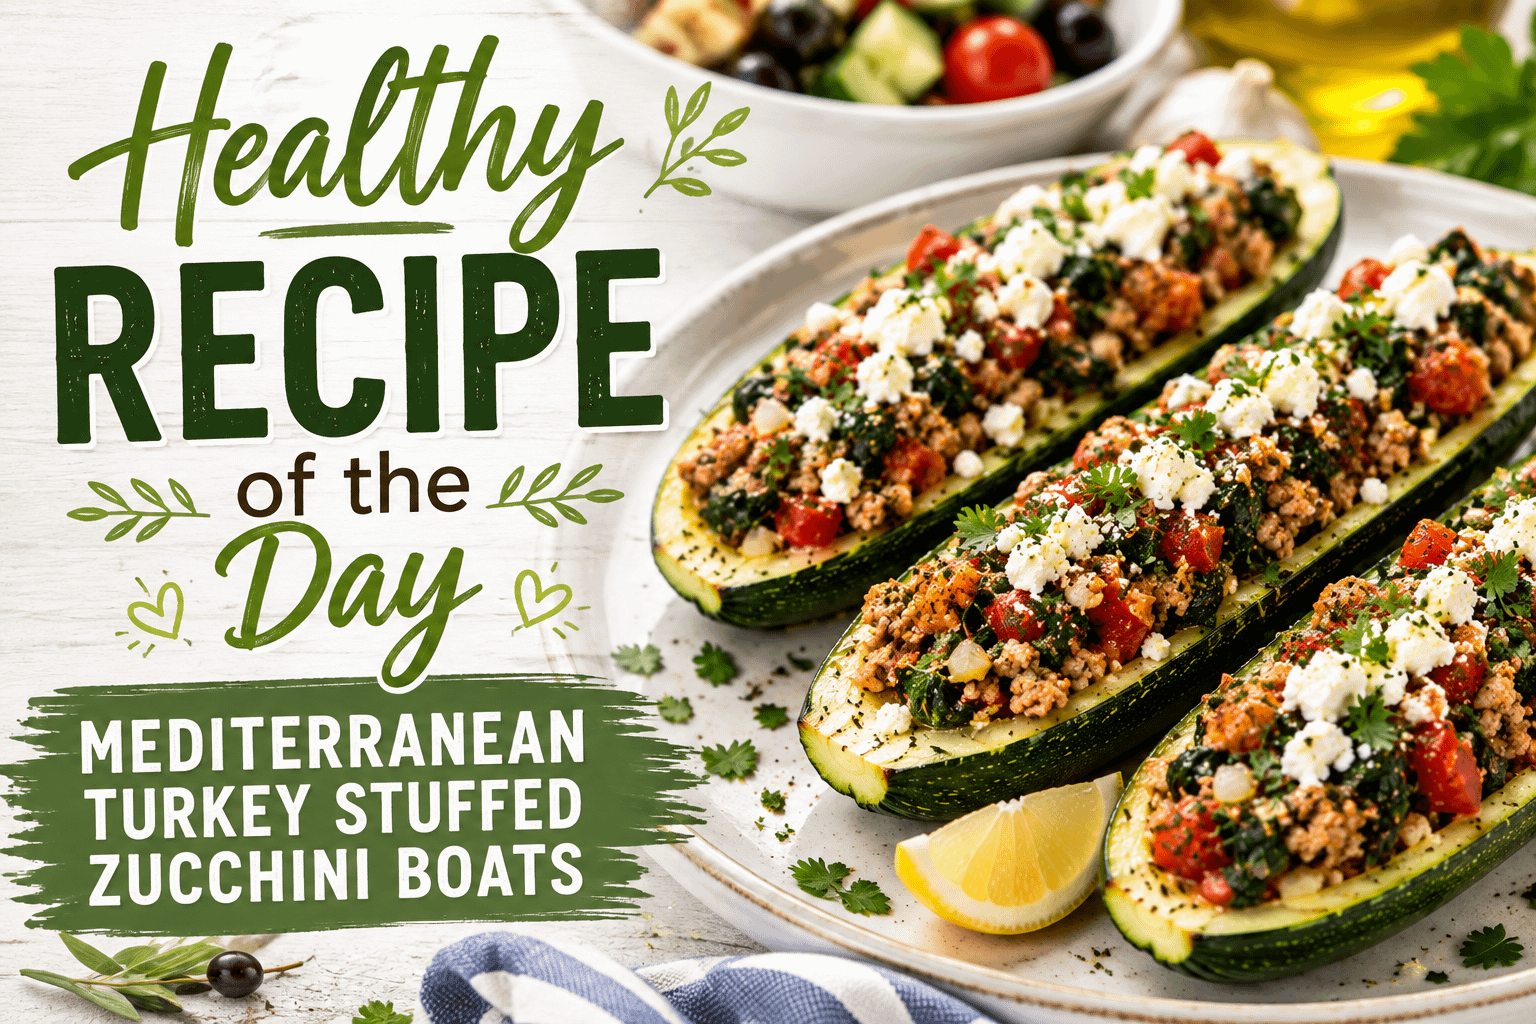
    If you are looking for a healthy dinner that is satisfying, colorful, and packed with flavor, these Mediterranean Turkey Stuffed Zucchini Boats deserve a place on your menu.

    Tender zucchini halves are filled with a savory combination of lean ground turkey, tomatoes, spinach, garlic, herbs, and feta cheese. The result is a wholesome meal that feels hearty without relying on a heavy sauce, large amount of cheese, or refined carbohydrates.

    One of the best things about stuffed zucchini is how much flavor you can build into such a simple ingredient. Zucchini has a mild taste, which makes it an excellent base for bold Mediterranean-inspired ingredients such as garlic, oregano, tomatoes, lemon, parsley, and feta.

    These zucchini boats also make an excellent option for meal preparation. Make a batch for dinner and save the extras for an easy lunch later in the week.

    Why You’ll Love These Mediterranean Turkey Stuffed Zucchini Boats

    Healthy eating doesn’t have to mean settling for bland meals or tiny portions. A good healthy recipe should leave you feeling satisfied while giving you ingredients you can feel good about eating.

    That’s exactly what these zucchini boats are designed to do.

    They’re filled with lean protein from ground turkey, vegetables from zucchini, spinach, onions, and tomatoes, and plenty of herbs and seasonings.

    You’ll love this recipe because it is:

    • High in protein
    • Packed with vegetables
    • Naturally lower in carbohydrates
    • Easy to customize
    • Great for meal prep
    • Family-friendly
    • Full of Mediterranean-inspired flavor
    • Made with readily available ingredients

    Best of all, everything comes together in a meal that looks impressive but doesn’t require complicated cooking techniques.

    What Makes This a Healthy Recipe?

    The foundation of this recipe is zucchini.

    Zucchini is naturally low in calories while providing nutrients and water. Instead of serving the turkey filling over a large portion of pasta or stuffing it into a heavy bread product, the zucchini itself becomes the edible vessel.

    Lean ground turkey provides the primary source of protein.

    The filling also incorporates spinach and tomatoes, allowing you to add even more vegetables to each serving.

    Feta provides the salty, creamy finish that makes Mediterranean-inspired dishes so satisfying. Because feta has a strong flavor, you don’t need a huge amount to make an impact.

    Finally, fresh lemon juice and herbs add brightness without requiring a rich sauce.

    The combination creates a balanced dinner that doesn’t taste like traditional “diet food.”

    Ingredients

    For the Zucchini Boats

    • 4 medium zucchini
    • 1 tablespoon extra-virgin olive oil, divided
    • 1 pound lean ground turkey
    • 1 small yellow onion, finely diced
    • 3 cloves garlic, minced
    • 1 cup chopped fresh spinach
    • 1 cup diced tomatoes, drained if especially juicy
    • 1 teaspoon dried oregano
    • 1 teaspoon dried basil
    • 1/2 teaspoon smoked paprika
    • 1/2 teaspoon ground black pepper
    • 1/4 teaspoon salt, or to taste
    • 1/4 teaspoon crushed red pepper flakes, optional
    • 1 tablespoon fresh lemon juice
    • 1/2 cup crumbled feta cheese
    • 2 tablespoons chopped fresh parsley

    Optional Garnishes

    • Additional chopped parsley
    • Fresh dill
    • Lemon wedges
    • Diced cucumber
    • Chopped tomatoes
    • A small spoonful of plain Greek yogurt
    • Extra feta cheese
    • Freshly ground black pepper

    How to Make Mediterranean Turkey Stuffed Zucchini Boats

    Step 1: Preheat the Oven

    Preheat your oven to 400°F.

    Lightly coat a large baking dish or rimmed baking sheet with cooking spray or a very small amount of olive oil.

    Step 2: Prepare the Zucchini

    Wash and dry the zucchini.

    Cut each zucchini lengthwise from stem to end, creating two long halves.

    Using a spoon, carefully scoop some of the flesh from the center of each zucchini half. Leave approximately 1/4 inch of zucchini around the sides and bottom so the boats remain sturdy.

    Don’t scoop too aggressively. If the zucchini shell becomes too thin, it may collapse during baking.

    Set the removed zucchini flesh aside rather than throwing it away.

    You’ll use some of it in the turkey filling.

    Arrange the zucchini halves cut-side up in your prepared baking dish.

    Lightly brush them with approximately half of the olive oil.

    Bake for about 8 to 10 minutes while you prepare the filling.

    This short head start helps ensure the zucchini becomes tender by the time the filling is completely heated.

    Step 3: Cook the Ground Turkey

    Heat the remaining olive oil in a large skillet over medium heat.

    Add the diced onion and cook for approximately 3 minutes, stirring occasionally.

    Add the minced garlic and cook for another 30 seconds.

    You want the garlic to become fragrant without allowing it to burn.

    Add the ground turkey.

    Use a wooden spoon or spatula to break the turkey into small pieces as it cooks.

    Continue cooking until the turkey is browned and no longer pink.

    Drain any excess liquid from the skillet if necessary.

    Step 4: Add the Vegetables

    Chop approximately 1/2 cup of the zucchini flesh you removed earlier.

    Add it to the skillet with the turkey.

    Stir in the spinach and diced tomatoes.

    Cook for another 2 to 4 minutes, allowing the spinach to wilt and some of the excess moisture from the vegetables to evaporate.

    This step is important because overly wet filling can make the finished zucchini boats watery.

    Step 5: Season the Filling

    Add:

    • Oregano
    • Basil
    • Smoked paprika
    • Black pepper
    • Salt
    • Crushed red pepper flakes, if desired

    Stir everything together until the seasonings are evenly distributed.

    Cook for approximately another minute.

    Remove the skillet from the heat.

    Add the fresh lemon juice and approximately half of the feta cheese.

    Gently stir.

    Taste the filling and adjust the seasonings if necessary.

    Remember that feta is naturally salty, so it’s usually better to begin with less added salt and increase it only if needed.

    Step 6: Fill the Zucchini

    Remove the partially baked zucchini from the oven.

    Carefully spoon the turkey mixture into each zucchini half.

    Don’t be afraid to pile the filling slightly above the top of the zucchini.

    Sprinkle the remaining feta cheese over the stuffed zucchini boats.

    Step 7: Bake

    Return the baking dish to the oven.

    Bake for approximately 15 to 20 minutes, or until the zucchini is tender and the filling is completely heated through.

    For slightly browned feta, you can place the zucchini under the broiler for the final minute or two.

    Watch carefully because feta can brown quickly.

    Step 8: Add the Finishing Touches

    Remove the zucchini boats from the oven and allow them to rest for approximately 5 minutes.

    Sprinkle with fresh parsley.

    Finish with another squeeze of lemon juice if you enjoy a brighter Mediterranean flavor.

    Serve warm.

    Don’t Overcook the Zucchini

    The ideal zucchini boat should be tender enough to cut easily with a fork but still firm enough to hold its filling.

    Zucchini contains a considerable amount of water, so cooking it for too long can make it soft and watery.

    The exact cooking time will depend on the size of your zucchini.

    Smaller zucchini may cook more quickly, while particularly large zucchini may require several additional minutes.

    Check them toward the end of the cooking time.

    Preventing Watery Zucchini Boats

    One of the biggest challenges with stuffed zucchini recipes is excess moisture.

    Fortunately, there are several easy ways to prevent it.

    First, don’t remove too much zucchini flesh. The remaining shell should be sturdy.

    Second, drain especially juicy tomatoes before adding them to the skillet.

    Third, allow the vegetable and turkey filling to cook for a few minutes before stuffing the zucchini. This gives excess liquid an opportunity to evaporate.

    Finally, don’t cover the zucchini while baking. Leaving them uncovered allows moisture to escape.

    Make It Even More Mediterranean

    There are plenty of ways to build additional Mediterranean flavor into this healthy dinner.

    Try adding sliced Kalamata olives to the filling.

    You could also incorporate chopped artichoke hearts, roasted red peppers, sun-dried tomatoes, fresh dill, or a small amount of fresh mint.

    If you enjoy stronger garlic flavor, add an additional clove.

    For additional brightness, sprinkle fresh lemon zest over the finished zucchini boats.

    These small additions can dramatically change the personality of the dish without requiring an entirely different recipe.

    Turkey Substitutions

    Ground turkey keeps this recipe relatively lean, but it isn’t your only option.

    Ground Chicken

    Lean ground chicken works beautifully and has a similarly mild flavor.

    Extra-Lean Ground Beef

    If you prefer beef, choose a lean variety and drain any excess fat before adding the vegetables.

    Plant-Based Option

    For a meatless version, replace the turkey with cooked lentils, chickpeas, quinoa, or a combination of finely chopped mushrooms and lentils.

    The Mediterranean seasonings work equally well with plant-based fillings.

    Add Whole Grains

    If you want a heartier version, add approximately 1 cup of cooked whole grain to the filling.

    Good options include:

    • Quinoa
    • Brown rice
    • Farro
    • Barley

    Quinoa is especially useful because it blends easily with ground turkey while adding additional texture.

    You may have more filling than will fit inside the zucchini if you add grains. That’s not a problem. Save the extra filling for lunch or serve it alongside the zucchini boats.

    Add More Vegetables

    This recipe is already vegetable-forward, but you can easily add more.

    Finely chopped mushrooms work especially well because they blend into the ground turkey.

    You could also try:

    • Bell peppers
    • Kale
    • Broccoli
    • Cauliflower
    • Carrots
    • Eggplant

    Keep the vegetables chopped fairly small so the filling remains easy to spoon into the zucchini.

    What to Serve With Turkey Stuffed Zucchini Boats

    These zucchini boats can absolutely serve as the main course by themselves, particularly for a lighter dinner.

    If you’d like to build a larger meal around them, there are several healthy side dishes that work beautifully.

    Greek-Style Salad

    Serve the zucchini with cucumber, tomatoes, red onion, olives, and a light lemon vinaigrette.

    Quinoa

    A small serving of quinoa makes the meal more substantial while complementing the Mediterranean flavors.

    Brown Rice

    Simple brown rice is another good choice if you’re feeding people who want a heartier dinner.

    Roasted Vegetables

    Roasted broccoli, cauliflower, asparagus, or Brussels sprouts are all excellent choices.

    Hummus and Fresh Vegetables

    Serve hummus with cucumber slices, carrots, bell peppers, and celery for an easy appetizer or side.

    A Simple Greek Yogurt Sauce

    A cool yogurt sauce is an excellent contrast to the warm turkey filling.

    Combine:

    • 1/2 cup plain Greek yogurt
    • 1 tablespoon lemon juice
    • 1 tablespoon chopped fresh dill
    • 1 small garlic clove, finely minced
    • Pinch of black pepper

    Stir everything together and refrigerate until ready to serve.

    Add a small spoonful over each zucchini boat just before eating.

    You get creaminess without needing a heavy cheese sauce.

    Meal Prep Made Easy

    Mediterranean Turkey Stuffed Zucchini Boats are a great meal-prep recipe because the filling can be prepared ahead of time.

    Cook the turkey mixture according to the recipe, allow it to cool, and store it in an airtight container in the refrigerator.

    You can also prepare and scoop out the zucchini ahead of time.

    When you’re ready for dinner, assemble the zucchini boats and bake them.

    For even faster weekday meals, bake the entire recipe ahead of time and portion the zucchini into individual containers.

    Then lunch or dinner is already waiting.

    How to Store Leftovers

    Allow leftover zucchini boats to cool before placing them in an airtight container.

    Store them in the refrigerator for approximately 3 to 4 days.

    Because zucchini naturally releases moisture after cooking, you may notice a little liquid in the storage container. This is normal.

    You can gently drain away excess liquid before reheating.

    How to Reheat Stuffed Zucchini

    For the best texture, reheat the zucchini boats in the oven.

    Place them in a baking dish and heat at 350°F until warmed through.

    You can also use the microwave when you’re short on time.

    Microwave individual portions in short intervals until hot.

    The zucchini will generally become softer when reheated in the microwave, but the flavor will still be delicious.

    Can You Freeze Stuffed Zucchini Boats?

    You can, but zucchini’s high water content means its texture may become softer after freezing and thawing.

    For better results, freeze the turkey filling separately.

    Allow the cooked filling to cool completely, place it in a freezer-safe container, and freeze it.

    When you’re ready to make dinner, thaw the filling overnight in the refrigerator and prepare fresh zucchini.

    This gives you much better texture while still saving considerable preparation time.

    Turn the Leftover Filling Into Another Meal

    Don’t worry if you end up with extra Mediterranean turkey filling.

    It’s incredibly versatile.

    Spoon it over quinoa or brown rice for a quick grain bowl.

    Add it to a salad.

    Stuff it inside bell peppers.

    Serve it in lettuce wraps.

    Add it to scrambled eggs for breakfast.

    Or combine it with chopped cucumber, tomatoes, hummus, and greens for a Mediterranean-inspired lunch bowl.

    Making ingredients work across multiple meals is one of the easiest ways to make healthy eating more practical.

    Easy Flavor Variations

    Once you understand the basic method, you can transform stuffed zucchini into many different meals.

    Italian Turkey Zucchini Boats

    Replace the Mediterranean seasonings with Italian seasoning and add a small amount of marinara sauce. Finish with part-skim mozzarella.

    Southwest Turkey Zucchini Boats

    Season the turkey with cumin, chili powder, paprika, garlic, black beans, corn, and diced tomatoes.

    Greek Chicken Zucchini Boats

    Use ground chicken with oregano, lemon, spinach, tomatoes, feta, and fresh dill.

    Spicy Turkey Zucchini Boats

    Increase the crushed red pepper and add diced jalapeño or your favorite hot pepper.

    Vegetarian Mediterranean Boats

    Replace the turkey with chickpeas, quinoa, spinach, tomatoes, mushrooms, and feta.

    Each version uses the same simple zucchini-boat technique while creating a completely different dinner.

    Tips for the Best Stuffed Zucchini

    Choose zucchini that are fairly similar in size so they cook at approximately the same rate.

    Don’t scoop the zucchini too thin.

    Cook excess moisture out of your filling before assembling the boats.

    Use fresh lemon juice when possible. Its acidity helps brighten the turkey, vegetables, and feta.

    Don’t overload the recipe with salt before adding feta.

    Use fresh herbs as a finishing ingredient whenever they’re available.

    And don’t worry if the zucchini boats aren’t perfectly shaped. Rustic homemade food doesn’t need to look identical to taste fantastic.

    Healthy Eating Can Still Be Comforting

    There’s a misconception that healthier meals have to remove everything comforting about dinner.

    That doesn’t need to be the case.

    Warm roasted vegetables, seasoned meat, herbs, cheese, and bright Mediterranean flavors can create the same satisfaction we associate with much heavier dishes.

    The goal isn’t necessarily to make every meal as low-calorie as possible.

    It’s to create meals built around nutritious ingredients that you genuinely look forward to eating.

    That’s what makes recipes like these Mediterranean Turkey Stuffed Zucchini Boats so useful.

    They don’t feel like a compromise.

    They feel like dinner.

    Perfect for Busy Weeknights

    Weeknight recipes need to strike a balance between healthy and realistic.

    Most people don’t want to spend two hours preparing dinner after a long day.

    This recipe uses straightforward ingredients and one skillet for the filling. While the zucchini begins baking, you prepare the turkey mixture.

    Everything then finishes together in the oven.

    You can simplify things even further by chopping the onion, garlic, spinach, and zucchini ahead of time.

    With a little preparation, the final meal can come together quickly.

    A Colorful Dinner for Any Season

    Zucchini is particularly abundant during the warmer months, making this an excellent recipe when gardens and farmers markets are overflowing with summer squash.

    But the ingredients are readily available in supermarkets throughout much of the year.

    The green zucchini, red tomatoes, white feta, and fresh herbs also create a naturally colorful presentation.

    That makes these zucchini boats just as appropriate for serving guests as they are for an ordinary Tuesday-night dinner.

    Mediterranean Turkey Stuffed Zucchini Boats at a Glance

    Prep Time: About 15 minutes
    Cook Time: About 30 minutes
    Total Time: About 45 minutes
    Servings: Approximately 4
    Main Protein: Lean ground turkey
    Cooking Method: Skillet and oven
    Difficulty: Easy

    Final Thoughts

    Healthy meals become much easier to stick with when they deliver real flavor, satisfying portions, and enough variety to keep dinner interesting.

    These Mediterranean Turkey Stuffed Zucchini Boats check all of those boxes.

    Tender zucchini provides the base, seasoned ground turkey brings plenty of protein, spinach and tomatoes add more vegetables, and feta, herbs, garlic, and lemon deliver the Mediterranean-inspired flavors that pull everything together.

    They’re easy enough for a weeknight, attractive enough to serve to guests, and practical enough to prepare ahead for busy days.

    Most importantly, this is the kind of healthy recipe that doesn’t make you feel like you’re missing out on anything.

    Whether you serve the zucchini boats by themselves or pair them with a fresh Greek salad, quinoa, roasted vegetables, or a spoonful of homemade yogurt sauce, you’ve got a wholesome dinner packed with flavor.

    What healthy ingredient would you add to your Mediterranean stuffed zucchini boats to make them your own?

  • Recipe of the Day: French Onion Chicken Meatballs

    Advertisements

    There is something incredibly comforting about the rich, savory flavor of French onion soup. Sweet caramelized onions, a deeply flavored broth, melted cheese, and warm herbs come together to create one of those classic dishes that always feels satisfying. Now imagine bringing those same flavors into a hearty skillet filled with tender chicken meatballs.

    That is exactly what you get with today’s Recipe of the Day: French Onion Chicken Meatballs.

    These juicy homemade chicken meatballs are cooked until golden and then nestled into a rich French onion-style sauce made with slowly caramelized onions, beef broth, Worcestershire sauce, garlic, and thyme. Everything is finished with plenty of melted Gruyère or Swiss cheese.

    The result is a warm, cheesy, savory dinner that combines two comfort-food favorites in one skillet.

    Serve these French Onion Chicken Meatballs over creamy mashed potatoes, buttered egg noodles, rice, or alongside crusty bread for soaking up every bit of that delicious onion gravy.

    Why You’ll Love French Onion Chicken Meatballs

    French onion flavors and meatballs may not be the most obvious combination, but once they come together, they make perfect sense.

    Ground chicken provides a lighter base than traditional beef meatballs while still becoming tender and flavorful when seasoned properly. The caramelized onion gravy supplies the richness, while melted cheese gives the finished dish its unmistakable French onion character.

    There are plenty of reasons to add this recipe to your dinner rotation.

    It’s comforting without being overly complicated.

    Everything can be prepared in one large oven-safe skillet.

    The ingredients are easy to find at most grocery stores.

    It’s impressive enough for company but simple enough for an ordinary weeknight.

    Most importantly, that combination of caramelized onions, savory gravy, juicy meatballs, and melted cheese is difficult to resist.

    Ingredients

    For the Chicken Meatballs

    • 1 1/2 pounds ground chicken
    • 1/2 cup plain breadcrumbs
    • 1 large egg
    • 1/3 cup finely grated Parmesan cheese
    • 2 cloves garlic, minced
    • 2 tablespoons finely chopped fresh parsley
    • 1 teaspoon dried thyme
    • 1 teaspoon onion powder
    • 1 teaspoon salt
    • 1/2 teaspoon black pepper
    • 1 tablespoon olive oil

    For the French Onion Sauce

    • 2 tablespoons butter
    • 2 large yellow onions, thinly sliced
    • 1/2 teaspoon salt
    • 1 teaspoon brown sugar, optional
    • 2 cloves garlic, minced
    • 2 tablespoons all-purpose flour
    • 2 cups beef broth
    • 1 tablespoon Worcestershire sauce
    • 1 teaspoon fresh thyme leaves or 1/2 teaspoon dried thyme
    • 1/2 teaspoon black pepper
    • 1 teaspoon Dijon mustard
    • 1 cup shredded Gruyère cheese
    • 1/2 cup shredded Swiss cheese
    • Fresh parsley or thyme for garnish

    Step 1: Make the Chicken Meatball Mixture

    Place the ground chicken in a large mixing bowl.

    Add the breadcrumbs, egg, Parmesan cheese, garlic, parsley, thyme, onion powder, salt, and black pepper.

    Use clean hands or a fork to gently combine the ingredients.

    Avoid aggressively mixing or compressing the meat. Overworking ground chicken can produce dense meatballs instead of the tender texture we’re looking for.

    Mix only until everything is evenly incorporated.

    Step 2: Shape the Meatballs

    Scoop approximately 1 1/2 tablespoons of the chicken mixture at a time and gently roll it between your hands.

    You should end up with approximately 18 to 22 meatballs, depending on their size.

    Keeping the meatballs relatively uniform helps them cook at approximately the same rate.

    Place the finished meatballs on a clean plate while you heat your skillet.

    Step 3: Brown the Chicken Meatballs

    Heat 1 tablespoon of olive oil in a large oven-safe skillet over medium-high heat.

    Once the oil is hot, carefully add the meatballs.

    Work in batches if necessary so you don’t overcrowd the pan.

    Brown the meatballs for approximately 6 to 8 minutes, rotating occasionally so several sides develop a golden crust.

    They don’t have to cook completely through during this stage because they’ll finish cooking in the sauce.

    Transfer the browned meatballs to a plate and set them aside.

    Step 4: Start the Caramelized Onions

    Reduce the heat to medium-low.

    Add the butter to the same skillet.

    Once melted, add the sliced onions and 1/2 teaspoon salt.

    Stir well, scraping up any browned bits left behind by the meatballs. Those browned bits contain plenty of flavor and will become part of the sauce.

    Cook the onions slowly for approximately 25 to 35 minutes.

    Stir every few minutes to prevent burning.

    The onions will gradually soften, shrink, and change from pale yellow to a rich golden brown.

    Don’t Rush the Onions

    This is arguably the most important step in the entire recipe.

    French onion dishes depend heavily on properly caramelized onions.

    Turning the heat too high may brown the outside of the onions quickly, but it won’t create the same deep sweetness.

    Low and slow is the better approach.

    If you want to encourage caramelization, add about 1 teaspoon of brown sugar. It isn’t necessary because onions contain natural sugars, but it can speed things along slightly while adding another hint of sweetness.

    If the skillet becomes too dry during cooking, add a tablespoon or two of broth.

    Step 5: Add the Garlic

    Once the onions are deeply golden and soft, add the minced garlic.

    Cook for approximately 30 to 60 seconds, stirring constantly.

    You want the garlic to become fragrant without burning.

    At this point, your kitchen should smell incredible.

    Step 6: Build the French Onion Gravy

    Sprinkle 2 tablespoons of flour over the onions.

    Stir continuously for approximately one minute.

    The flour will combine with the butter and help thicken the sauce.

    Slowly pour in the beef broth while stirring.

    Add the Worcestershire sauce, thyme, black pepper, and Dijon mustard.

    Stir until everything is thoroughly combined.

    Bring the sauce to a gentle simmer.

    Allow it to cook for approximately 3 to 5 minutes, or until it begins thickening.

    Step 7: Return the Meatballs to the Skillet

    Carefully return the browned chicken meatballs to the skillet.

    Spoon some of the onion gravy over the top.

    Reduce the heat to medium-low, cover, and simmer for approximately 10 to 12 minutes or until the chicken meatballs are completely cooked.

    Ground chicken should reach an internal temperature of 165°F.

    The meatballs will absorb some of the savory sauce as they finish cooking.

    Step 8: Add the Cheese

    Preheat your oven’s broiler.

    Remove the skillet lid.

    Sprinkle the shredded Gruyère and Swiss cheese evenly across the meatballs and onions.

    Place the oven-safe skillet underneath the broiler for approximately 2 to 4 minutes.

    Watch it carefully.

    You want the cheese melted, bubbling, and beginning to develop a few beautiful golden-brown spots.

    Remove the skillet from the oven and allow it to rest for several minutes before serving.

    Finish with fresh parsley or thyme.

    What Makes the Sauce So Good?

    The sauce is what transforms ordinary chicken meatballs into something memorable.

    It starts with the caramelized onions.

    As onions slowly cook, their natural sugars become concentrated, producing a sweetness that balances the savory broth.

    Beef broth provides a deeper flavor than chicken broth, even though we’re using chicken meatballs. Worcestershire sauce contributes another layer of savory complexity.

    Dijon mustard adds subtle tang without making the sauce taste noticeably like mustard.

    Then there is the cheese.

    Gruyère is one of the classic cheeses associated with French onion soup because it melts beautifully while providing a nutty, slightly sweet flavor.

    When all of these components come together, you get a sauce that’s savory, slightly sweet, cheesy, and incredibly satisfying.

    What to Serve With French Onion Chicken Meatballs

    This recipe practically begs to be served with something capable of absorbing the sauce.

    Creamy Mashed Potatoes

    Mashed potatoes might be my favorite option for this dish.

    Place a generous scoop of mashed potatoes on each plate and spoon several meatballs and plenty of French onion gravy over them.

    Buttered Egg Noodles

    Wide egg noodles are another excellent choice.

    Their mild flavor lets the onion sauce remain the star of the meal.

    Rice

    White or brown rice provides a simple and inexpensive base.

    Crusty Bread

    French bread, sourdough, or a crusty baguette works beautifully.

    Use pieces of bread to soak up the remaining sauce.

    Roasted Vegetables

    For something lighter, serve the meatballs alongside roasted broccoli, Brussels sprouts, asparagus, carrots, or green beans.

    Side Salad

    A crisp green salad with a tangy vinaigrette helps balance the richness of the cheese and gravy.

    Tips for Tender Chicken Meatballs

    Chicken meatballs can become dry if they’re overcooked or prepared incorrectly.

    A few simple techniques can make a major difference.

    Don’t Overmix

    Combine the ingredients only until everything comes together.

    Use Breadcrumbs and Egg

    These ingredients help hold moisture inside the meatballs while keeping everything together.

    Don’t Skip the Parmesan

    Parmesan adds both moisture and savory flavor.

    Brown Them First

    Browning creates additional flavor and gives the meatballs an attractive exterior.

    Finish Them in the Sauce

    Instead of cooking the meatballs completely during the browning stage, let them finish gently in the onion gravy.

    They’ll absorb flavor while remaining moist.

    Cheese Substitutions

    Gruyère is wonderful here, but you don’t have to abandon the recipe if you can’t find it.

    Try:

    • Swiss cheese
    • Provolone
    • Fontina
    • Mozzarella
    • Monterey Jack

    You can also combine cheeses.

    Swiss and mozzarella, for example, provide both traditional flavor and an impressive cheese pull.

    Ground Turkey Variation

    Ground turkey works very well as a substitute for ground chicken.

    Use the same quantity and follow the recipe exactly as written.

    Like chicken, ground turkey needs to reach an internal temperature of 165°F.

    Beef Meatball Variation

    Want an even richer meal?

    Replace the ground chicken with lean ground beef.

    The beef meatballs pair naturally with the caramelized onion and beef broth sauce.

    You could also use a mixture of ground beef and pork.

    Mushroom French Onion Meatballs

    Mushroom lovers can easily add another savory element.

    Slice about 8 ounces of cremini or white mushrooms.

    After browning the meatballs, sauté the mushrooms until golden, remove them temporarily, and then prepare the onions.

    Return the mushrooms when you add the broth.

    They’ll make the finished sauce even heartier.

    Add a Little Heat

    French onion dishes aren’t traditionally spicy, but that doesn’t mean you can’t experiment.

    Add:

    • 1/4 teaspoon crushed red pepper flakes
    • A pinch of cayenne pepper
    • Freshly cracked black pepper
    • A small amount of your favorite hot sauce

    Keep the heat moderate so it doesn’t overwhelm the caramelized onions.

    Make It Extra Cheesy

    For serious cheese lovers, increase the total cheese to approximately 2 cups.

    You can also sprinkle a little Parmesan over the Gruyère before broiling.

    The Parmesan will help create a beautifully browned surface.

    Can You Make French Onion Chicken Meatballs Ahead of Time?

    Yes.

    This recipe is actually a good candidate for advance preparation.

    You can form the raw chicken meatballs up to one day ahead. Store them covered in the refrigerator until you’re ready to cook.

    The onions can also be caramelized ahead of time and refrigerated.

    If you want to prepare most of the entire dish beforehand, cook the meatballs and sauce but don’t add the final cheese topping.

    Refrigerate everything in an airtight container.

    When you’re ready to serve, gently reheat the meatballs and sauce, transfer them to an oven-safe skillet or baking dish, add the cheese, and broil.

    Storing Leftovers

    Allow leftovers to cool before transferring them to an airtight container.

    Refrigerate for up to 3 to 4 days.

    Because the sauce thickens considerably when cold, you may need to add a splash of broth or water while reheating.

    How to Reheat

    Place the meatballs and sauce in a covered skillet over medium-low heat.

    Add a small splash of broth if necessary.

    Heat gently until the meatballs are hot throughout.

    Individual portions can also be reheated in the microwave.

    For the best cheesy finish, sprinkle a little fresh cheese over the reheated meatballs.

    Can You Freeze Them?

    Yes, although the texture of the sauce may change slightly after freezing.

    For the best results, freeze the cooked meatballs and onion sauce before adding the final cheese topping.

    Place cooled meatballs and sauce in a freezer-safe container and freeze for up to 2 to 3 months.

    Thaw overnight in the refrigerator.

    Reheat slowly on the stovetop, add fresh cheese, and broil before serving.

    Turn Them Into French Onion Meatball Subs

    Here’s a delicious way to use leftovers.

    Warm the chicken meatballs and onion sauce.

    Split sturdy sub rolls and arrange three or four meatballs inside each roll.

    Spoon caramelized onion gravy over the meatballs and top generously with Gruyère, Swiss, or provolone cheese.

    Place the sandwiches underneath the broiler until the cheese melts.

    You’ll have a French onion-inspired chicken meatball sandwich that’s perfect for lunch or an easy dinner.

    French Onion Chicken Meatballs for a Cozy Dinner

    Some dinners are designed purely around comfort, and French Onion Chicken Meatballs belong firmly in that category.

    You get juicy chicken meatballs, deeply caramelized onions, rich savory gravy, herbs, and bubbling melted cheese all together in one skillet.

    It’s familiar enough to appeal to anyone who loves classic comfort food while still being different from the usual spaghetti and meatballs or chicken dinner.

    The recipe is also flexible.

    Serve it with mashed potatoes when you’re craving something hearty, spoon it over noodles for an easy family dinner, or simply bring the skillet to the table with warm crusty bread and let everyone dig in.

    Taking the extra time to properly caramelize the onions is what makes this meal special. That slow cooking creates the deep, slightly sweet onion flavor that defines French onion dishes. Combined with savory chicken meatballs and melted Gruyère, it turns relatively simple ingredients into a memorable dinner.

    When you’re craving something warm, cheesy, and satisfying, make a skillet of French Onion Chicken Meatballs and don’t forget plenty of bread for soaking up that last spoonful of sauce.

    Would you serve these French Onion Chicken Meatballs over creamy mashed potatoes, buttered noodles, or with a big piece of crusty bread?

  • Breakfast of the Day: Maple Pecan French Toast Casserole

    Advertisements

    There is something especially comforting about waking up to the smell of warm cinnamon, toasted pecans, maple syrup, and buttery bread baking in the oven. Today’s Breakfast of the Day: Maple Pecan French Toast Casserole brings all those classic breakfast flavors together in one warm, satisfying dish.

    Instead of standing over the stove cooking individual slices of French toast, this recipe turns the traditional breakfast favorite into an easy casserole that can feed the whole family. Cubes of bread soak up a rich vanilla-cinnamon custard before being baked until the center becomes tender and almost pudding-like while the top develops deliciously crisp golden edges.

    Then comes the part that makes this breakfast particularly memorable: a buttery maple pecan topping.

    The combination of crunchy pecans, brown sugar, maple syrup, cinnamon, and soft French toast creates a breakfast that feels special enough for a holiday morning but is simple enough to prepare for an ordinary weekend.

    Even better, much of the preparation can be completed the night before. Put everything together before going to bed, refrigerate it overnight, and bake it the next morning.

    If you love breakfasts that are warm, comforting, slightly sweet, and easy to share, Maple Pecan French Toast Casserole deserves a place on your breakfast table.

    What Makes Maple Pecan French Toast Casserole Special?

    Traditional French toast is always delicious, but preparing enough for several people can become a balancing act. Someone usually ends up standing at the stove while everyone else begins eating.

    A French toast casserole solves that problem.

    Everything goes into one baking dish and cooks at the same time. When it comes out of the oven, you can place the casserole on the table and serve everyone together.

    But convenience isn’t the only reason to make it.

    The overnight soaking time allows the bread to absorb the custard throughout. As the casserole bakes, the interior becomes wonderfully soft while exposed pieces of bread turn golden and slightly crisp.

    Pecans add another layer of texture.

    Instead of every bite being soft, you get crunchy toasted nuts scattered across the top. Maple syrup reinforces the breakfast flavor without requiring the casserole to become overwhelmingly sweet.

    It’s somewhere between classic French toast, bread pudding, and a maple pecan breakfast bake.

    Ingredients

    This recipe makes approximately 8 servings.

    For the French Toast Casserole

    • 1 large loaf brioche, challah, or French bread, about 14 to 16 ounces
    • 8 large eggs
    • 2 cups whole milk
    • 1/2 cup heavy cream
    • 1/3 cup pure maple syrup
    • 1/4 cup packed brown sugar
    • 2 teaspoons vanilla extract
    • 2 teaspoons ground cinnamon
    • 1/4 teaspoon ground nutmeg
    • 1/4 teaspoon salt
    • 2 tablespoons butter for greasing the baking dish

    For the Maple Pecan Topping

    • 1 cup chopped pecans
    • 1/2 cup packed brown sugar
    • 1/3 cup all-purpose flour
    • 1 teaspoon ground cinnamon
    • 1/4 teaspoon salt
    • 5 tablespoons cold unsalted butter, cut into small pieces
    • 2 tablespoons pure maple syrup

    Optional Toppings for Serving

    • Warm maple syrup
    • Powdered sugar
    • Fresh strawberries
    • Fresh blueberries
    • Sliced bananas
    • Whipped cream
    • Additional toasted pecans
    • Butter

    Choosing the Best Bread

    The bread is one of the most important parts of any French toast recipe.

    For this casserole, brioche or challah are excellent choices because both are rich, slightly sweet breads that absorb the egg mixture beautifully.

    French bread also works very well and usually produces a casserole with slightly more structure.

    Whatever bread you choose, slightly stale bread is actually better than extremely fresh bread.

    Fresh bread contains more moisture and may become overly soft after absorbing the custard. Bread that has dried slightly can absorb more of the egg mixture without completely falling apart.

    If your bread is fresh, cut it into cubes and spread the pieces across a baking sheet. Leave them uncovered for several hours.

    You can also dry the cubes in a 300°F oven for approximately 10 to 15 minutes. You aren’t trying to toast them completely. You simply want to remove some excess moisture.

    How to Make Maple Pecan French Toast Casserole

    Step 1: Prepare the Baking Dish

    Grease a 9-by-13-inch baking dish generously with butter.

    Make sure you coat the bottom and sides. This helps prevent sticking while also adding a little extra buttery flavor around the edges of the casserole.

    Step 2: Cut the Bread

    Cut your bread into approximately 1-inch cubes.

    Don’t worry about making every piece perfectly uniform.

    Slightly irregular pieces actually work well because some pieces remain underneath the custard while others stick above the surface and become crisp during baking.

    Place all the bread cubes into the prepared baking dish.

    Spread them evenly without packing them down too tightly.

    Step 3: Make the Custard

    In a large mixing bowl, add:

    • Eggs
    • Whole milk
    • Heavy cream
    • Maple syrup
    • Brown sugar
    • Vanilla
    • Cinnamon
    • Nutmeg
    • Salt

    Whisk everything together until the eggs are completely incorporated and the mixture looks smooth.

    Pay particular attention to the brown sugar. Make sure there aren’t large clumps remaining at the bottom of the bowl.

    Step 4: Pour the Custard Over the Bread

    Slowly pour the egg mixture over the bread.

    Try to distribute it across the entire casserole rather than pouring everything into one spot.

    Once the custard has been added, gently press the bread down with the back of a spoon or clean hands.

    You want the bread to absorb the liquid without crushing it.

    Allow the casserole to sit for about 15 minutes if you plan to bake it immediately.

    For even better results, cover the baking dish and refrigerate it overnight.

    Why Overnight French Toast Casserole Works So Well

    Preparing this breakfast the night before isn’t simply about convenience.

    It can improve the texture.

    During several hours in the refrigerator, the bread slowly absorbs the egg, milk, cream, vanilla, cinnamon, and maple mixture.

    Instead of having flavorful custard primarily around the outside of each piece, the flavors penetrate deeper into the bread.

    This creates a soft, rich center once baked.

    It also makes breakfast the next morning much easier.

    There is no need to measure milk, crack eggs, slice bread, or clean multiple mixing bowls first thing in the morning.

    Most of the work has already been completed.

    Make the Maple Pecan Topping

    In a medium bowl, combine:

    • Chopped pecans
    • Brown sugar
    • Flour
    • Cinnamon
    • Salt

    Add the cold butter.

    Using your fingers, a pastry cutter, or a fork, work the butter into the dry ingredients until the mixture resembles coarse crumbs.

    Stir in the maple syrup.

    You should have a crumbly mixture with plenty of visible pecan pieces.

    If you’re preparing the casserole overnight, store the topping separately in an airtight container in the refrigerator.

    Don’t add it to the casserole until you’re ready to bake.

    This helps the topping remain crumbly instead of absorbing moisture overnight.

    Bake the French Toast Casserole

    When you’re ready to bake, preheat your oven to 350°F.

    If the casserole has been refrigerated overnight, remove it from the refrigerator while the oven preheats.

    Sprinkle the maple pecan mixture evenly across the top.

    Bake uncovered for approximately 45 to 55 minutes.

    Cooking time can vary depending on your baking dish, bread, and how deeply the custard has soaked into the casserole.

    The casserole is finished when the center is set and the top is golden brown.

    If you prefer softer French toast, bake closer to 45 minutes.

    For a firmer casserole with more toasted edges, let it bake a little longer.

    If the pecans begin browning too quickly, loosely cover the casserole with aluminum foil during the final portion of baking.

    Let It Rest Before Serving

    This is an important step that is easy to overlook.

    Allow the casserole to rest for approximately 10 minutes after removing it from the oven.

    The custard continues setting slightly during this time.

    Cutting into it immediately may cause the center to appear wetter than it actually is.

    After resting, slice or spoon the casserole onto individual plates.

    The Maple Pecan Flavor Combination

    Maple and pecans are one of those combinations that seem naturally made for breakfast.

    Maple syrup provides a deep sweetness that tastes very different from ordinary granulated sugar.

    Pecans bring a rich, buttery nuttiness along with plenty of crunch.

    Add cinnamon and vanilla and you get a collection of flavors that immediately feels warm and comforting.

    The maple syrup in this recipe isn’t limited to the topping either.

    It’s incorporated directly into the custard.

    That means the maple flavor runs throughout the casserole instead of simply sitting on top.

    How to Serve Maple Pecan French Toast Casserole

    This breakfast is delicious straight from the baking dish, but toppings can make it even better.

    For the classic approach, drizzle warm pure maple syrup over each serving.

    Add a small pat of butter and allow it to melt into the warm casserole.

    For additional sweetness, dust the top lightly with powdered sugar.

    Fresh fruit provides a nice contrast to the richness.

    Try serving it with:

    • Strawberries
    • Blueberries
    • Raspberries
    • Banana slices
    • Apple slices
    • Peaches

    You could also prepare a simple mixed fruit bowl for the table.

    Turn It Into a Complete Breakfast

    Because Maple Pecan French Toast Casserole is fairly rich, savory breakfast foods make excellent companions.

    Serve it alongside scrambled eggs or a vegetable omelet.

    Breakfast sausage or crispy bacon provides a salty contrast to the sweet maple flavor.

    For something lighter, serve it with Greek yogurt and berries.

    Coffee is almost mandatory for anyone who enjoys the classic combination of coffee and maple breakfast flavors.

    Other good drink options include:

    • Hot coffee
    • Iced coffee
    • Café au lait
    • Cold milk
    • Orange juice
    • Apple juice
    • Hot tea

    Put everything together and you have an easy weekend breakfast or brunch spread.

    Helpful Tips for the Best French Toast Casserole

    Use Slightly Dry Bread

    This may be the single most useful tip.

    Very fresh bread can become too soft when soaked in custard.

    Slightly stale or dried bread absorbs the mixture while maintaining more structure.

    Don’t Skip the Salt

    Salt might seem unnecessary in a sweet breakfast casserole, but a small amount helps balance the sugar and enhances the maple, vanilla, cinnamon, and pecan flavors.

    Use Pure Maple Syrup

    For the strongest maple flavor, use real maple syrup rather than pancake syrup.

    You don’t need an enormous amount because the maple is supported by brown sugar and vanilla.

    Keep the Pecans Coarsely Chopped

    Don’t chop the pecans too finely.

    Larger pieces provide better crunch and make the pecan topping more noticeable.

    Watch the Top While Baking

    Nuts can go from beautifully toasted to overly dark relatively quickly.

    Check the casserole during the final 10 to 15 minutes.

    Cover it loosely with foil if necessary.

    Easy Substitutions

    One advantage of breakfast casseroles is their flexibility.

    Milk

    Whole milk creates a rich custard, but you can substitute 2% milk.

    For an even richer version, increase the amount of heavy cream slightly.

    Bread

    Try:

    • Brioche
    • Challah
    • French bread
    • Italian bread
    • Texas toast
    • Cinnamon bread

    Each creates a slightly different texture and flavor.

    Nuts

    Don’t have pecans?

    Walnuts are the easiest substitute.

    You can also use sliced almonds, although they will change the character of the dish.

    Maple Syrup

    Pure maple syrup is recommended, but honey can be used if necessary. The result will obviously have more of a honey flavor than the maple character intended for this recipe.

    Delicious Variations

    Once you know the basic recipe, there are plenty of ways to change it.

    Apple Maple Pecan French Toast Casserole

    Add approximately 1 1/2 cups of peeled diced apples between the bread pieces.

    Granny Smith, Honeycrisp, or Fuji apples all work well.

    The apples soften during baking and pair beautifully with maple and cinnamon.

    Banana Pecan Version

    Layer sliced bananas throughout the casserole before adding the custard.

    Bananas add natural sweetness and make the center particularly soft and rich.

    Blueberry Maple French Toast Casserole

    Add about 1 1/2 cups fresh blueberries.

    Blueberries provide bursts of tart sweetness that help balance the richness of the custard.

    Chocolate Chip Pecan Version

    For a more indulgent breakfast, sprinkle approximately 3/4 cup mini chocolate chips throughout the bread.

    Chocolate, maple, and pecans make this version feel almost like dessert.

    Cinnamon Roll Inspired Version

    Increase the cinnamon slightly and drizzle a simple powdered sugar glaze across the casserole after baking.

    Make-Ahead Instructions

    This recipe is ideal for overnight preparation.

    Prepare the bread and custard according to the recipe.

    Pour the custard over the bread, cover the baking dish tightly, and refrigerate overnight.

    Prepare the pecan topping separately and refrigerate it.

    The following morning, remove the casserole from the refrigerator while your oven preheats.

    Add the topping and bake.

    It’s one of those breakfasts that actually becomes easier when you plan ahead.

    How to Store Leftovers

    Allow leftover French toast casserole to cool before storing.

    Transfer individual portions to airtight containers or cover the baking dish tightly.

    Refrigerate for up to 3 to 4 days.

    The topping will soften somewhat in the refrigerator, but the flavor remains delicious.

    How to Reheat French Toast Casserole

    Individual portions can be reheated in the microwave for a quick breakfast.

    For better texture, use the oven.

    Place the casserole in an oven-safe dish, cover loosely with foil, and warm at 325°F until heated through.

    Remove the foil during the final few minutes if you’d like to restore some crispness to the top.

    Add fresh maple syrup after reheating.

    Can You Freeze French Toast Casserole?

    Yes.

    After baking, allow the casserole to cool completely.

    Cut it into individual portions and wrap them tightly before placing them in a freezer-safe container or freezer bag.

    Freeze for approximately 2 months for the best quality.

    Individual portions make it easy to pull out exactly what you need for breakfast.

    Thaw overnight in the refrigerator before reheating.

    Perfect for Holidays and Weekend Brunch

    While this recipe can certainly be made whenever you’re craving French toast, it is especially useful when you’re feeding several people.

    Consider serving it for:

    Christmas morning, Thanksgiving weekend, Easter brunch, Mother’s Day, Father’s Day, birthdays, family gatherings, sleepovers, or relaxed Sunday breakfasts.

    Overnight preparation means you’re not stuck in the kitchen making individual plates while everyone else is spending time together.

    Put the casserole in the oven, make some coffee, prepare your side dishes, and breakfast is almost done.

    A Breakfast Worth Waking Up For

    Maple Pecan French Toast Casserole takes everything comforting about traditional French toast and turns it into an easy breakfast designed for sharing.

    The bread becomes soft and custardy underneath while developing golden edges on top. Cinnamon and vanilla give every bite that familiar French toast flavor, maple syrup adds rich sweetness, and toasted pecans provide the crunch that brings everything together.

    Perhaps the best part is how little work is required in the morning.

    Prepare it the night before, refrigerate it, add the pecan topping, and let the oven handle breakfast.

    Serve it warm with maple syrup, fresh berries, bacon, sausage, eggs, or simply a hot cup of coffee.

    Whether you’re planning a holiday breakfast, weekend brunch, or simply want something different for the family, this casserole offers an easy way to make an ordinary morning feel a little more special.

    Would you top your Maple Pecan French Toast Casserole with extra maple syrup, fresh berries, whipped cream, or all three?

  • Dessert of the Day: Malva Pudding

    Advertisements

    Some desserts impress with elaborate decorations, delicate layers, or complicated techniques. Malva pudding wins people over in a much simpler way: it is warm, wonderfully moist, deeply comforting, and covered in a buttery cream sauce that soaks into every bite.

    Despite its name, Malva pudding is not a pudding in the American sense of a smooth custard eaten with a spoon. It is a soft, caramel-colored baked sponge dessert traditionally associated with South Africa. Once the cake comes out of the oven, a warm cream sauce is poured over the top. The sponge eagerly absorbs that rich sauce, creating a tender dessert with slightly crisp edges and an almost sticky center.

    A small amount of apricot preserves adds subtle fruitiness without making the dessert taste strongly of apricot. Brown sugar creates warmth and depth, while vinegar and baking soda help give the sponge its characteristic light yet moist texture.

    Serve Malva pudding warm with vanilla ice cream, whipped cream, custard, or fresh berries. It is ideal for holidays, Sunday dinners, potlucks, family gatherings, or any evening when you want a comforting homemade dessert.

    What Makes Malva Pudding Special?

    Malva pudding strikes a beautiful balance between familiar and unexpected.

    At first glance, it may resemble an ordinary brown sugar cake. The real transformation happens after baking, when the warm sauce is slowly poured over the surface. Instead of sitting on top like frosting, the sauce travels through the sponge and becomes part of the dessert.

    Every serving offers several irresistible qualities:

    • A lightly caramelized surface
    • A soft and springy sponge
    • Buttery brown sugar flavor
    • Subtle apricot notes
    • A rich, sauce-soaked center
    • Warm creaminess in every bite

    It is decadent without needing layers of frosting or complicated decorations. The finished pudding looks rustic, warm, and welcoming—the kind of dessert that encourages everyone to gather around the table.

    Why You Will Love This Recipe

    Malva pudding deserves a place in your dessert collection for many reasons.

    It Uses Familiar Ingredients

    Most of the ingredients are ordinary baking staples, including flour, sugar, eggs, milk, butter, baking soda, and vanilla. Apricot preserves may be the only ingredient you need to pick up specifically for the recipe.

    It Is Easier Than It Looks

    The batter comes together in a few simple steps. There is no yeast, rolling, layering, piping, or complicated decorating involved.

    It Can Be Made Ahead

    Malva pudding reheats exceptionally well because its sauce helps it remain moist. You can bake it before a gathering and warm it shortly before serving.

    It Is Perfect for Sharing

    One baking dish produces approximately eight generous portions or up to twelve smaller servings. It is an excellent choice for dinner parties, holidays, potlucks, and family celebrations.

    It Feels Comforting

    Warm sponge, buttery sauce, and melting vanilla ice cream create the kind of dessert that makes an ordinary evening feel special.

    Ingredients

    For the Malva Pudding

    • 1 cup all-purpose flour
    • 1 teaspoon baking soda
    • 1/4 teaspoon salt
    • 1 large egg, at room temperature
    • 3/4 cup packed light brown sugar
    • 1 tablespoon smooth apricot preserves
    • 1 tablespoon unsalted butter, melted
    • 1 teaspoon white vinegar
    • 1 teaspoon pure vanilla extract
    • 1/2 cup whole milk

    For the Cream Sauce

    • 1/2 cup unsalted butter
    • 3/4 cup packed light brown sugar
    • 1/2 cup heavy cream
    • 1/3 cup hot water
    • 1 teaspoon pure vanilla extract
    • Pinch of salt

    For Serving

    • Vanilla ice cream
    • Homemade whipped cream
    • Warm vanilla custard
    • Fresh strawberries or raspberries
    • Toasted pecans, optional
    • Additional caramel sauce, optional

    Equipment You Will Need

    Malva pudding does not require specialized baking equipment. Gather the following before getting started:

    • An 8-inch square baking dish
    • Two medium mixing bowls
    • A whisk
    • A rubber spatula or wooden spoon
    • A small saucepan
    • Measuring cups and spoons
    • A toothpick or thin skewer
    • A ladle or large spoon

    A ceramic, glass, or metal baking dish can be used. Baking times may vary slightly depending on the material and depth of your dish.

    How to Make Malva Pudding

    Step 1: Prepare the Oven and Baking Dish

    Preheat the oven to 350°F.

    Lightly grease an 8-inch square baking dish with butter or nonstick cooking spray. Make sure to coat the corners so the sticky edges of the pudding release more easily.

    Set the prepared dish aside while you make the batter.

    Step 2: Combine the Dry Ingredients

    In a medium bowl, whisk together the all-purpose flour, baking soda, and salt.

    Whisking helps distribute the baking soda evenly throughout the flour. This is important because unevenly mixed baking soda can leave unpleasant-tasting pockets in the finished dessert.

    Set the dry mixture aside.

    Step 3: Beat the Egg and Brown Sugar

    Place the egg and brown sugar in a separate mixing bowl.

    Whisk vigorously for approximately two to three minutes. The mixture should become slightly lighter, thicker, and smoother.

    This step helps incorporate air into the batter and contributes to the pudding’s soft sponge texture.

    You can use an electric mixer if desired, but a sturdy whisk works perfectly well.

    Step 4: Add the Apricot Preserves

    Add the apricot preserves to the egg and sugar mixture.

    Whisk until the preserves are evenly incorporated and no large lumps remain.

    Smooth preserves work best because they blend easily into the batter. If your preserves contain large pieces of fruit, finely chop or mash them before adding.

    The apricot flavor will remain subtle. It adds a gentle fruitiness and complexity rather than making the entire dessert taste like an apricot cake.

    Step 5: Add the Wet Ingredients

    Pour the melted butter, white vinegar, and vanilla extract into the egg mixture.

    Whisk until everything is thoroughly combined.

    Do not worry about tasting vinegar in the finished pudding. It reacts with the baking soda and helps create the light, springy texture that allows the cake to absorb the sauce.

    Step 6: Alternate the Flour and Milk

    Add approximately one-third of the dry mixture to the wet ingredients and gently stir.

    Pour in half of the milk and mix again.

    Continue alternating the flour mixture and milk until everything has been added. Begin and end with the dry ingredients.

    Stir only until the flour disappears. Overmixing can develop too much gluten and make the pudding tougher instead of soft and tender.

    The finished batter should be smooth and pourable but not excessively thin.

    Step 7: Bake the Pudding

    Pour the batter into the prepared baking dish.

    Use a spatula to spread it evenly into the corners and smooth the surface.

    Bake for approximately 30 to 35 minutes. The pudding should be deeply golden brown, slightly puffed, and firm enough to spring back when gently touched.

    Insert a toothpick into the center. It should come out clean or with a few moist crumbs attached.

    Avoid opening the oven repeatedly during the first 25 minutes. A sudden drop in temperature can cause the center to sink before the structure has finished setting.

    Step 8: Prepare the Cream Sauce

    Begin making the sauce during the final ten minutes of baking.

    Place the butter, brown sugar, heavy cream, hot water, vanilla extract, and a pinch of salt in a small saucepan.

    Heat the mixture over medium-low heat, stirring frequently.

    Once the butter melts and the sugar dissolves, allow the sauce to reach a gentle simmer. Continue cooking for approximately two to three minutes.

    Do not boil it aggressively. You want a smooth, pourable sauce rather than a thick caramel.

    Remove the saucepan from the heat and keep the sauce warm until the pudding comes out of the oven.

    Step 9: Poke Holes in the Pudding

    Remove the baked pudding from the oven.

    While it is still hot, use a toothpick or thin skewer to make holes across the entire surface. Space the holes approximately one inch apart.

    The holes create channels that help the warm sauce travel into the sponge.

    Do not make the holes excessively large or tear apart the surface. Small, evenly spaced openings are all you need.

    Step 10: Add the Warm Sauce

    Slowly pour approximately half of the warm sauce over the hot pudding.

    Pause for a minute and allow the sponge to absorb it.

    Continue adding the remaining sauce gradually, paying special attention to the edges and corners.

    It may initially look like there is too much liquid, but the pudding will absorb most of it as it rests. Pouring slowly is the key. If the sauce is added all at once, it may collect around the edges instead of soaking evenly into the center.

    Step 11: Let It Rest

    Allow the Malva pudding to rest for approximately 15 to 20 minutes before serving.

    This waiting period gives the sauce time to soak into the sponge and helps the dessert develop its signature sticky, moist texture.

    Malva pudding is best served warm rather than piping hot.

    Tips for the Best Malva Pudding

    Measure the Flour Carefully

    Too much flour can make the sponge dense and prevent it from absorbing the sauce properly.

    Spoon flour into the measuring cup and level it with the back of a knife. Avoid scooping directly from the bag because that can compact the flour.

    Use Room-Temperature Ingredients

    A room-temperature egg and slightly warmed milk blend more smoothly into the batter. Cold ingredients can cause melted butter to firm up before everything is properly combined.

    Do Not Skip the Vinegar

    The small amount of vinegar is essential to the texture. It reacts with the baking soda and helps the pudding rise.

    White vinegar is the most neutral choice, but apple cider vinegar can be substituted if necessary.

    Pour Warm Sauce Over Hot Pudding

    Temperature matters. A hot sponge absorbs warm sauce much more effectively than a completely cooled dessert.

    Try to have the sauce ready when the pudding leaves the oven.

    Give the Sauce Time to Soak In

    Malva pudding improves as it rests. Waiting at least 15 minutes before serving prevents the sauce from immediately running to the bottom of each plate.

    Watch the Baking Time

    Overbaking can produce a dry sponge that does not absorb the sauce as evenly. Begin checking the center at approximately 28 minutes, especially if you are using a metal pan.

    Delicious Variations

    The traditional version is wonderful, but Malva pudding is also easy to customize.

    Orange Malva Pudding

    Add one teaspoon of finely grated orange zest to the batter.

    Replace one tablespoon of the hot water in the sauce with fresh orange juice. The citrus brightens the buttery sweetness and pairs beautifully with the apricot preserves.

    Spiced Malva Pudding

    Add 1/2 teaspoon ground cinnamon and a pinch of nutmeg to the flour mixture.

    These warm spices make the pudding especially inviting during fall and winter.

    Chocolate Malva Pudding

    Replace two tablespoons of flour with two tablespoons of unsweetened cocoa powder.

    Add 1/3 cup semisweet chocolate chips to the batter. The result combines Malva pudding’s soft, saucy texture with rich chocolate flavor.

    Coconut Malva Pudding

    Replace half of the whole milk with canned coconut milk.

    Sprinkle toasted coconut over each serving for additional flavor and texture.

    Coffee Caramel Malva Pudding

    Dissolve one teaspoon of instant espresso powder in the hot water before adding it to the cream sauce.

    The coffee helps balance the sweetness and deepens the caramel notes.

    Nutty Malva Pudding

    Add 1/2 cup finely chopped pecans or walnuts to the batter.

    You can also sprinkle toasted nuts over the top immediately before serving.

    Substitutions

    If you are missing an ingredient, one of these substitutions may help.

    Apricot Preserves

    Peach preserves are the closest substitute. Orange marmalade can also work, although it will produce a brighter citrus flavor and may add a slight bitterness.

    Whole Milk

    Two-percent milk can be used with good results. Buttermilk will add more tanginess and may create an even softer crumb.

    Heavy Cream

    Half-and-half can be substituted, but the sauce will be lighter and slightly less rich.

    Brown Sugar

    Granulated sugar can be used in the batter, but brown sugar provides a deeper caramel flavor.

    For the sauce, light or dark brown sugar will work. Dark brown sugar creates a stronger molasses flavor.

    Unsalted Butter

    Salted butter can be used. If you choose salted butter, omit the additional pinch of salt from the sauce.

    How to Serve Malva Pudding

    Spoon or cut the warm pudding into squares and place each serving in a shallow dessert bowl or on a small plate.

    Make sure to scoop up some of the sauce from the bottom of the baking dish.

    The classic finishing touch is vanilla custard, but there are many delicious options.

    Try serving it with:

    • A scoop of vanilla bean ice cream
    • Freshly whipped cream
    • Warm vanilla custard
    • Salted caramel ice cream
    • Fresh raspberries
    • Sliced strawberries
    • Toasted pecans
    • Toasted coconut
    • A light dusting of powdered sugar
    • An additional spoonful of warm cream sauce

    Vanilla ice cream provides an especially appealing contrast. The cold ice cream begins melting over the warm pudding and creates an extra creamy sauce on the plate.

    Because Malva pudding is rich, coffee or unsweetened tea makes an excellent beverage pairing.

    When to Serve Malva Pudding

    This comforting dessert fits almost any occasion.

    Serve it for:

    • Sunday family dinner
    • Thanksgiving
    • Christmas
    • Easter
    • Birthday celebrations
    • Potluck meals
    • Dinner parties
    • Cold-weather gatherings
    • Family movie nights
    • A cozy weekend dessert

    It travels well in its baking dish, making it a practical choice for potlucks. Cover the dish tightly, transport it warm, and bring ice cream or whipped cream separately.

    Make-Ahead Instructions

    Malva pudding can be prepared one day before serving.

    Bake the pudding and pour the sauce over it according to the recipe. Allow it to cool, cover the baking dish tightly, and refrigerate.

    When you are ready to serve, remove the dish from the refrigerator and let it sit at room temperature for approximately 20 minutes.

    Cover the dish loosely with foil and reheat it in a 300°F oven for 15 to 20 minutes or until warmed through.

    If the pudding seems slightly dry after refrigeration, prepare a small amount of additional sauce and pour it over the surface before reheating.

    How to Store Leftovers

    Cover leftover Malva pudding tightly or transfer individual servings to an airtight container.

    Store it in the refrigerator for up to four days.

    To reheat an individual serving, place it on a microwave-safe plate and microwave in short intervals of approximately 20 seconds until warm. Avoid overheating it because the sauce can become extremely hot.

    For several portions, cover the baking dish with foil and warm it in a 300°F oven.

    Can You Freeze Malva Pudding?

    Yes, Malva pudding can be frozen.

    Allow it to cool completely before cutting it into individual portions. Wrap each piece securely and place the wrapped portions in a freezer-safe container.

    Freeze for up to two months.

    Thaw the pudding overnight in the refrigerator. Reheat it gently in the microwave or oven before serving.

    For the freshest flavor and texture, consider adding only half of the sauce before freezing. Prepare a fresh half-batch of sauce to pour over the pudding while reheating.

    Common Questions

    Why Is My Malva Pudding Dry?

    The most likely causes are too much flour, overbaking, or not adding enough sauce.

    Measure the flour carefully, begin checking the pudding before the full baking time has passed, and pour the sauce over it while both are still warm.

    Why Did My Pudding Sink?

    A small amount of sinking is normal, especially after the sauce is added.

    Significant sinking may happen if the oven door was opened too early, the batter was underbaked, or the baking soda was no longer active.

    Can I Double the Recipe?

    Yes. Double all ingredients and bake the pudding in a 9-by-13-inch baking dish.

    The baking time will likely increase to approximately 35 to 45 minutes. Check the center with a toothpick before removing it from the oven.

    Can I Reduce the Sweetness?

    You can reduce the brown sugar in the batter to 1/2 cup.

    The sauce creates much of the dessert’s sweetness, so you can also reserve a portion of it and serve the extra on the side. Keep in mind that the sauce is essential to the traditional texture.

    Is Malva Pudding Served Warm or Cold?

    It can be eaten cold, but it is at its best when served warm. Heating softens the butter in the sauce and restores the pudding’s rich, moist texture.

    A Warm Dessert Worth Sharing

    Malva pudding proves that a memorable dessert does not need complicated decorations or hours of preparation.

    A simple apricot-infused sponge becomes something extraordinary when warm cream sauce is slowly poured over it. The surface turns glossy, the edges become sticky, and the center remains wonderfully soft.

    Add a scoop of vanilla ice cream and you have a dessert that delivers warmth, sweetness, creaminess, and comfort in every spoonful.

    Whether you prepare it for a holiday gathering, bring it to a potluck, or enjoy it at home after dinner, Malva pudding has all the qualities of a recipe people will ask you to make again.

    Would you serve your warm Malva pudding with vanilla ice cream, whipped cream, or homemade custard?

  • Healthy Recipe of the Day: Mediterranean Chickpea Stuffed Sweet Potatoes

    Advertisements

    Sweet potatoes are often treated as a simple side dish, but they are hearty and versatile enough to become the foundation of an entire meal.

    Today’s Healthy Recipe of the Day: Mediterranean Chickpea Stuffed Sweet Potatoes transforms tender roasted sweet potatoes into colorful, satisfying meal bowls. Each potato is filled with warmly seasoned chickpeas, crisp cucumber, juicy tomatoes, red onion, fresh parsley, and a creamy lemon-tahini sauce.

    Every bite offers something different.

    The sweet potatoes are soft and naturally sweet. The roasted chickpeas provide savory flavor and a lightly crisp texture. Fresh vegetables brighten the filling, while the tahini sauce ties everything together with its creamy consistency and tangy lemon flavor.

    This healthy stuffed sweet potato recipe is completely meatless, easy to customize, and practical enough for weeknight cooking. It also works beautifully for meal preparation because most of the components can be prepared in advance and assembled when you are ready to eat.

    Whether you are trying to include more plant-based meals in your routine or simply want a flavorful way to enjoy sweet potatoes, this recipe deserves a place on your dinner table.

    Why You’ll Love These Mediterranean Stuffed Sweet Potatoes

    A healthy dinner should still be something you genuinely look forward to eating. These stuffed sweet potatoes deliver plenty of color, texture, and flavor without requiring complicated cooking techniques.

    Here are a few reasons to try them:

    • The recipe uses affordable, easy-to-find ingredients.
    • Chickpeas provide plant-based protein and fiber.
    • Sweet potatoes create a filling and flavorful base.
    • Fresh vegetables add color, crunch, and brightness.
    • The lemon-tahini sauce is creamy without relying on mayonnaise or heavy cream.
    • Each potato can be customized with different toppings.
    • Most of the preparation can be completed ahead of time.
    • The entire recipe is naturally vegetarian and can easily remain vegan.
    • Leftover components can be turned into salads, wraps, or grain bowls.

    These potatoes also have enough substance to stand alone as a complete lunch or dinner. You can serve them with a simple salad or soup, but you do not necessarily need an elaborate collection of side dishes.

    Recipe at a Glance

    Prep time: Approximately 20 minutes
    Cooking time: Approximately 50 minutes
    Total time: Approximately 1 hour and 10 minutes
    Servings: 4
    Cooking method: Oven-roasted
    Dietary notes: Vegetarian, vegan when prepared without dairy-based toppings, and naturally gluten-free when all packaged ingredients are verified

    Ingredients

    For the Sweet Potatoes

    • 4 medium sweet potatoes, approximately 8–10 ounces each
    • 1 teaspoon olive oil, optional
    • Small pinch of salt

    For the Seasoned Chickpeas

    • 2 15-ounce cans chickpeas
    • 1 tablespoon olive oil
    • 1 teaspoon ground cumin
    • 1 teaspoon smoked paprika
    • 1 teaspoon garlic powder
    • ½ teaspoon dried oregano
    • ¼ teaspoon ground coriander
    • ¼ teaspoon salt, or to taste
    • ¼ teaspoon black pepper
    • Pinch of crushed red pepper flakes, optional

    For the Fresh Mediterranean Topping

    • 1 cup diced cucumber
    • 1 cup halved or quartered cherry tomatoes
    • ¼ cup finely diced red onion
    • ⅓ cup chopped fresh parsley
    • 2 tablespoons chopped fresh mint, optional
    • 1 tablespoon fresh lemon juice
    • 1 teaspoon olive oil
    • Pinch of salt
    • Black pepper to taste

    For the Lemon-Tahini Sauce

    • ¼ cup tahini
    • 3 tablespoons fresh lemon juice
    • 1 small garlic clove, finely grated or minced
    • ½ teaspoon ground cumin
    • ¼ teaspoon salt
    • 3–5 tablespoons cold water
    • 1 teaspoon maple syrup or honey, optional

    Optional Toppings

    • Crumbled feta cheese
    • Chopped Kalamata olives
    • Sliced green onions
    • Toasted pumpkin seeds
    • Chopped walnuts
    • Additional parsley or mint
    • Lemon wedges
    • Plain Greek yogurt
    • Hot sauce
    • Za’atar seasoning

    Step-by-Step Directions

    Step 1: Preheat the Oven

    Preheat your oven to 425°F.

    Line a large baking sheet with parchment paper or aluminum foil for easier cleanup.

    If you have two baking sheets, you can roast the sweet potatoes on one and the chickpeas on the other. This gives everything more room and helps the chickpeas become crisp.

    Step 2: Prepare the Sweet Potatoes

    Scrub the sweet potatoes thoroughly under cool running water to remove any dirt from the skins.

    Dry them with a clean kitchen towel.

    Pierce each sweet potato several times with a fork. These small openings allow steam to escape while the potatoes roast.

    You can rub the skins with a small amount of olive oil and sprinkle them lightly with salt if you enjoy flavorful, slightly crisp potato skins. This step is optional.

    Arrange the sweet potatoes on the prepared baking sheet with space between them.

    Step 3: Roast the Sweet Potatoes

    Place the sweet potatoes in the oven and roast them for approximately 45–55 minutes.

    The exact cooking time will depend on their size and thickness.

    They are ready when the skins look slightly wrinkled and a knife slides easily through the thickest section. The potatoes should feel very soft when gently squeezed with an oven mitt.

    Avoid removing them too soon. A properly roasted sweet potato should have a soft, creamy interior that is easy to fluff and fill.

    Step 4: Prepare the Chickpeas

    While the sweet potatoes begin roasting, drain and rinse the chickpeas.

    Spread them across a clean kitchen towel or several layers of paper towels. Gently pat them dry.

    Removing excess moisture is important because wet chickpeas will steam rather than roast. If some loose skins come off as you dry them, you can discard those skins, but you do not need to peel every chickpea.

    Transfer the dried chickpeas to a mixing bowl.

    Add the olive oil, cumin, smoked paprika, garlic powder, oregano, coriander, salt, black pepper, and crushed red pepper flakes if using.

    Toss until the chickpeas are evenly coated.

    Step 5: Roast the Chickpeas

    Spread the seasoned chickpeas into a single layer on a second baking sheet.

    Place them in the oven with the sweet potatoes and roast for approximately 20–25 minutes.

    Stir or shake the pan halfway through cooking so the chickpeas brown more evenly.

    The finished chickpeas should be hot, golden, and lightly crisp around the outside. They do not need to become completely crunchy. Keeping a little tenderness inside makes them especially good as a stuffed-potato filling.

    Remove them from the oven and set them aside.

    Step 6: Make the Fresh Mediterranean Topping

    Combine the cucumber, tomatoes, red onion, parsley, and mint in a medium bowl.

    Add the lemon juice, olive oil, salt, and black pepper.

    Toss gently until everything is evenly combined.

    Taste the mixture and adjust the lemon juice or seasoning as needed.

    Let the topping rest for approximately 10 minutes. This gives the vegetables time to absorb the lemon and allows their flavors to come together.

    Step 7: Prepare the Lemon-Tahini Sauce

    Add the tahini, lemon juice, garlic, cumin, salt, and optional maple syrup or honey to a small bowl.

    Begin whisking the ingredients together.

    The tahini may initially thicken or appear slightly grainy when the lemon juice is added. This is normal.

    Add the cold water 1 tablespoon at a time while continuing to whisk. After several tablespoons, the mixture should become smooth, creamy, and easy to drizzle.

    Use less water if you prefer a thick sauce or add another spoonful if you want a thinner dressing.

    Taste and adjust the lemon or salt before serving.

    Step 8: Open and Fluff the Sweet Potatoes

    Carefully remove the roasted sweet potatoes from the oven.

    Allow them to cool for several minutes so they are easier to handle.

    Use a sharp knife to cut a lengthwise opening across the top of each potato without slicing completely through the bottom.

    Gently push the ends toward the center to open the potato.

    Fluff the soft interior with a fork. You can add a small pinch of salt and black pepper, but remember that the chickpeas, vegetables, sauce, and optional toppings will contribute additional seasoning.

    Step 9: Fill the Potatoes

    Divide the roasted chickpeas among the four sweet potatoes.

    Spoon the cucumber and tomato mixture over the chickpeas.

    Drizzle each potato generously with lemon-tahini sauce.

    Finish with your favorite optional toppings. Feta provides a salty, creamy contrast, Kalamata olives add bold Mediterranean flavor, and pumpkin seeds or walnuts provide additional crunch.

    Serve the stuffed sweet potatoes while their centers and chickpea filling are warm.

    Why These Ingredients Work So Well Together

    A great recipe is about more than collecting healthy ingredients. Those ingredients also need to complement one another.

    Sweet potatoes provide the warm, comforting base. Their natural sweetness balances the savory spices on the chickpeas and the acidity of the lemon.

    Chickpeas are mild enough to absorb cumin, smoked paprika, garlic, oregano, and coriander. Roasting them concentrates those seasonings and creates a texture that contrasts with the creamy potatoes.

    Cucumber, tomatoes, onion, and fresh herbs keep the meal from becoming too heavy. They add freshness and moisture while contributing many of the familiar flavors found throughout Mediterranean-inspired cooking.

    Tahini is made from sesame seeds and has a rich, slightly nutty flavor. Lemon juice and garlic transform it into a bright sauce that works especially well with chickpeas and roasted vegetables.

    The finished meal brings together sweetness, savory seasoning, acidity, creaminess, and crunch—all on one plate.

    Tips for the Best Stuffed Sweet Potatoes

    Choose Potatoes That Are Similar in Size

    Sweet potatoes of similar size will finish roasting at approximately the same time.

    Long, narrow potatoes may cook faster than very thick ones. If your potatoes vary significantly, check each one individually and remove the smaller potatoes when they become tender.

    Dry the Chickpeas Well

    Moisture is one of the biggest obstacles to properly roasted chickpeas.

    After rinsing them, take the time to pat them dry before adding the oil and spices. A dry exterior helps the chickpeas develop better color and texture.

    Give Everything Enough Space

    Avoid crowding the chickpeas into a small baking dish.

    When ingredients are packed closely together, moisture becomes trapped and creates steam. Spreading the chickpeas into a single layer encourages roasting and browning.

    Use Fresh Lemon Juice

    Fresh lemon juice makes a noticeable difference in both the vegetable topping and tahini sauce.

    Bottled juice can work when necessary, but freshly squeezed lemon provides a brighter flavor.

    Taste Every Component

    Taste the fresh topping and tahini sauce before assembling the potatoes.

    It is much easier to correct the seasoning while each component is still in its bowl. You may decide that the topping needs more lemon, the sauce needs another pinch of salt, or the chickpeas need additional pepper.

    Add the Fresh Ingredients at the End

    Do not bake the cucumber and tomato mixture inside the potatoes.

    The contrast between the warm sweet potato and cool, crisp vegetables is one of the best parts of this recipe.

    Easy Substitutions and Variations

    Add More Greens

    Place a handful of baby spinach or chopped kale inside each hot potato before adding the chickpeas. The heat will gently wilt the greens.

    You can also serve the stuffed potato over arugula or mixed greens.

    Try a Different Bean

    Chickpeas are ideal for this recipe, but they are not the only option.

    White beans provide a softer and creamier filling. Black beans can create a Southwestern-inspired variation when seasoned with cumin, chili powder, and lime.

    Lentils can also work, especially when you have cooked lentils left from another meal.

    Add Grilled Chicken or Salmon

    The chickpeas provide plenty of substance, but you can add another protein if desired.

    Top each potato with sliced grilled chicken, flaked roasted salmon, cooked shrimp, or leftover turkey.

    Keep the fresh vegetables and tahini sauce because they pair well with all of these options.

    Make It Spicier

    Add cayenne pepper to the chickpea seasoning or increase the crushed red pepper flakes.

    You can also finish the potatoes with hot sauce, sliced jalapeños, or a spoonful of harissa.

    Replace the Tahini Sauce

    If you do not have tahini, prepare a lemon-herb yogurt sauce.

    Combine plain Greek yogurt with lemon juice, garlic, parsley, salt, pepper, and enough water to create a drizzleable consistency.

    For a dairy-free alternative, use unsweetened plant-based yogurt or hummus thinned with lemon juice and water.

    Turn It Into a Greek-Inspired Potato

    Add feta cheese, Kalamata olives, oregano, cucumber, tomatoes, and a spoonful of tzatziki.

    This variation will not be vegan, but it offers another delicious way to use the same roasted sweet-potato base.

    Use Regular Potatoes

    Russet potatoes can replace sweet potatoes if that is what you have available.

    They will not provide the same sweet-and-savory contrast, but they still create a satisfying base for chickpeas, vegetables, and tahini sauce.

    What to Serve With Mediterranean Stuffed Sweet Potatoes

    These loaded sweet potatoes can stand alone as a complete meal, particularly when you use a generous amount of chickpeas and vegetables.

    If you would like to add a side, try:

    • A simple mixed-green salad
    • Roasted broccoli
    • Steamed green beans
    • Lemon-garlic asparagus
    • Lentil soup
    • Tomato and cucumber salad
    • Vegetable soup
    • Quinoa tabbouleh
    • Warm whole-grain pita bread
    • Fresh fruit

    For a larger gathering, arrange the roasted sweet potatoes on a serving platter and set out the fillings separately. Everyone can build a potato with the toppings they enjoy.

    This makes the meal easy to adapt for people who do not like onions, prefer less sauce, want extra chickpeas, or enjoy plenty of spicy seasoning.

    Make-Ahead Instructions

    This recipe is an excellent choice for meal preparation because the components can be stored separately.

    Roast the sweet potatoes and chickpeas in advance. Prepare the tahini sauce and refrigerate it in a sealed container.

    The cucumber and tomato topping can also be prepared early, but it has the best texture when made on the day you plan to serve it. If preparing it ahead, consider storing the chopped vegetables separately from the lemon juice and salt. Combine them shortly before serving to help prevent the vegetables from releasing too much liquid.

    When you are ready to eat, reheat the sweet potato and chickpeas before adding the cold vegetables and sauce.

    Storage and Reheating

    Allow the cooked sweet potatoes and chickpeas to cool before placing them in airtight containers.

    Store the cooked components, fresh vegetable topping, and tahini sauce separately in the refrigerator. Separating everything helps protect the contrasting textures and prevents the potatoes from becoming soggy.

    Cooked leftovers should generally be refrigerated promptly and used within three to four days, following USDA leftovers guidance.

    Reheat the sweet potatoes in the microwave or in a 350°F oven until hot. Warm the chickpeas separately in a skillet, microwave, air fryer, or oven.

    The tahini sauce may thicken in the refrigerator. Stir in a teaspoon or two of cold water before serving to restore its smooth, drizzleable consistency.

    Add the fresh vegetables and sauce only after the potatoes have been reheated.

    Can You Freeze Stuffed Sweet Potatoes?

    The roasted sweet potatoes can be frozen, but it is best to freeze them without the fresh vegetables and tahini sauce.

    Let the potatoes cool completely, wrap them individually, and place them in a freezer-safe container.

    The roasted chickpeas can also be frozen, although they may lose some of their crisp texture after thawing.

    Cucumber and tomatoes should not be frozen for this recipe because their texture will become watery and soft. The fresh topping is quick enough to prepare while the potatoes reheat.

    Turn the Leftovers Into Something New

    If you have leftover chickpeas and toppings but no sweet potatoes, you still have the foundation for another meal.

    Add everything to a bowl of quinoa, brown rice, farro, or mixed greens. Drizzle the bowl with tahini sauce and finish it with fresh lemon.

    You can also tuck the chickpeas and vegetables into a whole-grain pita or wrap.

    Leftover sweet potato can be mashed and spread inside a wrap, served with eggs, added to a grain bowl, or stirred into soup.

    Using the components in different ways keeps meal preparation from feeling repetitive.

    A Colorful, Satisfying Plant-Forward Dinner

    Mediterranean Chickpea Stuffed Sweet Potatoes prove that a healthy dinner does not need to be plain, complicated, or built around meat.

    The roasted sweet potatoes provide a warm and comforting foundation. Seasoned chickpeas add substance and savory flavor. Cucumbers, tomatoes, herbs, and onions bring freshness, while the lemon-tahini sauce makes every bite creamy and satisfying.

    It is a meal filled with contrasting colors, temperatures, textures, and flavors.

    Better yet, the recipe can change with whatever you have available. Add greens, replace the chickpeas, include grilled chicken, make the sauce spicy, or set out several toppings and allow everyone to build their own potato.

    Sometimes the most enjoyable healthy meals begin with simple ingredients prepared thoughtfully.

    Roast the potatoes until tender, season the chickpeas generously, keep the vegetables fresh, and do not be shy with that creamy lemon-tahini drizzle.

    Which topping would you add to your Mediterranean Chickpea Stuffed Sweet Potato—feta, olives, avocado, hot sauce, or something else?

  • Recipe of the Day: Sausage, Apple, and Sage Stuffed Acorn Squash

    Advertisements

    When the weather begins to cool and you start craving something warm, hearty, and comforting, stuffed acorn squash is a wonderful meal to bring to the table. It has everything you could want in a seasonal dinner: tender roasted squash, savory sausage, sweet apples, fragrant herbs, nutty wild rice, tart cranberries, crunchy pecans, and a light layer of Parmesan cheese.

    Today’s Recipe of the Day: Sausage, Apple, and Sage Stuffed Acorn Squash brings those ingredients together in an impressive meal that is easier to prepare than it looks.

    Each roasted acorn squash half becomes its own edible serving bowl. The golden squash is soft and slightly sweet, providing the perfect contrast to the savory sausage filling. Apples and dried cranberries add small bursts of sweetness, while sage and thyme give the dish its familiar autumn flavor.

    This recipe is substantial enough to serve as a complete dinner, yet attractive enough for a holiday gathering or special family meal. It can also be partially prepared ahead of time, customized with different proteins, and adapted for vegetarian or gluten-free diets.

    What Makes This Stuffed Acorn Squash Special?

    Many comforting dinners rely on pasta, bread, or potatoes as their foundation. This recipe uses roasted acorn squash instead, creating a meal that feels familiar while offering something different.

    Roasting the squash brings out its natural sweetness and gives the edges a lightly caramelized flavor. That sweetness works especially well with Italian sausage, tart apples, dried cranberries, and earthy herbs.

    The filling offers several textures in every bite:

    • Tender roasted squash
    • Savory browned sausage
    • Soft wild rice
    • Crisp-tender apples and celery
    • Chewy dried cranberries
    • Crunchy toasted pecans
    • Melted Parmesan cheese

    It is also a beautiful dish to serve. The deep green squash skin frames the golden-orange flesh, while the colorful filling rises above the center. You do not need complicated garnishes or advanced cooking techniques to create a dinner that looks special.

    Recipe Overview

    • Preparation time: Approximately 25 minutes
    • Roasting and cooking time: Approximately 50 minutes
    • Total time: About 1 hour and 15 minutes
    • Servings: 4
    • Serving size: One stuffed squash half

    Ingredients

    For the Acorn Squash

    • 2 medium acorn squash
    • 1 tablespoon olive oil
    • ½ teaspoon salt
    • ¼ teaspoon freshly ground black pepper

    For the Sausage, Apple, and Sage Filling

    • 12 ounces mild Italian sausage, casings removed
    • 1 tablespoon butter or olive oil, if needed
    • 1 small yellow onion, finely diced
    • 2 celery stalks, finely diced
    • 1 medium firm apple, cored and diced
    • 2 cloves garlic, minced
    • 1 teaspoon finely chopped fresh sage or ½ teaspoon dried sage
    • ½ teaspoon dried thyme
    • ¼ teaspoon black pepper
    • 1½ cups cooked wild rice blend
    • ⅓ cup dried cranberries
    • ⅓ cup chopped pecans
    • ½ cup reduced-sodium chicken broth
    • ⅓ cup grated Parmesan cheese, divided
    • 2 tablespoons chopped fresh parsley

    Optional Garnishes

    • Fresh sage leaves
    • Additional chopped parsley
    • Extra grated Parmesan
    • Chopped toasted pecans
    • Freshly ground black pepper

    Choosing and Preparing Acorn Squash

    Look for medium acorn squash that feel heavy for their size. The skin should be firm and primarily dark green, although small orange patches are normal. Avoid squash with soft areas, deep cuts, or signs of mold.

    Try to select two squash that are approximately the same size. Similar-sized squash are more likely to finish roasting at the same time.

    Acorn squash can be difficult to cut because of its ridged shape and firm flesh. Place the squash on a stable cutting board and use a large, sharp chef’s knife. Cut each squash lengthwise from the stem end to the pointed bottom.

    If the squash is especially difficult to cut, pierce it several times with a fork and microwave it for approximately two minutes. This can soften the exterior just enough to make cutting easier. Let it cool briefly before handling.

    Use a spoon to scrape out the seeds and stringy fibers. You can discard the seeds or clean and roast them separately for a crunchy snack.

    How to Make Sausage, Apple, and Sage Stuffed Acorn Squash

    Step 1: Preheat the Oven

    Preheat your oven to 400°F.

    Line a rimmed baking sheet with parchment paper or aluminum foil. The lined pan will catch any juices released by the squash and make cleanup easier.

    Step 2: Season the Squash

    Brush the cut sides and hollow centers of the acorn squash with olive oil. Sprinkle them evenly with salt and black pepper.

    Place the squash halves cut-side down on the prepared baking sheet.

    Roasting them with the cut sides against the pan encourages caramelization while trapping enough steam to soften the flesh.

    Step 3: Roast Until Tender

    Roast the squash for approximately 30 to 35 minutes.

    Cooking time will depend on the size and thickness of your squash. The squash is ready for stuffing when a fork or small knife easily slides into the flesh.

    Avoid roasting it until it begins collapsing. It should be tender but still sturdy enough to hold the filling.

    Step 4: Brown the Sausage

    While the squash is roasting, heat a large skillet over medium-high heat.

    Add the Italian sausage and break it into small pieces with a wooden spoon or spatula. Cook for approximately 6 to 8 minutes, stirring occasionally, until the sausage is browned and completely cooked.

    Transfer the browned sausage to a plate. Leave approximately one tablespoon of drippings in the skillet for cooking the vegetables. If the sausage is especially lean and the skillet appears dry, add one tablespoon of butter or olive oil.

    If you are using pork sausage, cook it to a safe internal temperature of 160°F. Chicken or turkey sausage should reach 165°F.

    Step 5: Cook the Onion and Celery

    Reduce the heat to medium.

    Add the diced onion and celery to the skillet. Cook for approximately 4 to 5 minutes, stirring occasionally, until the onion becomes translucent and the celery begins to soften.

    The vegetables should still have a little texture. They will continue cooking after the squash is stuffed and returned to the oven.

    Step 6: Add the Apple

    Add the diced apple to the skillet.

    Cook for approximately 3 minutes, stirring occasionally. The goal is to soften the apple slightly without turning it into applesauce.

    A small amount of firmness helps the apple provide a pleasant contrast to the soft squash and rice.

    Step 7: Add the Garlic and Herbs

    Stir in the minced garlic, sage, thyme, and black pepper.

    Cook for approximately 30 to 60 seconds, stirring constantly. Garlic and herbs can burn quickly, so only cook them until they become fragrant.

    The combination of apple, sage, and sausage should already make the kitchen smell incredible.

    Step 8: Complete the Filling

    Return the browned sausage to the skillet.

    Add the cooked wild rice, dried cranberries, chopped pecans, chicken broth, half of the Parmesan cheese, and chopped parsley.

    Stir until everything is evenly combined. Cook for another 2 to 3 minutes, allowing the rice to absorb some of the broth.

    Taste the filling before adding more salt. Italian sausage, chicken broth, and Parmesan can all contain salt, so additional seasoning may not be necessary.

    Remove the skillet from the heat.

    Step 9: Prepare the Roasted Squash for Filling

    Remove the roasted squash from the oven and carefully turn each half cut-side up.

    If the cavities are small, scoop out one or two spoonfuls of cooked squash. Leave a thick border around the skin so each half remains sturdy.

    Stir the removed squash into the sausage mixture. This reduces waste and adds even more creamy squash flavor to the filling.

    Step 10: Fill the Squash

    Divide the sausage mixture evenly among the four squash halves.

    Gently press the filling into each cavity before mounding more on top. Depending on the size of your squash, you may have a small amount of filling left over. Extra filling can be baked in a small oven-safe dish or saved for lunch.

    Sprinkle the remaining Parmesan cheese over the stuffed squash.

    Step 11: Finish Baking

    Return the stuffed squash to the oven.

    Bake for approximately 10 to 15 minutes, or until the filling is hot and the Parmesan has melted.

    For a more golden topping, switch the oven to broil during the final one or two minutes. Watch the squash carefully because cheese and pecans can brown quickly under the broiler.

    Step 12: Garnish and Serve

    Remove the squash from the oven and let it rest for approximately five minutes.

    Garnish with chopped parsley, fresh sage, extra Parmesan, toasted pecans, or freshly ground black pepper.

    Serve one stuffed squash half per person.

    The Best Apples for Stuffed Acorn Squash

    A firm apple works best because it holds its shape during cooking. Apples that become soft too quickly can disappear into the filling.

    Excellent choices include:

    • Honeycrisp
    • Granny Smith
    • Pink Lady
    • Braeburn
    • Fuji
    • Gala

    Granny Smith apples provide a tart flavor that balances the sweetness of the squash and cranberries. Honeycrisp and Pink Lady apples are slightly sweeter but still remain firm when cooked.

    There is no need to peel the apple unless you prefer it that way. The peel adds color and usually softens enough during cooking to blend comfortably into the filling.

    Cut the apple into small, even pieces so it cooks at the same rate as the celery and onion.

    Tips for the Best Stuffed Acorn Squash

    Do Not Overcook the Squash Before Stuffing

    The squash needs to be tender, but it should not be falling apart. Remember that it will return to the oven after being filled.

    Begin checking it at approximately 30 minutes.

    Use Cooked Rice

    The wild rice must be completely cooked before it is added to the filling. Uncooked rice will not have enough time or liquid to cook inside the squash.

    You can prepare the rice earlier in the day or use leftover rice.

    Brown the Sausage Properly

    Allow the sausage to sit against the hot skillet for short periods instead of constantly stirring it. This helps create browned edges and deeper savory flavor.

    Cut Everything into Small Pieces

    Finely diced onion, celery, and apple are easier to eat from the squash. Smaller pieces also distribute their flavors more evenly throughout the filling.

    Taste Before Adding Salt

    Sausage, broth, and Parmesan all contribute salt. Taste the finished filling and only add more if it is truly needed.

    Toast the Pecans

    For stronger flavor and better crunch, toast the pecans in a dry skillet for approximately three minutes before adding them. Stir frequently and remove them as soon as they become fragrant.

    Substitutions and Variations

    One of the best qualities of this stuffed acorn squash recipe is its flexibility. The basic combination can be changed according to your preferences or ingredients.

    Use Turkey or Chicken Sausage

    Replace the pork sausage with turkey or chicken sausage for a lighter option.

    Sweet Italian poultry sausage works especially well with apples, cranberries, and sage. Make sure poultry sausage reaches an internal temperature of 165°F.

    Make It Spicy

    Use hot Italian sausage instead of mild sausage.

    You can also add ¼ teaspoon crushed red pepper flakes when adding the garlic and herbs.

    The heat creates a delicious contrast with the sweet squash and apples.

    Make It Vegetarian

    Leave out the sausage and increase the wild rice to approximately 2½ cups.

    Add sautéed mushrooms for a deeper savory flavor. Chopped walnuts, lentils, chickpeas, or white beans can also make the filling more substantial.

    Use vegetable broth instead of chicken broth.

    Try Ground Turkey

    Season one pound of ground turkey with fennel seeds, garlic powder, paprika, sage, salt, and black pepper. Brown it in the skillet and use it in place of sausage.

    Replace the Wild Rice

    Wild rice has a pleasantly chewy texture, but it is not the only option.

    Try:

    • Brown rice
    • White rice
    • Quinoa
    • Farro
    • Barley
    • Couscous
    • A rice and quinoa blend

    Farro, barley, and regular couscous contain gluten, so choose rice or quinoa when preparing a gluten-free version.

    Change the Dried Fruit

    Replace the dried cranberries with:

    • Chopped dried cherries
    • Golden raisins
    • Regular raisins
    • Chopped dried apricots
    • Chopped dates

    Use dried fruit moderately so it complements the savory filling without making it excessively sweet.

    Use a Different Cheese

    Parmesan adds salty, nutty flavor without overwhelming the other ingredients.

    You could also use:

    • Sharp white cheddar
    • Gruyère
    • Fontina
    • Crumbled goat cheese
    • Feta
    • Smoked Gouda

    Goat cheese creates an especially creamy and tangy filling, while Gruyère gives the squash a richer holiday-dinner feeling.

    Make It Nut-Free

    Simply leave out the pecans.

    For additional texture, try roasted pumpkin seeds or sunflower seeds if those fit your dietary needs. You can also add extra celery or rice.

    Add Leafy Greens

    Stir two cups of chopped spinach or kale into the skillet after the apples have softened.

    Cook until the greens wilt before adding the rice and remaining filling ingredients.

    What to Serve With Stuffed Acorn Squash

    Sausage, Apple, and Sage Stuffed Acorn Squash can easily serve as a complete meal. It includes protein, vegetables, fruit, and grains in one attractive package.

    If you would like to add a side dish, consider something fresh and relatively simple.

    Excellent choices include:

    • Mixed green salad with apple-cider vinaigrette
    • Roasted Brussels sprouts
    • Garlic green beans
    • Steamed broccoli
    • Maple-glazed carrots
    • Roasted asparagus
    • Warm dinner rolls
    • Crusty bread
    • Creamy cauliflower soup
    • Simple tomato soup

    For a holiday dinner, serve the squash alongside roasted turkey, ham, or pork tenderloin. Smaller squash halves can also work as substantial side dishes.

    Can You Eat Acorn Squash Skin?

    Acorn squash skin is edible, especially after it has been thoroughly roasted. However, eating it is completely optional.

    Some people enjoy the tender roasted skin, while others prefer to use a fork to scoop the flesh and filling away from it. The skin still serves an important purpose even if you do not eat it because it creates a natural bowl that holds everything together.

    Wash and scrub the squash thoroughly before cutting it, particularly if you plan to eat the skin.

    Make-Ahead Instructions

    Several parts of this recipe can be prepared ahead of time.

    Cook the wild rice up to three days in advance and refrigerate it in an airtight container.

    The sausage filling can also be prepared one day ahead. Let it cool completely before covering and refrigerating it. When you are ready to assemble the meal, warm the filling slightly so you are not placing an extremely cold mixture into hot roasted squash.

    You can roast the squash earlier in the day, let it cool, and refrigerate it. Fill the squash shortly before dinner and bake it at 375°F until everything is thoroughly heated. Because the ingredients will be cold, the final baking time may increase to approximately 20 to 25 minutes.

    For the best presentation, add the Parmesan immediately before baking.

    How to Store Leftovers

    Place leftover stuffed squash in an airtight container and refrigerate it within two hours of serving.

    Properly stored leftovers can generally be enjoyed within three to four days.

    If the squash halves are too large for your containers, transfer the filling and roasted squash flesh into smaller containers. It may no longer have the same presentation, but it will still taste delicious.

    How to Reheat Stuffed Acorn Squash

    For the best texture, reheat the stuffed squash in the oven.

    Place it in a baking dish, cover loosely with aluminum foil, and warm at 350°F for approximately 20 minutes. Remove the foil during the final few minutes if you want the top to become lightly crisp again.

    Individual portions can also be reheated in the microwave. Heat in short intervals until the center is hot, checking between each interval to avoid drying out the filling.

    Adding a tablespoon of broth before reheating can help restore moisture.

    Can You Freeze Stuffed Acorn Squash?

    Stuffed acorn squash can be frozen, although the squash may become softer after thawing.

    Let the cooked squash cool completely. Wrap each half tightly or place it in a freezer-safe container. Freeze for up to approximately two months.

    Thaw frozen stuffed squash overnight in the refrigerator before reheating it in the oven.

    If you are planning specifically for freezer meals, another option is to freeze only the sausage and rice filling. Prepare freshly roasted squash when you are ready to serve it. This provides a firmer texture and fresher presentation.

    A Warm and Satisfying Seasonal Dinner

    Sausage, Apple, and Sage Stuffed Acorn Squash transforms simple seasonal ingredients into a comforting dinner that looks just as good as it tastes.

    The roasted squash provides a soft, naturally sweet foundation. Savory sausage makes the filling hearty and satisfying. Apples and cranberries bring bright sweetness, while celery, onion, garlic, sage, and thyme create layers of comforting flavor. Wild rice adds substance, pecans contribute crunch, and Parmesan finishes everything with a salty, nutty touch.

    It is the kind of recipe that can work for an ordinary family dinner, a relaxed autumn weekend, Thanksgiving, or any occasion when you want to serve something warm and memorable.

    Best of all, every person receives an individual stuffed squash half. There is no complicated plating required and fewer serving dishes to clean afterward.

    Whether you follow the recipe exactly, substitute turkey sausage, add leafy greens, change the grain, or prepare a vegetarian version, the basic idea remains delicious: tender roasted squash filled with a colorful mixture of savory, sweet, creamy, and crunchy ingredients.

    Would you make your stuffed acorn squash with Italian sausage, turkey sausage, or a hearty vegetarian filling?

Exit mobile version