Category: Recipes

  • Dessert of the Day: No Bake Oreo Truffles

    Advertisements

    Some desserts are impressive because they require hours of careful baking, complicated techniques, and a long list of ingredients. Others prove that something incredibly simple can be every bit as delicious.

    Today’s Dessert of the Day: No Bake Oreo Truffles definitely belongs in the second category.

    Rich, creamy, chocolatey, and perfectly bite-sized, Oreo truffles transform one of America’s most recognizable sandwich cookies into a decadent homemade candy-style dessert. The center is made by combining finely crushed Oreo cookies with softened cream cheese, while the outside gets covered in smooth melted chocolate.

    The result is a dessert with several delicious textures in every bite: a firm chocolate shell on the outside followed by a soft, creamy cookies-and-cream center.

    And perhaps the best part?

    You don’t even have to turn on the oven.

    The recipe that inspired today’s dessert comes from Fifteen Spatulas, where the truffles are made with only a handful of ingredients and can be customized with different chocolates, sprinkles, cookie crumbs, and other decorations.

    Whether you’re preparing something sweet for your family, putting together a holiday dessert platter, bringing dessert to a party, or simply looking for an excuse to eat Oreos, these little chocolate treats are worth trying.


    What Are Oreo Truffles?

    Oreo truffles are small dessert balls made primarily from crushed Oreo cookies and cream cheese.

    The two ingredients are blended together until they create a thick mixture that can be shaped into balls. Those balls are chilled briefly and then dipped into melted chocolate.

    Once the chocolate hardens, you have a bite-sized dessert that resembles a traditional chocolate truffle on the outside but contains a creamy Oreo filling on the inside.

    The concept is wonderfully simple.

    Oreos + cream cheese + chocolate = one seriously delicious dessert.

    The original Fifteen Spatulas recipe makes approximately 15 truffles, with about 15 minutes of preparation and another 15 minutes of chilling time.

    That means you can potentially have an impressive homemade dessert ready in around half an hour.


    Why You’ll Love No Bake Oreo Truffles

    There are plenty of reasons Oreo truffles have become such a popular homemade treat.

    They’re Incredibly Easy

    You don’t need advanced baking skills.

    There are no cake layers to level, no dough to proof, no complicated frosting techniques, and no worrying about whether something has been baked long enough.

    If you can crush cookies, mix ingredients, roll the mixture into balls, and dip them into chocolate, you can make Oreo truffles.

    You Only Need a Few Ingredients

    The basic recipe requires Oreos, cream cheese, and chocolate.

    Everything else is optional decoration.

    That makes Oreo truffles an excellent dessert when you want something impressive without purchasing a cart full of ingredients.

    No Oven Required

    No-bake desserts are particularly convenient when it’s hot outside or when your oven is already occupied preparing dinner.

    They’re also great when you simply don’t feel like baking.

    They’re Easy to Customize

    You can change the chocolate coating, decorations, toppings, Oreo flavors, and presentation.

    One basic recipe can become dozens of different-looking desserts.

    They’re Perfectly Portion-Sized

    Instead of slicing a large cake or pie, guests can simply grab an individual truffle.

    They’re perfect for dessert tables, potlucks, birthday parties, holiday gatherings, and cookie exchanges.


    Ingredients You’ll Need

    One of the greatest things about these truffles is the short ingredient list.

    For the original version, you’ll need approximately:

    • 25 original Oreo cookies
    • 4 ounces softened cream cheese
    • ½ cup chopped white chocolate
    • ½ cup chopped dark chocolate
    • Assorted sprinkles, optional

    The source recipe notes that you can use different chocolates for dipping, including white, milk, dark, or ruby chocolate.

    That flexibility makes it easy to customize your batch.


    Why Regular Oreos Work Best

    When standing in the cookie aisle, you might be tempted to grab Double Stuf Oreos.

    More filling sounds better, right?

    Not necessarily for truffles.

    The original recipe recommends avoiding Double Stuf because the additional creme filling can make the truffle mixture too soft. Regular Oreos provide a better cookie-to-filling balance for creating a mixture that holds its shape.

    Save the Double Stuf cookies for snacking and stick with regular Oreos for this recipe.


    Step-by-Step: How to Make No Bake Oreo Truffles

    Step 1: Crush the Oreos

    Place approximately 25 Oreo cookies into a food processor.

    Process the cookies until they’ve been reduced to very fine crumbs.

    You don’t want large pieces of cookie remaining.

    The finer the crumbs, the smoother and more consistent your finished truffle filling will be.

    Keep processing until the cookie mixture becomes extremely fine and begins clumping together.


    Step 2: Add the Cream Cheese

    Add 4 ounces of softened cream cheese to your crushed Oreos.

    Softened cream cheese is important because it blends much more easily with the cookie crumbs.

    Process everything together.

    Eventually, the mixture should begin collecting together into a large clump.

    That’s exactly what you want.

    The Oreo crumbs and cream cheese have now transformed into your truffle filling.


    Step 3: Portion the Mixture

    A cookie scoop is especially helpful here.

    Scoop approximately equal amounts of the Oreo mixture.

    The original recipe suggests making approximately 1-inch truffle balls, which creates a convenient bite-sized serving.

    Using a scoop also makes your finished truffles look more uniform.

    Don’t have one?

    No problem.

    You can simply use a spoon and estimate each portion.


    Step 4: Roll Them Into Balls

    Place each portion between your palms and gently roll it into a smooth ball.

    Don’t worry if they’re not absolutely perfect.

    Homemade desserts don’t need to look like they came off an assembly line.

    Place each finished ball onto a baking sheet or tray lined with parchment paper.


    Don’t Skip the Chilling Step

    Once you’ve rolled all the Oreo balls, place them in the refrigerator for approximately 15 minutes.

    This step might seem unnecessary, but it makes the chocolate-dipping process much easier.

    The colder filling becomes slightly firmer and holds together better when submerged in warm melted chocolate.

    Use those 15 minutes to prepare your chocolate and decorations.


    Choosing Your Chocolate

    Here’s where you can really personalize your Oreo truffles.

    Dark Chocolate

    Dark or bittersweet chocolate is an excellent choice because Oreo filling is already quite sweet.

    The slight bitterness of darker chocolate creates contrast and keeps the dessert from becoming overwhelmingly sweet.

    Milk Chocolate

    Milk chocolate is ideal if you’re looking for a classic, creamy chocolate flavor.

    This version is definitely for serious chocolate lovers.

    White Chocolate

    White chocolate creates perhaps the most dramatic visual contrast.

    Imagine a bright white truffle sprinkled with dark Oreo crumbs.

    It’s a beautiful cookies-and-cream presentation.

    Mix and Match

    Can’t decide?

    Don’t.

    Make several varieties.

    Dip some truffles in dark chocolate, some in milk chocolate, and others in white chocolate.

    Arrange them together on a platter and suddenly your simple three-ingredient dessert looks like an elaborate chocolate collection.


    How to Melt the Chocolate

    Chocolate can burn surprisingly quickly, so don’t rush this step.

    The source recipe recommends microwaving the chocolate in approximately 30-second intervals, stirring between intervals.

    Stop heating when only a few small pieces remain and allow the residual heat to finish melting them as you stir.

    You can also use a double boiler if that’s your preferred method.

    The goal is smooth, fluid chocolate that’s easy to use for dipping.


    The Fun Part: Dipping the Truffles

    Take your chilled Oreo balls from the refrigerator.

    Drop one into your melted chocolate.

    Turn it gently until the entire ball is covered.

    Lift it out using a fork and allow the excess chocolate to drip back into the bowl.

    Place the coated truffle back onto your parchment-lined tray.

    Continue until you’ve dipped the entire batch.

    Don’t worry if the first couple aren’t beautiful.

    Chocolate dipping becomes easier as you go.


    Decorating Your Oreo Truffles

    Before the chocolate completely hardens, add your decorations.

    This is where you can transform a simple Oreo truffle into something that looks like it came from a specialty candy shop.

    Crushed Oreos

    Crush a few additional cookies and sprinkle the crumbs over the freshly dipped chocolate.

    This might be the perfect topping because people immediately know what’s hiding inside.

    Chocolate Drizzle

    Allow your first chocolate coating to harden.

    Then melt a contrasting chocolate and drizzle thin lines across the top.

    Try:

    White chocolate over dark chocolate

    or

    Dark chocolate over white chocolate

    The contrasting colors create an elegant appearance with very little additional work.

    Sprinkles

    Sprinkles make these perfect for practically any celebration.

    Choose colors based on the occasion.

    Crushed Candy Canes

    During Christmas, crushed peppermint candy canes add color, crunch, and a festive peppermint flavor.

    Crushed Oreos, sprinkles, candy canes, and additional chocolate drizzle are among the topping ideas suggested by the original recipe.


    Turn Oreo Truffles Into a Holiday Tradition

    One recipe can easily become a year-round dessert simply by changing the decorations.

    Valentine’s Day

    Use red, pink, and white sprinkles.

    Try white chocolate with a pink or red drizzle.

    They could make an easy homemade Valentine’s gift.

    Easter

    Use pastel sprinkles or pastel-colored decorations.

    Arrange the truffles in a basket alongside other Easter candy.

    Fourth of July

    Red, white, and blue sprinkles instantly transform them into a patriotic party dessert.

    Halloween

    Use orange, purple, green, and black decorations.

    White chocolate truffles can even be decorated to resemble little ghosts.

    Thanksgiving

    Try warm autumn-colored sprinkles or a chocolate-and-caramel presentation.

    Christmas

    This might be the ultimate season for Oreo truffles.

    Decorate them with red and green sprinkles, crushed peppermint, white chocolate drizzle, or festive candy decorations.

    Arrange several varieties together inside a holiday tin and you have a homemade edible gift.


    Birthday Oreo Truffles

    Forget waiting for a holiday.

    Oreo truffles make fantastic birthday treats.

    Dip them in chocolate and cover them with colorful birthday sprinkles.

    You could even coordinate the sprinkle colors with the birthday party theme.

    For children’s parties, let kids decorate their own truffles.

    Set out small bowls containing:

    • Sprinkles
    • Oreo crumbs
    • Mini chocolate chips
    • Colored sugar
    • Chocolate drizzle
    • Crushed cookies

    Then let everyone create their own masterpiece.


    Oreo Truffle Flavor Variations

    The original Oreo version is hard to beat, but once you understand the basic concept, you can experiment.

    Mint Oreo Truffles

    Use mint-flavored Oreos and dark chocolate.

    This combination would be especially good around Christmas or St. Patrick’s Day.

    Golden Oreo Truffles

    Swap chocolate Oreos for Golden Oreos and coat them with white chocolate.

    You’ll get a completely different vanilla-forward dessert.

    Peanut Butter Oreo Truffles

    Use peanut butter-flavored sandwich cookies when available or incorporate complementary peanut butter decorations.

    Chocolate and peanut butter rarely disappoint.

    Birthday Cake Oreo Truffles

    Use a birthday-inspired Oreo flavor and coat the finished truffles in white chocolate and rainbow sprinkles.

    Extra Chocolate Oreo Truffles

    Chocolate cookies.

    Chocolate filling.

    Chocolate coating.

    Chocolate drizzle.

    Sometimes there’s simply no reason to hold back.


    Create an Oreo Truffle Dessert Board

    If you’re serving a crowd, don’t stop at one variety.

    Create an entire Oreo truffle dessert board.

    Arrange groups of different truffles around a large platter:

    Dark Chocolate Oreo Truffles

    White Chocolate Oreo Truffles

    Milk Chocolate Oreo Truffles

    Oreo Crumb Truffles

    Sprinkle-Covered Truffles

    Chocolate Drizzle Truffles

    Fill empty spaces with whole Oreos, strawberries, pretzels, marshmallows, or other bite-sized sweets.

    It’s an easy way to turn a simple recipe into the centerpiece of your dessert table.


    Perfect for Parties and Gatherings

    One reason Oreo truffles work so well at parties is their size.

    There’s no slicing.

    There’s no serving.

    There’s very little mess.

    Guests simply grab one and enjoy.

    They’re especially good for:

    • Birthday parties
    • Holiday celebrations
    • Potlucks
    • Office parties
    • Baby showers
    • Bridal showers
    • Graduation celebrations
    • Game-day gatherings
    • Family reunions
    • Cookie exchanges
    • Dessert buffets
    • Movie nights

    The source recipe also notes that these truffles travel well, making them convenient for gatherings away from home.


    Oreo Truffles Make Wonderful Homemade Gifts

    Food gifts don’t have to be complicated.

    Place several Oreo truffles into a decorative box, small tin, or treat container.

    Separate layers with parchment or wax paper.

    Tie the package with ribbon and add a small handwritten card.

    Suddenly you’ve created a thoughtful homemade gift that looks like something from a chocolate shop.

    They’re especially nice for:

    Teachers.

    Neighbors.

    Coworkers.

    Friends.

    Hosts.

    Family members.

    Holiday gift exchanges.

    Sometimes a homemade treat says more than something grabbed from a store shelf.


    How to Serve Oreo Truffles

    There are two particularly good ways to enjoy these treats.

    Straight From the Refrigerator

    Cold Oreo truffles have a firmer center and crisp chocolate shell.

    They’re especially satisfying if you enjoy chilled chocolate desserts.

    Closer to Room Temperature

    Allow them to sit out briefly and the center becomes softer and creamier.

    The source recipe suggests taking refrigerated truffles out about 30 to 60 minutes before eating if you prefer them less chilled. Because they contain cream cheese, however, they shouldn’t remain at room temperature for extended periods.


    How to Store No Bake Oreo Truffles

    Because Oreo truffles contain cream cheese, refrigeration is important.

    Place them inside an airtight container.

    If you’re stacking multiple layers, place parchment or wax paper between the layers.

    According to the original recipe, Oreo truffles can be refrigerated for up to one week.

    That makes them an excellent make-ahead dessert.

    Prepare them a day or two before your event and you have one less thing to worry about on party day.


    Can You Freeze Oreo Truffles?

    Yes.

    This is another reason they’re such a convenient dessert.

    The original recipe says Oreo truffles can be stored in an airtight container in the freezer for up to two months. They can then be thawed overnight in the refrigerator or for roughly an hour on the counter before serving.

    You could make a large batch and keep some tucked away for future dessert emergencies.

    And yes, dessert emergencies are absolutely real.


    Tips for Making the Best Oreo Truffles

    Use Softened Cream Cheese

    Cold cream cheese won’t blend as smoothly.

    Allow it to soften first.

    Crush the Cookies Thoroughly

    You want extremely fine Oreo crumbs rather than chunks.

    The smoother your cookie mixture, the smoother your truffle filling.

    Keep the Truffles Similar in Size

    A cookie scoop makes this much easier.

    Uniform truffles also look better when arranged together.

    Chill Before Dipping

    Those 15 minutes in the refrigerator make a difference.

    Cold truffles are easier to handle.

    Don’t Overheat Your Chocolate

    Use short microwave intervals and stir frequently.

    Chocolate can go from perfectly melted to scorched very quickly.

    Work Quickly With Decorations

    If you’re adding sprinkles or cookie crumbs, do so while the coating is still wet enough for the decorations to stick.

    Make Several Chocolate Varieties

    Different coatings make one batch look much more impressive.


    Why Bite-Sized Desserts Are So Much Fun

    There’s something irresistible about miniature desserts.

    Maybe it’s because you don’t have to commit to an enormous slice of cake.

    Maybe it’s because having “just one more” seems completely reasonable.

    Or maybe it’s simply because bite-sized desserts are fun.

    Oreo truffles fit perfectly into that category.

    They’re small enough to enjoy in a couple of bites but rich enough to satisfy a serious dessert craving.


    A Dessert Kids Can Help Make

    Oreo truffles can also be a fun family kitchen activity.

    Adults can handle melting the chocolate while children help with safer tasks such as rolling the Oreo mixture or adding decorations.

    Give everyone their own bowl of sprinkles and let creativity take over.

    The finished truffles don’t need to look identical.

    In fact, seeing all the different designs might be part of the fun.


    Why This Dessert Works

    Great desserts usually depend on balance.

    Oreo truffles have plenty of it.

    You get the recognizable cocoa flavor of Oreo cookies.

    Cream cheese adds richness and creates that soft, almost cheesecake-like interior.

    Chocolate creates a firm outer shell.

    And optional toppings introduce crunch, color, additional flavor, and visual appeal.

    Each component is simple.

    Together, they’re something special.


    No Baking, No Complicated Techniques, No Problem

    Not every homemade dessert needs to involve measuring flour, cracking eggs, preheating an oven, watching timers, and hoping everything rises correctly.

    Sometimes you want dessert without all the work.

    That’s exactly where No Bake Oreo Truffles shine.

    A package of cookies.

    Some cream cheese.

    A bowl of melted chocolate.

    A little creativity.

    That’s really all it takes.


    Dessert of the Day: No Bake Oreo Truffles

    🍪 Main Flavor: Cookies and cream

    🍫 Coating: White, milk, dark, or ruby chocolate

    🧁 Dessert Type: No-bake bite-sized treat

    ⏱️ Total Time: About 30 minutes, including chilling

    🎉 Perfect For: Birthdays, holidays, parties, gifting, potlucks, and family dessert nights

    ❄️ Storage: Refrigerate in an airtight container

    Best Feature: An incredibly simple dessert that looks far more impressive than the effort required


    Final Thoughts

    Today’s Dessert of the Day: No Bake Oreo Truffles is proof that sometimes the simplest recipes deliver the biggest smiles.

    There’s no oven.

    There’s no complicated ingredient list.

    There’s no advanced baking technique.

    Instead, you’re taking a cookie people already love and transforming it into something even more decadent.

    Underneath that smooth chocolate shell is a rich, creamy Oreo center that delivers cookies-and-cream flavor in every bite.

    Make them with dark chocolate for something a little less sweet.

    Cover them with white chocolate and Oreo crumbs for a beautiful cookies-and-cream presentation.

    Decorate them with colorful sprinkles for birthdays.

    Add crushed peppermint for Christmas.

    Make several varieties and create an entire dessert platter.

    Or forget the special occasion entirely and make a batch because it’s Tuesday and Oreo truffles sound good.

    That’s reason enough.

    Sometimes dessert doesn’t need to be complicated.

    Sometimes all you need are Oreos, cream cheese, chocolate, and a little room in the refrigerator.

    And when the result looks this good and tastes this indulgent, it’s easy to understand why Oreo truffles have become such a beloved no-bake treat.

    If a tray of Oreo truffles was sitting in front of you right now, which would you grab first: dark chocolate, milk chocolate, white chocolate, or one covered in Oreo crumbs and sprinkles?

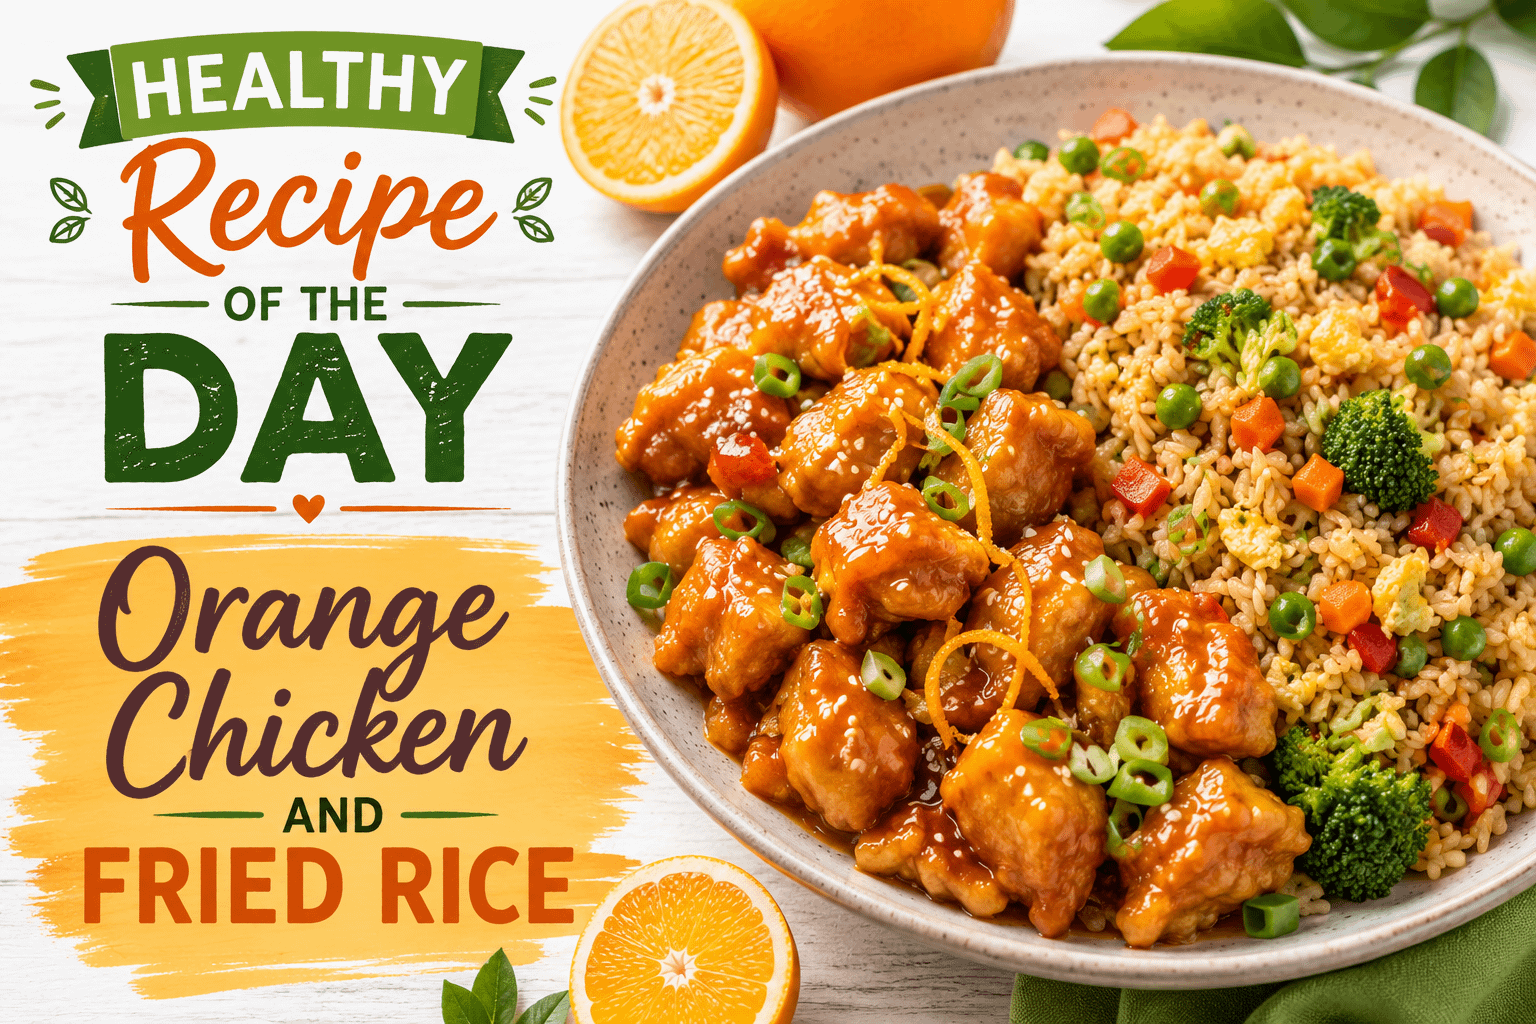
  • Healthy Recipe of the Day: Orange Chicken and Fried Rice

    Healthy Recipe of the Day: Orange Chicken and Fried Rice

    Advertisements

    There is something incredibly satisfying about a plate of sticky orange chicken served alongside hot, savory fried rice. The combination of sweet citrus, garlic, ginger, tender chicken, fluffy rice, vegetables, and scrambled egg delivers nearly everything you could want from a comfort-food dinner.

    Unfortunately, traditional takeout orange chicken can also come with a lot of breading, frying oil, sodium, and added sugar.

    That doesn’t mean orange chicken has to disappear from the menu when you’re trying to make healthier choices.

    Today’s Healthy Recipe of the Day: Orange Chicken and Fried Rice takes inspiration from the classic takeout combination and gives it a lighter homemade makeover. Instead of deep-frying battered chicken, we’re cooking lean chicken breast in a skillet and coating it in a fresh orange sauce made with real orange juice, orange zest, garlic, ginger, honey, and reduced-sodium soy sauce.

    Then we’re serving it alongside homemade vegetable fried rice filled with brown rice, eggs, peas, carrots, bell peppers, broccoli, and green onions.

    The result is a complete dinner that feels like a treat while still incorporating plenty of nutritious ingredients.

    Even better, you can have everything ready in around 30–40 minutes, making this an excellent option for busy weeknights.


    A Healthier Way to Enjoy a Takeout Favorite

    Healthy eating becomes much easier when you don’t feel like you’re constantly giving something up.

    Rather than looking at foods as completely “good” or “bad,” it can be more practical to ask a different question:

    How can I make this meal work better for me?

    Orange chicken is a perfect example.

    Instead of removing everything you enjoy about the dish, you can change the cooking method and ingredients.

    Deep-fried chicken becomes skillet-cooked chicken.

    A heavily sweetened sauce becomes a fresh orange sauce.

    Plain fried rice becomes vegetable-packed fried rice.

    Large restaurant portions become portions you control yourself.

    These changes allow you to keep the flavors that made you want orange chicken in the first place.


    Why You’ll Love This Healthy Orange Chicken and Fried Rice

    There are plenty of reasons this recipe deserves a spot in your regular dinner rotation.

    It’s Packed With Flavor

    Fresh orange juice, orange zest, garlic, ginger, soy sauce, sesame oil, and honey create a sauce that delivers sweetness, acidity, saltiness, and plenty of citrus flavor.

    No Deep Fryer Required

    The chicken is cooked in a skillet with a small amount of oil instead of being battered and submerged in frying oil.

    Plenty of Protein

    Chicken breast and eggs provide protein that helps make the meal satisfying.

    Vegetables Are Built Right In

    Peas, carrots, broccoli, bell peppers, and green onions turn ordinary fried rice into a colorful vegetable-packed side.

    Easy to Customize

    You can adjust the vegetables, sweetness, spice level, rice, and protein based on what you have available.

    Family Friendly

    The sweet orange sauce makes this a good recipe for introducing additional vegetables to a family meal.

    Meal-Prep Friendly

    Both the chicken and fried rice can be prepared ahead of time and portioned into containers for future lunches or dinners.


    Ingredients

    For the Orange Chicken

    • 1 ½ pounds boneless, skinless chicken breasts
    • 1 tablespoon olive oil or avocado oil
    • ½ teaspoon garlic powder
    • ½ teaspoon onion powder
    • ½ teaspoon paprika
    • ¼ teaspoon black pepper
    • ¼ teaspoon salt
    • 2 green onions, thinly sliced
    • 1 teaspoon sesame seeds, optional

    Cut the chicken into approximately 1-inch pieces so they cook evenly.


    For the Homemade Orange Sauce

    • ¾ cup fresh orange juice
    • 1 tablespoon finely grated orange zest
    • 2 tablespoons low-sodium soy sauce
    • 1 ½ tablespoons honey
    • 1 tablespoon rice vinegar
    • 2 cloves garlic, minced
    • 1 teaspoon freshly grated ginger
    • ½ teaspoon sesame oil
    • ¼ teaspoon crushed red pepper flakes, optional
    • 1 tablespoon cornstarch
    • 2 tablespoons cold water

    The combination of orange juice and orange zest is important. Juice provides sweetness and acidity, while zest delivers a stronger citrus aroma and flavor.


    For the Vegetable Fried Rice

    • 3 cups cooked and chilled brown rice
    • 1 tablespoon olive oil or avocado oil
    • 2 large eggs, lightly beaten
    • 1 cup frozen peas and carrots
    • ½ cup diced red or yellow bell pepper
    • ½ cup finely chopped broccoli
    • 2 green onions, sliced
    • 2 tablespoons low-sodium soy sauce
    • 1 teaspoon sesame oil
    • ½ teaspoon garlic powder
    • ¼ teaspoon ground ginger, optional
    • Black pepper to taste

    Before You Start: Cook the Rice Ahead of Time

    One of the easiest ways to improve homemade fried rice is to start with cold cooked rice.

    Freshly cooked rice contains plenty of moisture. When immediately transferred into a hot skillet, it can become soft, sticky, or mushy.

    Chilled rice has had time to dry slightly and firm up.

    That allows the individual grains to separate more easily when they’re fried.

    If possible, cook your rice the night before and refrigerate it.

    Don’t have leftover rice?

    Cook your rice earlier in the day, spread it across a large baking sheet or shallow container so it cools quickly, and refrigerate it until you’re ready to make dinner.


    Step 1: Prepare the Chicken

    Pat the chicken dry with paper towels and cut it into bite-sized pieces.

    Place the chicken in a bowl.

    Season with:

    • Garlic powder
    • Onion powder
    • Paprika
    • Salt
    • Black pepper

    Toss everything together until the chicken is evenly seasoned.

    Patting away excess moisture helps the chicken brown more effectively in the skillet.


    Step 2: Make the Orange Sauce

    Before cooking your chicken, prepare the sauce so it’s ready when you need it.

    In a medium bowl, whisk together:

    • Fresh orange juice
    • Orange zest
    • Soy sauce
    • Honey
    • Rice vinegar
    • Garlic
    • Ginger
    • Sesame oil
    • Red pepper flakes

    Taste the sauce.

    Want it sweeter?

    Add another small drizzle of honey.

    Want more tang?

    Add a little additional rice vinegar.

    Want stronger orange flavor?

    Add another small amount of orange zest.

    In a separate bowl, whisk together the cornstarch and cold water until smooth.

    This creates a cornstarch slurry, which will thicken the sauce later.

    Don’t add the slurry to the orange mixture just yet.


    Step 3: Cook the Chicken

    Heat one tablespoon of olive or avocado oil in a large nonstick skillet over medium-high heat.

    Once the skillet is hot, add the chicken.

    Arrange the pieces in a single layer.

    Let them cook undisturbed for a couple of minutes before stirring. This gives the chicken time to develop some golden-brown color.

    Continue cooking and turning the chicken until browned and completely cooked through, approximately 6–8 minutes, depending on the size of your pieces.

    The USDA-recommended minimum internal temperature for chicken is 165°F (74°C).

    If your skillet isn’t large enough to comfortably hold all of the chicken, cook it in batches.

    Overcrowding lowers the temperature of the pan and can cause the chicken to steam instead of brown.


    Step 4: Turn It Into Orange Chicken

    Once the chicken is cooked, reduce the heat to medium.

    Pour the prepared orange sauce into the skillet.

    Stir everything together and allow the sauce to gently simmer for approximately 2 minutes.

    Give your cornstarch slurry another quick stir.

    Slowly pour it into the skillet while stirring the sauce.

    Within another minute or two, you’ll notice the sauce beginning to thicken.

    Continue stirring until the sauce becomes glossy and coats the chicken.

    You want enough sauce to cling to each piece without becoming overly thick.

    If the sauce gets thicker than you’d like, add a splash of water or additional orange juice.

    Remove the skillet from the heat.

    Finish with sliced green onions and sesame seeds.

    Your orange chicken is ready.


    Step 5: Scramble the Eggs for the Fried Rice

    Heat another large skillet or wok over medium-high heat.

    Add a small amount of your cooking oil.

    Pour in the beaten eggs.

    Use a spatula to gently scramble them until they’re just cooked.

    Transfer the eggs to a clean plate.

    You’ll add them back later.

    Removing the eggs temporarily prevents them from becoming overcooked while you prepare the vegetables and rice.


    Step 6: Cook the Vegetables

    Add the peas, carrots, bell peppers, and broccoli to the skillet.

    Cook for approximately 3–5 minutes, stirring frequently.

    You want the vegetables tender but still colorful and slightly crisp.

    This is where you can really personalize the recipe.

    If your refrigerator contains vegetables that need to be used, there’s a good chance they’ll work in fried rice.


    Step 7: Add the Brown Rice

    Add your chilled brown rice directly to the vegetables.

    Use your spatula to break apart any large clumps.

    Spread the rice around the skillet so as much of it as possible comes into contact with the hot cooking surface.

    Cook for approximately 3–4 minutes, stirring occasionally.

    You may notice some of the rice beginning to toast slightly around the edges.

    That’s exactly what you want.


    Step 8: Season the Fried Rice

    Return the scrambled eggs to the skillet.

    Add:

    • Low-sodium soy sauce
    • Sesame oil
    • Garlic powder
    • Ground ginger
    • Black pepper
    • Green onions

    Toss everything together until the vegetables, eggs, seasonings, and rice are evenly distributed.

    Cook for another minute or two.

    Taste before adding any additional soy sauce.

    Remember that you’ll also be serving the fried rice with orange chicken that already contains soy sauce in its glaze.


    Step 9: Build Your Orange Chicken Bowl

    Now comes the best part.

    Add a generous scoop of vegetable fried rice to each bowl.

    Top it with your homemade orange chicken.

    Spoon a little extra orange sauce over the chicken.

    Finish with:

    • Green onions
    • Sesame seeds
    • Orange zest
    • Red pepper flakes

    For additional vegetables, add steamed broccoli or green beans alongside the chicken.

    You now have a colorful homemade orange chicken dinner ready to enjoy.


    What Makes This Orange Chicken Healthier?

    Making a recipe “healthier” doesn’t necessarily require completely reinventing it.

    Sometimes a few meaningful changes can make a big difference.

    1. The Chicken Isn’t Deep-Fried

    Traditional orange chicken is commonly breaded or battered before frying.

    This version skips that process.

    The chicken is seasoned and cooked with a relatively small amount of oil.

    You still get browned, flavorful chicken without needing a deep fryer.

    2. Lean Chicken Breast Provides Protein

    Boneless, skinless chicken breast is a convenient source of lean protein.

    Protein can help make a meal more filling, especially when combined with fiber-rich vegetables and whole grains.

    3. Fresh Orange Adds Real Citrus Flavor

    Instead of trying to create orange flavor entirely through sweeteners, this sauce uses fresh orange juice and zest.

    Orange zest is especially helpful because it provides concentrated citrus flavor without requiring much additional sweetness.

    4. You Control the Added Sugar

    Making the sauce yourself allows you to decide exactly how sweet you want it.

    Start with a modest amount of honey and adjust only if necessary.

    5. More Vegetables

    Instead of treating vegetables as an afterthought, they’re incorporated directly into the fried rice.

    You can easily increase them even further.

    6. Brown Rice Adds Whole Grains

    Brown rice provides more fiber than refined white rice while also bringing a slightly nutty flavor and chewy texture to the meal.


    Don’t Be Afraid to Use White Rice

    While brown rice works wonderfully in this recipe, you don’t have to use it.

    If your family strongly prefers white rice, use white rice.

    Healthy eating doesn’t have to mean forcing yourself to eat ingredients you dislike.

    You could also try:

    • Jasmine rice
    • Basmati rice
    • Wild rice blends
    • Quinoa
    • Cauliflower rice
    • Half brown rice and half cauliflower rice

    The best choice is one that helps you create a balanced meal you’ll actually enjoy.


    Make Half Rice and Half Cauliflower Rice

    One simple way to increase the vegetables while maintaining a traditional fried-rice texture is to combine regular rice with cauliflower rice.

    Instead of using three cups of brown rice, try:

    1 ½ cups brown rice + 1 ½ cups cauliflower rice

    Cook the cauliflower rice with the vegetables before adding your regular rice.

    This provides the familiar texture of fried rice while sneaking additional vegetables into the meal.


    Load It With Vegetables

    Fried rice is one of those recipes that can help clean out your refrigerator.

    You don’t have to stick with peas, carrots, bell peppers, and broccoli.

    Try adding:

    • Mushrooms
    • Zucchini
    • Snow peas
    • Sugar snap peas
    • Cabbage
    • Edamame
    • Corn
    • Green beans
    • Bok choy
    • Bean sprouts
    • Water chestnuts
    • Celery
    • Spinach

    Aim for a variety of colors.

    Different vegetables contribute different nutrients, textures, and flavors while making your plate more visually appealing.


    Make It Spicy

    Orange chicken is generally sweet and tangy, but spicy orange chicken is delicious too.

    Add crushed red pepper flakes directly to the sauce.

    You can also finish your bowl with:

    • Chili garlic sauce
    • Sriracha
    • Fresh jalapeño
    • Serrano pepper
    • Chili crisp
    • Cayenne pepper

    If you’re feeding children or people who don’t enjoy spicy food, keep the main recipe mild and put the spicy toppings on the table.

    Everyone can customize their own bowl.


    Try Chicken Thighs

    Chicken breast isn’t your only option.

    Boneless, skinless chicken thighs work extremely well with orange sauce.

    Thigh meat tends to stay juicy and has a richer flavor.

    Cut the thighs into bite-sized pieces and prepare them using the same basic method, making sure they’re fully cooked before serving.


    Turn It Into Orange Shrimp

    Want to change things up?

    Replace the chicken with peeled and deveined shrimp.

    Shrimp cooks much faster than chicken, so keep a close eye on it.

    Cook the shrimp until opaque and cooked through, remove it from the pan, prepare the sauce, and return the shrimp briefly to coat.

    Orange shrimp with vegetable fried rice makes another fantastic homemade takeout-style dinner.


    Vegetarian Orange Bowls

    You can even use the same general idea for a meatless meal.

    Try replacing chicken with:

    • Extra-firm tofu
    • Tempeh
    • Chickpeas
    • Cauliflower
    • Mushrooms

    Cook your chosen protein or vegetable until browned, then toss it with the homemade orange sauce.

    Serve it over the same vegetable fried rice.


    How to Make the Perfect Orange Sauce

    The sauce is the star of this recipe.

    A great orange sauce should balance several flavors at once.

    Sweet

    Orange juice and honey provide sweetness.

    Sour

    Rice vinegar provides acidity and prevents the sauce from becoming overly sweet.

    Salty

    Soy sauce adds saltiness and savory depth.

    Aromatic

    Fresh garlic and ginger bring bold flavor.

    Citrus

    Orange zest intensifies the orange flavor.

    Heat

    Red pepper flakes are optional but provide a pleasant contrast to the sweetness.

    The key is balance.

    Taste your sauce before thickening it and make small adjustments.


    Don’t Skip the Fresh Ginger

    Fresh ginger may seem like a minor ingredient, but it can transform homemade orange sauce.

    Ginger provides warmth and a slightly spicy aroma that works beautifully with citrus.

    If you’ve never cooked with fresh ginger before, simply peel a small piece and grate it using a fine grater.

    You don’t need much.

    A teaspoon can add plenty of flavor.


    Orange Zest Is the Secret Ingredient

    When zesting your orange, remove only the brightly colored outer layer.

    Avoid digging deeply into the white layer underneath, known as the pith, because it can taste bitter.

    The aromatic oils in the orange peel give the sauce a stronger orange fragrance and flavor.

    A small amount can make the difference between a sauce that tastes vaguely sweet and one that clearly tastes like fresh orange.


    Meal Prep Orange Chicken and Fried Rice

    This meal is excellent for preparing lunches ahead of time.

    After cooking, allow the food to cool appropriately and divide it into meal-prep containers.

    Add a portion of fried rice to each container and top with orange chicken.

    Store the containers refrigerated and use within approximately 3–4 days.

    When you’re ready to eat, reheat the food thoroughly.

    For the best results, consider storing extra sauce separately.

    A small spoonful added after reheating can help refresh the orange flavor.


    Make a Double Batch

    If you’re already chopping vegetables and cooking chicken, consider doubling the recipe.

    A double batch can give you dinner tonight and several lunches for later.

    It can also reduce the temptation to grab something less balanced when you’re busy because you already have a prepared meal waiting in the refrigerator.

    Meal prep doesn’t need to mean spending your entire Sunday cooking.

    Sometimes it simply means making a little extra dinner.


    Portioning Your Orange Chicken Bowl

    You don’t need to obsess over perfect measurements to build a balanced bowl.

    A simple approach is to make vegetables a major part of the meal, add a satisfying portion of lean protein, and include enough rice to make the meal enjoyable and filling.

    For example, your bowl could include:

    • Orange chicken
    • Vegetable fried rice
    • Extra steamed broccoli
    • Green onions
    • A small amount of additional orange sauce

    If you’re especially hungry, adding more vegetables and protein can increase the volume of your meal.


    Easy Side Dishes

    Orange chicken and fried rice can stand alone as a complete meal, but you can add a side when you’re feeding a larger family.

    Consider:

    Steamed Broccoli

    Broccoli works beautifully with orange sauce and adds another vegetable to your plate.

    Cucumber Salad

    Cool cucumber provides a refreshing contrast to the warm, sweet orange chicken.

    Asian-Inspired Slaw

    Shredded cabbage and carrots tossed in a light dressing can add crunch.

    Steamed Edamame

    A simple side that adds protein, fiber, and color.

    Roasted Green Beans

    Roasted green beans provide a crisp, savory contrast.


    Create an Orange Chicken Bowl Bar

    This can also become a fun family-style dinner.

    Instead of assembling everyone’s plates, put the ingredients in separate serving dishes.

    Set out:

    • Orange chicken
    • Brown fried rice
    • Cauliflower rice
    • Steamed broccoli
    • Shredded carrots
    • Green onions
    • Sesame seeds
    • Orange wedges
    • Chili sauce
    • Additional orange sauce

    Everyone can build their own bowl.

    This is particularly useful when different people in the family have different preferences.


    Cooking for Kids

    The natural sweetness of orange chicken can make it especially appealing to younger eaters.

    If you’re serving children, consider leaving the red pepper flakes out of the main sauce.

    You can always add heat to individual portions later.

    Cut the chicken into smaller pieces and keep some of the vegetables familiar.

    If broccoli isn’t popular, start with peas, carrots, or corn.

    Healthy eating habits often develop gradually, and repeated exposure to different foods can be more useful than turning dinner into a battle.


    Common Mistakes to Avoid

    Even a simple recipe can turn out differently depending on technique.

    Overcrowding the Chicken

    Too much chicken in a small skillet traps steam.

    Cook in batches if necessary.

    Using Wet Chicken

    Patting the chicken dry helps it brown.

    Adding Too Much Cornstarch

    A little cornstarch goes a long way.

    You want a glossy sauce, not orange-flavored paste.

    Using Hot Fresh Rice

    Fresh rice is more likely to become mushy.

    Use chilled rice whenever possible.

    Adding Too Much Soy Sauce

    You can always add more.

    You can’t easily remove it.

    Start conservatively, taste, and adjust.

    Overcooking the Vegetables

    Fried rice is especially good when the vegetables retain some texture.

    Forgetting to Taste

    Recipes provide a starting point, but oranges vary in sweetness.

    Taste your sauce and adjust accordingly.


    Approximate Nutrition

    Exact nutrition will depend on your specific ingredients, portion sizes, amount of sauce used, and any substitutions.

    A balanced serving provides nutrients from several food groups, including:

    Protein: Chicken and eggs

    Carbohydrates: Brown rice and vegetables

    Fiber: Brown rice, broccoli, peas, carrots, and other vegetables

    Healthy fats: Olive or avocado oil

    Vitamin C: Fresh orange juice, bell peppers, and broccoli

    Rather than focusing only on calories, think about the overall composition of your plate.

    A meal containing protein, whole grains, vegetables, and satisfying flavor can be much easier to stick with than one that leaves you hungry an hour later.


    How to Store Leftovers

    Transfer leftovers to airtight containers and refrigerate promptly.

    For best quality, enjoy them within 3–4 days.

    You can store the orange chicken and fried rice together for convenience or separately if you want better control over reheating.


    How to Reheat

    A microwave works perfectly well for meal-prep portions.

    Add a tiny splash of water to the rice before reheating if it seems dry.

    You can also reheat everything in a skillet over medium heat.

    Add a splash of water or orange juice to loosen the sauce if necessary.

    Heat leftovers thoroughly before serving.


    Healthy Eating Doesn’t Have to Be Boring

    One of the biggest misconceptions about healthier eating is that everything has to taste plain.

    It doesn’t.

    Garlic, ginger, citrus, herbs, spices, vinegar, vegetables, and small amounts of flavorful sauces can completely transform simple ingredients.

    A plain piece of chicken and bowl of brown rice might not sound particularly exciting.

    Turn that same chicken into orange-glazed chicken, transform that brown rice into vegetable fried rice, and suddenly dinner becomes something you look forward to.

    That’s an important difference.

    A healthier lifestyle is easier to maintain when the food still brings you enjoyment.


    Homemade Doesn’t Have to Mean Complicated

    It’s also easy to assume that recreating takeout food at home requires a long list of unusual ingredients or advanced cooking skills.

    This recipe proves otherwise.

    You’re essentially preparing three things:

    Chicken.

    Sauce.

    Fried rice.

    Once you understand those three components, the recipe becomes incredibly flexible.

    You can change the protein.

    You can change the vegetables.

    You can change the rice.

    You can change the spice level.

    You can even prepare the sauce ahead of time.

    That’s what makes recipes like this useful beyond a single dinner.

    They teach you a basic cooking formula you can continue adapting.


    Turn Leftovers Into Tomorrow’s Lunch

    If you have a small amount of orange chicken left but not enough for another complete dinner, don’t waste it.

    Turn it into a lunch bowl.

    Start with leftover rice or greens.

    Add the orange chicken.

    Then add whatever vegetables you have available.

    Finish with green onions and a small drizzle of orange sauce.

    You can even turn leftovers into lettuce wraps by chopping the chicken into smaller pieces and spooning it into crisp lettuce leaves.

    A little creativity can turn one dinner into several different meals.


    Make Healthy Choices One Meal at a Time

    You don’t have to completely change the way you eat overnight.

    Small choices add up.

    Maybe today it’s making orange chicken at home instead of ordering the deep-fried version.

    Tomorrow it might be adding another serving of vegetables to dinner.

    Another day it could be replacing a sugary drink with water.

    Healthy habits aren’t built through perfection.

    They’re built through consistency.

    That’s why meals like this can be so helpful.

    You aren’t giving up something you enjoy.

    You’re simply finding a different way to prepare it.


    Final Thoughts

    Today’s Healthy Recipe of the Day: Orange Chicken and Fried Rice proves that healthier meals can still deliver the bold, comforting flavors you crave.

    Tender skillet-cooked chicken gets coated in a homemade orange glaze bursting with fresh citrus, garlic, and ginger. Vegetable fried rice adds brown rice, eggs, broccoli, carrots, peas, peppers, and green onions to create a colorful and satisfying meal.

    There’s no deep fryer required.

    There’s no need for a complicated ingredient list.

    And there’s no reason healthy food has to feel boring.

    Make the recipe exactly as written the first time, then start experimenting.

    Add more vegetables.

    Make it spicy.

    Try cauliflower rice.

    Swap chicken for shrimp.

    Make a vegetarian version with tofu.

    Prepare extra for tomorrow’s lunch.

    Healthy cooking becomes much more enjoyable when you stop thinking about everything you “can’t” eat and start discovering new ways to prepare the foods you already love.

    So the next time the craving for orange chicken hits, skip the takeout menu and grab your skillet.

    A fresh, colorful, homemade dinner might be closer than you think.

    Healthy Recipe of the Day Tip

    Recreate your favorite restaurant meals at home whenever you can. Small changes to cooking methods, portions, sauces, and vegetables can turn familiar comfort foods into meals that better support your goals without sacrificing flavor.

    Question of the Day

    What’s one takeout favorite you’d love to see transformed into a healthier homemade recipe?

    Share your answer and inspire someone else to try something new in the kitchen!

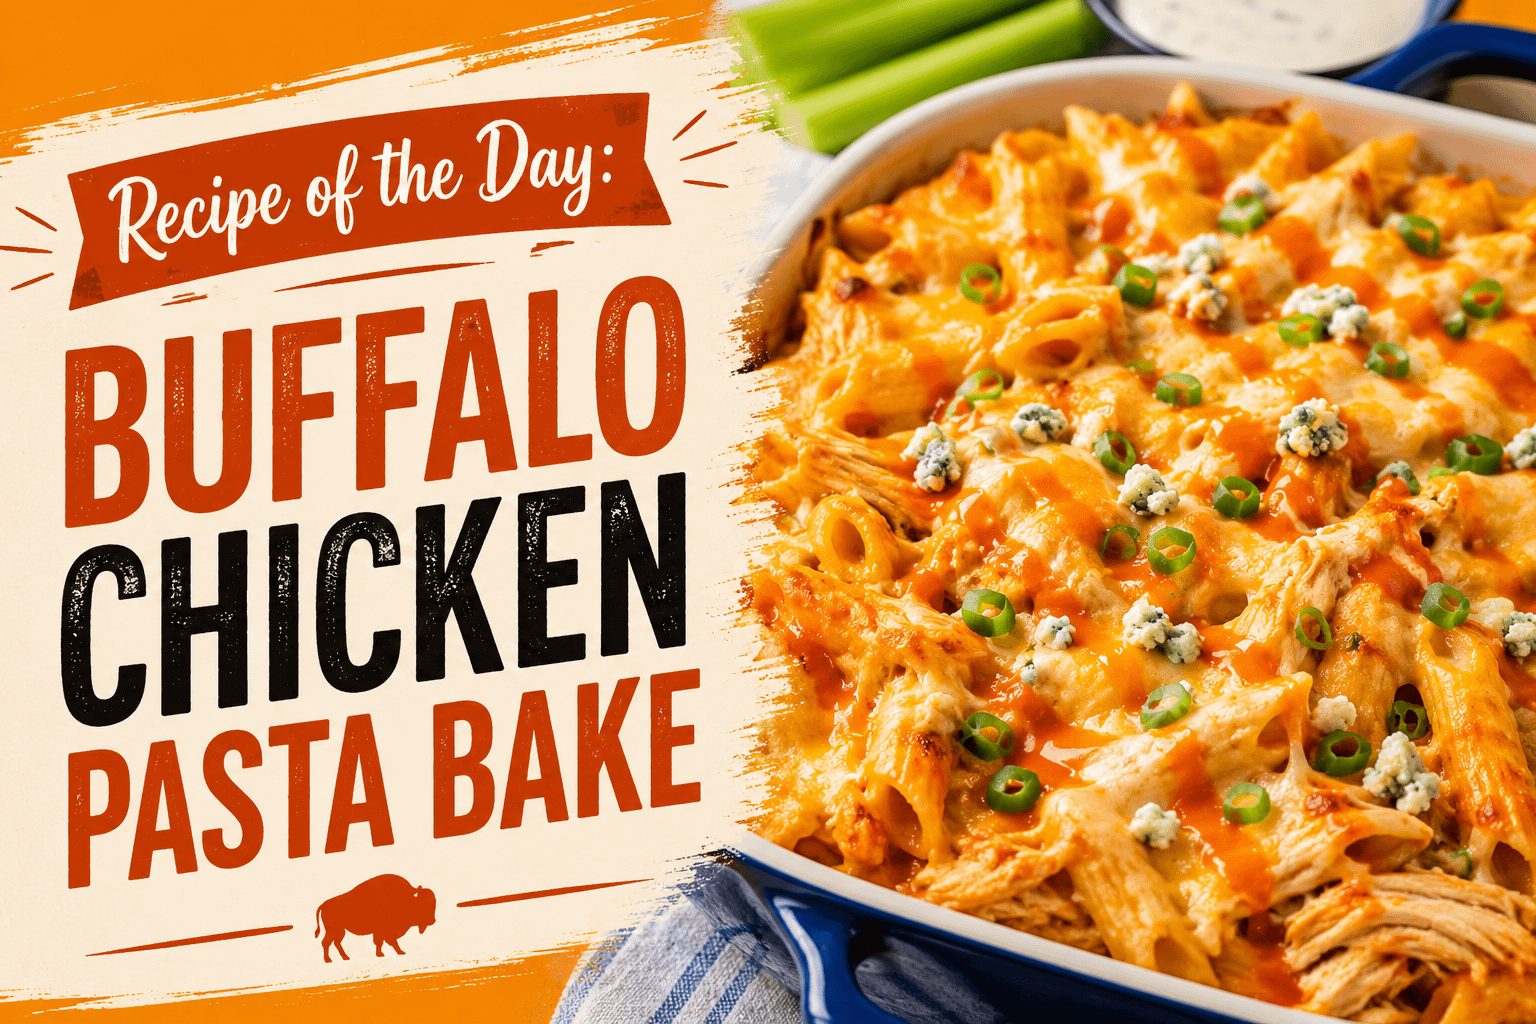
  • Recipe of the Day: Buffalo Chicken Pasta Bake

    Advertisements

    There are some dinners that check every comfort-food box at once—creamy, cheesy, hearty, a little spicy, and easy enough to make without spending the entire evening in the kitchen. Buffalo Chicken Pasta Bake is one of those meals.

    This satisfying casserole combines tender pasta and seasoned chicken with a rich, creamy buffalo sauce before everything is covered with plenty of melted cheese and baked until hot and bubbly. Every forkful delivers that unmistakable buffalo chicken flavor balanced by cool, creamy ranch and gooey cheese.

    If you love buffalo wings, buffalo chicken dip, creamy pasta, or cheesy baked casseroles, this recipe brings all of those flavors together in one irresistible dinner.

    Even better, Buffalo Chicken Pasta Bake is incredibly versatile. You can make it mild enough for people who don’t enjoy much heat, load it with extra buffalo sauce for spice lovers, add vegetables, mix in crispy bacon, swap ranch for blue cheese, or use whatever cooked chicken you already have available.

    It works for an ordinary Tuesday night just as easily as it works for Sunday football.

    Why Buffalo Chicken and Pasta Work So Well Together

    Buffalo chicken is known for its combination of heat, tanginess, richness, and savory flavor. Pasta provides the perfect foundation because it absorbs some of that sauce while still allowing the buffalo flavor to remain front and center.

    Then comes the cheese.

    Cheddar contributes sharpness and richness, while mozzarella gives the casserole its wonderfully stretchy, melted texture. Cream cheese helps turn the buffalo sauce into something smooth and luxurious rather than simply spicy.

    Ranch adds another important layer. Its creamy, herby flavor helps soften the sharpness of the buffalo sauce and brings the entire casserole together.

    The finished dish isn’t simply spicy pasta.

    It’s creamy, tangy, cheesy, savory, and comforting all at once.

    Why You’ll Love This Recipe

    There are plenty of reasons Buffalo Chicken Pasta Bake deserves a place in your dinner rotation.

    It’s Easy to Prepare

    Most of the ingredients are everyday grocery-store staples. Using leftover or rotisserie chicken makes preparation even faster.

    It’s Filling

    Chicken, pasta, cheese, and creamy sauce make this a hearty meal capable of feeding a hungry family.

    It’s Customizable

    You control the heat level, cheese combination, vegetables, toppings, and even the type of pasta.

    It’s Great for Leftovers

    The flavors remain delicious after refrigeration, making it a good choice for lunch or dinner the following day.

    It’s Perfect for Entertaining

    Buffalo chicken is always popular for game days and casual gatherings. Turning those flavors into a casserole makes serving a crowd much easier.

    It Uses Leftover Chicken

    Have chicken sitting in the refrigerator from yesterday’s dinner? This recipe can give it an entirely new personality.

    Buffalo Chicken Pasta Bake Recipe

    Ingredients

    For the Pasta

    • 12 ounces penne, rotini, rigatoni, cavatappi, ziti, or another short pasta
    • Salt for the pasta water

    For the Buffalo Chicken Sauce

    • 3 cups cooked chicken, shredded or chopped
    • 2 tablespoons butter
    • 2 cloves garlic, minced
    • 8 ounces cream cheese, softened and cubed
    • 1 cup buffalo wing sauce
    • 1 cup ranch dressing
    • 1/2 cup milk
    • 1 1/2 cups shredded cheddar cheese, divided
    • 1 1/2 cups shredded mozzarella cheese, divided
    • 1/2 teaspoon garlic powder
    • 1/2 teaspoon onion powder
    • 1/4 teaspoon freshly ground black pepper
    • 2 green onions, thinly sliced

    Optional Toppings

    • Crumbled blue cheese
    • Additional buffalo sauce
    • Ranch dressing
    • Blue cheese dressing
    • Chopped green onions
    • Fresh parsley
    • Diced celery
    • Crushed red pepper flakes
    • Sliced jalapeños
    • Crispy bacon

    Equipment You’ll Need

    You don’t need anything unusual to prepare this casserole.

    Gather:

    • Large pot
    • Colander
    • Large skillet or saucepan
    • Wooden spoon or spatula
    • Measuring cups and spoons
    • 9-by-13-inch baking dish
    • Cheese grater if shredding your own cheese

    Step 1: Preheat the Oven

    Preheat your oven to 375°F.

    Lightly grease a 9-by-13-inch baking dish with butter or nonstick cooking spray.

    Preparing the baking dish before you begin makes assembly much easier once your pasta and sauce are ready.

    Step 2: Cook the Pasta

    Bring a large pot of generously salted water to a boil.

    Add your pasta and cook it until slightly firmer than al dente. Check the package instructions and consider cooking it approximately one or two minutes less than recommended.

    Why undercook it slightly?

    Because the pasta will continue cooking once it goes into the oven. Pasta that’s completely soft before baking can become overly tender by the time the casserole is finished.

    Drain the pasta well and set it aside.

    Don’t rinse it.

    The starch remaining on the pasta helps the creamy sauce cling to every piece.

    Step 3: Prepare the Garlic Butter Base

    Place a large skillet or saucepan over medium heat.

    Add the butter.

    Once melted, add the minced garlic and cook for approximately 30–60 seconds.

    Stir constantly.

    You’re looking for fragrant garlic rather than browned garlic. Garlic can burn quickly, and burned garlic may add bitterness to your sauce.

    Step 4: Build the Creamy Buffalo Sauce

    Reduce the heat to medium-low.

    Add the softened cream cheese.

    Gradually stir in the buffalo sauce, ranch dressing, and milk.

    Continue stirring as the cream cheese melts.

    Don’t worry if the mixture initially looks uneven. As everything warms and combines, it should transform into a smooth, creamy sauce.

    If necessary, use a whisk to remove any stubborn pieces of cream cheese.

    Step 5: Add the Seasonings

    Stir in:

    • Garlic powder
    • Onion powder
    • Black pepper

    Taste the sauce before adding additional salt.

    Buffalo sauce, ranch dressing, and cheese can all contain significant amounts of salt, so additional seasoning may not be necessary.

    Step 6: Add the Cheese

    Stir approximately:

    • 1 cup shredded cheddar
    • 1 cup shredded mozzarella

    into the warm buffalo sauce.

    Continue stirring over low heat until the cheese melts.

    The sauce should now be creamy, cheesy, and slightly thick.

    If it becomes thicker than you’d like, add another small splash of milk.

    Step 7: Add the Chicken

    Add 3 cups of cooked chicken.

    Stir until the chicken is completely coated in the buffalo cheese sauce.

    Allow it to warm for a minute or two.

    Because the chicken is already cooked, you aren’t trying to cook it again. You’re simply allowing it to absorb some of the sauce.

    Step 8: Combine the Pasta and Sauce

    Add the drained pasta to the skillet if your skillet is large enough.

    Otherwise, return the pasta to the large pot and pour the buffalo chicken mixture over it.

    Gently toss until everything is evenly coated.

    Take a moment to check the consistency.

    Remember that pasta absorbs sauce as it bakes. The mixture should look slightly creamier than you ultimately want it.

    If it looks dry before going into the oven, stir in a little additional milk, ranch, or buffalo sauce.

    Step 9: Assemble the Pasta Bake

    Transfer everything into your prepared baking dish.

    Spread the pasta evenly from corner to corner.

    Sprinkle the remaining:

    • 1/2 cup cheddar
    • 1/2 cup mozzarella

    across the top.

    Don’t worry about creating a perfectly even layer. Some areas with extra cheese make the casserole even better.

    Step 10: Bake Until Hot and Bubbling

    Place the uncovered casserole into your preheated oven.

    Bake for approximately 20–25 minutes, or until the sauce is bubbling around the edges and the cheese has completely melted.

    If you’d like a lightly browned cheese topping, turn on the broiler for approximately one or two minutes.

    Stay near the oven while broiling.

    The difference between beautifully golden cheese and burned cheese can happen very quickly.

    Step 11: Let It Rest

    Remove the Buffalo Chicken Pasta Bake from the oven and allow it to rest for approximately five minutes.

    This short resting period helps the sauce settle and makes the casserole easier to serve.

    Step 12: Add Your Favorite Toppings

    Now comes one of the best parts.

    Finish your casserole with whatever buffalo chicken toppings you enjoy.

    Try:

    • Fresh green onions
    • Crumbled blue cheese
    • Ranch drizzle
    • Blue cheese dressing
    • Extra buffalo sauce
    • Chopped parsley
    • Diced celery
    • Bacon
    • Jalapeños

    Then serve it while it’s still warm.

    What Is Buffalo Sauce?

    Buffalo sauce is traditionally a combination of cayenne-pepper hot sauce and butter, although bottled buffalo wing sauces may contain additional ingredients and seasonings.

    Its signature flavor isn’t just heat.

    A good buffalo sauce combines spicy, tangy, buttery, and slightly acidic flavors.

    That’s one reason creamy ingredients pair so beautifully with it.

    Ranch, blue cheese, cream cheese, mozzarella, and cheddar all soften the heat without completely covering the buffalo flavor.

    How Much Buffalo Sauce Should You Use?

    The answer depends on your preferred spice level.

    The recipe calls for approximately one cup, which creates a noticeable buffalo flavor.

    However, there’s no rule saying you can’t adjust it.

    For Mild Buffalo Pasta

    Start with approximately 1/2 to 3/4 cup buffalo sauce.

    Increase the milk or ranch slightly if needed.

    For Medium Heat

    Use approximately one cup.

    For Extra Spicy Buffalo Pasta

    Use 1 1/4 cups or more, depending on the sauce.

    You can also add cayenne pepper, hot sauce, crushed red pepper, or fresh jalapeños.

    When cooking for several people, keeping the casserole moderately spicy and placing additional buffalo sauce on the table is usually the easiest approach.

    The Secret to Creamy Buffalo Chicken Pasta

    Nobody wants a baked pasta casserole that’s dry.

    There are several ways to prevent that.

    First, don’t overcook the pasta.

    Second, make sure there’s plenty of sauce before the casserole enters the oven.

    Third, don’t overbake it.

    Once the ingredients are hot and the cheese is melted, your casserole is ready.

    Finally, cream cheese plays an important role. It gives the sauce body and helps maintain that creamy texture.

    If the pasta mixture seems too thick during assembly, don’t hesitate to add another splash of milk.

    What’s the Best Chicken to Use?

    Buffalo Chicken Pasta Bake is one of those recipes where convenience works in your favor.

    Rotisserie Chicken

    Rotisserie chicken is arguably the easiest option.

    Remove the skin and bones, shred approximately three cups of meat, and you’re ready.

    Using both white and dark meat can give the casserole additional flavor.

    Chicken Breast

    Bake, grill, sauté, or poach boneless chicken breasts before chopping or shredding them.

    Chicken breast provides a leaner option with a mild flavor that readily absorbs the buffalo sauce.

    Chicken Thighs

    Chicken thighs are naturally juicy and flavorful.

    Their richness works particularly well in baked casseroles.

    Leftover Chicken

    This may be the best reason to make Buffalo Chicken Pasta Bake.

    Instead of serving the same leftover chicken two nights in a row, transform it into something completely different.

    What Pasta Works Best?

    Short pasta shapes are ideal because they’re easier to serve and provide plenty of spaces for sauce to collect.

    Penne

    A classic casserole choice. The hollow centers capture sauce beautifully.

    Rotini

    Those spirals grab onto creamy buffalo sauce with every turn.

    Rigatoni

    A larger, hearty pasta that’s especially good for substantial baked dishes.

    Cavatappi

    The curved corkscrew shape provides excellent texture and holds plenty of sauce.

    Ziti

    Simple, traditional, and perfect for baking.

    Shells

    Small and medium shells act like little cups for cheese sauce.

    There’s really no wrong answer as long as you choose a sturdy pasta that can withstand baking.

    Why Shredding Your Own Cheese Can Make a Difference

    Pre-shredded cheese is incredibly convenient, and it will certainly work.

    However, packaged shredded cheese often contains anti-caking ingredients that can affect how smoothly it melts.

    Freshly shredded cheddar and mozzarella generally melt more evenly.

    If you have a few extra minutes, shredding cheese directly from the block can give the sauce an especially smooth texture.

    Ranch vs. Blue Cheese

    It’s the great buffalo chicken debate.

    Some people can’t imagine buffalo chicken without ranch.

    Others insist blue cheese is the only correct choice.

    Fortunately, this recipe doesn’t require you to choose.

    The ranch inside the casserole contributes creaminess and seasoning, while crumbled blue cheese can be added as a topping.

    Or reverse things and serve blue cheese dressing alongside the casserole.

    If you’re serving a crowd, put both on the table.

    Everyone wins.

    Add a Crispy Breadcrumb Topping

    Creamy pasta underneath and crunchy breadcrumbs on top create a fantastic contrast.

    Combine:

    • 1 cup panko breadcrumbs
    • 2 tablespoons melted butter
    • 1/4 teaspoon garlic powder
    • 2 tablespoons grated Parmesan, optional

    Mix everything together.

    After sprinkling the cheese over your casserole, distribute the breadcrumb mixture across the top.

    Bake normally.

    The result is a golden, crunchy layer covering the creamy buffalo chicken pasta underneath.

    Bacon Buffalo Chicken Pasta Bake

    Buffalo chicken and bacon are a fantastic combination.

    Cook approximately six to eight slices of bacon until crispy.

    Drain and crumble them.

    Stir half of the bacon into the pasta and reserve the remainder for topping the casserole after baking.

    The smoky, salty bacon adds another layer of flavor without overpowering the buffalo sauce.

    Buffalo Chicken and Broccoli Pasta Bake

    Want to add vegetables?

    Broccoli is one of the easiest choices.

    Cut broccoli into small florets and lightly steam or blanch them before assembling the casserole.

    Add approximately two cups of broccoli when combining the chicken and pasta.

    Broccoli adds color, texture, and freshness that contrasts nicely with the rich sauce.

    Buffalo Chicken Spinach Pasta Bake

    Fresh spinach practically disappears into creamy pasta.

    Add several handfuls of baby spinach directly to your warm sauce.

    Stir until the spinach begins to wilt.

    Then proceed with the recipe normally.

    It’s an easy addition that doesn’t dramatically change the buffalo chicken flavor.

    Buffalo Chicken Bacon Ranch Pasta Bake

    Want to take things even further?

    Combine buffalo chicken, bacon, and ranch.

    Prepare the recipe normally and add cooked bacon.

    Once baked, finish each serving with:

    • Ranch drizzle
    • Chopped green onions
    • Bacon crumbles
    • Buffalo sauce

    It’s rich, indulgent, and made for serious comfort-food cravings.

    Buffalo Chicken Mac and Cheese Variation

    You can easily turn this concept into buffalo chicken macaroni and cheese.

    Replace the larger pasta with elbow macaroni.

    Increase the cheddar slightly and reduce the buffalo sauce if you want the cheese flavor to remain more prominent.

    Top with breadcrumbs and bake until bubbling.

    You now have a spicy buffalo twist on classic baked macaroni and cheese.

    Turn It Into a Game-Day Favorite

    Buffalo chicken is practically synonymous with game-day food.

    Wings and buffalo chicken dip are classics, but Buffalo Chicken Pasta Bake gives you another way to serve those familiar flavors.

    It’s particularly useful when feeding a crowd because one large casserole can provide numerous servings.

    Create a topping station with bowls of:

    • Blue cheese
    • Bacon
    • Green onions
    • Jalapeños
    • Diced celery

    Then put bottles of ranch, blue cheese dressing, and buffalo sauce nearby.

    Everyone can customize their own serving.

    Make-Ahead Buffalo Chicken Pasta Bake

    Busy tomorrow?

    Assemble dinner tonight.

    Prepare the recipe up to the point where it would normally go into the oven.

    Cover the baking dish tightly and refrigerate.

    When you’re ready to cook, remove it from the refrigerator while the oven preheats.

    Bake as directed, allowing a little additional cooking time because you’re starting with a cold casserole.

    Check the center before serving to ensure everything is thoroughly heated.

    Can You Freeze Buffalo Chicken Pasta Bake?

    You can freeze the assembled casserole, although creamy sauces can occasionally change texture slightly after freezing and reheating.

    For best results, assemble the casserole without baking it.

    Wrap the dish tightly in freezer-safe packaging and freeze.

    Thaw overnight in the refrigerator before baking.

    You may need additional baking time depending on how cold the casserole is when it enters the oven.

    How to Store Leftovers

    Allow leftovers to cool before placing them in airtight containers.

    Refrigerate promptly and enjoy within approximately 3–4 days.

    The pasta will continue absorbing sauce while refrigerated, so leftovers may be thicker than the freshly baked casserole.

    That’s easy to fix.

    Add a splash of milk before reheating.

    How to Reheat Buffalo Chicken Pasta

    For individual portions, microwave until thoroughly heated.

    Adding a tablespoon or two of milk before reheating can help loosen the sauce.

    For larger portions, place the pasta in an oven-safe dish, cover with foil, and reheat until hot.

    You can also sprinkle a little fresh cheese over the top before reheating.

    Because more melted cheese rarely hurts.

    What to Serve With Buffalo Chicken Pasta Bake

    This casserole can absolutely stand on its own, but adding a side dish creates a more complete dinner.

    Since Buffalo Chicken Pasta Bake is rich, creamy, and cheesy, fresh or lighter sides provide a nice balance.

    Try serving it with:

    • Garden salad
    • Caesar salad
    • Cucumber salad
    • Roasted broccoli
    • Green beans
    • Roasted asparagus
    • Celery sticks
    • Carrot sticks
    • Garlic bread
    • Dinner rolls
    • Roasted vegetables
    • Corn on the cob

    Celery and carrots are particularly appropriate because they’re traditionally served with buffalo wings.

    Buffalo Chicken Pasta Bake for a Potluck

    This recipe is an excellent potluck option because it’s familiar enough to appeal to a crowd but different enough to stand out among ordinary casseroles.

    If you’re making it for a gathering where you don’t know everyone’s spice tolerance, keep the heat moderate.

    Then bring extra buffalo sauce.

    People who love heat can add as much as they want without making the entire dish too spicy for everyone else.

    Budget-Friendly Dinner Tips

    Casseroles are often useful when you’re trying to stretch ingredients.

    Buffalo Chicken Pasta Bake can be particularly economical when made with leftover chicken.

    You can also use whichever pasta is on sale, purchase cheese in larger blocks, and use store-brand cream cheese and ranch dressing.

    Adding vegetables such as broccoli can help stretch the casserole into additional servings.

    How to Double the Recipe

    Feeding a big crowd?

    Double the ingredients and divide the mixture between two 9-by-13-inch baking dishes.

    This is useful for:

    • Large family gatherings
    • Birthday parties
    • Potlucks
    • Game-day parties
    • Neighborhood gatherings
    • Team dinners

    You can bake both casseroles at once if your oven has enough space, although you may need to rotate the pans during cooking for more even heating.

    How to Make Buffalo Chicken Pasta Bake Your Own

    Recipes don’t have to be rigid.

    Use this Buffalo Chicken Pasta Bake as your starting point and customize it according to what your family enjoys.

    Try different cheeses.

    Use Monterey Jack for additional creaminess.

    Add pepper Jack for extra heat.

    Mix in smoked Gouda for deeper flavor.

    Add bacon.

    Add broccoli.

    Add spinach.

    Add jalapeños.

    Use blue cheese.

    Pile on green onions.

    Give it a breadcrumb topping.

    Make it mild.

    Make it fiery.

    That’s part of what makes casseroles so enjoyable. Once you understand the basic combination of pasta, chicken, sauce, and cheese, you can create your own version.

    Common Mistakes to Avoid

    Even easy recipes can become better when you know what to watch for.

    Overcooking the Pasta

    Remember that the pasta cooks twice—once in boiling water and again in the oven.

    Keep it slightly firm during the first cooking stage.

    Using Too Little Sauce

    Pasta absorbs moisture while baking.

    The mixture should look generously sauced before entering the oven.

    Adding Too Much Salt

    Buffalo sauce, ranch, and cheese already contain salt.

    Taste before seasoning.

    Baking Too Long

    The ingredients are already cooked before the casserole enters the oven.

    You’re primarily heating everything through and melting the cheese.

    Adding Too Much Buffalo Sauce Immediately

    If you’re uncertain about your heat tolerance, start with less.

    You can always add extra buffalo sauce later.

    You can’t easily remove it.

    Frequently Asked Questions

    Can I use leftover chicken?

    Absolutely. Leftover cooked chicken is one of the easiest options for this recipe.

    Can I use rotisserie chicken?

    Yes. Rotisserie chicken makes this casserole especially quick to prepare.

    Can I make it less spicy?

    Yes. Reduce the buffalo sauce and increase the ranch or milk slightly.

    Can I make it hotter?

    Absolutely. Add more buffalo sauce, cayenne, jalapeños, crushed red pepper, or hot sauce.

    Can I use blue cheese instead of ranch?

    Yes. You can use blue cheese dressing or incorporate crumbled blue cheese into the casserole.

    Can I add bacon?

    Definitely. Crispy bacon is one of the best additions to buffalo chicken pasta.

    Can I add vegetables?

    Yes. Broccoli, spinach, bell peppers, cauliflower, celery, and even corn can work.

    Can I prepare it ahead of time?

    Yes. Assemble the casserole, refrigerate it covered, and bake when needed.

    What cheese works best?

    Cheddar and mozzarella provide a great balance, but Monterey Jack, Colby Jack, pepper Jack, Gouda, or Parmesan can also be added.

    From Buffalo Wings to Comfort-Food Casserole

    Buffalo chicken has become much bigger than the original plate of wings.

    Today you’ll find those flavors in sandwiches, pizzas, wraps, dips, salads, nachos, quesadillas, macaroni and cheese, and countless other dishes.

    Buffalo Chicken Pasta Bake feels like a natural addition to that list.

    It preserves everything people love about buffalo chicken—the tangy heat, creamy dressing, tender chicken, and cooling cheese—while transforming it into a hearty dinner.

    Instead of finger food, you get a complete casserole.

    Instead of dipping every bite, the creamy buffalo flavor is already distributed throughout the dish.

    And instead of standing over the stove preparing multiple components at dinner time, you can put everything into one baking dish and let the oven finish the job.

    The Perfect Combination of Spicy and Creamy

    The magic of Buffalo Chicken Pasta Bake comes from contrast.

    Buffalo sauce brings the heat.

    Cream cheese brings richness.

    Ranch brings coolness and tang.

    Chicken makes it hearty.

    Pasta makes it comforting.

    Cheddar brings sharp cheesiness.

    Mozzarella provides that irresistible melted stretch.

    Green onions add freshness.

    Optional blue cheese brings another punch of bold flavor.

    Put them all together and you’ve got a casserole that’s far more exciting than an ordinary pasta dinner.

    A Dinner Worth Making Again

    Some recipes are fun to try once.

    Others immediately earn a place in your regular dinner rotation.

    Buffalo Chicken Pasta Bake has everything needed to become one of those repeat recipes.

    It’s easy.

    It’s customizable.

    It feeds several people.

    It reheats well.

    It can use leftovers.

    And most importantly, it tastes like pure comfort food.

    Keep some cooked chicken, pasta, buffalo sauce, ranch, and cheese around, and you’re never very far away from a satisfying dinner.

    Final Thoughts

    Today’s Recipe of the Day: Buffalo Chicken Pasta Bake proves that you don’t have to choose between spicy buffalo chicken and creamy baked pasta.

    You can have both.

    Tender chicken and pasta are coated in a creamy buffalo ranch cheese sauce, covered with even more cheese, and baked until everything is bubbling and irresistible.

    Serve it for family dinner.

    Bring it to a potluck.

    Make it for game day.

    Prepare it ahead for a busy weeknight.

    Or simply make it because you’re craving something warm, cheesy, spicy, and comforting.

    And don’t forget the toppings.

    A drizzle of ranch, extra buffalo sauce, fresh green onions, crispy bacon, or crumbled blue cheese can take an already delicious casserole to another level.

    However you customize it, this is one pasta bake that’s designed to bring bold flavor to the dinner table.

    Recipe of the Day Question

    How would you top your Buffalo Chicken Pasta Bake—ranch, blue cheese, crispy bacon, extra buffalo sauce, jalapeños, or a little bit of everything?

  • Breakfast of the Day: Cinnamon Sugar Breakfast Knots

    Advertisements

    There are certain breakfast aromas that can make an ordinary morning instantly feel warmer and more inviting. Fresh coffee is one. Bacon sizzling in a skillet is another. But few things can compete with the comforting smell of cinnamon, sugar, butter, and freshly baked dough coming from the oven.

    Today’s Breakfast of the Day: Cinnamon Sugar Breakfast Knots brings all of those wonderful flavors together in one irresistible little breakfast pastry.

    Imagine soft, fluffy dough twisted into individual knots, baked until beautifully golden, brushed with warm melted butter, and then generously coated with cinnamon sugar. The outside develops a lightly crisp, sugary coating while the inside remains tender and pillowy.

    They’re somewhere between a cinnamon roll, cinnamon-sugar doughnut, and warm bakery pastry—but they’re much easier to prepare.

    Serve them for a quiet weekend breakfast, put them in the middle of the table for family brunch, make them for the holidays, or prepare a batch simply because you want something warm and sweet with your morning coffee.

    Sometimes the simplest breakfasts create the best mornings.


    Why Cinnamon Sugar Is Such a Classic Breakfast Flavor

    Cinnamon and sugar have been paired together in countless desserts, breads, pastries, and breakfast foods for generations.

    There’s a reason the combination continues to work.

    Cinnamon brings warmth, spice, and an unmistakable aroma, while sugar adds sweetness and creates a slightly crunchy coating when combined with butter.

    Then there’s the butter.

    Butter helps the cinnamon sugar cling to the freshly baked dough while adding richness to every bite.

    Put those three ingredients together with warm bread and you have something incredibly comforting.

    It’s the same flavor combination that makes cinnamon toast, cinnamon rolls, churros, cinnamon doughnuts, snickerdoodles, and cinnamon-sugar pretzels so difficult to resist.

    Cinnamon Sugar Breakfast Knots take that familiar combination and turn it into a fun breakfast pastry that’s perfect for pulling apart and enjoying while it’s still warm.


    Cinnamon Sugar Breakfast Knots Recipe

    Ingredients

    For the Breakfast Knots

    • 1 package refrigerated pizza dough, biscuit dough, or homemade sweet dough
    • 4 tablespoons unsalted butter, melted
    • ½ cup granulated sugar
    • 1½ tablespoons ground cinnamon
    • ½ teaspoon vanilla extract
    • Small pinch of salt

    Optional Vanilla Glaze

    • 1 cup powdered sugar
    • 2 tablespoons milk
    • ½ teaspoon vanilla extract

    Optional Cream Cheese Glaze

    • 4 ounces cream cheese, softened
    • ½ cup powdered sugar
    • ½ teaspoon vanilla extract
    • 1–2 tablespoons milk

    How to Make Cinnamon Sugar Breakfast Knots

    Step 1: Preheat the Oven

    Preheat your oven to 375°F.

    Line a large baking sheet with parchment paper. If you don’t have parchment paper, lightly grease the baking sheet with butter or nonstick cooking spray.

    Giving the knots enough room on the baking sheet is important because the dough will expand as it bakes.


    Step 2: Make the Cinnamon Sugar

    In a small bowl, combine:

    • Granulated sugar
    • Ground cinnamon
    • Pinch of salt

    Mix everything together until the cinnamon is evenly distributed throughout the sugar.

    You can adjust the cinnamon depending on your preference. If you love a stronger cinnamon flavor, add a little extra.

    Set the mixture aside.

    You’ll want it ready as soon as the knots come out of the oven.


    Step 3: Prepare the Butter

    Melt the butter in a small microwave-safe bowl or saucepan.

    Stir in the vanilla extract.

    That tiny addition of vanilla adds another layer of bakery-style flavor without making the recipe complicated.

    Set some of the butter aside for brushing the knots after baking.


    Step 4: Prepare the Dough

    Place your dough on a lightly floured work surface.

    Gently roll or stretch it into a rectangle.

    Using a pizza cutter or sharp knife, slice the dough into strips approximately 1 inch wide.

    The strips don’t have to be perfectly identical.

    In fact, slightly different knots can give the finished batch a homemade bakery appearance.


    Step 5: Form the Knots

    Take one strip of dough and gently stretch it lengthwise.

    Carefully tie the strip into a loose knot.

    Tuck the ends underneath or leave them slightly exposed for a more rustic appearance.

    Place the finished knot onto your prepared baking sheet.

    Repeat with the remaining strips.

    The biggest thing to remember is don’t tie them too tightly.

    The dough needs room to expand.


    Step 6: Brush With Butter

    Lightly brush each dough knot with some of the melted vanilla butter.

    You don’t need to completely soak them.

    A thin coating helps the dough develop a beautiful golden exterior while adding flavor.


    Step 7: Bake Until Golden

    Place the baking sheet in the preheated oven.

    Bake for approximately 12–16 minutes, depending on the size of your knots and the type of dough you’re using.

    You’re looking for knots that are:

    • Puffing up
    • Lightly browned
    • Golden around the edges
    • Cooked through in the center

    Begin checking them around the 12-minute mark.

    Avoid overbaking them because the best Cinnamon Sugar Breakfast Knots have soft, tender centers.


    The Most Important Step: Cinnamon Sugar Time

    As soon as the breakfast knots come out of the oven, brush them generously with the remaining melted butter.

    Don’t wait until they’ve completely cooled.

    While they’re still warm and buttery, sprinkle, toss, or roll them in the prepared cinnamon-sugar mixture.

    Make sure you get cinnamon sugar into all the little twists, curves, and crevices created by the knot.

    That’s where some of the best bites are hiding.

    For an extra-generous coating, brush them with another tiny amount of butter and sprinkle them a second time.

    Now you’re talking.


    Make a Simple Vanilla Glaze

    If cinnamon sugar isn’t quite enough sweetness for you, add a drizzle of vanilla glaze.

    Combine the powdered sugar, milk, and vanilla extract in a small bowl.

    Whisk until smooth.

    If the glaze is too thick, add milk about a teaspoon at a time.

    If it’s too thin, add additional powdered sugar.

    Drizzle the glaze over the warm knots.

    Allow it to run naturally over the twists and sides.

    You don’t need to cover every inch. A light drizzle gives you little pockets of glaze mixed with cinnamon sugar.


    Try a Cream Cheese Glaze

    Anyone who loves cinnamon rolls will probably appreciate this variation.

    Beat the softened cream cheese until smooth.

    Add powdered sugar and vanilla.

    Slowly mix in milk until you’ve reached your desired consistency.

    You can make it thick enough for dipping or thinner for drizzling.

    Serve the glaze in a small bowl beside the breakfast knots and let everyone decide how much they want.

    Or drizzle it generously over the entire batch.


    Make Them Taste Like Mini Cinnamon Rolls

    Want even more cinnamon?

    Before cutting your dough into strips, brush the dough with melted butter and sprinkle it with a mixture of brown sugar and cinnamon.

    Fold the dough over.

    Cut it into strips.

    Then gently twist each strip before tying it into a knot.

    Now you’ve got cinnamon-sugar flavor running throughout the inside of the pastry as well as covering the outside.

    Top them with cream cheese glaze and you’ve essentially created little knotted cinnamon rolls.


    Brown Sugar Cinnamon Knots

    Granulated sugar creates that classic cinnamon-sugar coating, but brown sugar brings something different to the table.

    Its deeper caramel-like flavor works beautifully with cinnamon and butter.

    Try mixing:

    • ¼ cup granulated sugar
    • ¼ cup brown sugar
    • 1½ tablespoons cinnamon

    The brown sugar may create a slightly softer coating, but the flavor is fantastic.


    Maple Cinnamon Breakfast Knots

    Few flavors say breakfast quite like maple.

    Prepare the breakfast knots normally, but replace the vanilla glaze with maple glaze.

    Combine:

    • Powdered sugar
    • Pure maple syrup
    • Splash of milk
    • Tiny pinch of cinnamon

    Whisk until smooth and drizzle over the warm knots.

    For extra texture, sprinkle chopped toasted pecans on top.

    Suddenly your simple cinnamon knots feel like something from a specialty bakery.


    Cinnamon Apple Breakfast Knots

    Cinnamon and apples are another classic combination.

    While your knots are baking, prepare some warm cinnamon apples.

    Dice one or two apples.

    Melt butter in a skillet and add the apples.

    Sprinkle with cinnamon and brown sugar.

    Cook until the apples become tender but still hold their shape.

    Add a small splash of vanilla near the end.

    Serve the warm apples over the Cinnamon Sugar Breakfast Knots.

    You can even add vanilla or cream cheese glaze over everything.

    This variation is especially delicious during fall.


    Cinnamon Banana Breakfast Knots

    Bananas work surprisingly well with warm cinnamon pastries.

    Slice bananas and arrange them beside the breakfast knots.

    For something more indulgent, cook banana slices briefly in butter with a little brown sugar and cinnamon.

    Spoon the warm bananas over the knots and drizzle with maple syrup.

    It’s almost dessert for breakfast—and sometimes that’s exactly what the morning needs.


    Cinnamon Pecan Breakfast Knots

    Chopped pecans bring crunch and a slightly toasted flavor that balances the soft dough beautifully.

    Toast your pecans briefly in a dry skillet.

    After glazing the breakfast knots, sprinkle the toasted pecans over the top.

    You can also mix finely chopped pecans directly into your cinnamon-sugar coating.

    Walnuts work well too.


    Chocolate Cinnamon Breakfast Knots

    Chocolate lovers don’t have to sit this breakfast out.

    After coating the warm knots with cinnamon sugar, drizzle them with melted chocolate.

    You could use:

    • Milk chocolate
    • Dark chocolate
    • Semi-sweet chocolate
    • White chocolate

    Another option is adding miniature chocolate chips inside the dough before forming the knots.

    Chocolate, cinnamon, butter, and warm bread?

    That’s a breakfast worth getting out of bed for.


    Orange Cinnamon Breakfast Knots

    Orange and cinnamon create a bright, aromatic flavor combination.

    Add a little fresh orange zest to your cinnamon-sugar mixture.

    Then replace the milk in your glaze with fresh orange juice.

    Drizzle the orange glaze over the finished knots.

    The citrus flavor cuts through the sweetness and adds freshness.


    What Dough Works Best?

    One of the best things about this recipe is its flexibility.

    You have several options.

    Refrigerated Pizza Dough

    Pizza dough is easy to work with and produces chewy, bread-like breakfast knots.

    It’s an excellent option when you want something quick.

    Refrigerated Biscuit Dough

    Biscuits create softer, more tender knots.

    You may need to gently roll or stretch each biscuit before shaping it.

    Crescent Roll Dough

    Crescent dough creates a lighter, buttery, flaky version.

    Because it’s softer, handle it gently while tying the knots.

    Homemade Sweet Dough

    If you have extra time, homemade dough creates an incredible result.

    A slightly sweet yeast dough will give you soft, fluffy, bakery-style knots.

    It requires more preparation, but the results can be worth the effort for special occasions.


    What to Serve With Cinnamon Sugar Breakfast Knots

    Because these knots are sweet and rich, they pair wonderfully with savory breakfast foods.

    Try serving them with:

    • Scrambled eggs
    • Fried eggs
    • Omelets
    • Bacon
    • Breakfast sausage
    • Turkey sausage
    • Ham
    • Breakfast potatoes
    • Hash browns

    The salty and savory flavors help balance the sweetness of the knots.


    Add Fresh Fruit

    Fresh fruit makes a refreshing addition to this breakfast.

    Try:

    • Strawberries
    • Blueberries
    • Raspberries
    • Blackberries
    • Bananas
    • Apples
    • Oranges
    • Peaches
    • Grapes
    • Pineapple

    A large fruit salad in the center of the table is perfect when serving these knots for brunch.


    What to Drink With Cinnamon Sugar Breakfast Knots

    Coffee may be the obvious answer—and for good reason.

    The slight bitterness of coffee balances the sweet cinnamon coating beautifully.

    Other great options include:

    • Cappuccino
    • Latte
    • Espresso
    • Hot chocolate
    • Chai tea
    • Black tea
    • Cold brew
    • Milk
    • Chocolate milk
    • Orange juice
    • Apple juice

    For fall mornings, try them alongside hot apple cider.


    Build a Cinnamon Sugar Breakfast Board

    If you’re entertaining guests, transform this simple recipe into an entire breakfast board.

    Place warm Cinnamon Sugar Breakfast Knots in the center.

    Surround them with small bowls containing:

    • Vanilla glaze
    • Cream cheese frosting
    • Maple syrup
    • Honey
    • Chocolate sauce
    • Fresh berries
    • Banana slices
    • Warm cinnamon apples
    • Chopped pecans
    • Chopped walnuts

    Everyone can create their own breakfast knot combination.

    It’s interactive, fun, and perfect for brunch.


    Perfect for Christmas Morning

    Imagine waking up on Christmas morning and filling the kitchen with the smell of cinnamon and freshly baked bread.

    Cinnamon Sugar Breakfast Knots fit naturally into a holiday breakfast.

    Prepare them alongside eggs, bacon, fruit, and coffee.

    For an extra festive touch, drizzle them with vanilla glaze and add red and green sprinkles.

    They can become a simple holiday breakfast tradition your family looks forward to every year.


    A Wonderful Thanksgiving Weekend Breakfast

    Thanksgiving may be known for dinner, but the morning deserves something delicious too.

    These knots are especially useful when you’re preparing a large holiday meal later in the day because breakfast doesn’t have to be complicated.

    Bake a batch, make some coffee, add fresh fruit, and you’ve got a warm breakfast everyone can enjoy before the day’s cooking begins.

    They’re also perfect for the morning after Thanksgiving when everyone is still gathered together.


    Great for Birthday Breakfasts

    Birthdays don’t always have to begin with pancakes.

    Make a batch of Cinnamon Sugar Breakfast Knots and stack them on a platter.

    Drizzle them with glaze and add colorful sprinkles.

    You can even place a birthday candle in the center knot.

    It’s a fun alternative to the usual breakfast routine.


    Breakfast for a Crowd

    Hosting family or friends?

    This recipe is easy to double.

    Prepare multiple trays and bake them in batches.

    Set out different dipping sauces and toppings so guests can customize their knots.

    Because they’re individual portions, you don’t need to slice or serve anything complicated.

    People can simply grab one and enjoy.

    Although there’s a good chance they’ll grab a second.


    A Fun Breakfast Recipe for Kids

    Cinnamon Sugar Breakfast Knots are also a great way to get kids involved in the kitchen.

    Depending on their age, they can help:

    • Mix the cinnamon sugar
    • Brush butter onto the dough
    • Twist the dough
    • Form the knots
    • Sprinkle cinnamon sugar
    • Mix the glaze
    • Decorate the finished pastries

    And here’s the best part:

    The knots don’t need to look perfect.

    One might be big.

    Another might be tiny.

    One may barely look like a knot at all.

    That’s completely fine.

    Homemade food doesn’t need to look identical to be delicious.


    Tips for the Best Cinnamon Sugar Breakfast Knots

    Don’t Overwork the Dough

    Handle the dough gently.

    Overworking some types of dough can make the finished knots tougher.

    Don’t Tie Them Too Tightly

    Leave a little room in your knots so the dough can expand during baking.

    Watch the Oven

    The difference between perfectly golden and overbaked can happen quickly.

    Start checking the knots toward the lower end of the recommended baking time.

    Use Real Butter

    Butter contributes significantly to the flavor of this recipe.

    If possible, use real melted butter for the coating.

    Coat Them While Warm

    Don’t allow the knots to completely cool before adding the cinnamon sugar.

    Warm butter and warm dough help everything stick.

    Serve Them Fresh

    Like most pastries, Cinnamon Sugar Breakfast Knots are best shortly after baking.

    Warm is definitely the way to go.


    Can You Make Cinnamon Sugar Breakfast Knots Ahead of Time?

    Yes.

    Depending on the dough you’re using, you can prepare and shape the knots ahead of time, refrigerate them, and bake them in the morning.

    Always follow the storage and handling recommendations for your particular dough.

    You can also prepare your cinnamon-sugar mixture ahead of time and store it in an airtight container.

    Then all that’s left in the morning is baking, buttering, and coating.


    How to Store Leftovers

    Allow leftover knots to cool completely.

    Place them inside an airtight container or resealable storage bag.

    For the best texture, enjoy them within 1–2 days.

    If you’ve topped them with a dairy-based cream cheese frosting, refrigerate them.


    How to Reheat Cinnamon Sugar Breakfast Knots

    Warm knots are much better than cold ones.

    Reheat individual knots briefly in the microwave or warm several together in a low-temperature oven until heated through.

    Be careful not to overheat them, especially in the microwave, because bread can become chewy when heated too long.

    After warming, you can brush on another tiny amount of melted butter and sprinkle with fresh cinnamon sugar.

    It’s almost like bringing them back to life.


    Make a Cinnamon Sugar Knot Sundae

    Okay, technically we’ve crossed from breakfast into dessert territory.

    But leftover knots can make an incredible dessert.

    Warm a knot and place it in a bowl.

    Add vanilla ice cream.

    Drizzle with caramel sauce.

    Sprinkle with cinnamon.

    Add chopped pecans.

    You’ve transformed breakfast leftovers into a completely different treat.


    Why Homemade Breakfasts Feel Different

    Breakfast doesn’t always have to be elaborate.

    Sometimes the experience matters as much as the food itself.

    It’s the smell coming from the oven.

    It’s someone wandering into the kitchen asking, “What are you making?”

    It’s pouring another cup of coffee while the pastries finish baking.

    It’s placing a warm basket of food in the center of the table and watching everyone reach for one.

    Those simple moments can turn an ordinary morning into a memory.

    That’s part of what makes recipes like Cinnamon Sugar Breakfast Knots so enjoyable.

    They’re uncomplicated, approachable, and meant to be shared.


    A Little Sweetness Can Change the Morning

    Not every morning begins perfectly.

    Sometimes you’re tired.

    Sometimes you’re rushing.

    Sometimes you wake up with a long list of responsibilities already waiting.

    And while a cinnamon-sugar pastry certainly can’t solve life’s problems, there is something comforting about creating a small moment of enjoyment before facing the rest of the day.

    A warm breakfast.

    A cup of coffee.

    A few quiet minutes.

    A conversation around the table.

    Sometimes those little things matter more than we realize.


    Breakfast of the Day

    Today’s Breakfast of the Day: Cinnamon Sugar Breakfast Knots is everything a comforting sweet breakfast should be.

    They’re warm.

    They’re buttery.

    They’re soft.

    They’re covered in cinnamon sugar.

    And they’re incredibly customizable.

    Keep them simple with nothing more than butter and cinnamon sugar, or transform them with vanilla glaze, cream cheese frosting, maple icing, apples, bananas, chocolate, pecans, or whatever sounds good to you.

    Make them for the family.

    Make them for brunch.

    Make them for a holiday.

    Or make them on an ordinary morning simply because cinnamon sugar makes mornings better.

    Once that first batch comes out of the oven and the smell of cinnamon begins filling the kitchen, getting everyone to the breakfast table probably won’t be difficult.

    The harder part might be keeping a few Cinnamon Sugar Breakfast Knots around long enough for seconds.

    Question of the Day

    How would you eat your Cinnamon Sugar Breakfast Knots—plain with cinnamon sugar, covered in vanilla glaze, dipped in cream cheese frosting, or drizzled with maple icing?

  • Dessert of the Day: Homemade Chocolate Marble Brownies

    Advertisements

    Few desserts can compete with the simple pleasure of a freshly baked brownie. That rich chocolate aroma filling the kitchen, the slightly crisp edges, the soft and fudgy center, and the temptation to cut into the pan before it has even cooled make brownies one of those timeless desserts that never seem to go out of style.

    But today’s Dessert of the Day: Homemade Chocolate Marble Brownies takes the classic brownie and gives it an extra layer of decadence.

    Imagine a deeply chocolatey homemade brownie combined with ribbons of smooth, creamy vanilla cheesecake. The two batters are gently swirled together before baking, producing a beautiful marble pattern across the top and throughout every square.

    The finished dessert gives you everything you could want from a brownie: rich chocolate flavor, a moist and fudgy texture, creamy cheesecake, and an impressive appearance that makes these brownies look like they came straight from a bakery.

    The best part?

    Creating that beautiful marble effect is much easier than it looks.

    You don’t need professional decorating equipment or advanced baking skills. All you need is a knife, skewer, or toothpick and a few gentle swirls through the batter.

    Whether you’re baking for your family, bringing dessert to a potluck, preparing treats for a party, or simply craving chocolate, these homemade chocolate marble brownies are worth turning on the oven for.


    Why Homemade Brownies Are So Good

    Boxed brownie mixes are convenient, but there is something special about making brownies from scratch.

    Homemade brownies allow you to control everything from the sweetness and chocolate intensity to the final texture.

    Want them extra chocolatey?

    Add chocolate chips.

    Want a deeper flavor?

    Add a little espresso powder.

    Want some crunch?

    Fold in walnuts or pecans.

    Making brownies from scratch also fills your kitchen with one of the best baking aromas imaginable.

    Butter, cocoa, vanilla, and chocolate baking together create a smell that makes waiting for the brownies to cool nearly impossible.

    And with this recipe, that familiar chocolate aroma is joined by a creamy cheesecake layer.


    Why You’ll Love Chocolate Marble Brownies

    These brownies aren’t only delicious—they’re also beautiful.

    Every brownie has its own unique combination of chocolate and cream cheese swirls, which means no two pieces look exactly alike.

    Here are a few reasons this dessert deserves a place in your recipe collection.

    Rich Chocolate Flavor

    Cocoa powder creates a deep chocolate base without making the recipe overly complicated.

    Adding chocolate chips takes that flavor even further.

    Creamy Cheesecake Swirls

    The cream cheese mixture adds a smooth, slightly tangy contrast to the sweet chocolate brownie.

    Fudgy Texture

    When baked correctly, the brownie portion stays moist, dense, and wonderfully fudgy.

    Beautiful Presentation

    The swirling technique makes these brownies look much more complicated than they actually are.

    Easy to Customize

    Chocolate chips, nuts, caramel, peanut butter, espresso, and other ingredients can easily be incorporated.

    Perfect for Sharing

    A single pan produces enough brownies for family dessert night, parties, bake sales, potlucks, and holiday gatherings.


    Homemade Chocolate Marble Brownies Recipe

    Prep Time: 20 minutes
    Bake Time: 30–35 minutes
    Cooling Time: 1 hour
    Total Time: About 1 hour 55 minutes
    Servings: Approximately 16 brownies

    Ingredients

    For the Chocolate Brownie Batter

    • 1/2 cup unsalted butter, melted
    • 1 cup granulated sugar
    • 2 large eggs
    • 1 teaspoon vanilla extract
    • 1/3 cup unsweetened cocoa powder
    • 1/2 cup all-purpose flour
    • 1/4 teaspoon salt
    • 1/4 teaspoon baking powder
    • 1/2 cup semi-sweet chocolate chips, optional

    For the Cream Cheese Marble Swirl

    • 8 ounces cream cheese, softened
    • 1/4 cup granulated sugar
    • 1 large egg
    • 1/2 teaspoon vanilla extract

    Step-by-Step Instructions

    Step 1: Preheat Your Oven

    Preheat your oven to 350°F.

    Giving your oven enough time to fully preheat helps the brownies bake more evenly.

    Prepare an 8-by-8-inch baking pan by lightly greasing it or lining it with parchment paper.

    If using parchment paper, leave a little extra hanging over two sides of the pan. Once the brownies have cooled, you can use the parchment as handles to lift the entire batch from the pan.

    This makes cutting clean brownie squares much easier.


    Step 2: Melt the Butter

    Melt the unsalted butter and allow it to cool slightly.

    You want it warm and liquid, but not extremely hot.

    If the butter is too hot when the eggs are added, it can affect the texture of the batter.


    Step 3: Combine the Butter and Sugar

    Pour the melted butter into a large mixing bowl.

    Add the granulated sugar and whisk until thoroughly combined.

    The mixture may look slightly grainy, which is completely normal.


    Step 4: Add the Eggs and Vanilla

    Add the eggs one at a time, mixing well after each addition.

    Stir in the vanilla extract.

    Continue whisking until the mixture looks smooth and glossy.

    Vanilla may seem like a minor ingredient in a chocolate dessert, but it helps round out and enhance the chocolate flavor.


    Step 5: Add the Dry Ingredients

    Add the cocoa powder, all-purpose flour, salt, and baking powder.

    Gently stir the ingredients together until just combined.

    Once you add the flour, avoid aggressively mixing the batter.

    Overmixing develops more gluten in the flour, which can make your brownies tougher or more cake-like.

    For dense and fudgy brownies, mix only until you no longer see streaks of dry flour.


    Step 6: Add Chocolate Chips

    If you’re using chocolate chips, gently fold them into the batter.

    Semi-sweet chocolate chips work especially well because they add additional chocolate flavor without making the brownies overwhelmingly sweet.

    Dark chocolate chips are another excellent option.


    Making the Cream Cheese Swirl

    Now it’s time to prepare the creamy portion that transforms ordinary brownies into chocolate marble brownies.

    Step 7: Beat the Cream Cheese

    Place the softened cream cheese in a medium bowl.

    Beat until smooth.

    Starting with properly softened cream cheese is important because cold cream cheese can create lumps.

    If possible, allow your cream cheese to sit at room temperature for about 30–60 minutes before preparing the recipe.


    Step 8: Add Sugar

    Add the granulated sugar and continue mixing until smooth and creamy.

    Scrape down the sides of the bowl as needed.


    Step 9: Add Egg and Vanilla

    Add the egg and vanilla extract.

    Beat just until everything is incorporated.

    You should now have a smooth, creamy cheesecake mixture that’s easy to spoon over the brownie batter.


    Assembling Your Chocolate Marble Brownies

    Step 10: Add the First Brownie Layer

    Spread approximately three-quarters of the chocolate brownie batter into your prepared baking pan.

    Use a spatula or the back of a spoon to gently spread it into an even layer.

    Don’t worry if it isn’t perfectly smooth.


    Step 11: Add the Cream Cheese Mixture

    Spoon dollops of cream cheese mixture across the brownie batter.

    Try to distribute the dollops throughout the pan instead of concentrating everything in the center.

    This will help create a more even marble pattern.


    Step 12: Add the Remaining Chocolate Batter

    Drop spoonfuls of the remaining chocolate brownie batter between and over the cream cheese dollops.

    At this point, the surface should look like patches of chocolate and vanilla.

    Now you’re ready to create the marble effect.


    How to Create the Perfect Marble Swirl

    Take a butter knife, skewer, or toothpick and gently drag it through the chocolate and cream cheese mixtures.

    Use large S-shaped motions, circles, or loose figure-eight patterns.

    You want the two batters to flow into each other without completely combining.

    The key word is gently.

    A few swirls create dramatic ribbons of chocolate and cream cheese.

    Too much swirling can blend everything together, causing the distinctive marble pattern to disappear.

    There’s no need to make the design perfect.

    In fact, the irregular swirls are part of what makes marble brownies so beautiful.

    Every batch will look slightly different.


    Baking Your Brownies

    Place the pan in your preheated oven and bake for approximately 30–35 minutes.

    Start checking the brownies near the 30-minute mark.

    Insert a toothpick into the chocolate portion near the center.

    You’re looking for a toothpick with a few moist crumbs attached—not wet batter, but not completely clean either.

    A completely clean toothpick can sometimes mean you’ve gone slightly too far if your goal is a fudgy brownie.

    The brownies will continue setting as they cool.


    Don’t Overbake Your Brownies

    This is one of the most important tips for making incredible brownies.

    Brownies can go from perfectly fudgy to dry surprisingly quickly.

    The edges should appear set, while the center may still look slightly soft.

    That’s okay.

    As the brownies cool, residual heat continues cooking the center.

    Pulling them from the oven at the right moment helps preserve that moist, dense interior.


    Let Them Cool

    Fresh brownies smell incredible.

    That makes this next step difficult.

    Wait before cutting them.

    The brownies need time to set, especially because they contain a cream cheese swirl.

    Allow the pan to cool at room temperature for approximately one hour.

    For even cleaner slices, refrigerate the cooled brownies for another 30 minutes before cutting.


    How to Cut Perfect Brownie Squares

    If presentation matters, there are a few tricks that can help you get cleaner cuts.

    First, make sure the brownies are completely cool.

    Use the parchment paper to lift the entire brownie slab from the baking pan.

    Place it on a cutting board.

    Use a large, sharp knife to make each cut.

    After every slice, wipe the knife clean.

    A warm knife can also help. Carefully run the knife under warm water, dry it completely, and then make your cut.

    Repeat as necessary.

    This technique is particularly helpful because the cheesecake portion can stick to the knife.


    Fudgy vs. Cakey Brownies

    Brownie lovers often fall into two camps.

    Some want a light, cakey brownie.

    Others want a dense, almost truffle-like fudgy brownie.

    These chocolate marble brownies are designed to lean toward the fudgy side.

    A fudgy brownie generally contains more fat compared with flour, while cakey brownies typically contain more flour and leavening.

    The melted butter in this recipe contributes richness, while the relatively small amount of flour helps maintain the dense texture.

    The cheesecake swirl makes the finished dessert even richer.


    Make Your Brownies Even More Chocolatey

    If you’re someone who believes there is no such thing as too much chocolate, there are several ways to intensify this recipe.

    Add Dark Chocolate Chips

    Fold 1/2 cup of dark chocolate chips into the batter.

    Use Chocolate Chunks

    Chocolate chunks create larger pockets of melted chocolate throughout each brownie.

    Add Mini Chocolate Chips

    Mini chips distribute chocolate more evenly throughout the batter.

    Sprinkle Chocolate on Top

    Scatter a small handful of chocolate chips over the brownies immediately before baking.

    Add Espresso Powder

    Add approximately 1 teaspoon of instant espresso powder to the brownie batter.

    Coffee naturally enhances chocolate flavor.

    You don’t necessarily end up with coffee-flavored brownies—the chocolate simply tastes deeper and more intense.


    Chocolate Marble Brownie Variations

    Once you’ve mastered the basic recipe, there are plenty of ways to experiment.

    Peanut Butter Marble Brownies

    Add small spoonfuls of creamy peanut butter alongside the cream cheese mixture before swirling.

    Chocolate, peanut butter, and cheesecake make an incredibly rich combination.

    Salted Caramel Marble Brownies

    Drizzle caramel sauce lightly across the batter before swirling.

    After baking, add a tiny sprinkle of flaky sea salt.

    Raspberry Chocolate Marble Brownies

    Add small spoonfuls of raspberry preserves throughout the batter.

    Raspberry’s tartness pairs beautifully with dark chocolate and cream cheese.

    Mint Chocolate Marble Brownies

    Add a small amount of peppermint extract to the cream cheese mixture.

    This variation works especially well during the holidays.

    Triple Chocolate Marble Brownies

    Use cocoa powder in the batter and fold in both semi-sweet and white chocolate chips.

    Walnut Marble Brownies

    Fold chopped walnuts into the chocolate batter before assembling.

    Pecan Marble Brownies

    Chopped pecans add a buttery crunch that contrasts nicely with the creamy cheesecake layer.


    Turn Them Into a Brownie Sundae

    Chocolate marble brownies are already rich enough to stand alone.

    But sometimes you want dessert to be completely over the top.

    Warm one brownie for approximately 10–15 seconds in the microwave.

    Place it in a dessert bowl.

    Top with:

    • Vanilla ice cream
    • Hot fudge
    • Whipped cream
    • Chopped nuts
    • Chocolate shavings
    • Caramel sauce
    • Fresh strawberries
    • A maraschino cherry

    Now you’ve turned a simple brownie square into a full chocolate marble brownie sundae.


    What to Serve With Chocolate Marble Brownies

    Because these brownies are rich, simple accompaniments work particularly well.

    Cold Milk

    Chocolate brownies and cold milk remain a classic combination for good reason.

    Coffee

    A cup of freshly brewed coffee helps balance the sweetness of the dessert.

    Vanilla Ice Cream

    The cold vanilla ice cream slowly melting against a slightly warm brownie is difficult to beat.

    Fresh Berries

    Strawberries, raspberries, and blackberries provide a fresh, slightly tart contrast.

    Whipped Cream

    A small spoonful of lightly sweetened whipped cream adds another creamy texture without overwhelming the brownie.


    Make Them for Your Next Party

    One advantage of brownies is how easy they are to serve to a crowd.

    There’s no need for plates and forks if you cut them into smaller squares.

    Arrange bite-sized chocolate marble brownies on a large dessert tray and guests can simply grab one.

    They’re a great choice for:

    • Birthday celebrations
    • Family gatherings
    • Potlucks
    • Bake sales
    • Office parties
    • School events
    • Game-day gatherings
    • Holiday dessert tables
    • Valentine’s Day
    • Christmas
    • Thanksgiving
    • Weekend cookouts

    For larger gatherings, double the recipe and use a larger baking pan, adjusting the baking time as needed.


    A Beautiful Holiday Dessert

    Chocolate marble brownies can easily be adapted for different holidays.

    Valentine’s Day

    Top with red and pink sprinkles or serve with fresh strawberries.

    Easter

    Decorate with pastel-colored chocolate candies.

    Halloween

    Add orange and black sprinkles after baking.

    Thanksgiving

    Add caramel and chopped pecans for a fall-inspired variation.

    Christmas

    Add crushed peppermint candy or festive sprinkles.

    The chocolate-and-cream marble pattern already makes the brownies attractive, so you don’t need much decoration.


    Can You Make Chocolate Marble Brownies Ahead of Time?

    Absolutely.

    In fact, these brownies are an excellent make-ahead dessert because allowing them to cool and chill gives the cheesecake layer plenty of time to set.

    Prepare them the evening before your gathering.

    Bake and cool completely, then cover and refrigerate overnight.

    The next day, slice them shortly before serving.

    This can make party preparation much easier because dessert is already finished.


    How to Store Chocolate Marble Brownies

    Because the recipe contains cream cheese, it’s best to store leftover brownies in the refrigerator.

    Place them in an airtight container and refrigerate for approximately 4–5 days.

    You can enjoy them directly from the refrigerator for a firmer, cheesecake-like texture.

    For softer brownies, allow them to sit at room temperature for about 15–20 minutes before eating.


    Can You Freeze Marble Brownies?

    Yes.

    Chocolate marble brownies freeze surprisingly well.

    Allow the brownies to cool completely before freezing.

    Cut them into individual squares and wrap each brownie tightly.

    Place the wrapped brownies in a freezer-safe container or freezer bag.

    They can be frozen for approximately 2 months.

    When you’re ready for dessert, transfer a brownie to the refrigerator and allow it to thaw overnight.

    Individual freezing also means you can pull out one brownie whenever a chocolate craving appears.


    Common Brownie Mistakes to Avoid

    Even a simple brownie recipe can go wrong if you’re not careful.

    Overmixing the Batter

    Once the flour is added, mix only until combined.

    Overbaking

    Remember that brownies continue setting after leaving the oven.

    Using Cold Cream Cheese

    Cold cream cheese can leave lumps in your cheesecake mixture.

    Over-Swirling

    Too much swirling blends the batters instead of creating distinct ribbons.

    Cutting Too Soon

    Warm brownies are delicious but notoriously difficult to slice neatly.

    Measuring Flour Incorrectly

    Too much flour can produce dry brownies. Spoon flour into your measuring cup and level it rather than packing it tightly.


    Why Chocolate and Cream Cheese Work So Well Together

    Chocolate is rich, sweet, slightly bitter, and intense.

    Cream cheese is smooth, creamy, tangy, and mildly sweet.

    Those contrasting qualities complement one another.

    The cream cheese helps cut through some of the chocolate’s richness while simultaneously making the dessert feel even more decadent.

    It’s the same reason chocolate cheesecake is such a popular combination.

    With marble brownies, however, you get both textures instead of completely blending the flavors together.

    One bite might contain mostly fudgy chocolate brownie.

    The next might have a generous ribbon of creamy cheesecake.

    And the best bite may have the perfect balance of both.


    A Dessert That Looks Harder Than It Is

    One of my favorite things about marble desserts is their presentation.

    People see those intricate swirls and assume you spent a tremendous amount of time creating them.

    In reality, the design takes only a minute or two.

    That’s why chocolate marble brownies are such a good choice when you want something homemade that feels a little more special than an ordinary pan of brownies.

    They’re approachable enough for everyday baking but attractive enough for a celebration.


    The Ultimate Chocolate Marble Brownie Experience

    For an especially decadent dessert, serve one brownie slightly warm.

    Add a scoop of vanilla bean ice cream.

    Drizzle warm chocolate fudge over the top.

    Add several fresh raspberries or strawberries.

    Finish with whipped cream and shaved dark chocolate.

    Then grab a spoon.

    The warm brownie softens the ice cream. The chocolate sauce mixes with the creamy cheesecake ribbons. The berries provide just enough freshness to balance everything.

    It’s simple comfort food transformed into a dessert worthy of a special occasion.


    Dessert of the Day: Homemade Chocolate Marble Brownies

    Today’s Dessert of the Day: Homemade Chocolate Marble Brownies brings together two desserts that are already incredible on their own.

    Chocolate brownies and cheesecake.

    The brownie layer provides the deep chocolate flavor and dense, fudgy texture.

    The cream cheese swirl brings smoothness, richness, and just enough tang to balance the sweetness.

    Then there is that beautiful marble pattern.

    No two brownies come out exactly alike, making every square look homemade and unique.

    Make a batch for your family.

    Bring them to your next party.

    Add them to your holiday dessert table.

    Or make them on a quiet evening when you simply want something chocolatey waiting in the kitchen.

    Serve them chilled for a firmer cheesecake texture, at room temperature for maximum fudginess, or slightly warmed with vanilla ice cream when you want the full dessert experience.

    However you serve them, Homemade Chocolate Marble Brownies are proof that sometimes combining two classic desserts creates something even better.

    How would you eat your Homemade Chocolate Marble Brownies—plain and fudgy, topped with vanilla ice cream, drizzled with hot fudge, or loaded with all the toppings?

  • Healthy Recipe of the Day: Buffalo Chicken Casserole

    Advertisements

    When you’re craving something spicy, cheesy, warm, and comforting, Buffalo chicken is hard to beat. The problem is that many traditional Buffalo chicken dishes can be loaded with fried chicken, butter-heavy sauces, cream cheese, ranch dressing, and plenty of extra calories.

    That’s where today’s Healthy Recipe of the Day: Buffalo Chicken Casserole comes in.

    This recipe takes everything people love about Buffalo chicken—the tangy heat, tender chicken, creamy sauce, crunchy celery, and melted cheese—and transforms it into a vegetable-packed casserole that can work beautifully as a satisfying lunch or dinner.

    Instead of pasta or potatoes forming the base of the casserole, we’re using cauliflower and broccoli. Instead of relying entirely on cream cheese or sour cream for the sauce, plain Greek yogurt provides creaminess while adding extra protein.

    The result is a comforting casserole that doesn’t taste like typical “diet food.”

    It’s spicy. It’s cheesy. It’s creamy. It’s filling.

    And perhaps most importantly, it’s a healthy dinner you might actually look forward to eating.


    Why Buffalo Chicken Makes Such a Great Casserole

    Buffalo chicken has become much more than a plate of wings.

    Today you’ll find Buffalo chicken pizza, sandwiches, wraps, salads, dips, quesadillas, flatbreads, tacos, pasta, and countless other creations.

    There’s a reason the flavor works in so many dishes.

    Buffalo sauce combines heat with acidity and tanginess, which means it can add tremendous flavor without needing complicated seasonings. When you combine it with chicken, creamy ingredients, cheese, and crunchy vegetables such as celery, you get layers of flavor and texture in every bite.

    A casserole gives those ingredients time to cook together.

    The chicken absorbs some of the Buffalo flavor. The vegetables become tender. The creamy sauce surrounds everything, and the cheese melts across the top.

    It’s Buffalo chicken comfort food in one baking dish.


    Why You’ll Love This Healthy Buffalo Chicken Casserole

    There are plenty of reasons to add this recipe to your regular dinner rotation.

    It’s Packed With Protein

    Chicken breast provides plenty of lean protein, while Greek yogurt contributes even more.

    Protein can help make a meal more satisfying, which is especially useful when you’re trying to build meals that keep you full.

    It’s Loaded With Vegetables

    Cauliflower, broccoli, bell pepper, celery, onion, and garlic all make their way into this casserole.

    Instead of vegetables being an afterthought on the side of your plate, they’re built directly into the meal.

    It’s Lower in Carbohydrates

    Many casseroles rely heavily on noodles, rice, bread, or potatoes.

    This recipe uses cauliflower and broccoli as its vegetable base, making it naturally lower in carbohydrates than many traditional casseroles.

    It’s Great for Meal Prep

    Make a casserole on Sunday and portion the leftovers into containers for several easy lunches or dinners.

    It’s Easy to Customize

    Want it hotter? Add more Buffalo sauce.

    Want it milder? Reduce the sauce.

    Want more vegetables? Throw them in.

    Want extra cheese? Sprinkle a little more over the top.

    This is an extremely flexible recipe.


    Ingredients

    For the Buffalo Chicken Casserole

    • 4 cups cooked chicken breast, shredded or diced
    • 4 cups cauliflower florets
    • 2 cups broccoli florets
    • 1 red bell pepper, diced
    • 1/2 cup celery, finely chopped
    • 1/2 cup yellow or white onion, diced
    • 2 cloves garlic, minced
    • 3/4 cup Buffalo-style hot sauce
    • 1 cup plain nonfat or low-fat Greek yogurt
    • 1/2 cup reduced-fat shredded cheddar cheese
    • 1/2 cup reduced-fat shredded mozzarella cheese
    • 1 tablespoon olive oil
    • 1 teaspoon garlic powder
    • 1 teaspoon onion powder
    • 1/2 teaspoon smoked paprika
    • 1/4 teaspoon black pepper

    Optional Toppings

    • Chopped green onions
    • Thinly sliced celery
    • Fresh parsley
    • Crumbled blue cheese
    • Extra Buffalo sauce
    • Light ranch dressing
    • Greek yogurt ranch dressing
    • Freshly cracked black pepper

    How to Make Healthy Buffalo Chicken Casserole

    Step 1: Preheat Your Oven

    Preheat the oven to 375°F.

    Lightly coat a 9-by-13-inch baking dish with nonstick cooking spray.

    Set it aside while you prepare the remaining ingredients.


    Step 2: Prepare the Cauliflower and Broccoli

    Steam the cauliflower and broccoli for approximately 4–5 minutes.

    You want the vegetables to begin softening without becoming completely tender.

    Remember, they’re going into the oven afterward.

    Once steamed, drain them extremely well.

    This step is more important than it might seem.

    Cauliflower and broccoli can hold quite a bit of water. Too much moisture can turn what should be a creamy casserole into a watery one.

    Allow the vegetables to sit in a colander for several minutes if necessary.


    Step 3: Sauté the Vegetables

    Heat the olive oil in a large skillet over medium heat.

    Add the diced onion, red bell pepper, and celery.

    Cook for approximately 4–5 minutes, stirring occasionally.

    The onion should begin turning translucent while the bell pepper and celery soften slightly.

    Add the minced garlic.

    Cook for another 30–60 seconds, stirring constantly so the garlic doesn’t burn.

    Remove the skillet from the heat.


    Step 4: Make the Creamy Buffalo Sauce

    Add the Greek yogurt to a large mixing bowl.

    Pour in the Buffalo sauce.

    Add:

    • Garlic powder
    • Onion powder
    • Smoked paprika
    • Black pepper

    Whisk everything together until smooth.

    Taste the sauce.

    This is your opportunity to decide how spicy you want the final casserole.

    If you’d like more heat, add additional Buffalo sauce.

    For a milder casserole, add a little more Greek yogurt.


    Step 5: Add the Chicken

    Add your cooked shredded or diced chicken to the Buffalo mixture.

    Rotisserie chicken works wonderfully here, especially when you’re trying to get dinner on the table quickly.

    If using rotisserie chicken, removing the skin can help keep the recipe lighter.

    Stir until the chicken is completely coated in the Buffalo mixture.


    Step 6: Add the Vegetables

    Add the steamed cauliflower and broccoli.

    Then add the sautéed onion, bell pepper, celery, and garlic.

    Gently fold everything together.

    You want every piece of chicken and every vegetable coated with some of that creamy Buffalo sauce.


    Step 7: Assemble the Casserole

    Transfer the mixture to your prepared baking dish.

    Spread everything evenly across the dish.

    Combine the cheddar and mozzarella cheeses and sprinkle them evenly over the top.

    Using two cheeses gives you a nice balance.

    Cheddar brings stronger flavor, while mozzarella gives you that satisfying melted-cheese texture.


    Step 8: Bake

    Place the casserole in your preheated oven.

    Bake uncovered for approximately 20–25 minutes.

    You’re looking for:

    • Bubbling sauce around the edges
    • Tender vegetables
    • Completely melted cheese
    • A hot center

    If you’d like the cheese slightly browned, switch your oven to broil for approximately 1–2 minutes.

    Keep a close eye on it.

    Cheese can go from beautifully browned to burned surprisingly quickly.


    Step 9: Let It Rest

    Remove the casserole from the oven and allow it to rest for approximately 5–10 minutes.

    Resting gives the sauce a little time to thicken and makes serving easier.


    Step 10: Add Your Favorite Toppings

    Now comes the fun part.

    Top individual servings with chopped green onions, celery, parsley, blue cheese, ranch, or additional Buffalo sauce.

    You can even put several toppings on the table and let everyone customize their own bowl.


    How This Recipe Lightens Up Traditional Buffalo Chicken

    Healthy cooking doesn’t always require reinventing an entire dish.

    Sometimes it’s simply about making thoughtful substitutions.

    Traditional Buffalo chicken casseroles can include large quantities of cream cheese, ranch dressing, butter, shredded cheese, pasta, or potatoes.

    Those ingredients aren’t automatically off-limits, but using several of them together can quickly create an extremely rich dish.

    This recipe takes a different approach.

    We keep the ingredients responsible for the recognizable Buffalo chicken flavor while changing some of the ingredients that provide the bulk of the casserole.

    Chicken stays.

    Buffalo sauce stays.

    Cheese stays.

    Celery stays.

    But vegetables replace much of the starch, while Greek yogurt creates the creamy texture.

    You’re still eating Buffalo chicken casserole.

    You’re simply building it differently.


    Why Chicken Breast Is a Great Protein Choice

    Boneless, skinless chicken breast is one of the easiest lean proteins to incorporate into healthy recipes.

    Its mild flavor is especially useful in dishes like this because it absorbs surrounding seasonings.

    Buffalo sauce isn’t competing against the chicken.

    Instead, the chicken becomes a vehicle for all that spicy, tangy flavor.

    Shredded chicken is particularly good because the smaller pieces allow sauce to reach almost every bite.

    You can also use diced grilled chicken if you prefer a chunkier texture.


    Don’t Overlook Cauliflower

    Cauliflower has become incredibly popular as a substitute for higher-carbohydrate ingredients, but its greatest advantage may simply be its versatility.

    Its flavor is mild enough to work with bold sauces.

    That’s exactly what you want in this recipe.

    Rather than tasting strongly like cauliflower, the florets absorb some of the creamy Buffalo sauce.

    Cauliflower also adds texture and bulk to the casserole.

    It helps turn what could otherwise feel like chicken covered in sauce into a complete meal.


    Why Add Broccoli?

    Broccoli adds another layer of color, texture, and nutrition.

    It also stands up well to baking.

    The key is avoiding overcooking it before the casserole enters the oven.

    Steam it just enough to begin the cooking process.

    If it’s already completely tender before baking, it can become mushy by the time the casserole is finished.

    A little bite remaining in the broccoli gives the casserole better texture.


    Celery Is More Important Than You Think

    Buffalo wings and celery have been served together for generations.

    That cool crunch works beautifully against spicy Buffalo sauce.

    Instead of only serving celery sticks alongside the casserole, this recipe incorporates chopped celery directly into it.

    Some celery softens during cooking, while fresh celery can be added as a garnish afterward.

    That gives you two different textures from the same ingredient.


    Greek Yogurt: The Secret to a Creamier Healthy Casserole

    Plain Greek yogurt is one of the easiest ways to create creamy sauces without relying entirely on heavier ingredients.

    It provides a thick consistency and tangy flavor that pairs especially well with Buffalo sauce.

    And because Buffalo sauce already has such a bold personality, the yogurt blends into the background.

    It doesn’t taste like you’re eating yogurt-covered chicken.

    Instead, you get a creamy Buffalo sauce.

    That’s exactly what we’re after.


    How Spicy Is This Casserole?

    That depends almost entirely on the Buffalo sauce you choose.

    Different sauces have different heat levels.

    For a mild version, begin with approximately 1/2 cup Buffalo sauce.

    For medium heat, use the 3/4 cup recommended in the recipe.

    If you love spicy food, increase the sauce or add your favorite hot sauce.

    Another strategy is making the casserole moderately spicy and putting additional Buffalo sauce on the table.

    That allows everyone to control their own heat level.


    How to Make Buffalo Chicken Casserole Even Creamier

    Prefer a really creamy casserole?

    There are several options.

    Increase the Greek yogurt from 1 cup to approximately 1 1/4 cups.

    You could also add a few tablespoons of softened reduced-fat cream cheese.

    Another option is mixing a small amount of light ranch dressing into the Buffalo sauce.

    Just remember that additional creamy ingredients will change the nutritional profile.

    Sometimes a little extra goes a long way.


    Easy Rotisserie Chicken Shortcut

    One of the best ways to turn this into a fast weeknight dinner is using rotisserie chicken.

    Instead of cooking chicken specifically for the casserole, simply shred approximately four cups of cooked chicken.

    Remove the skin if you’re trying to reduce some of the added fat.

    You can assemble the entire casserole surprisingly quickly when the chicken is already prepared.

    Leftover grilled or baked chicken works equally well.


    Turn Leftovers Into Something New

    Don’t feel like eating the exact same casserole for several days?

    Transform your leftovers.

    Spoon leftover Buffalo chicken casserole into a whole-grain tortilla and make a wrap.

    Put it over mixed greens for a Buffalo chicken salad.

    Serve it over brown rice.

    Stuff it inside a baked potato or sweet potato.

    Spoon it into lettuce cups.

    Or add a small amount to scrambled eggs for a spicy breakfast.

    Cooking once doesn’t necessarily mean eating the exact same meal repeatedly.


    Make It a Buffalo Chicken Meal-Prep Bowl

    This casserole is perfect for meal prepping.

    Divide cooked casserole into individual containers.

    Then add different sides to each one.

    One container could have brown rice.

    Another could include quinoa.

    Another could have extra roasted vegetables.

    Another might include a side salad packed separately.

    You now have several meals built from one main recipe.


    Add Even More Vegetables

    Don’t be afraid to clean out your refrigerator with this recipe.

    Vegetables that can work well include:

    • Spinach
    • Mushrooms
    • Zucchini
    • Carrots
    • Green bell peppers
    • Yellow bell peppers
    • Brussels sprouts
    • Green beans

    Just be mindful of vegetables containing lots of water.

    Zucchini and mushrooms, for example, should generally be cooked first so excess moisture doesn’t end up in your casserole.


    What to Serve With Buffalo Chicken Casserole

    Because you’ve already got protein and vegetables in the casserole, you don’t necessarily need much else.

    But if you’re feeding a hungry family, try serving it with:

    • Garden salad
    • Cucumber and tomato salad
    • Roasted asparagus
    • Roasted Brussels sprouts
    • Green beans
    • Carrot and celery sticks
    • Brown rice
    • Quinoa
    • Wild rice
    • Baked sweet potato

    For a lower-carbohydrate dinner, stick with vegetables or salad.

    For a more substantial meal, add a moderate serving of whole grains.


    How to Keep Your Casserole From Becoming Watery

    One of the most common problems with vegetable-based casseroles is excess moisture.

    Thankfully, it’s easy to avoid.

    Drain Your Vegetables Thoroughly

    After steaming the cauliflower and broccoli, let them drain.

    Don’t immediately transfer soaking-wet vegetables into the casserole.

    Cook Watery Vegetables First

    If you’re adding mushrooms or zucchini, sauté them beforehand.

    Don’t Cover the Casserole While Baking

    Baking uncovered allows some moisture to evaporate.

    Let It Rest Before Serving

    Those extra five or ten minutes after baking can make a noticeable difference.

    The casserole will settle and thicken slightly.


    Make-Ahead Instructions

    Want dinner waiting when you get home?

    Prepare the casserole earlier in the day.

    Assemble everything in the baking dish but don’t bake it.

    Cover and refrigerate.

    When you’re ready for dinner, remove it from the refrigerator while the oven preheats.

    Because the casserole is cold, you may need to add several minutes to the baking time.

    Make sure the center is thoroughly heated before serving.


    How to Store Leftovers

    Allow leftovers to cool before transferring them to airtight containers.

    Refrigerate promptly and enjoy within approximately 3–4 days.

    Individual portions are especially convenient because you can grab one for lunch without reheating the entire casserole.


    How to Reheat Buffalo Chicken Casserole

    For individual servings, the microwave is usually easiest.

    Heat until the center is steaming hot.

    For larger portions, place the casserole in an oven-safe dish, cover loosely with foil, and reheat at approximately 350°F until thoroughly warmed.

    Adding a little fresh Buffalo sauce after reheating can wake the flavors back up.


    Can You Freeze Buffalo Chicken Casserole?

    You can freeze Buffalo chicken casserole, although the texture of the vegetables and Greek yogurt sauce may change somewhat after thawing.

    If freezing, divide the cooled casserole into individual freezer-safe containers.

    That allows you to thaw only what you need.

    For the best texture, this casserole is generally at its best when enjoyed fresh or refrigerated for several days.


    Healthy Eating Doesn’t Mean Giving Up Comfort Food

    There’s an unfortunate idea that eating healthier means living on plain grilled chicken, steamed broccoli, and salads.

    It doesn’t have to.

    A sustainable approach to healthier eating should include food you genuinely enjoy.

    That might mean modifying familiar recipes rather than eliminating them.

    If Buffalo chicken is something you love, you don’t necessarily need to stop eating it.

    Instead, look at how you can build a complete meal around those flavors.

    Add vegetables.

    Choose lean protein.

    Control the amount of cheese.

    Use Greek yogurt for creaminess.

    Watch portion sizes.

    Small adjustments can transform a recipe while still allowing it to feel familiar.


    Portion Size Still Matters

    Even healthier recipes can become less balanced when portions become enormous.

    Start with a reasonable serving of casserole.

    Eat slowly.

    Give yourself time to determine whether you’re actually still hungry before going back for seconds.

    Pairing your serving with salad or additional vegetables can also help create a satisfying plate.

    Healthy eating isn’t necessarily about eating as little as possible.

    It’s about creating meals that provide nourishment, satisfaction, and enjoyment.


    Healthy Recipe Tip of the Day

    Use bold flavors to make nutritious foods more exciting.

    Garlic, herbs, spices, citrus, vinegar, mustard, salsa, and hot sauce can completely change the personality of simple ingredients.

    Chicken and cauliflower might sound ordinary on their own.

    Add Buffalo sauce, garlic, smoked paprika, melted cheese, green onions, and crunchy celery, and suddenly you’ve got something you may actually crave.

    That’s an important lesson for anyone trying to eat healthier.

    Don’t just remove ingredients.

    Build flavor.


    Ways to Customize Your Buffalo Chicken Casserole

    Once you’ve made the basic recipe, experiment with different variations.

    Buffalo Chicken Ranch Casserole

    Add a little ranch seasoning to the Greek yogurt mixture.

    Buffalo Chicken Blue Cheese Casserole

    Sprinkle a modest amount of crumbled blue cheese over the casserole before serving.

    Extra-Veggie Buffalo Chicken Casserole

    Add spinach, mushrooms, peppers, or zucchini.

    Buffalo Chicken Rice Casserole

    Add cooked brown rice if you want something more substantial.

    Buffalo Chicken Quinoa Casserole

    Mix in cooked quinoa for additional texture and protein.

    Extra-Spicy Buffalo Chicken Casserole

    Add cayenne pepper, crushed red pepper flakes, or additional hot sauce.

    Mild Buffalo Chicken Casserole

    Reduce the Buffalo sauce and increase the Greek yogurt slightly.


    A Healthy Dinner the Whole Family Can Customize

    One of the challenges of cooking for several people is dealing with different preferences.

    One person loves spicy food.

    Someone else wants ranch.

    Another wants blue cheese.

    Someone wants extra cheese.

    Instead of trying to make the casserole perfect for everyone, keep the base relatively simple and create a small topping station.

    Put out bowls containing:

    • Green onions
    • Celery
    • Buffalo sauce
    • Light ranch
    • Blue cheese
    • Shredded cheese
    • Parsley

    Everyone can finish their own serving exactly how they want it.

    It’s an easy way to make one healthy dinner work for several different tastes.


    Great for Busy Weeknights

    After a long day, complicated healthy recipes can be difficult to stick with.

    That’s another reason casseroles are so useful.

    You can prepare several ingredients ahead of time.

    Cook and shred the chicken earlier.

    Chop the vegetables.

    Mix the Buffalo sauce.

    When dinner time arrives, combine everything, add the cheese, and put it into the oven.

    While it bakes, you’ve got time to clean up the kitchen, prepare a salad, or simply relax for a few minutes.

    Healthy meals are much easier to maintain when they fit realistically into everyday life.


    The Beauty of One-Dish Meals

    There’s something wonderfully convenient about pulling one baking dish from the oven and having most of dinner ready.

    You’ve got your protein.

    You’ve got several vegetables.

    You’ve got plenty of flavor.

    You can serve the casserole alone or add a simple side depending on your appetite.

    And fewer cooking vessels usually mean fewer dishes afterward.

    That’s always a win.


    Buffalo Flavor Without the Deep Fryer

    Traditional Buffalo wings are delicious, but the signature Buffalo flavor isn’t created by deep frying.

    It’s the sauce.

    That means you can use those same flavors in grilled, baked, roasted, or casserole-style recipes.

    This is an important concept when trying to create healthier versions of favorite foods.

    Identify what you truly love about a dish.

    Then determine whether you can preserve that element while changing the rest.

    With Buffalo chicken, keeping the spicy, tangy sauce allows you to dramatically change the cooking method while maintaining the personality of the dish.


    A Comforting Meal for Any Season

    Casseroles are especially comforting during cooler months, but Buffalo chicken works throughout the year.

    Serve this casserole during fall football season.

    Make it for a cold winter dinner.

    Prepare it for meal prep during spring.

    Serve it alongside a fresh salad during summer.

    The bold Buffalo flavor keeps it from feeling overly heavy, especially when the casserole is packed with vegetables.


    Final Thoughts

    Today’s Healthy Recipe of the Day: Buffalo Chicken Casserole is proof that comfort food and healthier eating can absolutely share the same plate.

    You get tender chicken, cauliflower, broccoli, bell peppers, celery, creamy Greek yogurt, tangy Buffalo sauce, and melted cheese all baked together into one flavorful dish.

    It’s spicy enough to keep dinner interesting.

    It’s creamy enough to satisfy that comfort-food craving.

    It’s packed with protein and vegetables.

    And it’s versatile enough to customize for almost anyone at the table.

    Most importantly, this isn’t a recipe that asks you to abandon the flavors you love.

    It simply takes those flavors and builds a more balanced meal around them.

    Healthy eating becomes much easier when dinner is something you’re excited to eat.

    So the next time you’re craving Buffalo wings, Buffalo chicken dip, or a cheesy casserole, give this healthier version a try.

    You might discover that vegetables, lean chicken, creamy Buffalo sauce, and a little melted cheese are all you need to turn an ordinary weeknight into a dinner worth looking forward to.

    What’s your favorite way to enjoy Buffalo chicken—wings, pizza, wraps, sandwiches, dip, salad, or a casserole like this one?

  • Recipe of the Day: Stuffed Bell Peppers with Ground Turkey

    Advertisements

    When you want a dinner that’s colorful, comforting, filling, and easy enough for a weeknight, Stuffed Bell Peppers with Ground Turkey are an excellent choice. Tender bell peppers are filled with a savory combination of lean ground turkey, fluffy rice, tomatoes, onions, garlic, herbs, and melted cheese to create a complete meal inside every pepper.

    Stuffed bell peppers have been a family dinner favorite for generations, and it’s easy to understand why. They’re incredibly versatile. You can change the meat, vegetables, grains, seasonings, sauce, and cheese to create dozens of different variations.

    For today’s Recipe of the Day, we’re keeping things relatively simple while packing in plenty of flavor. Ground turkey replaces the traditional ground beef, giving the filling a lighter texture while still providing plenty of satisfying protein.

    Add rice, tomatoes, aromatics, seasonings, and cheese, and you have a comforting meal that’s hearty without feeling overly heavy.

    Whether you’re cooking for your family, preparing meals for the week, or simply trying to find another delicious way to use ground turkey, this recipe deserves a spot in your dinner rotation.


    Why Stuffed Bell Peppers Make Such a Great Dinner

    Some recipes require several different pots, pans, side dishes, and complicated preparation. Stuffed bell peppers are different.

    They’re essentially a complete dinner wrapped inside a vegetable.

    You have protein from the turkey, carbohydrates from the rice, vegetables from the peppers and tomatoes, and plenty of flavor from the seasonings and cheese.

    They also look impressive without requiring advanced cooking skills.

    Bring a baking dish filled with red, orange, yellow, and green stuffed peppers to the dinner table, and you instantly have a colorful centerpiece for the meal.

    Best of all, stuffed peppers are forgiving.

    Don’t have white rice? Use brown rice.

    Want more vegetables? Add spinach or mushrooms.

    Like spicy food? Add jalapeños.

    Trying to use something already sitting in your refrigerator? There’s a good chance you can incorporate it into the filling.

    That’s the beauty of stuffed peppers.


    Ground Turkey: A Delicious Alternative to Ground Beef

    Ground beef may be the traditional choice for many stuffed pepper recipes, but ground turkey works exceptionally well.

    Turkey has a relatively mild flavor, allowing it to absorb the seasonings and ingredients surrounding it. Garlic, onion, tomatoes, smoked paprika, herbs, and cheese all help transform simple ground turkey into a flavorful filling.

    Because turkey can be lean, one of the most important parts of this recipe is adding enough moisture.

    The diced tomatoes and tomato sauce aren’t just there for flavor. They help prevent the filling from becoming dry while the peppers bake.

    Cooking the onions before adding the turkey also contributes moisture and sweetness.

    The result is a juicy, flavorful filling rather than dry, crumbly ground turkey.


    Ingredients

    For the Stuffed Peppers

    • 4 large bell peppers
    • 1 pound lean ground turkey
    • 1 tablespoon olive oil
    • 1 small yellow onion, finely diced
    • 2 cloves garlic, minced
    • 1 1/2 cups cooked rice
    • 1 can (14.5 ounces) diced tomatoes, drained
    • 1/2 cup tomato sauce
    • 1 teaspoon Italian seasoning
    • 1 teaspoon smoked paprika
    • 1/2 teaspoon onion powder
    • 1/2 teaspoon garlic powder
    • 1/2 teaspoon salt, or to taste
    • 1/4 teaspoon freshly ground black pepper
    • 1 cup shredded mozzarella, cheddar, Monterey Jack, or an Italian cheese blend
    • 2 tablespoons chopped fresh parsley, optional
    • Crushed red pepper flakes, optional

    Optional Add-Ins

    You can also add any combination of:

    • 1/2 cup corn
    • 1/2 cup black beans
    • 1/2 cup chopped mushrooms
    • 1 cup chopped fresh spinach
    • 1/2 cup diced zucchini
    • 1/4 cup grated Parmesan
    • Chopped jalapeños
    • Fresh basil
    • Fresh cilantro
    • Hot sauce

    Choosing Your Bell Peppers

    You can use any color of bell pepper for this recipe, but each one offers a slightly different flavor.

    Green Bell Peppers

    Green peppers have the strongest and least sweet flavor. Their slightly bitter edge pairs particularly well with savory meat fillings.

    Red Bell Peppers

    Red bell peppers are naturally sweet. Roasting them intensifies that sweetness, creating a wonderful contrast with the savory turkey filling.

    Yellow Bell Peppers

    Yellow peppers are mild, sweet, and colorful. They’re a great middle ground if you don’t want the stronger flavor of green peppers.

    Orange Bell Peppers

    Orange peppers are also sweet and mild. They look especially attractive when served alongside red and yellow peppers.

    For the most colorful presentation, use a combination.


    Should You Cut the Peppers in Half or Leave Them Whole?

    Either method works.

    For this recipe, I recommend cutting the peppers in half lengthwise.

    Pepper halves are easier to fill, cook more evenly, and create individual portions that aren’t overwhelmingly large.

    Whole peppers create a more traditional presentation. If you prefer them whole, slice off the tops, remove the seeds and membranes, and fill each pepper from the top.

    Whole peppers may require additional baking time.


    How to Make Stuffed Bell Peppers with Ground Turkey

    Step 1: Preheat the Oven

    Preheat your oven to 375°F.

    Lightly grease a large baking dish with cooking spray or a small amount of olive oil.


    Step 2: Prepare the Bell Peppers

    Wash and dry the peppers.

    Slice each pepper in half lengthwise.

    Carefully remove the seeds and white membranes without cutting through the pepper.

    Place the pepper halves cut-side up inside your prepared baking dish.

    Optional Pre-Baking Step

    If you prefer very soft peppers, cover the dish with aluminum foil and bake the empty pepper halves for approximately 10 minutes.

    Remove them from the oven while you prepare the filling.

    This step isn’t absolutely necessary, but it helps guarantee tender peppers.


    Step 3: Sauté the Onion

    Heat one tablespoon of olive oil in a large skillet over medium heat.

    Add the diced onion.

    Cook for approximately 3 to 5 minutes, stirring occasionally, until the onion becomes soft and translucent.

    Don’t rush this step.

    Cooking the onions brings out their natural sweetness and creates a flavorful foundation for the filling.


    Step 4: Add the Garlic

    Add the minced garlic.

    Cook for approximately 30 seconds to 1 minute, stirring constantly.

    Garlic can burn quickly, so don’t leave it unattended.

    Once it becomes fragrant, you’re ready for the turkey.


    Step 5: Cook the Ground Turkey

    Add the ground turkey to the skillet.

    Use a wooden spoon or spatula to break the turkey into small pieces.

    Cook until browned and no longer pink, stirring occasionally.

    Ground turkey should reach an internal temperature of 165°F for food safety.

    Because the turkey will continue cooking inside the peppers, avoid unnecessarily overcooking it during this stage.


    Step 6: Season the Filling

    Add:

    • Italian seasoning
    • Smoked paprika
    • Onion powder
    • Garlic powder
    • Salt
    • Black pepper

    Stir until the seasonings evenly coat the turkey.

    The smoked paprika adds a subtle smoky depth that works especially well with the turkey and roasted peppers.


    Step 7: Add the Tomatoes and Rice

    Add the drained diced tomatoes, tomato sauce, and cooked rice.

    Stir everything together.

    Reduce the heat to medium-low and allow the mixture to simmer for approximately 3 to 5 minutes.

    Taste the filling before stuffing the peppers.

    This is your opportunity to adjust the seasonings.

    Want more garlic? Add garlic powder.

    Want heat? Add red pepper flakes.

    Want more tomato flavor? Add another spoonful of tomato sauce.


    Step 8: Add Some Cheese

    Remove the skillet from the heat.

    Stir approximately 1/2 cup of shredded cheese into the turkey mixture.

    The cheese melts into the warm filling, helping bind everything together while adding richness.

    Save the remaining cheese for topping the peppers.


    Step 9: Stuff the Bell Peppers

    Generously spoon the turkey mixture into each pepper half.

    Pack the filling gently without crushing the peppers.

    You want each pepper overflowing slightly with turkey, rice, and vegetables.

    If you have extra filling, don’t throw it away. Place it around the peppers in the baking dish or refrigerate it for another meal.


    Step 10: Add the Cheese

    Sprinkle the remaining shredded cheese over each stuffed pepper.

    You can use mozzarella for a mild, stretchy topping, cheddar for a sharper flavor, Monterey Jack for creaminess, or an Italian blend for a combination of flavors.

    Cheese lovers can certainly add more.


    Step 11: Bake the Stuffed Peppers

    Cover the baking dish loosely with aluminum foil.

    Bake for approximately 20 minutes.

    Remove the foil and continue baking for another 10 to 15 minutes, or until the peppers are tender and the cheese is completely melted.

    Cooking time may vary depending on the thickness of your peppers and how soft you prefer them.


    Step 12: Get That Golden Cheese Topping

    If you love browned, bubbly cheese, switch your oven to broil during the final minute or two.

    Place the peppers under the broiler and watch them carefully.

    The cheese can go from beautifully golden to burned surprisingly quickly.


    Step 13: Let Them Rest

    Remove the baking dish from the oven and allow the peppers to rest for approximately 5 minutes.

    This helps the filling settle and makes the peppers easier to serve.

    Finish with chopped parsley, fresh herbs, grated Parmesan, or crushed red pepper flakes.

    Then dig in.


    How to Keep Ground Turkey from Becoming Dry

    One complaint people sometimes have about ground turkey is that it can become dry.

    Fortunately, that’s easy to prevent.

    First, don’t overcook it in the skillet. Cook it just until it’s safely done.

    Second, incorporate ingredients that provide moisture.

    In this recipe, the onions, tomatoes, tomato sauce, and cheese all help create a moist filling.

    Third, keep the peppers covered during the first portion of baking. The trapped steam helps soften the peppers while protecting the filling.

    Finally, don’t be afraid of sauce.

    If your turkey mixture looks dry before you stuff the peppers, add another tablespoon or two of tomato sauce.


    Rice Options

    You don’t have to stick with traditional white rice.

    White Rice

    Simple, fluffy, and familiar. White rice creates the classic stuffed pepper texture.

    Brown Rice

    Brown rice has a slightly nutty flavor and chewier texture.

    Jasmine Rice

    Jasmine rice gives the filling a delicate aroma and soft texture.

    Basmati Rice

    Basmati stays relatively fluffy and separated, making it another excellent choice.

    Wild Rice Blend

    For a heartier variation, try a cooked wild rice blend.

    Quinoa

    Quinoa can replace the rice entirely and adds its own distinctive texture.

    Cauliflower Rice

    If you’d like to reduce the amount of traditional rice, substitute some or all of it with cauliflower rice.


    Turn Them Into Southwest Turkey Stuffed Peppers

    One of the easiest ways to reinvent this recipe is to take it in a Southwest direction.

    Replace the Italian seasoning with taco seasoning.

    Add:

    • Black beans
    • Corn
    • Salsa
    • Diced green chiles
    • Jalapeños
    • Cumin
    • Chili powder

    Top the peppers with cheddar or Pepper Jack cheese.

    After baking, garnish with avocado, cilantro, sour cream, green onions, salsa, or pico de gallo.

    Suddenly you’ve transformed the same basic recipe into an entirely different dinner.


    Italian Ground Turkey Stuffed Peppers

    For an Italian-inspired variation, increase the Italian seasoning and replace the tomato sauce with your favorite marinara.

    Add Parmesan cheese to the turkey mixture.

    Top each pepper with mozzarella.

    After baking, garnish with fresh basil and additional Parmesan.

    You could even add finely chopped turkey sausage to the filling for additional flavor.


    Mediterranean Stuffed Peppers

    For another variation, give your peppers a Mediterranean twist.

    Try adding:

    • Spinach
    • Diced tomatoes
    • Kalamata olives
    • Feta cheese
    • Oregano
    • Parsley
    • Lemon zest

    You can reduce or eliminate the mozzarella and finish the peppers with crumbled feta instead.


    Make Them Extra Spicy

    If mild isn’t your style, stuffed peppers can easily bring the heat.

    Add diced jalapeño or serrano pepper when cooking the onion.

    Season the turkey with cayenne, crushed red pepper flakes, chipotle powder, or hot sauce.

    Top everything with Pepper Jack cheese.

    For serving, drizzle your favorite hot sauce across the top.


    Sneak in More Vegetables

    Stuffed peppers are an excellent way to incorporate additional vegetables into dinner.

    Finely chop your vegetables so they blend naturally into the turkey filling.

    Good choices include:

    • Mushrooms
    • Spinach
    • Zucchini
    • Carrots
    • Celery
    • Corn
    • Broccoli
    • Cauliflower
    • Additional bell peppers

    Sauté vegetables with the onions before adding the ground turkey.

    Mushrooms are particularly good because they add savory flavor and moisture.


    What to Serve with Ground Turkey Stuffed Peppers

    These peppers are hearty enough to serve as a complete meal, but a simple side can round out dinner.

    Try pairing them with a fresh garden salad, Caesar salad, roasted broccoli, steamed green beans, roasted asparagus, zucchini, garlic bread, dinner rolls, or fresh fruit.

    For an especially hearty meal, serve the peppers alongside roasted potatoes or a bowl of soup.


    Make-Ahead Stuffed Bell Peppers

    Busy evenings become much easier when dinner is already assembled.

    Prepare the filling according to the recipe.

    Stuff the peppers and place them in your baking dish.

    Cover tightly and refrigerate.

    When you’re ready to eat, remove the dish from the refrigerator while the oven preheats.

    Add the cheese and bake as directed.

    Because everything starts cold, you may need to increase the baking time slightly.


    Meal Prep Idea

    Stuffed peppers also work wonderfully for meal preparation.

    Bake a batch on Sunday and divide the peppers among individual meal-prep containers.

    Add a side of vegetables or salad ingredients, and you’ve already handled several lunches or dinners.

    Because each pepper is naturally portioned, there’s very little work involved when it’s time to eat.


    How to Store Leftover Stuffed Peppers

    Allow the peppers to cool before storing.

    Transfer them to an airtight container and refrigerate for approximately 3 to 4 days.

    If possible, store them upright or cut-side up so the filling stays in place.


    How to Reheat Stuffed Peppers

    Microwave

    Place one pepper on a microwave-safe plate.

    Heat until warmed completely through.

    Microwave times vary depending on the size of the pepper and the power of your microwave.

    Oven

    Place the peppers inside a baking dish.

    Add a tablespoon or two of water or tomato sauce to the bottom of the dish.

    Cover with foil.

    Bake at 350°F until heated through.

    Remove the foil during the final few minutes if you’d like to refresh the cheese topping.


    Can You Freeze Stuffed Bell Peppers?

    Yes.

    Stuffed peppers can be frozen, although the bell peppers may become slightly softer after thawing and reheating.

    Allow cooked peppers to cool completely.

    Wrap individual peppers well or place them in freezer-safe containers.

    Freeze them for convenient future meals.

    Thaw overnight in the refrigerator before reheating for the best results.


    What to Do With Extra Filling

    Sometimes you have more turkey filling than peppers.

    That’s a good problem to have.

    Use the extra filling to make:

    • Turkey and rice bowls
    • Burritos
    • Quesadillas
    • Lettuce wraps
    • Stuffed zucchini
    • Stuffed tomatoes
    • Taco bowls
    • Turkey wraps

    You can also simply place the extra mixture in a baking dish, cover it with cheese, and bake it alongside the peppers.


    Common Stuffed Pepper Mistakes

    Not Seasoning the Filling Enough

    Bell peppers and rice both have mild flavors, so the turkey mixture needs proper seasoning.

    Taste the cooked filling before stuffing your peppers and adjust as needed.

    Using Uncooked Rice

    This recipe calls for cooked rice.

    Adding uncooked rice can cause problems because it requires additional liquid and cooking time.

    Overcooking the Turkey

    Remember that the turkey goes into the oven after cooking in the skillet.

    Don’t cook it far beyond the point of doneness before stuffing the peppers.

    Not Adding Enough Moisture

    If your filling looks dry before it goes into the peppers, it will probably be dry afterward.

    Add a little additional tomato sauce.

    Underbaking the Peppers

    Some people enjoy peppers with a little bite, while others want them completely tender.

    If you prefer softer peppers, pre-bake them for 10 minutes before stuffing.


    Why This Recipe Works for Busy Weeknights

    Weeknight dinners need to strike a balance.

    They should be relatively easy to prepare, satisfying enough to feed hungry people, and flavorful enough that everyone actually wants to eat them.

    These turkey stuffed peppers check those boxes.

    Much of the recipe can also be prepared ahead of time.

    Cook rice ahead.

    Chop the vegetables ahead.

    Prepare the turkey filling ahead.

    You can even completely assemble the peppers ahead.

    When dinner approaches, all that’s left is baking.


    A Great Way to Use Leftovers

    Stuffed peppers are also perfect when you’re trying to clean out the refrigerator.

    Have half a container of leftover rice?

    Use it.

    A handful of spinach that needs to be eaten?

    Chop it and add it.

    A small amount of shredded cheese?

    Put it on top.

    Leftover corn, beans, mushrooms, zucchini, or tomato sauce?

    There’s probably room for those too.

    Instead of being a rigid recipe, stuffed peppers can become a blueprint for creating dinner from ingredients you already have.


    Family-Friendly and Customizable

    Another advantage of stuffed peppers is that individual peppers can be customized.

    Maybe one person loves spicy food while another doesn’t.

    Add jalapeños to only one or two peppers.

    Someone doesn’t like cheese?

    Leave it off theirs.

    Someone wants extra cheese?

    Pile it on.

    Different colors of bell peppers can even be assigned to different fillings, making it easy to remember which pepper belongs to whom.


    Presentation Tips

    Stuffed bell peppers are naturally colorful, but a few finishing touches can make them look even better.

    Arrange several different pepper colors in the baking dish.

    Allow the cheese to become lightly golden.

    Sprinkle fresh parsley or basil over the top immediately before serving.

    A little fresh green against the red, yellow, and orange peppers creates a beautiful contrast.

    For Italian-style peppers, add freshly grated Parmesan.

    For Southwest peppers, use cilantro, avocado, green onions, or pico de gallo.


    Approximate Serving Size

    This recipe makes approximately 8 stuffed pepper halves, depending on the size of your bell peppers and how generously you fill them.

    For a lighter meal, one stuffed half with a salad may be enough.

    For a heartier dinner, serve two halves per person.

    That generally makes this recipe suitable for approximately 4 servings.


    Recipe at a Glance

    Prep Time: About 20 minutes
    Cook Time: About 30–40 minutes
    Total Time: About 50–60 minutes
    Servings: Approximately 4
    Main Protein: Ground turkey
    Difficulty: Easy to moderate
    Best For: Family dinners, weeknight meals, meal prep, and leftovers


    Why You’ll Want to Make These Again

    The best everyday recipes aren’t necessarily the most complicated ones.

    They’re the meals that taste good, use accessible ingredients, leave you satisfied, and can be adapted based on what you already have.

    Stuffed Bell Peppers with Ground Turkey fit that description perfectly.

    You can make the original recipe one week, a Southwest version the next, and an Italian version after that.

    The basic concept remains the same, but the possibilities are nearly endless.

    And because the meal is served inside colorful roasted peppers, even a simple dinner feels a little more special.


    Recipe of the Day Final Thoughts

    Today’s Recipe of the Day: Stuffed Bell Peppers with Ground Turkey combines classic comfort food with a lighter, versatile filling that’s perfect for everyday cooking.

    Sweet bell peppers become tender in the oven while the ground turkey filling stays savory and satisfying thanks to onions, garlic, tomatoes, rice, herbs, spices, and plenty of melted cheese.

    It’s a recipe you can make exactly as written or use as inspiration.

    Add more vegetables.

    Turn up the spice.

    Switch the cheese.

    Replace the rice.

    Give it an Italian, Mexican, Southwest, or Mediterranean twist.

    Make it ahead for a busy night or prepare extra peppers for easy meals later in the week.

    However you customize them, the basic formula is hard to beat: tender roasted bell peppers + seasoned ground turkey + rice + tomatoes + melted cheese = one seriously satisfying dinner.

    Sometimes the best meals don’t need complicated techniques or expensive ingredients. They simply need familiar flavors brought together in a way that makes everyone excited to sit down for dinner.

    And these Ground Turkey Stuffed Bell Peppers do exactly that.

    How would you build your perfect stuffed bell pepper — ground turkey, beef, chicken, sausage, or meatless, and what cheese would you put on top?

  • Breakfast of the Day: Caprese Breakfast Toast

    Advertisements

    Bring a little Italian-inspired freshness to your morning with today’s Breakfast of the Day: Caprese Breakfast Toast. Crispy toasted bread is layered with juicy ripe tomatoes, creamy fresh mozzarella, fragrant basil, and a perfectly cooked egg before being finished with extra-virgin olive oil and a drizzle of sweet, tangy balsamic glaze.

    It is colorful, satisfying, and surprisingly simple to prepare.

    Caprese Breakfast Toast is an excellent option when you want to break away from heavier breakfast favorites without settling for something boring. Every bite delivers a combination of crunchy bread, creamy cheese, fresh tomato, aromatic basil, rich egg yolk, and tangy balsamic flavor.

    Whether you are making a quick weekday breakfast, relaxing over a weekend brunch, or serving breakfast to family and friends, this recipe can turn a handful of simple ingredients into something memorable.

    What Is Caprese Breakfast Toast?

    Caprese Breakfast Toast takes inspiration from the classic Italian combination of tomatoes, fresh mozzarella, basil, and olive oil.

    Instead of serving those ingredients as a salad, they are layered over toasted bread and transformed into a satisfying breakfast.

    Adding an egg gives the dish even more breakfast appeal. A sunny-side-up or over-easy egg is particularly delicious because the warm yolk runs over the tomatoes and mozzarella when you cut into it.

    The result is somewhere between avocado toast, an open-faced breakfast sandwich, and a classic Caprese salad.

    And that combination works beautifully.

    Why Caprese Flavors Belong at Breakfast

    Tomatoes and eggs are already a classic breakfast pairing. Cheese and eggs are another. Toast is one of the most familiar breakfast foods around.

    Caprese Breakfast Toast simply brings those familiar ingredients together with fresh basil and balsamic glaze.

    The result feels different without being unfamiliar.

    Fresh tomatoes provide acidity and sweetness. Mozzarella adds creaminess without overpowering the other ingredients. Basil brings freshness, and the balsamic glaze provides just enough sweetness and tanginess to balance the richness of the egg.

    It is a breakfast built around contrasts.

    You get warm and cool, crispy and creamy, savory and slightly sweet—all on the same piece of toast.

    Caprese Breakfast Toast Recipe

    Ingredients

    Makes 2 servings

    • 2 large, thick slices sourdough, Italian, ciabatta, or multigrain bread
    • 1 large ripe tomato, sliced
    • 4 ounces fresh mozzarella cheese, sliced
    • 2 large eggs
    • 6–10 fresh basil leaves
    • 1 tablespoon extra-virgin olive oil
    • 1–2 teaspoons balsamic glaze
    • Salt, to taste
    • Freshly ground black pepper, to taste
    • Pinch of red pepper flakes, optional
    • 1 small garlic clove, optional
    • Pesto, optional

    Instructions

    Step 1: Choose Your Bread

    Begin with thick slices of sturdy bread.

    Sourdough is an excellent choice because its slightly tangy flavor complements the tomatoes and balsamic glaze. Ciabatta and rustic Italian bread are also great options.

    If you prefer whole grains, use a hearty multigrain or whole-wheat artisan bread.

    Avoid bread that is extremely thin or soft. The toppings contain moisture, and a sturdy piece of toast will hold everything together much better.

    Step 2: Toast the Bread

    Toast the bread until it is golden brown and crisp.

    You can use a toaster, toaster oven, skillet, grill pan, or conventional oven.

    For an especially flavorful version, lightly brush both sides of the bread with olive oil before toasting it in a skillet.

    The goal is to develop a crisp exterior while leaving a little chewiness in the center.

    Step 3: Add a Touch of Garlic

    This step is optional but highly recommended for garlic lovers.

    Cut a small garlic clove in half and gently rub the cut side across the surface of the warm toast.

    You don’t need much.

    The heat and rough surface of the toasted bread will release enough garlic flavor to give the toast an additional savory layer without overwhelming the tomatoes and basil.

    Step 4: Prepare the Tomatoes

    Slice the tomato into relatively even pieces.

    Place the slices on a plate or paper towel and lightly season them with salt and freshly ground black pepper.

    Allowing the tomatoes to sit for a few minutes helps bring out their natural flavor.

    If your tomatoes are especially juicy, gently blot them with a paper towel before putting them on the toast.

    This small step can make a big difference in preventing soggy bread.

    Step 5: Prepare the Mozzarella

    Drain your fresh mozzarella and pat it gently with a paper towel.

    Slice it into pieces roughly the same size as your tomato slices.

    Fresh mozzarella contains more moisture than standard low-moisture mozzarella, so removing a little excess liquid will help your toast stay crisp.

    Step 6: Cook the Eggs

    Heat a nonstick skillet over medium-low to medium heat.

    Add a small amount of olive oil or butter if desired.

    Crack the eggs into the skillet and cook them to your preferred doneness.

    For the classic presentation, sunny-side-up eggs are fantastic. The bright golden yolk looks beautiful against the red tomatoes, white mozzarella, and green basil.

    Over-easy eggs are another excellent choice.

    If you don’t enjoy runny yolks, cook your eggs over-medium or over-hard.

    You can even use scrambled or poached eggs if you prefer.

    Step 7: Build Your Caprese Toast

    Place the toasted bread on serving plates.

    Drizzle each piece lightly with extra-virgin olive oil.

    Arrange alternating slices of tomato and mozzarella across the bread.

    Try overlapping them slightly so every bite includes a little tomato and cheese.

    Step 8: Add the Egg

    Carefully place one cooked egg over each piece of toast.

    Season the egg lightly with salt and freshly ground black pepper.

    Step 9: Add Fresh Basil

    Tear or thinly slice the fresh basil leaves.

    Scatter them generously over the tomatoes, mozzarella, and egg.

    You can also leave a few smaller basil leaves whole for a beautiful presentation.

    Step 10: Finish With Balsamic Glaze

    Drizzle a small amount of balsamic glaze across the toast.

    You don’t need much.

    Balsamic glaze has a concentrated sweet-and-tangy flavor, so a little goes a long way.

    Add red pepper flakes if you enjoy a touch of heat.

    Serve immediately.

    The Secret Is Using Great Ingredients

    Caprese-style dishes are incredibly simple, which means there isn’t much room for mediocre ingredients to hide.

    You don’t need expensive ingredients, but freshness matters.

    When possible, choose ripe tomatoes, fresh mozzarella, vibrant basil, good bread, and flavorful olive oil.

    Each ingredient contributes something important to the finished breakfast.

    Choosing the Perfect Tomato

    Tomatoes are one of the stars of this recipe.

    During peak tomato season, use whichever tomatoes look and smell the best.

    Heirloom tomatoes can provide incredible flavor and beautiful colors.

    Beefsteak tomatoes create large slices that fit perfectly across toast.

    Roma tomatoes are slightly less juicy and can help keep your toast crisp.

    Vine-ripened tomatoes are an excellent everyday option.

    Cherry and grape tomatoes work wonderfully too. Slice them in half and pile them over the toast.

    You could even combine red, yellow, orange, and purple tomatoes for an especially colorful breakfast.

    Why Fresh Mozzarella Works Best

    Fresh mozzarella has a soft texture and mild, milky flavor that allows the tomatoes and basil to remain prominent.

    It also becomes slightly softer when placed against warm toast and eggs.

    Look for fresh mozzarella packed in water or brine.

    Mozzarella pearls are another fun option. Simply drain them, slice them in half, and scatter them across your toast.

    If you can’t find fresh mozzarella, regular sliced mozzarella will still work, although the flavor and texture will be slightly different.

    Fresh Basil Is Essential

    Basil might seem like a garnish, but in Caprese-inspired dishes, it is much more important.

    Fresh basil provides an aromatic quality that dried basil simply cannot reproduce.

    Add the basil after cooking rather than exposing it to prolonged heat. This preserves its fresh flavor and vibrant color.

    If you grow basil at home, this breakfast is an excellent way to use it.

    The Perfect Egg for Caprese Toast

    There really isn’t a wrong way to prepare the egg.

    However, different cooking methods create different experiences.

    Sunny-Side Up

    This is arguably the most visually impressive option.

    The bright yellow yolk sits beautifully on top of the red tomatoes and green basil. Once broken, the yolk creates a rich sauce that coats the toast.

    Over Easy

    You still get a soft, runny yolk, but both sides of the egg are lightly cooked.

    Over Medium

    Perfect for anyone who wants a softer yolk without it being completely runny.

    Scrambled

    Soft scrambled eggs make the toast especially comforting.

    Place the scrambled eggs underneath or on top of the tomato and mozzarella.

    Poached

    A poached egg turns Caprese toast into something that feels like it came straight from a brunch restaurant.

    Break into the egg and allow the yolk to run over everything underneath.

    Try the Avocado Caprese Version

    If you love avocado toast, combine the two breakfasts.

    Mash half a ripe avocado with a pinch of salt, pepper, and a squeeze of lemon juice.

    Spread it over the toasted bread before adding the tomatoes and mozzarella.

    Top with your egg, basil, and balsamic glaze.

    The avocado adds extra creaminess and makes the breakfast even more substantial.

    Pesto Caprese Breakfast Toast

    Want even more basil flavor?

    Spread a thin layer of pesto over the toasted bread before assembling your toppings.

    Then add mozzarella, tomato, egg, fresh basil, and balsamic glaze.

    Pesto adds garlic, herbs, olive oil, and nutty flavor to the toast, making the finished breakfast even more savory.

    Bacon Caprese Breakfast Toast

    Bacon lovers don’t have to sit this breakfast out.

    Cook several strips of bacon until crispy.

    Crumble them over your finished toast or place whole strips underneath the tomato and mozzarella.

    The salty, smoky bacon contrasts beautifully with sweet tomatoes and balsamic glaze.

    Prosciutto Caprese Breakfast Toast

    For an even stronger Italian influence, add thin slices of prosciutto.

    Place the prosciutto directly over the toast before adding the tomato and mozzarella.

    The salty cured meat provides another layer of flavor without requiring additional cooking.

    Spicy Caprese Breakfast Toast

    If you like a little heat in the morning, there are several ways to spice things up.

    Sprinkle crushed red pepper flakes over the finished toast.

    You can also add thinly sliced fresh jalapeños, chili crisp, hot honey, or a small drizzle of your favorite hot sauce.

    Hot honey is particularly interesting because its sweetness works surprisingly well with mozzarella, tomatoes, and balsamic glaze.

    Add More Vegetables

    Caprese Breakfast Toast can easily become a vehicle for additional vegetables.

    Try adding:

    • Baby spinach
    • Arugula
    • Sautéed mushrooms
    • Roasted red peppers
    • Grilled zucchini
    • Sautéed onions
    • Caramelized onions
    • Microgreens
    • Sliced avocado

    Peppery arugula is an especially good addition because it provides another fresh flavor without overpowering the traditional Caprese ingredients.

    Make It on the Grill

    On a warm morning, take breakfast outside.

    Thick slices of bread are fantastic when grilled.

    Brush them lightly with olive oil and grill until you see crisp, golden grill marks.

    Grilled bread develops a subtle smoky flavor that works wonderfully with fresh mozzarella, tomatoes, and basil.

    You can even grill thick tomato slices briefly before assembling the toast.

    Turn It Into a Caprese Breakfast Sandwich

    If you need a breakfast that is easier to eat with your hands, turn the toast into a sandwich.

    Use two smaller slices of toasted bread.

    Layer them with mozzarella, tomato, basil, and a fried egg.

    Add pesto or balsamic glaze before closing the sandwich.

    For an extra hearty version, add avocado, bacon, turkey sausage, or prosciutto.

    Wrap it in parchment or foil if you need breakfast on the go.

    Make Caprese Breakfast Crostini

    Hosting brunch?

    Turn the recipe into bite-sized crostini.

    Slice a baguette into rounds and brush each piece lightly with olive oil.

    Toast until golden and crisp.

    Top the pieces with tomato, fresh mozzarella, and basil.

    Drizzle lightly with balsamic glaze.

    You can serve scrambled eggs alongside the crostini or add small spoonfuls of scrambled egg directly on top.

    These make a colorful addition to a breakfast or brunch spread.

    Make a Caprese Breakfast Board

    Breakfast boards are an easy way to serve several people while allowing everyone to build their own meal.

    Arrange toasted bread on a large platter or board alongside:

    • Sliced tomatoes
    • Cherry tomatoes
    • Fresh mozzarella
    • Basil leaves
    • Avocado
    • Fried or scrambled eggs
    • Crispy bacon
    • Prosciutto
    • Pesto
    • Olive oil
    • Balsamic glaze
    • Red pepper flakes
    • Arugula

    Everyone can assemble their own Caprese toast exactly how they like it.

    This is especially convenient when serving people with different preferences.

    What to Serve With Caprese Breakfast Toast

    Caprese Breakfast Toast can easily stand on its own, but a few simple sides can turn it into a complete brunch.

    Fresh fruit is one of the best options.

    Try serving it with strawberries, blueberries, raspberries, grapes, melon, peaches, pineapple, or a mixed fruit salad.

    For something heartier, add roasted breakfast potatoes or hash browns.

    A small green salad dressed with lemon and olive oil also works surprisingly well, particularly for brunch.

    Other possibilities include Greek yogurt, cottage cheese, turkey sausage, bacon, oatmeal, or additional eggs.

    Drink Pairings

    Coffee is always welcome with breakfast, and Caprese toast pairs especially well with a simple hot coffee, cappuccino, latte, or cold brew.

    For a refreshing non-coffee option, try:

    • Fresh orange juice
    • Grapefruit juice
    • Lemon water
    • Iced tea
    • Sparkling water with lemon
    • Fresh fruit smoothies

    The freshness of the toast makes lighter, refreshing beverages particularly enjoyable.

    Can You Prepare Caprese Breakfast Toast Ahead of Time?

    The finished toast is best prepared immediately before eating.

    However, you can prepare most of the ingredients ahead of time.

    Wash your tomatoes and basil.

    Drain the mozzarella.

    Have your bread sliced and ready.

    You can also prepare cooked bacon, roasted vegetables, or other toppings ahead of time.

    When breakfast time arrives, simply toast the bread, cook the eggs, slice the fresh ingredients, and assemble.

    The whole meal can come together quickly.

    How to Prevent Soggy Toast

    Nobody wants soggy breakfast toast.

    There are several easy ways to prevent it.

    First, toast your bread thoroughly.

    Second, use thick, sturdy bread.

    Third, remove excess moisture from the tomatoes and mozzarella.

    After slicing tomatoes, place them briefly on paper towels.

    Do the same with fresh mozzarella after removing it from its liquid.

    Finally, don’t assemble the toast until you are ready to eat.

    These simple steps help preserve that important crispy texture.

    How to Make It for a Crowd

    If you are making Caprese Breakfast Toast for several people, use your oven rather than a toaster.

    Arrange bread slices on baking sheets and lightly brush them with olive oil.

    Toast them in the oven until golden.

    Meanwhile, prepare trays of sliced tomatoes, mozzarella, basil, and other toppings.

    Cook eggs in batches just before serving.

    Guests can assemble their own toast, or you can prepare everything buffet-style.

    This approach works particularly well for weekend brunches, family breakfasts, showers, holiday gatherings, and other casual celebrations.

    A Beautiful Breakfast Without Complicated Cooking

    Some breakfasts look impressive because they require complicated techniques.

    Caprese Breakfast Toast isn’t one of them.

    Its beauty comes naturally from the ingredients.

    Bright red tomatoes, snowy white mozzarella, deep green basil, golden egg yolks, toasted bread, and glossy balsamic glaze create a dish that looks restaurant-worthy before you have done much more than slice, toast, cook, and assemble.

    That makes it an especially good breakfast when you want to serve something impressive without spending the entire morning cooking.

    Perfect for Summer Mornings

    Although you can enjoy this breakfast throughout the year, summer is when it really shines.

    Fresh tomatoes are often at their most flavorful, basil is plentiful, and lighter breakfasts can be especially appealing during warmer weather.

    If you have tomatoes and basil growing in your garden, Caprese Breakfast Toast is an excellent way to put your harvest to work.

    Pick a ripe tomato and several basil leaves, toast some bread, add mozzarella and an egg, and breakfast is nearly finished.

    It doesn’t get much fresher than that.

    A Breakfast You Can Make Your Own

    One of the best qualities of Caprese Breakfast Toast is its flexibility.

    Keep it traditional with tomato, mozzarella, and basil.

    Add an egg for breakfast.

    Add avocado for creaminess.

    Add bacon for smoky flavor.

    Add prosciutto for an Italian-inspired twist.

    Add pesto for extra basil and garlic.

    Add red pepper flakes or hot honey for heat.

    Add greens for even more freshness.

    You can even leave off the egg entirely and enjoy a simple Caprese toast alongside fruit or yogurt.

    There are countless ways to make the recipe your own.

    Tips for the Best Caprese Breakfast Toast

    Start with great bread. A thick slice of sourdough, ciabatta, or artisan bread creates the best foundation.

    Toast it until crisp. Don’t be afraid to give the bread some color. The crunch is an important contrast to the softer toppings.

    Use ripe tomatoes. Tomatoes should smell fresh and have a rich color.

    Drain the mozzarella. Removing excess moisture helps prevent sogginess.

    Season as you go. A little salt and pepper on the tomatoes and egg makes a noticeable difference.

    Use fresh basil. Add it just before serving.

    Choose good olive oil. Because the olive oil isn’t hidden inside a cooked recipe, its flavor matters.

    Use balsamic glaze sparingly. You want it to complement the ingredients rather than dominate them.

    Serve immediately. Don’t allow assembled toast to sit around for long.

    Why Simple Breakfasts Can Be the Best Breakfasts

    Breakfast doesn’t always need stacks of pancakes, piles of bacon, casseroles, or complicated recipes to be memorable.

    Sometimes the best meals are built around a few ingredients that naturally work together.

    Caprese Breakfast Toast is a perfect example.

    There isn’t one ingredient trying to overpower everything else. Instead, each component contributes something different.

    The bread brings crunch.

    The mozzarella brings creaminess.

    The tomatoes bring freshness.

    The basil brings aroma.

    The egg brings richness.

    The olive oil ties everything together.

    And the balsamic glaze adds the final sweet-and-tangy contrast.

    Together, those simple ingredients become something far greater than the sum of their parts.

    Breakfast of the Day

    Today’s Breakfast of the Day: Caprese Breakfast Toast is proof that a fresh, satisfying breakfast doesn’t have to be complicated.

    With crispy toasted bread, ripe tomatoes, creamy fresh mozzarella, aromatic basil, a perfectly cooked egg, olive oil, and balsamic glaze, every bite offers a delicious balance of flavors and textures.

    Make it for a quiet breakfast at home.

    Serve it during weekend brunch.

    Pile it high with avocado and bacon when you’re extra hungry.

    Add pesto when you want more Italian flavor.

    Or keep it beautifully simple with tomato, mozzarella, basil, and egg.

    However you choose to prepare it, Caprese Breakfast Toast is a colorful and flavorful way to begin the day.

    Fresh ingredients. Crispy toast. Creamy mozzarella. Juicy tomatoes. Fragrant basil. A golden egg. One delicious breakfast.

    Question of the Day

    How would you build your perfect Caprese Breakfast Toast—fried egg, avocado, bacon, prosciutto, pesto, or the classic tomato, mozzarella, and basil combination?

  • Dessert of the Day: Chocolate Peanut Butter Cupcakes

    Advertisements

    Few dessert combinations are as instantly recognizable—or as satisfying—as chocolate and peanut butter. Rich chocolate brings deep cocoa flavor and sweetness, while peanut butter adds creamy nuttiness and just enough saltiness to balance everything out. Put those flavors together in a soft cupcake topped with a generous swirl of peanut butter frosting, and you have a dessert that’s difficult to resist.

    Today’s Dessert of the Day: Chocolate Peanut Butter Cupcakes celebrates this classic pairing with moist homemade chocolate cupcakes, fluffy peanut butter buttercream, and plenty of opportunities to make them even more decadent.

    You can keep them simple with a swirl of frosting or transform them into bakery-style cupcakes with chocolate ganache, chopped peanuts, chocolate chips, or miniature peanut butter cups. You can even hide a peanut butter surprise inside.

    These cupcakes are perfect for birthdays, potlucks, family gatherings, celebrations, bake sales, holidays, or those evenings when you’re simply craving something chocolatey.

    And despite how impressive they look when finished, they’re surprisingly approachable for home bakers.


    Why Chocolate and Peanut Butter Are Such a Perfect Pair

    Some flavor combinations seem as though they were made for each other, and chocolate and peanut butter are near the top of that list.

    Chocolate delivers sweetness, richness, and slightly bitter cocoa notes. Peanut butter brings nuttiness, creaminess, saltiness, and richness of its own.

    The contrast is what makes the combination work so beautifully.

    If everything in a dessert is extremely sweet, the flavors can sometimes become overwhelming. Peanut butter helps balance the sweetness of the chocolate and powdered sugar while adding another dimension of flavor.

    Texture plays a role too.

    Imagine biting through fluffy peanut butter frosting into a soft chocolate cupcake. If you’ve added chopped peanuts, chocolate chips, or peanut butter cups, you’ll also get little bursts of crunch and extra richness.

    Every bite can offer something slightly different.


    Chocolate Peanut Butter Cupcakes Recipe

    Prep Time: 20 minutes
    Bake Time: 18–22 minutes
    Cooling Time: About 30 minutes
    Decorating Time: 15 minutes
    Total Time: About 1 hour 15 minutes
    Servings: 12 cupcakes


    Ingredients for the Chocolate Cupcakes

    • 1 cup all-purpose flour
    • 1 cup granulated sugar
    • 1/3 cup unsweetened cocoa powder
    • 1 teaspoon baking soda
    • 1/2 teaspoon baking powder
    • 1/2 teaspoon salt
    • 1 large egg
    • 1/2 cup milk
    • 1/4 cup vegetable oil
    • 1 teaspoon vanilla extract
    • 1/2 cup hot brewed coffee or hot water

    Why Add Coffee?

    Don’t worry—your cupcakes don’t have to taste like coffee.

    A small amount of hot coffee can deepen the flavor of cocoa, making chocolate desserts taste even more chocolatey.

    If you don’t drink coffee or don’t want to use it, hot water works perfectly well.


    Ingredients for the Peanut Butter Frosting

    • 1/2 cup unsalted butter, softened
    • 3/4 cup creamy peanut butter
    • 2 cups powdered sugar
    • 1 teaspoon vanilla extract
    • 2–3 tablespoons heavy cream or milk
    • Pinch of salt

    The frosting should be smooth, creamy, and firm enough to hold a swirl when piped onto the cupcakes.


    Optional Toppings

    This is where you can make these cupcakes your own.

    Try topping them with:

    • Miniature peanut butter cups
    • Chopped peanut butter cups
    • Chocolate ganache
    • Melted chocolate
    • Mini chocolate chips
    • Chocolate sprinkles
    • Chopped roasted peanuts
    • Crushed pretzels
    • Peanut butter drizzle
    • Chocolate curls
    • Crushed chocolate cookies

    You don’t need all of these. One or two toppings are enough to transform a simple cupcake into an impressive dessert.


    How to Make Chocolate Peanut Butter Cupcakes

    Step 1: Prepare Your Oven and Pan

    Preheat your oven to 350°F.

    Line a standard 12-cup muffin pan with paper cupcake liners.

    Cupcake liners make serving easier and help prevent the cupcakes from sticking to the pan.


    Step 2: Mix the Dry Ingredients

    In a large mixing bowl, combine:

    • Flour
    • Sugar
    • Cocoa powder
    • Baking soda
    • Baking powder
    • Salt

    Whisk everything together until evenly distributed.

    Breaking up any cocoa powder lumps at this stage helps create a smoother batter later.


    Step 3: Add the Wet Ingredients

    Add the egg, milk, vegetable oil, and vanilla extract.

    Mix until everything is incorporated.

    Gradually pour in the hot coffee or water.

    Continue stirring until the batter becomes smooth.

    The finished batter may look thinner than other cupcake batters you’ve made. That’s normal.

    A thinner chocolate batter can produce wonderfully moist and tender cupcakes.


    Step 4: Fill the Cupcake Liners

    Divide the batter evenly between your 12 cupcake liners.

    Fill each approximately two-thirds full.

    Try not to overfill them.

    The cupcakes need enough room to rise without spilling over the edges of the liners.

    An ice cream scoop or large cookie scoop can make portioning the batter easier and help ensure that the cupcakes are similar in size.


    Step 5: Bake the Cupcakes

    Place the pan in your preheated oven.

    Bake for approximately 18–22 minutes.

    To check for doneness, insert a toothpick into the center of one cupcake.

    If it comes out clean or with only a few moist crumbs attached, the cupcakes are ready.

    Avoid overbaking because chocolate cupcakes can dry out if left in the oven too long.


    Step 6: Cool Completely

    Allow the cupcakes to cool in the pan for approximately five minutes.

    Then transfer them to a wire cooling rack.

    This step requires a little patience.

    Your cupcakes should be completely cool before frosting.

    If you add peanut butter frosting while they’re still warm, the butter in the frosting may begin melting.


    How to Make Creamy Peanut Butter Frosting

    The cupcake may provide the chocolate, but the peanut butter frosting is what makes this dessert special.

    Place the softened butter and creamy peanut butter into a mixing bowl.

    Beat them together until completely smooth.

    Gradually add the powdered sugar.

    Adding it slowly helps prevent powdered sugar from flying everywhere and makes it easier to achieve the correct frosting consistency.

    Add the vanilla extract and a small pinch of salt.

    Then add the heavy cream or milk one tablespoon at a time.

    Continue beating until the frosting becomes smooth, fluffy, and easy to spread or pipe.

    For an especially fluffy frosting, beat it for another minute or two after everything has been incorporated.


    Getting the Frosting Consistency Just Right

    If your frosting is too thick, add a little more milk or heavy cream.

    Add only a teaspoon or so at a time.

    If your frosting becomes too thin, add additional powdered sugar.

    For piping tall bakery-style swirls, you’ll want frosting that’s relatively firm.

    For spreading with a knife or spoon, the frosting can be slightly softer.


    How to Decorate the Cupcakes

    Once the cupcakes are completely cool, you’re ready to decorate.

    For a rustic homemade appearance, simply spread peanut butter frosting generously over each cupcake using a butter knife or small spatula.

    For a bakery-style presentation, transfer your frosting to a piping bag fitted with a large star tip.

    Start around the outside edge of the cupcake and pipe the frosting in a circular motion toward the center, gradually building upward.

    Finish with your favorite toppings.

    One easy combination is:

    Peanut butter frosting + chocolate drizzle + chopped peanut butter cups.

    It looks impressive without requiring complicated decorating techniques.


    Add a Chocolate Ganache Drizzle

    Chocolate ganache makes these cupcakes even more decadent.

    Ingredients

    • 1/2 cup semi-sweet chocolate chips
    • 1/4 cup heavy cream

    Place the chocolate chips in a heat-safe bowl.

    Heat the cream until it’s hot but not boiling.

    Pour the cream over the chocolate.

    Allow the mixture to sit for approximately two minutes.

    Then stir until completely smooth and glossy.

    Allow the ganache to cool slightly before drizzling it over your peanut butter frosting.

    You want the ganache fluid enough to drizzle but not so hot that it melts your frosting.


    Make Them Peanut Butter Cup Stuffed

    If regular Chocolate Peanut Butter Cupcakes sound delicious, imagine biting into one and discovering a peanut butter cup hidden inside.

    There are a couple of ways to do it.

    Method One: Bake the Candy Inside

    Add a small amount of cupcake batter to each liner.

    Place a miniature peanut butter cup in the center.

    Cover it with additional batter.

    Bake normally.

    The candy becomes a delicious hidden surprise inside the chocolate cupcake.

    Method Two: Fill Them After Baking

    Bake and cool the cupcakes normally.

    Use a cupcake corer, small knife, or spoon to remove a small section from the center.

    Fill the opening with:

    • Peanut butter
    • Peanut butter filling
    • Chocolate ganache
    • Peanut butter ganache
    • Chopped peanut butter cups

    Replace a small piece of cupcake over the filling before frosting.

    Guests won’t know what’s inside until they take their first bite.


    Easy Peanut Butter Filling

    Want something slightly sweeter than straight peanut butter?

    Combine:

    • 1/2 cup creamy peanut butter
    • 1/4 cup powdered sugar
    • 1–2 tablespoons softened butter

    Mix until smooth.

    Spoon a small amount into the center of each cupcake.

    Now you’ve got chocolate cake, creamy filling, peanut butter frosting, and chocolate toppings all in one dessert.


    Chocolate Peanut Butter Cupcake Variations

    One of the best things about this recipe is how easily you can customize it.

    Peanut Butter Cup Explosion Cupcakes

    Place a miniature peanut butter cup inside each cupcake before baking.

    Frost with peanut butter buttercream.

    Drizzle with chocolate ganache.

    Finish with chopped peanut butter cups.

    If you really love chocolate and peanut butter, this is the version for you.


    Chocolate Peanut Butter Pretzel Cupcakes

    Sweet and salty desserts are always fun.

    Top the peanut butter frosting with crushed pretzels and chocolate drizzle.

    The pretzels provide a salty crunch that contrasts beautifully with the soft cupcake and creamy frosting.


    Peanut Butter and Jelly Cupcakes

    Here’s a playful twist inspired by another classic combination.

    After baking, remove the center of each chocolate cupcake.

    Add a spoonful of strawberry, raspberry, or grape preserves.

    Top with peanut butter frosting.

    Chocolate, peanut butter, and fruit preserves might sound unusual at first, but the flavors can work surprisingly well together.


    Dark Chocolate Peanut Butter Cupcakes

    Prefer a deeper chocolate flavor?

    Use dark cocoa powder in the cupcakes and dark chocolate for your ganache.

    The slight bitterness of dark chocolate balances the sweet peanut butter frosting beautifully.


    Chocolate Peanut Butter Crunch Cupcakes

    Add chopped roasted peanuts to the top.

    You can also sprinkle chopped peanuts between the cupcake and frosting.

    The extra crunch makes each bite more interesting.


    Cookies and Peanut Butter Cupcakes

    Crush chocolate sandwich cookies and sprinkle them over the peanut butter frosting.

    For even more cookie flavor, fold finely crushed cookies into the frosting.


    Triple Chocolate Peanut Butter Cupcakes

    Chocolate lovers can take things even further.

    Add miniature chocolate chips to the cupcake batter.

    Bake normally.

    Top with peanut butter frosting and chocolate ganache.

    Finish with chocolate curls or more chocolate chips.

    You’ll have chocolate cake, chocolate chips, chocolate ganache, and peanut butter frosting all in one cupcake.


    Tips for Perfect Chocolate Cupcakes

    Even a simple cupcake recipe benefits from a few baking tricks.

    Measure Flour Carefully

    Too much flour can produce dry, dense cupcakes.

    Instead of scooping flour directly from the bag with your measuring cup, spoon the flour gently into the cup and level the top.


    Don’t Overmix

    Once the wet and dry ingredients have come together, don’t continue mixing unnecessarily.

    Overmixing can affect the cupcake’s texture.

    Mix just until everything is incorporated.


    Don’t Overbake

    A few extra minutes can make a noticeable difference.

    Begin checking your cupcakes around the lower end of the suggested baking time.


    Use Fresh Baking Ingredients

    Baking soda and baking powder lose effectiveness over time.

    Fresh leavening agents help your cupcakes rise properly.


    Use Room-Temperature Ingredients

    When possible, allow your egg and milk to come closer to room temperature before baking.

    Room-temperature ingredients generally blend more smoothly into cake batter.


    Tips for Amazing Peanut Butter Frosting

    The frosting is just as important as the cupcake.

    Use creamy peanut butter for the smoothest results.

    Natural peanut butter that separates heavily may create inconsistent frosting because the oil can affect the texture.

    Make sure your butter is softened but not melted.

    If it’s too cold, the frosting can become lumpy. If it’s melted, your frosting may become too loose.

    Finally, don’t underestimate the importance of salt.

    Even a small pinch can balance the sweetness of the powdered sugar and intensify the peanut butter flavor.


    How to Make Them Look Like Bakery Cupcakes

    You don’t need professional decorating skills to make homemade cupcakes look impressive.

    Use a large piping tip to create generous frosting swirls.

    Then add one dramatic topping rather than covering the cupcake with everything you have.

    For example, pipe a tall peanut butter swirl, drizzle a little chocolate over it, and place half of a peanut butter cup at an angle on top.

    Simple decorations often look more polished than overcrowded ones.


    Mini Chocolate Peanut Butter Cupcakes

    Need something for a larger party?

    Turn this recipe into miniature cupcakes.

    Prepare the batter normally and divide it between lined mini muffin cups.

    Because they’re smaller, mini cupcakes will generally require less baking time than standard cupcakes, so watch them carefully and begin checking early.

    Top each with a small swirl of peanut butter frosting and a miniature chocolate chip or tiny piece of peanut butter cup.

    Mini cupcakes are especially convenient for:

    • Parties
    • Dessert tables
    • School events
    • Potlucks
    • Holiday gatherings
    • Baby showers
    • Birthday celebrations

    They’re easy to grab, easy to serve, and perfect when guests want to sample several desserts.


    Make-Ahead Instructions

    If you’re preparing these cupcakes for a party, you don’t have to do everything at the last minute.

    Bake the chocolate cupcakes the day before your event.

    Once completely cool, store them in an airtight container.

    Prepare the peanut butter frosting separately and refrigerate it if needed.

    Before decorating, allow chilled frosting to soften slightly and beat it again until fluffy.

    Decorate the cupcakes closer to serving time for the freshest presentation.


    How to Store Chocolate Peanut Butter Cupcakes

    Place leftover cupcakes in an airtight container.

    If your kitchen is cool and you’re serving them relatively soon, they can remain at room temperature for a limited period.

    For longer storage, refrigerate them.

    They should stay enjoyable for approximately 3–4 days when properly stored.

    Because refrigeration can firm up both cake and frosting, remove the cupcakes about 20–30 minutes before serving.

    Allowing them to warm slightly helps restore their soft texture and creamy frosting.


    Can You Freeze Chocolate Peanut Butter Cupcakes?

    Yes.

    For the easiest results, freeze the cupcakes before frosting.

    Allow them to cool completely.

    Wrap each cupcake securely and place them in a freezer-safe container.

    When you’re ready to serve them, allow the cupcakes to thaw completely before adding fresh peanut butter frosting.

    You can also freeze decorated cupcakes, although toppings and frosting may not look quite as perfect after thawing.


    Perfect Occasions for Chocolate Peanut Butter Cupcakes

    You don’t need a special occasion to make cupcakes, but these are particularly good for celebrations.

    Serve them at:

    • Birthday parties
    • Family dinners
    • Backyard barbecues
    • Game-day parties
    • Potlucks
    • Office celebrations
    • Bake sales
    • Holiday gatherings
    • Graduation parties
    • Movie nights
    • Weekend get-togethers

    Because they’re individually portioned, cupcakes are often easier to serve than a traditional layer cake.

    Guests can simply grab one whenever they’re ready for dessert.


    Turn Them Into a Cupcake Sundae

    Have leftover cupcakes?

    Turn one into an over-the-top dessert.

    Place a Chocolate Peanut Butter Cupcake in a shallow bowl.

    Add a scoop of vanilla or chocolate ice cream.

    Drizzle with warm chocolate sauce and peanut butter sauce.

    Finish with whipped cream and chopped peanuts.

    You can even add a cherry on top.

    It’s essentially a chocolate peanut butter cupcake transformed into an ice cream sundae.


    What to Drink With Chocolate Peanut Butter Cupcakes

    A cold glass of milk is probably the classic choice.

    The milk helps balance the richness of the chocolate and peanut butter.

    Coffee is another excellent pairing, especially with darker chocolate cupcakes.

    You could also serve them alongside hot chocolate for an extremely indulgent dessert experience.

    For kids’ parties, cold milk or chocolate milk makes an easy pairing.


    Build a Chocolate Peanut Butter Dessert Table

    If you’re hosting a party and really want to embrace the theme, make these cupcakes the centerpiece of an entire chocolate peanut butter dessert table.

    You could include:

    • Chocolate Peanut Butter Cupcakes
    • Peanut butter cookies
    • Chocolate brownies
    • Chocolate-dipped pretzels
    • Peanut butter fudge
    • Chocolate-covered peanuts
    • Peanut butter cup cookies
    • Chocolate pudding cups

    The cupcakes can be the main attraction while the smaller treats give guests plenty of choices.


    Why These Cupcakes Are Great for Sharing

    Cupcakes are naturally social desserts.

    There’s no cutting or complicated serving required.

    Put them on a platter or cupcake stand, and everyone can choose one.

    They’re also easy to transport, making them a convenient option when you’re bringing dessert to someone else’s house.

    And because chocolate and peanut butter are such familiar flavors, these cupcakes are likely to attract plenty of attention when they hit the dessert table.


    Homemade Doesn’t Have to Mean Complicated

    Sometimes people see beautifully decorated cupcakes and assume they require hours of work or professional baking experience.

    They don’t.

    A great homemade cupcake comes down to a few simple things:

    A flavorful cake.

    A good frosting.

    And a topping that makes it look special.

    That’s exactly what this recipe delivers.

    The chocolate cupcakes are simple enough for an everyday baking project, while the peanut butter frosting and optional decorations make them special enough for a celebration.


    A Dessert Worth Making Again

    The best recipes aren’t necessarily the most complicated ones.

    They’re the recipes people enjoy enough to ask you to make again.

    Chocolate Peanut Butter Cupcakes have that kind of appeal.

    They’re familiar but indulgent. They’re easy to customize. They’re attractive enough for celebrations but simple enough to make just because you want dessert.

    You can even change the decorations each time you make them.

    One batch might feature chocolate ganache and chopped peanuts.

    The next might have peanut butter cups.

    Another could have pretzels and chocolate drizzle.

    The basic cupcake stays the same while the possibilities keep changing.


    Dessert of the Day: Chocolate Peanut Butter Cupcakes

    There are desserts you make because they’re beautiful, desserts you make because they’re easy, and desserts you make because they taste incredible.

    Chocolate Peanut Butter Cupcakes manage to check all three boxes.

    You get a soft and moist chocolate cupcake underneath a thick swirl of creamy peanut butter frosting. Add chocolate ganache and peanut butter cup pieces, and every bite becomes an indulgent combination of chocolate, peanut butter, sweetness, saltiness, softness, and crunch.

    Make them for your next celebration, bring them to a potluck, serve them after dinner, or bake a batch simply because chocolate and peanut butter sound good today.

    Keep them simple or load them with toppings.

    Fill them with peanut butter or hide a peanut butter cup inside.

    Serve them alone or turn them into cupcake sundaes.

    There’s really no wrong way to enjoy them.

    Sometimes the best Dessert of the Day is simply a homemade version of a flavor combination people have loved for generations.

    And when that combination is chocolate and peanut butter, one cupcake might not be enough.

    Dessert Question of the Day

    How would you top your Chocolate Peanut Butter Cupcake—chocolate ganache, chopped peanut butter cups, roasted peanuts, crushed pretzels, or all of the above?

  • Healthy Recipe of the Day: BBQ Chicken and Vegetables

    Advertisements

    There’s something incredibly satisfying about the combination of smoky barbecue chicken and colorful vegetables. You get the familiar sweet and savory flavors of a backyard barbecue while still putting together a meal packed with lean protein and vegetables.

    Today’s Healthy Recipe of the Day: BBQ Chicken and Vegetables is designed for those days when you want something flavorful and filling without making dinner overly complicated.

    Tender chicken is seasoned with garlic, onion, and smoked paprika before being coated with barbecue sauce. Bell peppers, zucchini, yellow squash, broccoli, tomatoes, and red onion add color, texture, and plenty of vegetables to the plate.

    Even better, you can prepare this recipe several different ways.

    Roast everything on a sheet pan.

    Cook it in a skillet.

    Fire up the grill.

    Turn it into BBQ chicken bowls.

    Make colorful chicken and vegetable skewers.

    Or prepare a big batch for lunches and dinners throughout the week.

    However you make it, this is one healthy dinner that certainly doesn’t have to taste boring.


    Why You’ll Love This Healthy BBQ Chicken Recipe

    Healthy recipes are much easier to stick with when they actually taste good.

    That’s exactly what makes BBQ chicken and vegetables such a useful recipe to keep in your regular meal rotation.

    The barbecue sauce provides plenty of flavor, while the vegetables help make the meal substantial without requiring a heavy side dish.

    You’ll also love this recipe because it’s:

    High in protein. Chicken breast provides a generous amount of lean protein.

    Loaded with vegetables. You’re getting several different vegetables in one meal.

    Easy to customize. Change the vegetables, seasonings, sauce, or side dishes whenever you want.

    Meal-prep friendly. Make several portions at once and you’ve got lunch or dinner ready for the next few days.

    Family friendly. BBQ chicken is familiar enough that even people who aren’t enthusiastic about “healthy food” may enjoy it.

    Great year-round. Grill it during summer or make the sheet-pan version when it’s too cold to cook outside.

    Most importantly, it doesn’t require complicated ingredients or advanced cooking skills.


    BBQ Chicken and Vegetables Recipe

    Prep Time: 15 minutes
    Cook Time: 25–30 minutes
    Total Time: About 40–45 minutes
    Servings: 4–6

    Ingredients

    For the BBQ Chicken

    • 1 ½ pounds boneless, skinless chicken breasts
    • ½ cup barbecue sauce
    • 1 tablespoon olive oil
    • 1 teaspoon smoked paprika
    • 1 teaspoon garlic powder
    • ½ teaspoon onion powder
    • ½ teaspoon black pepper
    • ¼ teaspoon salt
    • ¼ teaspoon chili powder, optional

    For the Vegetables

    • 1 red bell pepper, cut into chunks
    • 1 yellow or orange bell pepper, cut into chunks
    • 1 medium zucchini, sliced
    • 1 medium yellow squash, sliced
    • 1 small red onion, cut into chunks
    • 1 cup broccoli florets
    • 1 cup cherry or grape tomatoes
    • 1 tablespoon olive oil
    • ½ teaspoon garlic powder
    • ½ teaspoon smoked paprika
    • ¼ teaspoon black pepper
    • Pinch of salt

    Optional Garnishes

    • Chopped fresh parsley
    • Fresh cilantro
    • Sliced green onions
    • Crushed red pepper flakes
    • Freshly ground black pepper
    • Extra barbecue sauce
    • Lime wedges

    How to Make BBQ Chicken and Vegetables

    Step 1: Preheat the Oven

    Preheat your oven to 425°F.

    A relatively high oven temperature helps the vegetables roast instead of slowly steaming. You want some browned edges and caramelization while keeping the vegetables tender.

    Line a large sheet pan with parchment paper or lightly coat it with cooking spray for easier cleanup.


    Step 2: Prepare the Chicken

    Pat the chicken breasts dry with paper towels.

    If the chicken breasts are particularly thick, slice them horizontally into thinner pieces or pound them gently until they’re approximately the same thickness.

    This helps the chicken cook more evenly.

    Place the chicken in a large bowl.

    Drizzle with olive oil and season with:

    • Smoked paprika
    • Garlic powder
    • Onion powder
    • Black pepper
    • Salt
    • Chili powder, if using

    Rub the seasonings over both sides of the chicken.

    At this stage, don’t completely cover the chicken with barbecue sauce. You’ll add most of the sauce later so it doesn’t burn during cooking.


    Step 3: Prepare the Vegetables

    Wash and dry all your vegetables.

    Cut them into relatively similar-sized pieces so they cook at roughly the same rate.

    Place the bell peppers, zucchini, yellow squash, red onion, broccoli, and tomatoes in a large bowl.

    Drizzle with olive oil.

    Sprinkle with garlic powder, smoked paprika, black pepper, and a small pinch of salt.

    Toss until the vegetables are lightly coated.

    You don’t need a lot of oil. The goal is simply to give the vegetables enough moisture to help them roast and develop some color.


    Step 4: Arrange Everything on the Sheet Pan

    Spread the vegetables across the sheet pan.

    Arrange the chicken between the vegetables, leaving a little room around each piece when possible.

    One important rule for sheet-pan meals is:

    Don’t overcrowd the pan.

    When vegetables are packed tightly together, the moisture they release becomes trapped and they begin steaming.

    They’ll still cook, but you won’t get the same delicious roasted edges.

    If you’re doubling the recipe, consider using two sheet pans.


    Step 5: Begin Roasting

    Place the sheet pan in the preheated oven.

    Roast for approximately 15 minutes.

    Remove the pan carefully.

    Turn or stir the vegetables.

    Now brush the chicken generously with barbecue sauce.

    Return the pan to the oven.


    Step 6: Finish Cooking

    Continue roasting for another 5–10 minutes, depending on the thickness of your chicken.

    Chicken should reach a safe internal temperature of 165°F at the thickest part.

    A meat thermometer makes checking much easier.

    Once the chicken is cooked, remove the sheet pan from the oven.

    Brush the chicken with a little additional barbecue sauce if desired.

    Allow the chicken to rest for approximately five minutes before slicing.


    Why Add the BBQ Sauce Near the End?

    This small step can make a big difference.

    Most barbecue sauces contain some form of sugar, whether that’s brown sugar, honey, molasses, corn syrup, fruit concentrate, or another sweetener.

    Sugar caramelizes quickly at high temperatures.

    That’s delicious when controlled.

    But leave sugary barbecue sauce under intense heat for too long and it can go from caramelized to burned.

    Cooking the chicken mostly with dry seasonings and adding the BBQ sauce toward the end gives you a sticky, flavorful coating without as much risk of burning.


    How to Choose a Healthier BBQ Sauce

    You don’t have to give up barbecue sauce to make a healthier meal.

    Instead, compare labels.

    Pay particular attention to:

    • Added sugar
    • Sodium
    • Serving size
    • Calories
    • Ingredient list

    Some sauces are considerably sweeter than others.

    You can also reduce the amount of barbecue sauce and increase the seasonings on the chicken.

    Smoked paprika is especially helpful because it contributes a barbecue-style smoky flavor without adding sugar.


    Make Your Own Simple BBQ Sauce

    If you want more control over the ingredients, you can make a quick homemade barbecue sauce.

    Combine:

    • ½ cup tomato sauce
    • 1 tablespoon tomato paste
    • 1 tablespoon apple cider vinegar
    • 1 tablespoon honey or maple syrup
    • 1 teaspoon Worcestershire sauce
    • ½ teaspoon smoked paprika
    • ½ teaspoon garlic powder
    • ¼ teaspoon onion powder
    • Black pepper to taste
    • Pinch of cayenne, optional

    Stir everything together in a small saucepan.

    Simmer over low heat for approximately 10 minutes, stirring occasionally.

    Taste and adjust the sweetness, acidity, or spice level.


    The Vegetables Are Just as Important as the Chicken

    The chicken may be the star of the recipe, but don’t treat the vegetables like an afterthought.

    Using several vegetables gives you different flavors and textures.

    Bell peppers become sweeter as they roast.

    Red onions soften and caramelize around the edges.

    Broccoli develops slightly crispy roasted tips.

    Zucchini and yellow squash become tender while soaking up the smoky seasonings.

    Cherry tomatoes soften and release their natural sweetness.

    Combined with BBQ chicken, you get something different in nearly every bite.


    Use the Rainbow When Choosing Vegetables

    One easy way to make meals more interesting is to use several colors.

    For this recipe, you might have:

    Red from bell peppers and tomatoes.

    Yellow from peppers and squash.

    Green from zucchini and broccoli.

    Purple from red onions.

    Besides providing different nutrients, colorful vegetables make your meal look much more appealing.

    We often eat with our eyes before taking the first bite, and a colorful plate simply looks more inviting.


    Don’t Overcook Your Vegetables

    Nobody gets excited about mushy vegetables.

    The goal is tender vegetables that still have some texture.

    One challenge with this recipe is that different vegetables cook at different speeds.

    Broccoli and onions can handle longer roasting.

    Zucchini and squash cook relatively quickly.

    Cherry tomatoes can become very soft if roasted too long.

    If you prefer firmer vegetables, start roasting the broccoli, peppers, and onions first.

    Add the zucchini, squash, and tomatoes approximately 10 minutes later.

    This extra step isn’t required, but it gives you greater control over the final texture.


    Try Different Vegetable Combinations

    Use the recipe as a starting point rather than a strict rule.

    You can easily substitute vegetables based on what’s in season or already sitting in your refrigerator.

    Try adding:

    • Mushrooms
    • Asparagus
    • Cauliflower
    • Brussels sprouts
    • Green beans
    • Carrots
    • Corn
    • Eggplant
    • Sweet potatoes
    • Baby potatoes
    • Snap peas

    Just remember that harder vegetables such as carrots, potatoes, and sweet potatoes usually require more cooking time.

    Cutting them into smaller pieces can help.


    Grilled BBQ Chicken and Vegetables

    When the weather is nice, take this recipe outside.

    BBQ chicken tastes fantastic cooked over a grill because you get additional smoky and charred flavors.

    Preheat your grill to medium-high heat.

    Season the chicken as directed.

    Place it on the grill and cook until nearly done, turning as necessary.

    During the final few minutes, brush the chicken with barbecue sauce.

    Continue grilling until the chicken reaches 165°F internally.

    For the vegetables, use a grill basket so smaller pieces don’t fall through the grates.

    Toss the vegetables occasionally until they’re tender and lightly charred.

    Serve everything together with additional BBQ sauce on the side.


    BBQ Chicken and Vegetable Skewers

    Another fun option is turning the recipe into kabobs.

    Cut the chicken into approximately 1-inch pieces.

    Use vegetables such as:

    • Bell peppers
    • Red onion
    • Zucchini
    • Yellow squash
    • Mushrooms

    Thread alternating pieces of chicken and vegetables onto skewers.

    Season everything before grilling.

    Cook the skewers over medium-high heat, turning occasionally.

    Brush with barbecue sauce toward the end of cooking.

    Continue cooking until the chicken reaches 165°F.

    If you’re using wooden skewers, soaking them in water before grilling can help reduce scorching.

    These skewers are perfect for summer gatherings because they’re colorful, easy to serve, and portion-friendly.


    Easy Skillet BBQ Chicken and Vegetables

    No grill?

    Don’t want to heat the oven?

    Make everything in a large skillet.

    Cut the chicken into bite-sized pieces.

    Heat a small amount of olive oil in a large skillet over medium-high heat.

    Add the seasoned chicken.

    Cook until browned and nearly cooked through.

    Transfer the chicken temporarily to a plate.

    Add the vegetables to the same skillet.

    Cook until tender-crisp.

    Return the chicken to the skillet.

    Pour in the barbecue sauce.

    Stir everything together and continue cooking until the chicken reaches 165°F.

    Dinner is done.


    Turn It Into a BBQ Chicken Bowl

    Bowls are one of the easiest ways to turn leftovers into an entirely different meal.

    Start with a base such as:

    • Brown rice
    • Quinoa
    • Cauliflower rice
    • Wild rice
    • Mixed greens

    Add roasted vegetables.

    Slice the BBQ chicken and place it on top.

    Then add your favorite toppings.

    Try:

    • Green onions
    • Cilantro
    • Diced avocado
    • Corn
    • Black beans
    • Tomatoes
    • Jalapeños
    • Plain Greek yogurt
    • Lime juice
    • Small drizzle of barbecue sauce

    You can customize each bowl depending on what you have available.


    Make a BBQ Chicken Salad

    Another great way to use leftovers is a BBQ chicken salad.

    Start with a large bowl of chopped romaine or mixed greens.

    Add sliced leftover BBQ chicken and vegetables.

    Then add:

    • Corn
    • Black beans
    • Tomatoes
    • Cucumber
    • Red onion
    • Avocado

    Finish with a light dressing or a small drizzle of BBQ sauce mixed with plain Greek yogurt.

    You get the flavor of BBQ chicken in a completely different meal.


    What to Serve With BBQ Chicken and Vegetables

    Although chicken and vegetables can make a satisfying meal by themselves, there are plenty of healthy sides you can add.

    Brown Rice

    Brown rice is simple, filling, and pairs beautifully with BBQ sauce.

    Spoon the chicken and vegetables over the rice and allow the extra sauce to soak into it.

    Quinoa

    Quinoa provides additional protein and fiber and works especially well when you’re making BBQ chicken bowls.

    Cauliflower Rice

    If you want to increase the vegetable portion of the meal, cauliflower rice is an easy option.

    Sweet Potatoes

    Roasted or baked sweet potatoes complement the smoky-sweet flavor of barbecue sauce.

    Corn on the Cob

    BBQ chicken and corn are a classic summertime combination.

    Green Salad

    A crisp salad adds freshness and provides contrast to the warm roasted chicken and vegetables.


    Healthy Meal Prep Made Easy

    This recipe is particularly useful for meal prepping because all the major components can be prepared together.

    Cook a large batch on Sunday and divide it between meal-prep containers.

    For example:

    Container 1: BBQ chicken + roasted vegetables + brown rice

    Container 2: BBQ chicken + roasted vegetables + quinoa

    Container 3: BBQ chicken + vegetables + cauliflower rice

    Container 4: BBQ chicken + vegetables to add to a fresh salad later

    Using slightly different bases can keep the meals from feeling repetitive.

    Keep additional barbecue sauce in a separate container so you can add it after reheating.


    How to Store Leftovers

    Allow the chicken and vegetables to cool before transferring them to airtight containers.

    Refrigerate leftovers promptly.

    For best quality, enjoy them within approximately 3–4 days.

    Store any extra barbecue sauce separately.

    If you’re meal prepping salads, keep the lettuce separate from the warm ingredients until you’re ready to eat.


    How to Reheat BBQ Chicken and Vegetables

    There are several ways to reheat leftovers.

    Microwave

    The microwave is the fastest option.

    Heat until the chicken is steaming hot throughout.

    Skillet

    A skillet is one of the best methods for maintaining texture.

    Add the chicken and vegetables to a skillet over medium heat and cook until heated through.

    Oven

    Place leftovers on a baking sheet and warm them in a moderate oven until hot.

    Avoid overheating the chicken because lean chicken breast can become dry.

    A little additional barbecue sauce can help restore moisture.


    Make It Spicy

    If you like heat, there are plenty of ways to turn this into spicy BBQ chicken.

    Add:

    • Cayenne pepper
    • Crushed red pepper
    • Jalapeños
    • Chipotle powder
    • Hot sauce
    • Spicy barbecue sauce

    Chipotle is particularly good because it adds both heat and smoky flavor.

    You could even make half the chicken mild and half spicy if you’re cooking for people with different preferences.


    Make It Smokier

    Want even more barbecue flavor?

    Increase the smoked paprika slightly.

    You can also add a small amount of:

    • Chipotle powder
    • Cumin
    • Chili powder
    • Smoked salt

    Just remember that smoked salt contributes sodium, so use it sparingly.


    Make It Sweeter

    Some people love a sweeter BBQ flavor.

    Instead of pouring on more sauce, try adding a small amount of natural sweetness.

    A touch of honey can work.

    You could also roast pineapple chunks alongside the vegetables.

    Pineapple and BBQ chicken are an excellent combination because the sweet and tangy fruit contrasts with the smoky sauce.


    Try BBQ Chicken and Pineapple

    For a tropical variation, add fresh pineapple chunks.

    Combine:

    • Chicken
    • Red bell pepper
    • Green bell pepper
    • Red onion
    • Pineapple

    Grill them as skewers or roast them together.

    Brush the chicken with BBQ sauce near the end.

    The pineapple caramelizes slightly as it cooks, giving you a combination of sweet, smoky, savory, and tangy flavors.


    Add More Protein

    Chicken already provides plenty of protein, but you can make your BBQ bowl even more substantial by adding:

    • Black beans
    • Chickpeas
    • Quinoa
    • Greek yogurt-based sauce

    Beans are especially useful because they also contribute fiber.


    Control the Portion Without Feeling Deprived

    Healthy eating isn’t necessarily about making every portion tiny.

    Instead, think about how the plate is balanced.

    A simple approach is to make vegetables a large part of your plate, add a reasonable serving of chicken, and include a moderate portion of whole grains or another nutritious carbohydrate when desired.

    The result can still be a generous-looking, satisfying meal.


    Healthy Eating Doesn’t Have to Be Complicated

    Sometimes people assume eating healthier requires unusual ingredients, complicated meal plans, or giving up everything they enjoy.

    It doesn’t.

    Simple changes can make a big difference.

    Grill or roast instead of deep frying.

    Choose lean protein more often.

    Add more vegetables.

    Watch heavily sweetened sauces.

    Use spices and herbs generously.

    Pay attention to portions.

    Drink water with your meal.

    And most importantly, make food that you genuinely look forward to eating.

    That’s what makes healthy habits easier to continue.


    Budget-Friendly Tips

    Healthy meals don’t necessarily have to be expensive either.

    Shop for vegetables that are in season or on sale.

    Frozen vegetables can also work when fresh produce is expensive.

    Buy larger packages of chicken when they’re discounted and freeze individual portions.

    Store-brand barbecue sauces may cost considerably less than premium brands, so compare nutrition labels instead of assuming a more expensive sauce is automatically healthier.

    And don’t throw away leftover vegetables.

    If you’ve got half a pepper, part of an onion, broccoli, or zucchini left in the refrigerator, this recipe is an excellent way to use them.


    Great for Cleaning Out the Refrigerator

    This is one of those recipes where you don’t need exact vegetables.

    Open your refrigerator and see what needs to be used.

    A little broccoli?

    Throw it in.

    Half an onion?

    Use it.

    One lonely zucchini?

    Perfect.

    A handful of mushrooms?

    Add those too.

    Recipes like this can help reduce food waste while creating a different combination every time.


    Perfect for Busy Weeknights

    After a long day, complicated cooking is often the last thing anyone wants.

    That’s where sheet-pan recipes really shine.

    There aren’t multiple pots and pans.

    You don’t need to stand over the stove.

    Most of the cooking happens while you’re doing something else.

    Prepare everything.

    Put it on the pan.

    Roast it.

    Add sauce.

    Finish cooking.

    Serve.

    And cleanup is relatively easy.

    That’s a weeknight dinner win.


    Perfect for Summer Cookouts Too

    BBQ chicken doesn’t have to mean heavy sides and oversized portions.

    You can build a lighter cookout around grilled chicken and vegetables.

    Serve the chicken with grilled peppers, zucchini, onions, corn, and a large salad.

    People can choose what they want and build their own plates.

    You still get all the familiar smells and flavors of summer grilling while including plenty of vegetables.


    Frequently Asked Questions

    Can I use chicken thighs?

    Absolutely.

    Boneless, skinless chicken thighs are flavorful and tend to stay juicy during cooking.

    They may require a slightly different cooking time, so always use internal temperature rather than time alone to determine doneness.

    Can I use frozen vegetables?

    Yes, although fresh vegetables generally roast better.

    Frozen vegetables contain more moisture and may steam rather than brown.

    If using frozen vegetables, avoid overcrowding the pan.

    Can I make this ahead?

    Yes.

    You can chop the vegetables and season the chicken ahead of time.

    Store them separately in the refrigerator until you’re ready to cook.

    Can I make it without BBQ sauce?

    Certainly.

    Season the chicken heavily with smoked paprika, garlic, onion powder, pepper, and other spices.

    You’ll end up with more of a smoky roasted chicken and vegetable dish.

    Can I double the recipe?

    Yes, but use two sheet pans.

    Trying to fit twice as much food onto one pan will overcrowd it and prevent the vegetables from roasting properly.


    Healthy Recipe of the Day Tip

    Don’t focus only on removing foods from your diet. Look for ways to add nutritious ingredients to meals you already enjoy.

    Love BBQ chicken?

    Great.

    Instead of giving it up, surround it with colorful roasted vegetables.

    Love BBQ bowls?

    Build one with vegetables, lean chicken, brown rice, and flavorful toppings.

    Enjoy cookouts?

    Grill vegetables alongside your chicken.

    Healthy eating can often be about improving familiar meals rather than completely replacing them.


    A Healthy Dinner Worth Repeating

    The best healthy recipes are the ones you actually want to make again.

    BBQ Chicken and Vegetables checks a lot of boxes.

    It’s easy.

    It’s colorful.

    It’s customizable.

    It’s protein-packed.

    It’s loaded with vegetables.

    It’s suitable for meal prep.

    And most importantly, it’s full of flavor.

    You can roast it on a busy weeknight, grill it on a summer afternoon, turn the leftovers into lunch bowls, or make colorful skewers for your next cookout.

    There are enough variations that the basic recipe never has to feel exactly the same.


    Final Thoughts

    Healthy eating becomes much more enjoyable when you stop thinking of it as a choice between food that’s good for you and food that tastes good.

    You can have both.

    Today’s Healthy Recipe of the Day: BBQ Chicken and Vegetables brings together juicy chicken, smoky barbecue flavor, roasted vegetables, simple seasonings, and plenty of opportunities to customize the meal.

    Make the sheet-pan version when you’re short on time.

    Grill it when the weather is beautiful.

    Turn it into skewers for your next cookout.

    Prepare BBQ chicken bowls for the week.

    Use leftover chicken on salads.

    Or simply pile the chicken and colorful vegetables onto your plate and enjoy.

    Sometimes healthy cooking really can be that simple.

    Healthy Recipe of the Day: BBQ Chicken and Vegetables — smoky, colorful, satisfying, and proof that adding more vegetables doesn’t mean sacrificing the flavors you love.

Exit mobile version