Category: Recipes

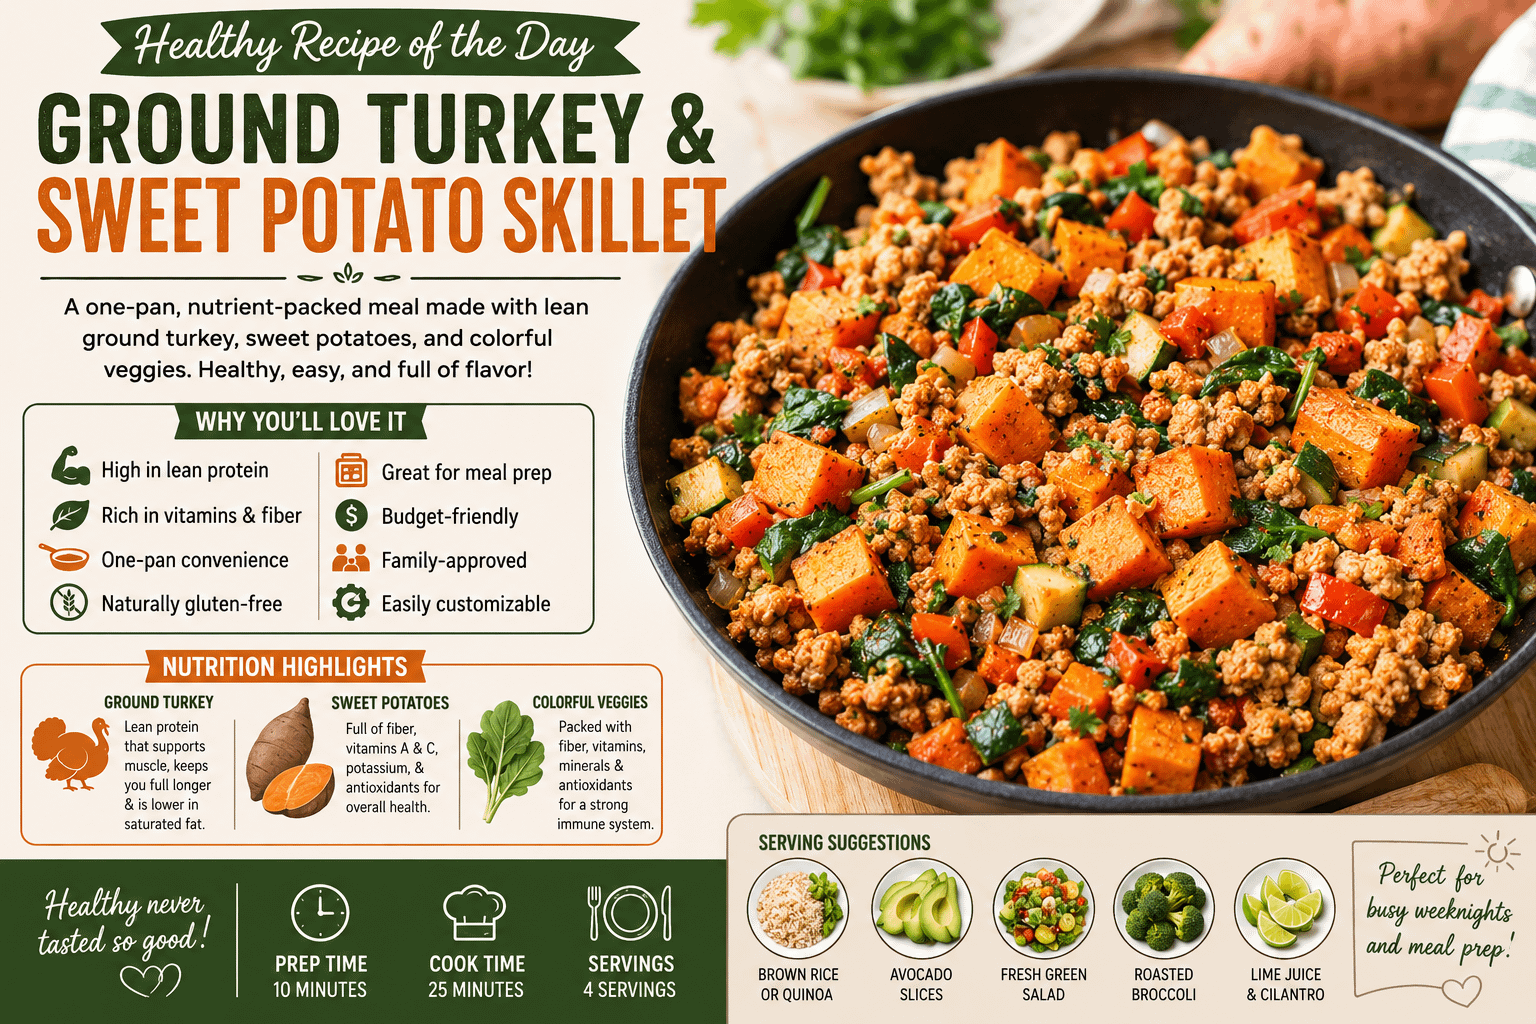
  • Healthy Recipe of the Day: Ground Turkey & Sweet Potato Skillet

    Healthy Recipe of the Day: Ground Turkey & Sweet Potato Skillet

    Advertisements

    When you’re looking for a meal that’s nutritious, filling, and easy to prepare, it’s hard to beat a Ground Turkey & Sweet Potato Skillet. This wholesome one-pan recipe combines lean ground turkey, naturally sweet potatoes, colorful vegetables, and savory seasonings into a balanced meal that’s as delicious as it is healthy.

    Perfect for busy families, meal prep enthusiasts, or anyone wanting to eat healthier without sacrificing flavor, this skillet comes together in about 35 minutes and requires minimal cleanup.


    Why You’ll Love This Recipe

    • High in lean protein
    • Rich in fiber and vitamins
    • One-pan convenience
    • Naturally gluten-free
    • Great for meal prep
    • Budget-friendly
    • Family-approved
    • Easily customizable

    Whether you’re trying to eat healthier, lose weight, or simply enjoy a satisfying homemade dinner, this recipe checks every box.


    Ingredients

    For the Skillet

    • 1 pound lean ground turkey (93% lean)
    • 2 medium sweet potatoes, peeled and diced
    • 1 tablespoon olive oil
    • 1 small onion, diced
    • 1 red bell pepper, chopped
    • 1 zucchini, diced
    • 3 cloves garlic, minced
    • 1 teaspoon smoked paprika
    • 1 teaspoon chili powder
    • ½ teaspoon cumin
    • ½ teaspoon dried oregano
    • Salt and black pepper to taste
    • ¼ teaspoon crushed red pepper flakes (optional)
    • ½ cup low-sodium chicken broth
    • 2 cups fresh spinach
    • Juice of ½ lime

    Optional Toppings

    • Fresh cilantro
    • Green onions
    • Avocado slices
    • Greek yogurt
    • Shredded reduced-fat cheese
    • Pumpkin seeds
    • Fresh parsley

    Directions

    Step 1: Cook the Sweet Potatoes

    Heat olive oil in a large skillet over medium heat.

    Add the diced sweet potatoes and cook for 8–10 minutes, stirring occasionally until they begin to soften.

    If needed, add a splash of chicken broth and cover for a few minutes to steam them.


    Step 2: Brown the Turkey

    Push the sweet potatoes to one side of the skillet.

    Add the ground turkey and cook until browned, breaking it apart with a spoon.

    Drain excess liquid if necessary.


    Step 3: Add the Vegetables

    Mix in:

    • Onion
    • Bell pepper
    • Garlic
    • Zucchini

    Cook for another 5–6 minutes until the vegetables become tender.


    Step 4: Season Everything

    Add:

    • Smoked paprika
    • Chili powder
    • Cumin
    • Oregano
    • Salt
    • Pepper
    • Red pepper flakes

    Stir well to coat everything evenly.


    Step 5: Add Spinach

    Fold in the fresh spinach.

    Cook for 1–2 minutes until wilted.

    Finish with fresh lime juice.


    Nutrition Highlights

    Ground Turkey

    Lean ground turkey provides:

    • High-quality protein
    • Iron
    • Zinc
    • Vitamin B12
    • Lower saturated fat than ground beef

    Protein helps build muscle, supports metabolism, and keeps you feeling full longer.


    Sweet Potatoes

    Sweet potatoes are loaded with:

    • Vitamin A
    • Vitamin C
    • Potassium
    • Fiber
    • Antioxidants

    Their natural sweetness balances the savory turkey perfectly.


    Colorful Vegetables

    Bell peppers, spinach, onions, and zucchini add:

    • Fiber
    • Vitamins
    • Minerals
    • Antioxidants

    The variety of vegetables makes every bite both flavorful and nutritious.


    Healthy Cooking Tips

    • Use 99% lean turkey for an even lighter meal.
    • Leave the sweet potato skins on for extra fiber.
    • Add mushrooms for additional nutrients.
    • Stir in black beans for extra protein.
    • Swap spinach for kale if preferred.
    • Add broccoli for more vegetables.

    Meal Prep Friendly

    This recipe is ideal for weekly meal prep.

    Store in airtight containers for up to:

    • Refrigerator: 4 days
    • Freezer: 3 months

    Simply reheat in the microwave or on the stovetop.


    Serving Suggestions

    Pair this healthy skillet with:

    • Brown rice
    • Quinoa
    • Cauliflower rice
    • Mixed green salad
    • Roasted broccoli
    • Whole grain tortillas
    • Fresh avocado

    Variations

    Southwest Style

    Add:

    • Black beans
    • Corn
    • Taco seasoning
    • Salsa
    • Cilantro

    Mediterranean Version

    Mix in:

    • Cherry tomatoes
    • Spinach
    • Feta cheese
    • Kalamata olives
    • Oregano

    Italian Style

    Season with:

    • Italian herbs
    • Parmesan cheese
    • Fresh basil
    • Diced tomatoes

    Breakfast Skillet

    Top each serving with a fried or poached egg for a hearty, protein-packed breakfast.


    Estimated Nutrition (Per Serving)

    Serves 4

    • Calories: ~360
    • Protein: 31g
    • Carbohydrates: 24g
    • Fiber: 5g
    • Fat: 14g
    • Saturated Fat: 3g
    • Sugar: 6g
    • Sodium: 380mg

    Nutritional values may vary depending on ingredients used.


    Final Thoughts

    Healthy eating doesn’t have to be complicated. This Ground Turkey & Sweet Potato Skillet delivers everything you want in a weeknight meal—lean protein, vibrant vegetables, wholesome carbohydrates, and plenty of satisfying flavor—all in one pan.

    Whether you’re preparing dinner for the family, planning healthy lunches for the week, or simply trying to add more nutritious meals to your routine, this recipe is one you’ll find yourself making again and again. It’s comforting, colorful, and packed with ingredients that fuel your body while tasting fantastic.

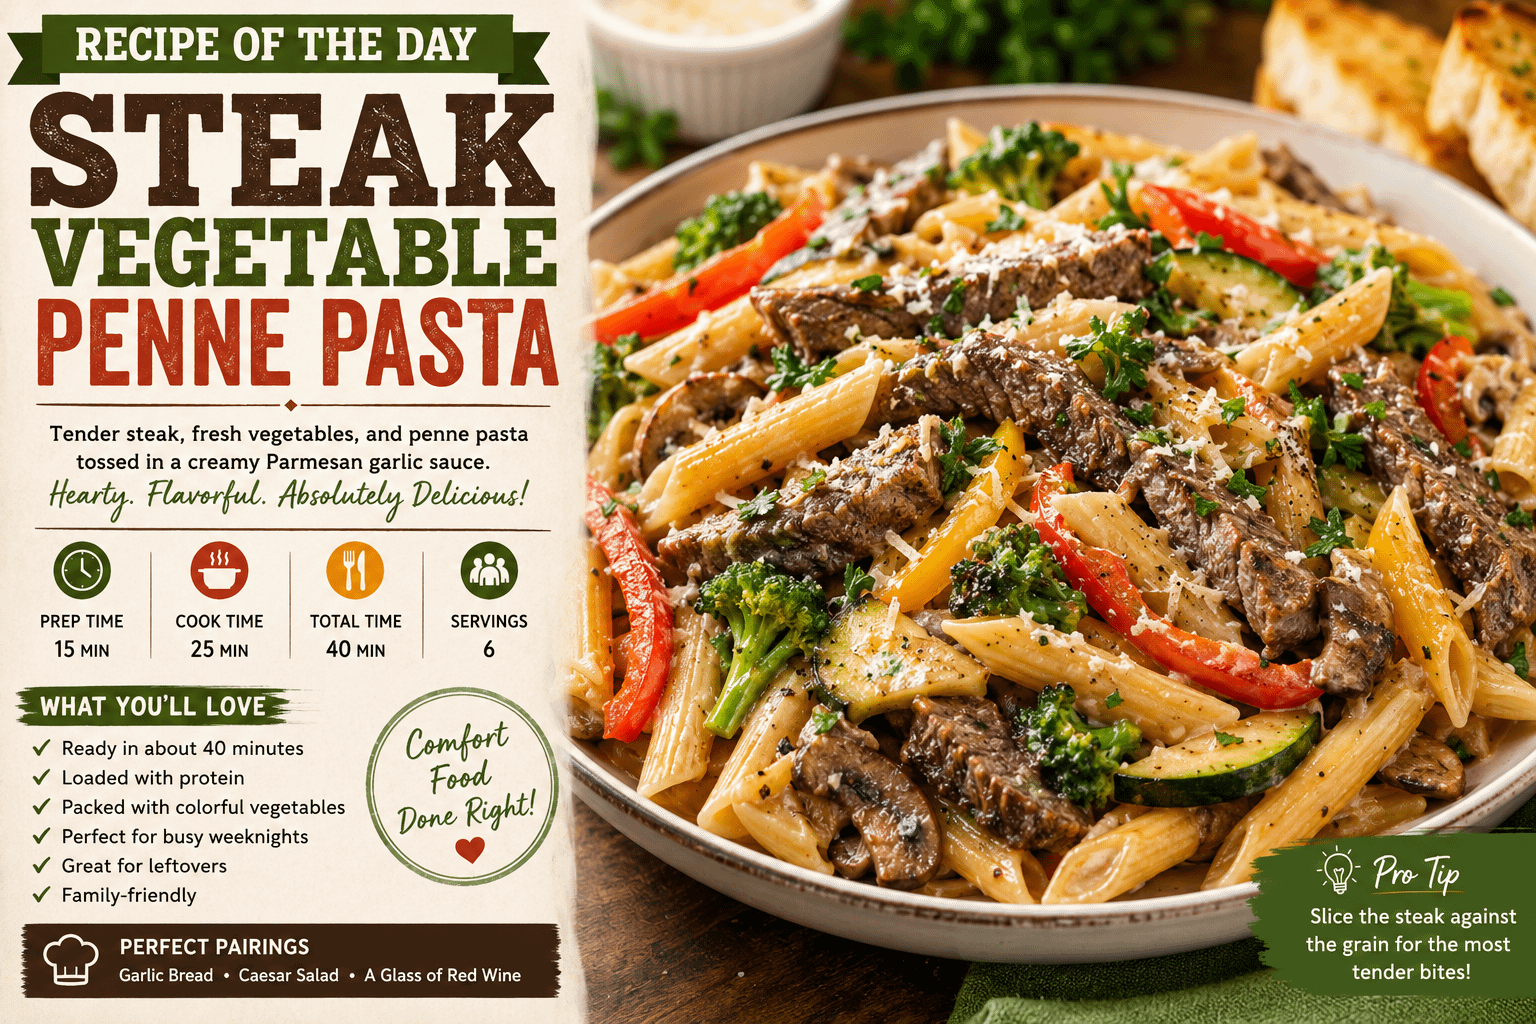
  • Recipe of the Day: Steak Vegetable Penne Pasta

    Advertisements

    There’s something incredibly satisfying about a hearty bowl of pasta loaded with tender steak, colorful vegetables, and a rich, flavorful sauce. Steak Vegetable Penne Pasta combines juicy strips of seasoned beef with perfectly cooked penne pasta and fresh vegetables for a meal that’s comforting, filling, and surprisingly easy to make.

    Whether you’re preparing a weeknight family dinner or looking for an impressive meal for guests, this recipe delivers restaurant-quality flavor without spending hours in the kitchen.


    Why You’ll Love This Recipe

    Steak and pasta are a classic combination, but adding fresh vegetables creates a balanced meal packed with flavor and texture.

    This recipe is:

    • Ready in about 40 minutes
    • Perfect for busy weeknights
    • Loaded with protein
    • Easy to customize with your favorite vegetables
    • Great for leftovers
    • Family-friendly

    Every bite offers tender steak, perfectly cooked pasta, crisp vegetables, and a savory garlic Parmesan sauce that brings everything together.


    Ingredients

    For the Pasta

    • 12 ounces penne pasta
    • 1 tablespoon olive oil

    For the Steak

    • 1½ pounds sirloin steak, sliced into thin strips
    • 1 tablespoon olive oil
    • 1 teaspoon garlic powder
    • 1 teaspoon onion powder
    • 1 teaspoon paprika
    • Salt and black pepper to taste

    Vegetables

    • 1 red bell pepper, sliced
    • 1 yellow bell pepper, sliced
    • 1 zucchini, sliced
    • 1 cup broccoli florets
    • 1 cup mushrooms, sliced
    • 3 cloves garlic, minced

    Sauce

    • 2 tablespoons butter
    • 1 cup beef broth
    • ½ cup heavy cream
    • ½ cup grated Parmesan cheese
    • 1 teaspoon Italian seasoning
    • Fresh parsley for garnish

    Instructions

    Step 1: Cook the Pasta

    Bring a large pot of salted water to a boil.

    Cook the penne according to package directions until al dente.

    Drain and drizzle with olive oil to prevent sticking.


    Step 2: Prepare the Steak

    Season the steak strips with:

    • Garlic powder
    • Onion powder
    • Paprika
    • Salt
    • Pepper

    Heat olive oil in a large skillet over medium-high heat.

    Cook the steak for 2–3 minutes per side until browned.

    Remove from the pan and set aside.


    Step 3: Cook the Vegetables

    Using the same skillet, add another drizzle of olive oil if needed.

    Cook:

    • Bell peppers
    • Mushrooms
    • Broccoli
    • Zucchini

    Sauté for about 5–6 minutes until just tender.

    Add minced garlic during the final minute.


    Step 4: Make the Sauce

    Reduce heat to medium.

    Add butter.

    Pour in beef broth and scrape up the browned bits from the pan.

    Stir in:

    • Heavy cream
    • Parmesan cheese
    • Italian seasoning

    Simmer for 3–4 minutes until slightly thickened.


    Step 5: Combine Everything

    Return the steak to the skillet.

    Add the cooked pasta.

    Toss until everything is evenly coated with the creamy sauce.

    Cook another 2–3 minutes until heated through.


    Step 6: Serve

    Top with:

    • Fresh parsley
    • Extra Parmesan cheese
    • Fresh cracked pepper

    Serve immediately with garlic bread or a fresh green salad.


    Tips for the Best Steak Pasta

    Don’t Overcook the Steak

    Medium-rare to medium keeps the steak tender. Since it returns to the pan later, slightly undercook it initially.

    Salt the Pasta Water

    Properly seasoned pasta makes the entire dish taste better.

    Use Fresh Parmesan

    Freshly grated Parmesan melts more smoothly than pre-shredded cheese.

    Slice Against the Grain

    Cutting steak against the grain ensures every bite is tender.


    Delicious Variations

    Spicy Version

    Add:

    • Crushed red pepper flakes
    • Cajun seasoning
    • Pepper Jack cheese

    Garlic Butter Version

    Skip the cream and toss everything with garlic butter and herbs.


    Mushroom Lovers

    Double the mushrooms for an earthy, rich flavor.


    Healthy Version

    Substitute:

    • Whole wheat penne
    • Half-and-half instead of heavy cream
    • Extra vegetables like spinach or asparagus

    What to Serve with Steak Vegetable Penne Pasta

    Pair this meal with:

    • Garlic bread
    • Caesar salad
    • Roasted asparagus
    • Steamed green beans
    • Bruschetta
    • Grilled zucchini
    • A glass of red wine or sparkling lemonade

    Storage Tips

    Store leftovers in an airtight container in the refrigerator for up to 3 days.

    Reheat gently on the stove with a splash of beef broth or cream to restore the sauce’s creamy consistency.

    Freezing is possible, though cream sauces may separate slightly after thawing.


    Recipe Summary

    Prep Time: 15 minutes

    Cook Time: 25 minutes

    Total Time: 40 minutes

    Servings: 6

    Difficulty: Easy


    Final Thoughts

    Steak Vegetable Penne Pasta is the perfect combination of comfort food and wholesome ingredients. Tender slices of seasoned steak, colorful vegetables, and creamy Parmesan sauce come together to create a satisfying meal that’s elegant enough for company yet simple enough for a busy weeknight.

    If you’re looking for a dinner that everyone at the table will enjoy, this flavorful pasta recipe is sure to become a favorite. It’s hearty, colorful, and packed with rich flavors that make every bite memorable.

  • Breakfast of the Day: Cowboy Omelet – A Hearty Breakfast to Fuel Your Morning

    Advertisements

    Few breakfasts are as satisfying as a Cowboy Omelet. Packed with smoky bacon, savory sausage, colorful vegetables, melted cheese, and fluffy eggs, this hearty meal is designed to keep you energized whether you’re heading out to work, tackling weekend projects, or simply enjoying a relaxing morning at home.

    Inspired by the rugged meals traditionally cooked over campfires on cattle drives, the Cowboy Omelet combines simple ingredients into a filling breakfast that’s full of bold flavor. It’s easy to customize, quick to prepare, and guaranteed to become a family favorite.


    What Is a Cowboy Omelet?

    A Cowboy Omelet is a loaded omelet featuring protein-rich meats, vegetables, cheese, and eggs. Unlike a traditional plain omelet, this version is hearty enough to serve as a complete meal.

    Common ingredients include:

    • Bacon
    • Breakfast sausage
    • Bell peppers
    • Onions
    • Mushrooms
    • Jalapeños (optional)
    • Cheddar cheese
    • Eggs

    The result is a savory breakfast that’s crispy, cheesy, fluffy, and incredibly satisfying.


    Why You’ll Love This Recipe

    ✔ High in protein

    ✔ Ready in about 30 minutes

    ✔ Perfect for breakfast or brunch

    ✔ Easy to customize

    ✔ Great use for leftover vegetables

    ✔ Naturally low in carbohydrates


    Cowboy Omelet Recipe

    Ingredients

    • 6 large eggs
    • 2 tablespoons milk
    • Salt and black pepper to taste
    • 4 slices bacon, cooked and chopped
    • ½ pound breakfast sausage, cooked and crumbled
    • ½ cup diced onion
    • ½ cup diced green bell pepper
    • ½ cup mushrooms, sliced
    • 1 jalapeño, diced (optional)
    • 1 cup shredded sharp cheddar cheese
    • 2 tablespoons butter
    • Fresh parsley for garnish

    Instructions

    Step 1: Cook the Meat

    Cook the bacon until crispy. Remove and chop into bite-sized pieces.

    Brown the breakfast sausage until fully cooked and drain any excess grease.


    Step 2: Cook the Vegetables

    In the same skillet, sauté:

    • Onion
    • Bell pepper
    • Mushrooms
    • Jalapeño

    Cook for about 5 minutes until softened.


    Step 3: Beat the Eggs

    Whisk together:

    • Eggs
    • Milk
    • Salt
    • Pepper

    The milk helps create a fluffier omelet.


    Step 4: Cook the Eggs

    Heat butter in a nonstick skillet over medium heat.

    Pour in the eggs.

    As the eggs begin to set, gently lift the edges with a spatula, allowing uncooked egg to flow underneath.


    Step 5: Add the Filling

    When the eggs are nearly cooked:

    • Sprinkle cooked bacon
    • Add sausage
    • Spoon on vegetables
    • Top with cheddar cheese

    Fold the omelet in half.

    Cook another minute until the cheese melts.


    Step 6: Serve

    Garnish with fresh parsley.

    Serve immediately with:

    • Hash browns
    • Country potatoes
    • Toast
    • Biscuits
    • Fresh fruit
    • Salsa
    • Hot sauce

    Tips for the Perfect Cowboy Omelet

    Don’t Overcook the Eggs

    Remove the omelet from the pan while the eggs are still slightly soft. They continue cooking from residual heat.

    Use Freshly Shredded Cheese

    Fresh cheese melts smoother than pre-packaged shredded cheese.

    Cook Fillings First

    Vegetables release moisture, so cooking them first prevents a watery omelet.

    Medium Heat Is Best

    Cooking too quickly can brown the eggs before the inside is fully cooked.


    Delicious Variations

    Southwest Cowboy Omelet

    Add:

    • Pepper Jack cheese
    • Black beans
    • Corn
    • Salsa
    • Avocado

    Steakhouse Cowboy Omelet

    Replace sausage with:

    • Grilled steak
    • Caramelized onions
    • Swiss cheese

    BBQ Cowboy Omelet

    Mix chopped brisket with:

    • BBQ sauce
    • Cheddar
    • Green onions

    Spicy Cowboy Omelet

    Add:

    • Chorizo
    • Jalapeños
    • Pepper Jack cheese
    • Chipotle seasoning

    Garden Cowboy Omelet

    Skip the meat and use:

    • Spinach
    • Tomatoes
    • Mushrooms
    • Zucchini
    • Feta cheese

    Nutritional Benefits

    This breakfast offers an excellent balance of nutrients.

    Eggs provide complete protein, healthy fats, vitamin D, and choline.

    Bacon and sausage contribute additional protein and rich flavor.

    Bell peppers and onions add vitamin C, antioxidants, and fiber.

    Cheddar cheese supplies calcium and protein.

    The combination helps keep you feeling full longer while providing lasting energy throughout the morning.


    Make-Ahead Tips

    You can prepare most of the ingredients ahead of time.

    • Cook bacon the night before.
    • Brown the sausage in advance.
    • Chop vegetables and refrigerate.
    • Shred cheese ahead of time.

    When you’re ready to eat, simply cook the eggs and assemble the omelet in minutes.


    What to Serve with a Cowboy Omelet

    Pair your Cowboy Omelet with:

    • Crispy hash browns
    • Country-style breakfast potatoes
    • Homemade biscuits
    • Buttered sourdough toast
    • Fresh berries
    • Orange juice
    • Fresh coffee
    • Sweet tea

    For an extra hearty breakfast, serve with sausage gravy over biscuits on the side.


    Final Thoughts

    The Cowboy Omelet is the ultimate hearty breakfast for anyone who loves bold flavors and satisfying comfort food. Loaded with smoky bacon, savory sausage, fresh vegetables, and gooey melted cheese, it’s a breakfast that’s both filling and delicious. Whether you’re feeding a hungry family, hosting brunch with friends, or simply treating yourself to a weekend breakfast, this classic omelet is guaranteed to start the day on a flavorful note.

    So fire up the skillet, gather your favorite ingredients, and enjoy a breakfast that’s as hearty and dependable as the cowboys who inspired it. Happy cooking!

    Read More Recipes

  • Dessert of the Day: Chocolate Guinness Lava Cakes

    Advertisements

    Rich, decadent, and irresistibly gooey, Chocolate Guinness Lava Cakes combine the bold flavor of stout beer with luxurious dark chocolate to create an unforgettable dessert. Whether you’re celebrating a special occasion, hosting friends, or simply craving something indulgent, these molten-centered cakes deliver restaurant-quality results from your own kitchen.

    The Guinness doesn’t make the dessert taste like beer—instead, it enhances the chocolate’s deep cocoa notes while adding subtle hints of roasted malt and coffee. The result is a rich, sophisticated lava cake with a warm, flowing center that’s perfect served with vanilla ice cream or fresh whipped cream.


    Why You’ll Love Chocolate Guinness Lava Cakes

    Chocolate lava cakes are already one of the most beloved desserts, but adding Guinness elevates them to another level. The stout’s roasted barley flavors intensify the richness of the chocolate, creating a dessert that’s bold without being overly sweet.

    These individual cakes are:

    • Ready in about 30 minutes
    • Rich with a warm molten center
    • Perfect for dinner parties and celebrations
    • Easy to prepare ahead of time
    • Beautiful enough for any special occasion

    Ingredients

    For the Lava Cakes

    • 6 ounces bittersweet chocolate, chopped
    • ½ cup unsalted butter
    • ¼ cup Guinness stout
    • 2 large eggs
    • 2 large egg yolks
    • ¼ cup granulated sugar
    • 1 teaspoon vanilla extract
    • Pinch of salt
    • ¼ cup all-purpose flour
    • Butter and cocoa powder for preparing ramekins

    Optional Toppings

    • Vanilla bean ice cream
    • Fresh whipped cream
    • Chocolate shavings
    • Fresh raspberries
    • Powdered sugar
    • Chocolate sauce
    • Caramel drizzle
    • Fresh mint leaves

    Directions

    Step 1: Prepare the Ramekins

    Preheat your oven to 425°F (220°C).

    Generously butter four 6-ounce ramekins and dust them with cocoa powder. Tap out any excess.

    Step 2: Melt the Chocolate

    In a heatproof bowl set over simmering water (or using short microwave intervals), melt together:

    • Chocolate
    • Butter

    Once smooth, stir in the Guinness until fully combined.

    Allow the mixture to cool slightly.

    Step 3: Make the Batter

    In a separate bowl, whisk together:

    • Eggs
    • Egg yolks
    • Sugar
    • Vanilla
    • Salt

    Beat until slightly thickened and lighter in color.

    Slowly whisk in the chocolate mixture.

    Fold in the flour just until incorporated.

    Do not overmix.

    Step 4: Fill the Ramekins

    Divide the batter evenly among the prepared ramekins.

    Fill each about three-quarters full.

    Step 5: Bake

    Bake for 11–13 minutes.

    The edges should be firm while the centers remain soft and slightly jiggly.

    Avoid overbaking or you’ll lose the molten center.

    Step 6: Serve Immediately

    Allow the cakes to rest for one minute.

    Carefully run a knife around the edge, invert onto serving plates, and gently lift away the ramekins.

    Serve immediately while the center is still warm and flowing.


    Tips for the Perfect Lava Cake

    • Use high-quality bittersweet chocolate for the richest flavor.
    • Room-temperature eggs blend more smoothly.
    • Do not overbake—the center should remain soft.
    • Prepare the batter several hours ahead and refrigerate until ready to bake.
    • Let refrigerated batter sit at room temperature for about 20 minutes before baking.

    Delicious Serving Ideas

    Chocolate Guinness Lava Cakes pair beautifully with:

    • Vanilla ice cream
    • Irish whipped cream
    • Salted caramel sauce
    • Fresh strawberries
    • Espresso
    • Irish coffee
    • Chocolate-covered espresso beans

    The contrast between the warm molten cake and cold ice cream creates an incredible dessert experience.


    Storage

    These cakes are best enjoyed fresh from the oven.

    If you have leftovers:

    • Refrigerate for up to 2 days.
    • Reheat in the microwave for 15–20 seconds.
    • The center may become less molten but will still be delicious.

    Flavor Variations

    Want to customize your lava cakes?

    Try adding:

    • Espresso powder for extra richness
    • Orange zest
    • Peppermint extract
    • Irish cream liqueur
    • Peanut butter center
    • Salted caramel filling
    • Chopped hazelnuts
    • Dark chocolate chunks

    Why Guinness Works So Well

    Guinness stout is famous for its notes of roasted coffee, cocoa, and caramel. Those flavors naturally complement dark chocolate, making desserts taste richer and more complex without overwhelming sweetness.

    Even people who don’t typically enjoy beer often love Guinness in baked goods because the alcohol cooks off, leaving behind only its incredible depth of flavor.


    Final Thoughts

    Chocolate Guinness Lava Cakes prove that a handful of quality ingredients can create an elegant dessert worthy of any celebration. With their rich chocolate flavor, warm molten center, and subtle roasted notes from Guinness, these individual cakes offer an unforgettable finish to any meal.

    Whether you’re baking for Valentine’s Day, St. Patrick’s Day, birthdays, dinner parties, or simply treating yourself, these decadent lava cakes are guaranteed to impress every chocolate lover at the table.

    Read More Recipes

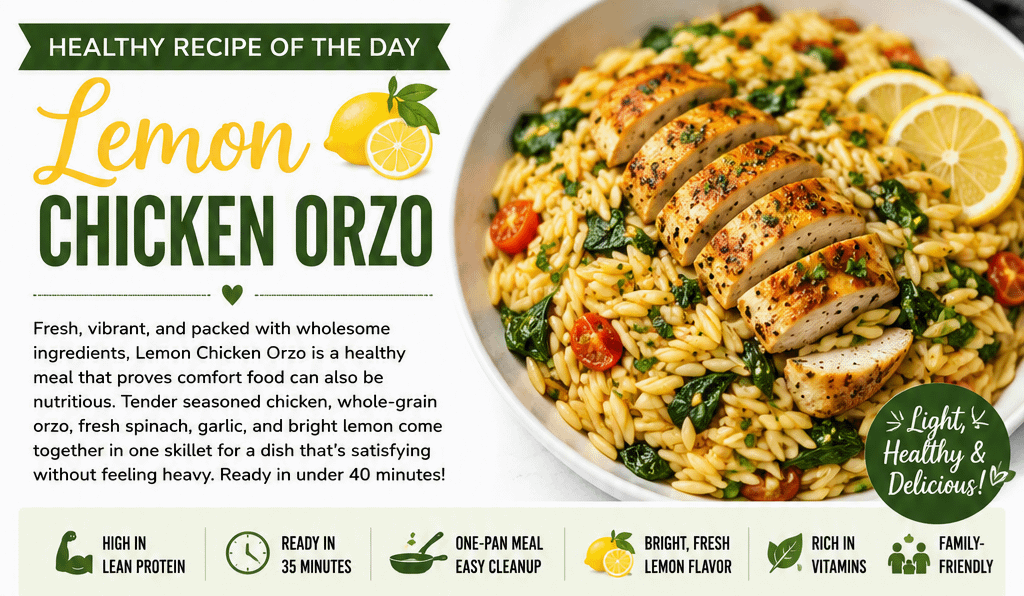
  • Healthy Recipe of the Day: Lemon Chicken Orzo

    Advertisements

    Fresh, vibrant, and packed with wholesome ingredients, Lemon Chicken Orzo is a healthy meal that proves comfort food can also be nutritious. Tender seasoned chicken, whole-grain orzo, fresh spinach, garlic, and bright lemon come together in one skillet to create a meal that’s satisfying without feeling heavy. Perfect for busy weeknights, meal prep, or a light family dinner, this recipe delivers restaurant-quality flavor in under 40 minutes.

    Whether you’re trying to eat healthier, add more lean protein to your diet, or simply enjoy fresh Mediterranean-inspired flavors, Lemon Chicken Orzo deserves a spot on your dinner table.


    Why You’ll Love This Recipe

    • High in lean protein
    • Ready in about 35 minutes
    • One-pan meal with easy cleanup
    • Bright, fresh lemon flavor
    • Rich in vitamins from spinach
    • Family-friendly
    • Great for meal prep
    • Light yet filling

    Ingredients

    For the Chicken

    • 2 boneless, skinless chicken breasts
    • 1 tablespoon olive oil
    • 1 teaspoon garlic powder
    • 1 teaspoon onion powder
    • 1 teaspoon paprika
    • ½ teaspoon Italian seasoning
    • Salt and black pepper to taste

    For the Orzo

    • 1 tablespoon olive oil
    • 3 cloves garlic, minced
    • 1 cup whole wheat or regular orzo
    • 2½ cups low-sodium chicken broth
    • Juice of 1 large lemon
    • Zest of 1 lemon
    • 2 cups fresh baby spinach
    • ¼ cup grated Parmesan cheese
    • 2 tablespoons chopped fresh parsley
    • Optional: sliced cherry tomatoes
    • Lemon slices for garnish

    Directions

    Step 1: Season the Chicken

    Mix the garlic powder, onion powder, paprika, Italian seasoning, salt, and pepper. Coat both chicken breasts evenly.

    Step 2: Cook the Chicken

    Heat olive oil in a large skillet over medium-high heat.

    Cook the chicken for 5–6 minutes per side until golden brown and fully cooked (165°F internal temperature).

    Transfer to a plate and allow it to rest.


    Step 3: Prepare the Orzo

    Reduce heat to medium.

    Add olive oil and minced garlic to the skillet.

    Cook for about one minute until fragrant.

    Stir in the orzo and toast it for 2 minutes.

    Pour in the chicken broth.

    Bring to a gentle boil, then reduce heat and simmer for about 10 minutes, stirring occasionally.


    Step 4: Add Fresh Ingredients

    Once most of the broth has been absorbed:

    • Stir in spinach
    • Add lemon juice
    • Mix in lemon zest
    • Sprinkle Parmesan cheese
    • Fold everything together until creamy.

    Step 5: Finish the Dish

    Slice the chicken.

    Arrange it over the creamy lemon orzo.

    Top with parsley, cherry tomatoes, extra Parmesan, and fresh lemon slices.

    Serve immediately.


    Healthy Tips

    For an even healthier version:

    • Use whole wheat orzo
    • Choose low-sodium broth
    • Add broccoli, asparagus, or zucchini
    • Reduce Parmesan if watching calories
    • Serve alongside a green salad

    Nutritional Benefits

    Chicken

    Lean chicken breast provides:

    • High-quality protein
    • B vitamins
    • Iron
    • Selenium

    Spinach

    Spinach offers:

    • Vitamin A
    • Vitamin C
    • Vitamin K
    • Iron
    • Fiber
    • Antioxidants

    Lemon

    Fresh lemon adds:

    • Vitamin C
    • Bright natural flavor
    • Antioxidants
    • Minimal calories

    Olive Oil

    Heart-healthy olive oil contains healthy monounsaturated fats that support cardiovascular health.


    Serving Suggestions

    This dish pairs wonderfully with:

    • Roasted asparagus
    • Steamed broccoli
    • Garlic green beans
    • Greek salad
    • Cucumber tomato salad
    • Fresh fruit

    Storage

    Store leftovers in an airtight container in the refrigerator for up to 4 days.

    Reheat gently on the stovetop or in the microwave with a splash of chicken broth to restore the creamy texture.


    Variations

    Try these delicious twists:

    • Add mushrooms
    • Stir in roasted red peppers
    • Substitute shrimp for chicken
    • Add fresh basil
    • Mix in artichoke hearts
    • Sprinkle with feta cheese
    • Add peas for extra color and fiber

    Healthy Eating Doesn’t Have to Be Boring

    Lemon Chicken Orzo is proof that healthy meals can be bursting with flavor. The combination of juicy chicken, creamy orzo, vibrant spinach, and fresh lemon creates a perfectly balanced dinner that’s comforting, nourishing, and easy enough for any night of the week.

    If you’re searching for a meal that’s both wholesome and satisfying, this bright Mediterranean-inspired recipe is sure to become a regular favorite.


    Recipe Summary

    Prep Time: 10 minutes
    Cook Time: 25 minutes
    Total Time: 35 minutes
    Servings: 4
    Calories: Approximately 430 per serving

    Read More Recipes

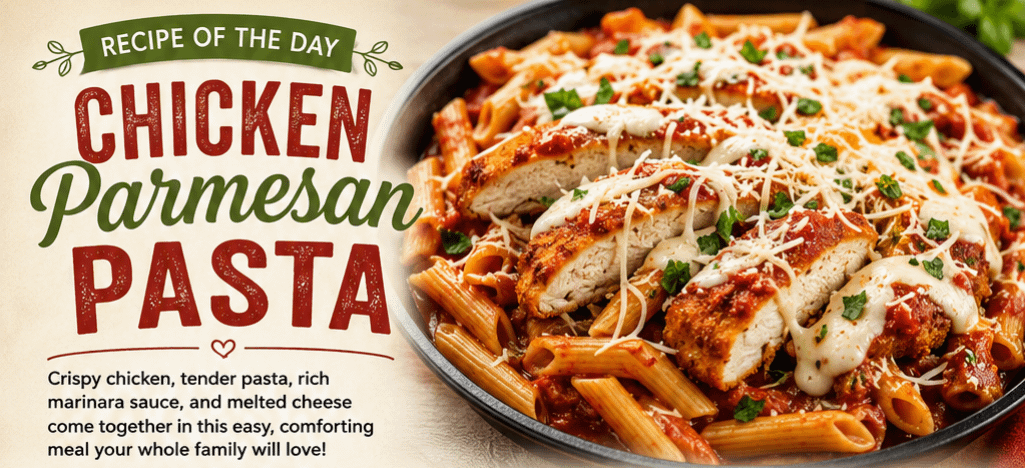
  • Recipe of the Day: Chicken Parmesan Pasta

    Advertisements

    Few comfort foods can compete with the rich, cheesy goodness of Chicken Parmesan Pasta. This easy, family-friendly recipe combines everything people love about classic Chicken Parmesan—crispy chicken, savory marinara sauce, melted mozzarella, Parmesan cheese, and perfectly cooked pasta—into one satisfying meal. It’s an excellent choice for busy weeknights, weekend family dinners, or whenever you’re craving hearty Italian-inspired comfort food.

    The best part? This recipe delivers restaurant-quality flavor without requiring hours in the kitchen.


    Why You’ll Love This Recipe

    Chicken Parmesan Pasta is a crowd-pleaser because it combines familiar flavors into one easy dish.

    Reasons to make it tonight:

    • Ready in about 40 minutes
    • Perfect for family dinners
    • Great for leftovers
    • Freezer-friendly
    • Rich, cheesy comfort food
    • Easy enough for beginner cooks

    Ingredients

    For the Chicken

    • 2 large boneless, skinless chicken breasts
    • Salt and pepper to taste
    • 1 teaspoon garlic powder
    • 1 teaspoon Italian seasoning
    • ½ cup flour
    • 2 eggs, beaten
    • 1 cup Italian breadcrumbs
    • ½ cup grated Parmesan cheese
    • 2 tablespoons olive oil

    For the Pasta

    • 12 ounces penne or rigatoni pasta
    • 3 cups marinara sauce
    • 2 cups shredded mozzarella cheese
    • ½ cup grated Parmesan cheese
    • 2 tablespoons fresh basil, chopped
    • Fresh parsley for garnish

    Instructions

    Step 1: Prepare the Chicken

    Butterfly or pound the chicken breasts until evenly thick.

    Season both sides with:

    • Salt
    • Pepper
    • Garlic powder
    • Italian seasoning

    Coat each piece in flour, then egg, then the breadcrumb-Parmesan mixture.


    Step 2: Cook the Chicken

    Heat olive oil in a large skillet over medium heat.

    Cook chicken for about 4–5 minutes per side until golden brown.

    Transfer to a paper towel-lined plate.


    Step 3: Cook the Pasta

    Boil pasta according to package directions until al dente.

    Drain and reserve about ½ cup of the pasta water.


    Step 4: Build the Sauce

    Return the skillet to medium heat.

    Add marinara sauce and simmer for about 5 minutes.

    Stir in a splash of reserved pasta water if needed for a smoother consistency.


    Step 5: Combine Everything

    Slice the cooked chicken into strips.

    Add pasta to the sauce and toss until coated.

    Fold in half of the mozzarella and Parmesan cheese.

    Top with sliced chicken.

    Sprinkle remaining cheeses over the top.


    Step 6: Melt the Cheese

    Either:

    • Cover the skillet for 3–5 minutes until cheese melts

    OR

    • Place under the broiler for 2–3 minutes until bubbly and lightly browned.

    Finish with fresh basil and parsley.


    Tips for the Best Chicken Parmesan Pasta

    • Use freshly grated Parmesan for the richest flavor.
    • Don’t overcook the pasta—it will continue cooking in the sauce.
    • Let the chicken rest for a few minutes before slicing to keep it juicy.
    • Add crushed red pepper flakes if you enjoy a little heat.
    • Fresh mozzarella creates an even creamier finish.

    Delicious Variations

    Creamy Chicken Parmesan Pasta

    Stir ½ cup heavy cream into the marinara sauce.

    Spicy Version

    Add red pepper flakes or diced hot cherry peppers.

    Veggie Loaded

    Mix in:

    • Spinach
    • Mushrooms
    • Zucchini
    • Bell peppers

    Extra Cheesy

    Add provolone, fontina, or shredded Italian cheese blend.


    What to Serve With It

    Chicken Parmesan Pasta pairs beautifully with:

    • Garlic bread
    • Caesar salad
    • Roasted broccoli
    • Italian green beans
    • Bruschetta
    • Caprese salad

    For dessert, enjoy tiramisu, cannoli, or a scoop of vanilla gelato.


    Storage

    Refrigerate leftovers in an airtight container for up to 4 days.

    Freeze for up to 3 months.

    Reheat gently in the microwave or on the stovetop with a splash of marinara sauce or water to restore moisture.


    Final Thoughts

    Chicken Parmesan Pasta is the perfect combination of crispy chicken, rich tomato sauce, gooey melted cheese, and tender pasta. It’s the kind of comforting meal that brings everyone to the dinner table and is guaranteed to become a regular favorite in your recipe collection.

    Whether you’re cooking for your family, hosting friends, or simply treating yourself to a comforting homemade dinner, this recipe delivers classic Italian-American flavors in every delicious bite. With simple ingredients and easy preparation, Chicken Parmesan Pasta proves that an unforgettable meal doesn’t have to be complicated.

    Read More Recipes

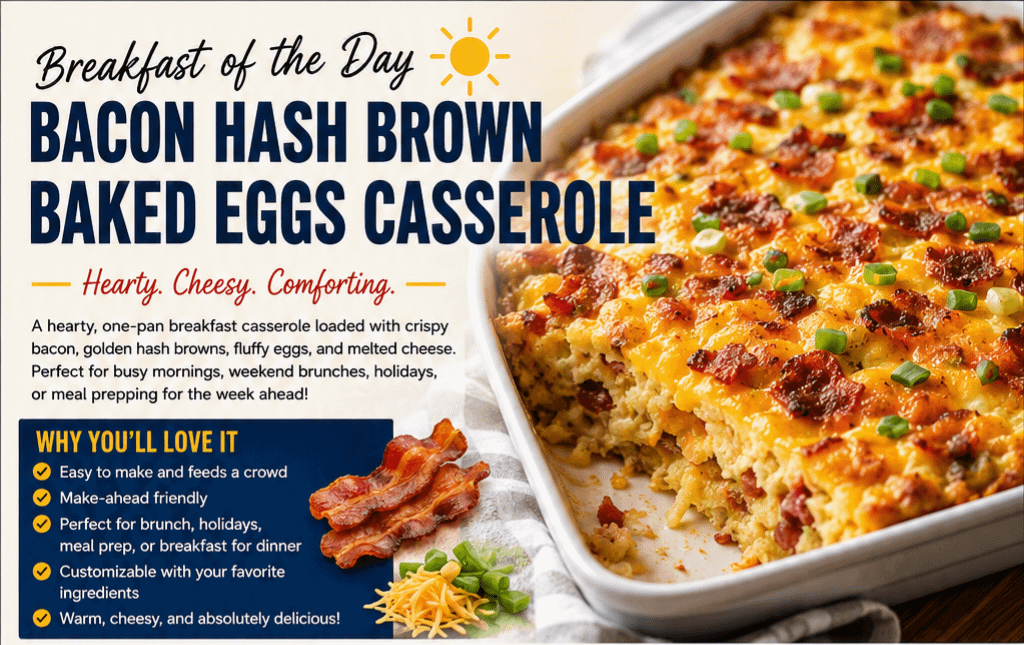
  • Breakfast of the Day: Bacon Hash Brown Baked Eggs Casserole

    Advertisements

    There are few breakfasts as satisfying as a warm, cheesy casserole fresh from the oven, and Bacon Hash Brown Baked Eggs Casserole is the perfect way to start your day. Packed with crispy bacon, golden hash browns, fluffy eggs, and melted cheese, this hearty breakfast is ideal for busy mornings, weekend brunches, holiday gatherings, or meal prepping for the week ahead.

    Best of all, this one-pan breakfast is easy to prepare, feeds a crowd, and combines everyone’s favorite breakfast ingredients into one delicious dish.

    Why You’ll Love This Breakfast

    This casserole is the ultimate comfort food while still being incredibly practical. It can be assembled ahead of time, baked fresh in the morning, and customized with your favorite vegetables, cheeses, or seasonings.

    It’s perfect for:

    • Family breakfasts
    • Weekend brunches
    • Holiday mornings
    • Potluck breakfasts
    • Meal prep
    • Breakfast for dinner

    Every bite offers crispy hash browns, smoky bacon, creamy eggs, and gooey melted cheese.

    Ingredients

    • 1 (30-ounce) package frozen shredded hash browns, thawed
    • 8 slices bacon, cooked and crumbled
    • 8 large eggs
    • 2 cups shredded cheddar cheese
    • 1 cup Monterey Jack cheese
    • ½ cup diced onion
    • ½ cup diced bell pepper
    • ¼ cup sliced green onions
    • 1 cup milk
    • ½ teaspoon garlic powder
    • ½ teaspoon onion powder
    • ½ teaspoon paprika
    • Salt and black pepper to taste
    • Cooking spray

    Instructions

    Step 1: Prepare the Dish

    Preheat your oven to 375°F (190°C).

    Grease a 9×13-inch baking dish with cooking spray.

    Spread the thawed hash browns evenly across the bottom.

    Step 2: Add the Fillings

    Sprinkle the cooked bacon over the hash browns.

    Add the diced onion, bell pepper, and half of the shredded cheeses.

    Step 3: Mix the Eggs

    In a large bowl whisk together:

    • Eggs
    • Milk
    • Garlic powder
    • Onion powder
    • Paprika
    • Salt
    • Pepper

    Pour evenly over the casserole.

    Step 4: Finish

    Top with the remaining cheese and green onions.

    Bake for 40–50 minutes, or until the eggs are fully set and the top is golden brown.

    Allow to rest for 10 minutes before slicing.

    Serving Suggestions

    Serve alongside:

    • Fresh fruit
    • Buttered toast
    • Biscuits
    • Orange juice
    • Coffee
    • Fresh salsa
    • Sour cream
    • Avocado slices

    Delicious Variations

    Southwest Style

    Add:

    • Jalapeños
    • Pepper Jack cheese
    • Chorizo
    • Salsa

    Veggie Lovers

    Mix in:

    • Spinach
    • Mushrooms
    • Tomatoes
    • Broccoli

    Meat Lover’s

    Combine bacon with:

    • Breakfast sausage
    • Ham
    • Diced steak

    Low-Carb Version

    Replace hash browns with cauliflower hash browns.

    Tips for Success

    • Thaw hash browns completely to prevent excess moisture.
    • Cook bacon until crispy for maximum flavor.
    • Let the casserole rest before cutting.
    • Use freshly shredded cheese for the best melting texture.
    • Make it the night before and refrigerate until ready to bake.

    Storage

    Refrigerate leftovers in an airtight container for up to 4 days.

    Freeze individual portions for up to 2 months.

    Reheat in the microwave or oven until heated through.

    Nutrition (Approximate Per Serving)

    • Calories: 430
    • Protein: 24g
    • Carbohydrates: 20g
    • Fat: 28g
    • Fiber: 2g
    • Sugar: 2g

    Why This Recipe Works

    Hash browns create a crispy, hearty base that perfectly complements fluffy baked eggs. Smoky bacon adds savory flavor, while cheddar and Monterey Jack cheeses melt into every bite for rich creaminess. The vegetables add freshness, color, and texture, making this casserole as balanced as it is comforting.

    Whether you’re feeding your family on a busy weekday or hosting a special brunch, this casserole delivers classic breakfast flavors in an easy-to-make dish that’s guaranteed to become a favorite.

    Final Thoughts

    Bacon Hash Brown Baked Eggs Casserole is everything a great breakfast should be—warm, filling, flavorful, and easy to share. Its make-ahead convenience and endless customization options make it a reliable recipe you’ll return to time and time again.

    Gather your favorite breakfast ingredients, bake until golden and bubbly, and enjoy a comforting meal that brings everyone to the table.

    Read More Recipes

  • Dessert of the Day: S’mores Brownies

    Advertisements

    Few desserts capture the feeling of summer quite like S’mores. Traditionally enjoyed around a campfire, this iconic treat combines graham crackers, melted chocolate, and toasted marshmallows into a sweet memory that many people cherish. Now imagine taking those beloved flavors and layering them over a rich, fudgy brownie. The result is a dessert that’s impossible to resist—S’mores Brownies.

    Whether you’re hosting a family gathering, attending a backyard barbecue, celebrating a birthday, or simply craving something chocolatey, S’mores Brownies deliver everything you love about classic brownies with an irresistible campfire twist.

    Why You’ll Love S’mores Brownies

    These brownies are the perfect combination of textures and flavors:

    • Rich, fudgy chocolate brownie base
    • Crunchy buttery graham cracker crust
    • Gooey melted marshmallows
    • Extra chocolate in every bite
    • Easy enough for beginner bakers
    • Perfect for parties, holidays, and potlucks

    Every bite combines creamy chocolate, sweet marshmallow, and crisp graham crackers into a dessert that’s both nostalgic and unforgettable.


    Ingredients

    Graham Cracker Crust

    • 1½ cups graham cracker crumbs
    • 6 tablespoons melted butter
    • 2 tablespoons sugar

    Brownie Layer

    • 1 box brownie mix (plus ingredients listed on the package)
    • or your favorite homemade brownie recipe

    Topping

    • 2 cups mini marshmallows
    • 1 cup milk chocolate chunks or chocolate chips
    • 4 graham crackers, roughly broken into pieces

    Instructions

    Step 1: Prepare the Crust

    Preheat your oven to 350°F (175°C).

    Mix together:

    • Graham cracker crumbs
    • Melted butter
    • Sugar

    Press firmly into the bottom of a greased or parchment-lined 9×13-inch baking dish.

    Bake for 5 minutes, then allow it to cool slightly.


    Step 2: Bake the Brownies

    Prepare the brownie batter according to the package directions.

    Pour over the graham cracker crust.

    Bake according to brownie directions until almost fully cooked.


    Step 3: Add the Toppings

    Remove brownies from the oven during the last 5–7 minutes of baking.

    Sprinkle over:

    • Mini marshmallows
    • Chocolate chunks
    • Broken graham crackers

    Return to the oven until the marshmallows become golden and gooey.

    For an extra toasted look, place under the broiler for 30–60 seconds, watching carefully so they don’t burn.


    Step 4: Cool

    Allow brownies to cool for at least 30 minutes before slicing.

    This helps everything set while keeping the brownies perfectly fudgy.


    Tips for Perfect S’mores Brownies

    • Use high-quality chocolate for richer flavor.
    • Slightly underbake the brownies for extra fudginess.
    • Line your pan with parchment paper for easy removal.
    • Add a drizzle of melted chocolate after cooling for a bakery-style finish.
    • Sprinkle with flaky sea salt to enhance the chocolate flavor.

    Delicious Variations

    Peanut Butter S’mores Brownies

    Swirl peanut butter into the brownie batter before baking.

    Cookies & Cream

    Mix crushed chocolate sandwich cookies into the topping.

    Salted Caramel

    Drizzle caramel sauce over the finished brownies.

    Double Chocolate

    Use dark chocolate brownie mix and add chocolate chunks throughout.

    Espresso Brownies

    Add one teaspoon of espresso powder to deepen the chocolate flavor.


    Serving Suggestions

    These brownies are delicious served:

    • Warm with vanilla ice cream
    • With hot chocolate
    • Alongside fresh strawberries
    • With cold milk
    • As the centerpiece of a dessert table

    For an extra indulgent dessert, warm a brownie for 15 seconds in the microwave before serving.


    Storage

    Store in an airtight container:

    • Room temperature: Up to 3 days
    • Refrigerator: Up to 1 week
    • Freezer: Up to 3 months

    Warm individual brownies before serving for that freshly baked taste.


    Perfect for Every Occasion

    S’mores Brownies are ideal for:

    • Summer cookouts
    • Camping-themed parties
    • Birthday celebrations
    • Holiday dessert trays
    • Bake sales
    • Family movie nights
    • School events
    • Weekend baking with kids

    They’re easy to transport, simple to make ahead, and guaranteed to disappear quickly wherever they’re served.


    Final Thoughts

    S’mores Brownies combine two timeless desserts into one irresistible treat. The buttery graham cracker crust provides the perfect foundation for rich chocolate brownies, while toasted marshmallows and chunks of chocolate create that unmistakable s’mores experience in every bite.

    Whether you’re recreating memories around the campfire or simply satisfying your chocolate cravings, this dessert delivers comfort, nostalgia, and indulgence all in one pan. Make a batch today, share them with family and friends, and discover why S’mores Brownies deserve a permanent place in your favorite dessert recipes.

    Read More Recipes

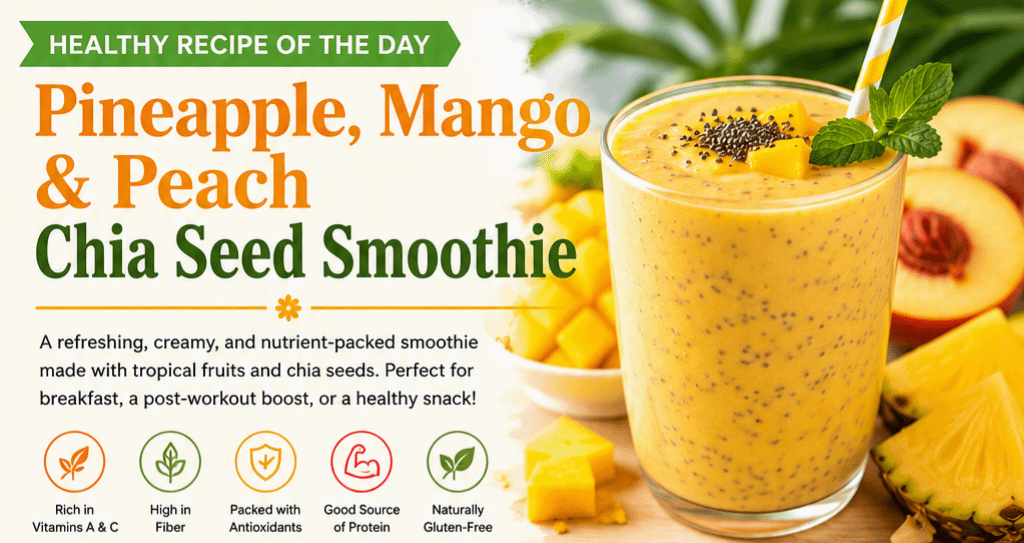
  • Healthy Recipe of the Day: Pineapple, Mango & Peach Chia Seed Smoothie

    Advertisements

    There’s nothing quite as refreshing as a smoothie packed with tropical fruit, natural sweetness, and wholesome nutrition. Today’s Healthy Recipe of the Day is a vibrant Pineapple, Mango & Peach Chia Seed Smoothie—a creamy, energizing drink that’s perfect for breakfast, a post-workout recovery, or an afternoon pick-me-up.

    Loaded with vitamin-rich fruits, protein, fiber, and healthy omega-3 fatty acids from chia seeds, this smoothie tastes like a tropical vacation while nourishing your body from the inside out.

    Why You’ll Love This Smoothie

    This smoothie combines three naturally sweet fruits with creamy Greek yogurt and chia seeds to create a balanced drink that is:

    • Rich in vitamins A and C
    • High in fiber for digestive health
    • Packed with antioxidants
    • A great source of protein
    • Naturally gluten-free
    • Easy to customize
    • Ready in under 5 minutes

    Whether you’re trying to eat healthier or simply craving something delicious, this smoothie delivers on both flavor and nutrition.


    Pineapple, Mango & Peach Chia Seed Smoothie Recipe

    Ingredients

    • 1 cup frozen pineapple chunks
    • 1 cup frozen mango chunks
    • 1 ripe peach, sliced (or 1 cup frozen peaches)
    • 1 tablespoon chia seeds
    • ½ cup plain Greek yogurt
    • 1 cup unsweetened almond milk (or milk of choice)
    • 1 teaspoon honey or maple syrup (optional)
    • ½ teaspoon vanilla extract
    • Ice cubes (optional for a thicker smoothie)

    Directions

    1. Add the almond milk to the blender first.
    2. Add Greek yogurt, pineapple, mango, peaches, and chia seeds.
    3. Blend until completely smooth.
    4. Taste and add honey if additional sweetness is desired.
    5. Pour into a chilled glass.
    6. Garnish with fresh fruit or a sprinkle of chia seeds.

    Serve immediately for the freshest flavor.


    Nutrition Highlights

    Pineapple

    Pineapple contains bromelain, a natural enzyme that may aid digestion while providing plenty of immune-supporting vitamin C.

    Mango

    Mangoes are rich in antioxidants, vitamin A, and vitamin C, helping support healthy skin, vision, and immune function.

    Peaches

    Peaches provide fiber, potassium, and antioxidants while adding natural sweetness without refined sugar.

    Chia Seeds

    Tiny but incredibly nutritious, chia seeds are packed with:

    • Omega-3 fatty acids
    • Fiber
    • Calcium
    • Magnesium
    • Plant-based protein

    They also help keep you feeling full longer.

    Greek Yogurt

    Greek yogurt boosts the protein content while adding probiotics that support gut health.


    Easy Variations

    Tropical Green Smoothie

    Add a handful of spinach or kale for extra nutrients without dramatically changing the flavor.

    Protein Power Smoothie

    Mix in a scoop of vanilla protein powder for an even more filling meal replacement.

    Coconut Paradise

    Replace almond milk with coconut milk for a richer tropical flavor.

    Dairy-Free Version

    Use a dairy-free yogurt alternative and your favorite plant-based milk.

    Extra Fiber Boost

    Add rolled oats or flaxseed for additional fiber and sustained energy.


    Health Benefits

    This smoothie supports overall wellness by providing:

    • Long-lasting natural energy
    • Improved digestion
    • Better hydration
    • Immune system support
    • Heart-healthy fats
    • Muscle recovery after exercise
    • Healthy skin and hair

    It’s a delicious way to increase your daily fruit intake while avoiding processed ingredients.


    Tips for the Best Smoothie

    • Freeze ripe fruit ahead of time for a thicker texture.
    • Use unsweetened milk to control added sugars.
    • Blend for at least one minute for maximum creaminess.
    • Let the chia seeds sit for a few minutes after blending if you prefer a thicker consistency.
    • Enjoy immediately for the freshest taste and best nutritional value.

    Perfect Pairings

    This smoothie pairs wonderfully with:

    • Whole grain avocado toast
    • Cottage cheese with berries
    • Overnight oats
    • Hard-boiled eggs
    • Homemade granola
    • Whole wheat breakfast muffins

    Together they create a satisfying and balanced breakfast.


    Final Thoughts

    The Pineapple, Mango & Peach Chia Seed Smoothie is proof that healthy eating can be simple, colorful, and incredibly delicious. Bursting with tropical flavors and loaded with nourishing ingredients, this smoothie offers the perfect combination of taste and nutrition.

    Whether you’re fueling your morning, recovering after a workout, or simply looking for a refreshing healthy snack, this smoothie is an easy recipe you’ll want to make again and again.

    Start your day with sunshine in a glass—and let every sip remind you that healthy choices can be the most delicious ones.

    Read More Recipes

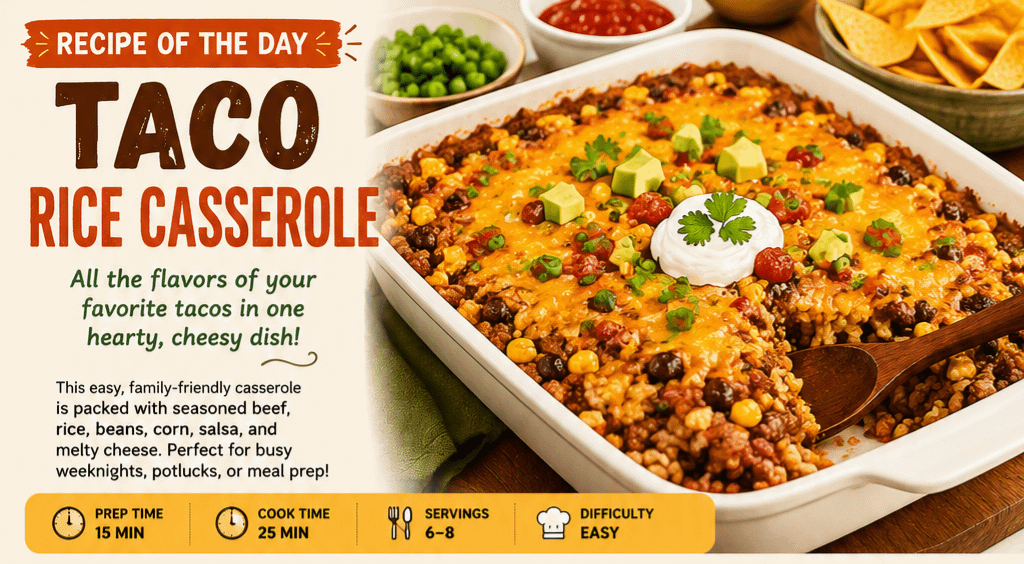
  • Recipe of the Day: Taco Rice Casserole

    Advertisements

    Taco night just got even easier with this hearty and flavorful Taco Rice Casserole. Combining seasoned ground beef, fluffy rice, melty cheese, beans, corn, and classic taco flavors into one delicious dish, this casserole is perfect for busy weeknights, potlucks, or feeding a hungry family. It’s simple to prepare, budget-friendly, and makes fantastic leftovers.

    Whether you top it with sour cream, fresh avocado, or crunchy tortilla chips, Taco Rice Casserole delivers all the flavors of your favorite tacos in one comforting baked meal.


    Why You’ll Love Taco Rice Casserole

    This recipe is a family favorite because it offers:

    • One-pan comfort food
    • Easy preparation in under an hour
    • Budget-friendly ingredients
    • Great for meal prep
    • Easily customizable
    • Freezer-friendly leftovers
    • Kid-approved flavors

    It’s the perfect combination of Mexican-inspired flavors and classic American casserole comfort.


    Ingredients

    For the Casserole

    • 1 pound lean ground beef
    • 1 small onion, diced
    • 2 cloves garlic, minced
    • 1 packet taco seasoning (or 2 tablespoons homemade taco seasoning)
    • 1 cup salsa
    • 2 cups cooked white or brown rice
    • 1 (15-ounce) can black beans, drained and rinsed
    • 1 cup corn kernels
    • 1 (10-ounce) can diced tomatoes with green chilies, drained
    • 2 cups shredded Mexican cheese blend
    • ½ teaspoon cumin
    • Salt and pepper to taste

    Optional Toppings

    • Sour cream
    • Diced avocado
    • Fresh cilantro
    • Green onions
    • Jalapeño slices
    • Crushed tortilla chips
    • Black olives
    • Fresh tomatoes
    • Lime wedges

    Instructions

    Step 1: Prepare the Meat

    Preheat your oven to 375°F (190°C).

    In a large skillet over medium heat, cook the ground beef and onion until browned. Drain any excess grease.

    Add the garlic and cook for one minute.


    Step 2: Season

    Stir in:

    • Taco seasoning
    • Salsa
    • Cumin

    Cook for about 2 minutes until everything is well combined.


    Step 3: Mix the Filling

    Remove from heat and stir in:

    • Cooked rice
    • Black beans
    • Corn
    • Diced tomatoes
    • Half of the shredded cheese

    Mix until evenly combined.


    Step 4: Assemble

    Transfer the mixture into a lightly greased 9×13-inch baking dish.

    Top with the remaining cheese.


    Step 5: Bake

    Bake uncovered for 20–25 minutes, or until the cheese is melted, bubbly, and lightly golden.

    Allow the casserole to rest for 5 minutes before serving.


    Serving Suggestions

    Serve Taco Rice Casserole with:

    • Mexican rice
    • Refried beans
    • Tortilla chips
    • Fresh garden salad
    • Guacamole
    • Homemade salsa
    • Warm flour tortillas
    • Cornbread

    A squeeze of fresh lime brightens every bite.


    Delicious Variations

    Chicken Taco Rice Casserole

    Swap the beef for shredded rotisserie chicken.

    Turkey Version

    Use lean ground turkey for a lighter meal.

    Vegetarian

    Skip the meat and add:

    • Extra beans
    • Bell peppers
    • Zucchini
    • Mushrooms

    Spicy Southwest

    Mix in:

    • Pepper Jack cheese
    • Jalapeños
    • Chipotle peppers in adobo

    Tex-Mex Deluxe

    Top with crushed Doritos or tortilla chips during the last 5 minutes of baking for extra crunch.


    Tips for Success

    • Use day-old rice for the best texture.
    • Drain tomatoes well to avoid a watery casserole.
    • Freshly shred your cheese for the smoothest melt.
    • Let the casserole rest before serving so it slices neatly.
    • Adjust the spice level with mild, medium, or hot salsa.

    Storage

    Store leftovers in an airtight container in the refrigerator for up to 4 days.

    Freeze individual portions for up to 3 months.

    Reheat in the microwave or oven until heated through.


    Nutrition (Approximate Per Serving)

    • Calories: 470
    • Protein: 28g
    • Carbohydrates: 32g
    • Fat: 24g
    • Fiber: 6g
    • Sugar: 5g

    Values will vary depending on ingredients used.


    Frequently Asked Questions

    Can I make Taco Rice Casserole ahead of time?

    Yes! Assemble the casserole up to a day in advance, cover, refrigerate, and bake when ready.

    Can I freeze it before baking?

    Absolutely. Wrap tightly and freeze for up to three months. Thaw overnight before baking.

    What rice works best?

    White rice, brown rice, jasmine rice, or even cilantro-lime rice all work beautifully.

    Is it gluten-free?

    It can be. Simply use certified gluten-free taco seasoning and double-check your salsa and canned ingredients.


    Final Thoughts

    Taco Rice Casserole is the kind of meal that brings everyone to the table. Packed with bold taco flavors, wholesome ingredients, and gooey melted cheese, it’s a satisfying dinner that’s easy enough for weeknights yet delicious enough for gatherings. Customize it with your favorite toppings, make it ahead for busy days, and enjoy a comforting casserole that’s sure to become a regular in your recipe rotation. One bite, and you’ll see why this flavorful dish is always a crowd-pleaser.

    Read More Recipes

Exit mobile version