Category: Recipes

  • Dessert of the Day: Reese’s Peanut Butter Ice Cream

    Dessert of the Day: Reese’s Peanut Butter Ice Cream

    Advertisements

    Rich, Creamy, and Loaded with Chocolate & Peanut Butter Goodness

    If you’re a fan of the irresistible combination of chocolate and peanut butter, Reese’s Peanut Butter Ice Cream is a dessert that deserves a place at the top of your must-make list. Smooth vanilla and peanut butter ice cream is swirled with creamy peanut butter, rich chocolate fudge, and chunks of Reese’s Peanut Butter Cups for a frozen treat that’s indulgent from the very first bite.

    Whether you’re cooling off on a warm summer day, celebrating with family, or simply satisfying a late-night sweet tooth, this homemade dessert delivers the classic Reese’s flavor everyone loves.


    Why You’ll Love Reese’s Peanut Butter Ice Cream

    This dessert is everything peanut butter lovers dream about:

    • Rich and creamy texture
    • Loaded with Reese’s Peanut Butter Cup pieces
    • Thick ribbons of peanut butter throughout
    • Chocolate fudge adds extra decadence
    • Easy to make with or without an ice cream maker
    • Perfect for birthdays, BBQs, holidays, or movie nights

    Every scoop offers the perfect balance of salty peanut butter and sweet milk chocolate.


    Ingredients

    Ice Cream Base

    • 2 cups heavy whipping cream
    • 1 cup whole milk
    • ¾ cup granulated sugar
    • ½ cup creamy peanut butter
    • 1 teaspoon vanilla extract
    • Pinch of salt

    Mix-Ins

    • 8–10 Reese’s Peanut Butter Cups, chopped
    • ½ cup chocolate fudge sauce
    • ¼ cup melted peanut butter

    Optional toppings:

    • Mini Reese’s Pieces
    • Chocolate chips
    • Whipped cream
    • Chocolate syrup
    • Crushed peanuts

    How to Make Reese’s Peanut Butter Ice Cream

    Step 1: Make the Base

    Whisk together:

    • Heavy cream
    • Whole milk
    • Sugar
    • Peanut butter
    • Vanilla
    • Salt

    Continue whisking until the peanut butter is fully incorporated and the mixture is smooth.


    Step 2: Chill

    Refrigerate the mixture for at least 2–4 hours, or overnight for the creamiest texture.


    Step 3: Churn

    Pour the chilled mixture into your ice cream maker.

    Churn according to the manufacturer’s instructions until it reaches a soft-serve consistency.


    Step 4: Add the Good Stuff

    Fold in:

    • Chopped Reese’s Peanut Butter Cups

    Layer the ice cream into a freezer-safe container while swirling in:

    • Chocolate fudge sauce
    • Melted peanut butter

    Use a knife to gently marble everything together.


    Step 5: Freeze

    Freeze for 4–6 hours until firm enough to scoop.


    No Ice Cream Maker?

    No problem.

    1. Whip 2 cups heavy cream until stiff peaks form.
    2. Mix together:
      • 1 can sweetened condensed milk
      • Peanut butter
      • Vanilla
    3. Fold the whipped cream into the peanut butter mixture.
    4. Stir in Reese’s pieces.
    5. Swirl in fudge and melted peanut butter.
    6. Freeze overnight.

    You’ll still end up with rich, creamy homemade ice cream.


    Delicious Variations

    Double Chocolate Reese’s

    Add:

    • Cocoa powder to the base
    • Chocolate chunks
    • Chocolate cookies

    Cookie Explosion

    Mix in:

    • Crushed Oreos
    • Chocolate sandwich cookies
    • Chocolate wafer pieces

    Peanut Butter Brownie

    Fold in:

    • Brownie chunks
    • Chocolate chips
    • Peanut butter cups

    Salted Caramel Reese’s

    Swirl in:

    • Salted caramel sauce
    • Crushed pretzels
    • Sea salt flakes

    The sweet-and-salty combination is incredible.


    Tips for Perfect Homemade Ice Cream

    • Chill the base thoroughly before churning.
    • Use full-fat dairy for maximum creaminess.
    • Freeze Reese’s cups before chopping to prevent melting.
    • Don’t overmix the swirls—you want visible ribbons of peanut butter and fudge.
    • Store in an airtight container to prevent freezer burn.

    Serving Ideas

    Serve your Reese’s Peanut Butter Ice Cream:

    • In waffle cones
    • Chocolate-dipped waffle bowls
    • Brownie sundaes
    • Ice cream sandwiches
    • Milkshakes
    • Banana splits
    • Over warm brownies
    • Alongside chocolate cake

    Top with whipped cream, extra peanut butter cups, chocolate syrup, chopped peanuts, and a cherry for an over-the-top dessert.


    Storage

    Store in an airtight freezer container for up to 2 weeks.

    For easier scooping, let the container sit at room temperature for about 5 minutes before serving.


    Nutritional Information (Approximate Per Serving)

    • Calories: 460
    • Fat: 32g
    • Carbohydrates: 36g
    • Sugar: 30g
    • Protein: 9g

    Nutrition will vary depending on ingredients and serving size.


    Frequently Asked Questions

    Can I use crunchy peanut butter?

    Yes. Crunchy peanut butter adds extra texture and a satisfying crunch.

    Can I make it without fudge?

    Absolutely. The peanut butter and Reese’s cups provide plenty of flavor on their own.

    Can I use mini Reese’s?

    Yes. Mini peanut butter cups work wonderfully and distribute evenly throughout the ice cream.

    How long does homemade ice cream last?

    For the best flavor and texture, enjoy it within two weeks.


    Final Thoughts

    Reese’s Peanut Butter Ice Cream is the ultimate dessert for chocolate and peanut butter fans. Rich, creamy, and packed with chunks of Reese’s Peanut Butter Cups, every bite delivers the nostalgic flavors of one of America’s favorite candies. Whether served in a cone, piled high in a sundae, or enjoyed straight from the freezer, this homemade treat is guaranteed to become a family favorite.

    The combination of velvety peanut butter ice cream, ribbons of chocolate fudge, and crunchy candy pieces makes this a dessert that’s perfect for celebrations, summer gatherings, or simply treating yourself after a long day.

    Read More Recipes

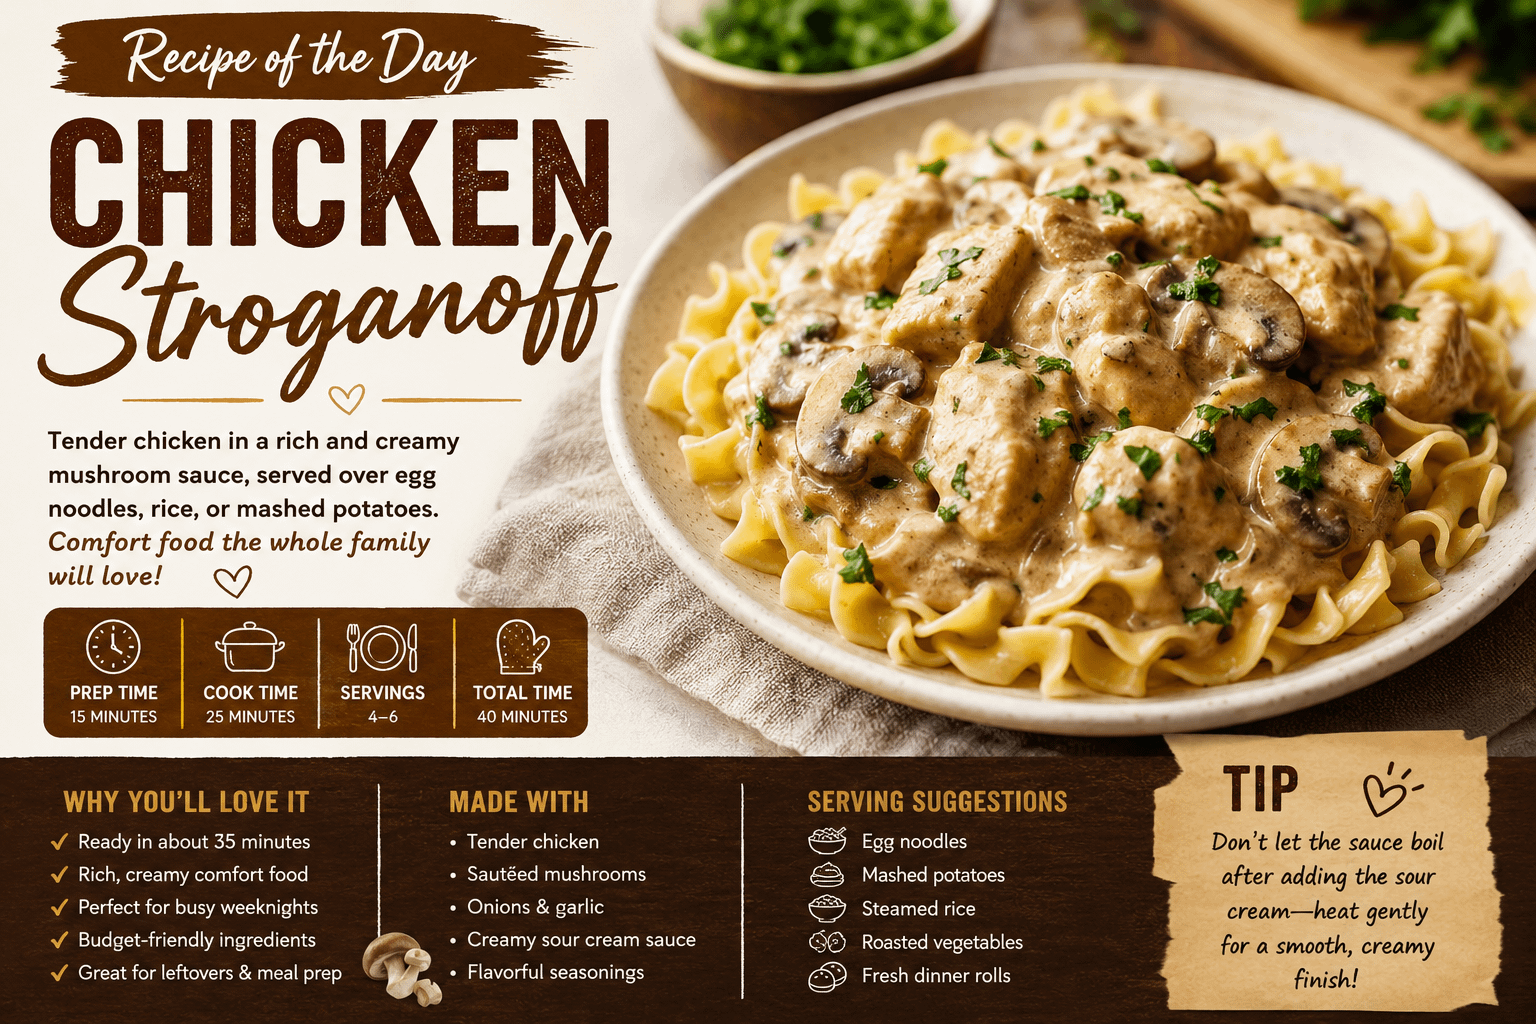
  • Recipe of the Day: Chicken Stroganoff

    Advertisements

    Creamy, comforting, and packed with savory flavor, Chicken Stroganoff is a delicious twist on the classic Russian-inspired beef dish. Tender pieces of chicken are simmered in a rich mushroom and sour cream sauce, then served over buttery egg noodles, fluffy rice, or creamy mashed potatoes. It’s an easy weeknight dinner that tastes like it took hours to prepare, making it a family favorite all year long.

    Whether you’re looking for a comforting cold-weather meal or a satisfying dinner after a busy day, Chicken Stroganoff delivers restaurant-quality flavor with simple ingredients.


    What Is Chicken Stroganoff?

    Chicken Stroganoff is a variation of the traditional Beef Stroganoff, replacing beef with juicy chicken breast or thighs while maintaining the signature creamy mushroom sauce. The combination of garlic, onions, mushrooms, chicken broth, Dijon mustard, Worcestershire sauce, and sour cream creates a luxurious sauce that’s both rich and tangy.

    The result is a hearty meal that’s comforting without feeling overly heavy.


    Why You’ll Love This Recipe

    • Ready in about 35 minutes
    • Rich, creamy comfort food
    • Perfect for busy weeknights
    • Budget-friendly ingredients
    • Easily customized with vegetables
    • Excellent for leftovers and meal prep

    Chicken Stroganoff Recipe

    Servings: 4–6

    Prep Time: 15 minutes

    Cook Time: 25 minutes

    Total Time: 40 minutes

    Ingredients

    • 2 pounds boneless skinless chicken breasts or thighs, cut into bite-sized pieces
    • 2 tablespoons olive oil
    • 2 tablespoons butter
    • 1 medium onion, diced
    • 3 cloves garlic, minced
    • 8 ounces mushrooms, sliced
    • 2 tablespoons all-purpose flour
    • 2 cups chicken broth
    • 1 tablespoon Worcestershire sauce
    • 1 teaspoon Dijon mustard
    • 1 teaspoon paprika
    • ½ teaspoon black pepper
    • ½ teaspoon salt (adjust to taste)
    • 1 cup sour cream (room temperature)
    • 2 tablespoons chopped fresh parsley
    • Cooked egg noodles, rice, or mashed potatoes for serving

    Directions

    Step 1: Cook the Chicken

    Heat the olive oil in a large skillet over medium-high heat.

    Season the chicken with salt, pepper, and paprika.

    Cook for 5–7 minutes until lightly browned and cooked through.

    Transfer the chicken to a plate.


    Step 2: Cook the Vegetables

    In the same skillet, melt the butter.

    Add the onions and cook until softened.

    Stir in the mushrooms and cook until browned and their moisture has evaporated.

    Add the garlic and cook for one minute.


    Step 3: Build the Sauce

    Sprinkle the flour over the vegetables.

    Cook for one minute while stirring constantly.

    Gradually whisk in the chicken broth until smooth.

    Add:

    • Worcestershire sauce
    • Dijon mustard

    Bring the sauce to a gentle simmer.

    Cook for 4–5 minutes until slightly thickened.


    Step 4: Finish the Dish

    Reduce the heat to low.

    Return the cooked chicken to the skillet.

    Slowly stir in the sour cream until fully combined.

    Do not allow the sauce to boil after adding the sour cream, as it may separate.

    Heat gently for 2–3 minutes.

    Sprinkle with fresh parsley.


    Serving Suggestions

    Chicken Stroganoff pairs beautifully with:

    • Buttered egg noodles
    • Garlic mashed potatoes
    • White or brown rice
    • Buttered pasta
    • Roasted vegetables
    • Steamed green beans
    • Fresh dinner rolls

    A crisp green salad with a light vinaigrette balances the richness of the sauce perfectly.


    Recipe Variations

    Garlic Parmesan

    Stir in ½ cup freshly grated Parmesan cheese for extra richness.

    Spinach Stroganoff

    Add fresh baby spinach during the final few minutes of cooking.

    Bacon Chicken Stroganoff

    Mix in crispy chopped bacon before serving.

    Herb Version

    Enhance the flavor with fresh thyme, rosemary, or dill.

    Lighter Version

    Replace sour cream with plain Greek yogurt for a protein-rich alternative.


    Tips for Perfect Chicken Stroganoff

    • Use chicken thighs for extra tenderness and flavor.
    • Let the sour cream come to room temperature before adding it to the sauce.
    • Stir continuously when adding the sour cream.
    • Avoid boiling the finished sauce.
    • Brown the mushrooms well to maximize flavor.
    • Taste and adjust seasoning before serving.

    Storage

    Store leftovers in an airtight container in the refrigerator for up to 4 days.

    To reheat, warm gently over low heat while stirring. Add a splash of chicken broth or milk if the sauce has thickened too much.

    Chicken Stroganoff can also be frozen for up to 2 months, though the sauce may separate slightly when thawed. Stirring gently while reheating usually restores its creamy consistency.


    Nutrition (Approximate Per Serving)

    • Calories: 485
    • Protein: 39g
    • Carbohydrates: 14g
    • Fat: 29g
    • Fiber: 2g
    • Sugar: 4g
    • Sodium: 640mg

    Values will vary depending on ingredients and serving size.


    Final Thoughts

    Chicken Stroganoff is one of those timeless comfort meals that combines simple ingredients into something truly satisfying. Tender chicken, earthy mushrooms, and a velvety sour cream sauce come together in a dish that’s hearty enough for family dinners yet elegant enough to serve guests. Whether paired with egg noodles, mashed potatoes, or rice, this recipe is sure to earn a regular place in your dinner rotation.

    Read More Recipes

  • Breakfast of the Day: Egg & Hash Brown Casserole

    Advertisements

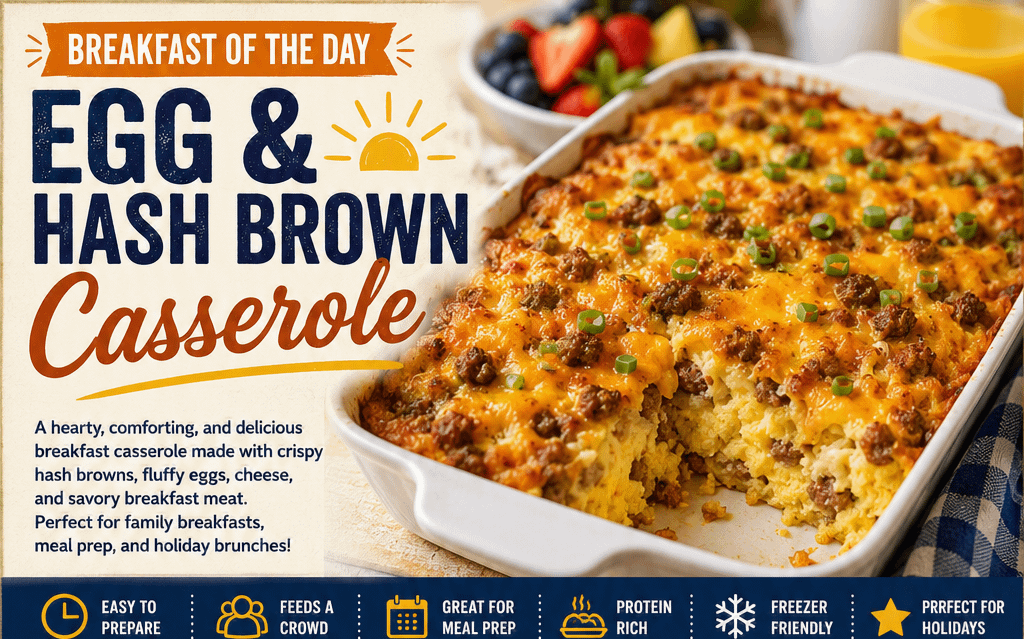
    Few breakfast dishes are as comforting and satisfying as a warm Egg & Hash Brown Casserole. Combining crispy shredded potatoes, fluffy eggs, melted cheese, and savory breakfast sausage or bacon, this all-in-one meal is perfect for feeding a crowd or preparing breakfast ahead of time.

    Whether you’re hosting a holiday brunch, serving weekend guests, or simply looking for an easy make-ahead breakfast, this casserole delivers incredible flavor with minimal effort.


    Why You’ll Love This Breakfast

    Egg & Hash Brown Casserole has become a favorite because it checks every box:

    • Easy to prepare
    • Great for meal prep
    • Feeds a large family
    • Rich in protein
    • Customizable with your favorite ingredients
    • Freezer-friendly
    • Perfect for holidays and special occasions

    It’s one of those recipes that tastes like you spent hours in the kitchen—even though most of the work is simply mixing and baking.


    Ingredients

    • 1 (30-ounce) package frozen shredded hash browns, thawed
    • 10 large eggs
    • 2 cups shredded sharp cheddar cheese
    • 1 pound breakfast sausage, cooked and crumbled (or bacon or ham)
    • 1 cup milk
    • ½ cup sour cream
    • ½ teaspoon garlic powder
    • ½ teaspoon onion powder
    • 1 teaspoon salt
    • ½ teaspoon black pepper
    • 2 green onions, sliced
    • Cooking spray

    Optional additions:

    • Bell peppers
    • Mushrooms
    • Spinach
    • Jalapeños
    • Monterey Jack cheese
    • Pepper Jack cheese

    Instructions

    Step 1: Prepare the Pan

    Preheat your oven to 375°F (190°C).

    Grease a 9×13-inch baking dish with cooking spray.


    Step 2: Layer the Hash Browns

    Spread the thawed hash browns evenly across the bottom of the baking dish.

    Top with the cooked breakfast sausage.

    Sprinkle on most of the shredded cheese.


    Step 3: Mix the Eggs

    In a large bowl whisk together:

    • Eggs
    • Milk
    • Sour cream
    • Garlic powder
    • Onion powder
    • Salt
    • Pepper

    Pour evenly over the casserole.

    Top with the remaining cheese.


    Step 4: Bake

    Bake for 45–55 minutes, or until the eggs are fully set and the center no longer jiggles.

    Let rest for 10 minutes before slicing.

    Garnish with sliced green onions.


    Tips for the Best Egg & Hash Brown Casserole

    Thaw the Hash Browns

    Removing excess moisture keeps the casserole from becoming watery.

    Brown the Meat First

    Cooking the sausage or bacon beforehand develops deeper flavor.

    Don’t Overbake

    Once the eggs are set, remove the casserole to keep it soft and fluffy.

    Let It Rest

    Waiting a few minutes before slicing helps everything hold together beautifully.


    Delicious Variations

    Bacon Lover’s Casserole

    Swap sausage for crispy bacon and add extra cheddar cheese.


    Southwest Style

    Mix in:

    • Pepper Jack cheese
    • Jalapeños
    • Green chiles
    • Salsa

    Serve with avocado.


    Veggie Breakfast Bake

    Skip the meat and add:

    • Spinach
    • Mushrooms
    • Tomatoes
    • Bell peppers
    • Broccoli

    Ham & Swiss

    Use diced ham and Swiss cheese for a brunch-inspired version.


    Loaded Breakfast Casserole

    Top with:

    • Crumbled bacon
    • Sour cream
    • Chives
    • Hot sauce

    What to Serve With Egg & Hash Brown Casserole

    This hearty breakfast pairs wonderfully with:

    • Fresh fruit salad
    • Buttermilk biscuits
    • Cinnamon rolls
    • Yogurt parfaits
    • Orange juice
    • Fresh coffee
    • Iced coffee
    • Smoothies

    Make-Ahead Instructions

    One of the best features of this casserole is how well it works as a make-ahead meal.

    Simply assemble everything the night before, cover tightly, and refrigerate overnight.

    The next morning, remove it from the refrigerator about 20 minutes before baking and cook as directed.

    This makes holiday mornings and busy weekdays much easier.


    Storage

    Store leftovers in an airtight container in the refrigerator for up to 4 days.

    Reheat individual portions in the microwave for 1–2 minutes or warm larger portions in the oven at 350°F until heated through.


    Freezing Tips

    Egg & Hash Brown Casserole freezes beautifully.

    Allow the casserole to cool completely before wrapping tightly in plastic wrap and aluminum foil.

    Freeze for up to 3 months.

    Thaw overnight in the refrigerator before reheating.


    Nutrition Highlights

    Egg & Hash Brown Casserole offers an excellent balance of protein, carbohydrates, and healthy fats to help keep you full throughout the morning.

    Eggs provide high-quality protein and essential nutrients like choline and vitamin D, while potatoes contribute fiber, potassium, and lasting energy. Adding vegetables can further increase vitamins, minerals, and fiber, making this breakfast even more nutritious.


    Perfect Occasions

    This casserole is ideal for:

    • Weekend family breakfasts
    • Holiday brunches
    • Christmas morning
    • Easter breakfast
    • Mother’s Day brunch
    • Father’s Day breakfast
    • Potluck gatherings
    • Meal prep for busy weeks
    • Overnight guests
    • Breakfast-for-dinner nights

    Final Thoughts

    Egg & Hash Brown Casserole is the kind of breakfast that brings everyone to the table. It’s warm, filling, easy to customize, and simple enough for beginners while still impressive enough for special occasions.

    Whether you enjoy it fresh from the oven or prepare it ahead for busy mornings, this classic breakfast casserole is sure to become a favorite in your recipe collection. With its crispy hash browns, fluffy eggs, savory meat, and gooey melted cheese, every bite delivers the comforting flavors of a homemade breakfast worth sharing.

  • Healthy Recipe of the Day: Chicken Caesar Salad Wraps

    Advertisements

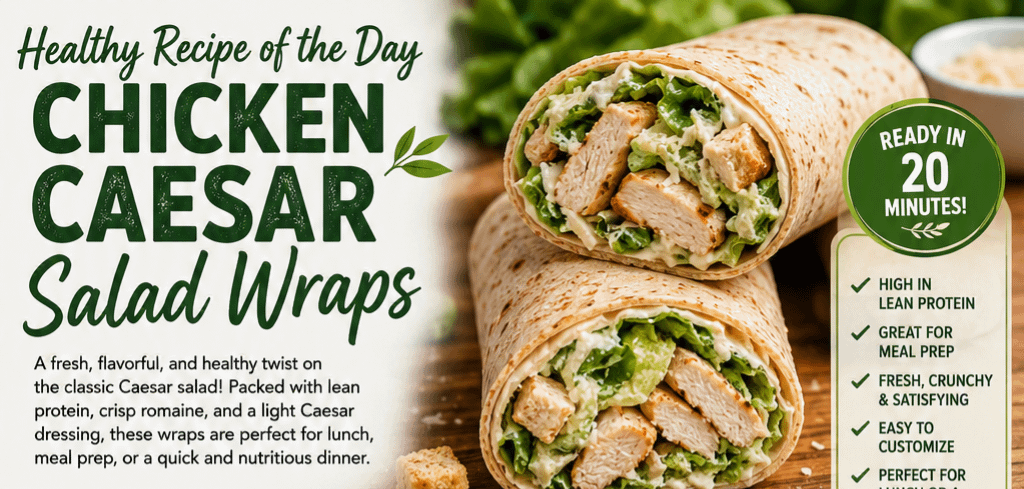
    When you’re looking for a meal that’s satisfying, nutritious, and easy to prepare, Chicken Caesar Salad Wraps are hard to beat. They combine all the flavors of a traditional Caesar salad with the convenience of a handheld wrap, making them ideal for busy weekdays, meal prep, picnics, or healthy lunches on the go.

    By using grilled chicken, whole wheat tortillas, and a lighter Caesar dressing, you can enjoy this classic without sacrificing flavor or adding unnecessary calories.


    Why You’ll Love This Recipe

    • High in lean protein
    • Ready in about 20 minutes
    • Great for meal prep
    • Fresh, crunchy, and satisfying
    • Easy to customize with your favorite vegetables
    • Perfect for lunch or a light dinner

    Ingredients

    For the Wraps

    • 2 large whole wheat tortillas
    • 2 cups chopped romaine lettuce
    • 2 grilled chicken breasts, sliced
    • ¼ cup freshly grated Parmesan cheese
    • ¼ cup light Caesar dressing
    • ½ cup cherry tomatoes, halved (optional)
    • Fresh cracked black pepper
    • 1 teaspoon lemon juice
    • Optional: avocado slices or cucumber

    Directions

    Step 1: Prepare the Chicken

    Season chicken with salt, pepper, garlic powder, and a touch of olive oil.

    Grill over medium-high heat for about 5–6 minutes per side until fully cooked.

    Allow to rest for a few minutes before slicing.


    Step 2: Make the Salad

    In a large bowl combine:

    • Romaine lettuce
    • Parmesan cheese
    • Cherry tomatoes
    • Caesar dressing
    • Lemon juice

    Toss until evenly coated.


    Step 3: Assemble

    Lay each tortilla flat.

    Add sliced chicken down the center.

    Top with Caesar salad mixture.

    Add avocado if desired.


    Step 4: Wrap

    Fold in both sides.

    Roll tightly from the bottom.

    Slice in half and serve immediately.


    Healthy Serving Ideas

    Pair your wrap with:

    • Fresh fruit
    • Greek yogurt
    • Carrot sticks
    • Cucumber slices
    • Mixed berries
    • Homemade vegetable soup

    These sides keep the meal balanced while adding vitamins, fiber, and hydration.


    Healthy Swaps

    Make this recipe even healthier with a few simple changes:

    • Use a low-carb or high-fiber tortilla.
    • Replace traditional Caesar dressing with Greek yogurt Caesar dressing.
    • Add spinach or kale for extra nutrients.
    • Include cucumbers, bell peppers, or shredded carrots.
    • Use grilled turkey instead of chicken for variety.
    • Sprinkle hemp hearts or chia seeds for healthy fats.

    Nutrition Benefits

    Lean Chicken

    Chicken breast is rich in high-quality protein that helps build muscle, supports recovery, and keeps you feeling full longer.

    Romaine Lettuce

    Romaine provides vitamins A, K, and folate while adding refreshing crunch with very few calories.

    Parmesan Cheese

    A small amount of Parmesan delivers bold flavor, calcium, and protein, so you can use less while still enjoying its rich taste.

    Whole Wheat Tortillas

    Whole grain tortillas provide additional fiber compared to white flour tortillas, helping promote healthy digestion and steady energy.


    Meal Prep Tips

    Chicken Caesar Salad Wraps are excellent for preparing ahead.

    • Grill several chicken breasts at once.
    • Store salad ingredients separately from the dressing.
    • Assemble wraps just before eating to prevent sogginess.
    • Refrigerate cooked chicken for up to four days.
    • Pack dressing in a small container for maximum freshness.

    Variations

    Southwest Caesar Wrap

    Add corn, black beans, and sliced avocado with a dash of chili powder.

    Bacon Caesar Wrap

    Mix in one slice of crispy turkey bacon for extra smoky flavor.

    Mediterranean Caesar Wrap

    Include cucumbers, roasted red peppers, and a sprinkle of feta cheese.

    Buffalo Chicken Caesar Wrap

    Toss the grilled chicken in a light buffalo sauce before assembling for a spicy kick.


    Tips for the Best Wrap

    • Warm the tortillas for 15–20 seconds before rolling to prevent cracking.
    • Pat the lettuce dry after washing to avoid excess moisture.
    • Don’t overfill the wraps, making them easier to roll and eat.
    • Slice the chicken thinly for even distribution in every bite.
    • Roll tightly and cut diagonally for a professional presentation.

    Final Thoughts

    Chicken Caesar Salad Wraps prove that healthy eating doesn’t have to be boring. With tender grilled chicken, crisp romaine, savory Parmesan, and a creamy light Caesar dressing wrapped in a wholesome tortilla, this recipe delivers all the flavor of the classic salad in a convenient, portable meal.

    Whether you’re meal prepping for the week, packing a healthy lunch, or looking for a quick family dinner, these wraps are a delicious choice that balances nutrition with satisfying taste. Fresh, protein-packed, and ready in minutes, they’re a recipe you’ll want to make again and again.

  • Dessert of the Day: Chocolate Chip Cookie Dough

    Advertisements

    Few desserts spark nostalgia quite like chocolate chip cookie dough. Before the cookies ever reached the oven, many of us couldn’t resist sneaking a spoonful from the mixing bowl. Today, edible cookie dough has become a dessert in its own right, served in bakeries, ice cream shops, and home kitchens around the world.

    Made with buttery dough, brown sugar, vanilla, and plenty of chocolate chips, this sweet treat delivers everything people love about cookies—without the wait. Best of all, modern edible cookie dough recipes are specially prepared to be safe to eat raw, making them perfect for dessert lovers of all ages.

    Whether you enjoy it by the spoonful, layered into desserts, or mixed into ice cream, chocolate chip cookie dough is comfort food at its finest.


    What Makes Edible Cookie Dough Safe?

    Traditional cookie dough isn’t recommended for eating raw because it contains uncooked eggs and raw flour, both of which may carry harmful bacteria.

    Edible cookie dough solves this by:

    • Leaving out the eggs
    • Using heat-treated flour
    • Mixing with butter, sugar, vanilla, milk, and chocolate chips

    The result is every bit as delicious as the dough you remember, but made for safe snacking.


    Easy Chocolate Chip Cookie Dough Recipe

    Ingredients

    • 1 cup all-purpose flour (heat-treated)
    • ½ cup unsalted butter, softened
    • ½ cup brown sugar
    • ¼ cup granulated sugar
    • 2 tablespoons milk
    • 1 teaspoon vanilla extract
    • ¼ teaspoon salt
    • ¾ cup semi-sweet chocolate chips

    Directions

    Step 1: Heat-Treat the Flour

    Spread the flour on a baking sheet and bake at 350°F (175°C) for about 5 minutes, or microwave until it reaches 165°F. Allow it to cool completely.

    Step 2: Cream the Butter and Sugars

    Beat together the softened butter, brown sugar, and white sugar until smooth and fluffy.

    Step 3: Add the Flavor

    Mix in the vanilla extract, milk, and salt.

    Step 4: Add the Flour

    Gradually stir in the cooled, heat-treated flour until a soft dough forms.

    Step 5: Fold in Chocolate Chips

    Mix in the chocolate chips until evenly distributed.

    Step 6: Enjoy

    Serve immediately or chill for a firmer texture.


    Delicious Variations

    One of the best things about cookie dough is how easy it is to customize.

    Peanut Butter Cookie Dough

    Replace part of the butter with creamy peanut butter for a rich, nutty twist.

    Cookies & Cream

    Mix in crushed chocolate sandwich cookies and white chocolate chips.

    Birthday Cake

    Add colorful sprinkles and white chocolate chips for a festive dessert.

    Double Chocolate

    Stir cocoa powder into the dough and use milk chocolate chips.

    Salted Caramel

    Mix in caramel bits and finish with flaky sea salt.


    Fun Ways to Serve Cookie Dough

    Chocolate chip cookie dough is much more than a spoon dessert.

    Try serving it:

    • With vanilla ice cream
    • Inside milkshakes
    • Rolled into bite-sized truffles
    • Between brownies
    • Layered in parfaits
    • On top of waffles
    • Stuffed inside cupcakes
    • Mixed into cheesecake
    • As a fruit dip
    • Sandwiched between graham crackers

    Storage Tips

    Store edible cookie dough in an airtight container in the refrigerator for up to one week.

    For longer storage, freeze individual scoops for up to three months. Simply thaw for a few minutes before serving.


    Why Everyone Loves Cookie Dough

    Chocolate chip cookie dough has become a dessert phenomenon because it offers the perfect balance of sweetness, buttery richness, and chocolate in every bite. It satisfies childhood memories while giving adults an indulgent treat that’s easy to make and endlessly customizable.

    Its creamy texture and familiar flavors make it ideal for parties, movie nights, birthdays, holidays, or simply satisfying a sweet craving after dinner.


    Dessert of the Day

    Today’s featured dessert is a reminder that sometimes the simplest treats are the most satisfying. Chocolate chip cookie dough combines classic flavors with endless possibilities, making it a favorite that never goes out of style.

    Whether you enjoy it chilled from the refrigerator, folded into your favorite ice cream, or shared with family and friends, this timeless dessert is sure to bring smiles with every delicious bite.

    Grab a spoon and enjoy today’s Dessert of the Day—Chocolate Chip Cookie Dough!

  • Recipe of the Day: Creamy Parmesan Garlic Chicken and Vegetables Casserole

    Advertisements

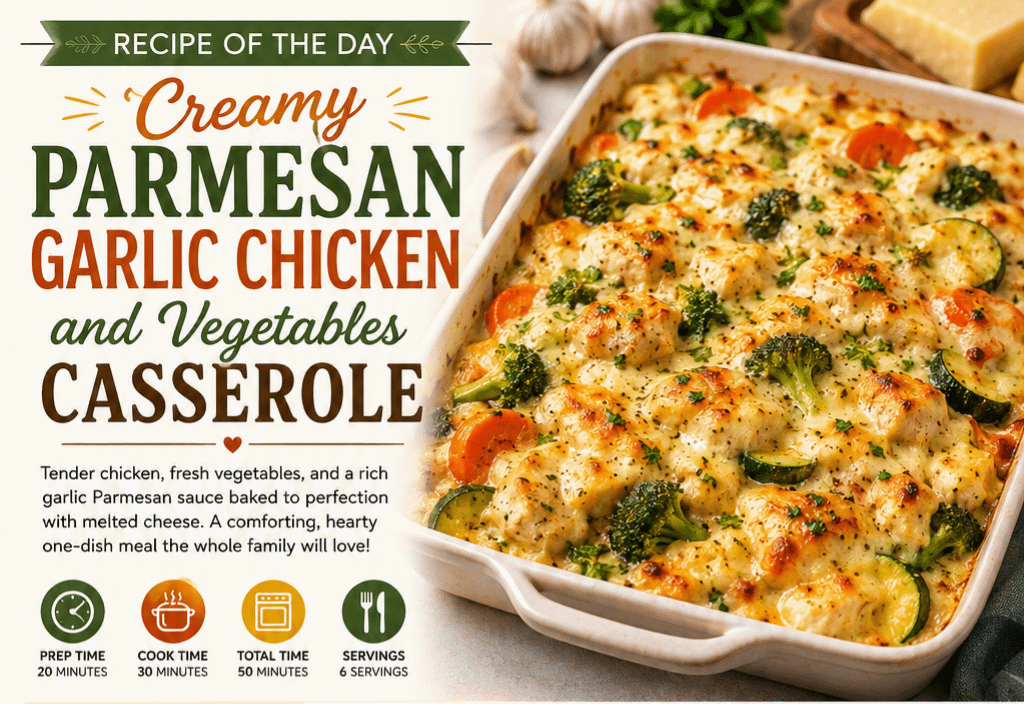
    When you’re looking for a meal that’s hearty, comforting, and packed with flavor, this Creamy Parmesan Garlic Chicken and Vegetables Casserole checks every box. Juicy chicken, colorful vegetables, a creamy garlic-Parmesan sauce, and melted cheese come together in one baking dish for a dinner that’s both satisfying and surprisingly easy to prepare.

    Whether you’re feeding a busy family, preparing meals ahead of time, or simply craving homemade comfort food, this casserole delivers rich flavors without requiring hours in the kitchen.


    Why You’ll Love This Recipe

    • One-pan meal with protein and vegetables
    • Rich, creamy garlic Parmesan sauce
    • Easy to customize with your favorite vegetables
    • Great for meal prep and leftovers
    • Family-friendly comfort food
    • Ready in about an hour

    Ingredients

    For the Chicken

    • 2 pounds boneless, skinless chicken breasts, cut into bite-sized pieces
    • 1 teaspoon salt
    • ½ teaspoon black pepper
    • 1 teaspoon Italian seasoning
    • 1 tablespoon olive oil

    Vegetables

    • 2 cups broccoli florets
    • 1 cup cauliflower florets
    • 1 cup sliced carrots
    • 1 cup zucchini, sliced
    • ½ cup diced onion

    Creamy Garlic Parmesan Sauce

    • 3 tablespoons butter
    • 5 cloves garlic, minced
    • 3 tablespoons all-purpose flour
    • 2 cups chicken broth
    • 1 cup heavy cream
    • 1 teaspoon Italian seasoning
    • ½ teaspoon paprika
    • 1 cup freshly grated Parmesan cheese
    • Salt and pepper to taste

    Topping

    • 1½ cups shredded mozzarella cheese
    • ¼ cup grated Parmesan cheese
    • 2 tablespoons chopped fresh parsley

    Instructions

    Step 1: Prepare the Oven

    Preheat your oven to 375°F (190°C).

    Lightly grease a 9×13-inch baking dish.


    Step 2: Cook the Chicken

    Season the chicken with:

    • Salt
    • Pepper
    • Italian seasoning

    Heat olive oil in a large skillet over medium-high heat.

    Cook the chicken for about 5–6 minutes until lightly browned. It doesn’t have to be fully cooked since it will finish baking.

    Transfer to a plate.


    Step 3: Cook the Vegetables

    In the same skillet, sauté:

    • Onion
    • Broccoli
    • Cauliflower
    • Carrots
    • Zucchini

    Cook for about 4–5 minutes until slightly tender.


    Step 4: Make the Garlic Parmesan Sauce

    Reduce heat to medium.

    Melt butter in the skillet.

    Add garlic and cook for one minute until fragrant.

    Whisk in flour and cook another minute.

    Slowly whisk in:

    • Chicken broth
    • Heavy cream

    Add:

    • Italian seasoning
    • Paprika
    • Parmesan cheese

    Continue stirring until the sauce becomes thick and creamy.

    Taste and adjust seasoning if needed.


    Step 5: Assemble the Casserole

    In the prepared baking dish combine:

    • Cooked chicken
    • Vegetables
    • Creamy garlic Parmesan sauce

    Mix gently.

    Top evenly with:

    • Mozzarella cheese
    • Additional Parmesan

    Step 6: Bake

    Bake uncovered for 25–30 minutes until bubbly and golden.

    Broil for 2–3 minutes if you’d like a beautifully browned cheese topping.


    Step 7: Garnish

    Sprinkle with fresh parsley before serving.

    Serve hot.


    Serving Suggestions

    This casserole pairs wonderfully with:

    • Garlic bread
    • Buttered dinner rolls
    • Steamed rice
    • Mashed potatoes
    • Buttered egg noodles
    • Simple garden salad
    • Caesar salad

    Recipe Variations

    Add Bacon

    Mix in crispy bacon for extra smoky flavor.

    Make It Spicy

    Add:

    • Crushed red pepper flakes
    • Cayenne pepper
    • Diced jalapeños

    Low-Carb Version

    Skip flour and thicken the sauce with cream cheese instead.

    Extra Vegetables

    Try adding:

    • Spinach
    • Mushrooms
    • Bell peppers
    • Green beans
    • Brussels sprouts
    • Asparagus

    Storage

    Store leftovers in an airtight container in the refrigerator for up to 4 days.


    Freezing Instructions

    This casserole freezes beautifully.

    • Assemble completely.
    • Cover tightly.
    • Freeze for up to 3 months.

    Bake from thawed or add 15–20 extra minutes if baking from frozen.


    Reheating

    Microwave individual servings for 2–3 minutes.

    Or reheat in a 350°F oven for 20–25 minutes until warmed through.


    Tips for Success

    • Freshly grate Parmesan cheese for the smoothest sauce.
    • Don’t overcook the vegetables before baking.
    • Use rotisserie chicken to save time.
    • Let the casserole rest for 10 minutes before serving.
    • Add extra mozzarella if you love a cheesy casserole.

    Nutrition (Approximate Per Serving)

    • Calories: 520
    • Protein: 43g
    • Carbohydrates: 14g
    • Fat: 31g
    • Fiber: 4g
    • Sugar: 5g

    Final Thoughts

    Creamy Parmesan Garlic Chicken and Vegetables Casserole is everything comfort food should be—warm, creamy, cheesy, and packed with wholesome ingredients. The savory garlic-Parmesan sauce coats every bite of tender chicken and fresh vegetables, creating a meal that’s both nourishing and indulgent. It’s perfect for weeknight dinners, potlucks, meal prep, or cozy family gatherings, and it’s sure to become a regular favorite in your recipe collection.

  • Breakfast of the Day: Cowboy Breakfast Bowl

    Advertisements

    Start Your Morning with a Hearty Cowboy Breakfast Bowl

    If you’re looking for a breakfast that keeps you full, fuels your day, and delivers bold, satisfying flavors, the Cowboy Breakfast Bowl is the perfect choice. Packed with crispy potatoes, seasoned sausage, fluffy scrambled eggs, melted cheese, and fresh toppings, this rustic breakfast combines everything you love about a hearty country-style meal in one delicious bowl.

    Whether you’re feeding a hungry family, preparing for a busy workday, or enjoying a relaxing weekend brunch, this breakfast bowl offers comfort, protein, and flavor in every bite.


    What Is a Cowboy Breakfast Bowl?

    A Cowboy Breakfast Bowl is a layered breakfast featuring crispy potatoes as the base, topped with breakfast meat, scrambled eggs, cheese, and flavorful garnishes. Inspired by hearty ranch-style cooking, it’s designed to provide lasting energy while satisfying even the biggest appetite.

    The beauty of this recipe is its flexibility—you can customize it with your favorite meats, vegetables, cheeses, and sauces to create your own signature breakfast bowl.


    Why You’ll Love This Breakfast

    • Rich, savory flavors
    • High in protein for lasting energy
    • Easy to customize
    • Great for meal prep
    • Family-friendly
    • Perfect for breakfast, brunch, or breakfast-for-dinner

    Cowboy Breakfast Bowl Recipe

    Prep Time: 15 minutes
    Cook Time: 20 minutes
    Total Time: 35 minutes

    Servings: 4


    Ingredients

    For the Potatoes

    • 4 cups frozen hash browns or diced breakfast potatoes
    • 2 tablespoons olive oil
    • 1 teaspoon garlic powder
    • 1 teaspoon paprika
    • Salt and pepper to taste

    For the Eggs

    • 8 large eggs
    • ¼ cup milk
    • Salt and pepper

    Meat

    • 1 pound breakfast sausage
    • or diced bacon
    • or smoked sausage

    Toppings

    • 1½ cups shredded cheddar cheese
    • ½ cup diced tomatoes
    • ¼ cup chopped green onions
    • ¼ cup diced jalapeños (optional)
    • Sour cream
    • Salsa
    • Hot sauce
    • Fresh chopped parsley

    Directions

    Step 1: Cook the Potatoes

    Heat olive oil in a large skillet.

    Cook the hash browns or diced potatoes until golden brown and crispy, about 10–15 minutes.

    Season with garlic powder, paprika, salt, and pepper.

    Set aside.


    Step 2: Cook the Meat

    Brown the breakfast sausage in a skillet until fully cooked.

    Drain any excess grease.

    If using bacon, cook until crispy and crumble.


    Step 3: Scramble the Eggs

    Whisk together:

    • Eggs
    • Milk
    • Salt
    • Pepper

    Cook slowly over medium-low heat until soft and fluffy.


    Step 4: Build the Bowl

    Layer each serving with:

    • Crispy potatoes
    • Scrambled eggs
    • Sausage or bacon
    • Cheddar cheese

    Top with:

    • Tomatoes
    • Green onions
    • Jalapeños
    • Sour cream
    • Salsa
    • Hot sauce
    • Parsley

    Serve immediately while hot.


    Delicious Variations

    Southwest Cowboy Bowl

    Add:

    • Black beans
    • Corn
    • Pepper Jack cheese
    • Avocado
    • Chipotle sauce

    Steakhouse Breakfast Bowl

    Replace sausage with:

    • Grilled steak bites
    • Sautéed mushrooms
    • Caramelized onions

    Finish with shredded Monterey Jack cheese.


    BBQ Cowboy Bowl

    Mix barbecue sauce into the meat.

    Top with:

    • Crispy onions
    • Smoked cheddar
    • Pickled jalapeños

    Veggie Cowboy Bowl

    Skip the meat and add:

    • Bell peppers
    • Mushrooms
    • Spinach
    • Zucchini
    • Black beans

    Spicy Ranch Bowl

    Top with:

    • Ranch dressing
    • Buffalo sauce
    • Pepper Jack cheese

    Make It Healthier

    For a lighter version:

    • Use turkey sausage
    • Substitute sweet potatoes for regular potatoes
    • Use reduced-fat cheese
    • Add spinach and peppers
    • Use egg whites or a mix of whole eggs and egg whites
    • Top with Greek yogurt instead of sour cream

    You’ll still enjoy the same hearty flavors with fewer calories and extra nutrients.


    Serving Suggestions

    Pair your Cowboy Breakfast Bowl with:

    • Fresh fruit
    • Buttermilk biscuits
    • Toast or English muffins
    • Pancakes
    • Fresh orange juice
    • Hot coffee
    • Sweet iced tea

    Storage Tips

    Store leftovers in an airtight container in the refrigerator for up to 3 days.

    Reheat in the microwave or skillet until warmed through.

    For meal prep, keep the toppings separate and assemble just before serving for the freshest texture.


    Tips for the Best Cowboy Breakfast Bowl

    • Cook the potatoes until deeply golden and crispy.
    • Season every layer for the best flavor.
    • Cook eggs gently to keep them soft and fluffy.
    • Use freshly shredded cheese for better melting.
    • Add fresh toppings at the end for color and crunch.
    • Serve with your favorite hot sauce for extra kick.

    Why This Breakfast Is So Popular

    The Cowboy Breakfast Bowl has become a favorite because it combines classic breakfast ingredients into one satisfying, easy-to-eat meal. It’s endlessly customizable, making it ideal for families with different tastes, and it’s equally at home on a weekend brunch table or as a quick weekday breakfast.

    Every bite delivers a comforting mix of crispy potatoes, creamy eggs, savory meat, melted cheese, and fresh toppings—a combination that’s hard to resist.

    Final Thoughts

    The Cowboy Breakfast Bowl is the kind of breakfast that sticks with you long after the last bite. Hearty, flavorful, and easy to customize, it’s a meal that brings together simple ingredients in a way that feels both comforting and satisfying. Whether you prefer classic sausage, crispy bacon, smoky steak, or a veggie-packed version, this breakfast bowl is sure to become a regular favorite in your kitchen.

    So grab your skillet, pile on your favorite toppings, and enjoy a breakfast that’s as bold and satisfying as the open range. Happy cooking!

    Read More Recipes

  • Dessert of the Day: Cinnamon Roll Ice Cream Sandwiches

    Advertisements

    The Ultimate Sweet Treat for Any Occasion

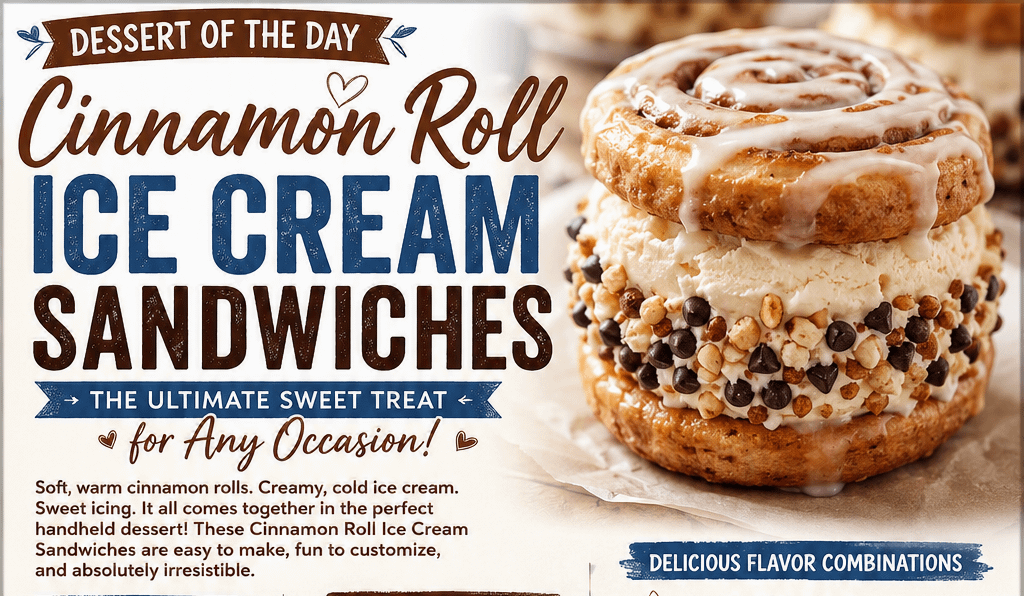
    If you’re looking for a dessert that combines warm bakery flavors with cool, creamy indulgence, Cinnamon Roll Ice Cream Sandwiches are the perfect choice. This irresistible dessert takes soft cinnamon rolls, fills them with rich ice cream, and creates a handheld treat that’s perfect for summer gatherings, family celebrations, birthdays, or simply satisfying your sweet tooth.

    The combination of warm cinnamon, sweet icing, and smooth ice cream creates a dessert that’s both comforting and refreshing. Best of all, it’s incredibly easy to make and can be customized with your favorite ice cream flavors and toppings.


    Why You’ll Love This Dessert

    Cinnamon Roll Ice Cream Sandwiches offer everything dessert lovers crave:

    • Soft, buttery cinnamon rolls
    • Cold, creamy ice cream
    • Sweet vanilla icing
    • Endless flavor combinations
    • Ready in minutes
    • Great for parties and family gatherings
    • Easy enough for beginner bakers

    Whether you use homemade cinnamon rolls or refrigerated dough from the grocery store, this dessert always feels special.


    Ingredients

    For the Sandwiches

    • 1 package refrigerated cinnamon rolls (or 8 homemade cinnamon rolls)
    • 1 quart vanilla ice cream (slightly softened)

    Optional Ice Cream Flavors

    • Cookies & Cream
    • Salted Caramel
    • Butter Pecan
    • Chocolate
    • Coffee
    • Cinnamon
    • Strawberry Cheesecake
    • Maple Walnut

    Optional Toppings

    • Chopped pecans
    • Mini chocolate chips
    • Crushed toffee bits
    • Rainbow sprinkles
    • Caramel sauce
    • Chocolate drizzle
    • Crushed Oreos
    • Cinnamon sugar

    Instructions

    Step 1: Bake the Cinnamon Rolls

    Bake the cinnamon rolls according to the package directions.

    Allow them to cool completely before assembling. Warm rolls will melt the ice cream too quickly.

    Step 2: Slice

    Using a serrated knife, carefully slice each cinnamon roll horizontally, creating a top and bottom half.

    Step 3: Add Ice Cream

    Place a generous scoop of softened ice cream on the bottom half.

    Spread evenly to reach the edges.

    Step 4: Assemble

    Place the top half over the ice cream and gently press together.

    Step 5: Freeze

    Place the sandwiches on a baking sheet lined with parchment paper.

    Freeze for at least 1–2 hours until firm.

    Step 6: Decorate

    Roll the exposed ice cream edges in your favorite toppings or drizzle with chocolate or caramel before serving.


    Delicious Flavor Combinations

    Classic Vanilla

    Vanilla ice cream with the cinnamon roll’s icing creates a timeless dessert everyone enjoys.

    Salted Caramel Delight

    Salted caramel ice cream with chopped pecans and caramel drizzle adds rich, buttery flavor.

    Cookies & Cream

    Crushed chocolate cookies mixed with cookies-and-cream ice cream create an extra crunchy bite.

    Chocolate Lover’s Dream

    Chocolate ice cream rolled in mini chocolate chips and topped with chocolate syrup.

    Coffee Break

    Coffee-flavored ice cream pairs beautifully with the cinnamon spice for a dessert inspired by your favorite café.

    Fall Favorite

    Cinnamon or pumpkin spice ice cream with crushed graham crackers makes an incredible autumn-inspired dessert.


    Make-Ahead Friendly

    One of the best things about Cinnamon Roll Ice Cream Sandwiches is that they can be prepared ahead of time.

    Wrap each sandwich individually in plastic wrap and store them in an airtight container in the freezer for up to two weeks.

    When guests arrive, simply unwrap and enjoy.


    Tips for Perfect Ice Cream Sandwiches

    • Let ice cream soften for about 10 minutes before scooping.
    • Cool cinnamon rolls completely before assembling.
    • Freeze sandwiches before adding warm sauces.
    • Use a cookie scoop for evenly sized portions.
    • Freeze for at least one hour before serving.
    • Store individually wrapped to prevent freezer burn.

    Fun Variations

    Birthday Celebration

    Use birthday cake ice cream and colorful sprinkles.

    Apple Pie Style

    Fill with vanilla ice cream and add warm cinnamon apples before freezing.

    S’mores Version

    Use chocolate ice cream, crushed graham crackers, and mini marshmallows.

    Peanut Butter Lovers

    Fill with peanut butter ice cream and chocolate chips.

    Holiday Edition

    Use peppermint ice cream with crushed candy canes during the holiday season.


    Serving Suggestions

    Serve Cinnamon Roll Ice Cream Sandwiches with:

    • Fresh strawberries
    • Blueberries
    • Whipped cream
    • Hot fudge sauce
    • Espresso or coffee
    • Cold milk
    • Iced latte
    • Fresh fruit salad

    They’re also perfect alongside a dessert buffet for birthdays, cookouts, or holiday celebrations.


    Storage

    Keep sandwiches frozen in an airtight container for up to two weeks.

    For the best texture, allow them to sit at room temperature for about 2–3 minutes before serving.


    Final Thoughts

    Cinnamon Roll Ice Cream Sandwiches are proof that two beloved desserts can become something even more extraordinary when combined. The soft, cinnamon-spiced rolls perfectly complement the creamy richness of the ice cream, creating a dessert that’s fun to make, easy to customize, and impossible to resist.

    Whether you’re preparing a quick family treat, celebrating a special occasion, or simply looking for a creative dessert to beat the heat, these delicious ice cream sandwiches are guaranteed to become a favorite. One bite delivers the comforting taste of fresh cinnamon rolls paired with the refreshing chill of your favorite ice cream—a combination that’s sure to bring smiles with every serving.

    Read More Recipes

  • Recipe of the Day: Creamy Garlic Chicken & Vegetables

    Advertisements

    Few meals strike the perfect balance between comfort food and wholesome eating quite like Creamy Garlic Chicken & Vegetables. Tender, juicy chicken is seared until golden, then simmered in a rich garlic cream sauce alongside colorful vegetables that soak up every bit of flavor. The result is a satisfying meal that’s elegant enough for guests yet simple enough for a busy weeknight.

    Whether you’re cooking for your family or preparing a cozy dinner for two, this recipe delivers restaurant-quality flavor with everyday ingredients.

    Why You’ll Love This Recipe

    • Ready in about 40 minutes
    • One skillet means fewer dishes
    • Packed with protein and vegetables
    • Rich, creamy garlic sauce without being overly heavy
    • Easily customizable with your favorite vegetables
    • Great for meal prep and leftovers

    Ingredients

    For the Chicken

    • 4 boneless, skinless chicken breasts (or thighs)
    • 2 tablespoons olive oil
    • 1 teaspoon paprika
    • 1 teaspoon Italian seasoning
    • Salt and freshly ground black pepper to taste

    Vegetables

    • 2 cups broccoli florets
    • 1 cup baby carrots, halved
    • 1 cup sliced mushrooms
    • 1 cup zucchini, sliced
    • 1 cup fresh spinach

    Creamy Garlic Sauce

    • 4 tablespoons butter
    • 6 garlic cloves, minced
    • 2 tablespoons all-purpose flour
    • 2 cups chicken broth
    • 1 cup heavy cream
    • ½ cup grated Parmesan cheese
    • 1 teaspoon Dijon mustard (optional)
    • ½ teaspoon onion powder
    • Fresh parsley for garnish

    Instructions

    1. Season the Chicken

    Pat the chicken dry and season both sides with paprika, Italian seasoning, salt, and pepper.

    2. Sear the Chicken

    Heat olive oil in a large skillet over medium-high heat.

    Cook the chicken for 5–6 minutes per side until beautifully browned. Remove from the skillet and set aside.

    3. Cook the Vegetables

    Add the carrots and broccoli first since they require a little longer to cook.

    After about 4 minutes, stir in the mushrooms and zucchini. Cook another 3–4 minutes until just tender.

    Remove vegetables and set aside.

    4. Make the Garlic Cream Sauce

    Reduce heat to medium.

    Melt the butter and sauté the garlic for about one minute until fragrant.

    Whisk in the flour and cook for another minute.

    Slowly whisk in the chicken broth until smooth.

    Add the heavy cream, Parmesan cheese, Dijon mustard, and onion powder.

    Simmer for 3–5 minutes until the sauce thickens.

    5. Finish the Dish

    Return the chicken and vegetables to the skillet.

    Add the spinach and allow it to wilt into the sauce.

    Simmer everything together for 5–8 minutes until the chicken reaches an internal temperature of 165°F (74°C).

    Sprinkle with fresh parsley before serving.

    Serving Suggestions

    This creamy chicken pairs wonderfully with:

    • Garlic mashed potatoes
    • Buttered egg noodles
    • Steamed white or brown rice
    • Cauliflower rice for a lower-carb option
    • Warm crusty bread to soak up the creamy garlic sauce

    Recipe Tips

    • Pound thick chicken breasts to an even thickness for quicker cooking.
    • Freshly grated Parmesan melts much smoother than pre-shredded cheese.
    • Don’t overcook the vegetables—they should remain slightly crisp.
    • Add a pinch of red pepper flakes for a little heat.
    • A squeeze of fresh lemon juice before serving brightens the entire dish.

    Make It Your Own

    One of the best things about this recipe is its versatility.

    Try adding:

    • Asparagus
    • Green beans
    • Bell peppers
    • Brussels sprouts
    • Sun-dried tomatoes
    • Fresh basil
    • Crispy bacon pieces

    You can even substitute shrimp or salmon for the chicken for a delicious seafood variation.

    Storage

    Store leftovers in an airtight container in the refrigerator for up to 3 days.

    Reheat gently over low heat, adding a splash of chicken broth or cream to restore the sauce’s silky texture.

    Freezing is possible, although cream sauces may separate slightly when thawed.

    Final Thoughts

    Creamy Garlic Chicken & Vegetables is the kind of recipe that quickly becomes a household favorite. The combination of juicy chicken, colorful vegetables, and a velvety garlic-Parmesan cream sauce creates a comforting meal that’s both hearty and satisfying. Whether it’s a weeknight dinner, a family gathering, or a special weekend meal, this one-pan recipe offers incredible flavor with minimal effort.

    Simple ingredients, timeless flavors, and easy preparation make this a recipe you’ll find yourself returning to again and again.

  • Breakfast of the Day: Sloppy Joe Eggs

    Advertisements

    A Hearty Breakfast That Brings Comfort to Your Morning

    If you’re looking for a breakfast that’s filling, flavorful, and a little different from the ordinary, Sloppy Joe Eggs deserve a place on your table. This creative breakfast combines the bold, savory flavors of a classic Sloppy Joe with perfectly cooked eggs, creating a satisfying meal that’s packed with protein and guaranteed to keep you energized throughout the day.

    Whether you’re feeding a hungry family, preparing brunch for friends, or simply craving a comforting breakfast with a twist, Sloppy Joe Eggs deliver everything you love about comfort food in one skillet.


    What Are Sloppy Joe Eggs?

    Sloppy Joe Eggs take the familiar sweet-and-savory seasoned ground beef mixture found in a traditional Sloppy Joe sandwich and pair it with eggs instead of hamburger buns. The result is a rich, hearty breakfast that balances savory meat, flavorful tomato sauce, onions, peppers, and creamy egg yolks in every bite.

    Serve it with toasted sourdough, biscuits, English muffins, or crispy hash browns for a complete breakfast that feels both rustic and satisfying.


    Why You’ll Love This Breakfast

    There are plenty of reasons Sloppy Joe Eggs have become a favorite among home cooks.

    • Ready in about 30 minutes
    • High in protein
    • Great use for leftover ground beef
    • One-pan meal for easy cleanup
    • Family-friendly and filling
    • Easy to customize with vegetables or cheese

    It’s comfort food without requiring hours in the kitchen.


    Ingredients

    For the Sloppy Joe Mixture

    • 1 pound lean ground beef
    • 1 small onion, diced
    • ½ green bell pepper, diced
    • 2 cloves garlic, minced
    • 1 cup tomato sauce
    • 2 tablespoons ketchup
    • 1 tablespoon tomato paste
    • 1 tablespoon Worcestershire sauce
    • 1 tablespoon brown sugar
    • 1 teaspoon yellow mustard
    • ½ teaspoon smoked paprika
    • Salt and black pepper to taste

    For the Eggs

    • 4–6 large eggs
    • 1 tablespoon butter or olive oil
    • Fresh parsley for garnish
    • Shredded cheddar cheese (optional)

    How to Make Sloppy Joe Eggs

    Step 1: Brown the Beef

    Heat a large skillet over medium heat. Cook the ground beef until browned. Drain excess grease if necessary.


    Step 2: Cook the Vegetables

    Add the diced onion and bell pepper to the skillet.

    Cook for about 5 minutes until softened.

    Stir in the garlic and cook for another minute.


    Step 3: Make the Sauce

    Add:

    • Tomato sauce
    • Ketchup
    • Tomato paste
    • Worcestershire sauce
    • Brown sugar
    • Mustard
    • Smoked paprika

    Mix well and simmer for 8–10 minutes until thick and flavorful.


    Step 4: Add the Eggs

    Using a spoon, make small wells in the meat mixture.

    Crack one egg into each well.

    Cover the skillet with a lid.

    Cook 5–8 minutes until the egg whites are set while the yolks remain runny, or longer if you prefer firmer yolks.


    Step 5: Finish and Serve

    Sprinkle with parsley and shredded cheddar cheese if desired.

    Serve immediately with toasted bread or breakfast potatoes.


    Serving Ideas

    Sloppy Joe Eggs pair wonderfully with:

    • Buttered sourdough toast
    • Homemade biscuits
    • Hash browns
    • Breakfast potatoes
    • Fresh fruit
    • Avocado slices
    • Crispy bacon
    • Fresh orange juice or coffee

    The runny yolks create a rich sauce that’s perfect for dipping toast.


    Delicious Variations

    Tex-Mex Style

    Add:

    • Jalapeños
    • Pepper Jack cheese
    • Taco seasoning
    • Fresh cilantro

    Serve with warm tortillas.


    Cheesy Version

    Top the skillet with:

    • Sharp cheddar
    • Mozzarella
    • Monterey Jack

    Broil for two minutes before adding the eggs or sprinkle on after the eggs are cooked.


    Low-Carb Option

    Skip the bread and serve over:

    • Cauliflower hash
    • Sautéed spinach
    • Roasted vegetables
    • Avocado halves

    Spicy Breakfast

    Increase the heat with:

    • Hot sauce
    • Red pepper flakes
    • Cayenne pepper
    • Chipotle peppers in adobo sauce

    Tips for Success

    • Use lean ground beef for less grease.
    • Don’t overcook the eggs—the runny yolk adds incredible richness.
    • Let the sauce simmer until thick before adding the eggs.
    • Fresh garlic creates deeper flavor than garlic powder.
    • Covering the skillet helps cook the eggs evenly.
    • Garnish with fresh herbs just before serving.

    Nutrition Highlights

    Sloppy Joe Eggs offer a balanced breakfast that combines protein, healthy fats, and vegetables.

    A typical serving provides:

    • Excellent source of protein
    • Iron from ground beef
    • Vitamin B12
    • Zinc
    • Vitamin C from peppers
    • Lycopene from tomatoes

    Pairing the dish with fruit or whole-grain toast creates an even more balanced meal.


    Make-Ahead Tips

    The Sloppy Joe mixture can be prepared up to three days ahead and refrigerated.

    When you’re ready to eat:

    1. Reheat the beef mixture.
    2. Make wells for the eggs.
    3. Crack the eggs directly into the skillet.
    4. Cover and cook until done.

    This makes weekday breakfasts incredibly simple.


    Perfect for Brunch

    Sloppy Joe Eggs make an impressive brunch centerpiece because everything cooks in one pan.

    Serve alongside:

    • Fresh fruit salad
    • Cinnamon rolls
    • Coffee
    • Mimosas
    • Hash browns

    Guests can scoop the hearty mixture onto toast or biscuits for a satisfying meal.


    Final Thoughts

    Sloppy Joe Eggs prove that breakfast doesn’t have to be ordinary. By combining the nostalgic flavors of a classic Sloppy Joe with perfectly cooked eggs, this recipe creates a hearty, protein-packed meal that’s ideal for busy mornings, weekend brunches, or breakfast-for-dinner nights.

    Simple ingredients, one-pan preparation, and bold comfort-food flavor make this recipe one you’ll want to keep in your regular breakfast rotation. Whether you enjoy it with crispy toast, flaky biscuits, or breakfast potatoes, Sloppy Joe Eggs offer a delicious way to start the day with warmth, flavor, and plenty of satisfaction.

    Read More Recipes

Exit mobile version