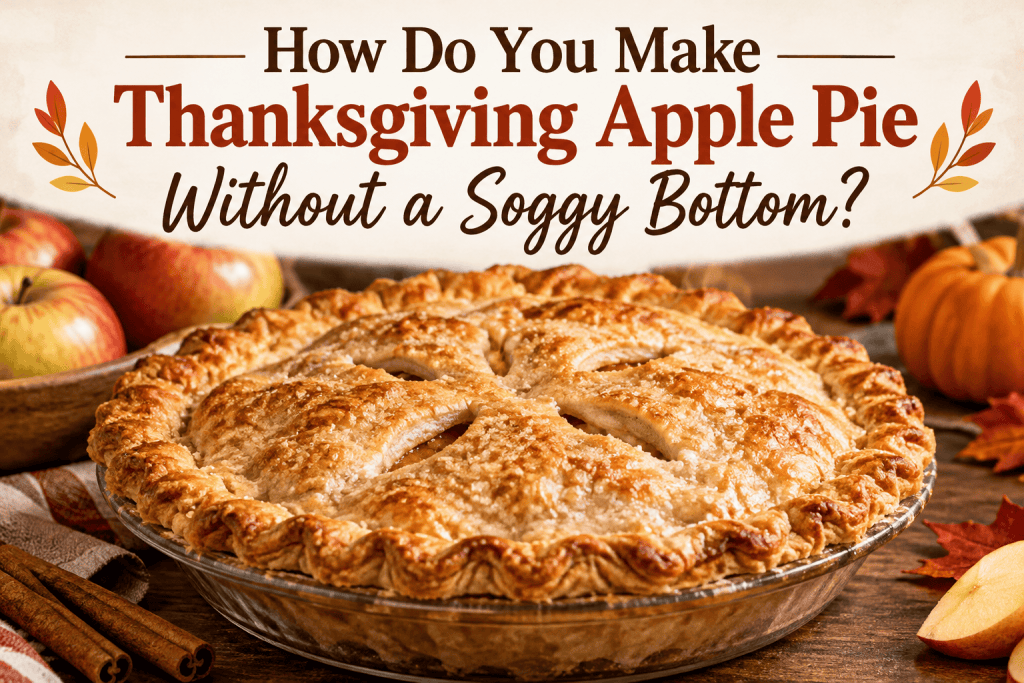
Thanksgiving apple pie is one of those classic holiday desserts that brings warmth, comfort, and tradition to the dinner table. With its buttery, flaky crust, tender cinnamon-spiced apples, and golden-brown top, homemade apple pie is often one of the most anticipated desserts of the holiday season.
However, there is one frustrating problem that can ruin an otherwise delicious pie: a soggy bottom crust.
You spend time peeling apples, preparing the filling, rolling out the dough, and carefully baking your pie, only to discover that the bottom crust is soft, wet, or undercooked when you cut the first slice.
Fortunately, you can make Thanksgiving apple pie without a soggy bottom by controlling the moisture in the apple filling, using the right baking temperature, and making sure the bottom crust receives enough heat to bake completely.
Whether you are preparing your first homemade apple pie or trying to perfect a family Thanksgiving recipe, understanding a few simple baking techniques can help you achieve a beautifully golden, flaky crust every time.
Why Does Thanksgiving Apple Pie Get a Soggy Bottom?
Before learning how to prevent a soggy crust, it helps to understand why the problem happens.
Apple pie filling naturally contains a significant amount of moisture. As apples bake, they release juices that combine with sugar, cinnamon, and other ingredients to create the sweet filling everyone loves.
Unfortunately, those juices can also soak into the bottom crust before it has time to become firm and flaky.
Several common mistakes contribute to a soggy apple pie bottom.
1. Using Apples That Release Too Much Juice
Some apple varieties contain more moisture than others.
When these apples bake, they can release excessive liquid, making the filling watery and soaking the bottom crust.
2. Adding Too Much Sugar
Sugar draws moisture out of apples.
Although sugar is essential for a delicious apple pie, using too much can create excess liquid in the filling.
3. Baking at Too Low a Temperature
A low oven temperature may allow the apple filling to release moisture before the crust has enough heat to begin baking properly.
This can leave the bottom crust pale and undercooked.
4. Using the Wrong Pie Dish
Different pie dishes conduct heat differently.
Some materials heat more slowly, making it harder for the bottom crust to brown before the filling finishes cooking.
5. Removing the Pie Too Early
Apple pie may look beautifully golden on top while the bottom crust is still underbaked.
A properly baked apple pie needs enough time for both the filling and crust to finish cooking.
Understanding these problems makes it much easier to prevent them.
What Is the Best Way to Prevent a Soggy Apple Pie Bottom?
The most reliable approach combines several baking techniques rather than depending on just one trick.
For the best results, use firm baking apples, reduce excess filling moisture, bake the pie on a preheated metal baking sheet, and allow the filling to bubble thoroughly before removing it from the oven.
Each of these techniques addresses a different cause of sogginess.
1. Choose the Best Apples for Thanksgiving Apple Pie
The apples you choose can make a noticeable difference in the texture of your finished pie.
Some varieties soften quickly and release substantial amounts of juice, while others maintain their shape during baking.
The best apples for pie provide a balance of sweetness, tartness, and firmness.
Granny Smith Apples
Granny Smith apples are among the most popular choices for homemade apple pie.
They have a firm texture and tart flavor that balances the sweetness of the filling.
They also tend to maintain their shape well during baking.
Honeycrisp Apples
Honeycrisp apples offer a naturally sweet flavor and pleasant texture.
They work especially well when combined with tart apples.
Braeburn Apples
Braeburn apples have a balanced sweet-tart flavor and generally hold up well during baking.
Their slightly spicy flavor also complements cinnamon and nutmeg.
Pink Lady Apples
Pink Lady apples are firm, flavorful, and slightly tart.
They make an excellent addition to a Thanksgiving apple pie filling.
Should You Mix Different Apple Varieties?
Yes.
Combining two apple varieties can create a more balanced filling.
For example, using half Granny Smith apples and half Honeycrisp apples provides both tartness and sweetness while maintaining a pleasant texture.
Avoid relying entirely on very soft apples that quickly break down during baking.
2. Remove Excess Moisture From the Apple Filling
One of the most effective ways to prevent a soggy bottom crust is to reduce the amount of liquid entering the pie.
Fresh apples naturally release moisture when mixed with sugar.
Instead of allowing all that moisture to collect inside the pie, you can remove some of it before baking.
How to Prepare Apples to Reduce Moisture
-
Peel, core, and slice the apples.
-
Place the slices in a large mixing bowl.
-
Toss them with the sugar called for in your recipe.
-
Let the apples rest for approximately 30–45 minutes.
-
Drain the released juices into a small saucepan.
-
Simmer the juices until reduced to a thick, syrupy consistency.
-
Allow the syrup to cool slightly before mixing it back into the apples.
This technique concentrates the apple flavor while reducing unnecessary moisture.
It also creates a richer filling without making the pie excessively watery.
Thanksgiving baking tip: Reducing the apple juices is particularly useful when making a deep-dish apple pie, which typically contains more fruit and therefore more moisture.
3. Use the Right Thickener for Apple Pie Filling
Even after removing excess liquid, apple pie filling needs an ingredient that helps thicken the remaining juices.
Without a thickener, the filling can become runny and soak into the crust.
Two popular options are cornstarch and all-purpose flour.
Cornstarch
Cornstarch creates a glossy filling and works well for apple pies.
For a standard 9-inch apple pie containing approximately 6–7 cups of sliced apples, start with about 2 tablespoons of cornstarch.
Very juicy apples may require slightly more.
All-Purpose Flour
Flour is another traditional option.
It creates a slightly more opaque filling and works particularly well in classic homemade apple pie recipes.
Approximately 3 tablespoons of flour can be a reasonable starting point for a standard pie.
Which Thickener Is Better?
Both work.
Cornstarch is often preferred when you want a glossy filling, while flour produces a more traditional texture.
Whichever thickener you choose, make sure the filling reaches a steady bubbling temperature during baking so the thickener can do its job.
Do not simply add excessive thickener to compensate for overly juicy apples. Removing excess moisture first usually produces a better filling.
4. Bake Apple Pie on a Preheated Baking Sheet
One of the easiest tricks for preventing a soggy bottom crust is to place your pie on a preheated metal baking sheet.
This helps deliver heat directly to the bottom of the pie dish.
How to Use This Method
-
Position an oven rack in the lower third of the oven.
-
Place a sturdy metal baking sheet on the rack.
-
Preheat the oven to 425°F.
-
Assemble your apple pie while the oven heats.
-
Carefully place the pie dish on the hot baking sheet.
-
Bake according to your recipe, reducing the temperature after the initial baking period.
The hot baking sheet helps the bottom crust begin cooking quickly.
This is particularly useful when using a metal pie pan.
If using glass or ceramic, follow the manufacturer’s thermal-shock guidance. Do not place a cold glass or ceramic dish onto a very hot metal surface unless the dish is specifically rated for that use.
5. Start Baking Thanksgiving Apple Pie at a Higher Temperature
A properly baked apple pie needs enough heat to create a crisp crust before the filling releases too much moisture.
Many successful apple pie recipes begin at a higher temperature before reducing the heat.
Recommended Baking Method
For a standard 9-inch double-crust apple pie:
-
Preheat the oven to 425°F.
-
Bake at 425°F for approximately 15–20 minutes.
-
Reduce the temperature to 375°F.
-
Continue baking for approximately 35–50 minutes, or until the filling bubbles thickly and the crust is golden brown.
The exact baking time depends on the size of the pie, thickness of the crust, type of apples, and material of the pie dish.
If the top crust begins browning too quickly, cover it loosely with aluminum foil while the pie continues baking.
The goal is to fully bake the bottom crust without burning the top.
6. Should You Blind Bake the Bottom Crust for Apple Pie?
Blind baking means partially or completely baking a pie crust before adding the filling.
This technique is especially common for custard pies, cream pies, and other desserts containing wet fillings.
But is it necessary for Thanksgiving apple pie?
Not always.
Traditional double-crust apple pies are generally assembled with an unbaked bottom crust.
Using the correct baking temperature, controlling filling moisture, and choosing a suitable pie pan are often enough to prevent sogginess.
However, partial blind baking can be helpful for certain apple pie recipes.
When Blind Baking Makes Sense
Consider partially baking the bottom crust if:
-
Your recipe uses a particularly juicy filling.
-
You are making an open-faced apple pie.
-
You have repeatedly experienced undercooked bottom crusts.
-
Your recipe specifically recommends prebaking.
For a double-crust pie, blind baking requires additional care because attaching the top crust to a partially baked bottom crust can be difficult.
If you are following a traditional Thanksgiving apple pie recipe, try improving your filling preparation and baking technique before adding this extra step.
7. Use a Metal Pie Pan for a Crispier Bottom Crust
The type of pie pan you use affects how heat reaches the crust.
Metal pie pans generally conduct heat efficiently, helping the bottom crust bake and brown.
Metal Pie Pans
Metal pans are an excellent choice when preventing soggy crust is your priority.
They heat quickly and can encourage more even browning.
Glass Pie Dishes
Glass pie dishes allow you to see the bottom crust, making it easier to check whether it has browned.
However, they may heat differently than metal pans and require careful handling to avoid thermal shock.
Ceramic Pie Dishes
Ceramic dishes are attractive for holiday serving and retain heat well.
However, thicker ceramic dishes may take longer to heat thoroughly.
For a reliably crisp Thanksgiving apple pie crust, a good-quality metal pie pan is often the easiest choice.
8. Add a Thin Moisture Barrier to the Bottom Crust
Another useful technique is creating a light barrier between the apple filling and the raw pie dough.
This can help slow the movement of moisture into the crust.
Brush With Egg White
Lightly brushing the bottom crust with beaten egg white can help create a thin protective layer as the crust bakes.
For best results, this technique is especially effective when applied to a partially prebaked crust and briefly returned to the oven to set.
On raw dough, the barrier is less reliable.
Sprinkle With Fine Breadcrumbs or Cookie Crumbs
A very thin layer of finely crushed plain cookies or dry breadcrumbs can absorb some excess juice.
Use only a small amount to avoid changing the texture of the pie.
Use Ground Nuts
Finely ground almonds can also absorb some moisture while adding a subtle nutty flavor.
This option works particularly well with cinnamon-spiced apple filling.
These methods can provide additional protection, but they should not replace proper moisture control and thorough baking.
9. Do Not Overfill the Apple Pie
Thanksgiving apple pies often look impressive when piled high with apples.
However, overfilling the pie can create problems.
Too many apples may release more liquid than the thickener can manage.
An excessively deep filling can also require longer baking times.
For a standard 9-inch pie, approximately 6–7 cups of sliced apples is a useful starting point.
Deep-dish pies may need more apples, but they also require adjustments to thickener quantities and baking time.
Avoid adding large amounts of extra sugar or liquid without adjusting the recipe.
10. Cut Proper Ventilation Slits in the Top Crust
Steam needs a way to escape as the apple filling cooks.
Without adequate ventilation, moisture can become trapped beneath the top crust.
This may contribute to an overly wet filling.
For a traditional double-crust apple pie, cut several slits in the top crust before baking.
A lattice crust naturally provides openings for steam to escape.
Although venting alone will not prevent a soggy bottom, it helps manage steam during baking.
11. Let the Apple Pie Cool Before Slicing
One of the most overlooked steps in making a perfect Thanksgiving apple pie is allowing it to cool.
Freshly baked apple pie contains hot juices that continue to thicken as the pie cools.
Cutting into the pie immediately can cause those juices to flow into the crust and across the plate.
How Long Should Apple Pie Cool?
Allow the pie to cool for at least 3–4 hours before slicing if you want neat slices and a properly set filling.
A pie served slightly warm may have a softer filling.
If you want warm apple pie for Thanksgiving dessert, bake it earlier in the day, allow it to cool, and gently reheat individual slices before serving.
This helps preserve the structure of the filling.
Easy Thanksgiving Apple Pie Recipe With a Flaky Bottom Crust
This classic homemade apple pie recipe uses firm apples, a thickened filling, and a two-temperature baking method to help prevent a soggy bottom.
PREP TIME
35 minutes
BAKE TIME
55–70 minutes
SERVINGS
8 slices
Additional time: 30–45 minutes for draining apples and 3–4 hours for cooling.
Ingredients
For the Apple Filling
-
6–7 cups peeled, cored, and sliced apples
-
½ cup granulated sugar
-
¼ cup packed brown sugar
-
2 tablespoons cornstarch
-
1 tablespoon fresh lemon juice
-
1½ teaspoons ground cinnamon
-
¼ teaspoon ground nutmeg
-
¼ teaspoon salt
-
1 teaspoon vanilla extract
-
1 tablespoon unsalted butter
For the Crust
-
2 unbaked 9-inch pie crusts, homemade or store-bought
-
1 large egg
-
1 tablespoon milk
-
1 tablespoon coarse sugar, optional
Step-by-Step Instructions
Step 1: Prepare the Apples
Peel, core, and slice the apples into pieces approximately ¼ inch thick.
Place the apple slices in a large mixing bowl.
Add the granulated sugar and brown sugar, tossing until the apples are evenly coated.
Let the mixture rest for 30–45 minutes.
This allows the sugar to draw some of the moisture out of the apples before baking.
Step 2: Reduce the Apple Juices
Drain the liquid from the apples into a small saucepan.
Simmer over medium heat until reduced to a thick syrup.
Remove from the heat and allow it to cool slightly.
Reducing the liquid helps concentrate the apple flavor without adding unnecessary moisture to the pie.
Step 3: Prepare the Filling
Add the cornstarch, lemon juice, cinnamon, nutmeg, salt, and vanilla extract to the apples.
Toss until evenly coated.
Pour the reduced apple syrup over the filling and mix gently.
Step 4: Prepare the Oven
Place a sturdy metal baking sheet on a rack in the lower third of the oven.
Preheat the oven to 425°F.
Use a metal pie pan for this method. For glass or ceramic dishes, follow the manufacturer’s heating instructions.
Step 5: Assemble the Pie
Roll out the first pie crust and place it into a 9-inch pie pan.
Gently press the dough into the bottom and sides without stretching it.
Add the apple filling, distributing it evenly.
Dot the filling with small pieces of butter.
Place the second pie crust over the filling.
Trim excess dough, seal the edges, and crimp as desired.
Cut several small slits in the top crust to allow steam to escape.
Step 6: Apply the Egg Wash
Whisk together the egg and milk.
Lightly brush the mixture over the top crust.
Sprinkle with coarse sugar if desired.
The egg wash helps create an attractive golden finish.
Step 7: Bake the Apple Pie
Carefully place the pie on the preheated baking sheet.
Bake at 425°F for 15–20 minutes.
Reduce the oven temperature to 375°F and continue baking for approximately 40–50 minutes.
The pie is ready when the crust is golden brown and thick apple juices are bubbling through the vents, including near the center.
If the edges begin browning too quickly, protect them with a pie shield or aluminum foil.
Step 8: Cool Completely
Remove the pie from the oven and place it on a wire cooling rack.
Allow it to cool for at least 3–4 hours before slicing.
This gives the filling time to set and helps prevent excess juice from soaking the bottom crust after baking.
Can You Make Thanksgiving Apple Pie Ahead of Time Without It Getting Soggy?
Yes. Apple pie is an excellent Thanksgiving dessert to prepare ahead of time.
In fact, making it in advance can simplify your holiday cooking schedule.
Make Apple Pie One Day Before Thanksgiving
Bake the pie the day before Thanksgiving and allow it to cool completely.
Cover it loosely once cooled.
For food safety and best quality, refrigerate the pie if you plan to keep it for more than a day, or if the recipe contains ingredients requiring refrigeration.
Avoid sealing a warm pie tightly because trapped condensation can soften the crust.
Reheat Before Serving
To restore some crispness, place the pie in a 325°F oven for approximately 15–25 minutes, depending on its size and starting temperature.
Cover the top loosely with foil if it begins to brown too much.
Allow the pie to rest briefly before serving.
Can You Freeze Apple Pie Before Baking?
Yes.
An assembled, unbaked apple pie can be frozen for future baking.
Wrap it securely and freeze until needed.
Bake directly from frozen using a freezer-to-oven-safe metal pan, adding additional baking time as necessary.
Do not place a frozen glass or ceramic pie dish directly into a hot oven unless specifically approved by the manufacturer.
Freezing an unbaked apple pie can be a convenient way to prepare Thanksgiving desserts ahead of schedule.
Common Thanksgiving Apple Pie Mistakes to Avoid
Even experienced home bakers occasionally encounter soggy crusts.
Avoiding these mistakes can make a noticeable difference.
| Common mistake | Better approach |
|---|---|
| Using very soft apples | Choose firm baking varieties |
| Adding all the apple juices | Reduce excess juices before baking |
| Baking at a low temperature throughout | Start with a hotter oven |
| Using too little thickener | Measure thickener for the amount of fruit |
| Removing the pie too early | Wait for thick bubbling filling |
| Cutting the pie immediately | Cool for 3–4 hours |
| Covering the pie while hot | Allow steam to escape first |
Frequently Asked Questions About Soggy Apple Pie Crust
Should You Bake the Bottom Crust Before Adding Apple Filling?
Not necessarily.
Most traditional double-crust apple pies can be baked successfully without prebaking the bottom crust.
Controlling filling moisture and baking at the correct temperature are usually more important.
Does Cornstarch Prevent a Soggy Apple Pie Bottom?
Cornstarch helps thicken the apple juices, reducing the amount of free liquid in the filling.
However, it works best when combined with proper baking and moisture management.
Why Is My Apple Pie Crust Raw on the Bottom?
The bottom crust may not have received enough heat.
This can happen when baking on a higher oven rack, using a thick pie dish, or removing the pie too early.
A metal pie pan and lower oven rack can help.
Is Glass or Metal Better for Baking Apple Pie?
Metal generally conducts heat more quickly and is often preferred for achieving a crisp bottom crust.
Glass allows you to monitor browning, but it heats differently and requires care when exposed to sudden temperature changes.
Can You Fix a Soggy Apple Pie After Baking?
Sometimes.
If the crust is merely soft and the pie is otherwise fully baked, reheating it in a moderate oven may improve the texture.
However, a heavily soaked crust may never become completely flaky.
If the bottom crust is still raw, additional baking may help, but protect the top crust from excessive browning.
Should Apple Pie Filling Be Cooked Before Baking?
It can be.
Precooking the filling allows you to control moisture and soften the apples before they enter the crust.
However, many traditional recipes use raw apples successfully.
Both approaches can produce delicious results when the filling is properly prepared.
How Do You Know When Apple Pie Is Fully Baked?
Look for a golden-brown crust and thick, actively bubbling juices visible through the top vents.
The apples should also be tender when tested carefully through a vent with a thin knife.
Do not rely on the color of the top crust alone.
Why Is My Apple Pie Watery Even After Cooling?
Possible causes include using very juicy apples, adding insufficient thickener, or not baking long enough for the filling to thicken properly.
Allowing the pie to cool helps, but it cannot completely correct an underbaked or improperly thickened filling.
Can You Put Apple Pie Directly on the Oven Rack?
Yes, provided the pie dish is oven-safe.
However, placing a metal pie pan on a preheated metal baking sheet can improve bottom heat and catch any overflowing juices.
How Do You Keep Apple Pie Crust Crispy Overnight?
Allow the pie to cool completely before covering it.
Avoid airtight wrapping while the pie is still warm.
Store it appropriately and gently reheat before serving if you want to restore some crispness.
Final Thoughts: How Do You Make Thanksgiving Apple Pie Without a Soggy Bottom?
A homemade Thanksgiving apple pie should have a tender, flavorful apple filling surrounded by a beautifully golden, flaky crust.
While a soggy bottom can be disappointing, preventing it is easier when you understand how moisture and oven heat affect the baking process.
The most important techniques are choosing firm apples, removing excess juice from the filling, using enough thickener, baking at the correct temperature, and giving the pie enough time to finish baking and cooling.
You do not need complicated equipment or professional baking experience to make a delicious apple pie.
A few thoughtful adjustments to your preparation and baking routine can make all the difference.
Whether you are continuing a treasured family tradition or making Thanksgiving apple pie for the first time, the goal is simple: a dessert that tastes as wonderful as it looks.
And when that first slice comes out with tender cinnamon-spiced apples and a crisp, buttery bottom crust, you will know the extra care was worth it.
The secret to Thanksgiving apple pie without a soggy bottom is simple: control the moisture, bake the crust thoroughly, and let the filling set before serving.




Leave a Reply