Category: Drinks

  • Drink of the Day: Salted Caramel White Russian

    Drink of the Day: Salted Caramel White Russian

    There are cocktails you order because they’re refreshing, cocktails you choose because they’re sophisticated, and then there are cocktails that feel like dessert in a glass. Today’s Drink of the Day: Salted Caramel White Russian definitely belongs in that last category.

    Rich coffee liqueur, smooth vodka, silky cream, and buttery salted caramel come together to transform the classic White Russian into something even more indulgent. It’s creamy without being complicated, sweet without needing a long list of ingredients, and impressive enough to serve when you’re entertaining.

    If you’re a fan of iced coffee, caramel desserts, creamy cocktails, or the classic White Russian, this variation brings all those flavors together beautifully.

    Whether you’re settling in for a quiet evening, planning an after-dinner drink, entertaining friends, or looking for something special to serve during the holidays, the Salted Caramel White Russian is worth trying.

    What Is a Salted Caramel White Russian?

    A classic White Russian is traditionally made with three primary ingredients:

    • Vodka
    • Coffee liqueur
    • Cream

    The Salted Caramel White Russian keeps that familiar foundation while adding caramel and a subtle touch of salt.

    It’s a small change that makes a surprisingly big difference.

    The caramel adds buttery sweetness that pairs naturally with coffee, while the salt keeps the drink from becoming one-dimensional. Cream ties everything together, creating a cocktail that’s smooth, rich, and wonderfully satisfying.

    Every sip can deliver several layers of flavor:

    Coffee. Caramel. Cream. Vanilla. A little salt. And the warmth of vodka underneath it all.

    Why Coffee and Caramel Work So Well Together

    Coffee and caramel are already a familiar combination.

    Walk into almost any coffee shop and you’ll probably find some version of a caramel latte, caramel macchiato, iced caramel coffee, or salted caramel cold brew.

    There’s a reason.

    Coffee naturally has roasted and slightly bitter characteristics. Caramel provides sweetness and buttery richness that softens those stronger coffee notes.

    Add a little salt and the flavors become even more pronounced.

    That’s exactly what happens in this cocktail.

    The coffee liqueur keeps the drink from tasting like nothing more than cream and sugar, while the caramel rounds out its darker roasted flavors.

    Salted Caramel White Russian Recipe

    Servings: 1
    Preparation Time: About 5 minutes
    Difficulty: Easy

    Ingredients

    • 1½ ounces vodka
    • 1 ounce coffee liqueur
    • 1 ounce heavy cream or half-and-half
    • ½ ounce caramel syrup
    • Small pinch of sea salt
    • Ice
    • Caramel sauce for garnish
    • Flaky sea salt for garnish, optional

    Directions

    1. Chill your glass.

    For an especially cold cocktail, place a rocks or old-fashioned glass in the freezer for approximately 10–15 minutes before making your drink.

    This isn’t required, but it’s a nice touch.

    2. Decorate the glass.

    Drizzle caramel sauce along the inside walls of your glass.

    Don’t worry about making the pattern perfect. A few irregular streaks of caramel actually make the finished cocktail look more inviting.

    You can also coat a portion of the rim with caramel and lightly sprinkle it with flaky sea salt.

    3. Fill the glass with ice.

    Add fresh ice until the glass is mostly full.

    Larger ice cubes are especially useful because they melt more slowly and help prevent your creamy cocktail from becoming watery too quickly.

    4. Add the vodka.

    Pour approximately 1½ ounces of vodka over the ice.

    5. Add the coffee liqueur.

    Pour in 1 ounce of your favorite coffee liqueur.

    You should immediately see the cocktail take on its characteristic deep coffee color.

    6. Add the caramel.

    Pour in approximately ½ ounce of caramel syrup.

    If you prefer your drinks less sweet, start with ¼ ounce and add more if needed.

    7. Add a tiny pinch of salt.

    You don’t need much.

    The goal isn’t to create a salty cocktail. The salt should simply enhance the caramel and provide contrast against the sweetness.

    8. Pour in the cream.

    Slowly pour approximately 1 ounce of heavy cream or half-and-half over the cocktail.

    For a layered presentation, pour the cream gently over the back of a spoon.

    You’ll see the pale cream begin swirling through the dark coffee mixture.

    9. Garnish.

    Finish with a drizzle of caramel sauce and, if desired, a few flakes of sea salt.

    Serve immediately.

    Should You Stir a White Russian?

    There’s no wrong answer.

    Leaving the drink unstirred gives you the beautiful layered appearance that makes a White Russian so visually appealing.

    You’ll have dark coffee liqueur and vodka toward the bottom, with cream cascading through the glass.

    For the most balanced flavor, however, give everything a gentle stir before drinking.

    The cream, caramel, coffee liqueur, and vodka blend together into a smooth tan-colored cocktail.

    Another option is to serve it layered and let each person decide whether they want to stir it.

    Regular Vodka or Salted Caramel Vodka?

    Both work.

    Using regular vodka gives you greater control over the sweetness and caramel flavor.

    Salted caramel vodka makes the cocktail even more dessert-like.

    If using flavored vodka, consider reducing the caramel syrup because the vodka itself may already contain considerable sweetness.

    Try:

    • 1½ ounces salted caramel vodka
    • 1 ounce coffee liqueur
    • 1 ounce cream
    • ¼ ounce caramel syrup

    Taste and adjust from there.

    How Sweet Should It Be?

    One of the biggest mistakes you can make with dessert cocktails is assuming that sweeter always means better.

    The Salted Caramel White Russian should certainly taste indulgent, but you still want to recognize the coffee, vodka, cream, and caramel individually.

    Too much caramel syrup can overwhelm everything.

    Start conservatively.

    If you prefer sweeter cocktails, add more.

    If you’re someone who drinks coffee without much sugar, you may discover that only a small amount of caramel is necessary.

    Heavy Cream vs. Half-and-Half

    Your choice of dairy dramatically affects the finished drink.

    Heavy Cream

    Heavy cream creates the richest, thickest, most luxurious version.

    It’s ideal when you’re treating the cocktail almost like an after-dinner dessert.

    Half-and-Half

    Half-and-half is slightly lighter while still producing plenty of creaminess.

    For many people, it’s the perfect middle ground.

    Whole Milk

    Whole milk works if that’s what you have available, although the cocktail will be noticeably thinner.

    Dairy-Free Alternatives

    You can also experiment with:

    • Oat milk
    • Almond milk
    • Coconut milk
    • Coconut cream
    • Cashew milk

    Oat milk is particularly well suited to coffee-flavored cocktails because of its relatively creamy texture and mild flavor.

    Make It Extra Decadent

    Sometimes you don’t want subtle.

    You want dessert.

    In that case, top your Salted Caramel White Russian with a small swirl of whipped cream.

    Then add:

    • Caramel drizzle
    • Chocolate shavings
    • Crushed chocolate-covered espresso beans
    • Toffee pieces
    • Flaky sea salt
    • Cinnamon
    • Cocoa powder

    You could even add a small cookie to the rim.

    At that point, you’re somewhere between cocktail and dessert—and that’s perfectly fine.

    Chocolate Salted Caramel White Russian

    Chocolate lovers can easily modify the recipe.

    Add approximately ¼ to ½ ounce of chocolate syrup along with the caramel.

    The combination of chocolate, coffee, caramel, and cream creates a rich mocha-inspired cocktail.

    Finish with chocolate shavings and caramel drizzle.

    Vanilla Salted Caramel White Russian

    Vanilla adds warmth without overpowering the coffee.

    Try adding a tiny splash of vanilla syrup or using vanilla-flavored vodka.

    Vanilla works particularly well when you’re making the cocktail for the holidays.

    Cinnamon Salted Caramel White Russian

    Add a light sprinkle of cinnamon over the cream.

    The warm spice complements both coffee and caramel and gives the drink a cozy fall-and-winter personality.

    For even more spice, add an extremely small pinch of nutmeg.

    Frozen Salted Caramel White Russian

    When the weather is warm, transform the cocktail into a frozen treat.

    Ingredients

    • 1½ ounces vodka
    • 1 ounce coffee liqueur
    • 1 ounce cream
    • ½ ounce caramel syrup
    • Approximately 1 cup ice

    Blend everything until smooth.

    Pour into a chilled glass and garnish with caramel sauce.

    For an even richer version, add a small scoop of vanilla ice cream before blending.

    Now you’ve basically created an adult caramel-coffee milkshake.

    Salted Caramel White Russian Float

    Want to push the dessert concept even further?

    Place a scoop of vanilla or coffee ice cream in a glass.

    Pour the vodka and coffee liqueur around it.

    Drizzle caramel sauce over the ice cream and finish with a small pinch of flaky sea salt.

    As the ice cream melts, the cocktail becomes increasingly creamy.

    Serve it with both a straw and spoon.

    Try a Cold Brew Variation

    Coffee lovers can add a small splash of cold brew coffee.

    This reduces some of the cocktail’s sweetness while strengthening its coffee character.

    Try:

    • 1½ ounces vodka
    • 1 ounce coffee liqueur
    • ½ ounce cold brew
    • 1 ounce cream
    • ¼ ounce caramel syrup

    It’s especially good for anyone who prefers stronger coffee flavor.

    Make It Into an Espresso Cocktail

    Another possibility is adding freshly brewed espresso.

    Let the espresso cool slightly before adding it so it doesn’t immediately melt all your ice.

    The espresso intensifies the coffee flavor and gives the cocktail a more sophisticated edge.

    It’s almost like combining elements of a White Russian and an espresso martini.

    The Importance of Ice

    Ice might seem like the least important ingredient, but it can significantly affect your cocktail.

    Small cubes melt quickly.

    That means your rich drink can become diluted before you’re finished.

    Larger cubes melt more slowly.

    If you have large cocktail cubes available, use them.

    And always start with fresh ice rather than ice that has been sitting uncovered in your freezer absorbing other flavors.

    Nobody wants a Salted Caramel White Russian with mysterious freezer aromas.

    Make a Caramel Rim

    A caramel rim gives the cocktail an impressive presentation.

    Spread a small amount of caramel sauce on a plate.

    On another plate, add a small amount of flaky sea salt.

    Dip part of the glass rim into the caramel and then lightly into the salt.

    Only coat part of the rim rather than the entire glass.

    That allows you to alternate between sweeter and saltier sips.

    The Perfect Garnish

    You don’t need an elaborate garnish, but a little presentation goes a long way.

    Consider:

    • Caramel drizzle
    • Flaky sea salt
    • Whipped cream
    • Chocolate curls
    • Coffee beans
    • Cinnamon
    • Cocoa powder
    • Toffee pieces

    Keep the garnish proportional to the drink.

    If you’re serving it as a cocktail, a simple caramel drizzle is enough.

    If you’re presenting it as an after-dinner dessert cocktail, go ahead and make it extravagant.

    Food Pairings

    Because the Salted Caramel White Russian is rich and sweet, it’s particularly well suited to dessert.

    Try serving it with:

    Chocolate Brownies

    Dark chocolate balances the cocktail’s sweetness beautifully.

    Cheesecake

    The creamy textures complement each other while coffee and caramel provide contrasting flavors.

    Chocolate Chip Cookies

    Few things pair better with creamy coffee flavors than a warm chocolate chip cookie.

    Tiramisu

    Coffee on coffee might sound excessive, but it works surprisingly well.

    Vanilla Ice Cream

    The simplicity of vanilla allows the cocktail’s caramel and coffee flavors to shine.

    Salted Caramel Cheesecake

    If you really love caramel, don’t hold back.

    Chocolate Cake

    Rich chocolate and coffee are natural partners.

    Bread Pudding

    Warm bread pudding paired with a cold Salted Caramel White Russian makes an especially comforting dessert combination.

    A Cocktail Made for Fall

    Salted caramel feels almost made for autumn.

    As temperatures cool and people start craving richer flavors, caramel, coffee, cinnamon, and cream become increasingly appealing.

    Serve this cocktail around:

    • Halloween
    • Thanksgiving
    • Fall dinner parties
    • Football gatherings
    • Bonfires
    • Movie nights
    • Weekend get-togethers

    Add a tiny sprinkle of cinnamon to give it an extra seasonal touch.

    A Holiday Cocktail Worth Serving

    The Salted Caramel White Russian transitions easily from fall into the Christmas season.

    Imagine serving one beside a plate of Christmas cookies.

    You could create a holiday version using caramel, cinnamon, chocolate, or peppermint garnishes.

    For a festive dessert cocktail station, allow guests to customize their drinks with several toppings.

    Build a White Russian Cocktail Bar

    If you’re hosting a party, a White Russian bar can be an entertaining alternative to making every cocktail yourself.

    Provide the basic ingredients:

    • Vodka
    • Coffee liqueur
    • Heavy cream
    • Half-and-half
    • Caramel syrup
    • Chocolate syrup
    • Ice

    Then provide toppings such as:

    • Whipped cream
    • Caramel sauce
    • Chocolate shavings
    • Cinnamon
    • Flaky sea salt
    • Toffee pieces

    Guests can make their cocktails as simple or extravagant as they like.

    Make a Pitcher for a Party

    White Russians are traditionally made individually, but you can prepare part of the drink ahead of time.

    Combine vodka, coffee liqueur, and caramel syrup in a pitcher and refrigerate.

    When guests are ready for a drink, pour the mixture over ice and add cream individually.

    Keeping the cream separate until serving helps preserve the cocktail’s layered appearance.

    A Brief History of the White Russian

    Despite the name, the White Russian isn’t necessarily a traditional Russian creation.

    Its name primarily comes from vodka’s historical association with Russia.

    The cocktail developed from the Black Russian, which traditionally combines vodka and coffee liqueur.

    Adding cream creates the White Russian.

    The drink became especially recognizable in popular culture during the late 20th century, and its simple three-ingredient formula has made it an enduring home-bar favorite.

    It’s also incredibly easy to customize.

    Once you have vodka, coffee liqueur, and cream, you can introduce countless flavors.

    Caramel happens to be one of the most natural additions.

    Why the White Russian Is So Easy to Customize

    Some cocktails rely on precise balances of citrus, bitters, syrups, and spirits.

    The White Russian is much more forgiving.

    Its basic flavor profile works beautifully with:

    • Caramel
    • Chocolate
    • Vanilla
    • Cinnamon
    • Hazelnut
    • Peppermint
    • Pumpkin spice
    • Coconut
    • Espresso
    • Toffee

    That makes it a great cocktail for experimenting at home.

    Make It Your Own

    The best cocktail recipe isn’t necessarily the one followed perfectly.

    It’s the one you enjoy drinking.

    Prefer more coffee flavor?

    Add a little cold brew.

    Prefer less sweetness?

    Reduce the caramel.

    Want it richer?

    Use heavy cream.

    Want something lighter?

    Use half-and-half.

    Love caramel?

    Drizzle a little extra around the glass.

    Want more contrast?

    Add another tiny pinch of sea salt.

    Start with the basic recipe and adjust until you discover your ideal combination.

    Presentation Matters

    Part of the appeal of this cocktail is visual.

    Use a clear rocks glass so you can see the different layers.

    Start with dark coffee liqueur and vodka.

    Add caramel.

    Then slowly introduce the cream.

    You’ll see pale ribbons moving through the darker liquid.

    Add caramel drizzle to the inside of the glass and suddenly a cocktail requiring only a few minutes of preparation looks like something you’d order at a dessert bar.

    The First Sip

    A properly made Salted Caramel White Russian should reveal its flavors gradually.

    First comes cool, silky cream.

    Then sweet caramel.

    Next comes roasted coffee.

    Finally, the warmth of vodka appears underneath everything else.

    A tiny bit of salt helps bring the entire experience together.

    It’s rich enough that you don’t need to drink it quickly.

    In fact, this is a cocktail best enjoyed slowly.

    Perfect for a Quiet Evening

    Not every cocktail needs a celebration.

    Sometimes you just want something special while relaxing at home.

    Put on a movie.

    Turn on some music.

    Sit outside in the evening.

    Enjoy it alongside dessert.

    The Salted Caramel White Russian fits those quieter moments especially well because it’s designed for slow sipping.

    Salted Caramel White Russian vs. Classic White Russian

    If you’ve never tried either, start with the classic.

    You’ll immediately recognize the combination of coffee, vodka, and cream.

    Then try the salted caramel variation.

    The classic White Russian is simpler and more coffee-forward.

    The Salted Caramel White Russian is sweeter, richer, and more dessert-like.

    Neither is necessarily better.

    They’re simply different versions of the same wonderfully adaptable cocktail.

    Tips for Making the Best Salted Caramel White Russian

    A few simple choices can take your drink from good to excellent.

    Use plenty of fresh ice. The cocktail should be served cold.

    Don’t overdo the caramel. You can always add more.

    Use good-quality cream. Cream is a major part of the drink, so its texture matters.

    Add salt carefully. You only need enough to enhance the caramel.

    Pour the cream slowly. This gives you the beautiful swirling appearance associated with White Russians.

    Serve immediately. The drink is best while everything is cold and the ice hasn’t diluted it.

    Why This Cocktail Deserves a Try

    There are plenty of elaborate cocktail recipes requiring unusual ingredients, special equipment, and considerable preparation.

    This isn’t one of them.

    The Salted Caramel White Russian proves that a memorable cocktail can still be incredibly simple.

    Vodka provides the foundation.

    Coffee liqueur brings depth.

    Cream creates luxurious texture.

    Caramel contributes buttery sweetness.

    Salt keeps everything balanced.

    Put them together and you have a cocktail that feels considerably more elaborate than the effort required to make it.

    Final Sip

    Today’s Drink of the Day: Salted Caramel White Russian is what happens when a classic cocktail meets one of the most irresistible dessert flavors.

    It’s creamy.

    It’s rich.

    It’s coffee-forward.

    It’s buttery and sweet.

    And that subtle hint of salt keeps you coming back for another sip.

    Make the classic version with vodka, coffee liqueur, cream, and salted caramel, or experiment with chocolate, vanilla, espresso, cinnamon, cold brew, or even ice cream.

    Serve it after dinner, make it for a holiday gathering, enjoy it during a cozy fall evening, or save it for the next time you’re craving something that falls somewhere between cocktail and dessert.

    However you decide to enjoy it, one thing is certain:

    The Salted Caramel White Russian turns an already creamy classic into an indulgent treat that’s difficult to resist.

    Drink of the Day Question

    Are you trying the Salted Caramel White Russian as-is, or would you add chocolate, espresso, or extra caramel to yours?

    Please enjoy responsibly. This recipe is intended for adults of legal drinking age.

  • Mocktail of the Day: Mint Lemon Splash

    Mocktail of the Day: Mint Lemon Splash

    There is something especially refreshing about the combination of fresh lemon, cooling mint, and sparkling bubbles. It is bright without being overwhelming, sweet without being heavy, and simple enough to enjoy whenever you want something more exciting than a glass of water or soda.

    Today’s Mocktail of the Day: Mint Lemon Splash brings those flavors together in one crisp, refreshing alcohol-free drink.

    Freshly squeezed lemon juice provides the tart citrus foundation. Mint adds a clean, cooling aroma, while simple syrup softens the lemon’s acidity. Sparkling water finishes everything with plenty of bubbles.

    The result is a mocktail that feels light, fresh, and perfect for sipping on a sunny afternoon, serving alongside dinner, or making for friends and family at your next gathering.

    Best of all, you don’t need complicated ingredients or specialized bartending equipment. With lemons, mint, something sweet, sparkling water, and ice, you can have this beautiful mocktail ready in minutes.

    Why Lemon and Mint Work So Well Together

    Some flavor combinations naturally complement each other, and lemon and mint are a perfect example.

    Lemon is bright, acidic, and intensely refreshing. Its tartness wakes up your taste buds immediately, but too much lemon on its own can become sharp.

    That’s where mint comes in.

    Fresh mint contributes a cooling herbal quality that softens the experience of the citrus without covering it up. Instead of competing with the lemon, mint makes the drink feel even fresher.

    Add a little sweetness, and the flavors begin to balance each other beautifully.

    Finally, sparkling water provides carbonation. Those bubbles lift the citrus and mint aromas while keeping the drink light.

    Every ingredient has a purpose.

    Mint Lemon Splash Recipe

    Ingredients

    For one serving:

    • 1 1/2 ounces freshly squeezed lemon juice
    • 3/4 ounce simple syrup
    • 6–8 fresh mint leaves
    • 4–5 ounces chilled sparkling water or club soda
    • Plenty of ice
    • Fresh lemon wheel or wedge for garnish
    • Fresh mint sprig for garnish

    Optional Additions

    You can also experiment with:

    • Fresh cucumber slices
    • Fresh strawberries
    • Raspberries
    • Blackberries
    • Blueberries
    • Fresh ginger
    • Honey syrup
    • Agave nectar
    • Lemon sparkling water
    • Lime sparkling water

    How to Make a Mint Lemon Splash

    Step 1: Prepare the Mint

    Place six to eight fresh mint leaves into the bottom of a tall glass.

    Look for mint leaves that are bright green and fragrant. Avoid leaves that are wilted, brown, or bruised.

    Step 2: Add the Simple Syrup

    Pour approximately 3/4 ounce of simple syrup over the mint.

    The syrup helps draw some of the mint’s aromatic qualities into the drink while balancing the acidity of the lemon.

    Step 3: Gently Muddle

    Using a muddler or the back of a wooden spoon, gently press the mint leaves several times.

    You aren’t trying to completely crush or shred them.

    Mint contains aromatic oils that are released with very little pressure. Over-muddling can break down the leaves too much and introduce bitter or grassy flavors.

    A few gentle presses are enough.

    Step 4: Add Fresh Lemon Juice

    Pour in 1 1/2 ounces of freshly squeezed lemon juice.

    Give the mixture a gentle stir so the lemon, mint, and syrup begin combining.

    Step 5: Add Plenty of Ice

    Fill the glass with ice.

    A generous amount of ice keeps the mocktail cold longer and can actually help prevent excessive dilution because the entire drink chills quickly.

    Step 6: Add the Bubbles

    Top the glass with approximately four to five ounces of chilled sparkling water or club soda.

    Pour slowly so you don’t lose too much carbonation.

    Step 7: Stir Gently

    Give everything a gentle stir from the bottom of the glass.

    You want to combine the ingredients without stirring so aggressively that you flatten the sparkling water.

    Step 8: Garnish and Serve

    Finish with a fresh lemon wheel and a beautiful sprig of mint.

    Serve immediately and enjoy while it’s cold and bubbly.

    What Does the Mint Lemon Splash Taste Like?

    The first thing you’ll notice is the lemon.

    It’s bright, tart, and refreshing.

    Almost immediately afterward, the cooling aroma and flavor of fresh mint appear. The simple syrup rounds everything out by reducing some of the lemon’s sharp acidity.

    Then come the bubbles.

    Sparkling water keeps the drink from feeling like traditional lemonade. Instead, it becomes lighter, crisper, and more refreshing.

    The overall flavor is:

    Tart + Sweet + Minty + Bubbly + Refreshing

    It’s simple, but that’s part of what makes it so enjoyable.

    Fresh Lemon Juice Is Worth It

    Because lemon is one of the main ingredients, its quality matters.

    Freshly squeezed lemon juice generally provides a brighter aroma and fresher citrus character than bottled alternatives.

    Fortunately, you don’t need much.

    One average lemon can often provide enough juice for approximately one Mint Lemon Splash, depending on its size and juiciness.

    Before cutting your lemon, gently roll it across the counter using the palm of your hand. This can help release some of the juice inside.

    Cut it in half, squeeze it, and strain out the seeds.

    If you don’t mind a little pulp, leave some in. It can make the drink feel even more homemade and fresh.

    The Secret Is Fresh Mint

    Mint might seem like a garnish, but in this drink it’s one of the stars.

    Fresh mint provides aroma before you even take your first sip.

    When you bring the glass toward your mouth, the mint garnish sits near your nose. Its aroma combines with the lemon fragrance, making the drink seem even fresher.

    That’s why you shouldn’t skip the mint garnish.

    For maximum aroma, gently clap the mint sprig between your palms before placing it in the glass.

    It may sound unusual, but the gentle impact helps release some of the aromatic oils.

    How Sweet Should It Be?

    That’s entirely up to you.

    The recommended 3/4 ounce of simple syrup creates a balanced drink, but everyone has a different preference.

    For a More Tart Mocktail

    Use approximately:

    • 1/2 ounce simple syrup

    This allows the lemon flavor to become more prominent.

    For a Sweeter Mocktail

    Increase the syrup to:

    • 1 ounce simple syrup

    This creates something closer to sparkling mint lemonade.

    For Extra Tartness

    Add an additional squeeze of lemon immediately before serving.

    The beauty of homemade mocktails is that there isn’t one perfect sweetness level. The best recipe is the one that tastes best to you.

    How to Make Simple Syrup

    If you don’t already have simple syrup, it’s incredibly easy to prepare.

    You’ll need:

    • 1 cup sugar
    • 1 cup water

    Combine equal parts sugar and water in a saucepan.

    Heat gently while stirring until the sugar completely dissolves.

    You don’t need to aggressively boil the mixture.

    Once the sugar has dissolved, remove it from the heat and allow it to cool.

    Transfer the syrup to a clean covered container and refrigerate.

    You can also make a smaller batch if you’re only preparing a few drinks.

    Try Honey Syrup Instead

    Want something a little different?

    Replace the traditional simple syrup with honey syrup.

    Combine:

    • 2 parts honey
    • 1 part warm water

    Stir until smooth.

    Honey brings a richer sweetness that pairs wonderfully with lemon.

    The resulting mocktail will taste slightly warmer and more complex while still maintaining the refreshing mint character.

    Make a Cucumber Mint Lemon Splash

    Cucumber and mint are another refreshing combination.

    Before adding the lemon juice, place three or four thin cucumber slices into the glass with the mint.

    Gently muddle them together.

    Then continue preparing the drink normally.

    Cucumber adds a subtle fresh flavor that makes the mocktail especially enjoyable during hot weather.

    Garnish with a cucumber ribbon, lemon wheel, and mint sprig for an impressive presentation.

    Make a Strawberry Mint Lemon Splash

    Want something fruity?

    Add two or three fresh strawberries.

    Slice the strawberries and gently muddle them with the mint and simple syrup.

    Add lemon juice, ice, and sparkling water.

    The strawberries provide natural sweetness while transforming the drink into a beautiful pink or reddish color.

    Garnish with a strawberry, lemon wheel, and mint.

    Make a Raspberry Mint Lemon Splash

    Fresh raspberries work beautifully with lemon.

    Add four or five raspberries to the glass and gently muddle them with the mint.

    The berries add a slightly tart fruitiness that complements the lemon instead of overwhelming it.

    You can strain the mixture before adding sparkling water if you prefer a smoother drink.

    Make a Blackberry Mint Lemon Splash

    For a darker, more dramatic variation, use blackberries.

    Muddle three or four ripe blackberries with the mint and simple syrup.

    Blackberries add sweetness, tartness, and a beautiful deep purple color.

    Serve it in a clear glass so the color can become part of the presentation.

    Make a Ginger Mint Lemon Splash

    Fresh ginger can completely change the personality of this drink.

    Add a small slice of peeled ginger while muddling the mint, or use a small amount of ginger syrup.

    The ginger adds warmth and a slight spicy kick while the mint and lemon keep everything refreshing.

    It’s an excellent variation when you want a mocktail with a little more complexity.

    Lemon-Lime Mint Splash

    Can’t decide between lemon and lime?

    Use both.

    Try:

    • 1 ounce fresh lemon juice
    • 1/2 ounce fresh lime juice

    Continue with the original recipe.

    The lime adds another layer of citrus and gives the drink a flavor somewhat reminiscent of a refreshing alcohol-free mojito-style beverage.

    Garnish with both lemon and lime wheels.

    Add Fresh Fruit

    One of the easiest ways to customize this mocktail is with seasonal fruit.

    Try adding:

    • Strawberries
    • Raspberries
    • Blackberries
    • Blueberries
    • Peaches
    • Watermelon
    • Pineapple
    • Mango
    • Cucumber

    Different fruits can completely transform the flavor while maintaining the lemon-and-mint foundation.

    This also makes the recipe useful throughout the year because you can change the fruit depending on what’s available.

    Choosing the Sparkling Water

    Your choice of sparkling water can subtly change the final drink.

    Club Soda

    Club soda provides plenty of bubbles without contributing much additional flavor.

    It’s an excellent choice when you want the lemon and mint to remain dominant.

    Sparkling Mineral Water

    Sparkling mineral water can contribute subtle mineral characteristics that give the mocktail a slightly different finish.

    Lemon Sparkling Water

    Want even more lemon?

    Use an unsweetened lemon-flavored sparkling water.

    Lime Sparkling Water

    Lime sparkling water adds another citrus dimension.

    Whatever you choose, make sure it’s cold.

    Warm sparkling water poured over ice will melt the ice faster and dilute the drink.

    The Importance of Ice

    Ice isn’t just there to make your Mint Lemon Splash look good.

    Temperature dramatically affects how refreshing a beverage tastes.

    Fill your glass generously rather than adding only a couple of cubes.

    Larger ice cubes can be especially useful because they generally melt more slowly.

    For parties, you can make decorative ice cubes by freezing small mint leaves, berries, or thin lemon pieces inside them.

    As the ice slowly melts, the garnish becomes visible and adds an attractive touch.

    Turn the Garnish Into Part of the Experience

    A great mocktail should appeal to more than your taste buds.

    Presentation matters.

    Try garnishing your Mint Lemon Splash with:

    • A lemon wheel
    • Lemon wedge
    • Lemon peel
    • Mint sprig
    • Cucumber ribbon
    • Strawberry
    • Fresh berries
    • Edible flowers

    You don’t need all of them.

    A lemon wheel and mint sprig are usually enough to make the drink look polished and inviting.

    Choose the Right Glass

    A tall highball or Collins glass works particularly well because it showcases the bubbles, mint, lemon, and ice.

    A stemless wine glass can create a more casual appearance.

    For outdoor gatherings, colorful reusable glasses can also make the presentation fun.

    Whatever glass you choose, consider chilling it before preparing the drink.

    A cold glass helps the mocktail stay refreshing longer.

    Make Mint Lemon Splash for a Crowd

    This recipe can easily become a party pitcher.

    Mint Lemon Splash Pitcher

    Makes approximately 6–8 servings.

    Ingredients

    • 1 cup freshly squeezed lemon juice
    • 1/2 cup simple syrup, adjusted to taste
    • 30–40 fresh mint leaves
    • 3–4 cups chilled sparkling water
    • 1 lemon, thinly sliced
    • Plenty of ice
    • Extra mint for garnish

    Instructions

    Add the mint and simple syrup to the pitcher and gently muddle.

    Pour in the lemon juice and stir.

    Refrigerate the mixture until you’re almost ready to serve.

    Just before serving, add ice and chilled sparkling water.

    Stir gently.

    Add fresh lemon slices and several mint sprigs.

    Serve immediately.

    Don’t Add the Sparkling Water Too Early

    When making a pitcher, this is one of the most important tips.

    Carbonation disappears over time.

    If you add sparkling water an hour before guests arrive, your Mint Lemon Splash may become flat before anyone gets to enjoy it.

    Instead, prepare the lemon, mint, and sweetener mixture ahead of time.

    Keep it chilled.

    Then add the sparkling water immediately before serving.

    You’ll get significantly better bubbles.

    Create a Mint Lemon Splash Mocktail Bar

    If you’re hosting a party, turn the recipe into an interactive drink station.

    Prepare the lemon-and-mint base and allow guests to customize their glasses.

    Set out bowls containing:

    • Fresh strawberries
    • Raspberries
    • Blackberries
    • Blueberries
    • Cucumber slices
    • Lemon wedges
    • Lime wedges
    • Fresh mint
    • Simple syrup
    • Honey syrup

    Provide chilled sparkling water nearby.

    Guests can create their own versions.

    It’s an easy way to make alcohol-free beverages feel like part of the entertainment rather than an afterthought.

    Perfect for Summer Gatherings

    Few drinks say warm weather quite like fresh lemon and mint.

    Serve the Mint Lemon Splash at:

    • Backyard barbecues
    • Pool parties
    • Picnics
    • Family reunions
    • Birthday parties
    • Graduation celebrations
    • Brunches
    • Baby showers
    • Wedding showers
    • Summer dinners
    • Holiday gatherings

    It’s particularly useful when you’re entertaining a mixed group because guests who aren’t drinking alcohol still have something festive and thoughtfully prepared to enjoy.

    A Great Everyday Mocktail

    You don’t need a party to make one.

    The Mint Lemon Splash can turn an ordinary afternoon into a small treat.

    Make one while relaxing outside, preparing dinner, reading, watching a movie, or simply winding down after a long day.

    That’s one of the things I enjoy most about simple mocktails: they make it easy to turn everyday ingredients into something that feels a little special.

    Pairing the Mint Lemon Splash With Food

    Because this drink is light and citrus-forward, it works with many different foods.

    Try serving it alongside:

    Grilled Chicken

    Lemon and grilled chicken naturally complement each other, while the mint provides a refreshing contrast.

    Seafood

    The citrus flavors work particularly well with grilled shrimp, salmon, fish tacos, or other seafood dishes.

    Mediterranean Food

    Mint and lemon are common flavors throughout Mediterranean cuisine, making this mocktail a natural companion for hummus, grilled vegetables, chicken skewers, salads, and pita dishes.

    Spicy Foods

    The cooling mint and refreshing bubbles can provide a pleasant contrast to spicy foods.

    Try it with tacos, spicy chicken, or dishes featuring jalapeños.

    Fresh Salads

    A Mint Lemon Splash is light enough that it won’t overpower a crisp salad.

    Fruit Desserts

    Lemon bars, berry desserts, fruit tarts, and fresh fruit pair beautifully with this drink.

    Make It Look Restaurant-Worthy

    You don’t need professional bartending skills to make a beautiful mocktail.

    Start with a clean, clear glass.

    Fill it completely with ice.

    Place a thin lemon wheel against the inside wall of the glass before adding the remaining ice.

    Pour in the mocktail.

    Finish with a large mint sprig.

    For an extra touch, add a colorful reusable straw.

    The combination of green mint, yellow lemon, clear bubbles, and sparkling ice creates a naturally attractive drink.

    Why Mocktails Have Become So Popular

    Mocktails offer something beyond simply removing alcohol from a cocktail.

    A thoughtfully prepared mocktail is its own beverage.

    It can include fresh fruit, herbs, spices, syrups, juices, teas, and sparkling ingredients to create layers of flavor.

    They also allow everyone at the table to enjoy something visually appealing and celebratory.

    The Mint Lemon Splash demonstrates exactly what a good mocktail can be.

    It’s not trying to imitate a complicated cocktail.

    It’s simply a delicious drink built around ingredients that work well together.

    Tips for the Best Mint Lemon Splash

    A few small details can make a big difference.

    Use fresh lemon juice. Because lemon is the primary flavor, freshness matters.

    Use healthy mint. Bright green leaves provide the best aroma and presentation.

    Don’t destroy the mint. Gentle muddling is enough.

    Chill your sparkling water. The colder your ingredients are, the longer your ice lasts.

    Add carbonation last. This preserves the bubbles.

    Taste before serving. Lemons vary in acidity, so adjust the sweetness when necessary.

    Garnish generously. A fresh mint sprig adds both aroma and visual appeal.

    Serve immediately. This mocktail is best when the ice is fresh and the sparkling water is still lively.

    Make the Recipe Your Own

    Think of the original Mint Lemon Splash as a starting point rather than a strict formula.

    Want it sweeter?

    Add more simple syrup.

    Want more citrus?

    Add extra lemon.

    Love mint?

    Use a larger handful.

    Want something fruity?

    Muddle in berries.

    Want something spicy?

    Add ginger.

    Want something extra refreshing?

    Add cucumber.

    Experiment until you discover your favorite combination.

    You may eventually create a signature version that becomes your go-to drink whenever friends and family visit.

    A Simple Drink That Feels Special

    Some of the best recipes aren’t complicated.

    They succeed because a few good ingredients complement each other perfectly.

    The Mint Lemon Splash is exactly that kind of drink.

    Fresh lemon brings brightness.

    Mint provides cooling freshness.

    Simple syrup creates balance.

    Sparkling water adds excitement.

    Ice keeps everything wonderfully cold.

    Put them together and you have a beautiful alcohol-free beverage that can be prepared in just a few minutes.

    Mocktail of the Day: Mint Lemon Splash

    Today’s Mint Lemon Splash is proof that you don’t need alcohol or a dozen ingredients to create a memorable drink.

    It’s tart, slightly sweet, wonderfully minty, and filled with refreshing bubbles.

    Make a single glass when you want something cool and refreshing, prepare a pitcher for your next family gathering, or create a full mocktail bar and let everyone build their own variation.

    However you serve it, don’t forget the finishing touches: plenty of ice, a fresh lemon wheel, and a fragrant sprig of mint.

    Raise your glass and enjoy a refreshing combination of citrus, herbs, sweetness, and sparkle.

    Cheers to the Mocktail of the Day: Mint Lemon Splash — simple, fresh, bubbly, and made for refreshing moments!

    Question of the Day

    If you were creating your own Mint Lemon Splash, what would you add—strawberry, cucumber, blackberry, watermelon, ginger, or would you keep it classic with lemon and mint?

  • Shot of the Day: Spider-Man

    Shot of the Day: Spider-Man

    If you’re looking for a shot that brings superhero energy to the bar, the Spider-Man Shot is ready to swing into action. Bright, colorful, fruity, and surprisingly simple to prepare, this red-and-blue creation takes its inspiration from one of the most recognizable superhero color combinations ever created.

    The combination of blue curaçao, vodka, cranberry juice, and grenadine creates a drink filled with contrasting colors and sweet citrus-and-berry flavors. Served in a clear shot glass, the vibrant blue and deep red immediately bring Spider-Man’s legendary suit to mind.

    This isn’t meant to be an overly complicated craft cocktail. It’s a fun party shot designed to make people look twice when you put it on the table.

    Whether you’re planning a superhero-themed party, settling in for a Spider-Man movie marathon, celebrating Halloween, or simply looking for something colorful to serve friends, today’s Shot of the Day: Spider-Man brings a little comic-book excitement to the occasion.

    Meet the Spider-Man Shot

    A great themed drink should capture the personality of its inspiration before anyone even tastes it.

    That’s exactly what we’re going for here.

    Spider-Man is associated with action, energy, humor, adventure, and—most importantly for our drink—those unmistakable red and blue colors.

    The Spider-Man Shot takes that visual inspiration and puts it into a glass.

    Blue curaçao creates the brilliant blue portion of the drink. Cranberry juice and grenadine provide the red. Vodka adds strength without competing too much with the fruity flavors.

    Put everything together and you’ve got a shot that’s:

    • Colorful
    • Fruity
    • Sweet
    • Citrusy
    • Slightly tart
    • Easy to prepare
    • Perfect for parties
    • Fun to photograph

    And unlike some novelty shots that require an entire shelf of unusual ingredients, this one uses bottles and mixers that are relatively common in home bars.

    Spider-Man Shot Recipe

    Serving Size: 1 shot
    Preparation Time: About 3 minutes
    Difficulty: Easy
    Flavor Profile: Sweet, fruity, citrusy, and slightly tart

    Ingredients

    • ½ oz blue curaçao
    • ½ oz vodka
    • ½ oz cranberry juice
    • Splash of grenadine
    • Ice for shaking

    Optional Garnishes

    • Red sanding sugar
    • Blue sanding sugar
    • Maraschino cherry
    • Small orange or lemon peel
    • Superhero-themed cocktail pick

    Equipment

    You don’t need much equipment to make this drink.

    Have ready:

    • Cocktail shaker
    • Ice
    • Shot glass
    • Bar spoon
    • Measuring jigger

    A bar spoon is particularly helpful if you want to experiment with creating more visible separation between the colors.

    How to Make the Spider-Man Shot

    Step 1: Chill the Glass

    Place your shot glass in the refrigerator or freezer for several minutes before preparing the drink.

    This isn’t absolutely necessary, but a chilled glass makes the shot more refreshing and helps give it a polished presentation.

    Step 2: Prepare the Blue Base

    Fill a cocktail shaker with ice.

    Add:

    ½ ounce blue curaçao
    ½ ounce vodka

    Shake briefly until thoroughly chilled.

    You don’t need to shake aggressively for a long time. Around 10 seconds should be enough.

    Step 3: Pour

    Strain the blue mixture into your chilled shot glass.

    You’ll immediately have a bright electric-blue foundation.

    Step 4: Add the Cranberry

    Slowly add approximately ½ ounce cranberry juice.

    If you’re trying to maintain some color distinction, pour the cranberry juice gently over the back of a bar spoon.

    Don’t worry if the colors blend slightly.

    In fact, some mixing can create interesting shades of purple between the red and blue portions.

    Step 5: Add the Grenadine

    Finish with a small splash of grenadine.

    Grenadine is relatively dense, so it naturally moves downward through the drink.

    This creates a deeper red color near the bottom and can produce an attractive gradient throughout the shot.

    Serve immediately.

    What Does the Spider-Man Shot Taste Like?

    The appearance may get everyone’s attention first, but a novelty drink still needs to taste good.

    Fortunately, these ingredients work naturally together.

    Blue Curaçao

    Blue curaçao brings the brilliant color while contributing a sweet orange-citrus flavor.

    Despite its dramatic blue appearance, the flavor is typically much more familiar than people expect.

    Vodka

    Vodka provides the alcoholic backbone.

    Using vodka allows the citrus, cranberry, and grenadine flavors to remain prominent rather than introducing another strong flavor.

    Cranberry Juice

    Cranberry adds tartness.

    That’s important because both blue curaçao and grenadine contribute sweetness. Cranberry helps balance everything.

    Grenadine

    Grenadine adds sweetness, color, and a fruity finish.

    Only a splash is necessary.

    Too much grenadine can overwhelm the other ingredients and make the shot excessively sweet.

    The Overall Flavor

    When everything comes together, expect a combination of:

    Sweet orange + tart cranberry + fruity grenadine + smooth vodka

    It’s much closer to a tiny fruity cocktail than a traditional straight-liquor shot.

    Why Red and Blue?

    Spider-Man’s red-and-blue costume is one of the most recognizable designs in superhero history.

    That makes the character perfect inspiration for a colorful drink.

    The goal isn’t to reproduce every tiny detail of the costume. Instead, the shot takes the two colors most strongly associated with the character and turns them into the centerpiece.

    The blue curaçao represents the blue, while the cranberry and grenadine create the red.

    When served in a transparent glass, those contrasting colors immediately establish the superhero theme.

    How to Create Better Layers

    Layering drinks can take a little practice.

    Liquids naturally arrange themselves according to density. Ingredients containing more sugar are generally heavier than ingredients containing less sugar.

    That’s why grenadine commonly sinks toward the bottom of cocktails.

    For better separation, try these tips.

    Keep Everything Cold

    Chill the ingredients beforehand.

    Cold ingredients can be easier to work with when you’re attempting a carefully layered presentation.

    Pour Slowly

    Speed is the enemy of layering.

    Dumping everything into the glass will immediately mix the colors.

    Instead, pour gently.

    Use the Back of a Spoon

    Hold a bar spoon just above the liquid already inside the glass.

    Slowly pour the next ingredient over the back of the spoon.

    This reduces the force of the liquid entering the glass.

    Don’t Expect Perfect Separation Every Time

    The Spider-Man Shot doesn’t need perfectly defined horizontal layers.

    A little blending between the blue and red can actually look fantastic.

    You’ll often get streaks of blue, purple, crimson, and red throughout the glass.

    That swirling appearance can make the drink feel even more like something pulled from a comic-book universe.

    Create a Red-and-Blue Sugar Rim

    Want to make the Spider-Man Shot even more dramatic?

    Decorate the rim.

    You’ll need:

    • Red sanding sugar
    • Blue sanding sugar
    • Simple syrup or lemon juice

    Place the red sugar on one small plate and blue sugar on another.

    Lightly coat the rim of the shot glass with simple syrup or lemon juice.

    Dip one portion into the red sugar and another portion into the blue.

    Now you’ve got a sparkling red-and-blue rim surrounding the drink.

    This is especially effective when you’re preparing the shots for photographs or parties.

    Turn It Into a Spiderweb Shot

    Here’s another presentation idea.

    Prepare the Spider-Man Shot normally.

    Then use a tiny amount of white cream liqueur to create thin lines across the surface.

    Carefully drag a cocktail pick through the lines to create something resembling a spiderweb.

    This technique takes patience, and your results may vary depending on the ingredients and temperatures involved, but it can create an impressive party presentation.

    Spider-Man Cherry Shot Variation

    Want even more red?

    Try a cherry-forward variation.

    Ingredients

    • ½ oz blue curaçao
    • ½ oz vodka
    • ½ oz cherry juice
    • Splash of grenadine

    Prepare it using the same basic method.

    Cherry gives the shot a sweeter, deeper fruit flavor while maintaining the red-and-blue theme.

    Spider-Man Berry Shot Variation

    For something sweeter and fruitier, swap regular vodka for berry-flavored vodka.

    Try:

    • Raspberry vodka
    • Blueberry vodka
    • Mixed berry vodka
    • Cherry vodka

    Raspberry works particularly well with cranberry juice and grenadine.

    Spider-Man Citrus Shot Variation

    If you prefer citrus flavors, make the drink brighter.

    Combine:

    • ½ oz blue curaçao
    • ½ oz citrus vodka
    • ½ oz cranberry juice
    • Small splash of grenadine

    You can also squeeze in a few drops of fresh lemon or lime juice.

    The extra acidity helps balance the sweeter ingredients.

    Spider-Man Black Suit Shot

    Spider-Man fans know that red and blue aren’t the only colors associated with the character.

    The famous black suit provides inspiration for an entirely different version.

    For a darker presentation, use a dark-colored liqueur or other cocktail ingredient as the visual foundation and add a small amount of grenadine for a red accent.

    Serve it in a clear glass against a red background for maximum contrast.

    You could even serve the classic red-and-blue Spider-Man Shot beside the darker version as a themed pair.

    Spider-Man vs. Venom Party Shots

    Want to take the superhero theme further?

    Create two contrasting shots.

    Make the bright Spider-Man Shot using red and blue ingredients.

    Then create a darker Venom-inspired shot featuring black, deep purple, or dark chocolate colors.

    Place them side by side.

    The contrast creates an easy centerpiece for a superhero-themed drink station.

    Make a Batch for a Party

    If you’re hosting several people, making every shot completely from scratch can become tedious.

    Instead, prepare part of the mixture ahead of time.

    For approximately eight shots, combine:

    • 4 oz blue curaçao
    • 4 oz vodka

    Keep the mixture chilled.

    When you’re ready to serve, portion the mixture among the shot glasses and add cranberry juice and grenadine individually.

    Preparing the final ingredients separately gives you more control over the red-and-blue appearance.

    For the best presentation, don’t completely assemble layered shots hours ahead of time. The colors may gradually mix.

    Prepare them shortly before serving instead.

    Build a Superhero Shot Bar

    The Spider-Man Shot can become the centerpiece of an entire superhero drink station.

    Set out several brightly colored ingredients and create drinks inspired by different comic-book characters.

    You could build the display around colors such as:

    Red and blue for Spider-Man
    Black and white for Venom
    Green and purple for a villain-inspired drink
    Red and gold for an armored superhero theme
    Blue and silver for an icy superhero creation

    Label each drink with a fun themed name and let guests choose their favorite.

    Just avoid serving so many varieties that guests lose track of how much alcohol they’re consuming.

    Best Occasions for the Spider-Man Shot

    You don’t necessarily need a superhero party to serve this drink.

    Its dramatic colors make it appropriate for plenty of celebrations.

    Try it for:

    Superhero Parties

    This is the obvious choice.

    Serve it alongside comic-themed food, decorations, and music.

    Movie Nights

    Planning a Spider-Man movie marathon?

    Make a round before the movie begins.

    Halloween

    The bright colors and superhero theme fit naturally into costume parties.

    Birthday Parties

    For adults of legal drinking age who love superheroes, this can make a memorable birthday shot.

    Comic-Con Watch Parties

    If you’re following comic, movie, or superhero announcements from home, themed drinks can make the evening more entertaining.

    Game Nights

    Bring out the Spider-Man Shot during superhero board games, trivia nights, or video-game sessions.

    Presentation Ideas

    The easiest way to make a simple shot memorable is through presentation.

    Use Clear Glassware

    You want people to see the colors.

    Avoid opaque shot glasses.

    Use a Dark Background

    Red and blue stand out beautifully against black.

    A black serving tray works particularly well.

    Add Comic-Book Decorations

    Place superhero decorations around the tray rather than inside the drinks.

    This keeps the drink itself relatively simple while reinforcing the theme.

    Use Red and Blue Lighting

    If you’re hosting a larger party, colored accent lighting can transform the entire drink station.

    Arrange the Shots in a Spider Shape

    Preparing several?

    Arrange the glasses with one in the center and others extending outward like spider legs.

    It’s simple but visually effective.

    Make It a Full-Sized Cocktail

    Love the flavors but don’t want a shot?

    Turn the recipe into a larger drink.

    Spider-Man Cocktail

    • 1½ oz vodka
    • 1 oz blue curaçao
    • 2 oz cranberry juice
    • ¼ oz grenadine
    • Splash of lemon-lime soda

    Fill a tall glass with ice.

    Add the vodka and blue curaçao.

    Pour in the cranberry juice and finish with grenadine.

    Top with a small splash of lemon-lime soda.

    The result is a longer, lighter superhero-inspired drink with the same basic flavor profile.

    Make It a Spider-Man Shooter

    If you want something slightly larger than a standard shot but smaller than a cocktail, increase the proportions and serve it in a shooter glass.

    Try:

    • ¾ oz vodka
    • ¾ oz blue curaçao
    • ¾ oz cranberry juice
    • Splash of grenadine

    This provides more room for the colors to develop and makes the presentation even more noticeable.

    Choosing the Right Vodka

    Because the other ingredients have relatively strong fruit flavors, you don’t need an extremely expensive vodka.

    A good, smooth mid-range vodka is perfectly suitable.

    If you want to experiment, flavored vodka can completely change the personality of the shot.

    Try citrus vodka for brightness, raspberry vodka for additional berry flavor, or vanilla vodka for something sweeter and smoother.

    Don’t Overdo the Grenadine

    Grenadine looks fantastic in colorful drinks, but it’s easy to use too much.

    Remember: you’re adding it primarily for color and a touch of sweetness.

    Start with a small splash.

    You can always add another drop or two.

    Once you’ve added too much, however, you can’t remove it.

    A heavy pour can turn your carefully balanced shot into something dominated by syrupy sweetness.

    Why Themed Shots Are So Much Fun

    There’s something different about serving a drink with a story behind it.

    You could simply mix vodka and fruit flavors and call it a shot.

    But give it bright red and blue colors, connect it to a superhero theme, and suddenly you’ve created an experience.

    That’s what makes themed drinks popular at parties.

    People talk about them.

    They photograph them.

    They compare them.

    And they remember them.

    The Spider-Man Shot is especially effective because the inspiration is communicated almost entirely through color.

    You don’t need an elaborate garnish or expensive glassware.

    Red.

    Blue.

    A clear shot glass.

    That’s enough to get the idea across.

    A Fun Addition to Your Shot Collection

    If you enjoy experimenting with a Shot of the Day, recipes like this show just how creative a tiny drink can become.

    Shots don’t always need to be straight whiskey, tequila, or vodka.

    They can combine flavors, colors, textures, garnishes, and themes just like full-sized cocktails.

    The smaller serving simply gives you a different canvas.

    Today’s Spider-Man Shot focuses heavily on color and presentation while keeping the flavor combination approachable.

    And once you’ve made it, you can use the same concept to invent your own superhero-themed creations.

    Responsible Serving Matters

    The superhero theme may be playful, but the alcohol is still real.

    Shots can be consumed quickly, which makes it particularly easy to underestimate how much alcohol someone has had.

    Serve responsibly, encourage guests to pace themselves, provide water and food, and make sure everyone has a safe way home.

    Never drink and drive.

    And, of course, alcoholic versions of this drink should only be served to adults who are of legal drinking age.

    Final Thoughts: Shot of the Day — Spider-Man

    The Spider-Man Shot proves that you don’t need complicated ingredients to make a drink stand out.

    With brilliant blue curaçao, smooth vodka, tart cranberry juice, and bright red grenadine, you’ve got a colorful combination inspired by Spider-Man’s unmistakable red-and-blue appearance.

    It’s sweet.

    It’s fruity.

    It’s colorful.

    And most importantly, it’s fun.

    Make one for a superhero movie night, prepare a tray for your next costume party, or add it to your collection of creative shots.

    Experiment with the layers. Try the sugar rim. Create the spiderweb effect. Make the berry or citrus variation. Or put your own spin on the recipe and create an entirely new version.

    Because when it comes to themed drinks, creativity is half the fun.

    So grab your shaker, chill your shot glass, and get those red-and-blue ingredients ready.

    Your friendly neighborhood Spider-Man Shot has arrived.

    With great shots comes great responsibility.

    Enjoy responsibly!

  • Cocktail of the Day: Blood Orange Margarita

    Cocktail of the Day: Blood Orange Margarita

    Bright, citrusy, colorful, and just the right balance of sweet and tart, today’s Cocktail of the Day is the Blood Orange Margarita.

    The classic margarita is already one of the most recognizable cocktails around, but blood orange juice gives it a beautiful seasonal twist. Its deep reddish-orange color immediately catches the eye, while its flavor adds a slightly sweeter, richer citrus character than a traditional lime-forward margarita.

    Whether you’re relaxing after a long day, planning taco night, hosting friends, or looking for a colorful cocktail for your next gathering, the Blood Orange Margarita is an easy drink that feels a little more special than the everyday margarita.

    🍹 Blood Orange Margarita Recipe

    Ingredients

    • 2 oz blanco tequila
    • 2 oz fresh blood orange juice
    • 1 oz fresh lime juice
    • ¾ oz orange liqueur, such as triple sec or Cointreau
    • ½ oz agave nectar or simple syrup, optional
    • Ice
    • Salt or Tajín for the rim, optional
    • Blood orange or lime wheel for garnish

    Instructions

    1. Run a lime wedge around the rim of a rocks or margarita glass.
    2. Dip the rim into salt or Tajín, if desired.
    3. Fill a cocktail shaker with ice.
    4. Add the tequila, blood orange juice, lime juice, orange liqueur, and agave nectar.
    5. Shake vigorously for about 15 seconds, until thoroughly chilled.
    6. Fill your prepared glass with fresh ice.
    7. Strain the margarita over the ice.
    8. Garnish with a blood orange wheel, blood orange wedge, or fresh lime.
    9. Serve immediately and enjoy responsibly.

    What Makes Blood Oranges Different?

    Blood oranges are known for their striking red, crimson, or deep orange flesh. While they still deliver the refreshing citrus flavor you expect from an orange, they can also have subtle berry-like notes.

    That combination works exceptionally well in cocktails.

    In a margarita, blood orange juice softens some of the sharpness of the lime without overpowering the tequila. You still get the unmistakable margarita character, but there is another layer of fruity flavor running through every sip.

    And then there’s the color.

    A freshly squeezed blood orange can transform an ordinary-looking margarita into a vibrant red-orange cocktail that looks fantastic sitting on the table.

    Choosing the Tequila

    For this cocktail, blanco tequila is an excellent choice.

    Blanco tequila generally has a bright, clean flavor that pairs naturally with citrus. Since the Blood Orange Margarita already contains several strong flavors, including orange, lime, and orange liqueur, you want the tequila to complement those ingredients rather than disappear behind them.

    You can also experiment with reposado tequila if you prefer something a little richer. Its subtle oak and vanilla characteristics can give the cocktail a warmer, smoother finish.

    The most important thing is choosing a tequila you genuinely enjoy drinking.

    Fresh Juice Makes a Difference

    Whenever possible, squeeze your blood orange and lime juice immediately before making the cocktail.

    Fresh citrus provides a brighter flavor and aroma than bottled alternatives.

    Depending on the size and juiciness of your blood oranges, you may need approximately one or two oranges for each margarita. Since blood oranges can vary considerably in sweetness, taste the juice before adding your sweetener.

    You might discover that you don’t need much agave at all.

    Salt or Tajín?

    A traditional salt rim is always a great option for a margarita. The salt contrasts beautifully with the sweet orange while highlighting the tart lime.

    But if you want to give this drink another dimension, try Tajín.

    The combination of chili, lime, and salt adds a mild spicy kick that pairs especially well with blood orange.

    You can also mix salt and Tajín together for a rim that lands somewhere between classic and spicy.

    For a lighter presentation, rim only half of the glass. That allows you to switch between salted and unsalted sips.

    Make It Spicy

    Blood orange also pairs extremely well with heat.

    For a Spicy Blood Orange Margarita, add two or three thin jalapeño slices to your cocktail shaker before shaking.

    For more heat, gently muddle the jalapeño before adding the remaining ingredients. For less heat, simply shake the slices with the cocktail and strain them out.

    A Tajín rim completes the spicy version perfectly.

    Make It Sweeter

    Blood oranges naturally vary in sweetness.

    If your cocktail tastes too tart, add another small splash of agave nectar or simple syrup. Start with about ¼ ounce and adjust from there.

    It is much easier to add sweetness than to remove it.

    If your blood oranges are naturally very sweet, you may be able to skip the added sweetener completely.

    Try a Frozen Blood Orange Margarita

    Want something especially refreshing on a warm afternoon?

    Turn the recipe into a frozen margarita.

    Add the tequila, blood orange juice, lime juice, orange liqueur, agave, and approximately 1 to 1½ cups of ice to a blender. Blend until smooth.

    Pour into a salt- or Tajín-rimmed margarita glass and garnish with fresh blood orange.

    The result is almost like an adult citrus slushie—cold, colorful, and refreshing.

    Make a Blood Orange Margarita Pitcher

    If you’re serving several people, making individual margaritas can quickly become time-consuming.

    For approximately six margaritas, combine:

    • 12 oz blanco tequila
    • 12 oz fresh blood orange juice
    • 6 oz fresh lime juice
    • 4½ oz orange liqueur
    • 2–3 oz agave nectar, adjusted to taste

    Mix everything together in a pitcher and refrigerate until thoroughly chilled.

    When you’re ready to serve, stir well and pour over ice into prepared glasses.

    Avoid adding ice directly to the pitcher too far in advance because melting ice will gradually dilute your margaritas.

    Garnish Ideas

    A simple blood orange wheel may be all you need, but you can make the presentation even more impressive.

    Try garnishing your Blood Orange Margarita with:

    • A dehydrated blood orange wheel
    • A fresh lime wheel
    • A blood orange wedge
    • A sprig of rosemary
    • A small edible flower
    • A Tajín-dusted blood orange slice
    • A combination of blood orange and lime

    For parties, prepare the garnishes before guests arrive so cocktails can be assembled quickly.

    What to Serve With a Blood Orange Margarita

    The citrus and tequila flavors make this cocktail an excellent partner for Mexican-inspired dishes and spicy foods.

    Try serving it alongside:

    • Street tacos
    • Chicken fajitas
    • Carne asada
    • Shrimp tacos
    • Fish tacos
    • Chips and fresh salsa
    • Guacamole
    • Quesadillas
    • Nachos
    • Grilled chicken
    • Spicy shrimp
    • Taco salads

    The drink’s sweetness can be particularly enjoyable alongside foods containing jalapeños, chili peppers, smoky seasonings, or spicy sauces.

    Perfect for Entertaining

    One of the best things about the Blood Orange Margarita is how impressive it looks without requiring complicated bartending techniques.

    You don’t need unusual equipment or a long list of ingredients. If you can juice citrus and shake a cocktail, you can make one.

    That makes it a great option for:

    Taco Tuesday — Give your usual margarita a colorful upgrade.

    Weekend gatherings — Prepare the juice ahead of time and shake cocktails as needed.

    Summer parties — Serve it over plenty of ice for a refreshing citrus cocktail.

    Date night at home — Pair it with homemade tacos, fajitas, or another favorite dinner.

    Holiday celebrations — Its deep red-orange color can fit beautifully into festive menus.

    Happy hour at home — Sometimes a small twist on a familiar cocktail is all you need.

    The Secret Is Balance

    A great margarita shouldn’t taste overwhelmingly sweet, sour, or alcoholic.

    Each ingredient has a job.

    The tequila provides the foundation.

    The blood orange juice adds sweetness, color, and fruity citrus flavor.

    The lime juice brings acidity and freshness.

    The orange liqueur ties the citrus flavors together.

    The agave nectar lets you fine-tune the sweetness.

    And the salt or Tajín rim provides contrast.

    When those elements are balanced, you get a cocktail where no single ingredient dominates the glass.

    Cocktail of the Day Final Sip

    The Blood Orange Margarita proves that you don’t have to completely reinvent a classic cocktail to create something exciting.

    Take the familiar combination of tequila, lime, and orange liqueur, add freshly squeezed blood orange juice, and suddenly the traditional margarita has a new personality.

    It’s colorful enough for a celebration, refreshing enough for a warm afternoon, and simple enough to make whenever you’re craving a margarita with a little extra character.

    Shake it cold, pour it over fresh ice, add your favorite rim and garnish, and raise a glass to today’s Cocktail of the Day.

    Cheers, and please enjoy responsibly!

    Question of the Day

    Would you try your Blood Orange Margarita with a classic salt rim, a spicy Tajín rim, or no rim at all?

  • Drink of the Day: Blackberry Tequila Sunrise

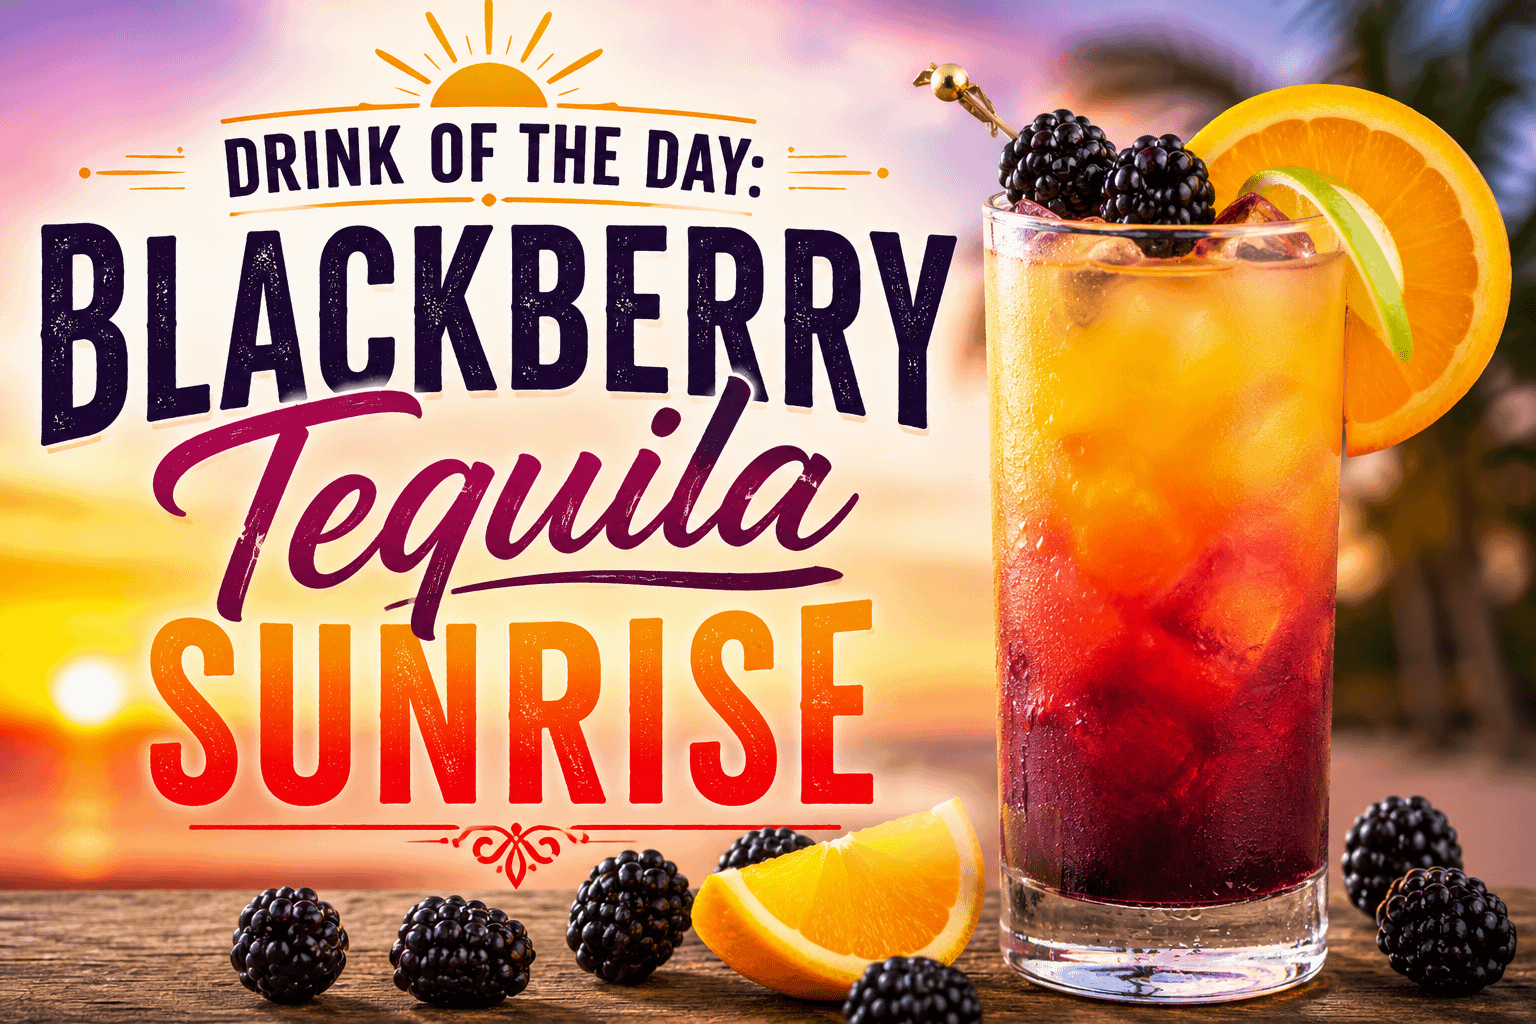
    Drink of the Day: Blackberry Tequila Sunrise

    If you’re looking for a cocktail that combines bold color, refreshing citrus, fresh berry flavor, and the unmistakable character of tequila, today’s Drink of the Day: Blackberry Tequila Sunrise deserves a place on your drink menu.

    The classic Tequila Sunrise has been enjoyed for decades thanks to its simple combination of tequila, orange juice, and grenadine. Its signature red-to-orange gradient gives the drink the appearance of a sunrise glowing inside the glass.

    The Blackberry Tequila Sunrise takes that familiar cocktail and gives it a delicious berry upgrade.

    Fresh blackberries add a slightly sweet, slightly tart flavor that complements orange juice beautifully. Fresh lime juice provides another layer of citrus, while blanco tequila gives the drink its distinctive agave character. Finish everything with grenadine, and you have a colorful cocktail that’s almost as enjoyable to look at as it is to drink.

    Whether you’re planning a backyard barbecue, summer party, weekend brunch, Taco Tuesday, or relaxing evening at home, this fruity tequila cocktail delivers plenty of flavor without requiring complicated ingredients or advanced bartending skills.

    A Fresh Blackberry Twist on the Classic Tequila Sunrise

    One reason the Tequila Sunrise has remained popular is its simplicity.

    The classic cocktail doesn’t require an extensive collection of mixers, bitters, syrups, or specialized equipment. Tequila and orange juice form the base, while grenadine provides sweetness and creates the famous sunrise appearance.

    Adding blackberries changes the drink without taking away what makes the original special.

    Blackberries have a deeper and slightly more complex flavor than many sweeter berries. Depending on their ripeness, they can range from noticeably tart to rich and sweet.

    That makes them particularly good partners for orange and lime.

    Once muddled, their deep purple-red juice also changes the appearance of the cocktail. Instead of having only the traditional orange, yellow, and red shades, the Blackberry Tequila Sunrise introduces darker berry tones.

    The finished drink can resemble a dramatic sunrise—or even the colors that appear just before sunrise when the sky transitions from deep purple into red, orange, and gold.

    Blackberry Tequila Sunrise Recipe

    Servings: 1 cocktail
    Preparation Time: About 5 minutes
    Difficulty: Easy
    Best Glass: Highball or Collins glass

    Ingredients

    • 2 ounces blanco tequila
    • 4 ounces orange juice
    • 4–5 fresh blackberries
    • 1/2 ounce fresh lime juice
    • 1/2 ounce grenadine
    • Ice
    • Fresh blackberries for garnish
    • Orange slice or wheel for garnish
    • Lime wheel or wedge, optional
    • Fresh mint, optional

    How to Make a Blackberry Tequila Sunrise

    Step 1: Muddle the Blackberries

    Place 4–5 fresh blackberries in the bottom of a cocktail shaker.

    Pour in the fresh lime juice.

    Using a cocktail muddler or the back of a sturdy spoon, gently press the berries until they release their juices.

    You don’t need to completely pulverize them. The goal is simply to extract enough blackberry juice and flavor to become part of the cocktail.

    Step 2: Add the Tequila

    Pour 2 ounces of blanco tequila into the shaker.

    Add a handful of ice.

    Shake for approximately 10–15 seconds. This chills the tequila while combining it with the blackberry and lime flavors.

    Step 3: Strain Into Your Glass

    Fill a tall highball or Collins glass with fresh ice.

    Strain the blackberry-tequila mixture over the ice.

    If you don’t mind a little blackberry pulp, a regular cocktail strainer works perfectly well.

    For a cleaner and smoother presentation, fine-strain the mixture through a small mesh strainer. This removes most of the blackberry seeds and pulp.

    Step 4: Add the Orange Juice

    Slowly pour approximately 4 ounces of orange juice into the glass.

    You’ll immediately see the darker blackberry mixture begin interacting with the bright orange juice.

    Avoid aggressively stirring if you want to maintain some separation between the colors.

    Step 5: Add the Grenadine

    Now comes the ingredient responsible for the famous sunrise appearance.

    Slowly pour about 1/2 ounce of grenadine down the inside of the glass.

    Because grenadine is denser than the other liquids, it naturally travels toward the bottom.

    The result should be a beautiful gradient of deep red, purple, orange, and golden yellow.

    Step 6: Garnish and Serve

    Finish the drink with an orange slice and several fresh blackberries.

    For additional color, add a lime wheel or fresh mint sprig.

    Serve immediately.

    Before drinking, you can gently stir the cocktail to distribute the grenadine and blackberry flavors throughout the glass.

    What Does a Blackberry Tequila Sunrise Taste Like?

    The Blackberry Tequila Sunrise offers several flavors at once without becoming overly complicated.

    The first thing you’ll notice is the citrus.

    Orange juice provides sweetness and brightness, while fresh lime adds enough acidity to sharpen the other flavors.

    Then comes the blackberry.

    Blackberries introduce a darker fruit flavor that balances the sweetness of the orange juice and grenadine. Their natural tartness helps prevent the cocktail from tasting like nothing more than fruit juice.

    Finally, there’s tequila.

    Blanco tequila provides fresh agave flavors and a little peppery warmth underneath all that fruit.

    Together, the ingredients create a cocktail that’s:

    Fruity. Citrusy. Slightly tart. Refreshingly sweet. Smooth. Colorful.

    Why Blanco Tequila Is a Great Choice

    There are several types of tequila you could use, but blanco tequila is especially well suited to this recipe.

    Blanco tequila is generally bottled without extended barrel aging, allowing the fresh agave characteristics to remain prominent.

    Those brighter flavors work extremely well with citrus and berries.

    Since this cocktail already contains blackberries, orange juice, lime juice, and grenadine, you don’t necessarily need the additional oak and vanilla characteristics associated with longer-aged tequila.

    Blanco keeps everything lively and refreshing.

    That said, experimentation is part of making cocktails at home.

    Can You Use Reposado Tequila?

    Absolutely.

    Reposado tequila spends time aging in barrels, giving it a somewhat richer flavor.

    Using reposado can introduce subtle notes of oak, vanilla, spice, or caramel depending on the tequila.

    That produces a Blackberry Tequila Sunrise with a little more depth.

    If you’re serving the drink during a hot summer afternoon, blanco might be your first choice.

    If you’re enjoying it during dinner or on a cooler evening, reposado can provide an interesting variation.

    Choosing the Best Blackberries

    Because fresh blackberries are one of the featured ingredients, choosing good berries can noticeably improve the finished cocktail.

    Look for blackberries that are:

    • Deep purple or nearly black
    • Plump
    • Juicy
    • Free from mold
    • Not excessively soft
    • Naturally fragrant

    Very firm berries may be more tart.

    Fully ripe blackberries will generally be sweeter and easier to muddle.

    Taste one before preparing your cocktail. If the berries are extremely tart, you may want the full amount of grenadine. If they’re exceptionally sweet, reducing the grenadine slightly can help maintain balance.

    Fresh Orange Juice vs. Bottled Orange Juice

    Both can work, but freshly squeezed orange juice can take the cocktail to another level.

    Fresh orange juice usually offers brighter acidity and more natural citrus character.

    If you’re making only one or two cocktails, squeezing fresh oranges doesn’t require much extra work.

    For parties and larger batches, bottled orange juice can certainly make preparation easier.

    When choosing bottled juice, look for one with a straightforward orange flavor rather than something with excessive added sweetness.

    Don’t Skip the Fresh Lime Juice

    Lime might seem like a small addition, but it plays an important role.

    Orange juice, ripe blackberries, and grenadine all contribute sweetness.

    Lime introduces acidity.

    That acidity helps balance the cocktail and makes the flavors taste brighter.

    Fresh lime juice is preferable whenever possible because you only need a small amount and its flavor can make a noticeable difference.

    How to Get the Perfect Sunrise Effect

    Part of the appeal of this cocktail is presentation.

    Fortunately, creating the sunrise appearance doesn’t require professional bartending experience.

    The most important rule is simple:

    Don’t stir after adding the grenadine.

    Slowly pour the grenadine down the side of the glass after you’ve added the other ingredients.

    It will naturally begin sinking.

    Give it a few moments and you’ll see the colors develop.

    The Blackberry Tequila Sunrise may not look identical every time because fresh berries vary in color and juiciness. That’s part of what makes using fresh ingredients interesting.

    How to Make the Drink Less Sweet

    If you prefer cocktails that lean tart rather than sweet, there are several easy adjustments.

    Start by reducing the grenadine from 1/2 ounce to approximately 1/4 ounce.

    You can also increase the lime juice slightly.

    Another option is using a little less orange juice and topping the drink with sparkling water.

    These small adjustments allow the tequila and blackberry flavors to become more noticeable.

    Want It Sweeter?

    You can also move in the opposite direction.

    If your blackberries are particularly tart or you simply enjoy sweeter cocktails, increase the grenadine slightly.

    Another option is adding a small amount of blackberry simple syrup.

    Just be careful not to add too much sweetness. You still want to taste the tequila, citrus, and fresh fruit.

    Make It Sparkling

    A little carbonation transforms this cocktail into an even lighter warm-weather drink.

    Prepare the cocktail using approximately 3 ounces of orange juice instead of 4.

    Once you’ve added the orange juice, top the glass with club soda or sparkling water.

    Finish with the grenadine.

    You’ll still get the colorful sunrise appearance while adding refreshing bubbles.

    Blackberry Tequila Sunrise with Blackberry Syrup

    Fresh blackberries provide excellent flavor, but homemade blackberry syrup is another option.

    Combine blackberries, sugar, and water in a saucepan and gently heat until the berries break down and release their juices.

    Strain the mixture and allow it to cool completely.

    A small amount can then be added to the cocktail.

    Because blackberry syrup contains additional sugar, reduce the grenadine accordingly.

    This variation is particularly useful when preparing multiple cocktails because you don’t have to muddle berries individually for every serving.

    Frozen Blackberry Tequila Sunrise

    When the weather gets hot, turn your Blackberry Tequila Sunrise into a frozen cocktail.

    Add tequila, orange juice, fresh blackberries, lime juice, and ice to a blender.

    Blend until smooth.

    Pour into a chilled glass and slowly drizzle grenadine around the inside.

    Garnish with fresh blackberries and an orange slice.

    The result is somewhere between a frozen margarita and a Tequila Sunrise.

    Blackberry Tequila Sunrise Pitcher

    Hosting friends?

    You can prepare most of the cocktail ahead of time.

    For Approximately 6 Cocktails

    • 12 ounces blanco tequila
    • 24 ounces orange juice
    • 3 ounces fresh lime juice
    • Approximately 30 fresh blackberries
    • 3 ounces grenadine
    • Plenty of ice
    • Orange slices and blackberries for garnish

    Muddle the blackberries with lime juice.

    Combine the blackberry mixture, tequila, and orange juice in a pitcher.

    Refrigerate until you’re ready to serve.

    When guests are ready for drinks, pour the mixture over ice.

    Then add approximately 1/2 ounce of grenadine individually to each glass.

    Adding the grenadine separately preserves the sunrise appearance.

    Make It for Brunch

    Tequila isn’t usually the first spirit people associate with brunch, but the combination of tequila and orange juice makes the Blackberry Tequila Sunrise an excellent alternative to more familiar brunch cocktails.

    Pair it with:

    • Breakfast tacos
    • Breakfast burritos
    • Huevos rancheros
    • Bacon and eggs
    • Breakfast quesadillas
    • French toast
    • Fresh fruit
    • Breakfast sandwiches
    • Avocado toast

    The blackberry and orange flavors also make the cocktail feel especially appropriate for late-morning gatherings.

    Serve It on Taco Night

    Tacos and tequila are a natural combination.

    The fruity sweetness of a Blackberry Tequila Sunrise can provide a refreshing contrast to spicy salsa, jalapeños, chili seasoning, and smoky grilled meats.

    Try serving it alongside:

    • Carne asada tacos
    • Chicken tacos
    • Shrimp tacos
    • Fish tacos
    • Carnitas
    • Birria
    • Chicken fajitas
    • Steak fajitas
    • Loaded nachos
    • Chips and salsa
    • Fresh guacamole

    If your meal is particularly spicy, keep the cocktail slightly sweeter to provide more contrast.

    More Food Pairings

    This cocktail doesn’t have to be limited to Mexican-inspired dishes.

    Its berry and citrus flavors work well with plenty of warm-weather foods.

    Consider pairing it with grilled chicken, barbecue chicken, grilled shrimp, salmon, burgers, fresh salads, grilled vegetables, fruit platters, spicy wings, pulled pork, or citrus-marinated meats.

    For dessert, try something featuring vanilla, orange, lime, lemon, berries, or chocolate.

    Garnish Ideas

    The drink is already colorful, but a thoughtful garnish can make it even more visually appealing.

    Try:

    • Fresh blackberries on a cocktail pick
    • Blackberry and orange skewer
    • Orange wheel
    • Orange wedge
    • Lime wheel
    • Lime wedge
    • Fresh mint sprig
    • Blackberry and mint combination
    • Orange peel
    • Mixed berry skewer

    For parties, prepare your garnishes ahead of time so each drink can be finished quickly.

    The Perfect Glass

    A traditional Tequila Sunrise is usually served in a tall glass, and that’s also a great choice here.

    A highball or Collins glass gives the colorful layers plenty of room to develop.

    Clear glassware is important.

    After all, the appearance is one of the highlights of the cocktail.

    Fill the glass generously with ice and leave enough room for the garnish.

    Make the Presentation Stand Out

    If you’re serving this cocktail for guests, presentation can turn a simple mixed drink into something memorable.

    Start with a clean, clear glass.

    Use fresh ice rather than partially melted ice.

    Slowly build the ingredients.

    Add the grenadine last.

    Then finish with contrasting garnishes such as a bright orange wheel and several dark blackberries.

    Place the finished drink somewhere with good natural light and those purple, red, orange, and golden tones will really stand out.

    It’s also an excellent cocktail for photographing before that first sip.

    When to Serve a Blackberry Tequila Sunrise

    There’s really no wrong occasion for a colorful tequila cocktail, but this one is especially fitting for:

    • Summer evenings
    • Backyard barbecues
    • Pool parties
    • Weekend brunch
    • Taco Tuesday
    • Birthday parties
    • Cinco de Mayo celebrations
    • Cookouts
    • Dinner parties
    • Vacation gatherings
    • Girls’ night or guys’ night
    • Happy hour at home
    • Sunset drinks on the patio

    Its dramatic colors make it especially fun when you’re entertaining.

    Turn It Into a Signature Party Cocktail

    If you’re hosting an event, consider making the Blackberry Tequila Sunrise your signature drink.

    You can prepare a small sign with the drink’s name and ingredients.

    Set out bowls containing orange slices, lime wheels, blackberries, and mint so guests can customize their garnish.

    You can even prepare the blackberry-tequila-orange mixture ahead of time and finish each cocktail with grenadine as it’s served.

    It looks much more complicated than it actually is—which is exactly what you want from an entertaining cocktail.

    Tips for the Best Blackberry Tequila Sunrise

    A few small details can make a noticeable difference.

    Use ripe blackberries. You’ll get more juice and better berry flavor.

    Use fresh lime juice. The acidity balances the sweeter ingredients.

    Don’t overdo the grenadine. You want enough to create the sunrise without overpowering everything else.

    Use plenty of ice. This drink is best served very cold.

    Add the grenadine last. That’s the secret to creating the layered appearance.

    Don’t immediately stir. Enjoy the presentation first.

    Adjust the sweetness. Every batch of berries and orange juice will taste slightly different.

    Garnish generously. Fresh berries make the drink look as good as it tastes.

    Why This Drink Works

    Great cocktails are often about balance.

    The Blackberry Tequila Sunrise has several elements working together.

    Tequila provides strength and character.

    Orange juice contributes sweetness and citrus.

    Blackberries introduce fresh fruit flavor and tartness.

    Lime adds acidity.

    Grenadine contributes sweetness, fruitiness, and dramatic color.

    Ice chills and slightly dilutes everything, allowing the flavors to come together.

    No single ingredient needs to dominate.

    When properly balanced, each component supports the others.

    A Cocktail Made for the Sunset—or Sunrise

    There is something undeniably fun about drinking a cocktail that looks like the sky.

    The traditional Tequila Sunrise captures the brilliant oranges and reds of morning. Adding blackberries introduces deeper purple shades that can make this version look just as much like a summer sunset.

    That makes the Blackberry Tequila Sunrise especially fitting for enjoying outdoors.

    Imagine sitting on the patio as the sun goes down, grilling dinner, listening to music, and enjoying a cold glass filled with blackberry, orange, lime, and tequila.

    Sometimes the simplest drinks create the best moments.

    Drink of the Day: Blackberry Tequila Sunrise

    Today’s Blackberry Tequila Sunrise proves that you don’t need dozens of ingredients to put an exciting twist on a classic cocktail.

    Start with tequila and orange juice.

    Add fresh blackberries and lime.

    Finish with grenadine.

    In just a few minutes, you’ve created a drink featuring beautiful layers of deep blackberry purple, vibrant orange, and rich red.

    More importantly, those colors are backed up by flavor.

    Fresh blackberry provides sweet-tart fruitiness. Orange juice brings bright citrus. Lime keeps everything refreshing. Tequila gives the cocktail its bold agave foundation, and grenadine ties everything together with sweetness and that unmistakable sunrise appearance.

    Make one for yourself on a relaxing evening, serve a pitcher at your next gathering, or add it to the menu for your next backyard barbecue.

    However you decide to enjoy it, the Blackberry Tequila Sunrise is a colorful reminder that sometimes a small twist is all it takes to make a classic feel completely new again.

    Cheers, and enjoy responsibly!

    Question of the Day

    Would you try a Blackberry Tequila Sunrise, or what fruit would you add to create your own version of the classic Tequila Sunrise?

  • Mocktail of the Day: Garden Refresher

    Mocktail of the Day: Garden Refresher

    There is something especially satisfying about a drink made with ingredients that look and taste like they came straight from the garden. Crisp cucumber, fragrant mint, freshly squeezed lime, and sparkling bubbles come together in today’s Mocktail of the Day: Garden Refresher.

    Light, cooling, colorful, and completely alcohol-free, the Garden Refresher is the kind of drink that works just as well beside the pool as it does at brunch, a backyard barbecue, a family celebration, or a quiet afternoon at home.

    Rather than relying on heavy syrups or overly sweet fruit juices, this mocktail allows fresh ingredients to take center stage. Cucumber provides a clean and cooling foundation. Mint contributes its unmistakable herbal aroma. Lime brings the tartness needed to wake everything up, while lemonade provides just enough sweetness to create balance.

    Finish it with sparkling water, plenty of ice, and a beautiful cucumber-and-mint garnish, and you have a drink that looks every bit as impressive as something you’d order at a restaurant or cocktail bar.

    The Garden Refresher proves that choosing an alcohol-free drink doesn’t mean settling for something boring.

    A Fresh Taste of the Garden

    The inspiration behind the Garden Refresher is simple: take flavors commonly associated with freshness and combine them into one sparkling beverage.

    Cucumber and mint are naturally refreshing partners.

    Cucumber has a mild flavor that doesn’t overpower other ingredients. Instead, it creates a fresh background that allows citrus and herbs to shine.

    Mint brings an entirely different dimension. Much of what we experience as flavor actually begins with aroma, and fresh mint immediately announces itself before you even take the first sip.

    Then comes lime.

    Fresh lime juice provides the acidity that brings the cucumber and mint together. Without citrus, the drink could taste flat. With lime, everything suddenly becomes brighter and more interesting.

    Lemonade introduces sweetness and another layer of citrus.

    Finally, sparkling water gives the drink its refreshing fizz.

    The result is a mocktail that feels like a walk through a summer garden poured over ice.

    Why You’ll Love the Garden Refresher

    One of the best things about this mocktail is its simplicity.

    You don’t need expensive ingredients, complicated equipment, or advanced drink-making skills. Most of the ingredients can be found at almost any grocery store, and you can prepare the drink in only a few minutes.

    The Garden Refresher is:

    • Alcohol-free
    • Crisp and cooling
    • Lightly sweet
    • Full of fresh ingredients
    • Easy to prepare
    • Beautifully colorful
    • Simple to customize
    • Great for entertaining
    • Perfect for warm weather
    • Easy to turn into a pitcher
    • Suitable for many celebrations
    • Refreshing without being overly heavy or sugary

    It’s also a great recipe to keep in your collection because you can easily change the fruit, herbs, sweetness, or carbonation depending on what you have available.

    Garden Refresher Recipe

    Prep Time: About 5 minutes
    Servings: 1

    Ingredients

    • 4 thin cucumber slices
    • 6 fresh mint leaves
    • 1 ounce freshly squeezed lime juice
    • ½ ounce simple syrup or honey syrup
    • 2 ounces chilled lemonade
    • 3 ounces sparkling water or club soda
    • Ice
    • Cucumber ribbon or cucumber slice for garnish
    • Fresh mint sprig for garnish
    • Lime wheel or wedge for garnish

    Optional Additions

    For additional flavor, you can also add:

    • Fresh strawberries
    • Blueberries
    • Watermelon
    • Basil
    • Lemon slices
    • Orange slices
    • Grapefruit juice
    • Fresh ginger
    • Jalapeño slices
    • Edible culinary flowers

    These aren’t necessary for the basic Garden Refresher, but they give you plenty of ways to create your own signature version.

    How to Make the Garden Refresher

    Step 1: Prepare Your Ingredients

    Wash the cucumber, mint, and lime thoroughly.

    Thinly slice the cucumber and cut your lime.

    Set aside the prettiest cucumber slice, mint sprig, and lime wheel for your garnish.

    Using fresh ingredients makes a noticeable difference in a drink this simple.

    Step 2: Muddle the Cucumber and Mint

    Place four cucumber slices and approximately six mint leaves into the bottom of a cocktail shaker.

    Gently muddle them.

    The goal isn’t to pulverize the ingredients. You’re simply pressing them enough to release the cucumber juice and the aromatic oils from the mint.

    Over-muddling mint can sometimes release bitter plant flavors, so a gentle touch works best.

    Step 3: Add Lime Juice

    Squeeze approximately one ounce of fresh lime juice into the shaker.

    Fresh lime is highly recommended.

    Because lime is one of the dominant flavors in the Garden Refresher, freshly squeezed juice will usually give you a brighter and fresher flavor than bottled alternatives.

    Step 4: Add Sweetener

    Pour in approximately ½ ounce of simple syrup or honey syrup.

    You can adjust this amount according to your preference.

    If your lemonade is already quite sweet, you may need very little additional sweetener.

    Step 5: Add Ice and Shake

    Fill the shaker with ice.

    Secure the lid and shake vigorously for approximately 10–15 seconds.

    Shaking chills the mixture while helping the cucumber, mint, lime, and sweetener combine.

    Step 6: Strain Into Your Glass

    Fill a tall glass with fresh ice.

    Strain the cucumber and mint mixture over the ice.

    For a more rustic presentation, you can allow a few small pieces of mint or cucumber into the glass.

    If you prefer a cleaner appearance, use a fine strainer.

    Step 7: Add Lemonade

    Pour approximately two ounces of chilled lemonade into the glass.

    Give everything a gentle stir.

    Step 8: Add Sparkling Water

    Top the drink with approximately three ounces of sparkling water or club soda.

    Add it slowly so you don’t lose too much carbonation.

    Step 9: Garnish

    Finish with a cucumber ribbon, lime wheel, and fresh mint sprig.

    Serve immediately while the drink is icy cold and bubbly.

    What Does the Garden Refresher Taste Like?

    The Garden Refresher has several layers of flavor, even though the recipe itself is simple.

    Your first impression will likely be the citrus.

    Fresh lime and lemonade provide a bright, slightly tart beginning.

    Then the cucumber appears.

    Its flavor is mild, clean, and refreshing rather than sweet.

    Mint follows with a cooling herbal note, while the sparkling water creates a light and bubbly finish.

    Nothing should overpower anything else.

    A properly balanced Garden Refresher should taste:

    Fresh.

    Crisp.

    Citrusy.

    Cooling.

    Lightly sweet.

    Sparkling.

    It’s refreshing enough for a hot summer afternoon but flavorful enough to feel like a special drink.

    Why Cucumber Works So Well in Mocktails

    Cucumber is one of those ingredients that can dramatically change a drink without dominating it.

    Its high water content and delicate flavor create an immediate sense of freshness.

    Cucumber also works exceptionally well with other common mocktail ingredients, including:

    • Lime
    • Lemon
    • Mint
    • Basil
    • Strawberry
    • Watermelon
    • Ginger
    • Pineapple
    • Grapefruit
    • Berries

    That’s why cucumber is such a useful ingredient when creating alcohol-free drinks.

    It contributes character without requiring lots of sugar.

    Fresh Mint Makes a Difference

    Mint might seem like a small part of the recipe, but it’s one of the ingredients responsible for giving the Garden Refresher its personality.

    Before drinking, gently clap the garnish mint sprig between your hands.

    This helps release some of the aromatic oils.

    Place the mint close to the rim of the glass.

    As you bring the drink toward your mouth, you’ll smell the mint before taking your sip.

    That combination of aroma and flavor makes the drink seem even fresher.

    Fresh Lime vs. Bottled Lime Juice

    For everyday cooking, bottled citrus juice can sometimes be convenient.

    For a mocktail where citrus plays a major role, fresh juice is worth the extra minute of preparation.

    Fresh lime juice has a bright acidity and citrus aroma that helps bring the entire Garden Refresher together.

    One medium lime will often provide around the amount needed for a single drink, although juice yield varies.

    If you’re making several drinks, squeeze the limes shortly before serving.

    Simple Syrup or Honey Syrup?

    Either sweetener works beautifully.

    Simple Syrup

    Traditional simple syrup has a neutral sweetness, which means it won’t interfere with the cucumber, lime, or mint.

    A basic version can be made by combining equal portions of sugar and water until the sugar dissolves.

    Allow it to cool before using it in your drink.

    Honey Syrup

    Honey provides sweetness along with a slightly floral character.

    Because straight honey doesn’t dissolve particularly well in an ice-cold beverage, thin it with warm water first.

    Allow the mixture to cool before adding it to your Garden Refresher.

    Both are excellent choices.

    Adjust the Sweetness

    Mocktails are highly personal.

    Some people love sweet drinks. Others want something tart and refreshing.

    The Garden Refresher is easy to adjust.

    For a Less-Sweet Garden Refresher

    Use:

    • Less simple syrup
    • More sparkling water
    • Less lemonade
    • Additional lime juice

    You can even eliminate the added syrup completely if your lemonade provides enough sweetness.

    For a Sweeter Garden Refresher

    Use:

    • Additional lemonade
    • Slightly more simple syrup
    • Honey syrup
    • Agave syrup

    Make small adjustments and taste as you go.

    The Importance of Ice

    Ice doesn’t receive much attention when people make drinks at home, but it plays an important role.

    The Garden Refresher should be served very cold.

    Fill the glass generously with fresh ice before adding your drink.

    Large ice cubes are particularly useful because they tend to melt more slowly, helping prevent excessive dilution.

    If you’re serving the Garden Refresher outdoors on a hot day, keep additional ice nearby.

    Create a Beautiful Cucumber Ribbon

    A cucumber ribbon is one of the easiest ways to transform this simple drink into something that looks professionally prepared.

    Using a vegetable peeler, carefully run the peeler lengthwise along the cucumber.

    You’ll create a long, thin strip.

    You can place the ribbon directly inside the glass, wrap it along the interior, or fold it into an accordion shape and place it onto a cocktail pick.

    Combined with a lime wheel and mint sprig, it creates a beautiful green presentation.

    Garden Refresher Variations

    Once you’ve made the original recipe, there are dozens of ways to experiment.

    Strawberry Garden Refresher

    Add one or two sliced strawberries when muddling the cucumber and mint.

    Strawberry adds natural sweetness and turns the drink a beautiful light pink.

    Garnish with a strawberry, cucumber slice, and mint sprig.

    Watermelon Garden Refresher

    Muddle several small pieces of seedless watermelon with the cucumber.

    Watermelon, cucumber, lime, and mint are a natural summer combination.

    This version is especially good for pool parties and backyard cookouts.

    Blueberry Garden Refresher

    Add a small handful of blueberries.

    Gently muddle them with the cucumber and mint.

    The berries contribute additional sweetness and a beautiful purple-blue color.

    Raspberry Garden Refresher

    Fresh raspberries provide both tartness and sweetness.

    Because raspberries break down easily, only gentle muddling is necessary.

    Basil Garden Refresher

    Replace some or all of the mint with fresh basil.

    Basil gives the drink a more complex herbal flavor and makes it feel especially garden-inspired.

    Strawberry Basil Garden Refresher

    Combine strawberries, cucumber, basil, and lime.

    This variation offers the perfect balance of fruity, herbal, sweet, and tart flavors.

    Watermelon Mint Garden Refresher

    Skip the lemonade and add fresh watermelon juice.

    Finish with lime and sparkling water.

    This version is especially light and refreshing.

    Ginger Garden Refresher

    Add a small amount of freshly grated ginger or ginger syrup.

    Ginger provides warmth and spice that contrasts beautifully with cooling cucumber.

    Spicy Garden Refresher

    Add one thin slice of fresh jalapeño while muddling.

    Be conservative.

    You can always add more heat, but you can’t easily remove it once the pepper has been muddled into the drink.

    Tropical Garden Refresher

    Add a splash of pineapple juice.

    Pineapple brings sweetness and tropical flavor while cucumber and mint keep the drink tasting fresh.

    Turn the Garden Refresher Into a Pitcher

    Having friends or family over?

    Instead of preparing individual mocktails, make a pitcher.

    Garden Refresher Pitcher — Approximately 6 Servings

    You’ll need:

    • 1 medium cucumber, thinly sliced
    • ½ cup loosely packed fresh mint
    • ¾ cup freshly squeezed lime juice
    • ½ cup simple syrup
    • 2 cups chilled lemonade
    • 3 cups chilled sparkling water
    • Ice
    • Additional cucumber, lime, and mint for garnish

    Pitcher Instructions

    Place some of the cucumber and mint in the bottom of a large pitcher.

    Gently muddle.

    Add the lime juice, simple syrup, and lemonade.

    Stir well.

    Refrigerate the mixture until you’re ready to serve.

    Do not add the sparkling water too early.

    Carbonation gradually disappears after opening, so add the sparkling water immediately before serving.

    Fill glasses with ice, pour in the Garden Refresher, and garnish individually.

    Create a Garden Refresher Mocktail Bar

    If you’re hosting a larger gathering, turn the drink into an interactive mocktail station.

    Prepare the cucumber, mint, lime juice, lemonade, sparkling water, and sweeteners.

    Then provide optional additions such as:

    • Strawberries
    • Raspberries
    • Blueberries
    • Watermelon
    • Pineapple
    • Basil
    • Fresh ginger
    • Lemon wedges
    • Lime wedges
    • Orange slices
    • Jalapeño
    • Honey syrup
    • Simple syrup

    Guests can mix and match ingredients to create their own Garden Refresher.

    You can even place small cards near the ingredients with suggested combinations.

    Perfect Occasions for the Garden Refresher

    Because the Garden Refresher is alcohol-free, it works for a wide range of events and gatherings.

    Consider serving it at:

    • Backyard barbecues
    • Family reunions
    • Birthday parties
    • Brunches
    • Baby showers
    • Bridal showers
    • Graduation parties
    • Pool parties
    • Picnics
    • Garden parties
    • Holiday gatherings
    • Summer dinners
    • Outdoor weddings
    • Afternoon gatherings
    • Family movie nights

    It can also simply be an enjoyable afternoon drink when you want something different from soda, juice, or plain water.

    Make It Look Restaurant-Worthy

    People often experience a drink with their eyes before tasting it.

    Presentation doesn’t need to be complicated.

    Start with a clear glass so the cucumber, mint, and lime are visible.

    Use plenty of ice.

    Place a cucumber ribbon against the inside of the glass.

    Add your drink.

    Finish with a lime wheel and generous mint sprig.

    For special occasions, you could also add edible flowers specifically intended for culinary use.

    The finished drink can look elegant without requiring expensive ingredients or equipment.

    Choosing the Best Glass

    A tall Collins or highball glass is ideal.

    The tall shape gives you enough room for:

    • Plenty of ice
    • Cucumber slices
    • Lemonade
    • Sparkling water
    • Garnishes

    Stemless wine glasses are another excellent option.

    Mason jars give the drink a more casual garden-party appearance.

    For larger celebrations, clear disposable cups can also work—especially when you add colorful garnishes.

    Make Garden Refresher Ice Cubes

    Want to take the presentation even further?

    Create decorative ice cubes.

    Place small mint leaves, tiny cucumber pieces, berries, or thin lime pieces into an ice cube tray.

    Add water and freeze.

    Once frozen, use the decorative cubes in your Garden Refresher.

    As the ice slowly melts, the ingredients become visible and add an attractive touch to the glass.

    Prepare Ingredients Ahead of Time

    If you’re hosting a party, you don’t want to spend the entire event making individual drinks.

    Fortunately, much of the Garden Refresher can be prepared ahead.

    Earlier in the day, you can:

    • Slice cucumbers
    • Wash mint
    • Cut lime wheels
    • Squeeze lime juice
    • Prepare simple syrup
    • Make cucumber ribbons
    • Chill lemonade
    • Chill sparkling water
    • Prepare decorative ice

    Store everything in the refrigerator.

    When guests arrive, assembly becomes quick and easy.

    A Refreshing Alternative to Soda

    When you’re looking for something festive and bubbly, soda is often the easiest choice.

    But sometimes you want something with more personality.

    The Garden Refresher gives you the carbonation of soda while adding fresh cucumber, mint, and citrus.

    You also have complete control over how sweet you make it.

    That’s one of the biggest advantages of homemade mocktails.

    You can modify the recipe until it tastes exactly the way you like it.

    Why Mocktails Have Become So Popular

    Alcohol-free drinks have become much more creative.

    A mocktail doesn’t need to be fruit juice mixed with soda.

    Modern mocktails can use fresh herbs, citrus, vegetables, flavored syrups, spices, sparkling water, teas, fresh fruit, and countless other ingredients.

    The goal is the same as with any carefully made drink: create layers of flavor that work together.

    The Garden Refresher is a perfect example.

    There’s sweetness.

    There’s acidity.

    There’s herbal flavor.

    There’s freshness.

    There’s carbonation.

    There’s aroma.

    Each component contributes something.

    Pair the Garden Refresher With Food

    Because the drink is relatively light, it pairs well with many different foods.

    Try serving it alongside:

    • Grilled chicken
    • Grilled vegetables
    • Burgers
    • Sandwiches
    • Salads
    • Fish tacos
    • Chicken tacos
    • Fresh fruit
    • Pasta salad
    • Charcuterie-style snack boards
    • Brunch dishes
    • Light appetizers

    Its citrus and cucumber flavors are especially enjoyable with foods served during spring and summer.

    Make It Your Signature Mocktail

    Recipes are starting points.

    Once you understand the basic Garden Refresher formula, experiment.

    Think of the drink as five basic components:

    Freshness: Cucumber
    Herbs: Mint
    Acidity: Lime
    Sweetness: Lemonade and syrup
    Bubbles: Sparkling water

    Change one component and you create something new.

    Replace mint with basil.

    Replace lemonade with watermelon juice.

    Add strawberry.

    Introduce ginger.

    Use grapefruit instead of some of the lime.

    Add rosemary.

    Try sparkling mineral water.

    You might eventually create a variation that becomes your personal signature mocktail.

    Tips for the Best Garden Refresher

    For the best possible drink, remember a few simple tips.

    Use fresh ingredients.
    Fresh cucumber, mint, and lime make a noticeable difference.

    Don’t over-muddle the mint.
    Gentle pressure releases the aroma without unnecessarily crushing the leaves.

    Keep everything cold.
    Chill your lemonade and sparkling water before making the drink.

    Use plenty of ice.
    The Garden Refresher is meant to be served cold.

    Add carbonation last.
    This helps preserve the bubbles.

    Taste before serving.
    Adjust the sweetness or acidity as necessary.

    Don’t forget the garnish.
    Cucumber, lime, and mint make the drink visually appealing while reinforcing its fresh flavors.

    More Than Just a Drink

    Part of the enjoyment of making a mocktail is turning an ordinary moment into something a little more special.

    You don’t need a party.

    You don’t need a holiday.

    You don’t need an elaborate dinner.

    Sometimes it’s enough to make yourself something refreshing, sit outside, and enjoy a few quiet minutes.

    The Garden Refresher fits those moments perfectly.

    It takes only a few minutes to prepare, but the combination of fresh ingredients, crushed ice, sparkling bubbles, and colorful garnishes makes it feel like a treat.

    Mocktail of the Day: Garden Refresher

    Today’s Garden Refresher celebrates how good simple ingredients can be when they’re combined thoughtfully.

    Fresh cucumber provides a crisp foundation.

    Mint brings cooling herbal aroma.

    Lime adds brightness.

    Lemonade contributes sweetness.

    Sparkling water gives everything an energetic bubbly finish.

    Pour it over plenty of ice, decorate the glass with cucumber and lime, tuck in a fresh sprig of mint, and you have a beautiful alcohol-free drink that’s ready for almost any occasion.

    Make one for yourself on a warm afternoon.

    Prepare a pitcher for the family.

    Serve it at your next backyard barbecue.

    Build a Garden Refresher bar for a summer party.

    Or use the basic recipe as inspiration for your own creation.

    However you choose to enjoy it, the Garden Refresher is proof that you don’t need alcohol—or a complicated list of ingredients—to create a drink worth looking forward to.

    Fresh, crisp, cooling, and filled with garden-inspired flavor, the Garden Refresher deserves a spot in your mocktail rotation.

    Cheers to today’s Mocktail of the Day: Garden Refresher!

  • Shot of the Day: The Pickax

    Shot of the Day: The Pickax

    Some shots are memorable because of their flavor. Others grab attention because of their appearance. The Pickax is designed to do both.

    With a dramatic combination of electric blue and midnight black, The Pickax looks like something created for a late-night party, a Halloween celebration, or any occasion where an ordinary shot simply isn’t going to cut it. Beneath that dark appearance is a surprisingly approachable combination of sweet citrus, blue raspberry, and vodka.

    The Pickax isn’t subtle—and that’s exactly the point.

    This Shot of the Day is meant to look bold sitting on the bar. The brilliant blue base contrasts with the darker vodka floating or swirling above it, producing shades ranging from bright sapphire to deep navy and nearly black.

    Pour it carefully and you can create two contrasting sections. Allow the ingredients to mingle slightly and you’ll get dark streaks running through the blue.

    Either way, The Pickax makes an entrance.


    💙🖤 The Pickax Shot Recipe

    Ingredients

    • ½ ounce blue curaçao
    • ½ ounce blue raspberry vodka
    • ½ ounce black vodka
    • Splash of lemon-lime soda, optional
    • Ice

    Optional Garnish

    • Blue cocktail sugar
    • Black cocktail sugar
    • Lemon twist
    • Fresh blackberry

    Equipment

    • Cocktail shaker
    • Shot glass
    • Bar spoon
    • Strainer
    • Small plates if making a sugar rim

    How to Make The Pickax

    The Pickax isn’t difficult to prepare, but pouring the ingredients carefully makes a big difference in its final appearance.

    Step 1: Chill Your Shot Glass

    Before making the drink, place your shot glass in the freezer for several minutes.

    A chilled glass isn’t absolutely necessary, but shooters like The Pickax taste best when they’re served extremely cold.

    It can also help maintain the drink’s crisp appearance when you’re building the layers.

    Step 2: Prepare the Blue Mixture

    Fill a cocktail shaker about halfway with ice.

    Add:

    • ½ ounce blue curaçao
    • ½ ounce blue raspberry vodka

    Close the shaker and shake vigorously for approximately 10 to 15 seconds.

    The goal is to thoroughly chill the alcohol without excessively diluting it.

    Step 3: Create the Electric-Blue Base

    Strain the blue mixture into your chilled shot glass.

    You should now have a brilliant blue foundation.

    This is where using a clear shot glass becomes important. The Pickax is as much about presentation as flavor, so you want everyone to be able to see the contrasting colors.

    Step 4: Add the Black Vodka

    Now comes the signature step.

    Hold a bar spoon just above the surface of the blue mixture with the back of the spoon facing upward.

    Very slowly pour:

    ½ ounce black vodka

    over the back of the spoon.

    The spoon helps reduce the force of the pour so the black vodka doesn’t immediately plunge into the blue mixture.

    Depending on the exact brands used and their relative densities, you may get a noticeable layer or a swirling mixture of black, navy, purple, and blue.

    Don’t worry if you don’t achieve a perfectly straight line.

    In fact, a slightly imperfect layer can make The Pickax look even better.

    Dark streaks moving through the blue can create an almost stormy appearance.


    What Does The Pickax Taste Like?

    For something that looks dark and intimidating, The Pickax is surprisingly fruity.

    Blue Curaçao

    Blue curaçao provides much of the brilliant color while contributing a sweet orange and citrus flavor.

    Despite its electric-blue appearance, the flavor is generally citrus-forward rather than berry flavored.

    Blue Raspberry Vodka

    Blue raspberry vodka introduces the candy-like berry character.

    It brings sweetness and fruitiness that works particularly well with the orange notes from the blue curaçao.

    Black Vodka

    Black vodka provides the dark contrast that gives The Pickax its distinctive appearance.

    Depending on the particular black vodka used, its flavor profile can vary, but its primary purpose in this recipe is adding vodka character and that unmistakable dark appearance.

    Put everything together and you get a shot that moves from sweet citrus and berry flavors into a stronger vodka finish.


    Why Call It “The Pickax”?

    A drink with electric-blue alcohol and a nearly black top needs a name with some attitude.

    The Pickax fits.

    A pickax is associated with strength, hard work, breaking through tough surfaces, and striking with purpose.

    There’s nothing particularly delicate about the image.

    That’s the personality this shot is meant to capture.

    The blue brings the energy.

    The black brings the darkness.

    The vodka brings the strike.

    And when those elements meet inside one small glass, you have The Pickax.


    The Signature Black-and-Blue Appearance

    Presentation is one of the biggest reasons to make this shot.

    The ideal Pickax starts with a brilliant blue lower portion and transitions into a dark upper portion.

    But don’t become obsessed with achieving perfect layers.

    Alcohol doesn’t always behave exactly the same way from one bottle to another. Sugar content and alcohol percentage influence how easily liquids separate.

    Your Pickax might have:

    A distinct black layer sitting above the blue.

    Or you might see:

    Dark clouds and streaks drifting through the electric-blue base.

    You could even end up with:

    Deep navy and purple sections where the colors begin mixing.

    All three appearances work.

    The shot doesn’t need laboratory-perfect layers to look impressive.


    Make The Pickax Even Bluer

    If you want the brilliant blue color to dominate, adjust the proportions.

    Electric Blue Pickax

    • ¾ ounce blue curaçao
    • ½ ounce blue raspberry vodka
    • ¼ ounce black vodka

    This variation allows the bright-blue portion to occupy most of the glass while the black vodka provides a dark accent across the top.

    It’s a great option when appearance is your priority.


    Make The Pickax Darker

    Maybe you want something that looks more mysterious.

    Go heavier on the black vodka.

    Midnight Pickax

    • ½ ounce blue curaçao
    • ¼ ounce blue raspberry vodka
    • ¾ ounce black vodka

    You’ll still see some electric blue, particularly toward the bottom of a clear glass, but the darker portion becomes much more prominent.

    It also produces a stronger vodka-forward flavor.


    The Black-and-Blue Pickax Rim

    Want to make the presentation even more dramatic?

    Give the shot glass a two-tone sugar rim.

    You’ll need:

    • Blue cocktail sugar
    • Black cocktail sugar
    • Lemon or lime wedge

    Place the blue and black sugars on separate small plates.

    Run the citrus wedge around half of the shot glass rim and dip that section into blue sugar.

    Repeat on the opposite side using black sugar.

    You now have a half-blue, half-black rim that mirrors the drink inside.

    For parties, prepare several rimmed glasses ahead of time and keep them chilled until you’re ready to make the shots.


    Add a Blackberry Garnish

    A fresh blackberry makes a simple garnish for The Pickax.

    Its naturally dark appearance works beautifully with the black-and-blue theme.

    Place a blackberry on a cocktail pick and rest it across the top of the shot glass.

    You could also pair a blackberry with a thin lemon twist to bring both the dark and bright elements of the drink together.


    Turn The Pickax Into a Full Cocktail

    Like the flavor but don’t feel like taking a shot?

    Turn it into a cocktail.

    The Pickax Cocktail

    Ingredients

    • 1 ounce blue curaçao
    • 1½ ounces blue raspberry vodka
    • 1 ounce black vodka
    • 2 ounces lemon-lime soda
    • Ice
    • Blackberry or lemon twist for garnish

    Directions

    Fill a clear rocks glass with ice.

    Pour in the blue curaçao and blue raspberry vodka.

    Add approximately 2 ounces of lemon-lime soda and gently stir.

    Then slowly pour the black vodka over the back of a spoon near the surface of the drink.

    Garnish with a blackberry or lemon twist.

    The result takes the visual concept behind The Pickax and turns it into something you can sip rather than shoot.


    Try The Pickax Over Crushed Ice

    Another fun presentation is serving the cocktail version over crushed ice.

    Fill a clear glass with crushed ice and slowly add the blue ingredients.

    Then drizzle the black vodka across the top.

    Because crushed ice creates different pathways through the glass, the darker liquid can move through the drink in unpredictable patterns.

    You may end up with black, blue, purple, and navy streaks running between the pieces of ice.

    It’s less controlled than a traditional layered shot, but visually it can be even more interesting.


    Make a Party Batch

    If you’re serving The Pickax at a gathering, you can prepare the blue portion ahead of time.

    For approximately eight shots, combine:

    • 4 ounces blue curaçao
    • 4 ounces blue raspberry vodka

    Pour the mixture into a sealed bottle or pitcher and refrigerate until you’re ready to serve.

    Keep your black vodka chilled separately.

    When it’s time for shots, pour the blue mixture into individual glasses and add the black vodka to each glass.

    Keeping the black portion separate until serving gives you more control over the presentation.


    Serve The Pickax Ice Cold

    Temperature matters with this drink.

    Because The Pickax contains several spirits and liqueurs without much mixer, serving it warm can make the alcohol significantly more noticeable.

    Cold temperatures help create a smoother drinking experience.

    Chill your bottles beforehand if possible.

    Shake the blue ingredients with plenty of fresh ice.

    Use chilled glasses.

    And serve immediately.

    Those small details can make a noticeable difference.


    Perfect Occasions for The Pickax

    The unusual appearance makes this shot particularly suited to occasions where you want the drinks to become part of the entertainment.

    The Pickax would be especially fun for:

    • Halloween parties
    • Birthday celebrations
    • Game nights
    • Bachelor or bachelorette parties
    • Football watch parties
    • Rock-themed gatherings
    • Black-and-blue parties
    • Nighttime backyard gatherings
    • Weekend celebrations
    • Adult costume parties
    • New Year’s Eve
    • Late-night get-togethers

    Bring out a tray filled with black-and-blue shots and you’re probably going to get some questions.

    And that’s part of the fun.


    Great Food Pairings

    The Pickax’s citrus and berry sweetness works best with foods that provide contrast.

    Try serving it alongside:

    Spicy Chicken Wings

    Heat from spicy wings contrasts with the sweet berry and citrus flavors.

    BBQ Sliders

    Smoky barbecue adds a savory element that prevents the sweeter flavors from becoming overwhelming.

    Loaded Nachos

    Salty tortilla chips, cheese, jalapeños, and salsa make a great party-food pairing.

    Burgers

    A juicy burger provides plenty of savory contrast.

    Pizza

    Pizza and party shots are an easy combination, especially when you’re serving a crowd.

    Chocolate Desserts

    Dark chocolate can work particularly well with berry flavors.

    Try brownies, chocolate cupcakes, or chocolate-covered strawberries.


    The Pickax for Halloween

    If you’re looking for a Halloween shooter, The Pickax naturally fits the occasion.

    The blue-and-black appearance already looks mysterious without requiring an elaborate presentation.

    Add black sugar around the rim, serve it under dim party lighting, and you’ve got a drink that looks made for Halloween.

    You could even rename the darker variation The Midnight Pickax for the occasion.


    The Pickax for a Black-and-Blue Party

    If you’re hosting a gathering built around black and blue colors, this drink practically names itself.

    Coordinate the shot with:

    • Black napkins
    • Blue lighting
    • Black serving trays
    • Blue cocktail picks
    • Blackberries
    • Blue and black sugar rims

    The result turns a simple three-spirit shooter into part of the party’s overall presentation.


    Don’t Forget the Clear Glass

    This might sound like a minor detail, but don’t serve The Pickax in an opaque shot glass.

    You’re putting effort into creating two dramatic colors.

    Show them off.

    A simple clear shot glass lets the electric blue shine while highlighting the dark upper layer.

    Tall, narrow shot glasses can make the color transition particularly noticeable.


    The Pickax: Sweet, Dark, and Bold

    There’s something fun about a drink that doesn’t look exactly like everything else sitting on the bar.

    That’s where The Pickax succeeds.

    It combines familiar fruity flavors with an unusual visual presentation.

    The blue curaçao provides citrus sweetness and electric color.

    The blue raspberry vodka adds berry flavor and additional sweetness.

    The black vodka creates the dark contrast and gives the drink its edge.

    Together, they produce a shooter that’s bright and dark, sweet and strong, playful and intimidating all at once.


    Shot of the Day Final Thoughts

    The Pickax isn’t trying to be an elegant after-dinner cocktail.

    It’s a party shot.

    It’s supposed to attract attention.

    It’s supposed to make someone across the table ask:

    “What is THAT?”

    And when they do, you have your answer.

    It’s The Pickax.

    Electric blue underneath.

    Midnight black above.

    Sweet citrus and raspberry in the first taste.

    Vodka bringing the final strike.

    Whether you’re serving one at home, preparing a tray for friends, or turning the recipe into a full-sized cocktail, The Pickax gives you something different from the typical shooter.

    Sometimes the simplest drinks become the most memorable because they have personality.

    The Pickax definitely has personality.

    So chill the bottles, grab a clear shot glass, build that brilliant blue base, and carefully bring in the darkness.

    Then raise your glass.

    Take your swing.

    Make it count.

    And let The Pickax strike.

    Please enjoy responsibly. This recipe is intended only for adults of legal drinking age.

  • Cocktail of the Day: Salted Caramel White Russian

    Cocktail of the Day: Salted Caramel White Russian

    Creamy, rich, slightly salty, and wonderfully sweet, the Salted Caramel White Russian is the kind of cocktail that can easily double as dessert. It takes everything people love about the classic White Russian—smooth vodka, deep coffee flavor, and luxurious cream—and gives it an irresistible salted caramel twist.

    The combination works because each ingredient brings something different to the glass. Vodka provides a clean alcoholic base. Coffee liqueur contributes sweetness and roasted coffee notes. Cream gives the cocktail its famous velvety texture. Caramel adds buttery sweetness, while just a touch of sea salt provides contrast and keeps the drink from becoming overwhelmingly sugary.

    It’s an easy cocktail to prepare, yet it looks and tastes impressive enough for a special occasion.

    Whether you’re settling in after dinner, entertaining friends, planning a holiday party, or simply craving something indulgent, today’s Cocktail of the Day is worth trying.


    What Is a Salted Caramel White Russian?

    A Salted Caramel White Russian is a dessert-inspired variation of the classic White Russian cocktail.

    The traditional White Russian is built around three basic ingredients:

    • Vodka
    • Coffee liqueur
    • Cream

    The Salted Caramel White Russian keeps that familiar foundation but introduces caramel and sea salt.

    It might sound like a small change, but it transforms the personality of the drink.

    Instead of simply being creamy and coffee-forward, the cocktail develops layers of buttery caramel sweetness followed by a subtle salty finish. The result falls somewhere between an iced coffee cocktail, an after-dinner drink, and a decadent dessert.

    Best of all, you don’t need professional bartending skills to make one.


    Salted Caramel White Russian Recipe

    Prep Time: 5 minutes
    Servings: 1 cocktail
    Difficulty: Easy
    Best Served: Over ice in a rocks or old-fashioned glass

    Ingredients

    • 2 ounces vodka
    • 1 ounce coffee liqueur
    • 1 ounce heavy cream or half-and-half
    • 1/2 ounce caramel syrup
    • Small pinch of sea salt
    • Ice
    • Caramel sauce for garnish
    • Flaky sea salt for garnish, optional

    Optional Garnishes

    For an even more indulgent cocktail, consider adding:

    • Whipped cream
    • Chocolate shavings
    • Crushed toffee
    • Cinnamon
    • Nutmeg
    • Chocolate drizzle
    • Caramel candies

    You don’t need all of these. A simple caramel drizzle is more than enough to make the drink look inviting.


    How to Make a Salted Caramel White Russian

    Step 1: Prepare Your Glass

    Start with a rocks or old-fashioned glass.

    Drizzle caramel sauce around the inside of the glass. Slowly rotate the glass as you drizzle so that streaks of caramel run down the sides.

    Don’t worry about making it perfect. An uneven caramel drizzle actually gives the drink a fun dessert-cocktail appearance.

    For an extra touch, lightly coat part of the rim with caramel and dip it into a small amount of flaky sea salt.

    Only rim part of the glass so the drinker can decide whether each sip gets an extra salty kick.

    Step 2: Fill the Glass With Ice

    Fill the prepared glass with ice.

    Large cubes are especially good for White Russians because they melt more slowly than smaller pieces of ice.

    Slower melting means less dilution and a richer cocktail.

    Step 3: Add the Vodka

    Pour 2 ounces of vodka over the ice.

    Vodka creates the foundation of the cocktail without competing heavily with the coffee, cream, and caramel flavors.

    Step 4: Add the Coffee Liqueur

    Pour in 1 ounce of coffee liqueur.

    You’ll immediately see the drink develop its dark coffee-colored base.

    Step 5: Add the Caramel

    Add 1/2 ounce caramel syrup.

    Then add a very small pinch of sea salt.

    Remember: you’re not trying to make the cocktail taste salty. The salt is there to enhance the caramel and balance the sweetness.

    Step 6: Add the Cream

    Slowly pour 1 ounce heavy cream or half-and-half over the top.

    If you pour carefully, you’ll create beautiful swirls of white cream against the dark coffee-colored cocktail.

    Step 7: Garnish and Serve

    Finish with another light drizzle of caramel sauce.

    For an extra-special presentation, add a tiny pinch of flaky sea salt.

    Serve immediately.

    You can leave the cocktail layered or gently stir it before drinking.


    What Does a Salted Caramel White Russian Taste Like?

    Imagine combining a creamy iced coffee, buttery caramel sauce, and a classic cocktail.

    That’s essentially the flavor experience you’re getting.

    The coffee liqueur provides deep roasted sweetness while the vodka adds warmth without dramatically changing the flavor.

    Then the cream softens everything.

    Caramel brings another layer of sweetness, but the small amount of salt prevents the cocktail from becoming one-dimensional.

    You’ll experience:

    Creaminess from the heavy cream.

    Coffee richness from the coffee liqueur.

    Buttery sweetness from the caramel.

    Warmth from the vodka.

    Sweet-and-salty contrast from the sea salt.

    Instead of tasting like several separate ingredients, they blend together into something resembling a sophisticated alcoholic caramel latte.


    Why Salt Makes Caramel Taste Even Better

    Salted caramel isn’t simply caramel with salt added for novelty.

    The contrasting flavors work extremely well together.

    Caramel is intensely sweet, buttery, and slightly toasted. A small amount of salt provides contrast and can make those caramel flavors seem even more pronounced.

    The same idea works in desserts like salted caramel brownies, cookies, cheesecake, ice cream, and chocolate.

    It works equally well in cocktails.

    Without salt, this White Russian variation can lean heavily toward sweetness.

    With just the right amount, the drink becomes more balanced.

    The important word is little.

    A pinch is enough.

    Too much salt can quickly overpower the drink.


    Choosing the Best Vodka

    Because there aren’t many ingredients in a White Russian, the quality and character of your vodka can make a difference.

    You don’t need the most expensive vodka available.

    Instead, look for something that tastes smooth and clean.

    Standard unflavored vodka is usually the best choice because it allows the coffee and caramel flavors to remain the stars.

    However, flavored vodkas open up several interesting possibilities.

    Vanilla Vodka

    Vanilla complements caramel, coffee, and cream beautifully.

    Using vanilla vodka can make the cocktail taste even more like dessert.

    Caramel Vodka

    Caramel vodka intensifies the caramel flavor.

    If you’re using it, consider reducing the amount of caramel syrup slightly so the cocktail doesn’t become overly sweet.

    Whipped Cream Vodka

    Whipped cream vodka pushes the drink firmly into dessert territory.

    It can be especially fun for holiday parties.

    Espresso or Coffee Vodka

    Coffee-flavored vodka can strengthen the cocktail’s roasted coffee character.

    This is a good option if you prefer your White Russian less sweet and more coffee-forward.


    Choosing Your Coffee Liqueur

    Coffee liqueur is one of the defining flavors of a White Russian.

    Different coffee liqueurs vary in sweetness and coffee intensity, so experimenting can slightly change the finished drink.

    A sweeter coffee liqueur produces a more dessert-like cocktail.

    A stronger, more coffee-forward liqueur gives the drink deeper roasted flavors.

    If your coffee liqueur is already particularly sweet, you may want to start with less caramel syrup and adjust after tasting.

    Cocktail recipes should serve as starting points. Personal preference matters.


    Heavy Cream vs. Half-and-Half

    Both work extremely well, but they create slightly different cocktails.

    Heavy Cream

    Heavy cream creates the richest version.

    It gives the cocktail a thick, silky mouthfeel and makes the Salted Caramel White Russian feel almost like a drinkable dessert.

    If indulgence is the goal, heavy cream wins.

    Half-and-Half

    Half-and-half is slightly lighter but still delivers plenty of creaminess.

    It’s a great everyday choice because it allows the coffee and caramel flavors to come through more prominently.

    Whole Milk

    Whole milk can work when that’s what you have available.

    The cocktail will be thinner and lighter, but you’ll still get the familiar White Russian flavor combination.


    Dairy-Free Salted Caramel White Russian

    You can also make a dairy-free version.

    Try replacing the cream with:

    • Oat milk
    • Coconut milk
    • Almond milk
    • Cashew milk
    • Plant-based creamer

    Oat milk is particularly good because its naturally creamy texture works nicely with coffee flavors.

    Coconut milk produces a more noticeable flavor change, but coconut and caramel can be a delicious combination.

    Whenever possible, choose an unsweetened alternative. The caramel syrup and coffee liqueur already provide sweetness.

    Also check that your caramel sauce and other ingredients meet your dietary needs, since recipes and formulations can vary.


    Make It a Salted Caramel Espresso White Russian

    Coffee lovers can easily intensify the drink.

    Add:

    1 ounce chilled espresso

    Combine the espresso with the vodka, coffee liqueur, caramel syrup, and salt before adding the cream.

    The espresso gives the cocktail a stronger roasted character and helps balance the sweetness.

    It also makes the drink feel like a cross between an espresso cocktail and a White Russian.

    This variation is particularly good after dinner.


    Frozen Salted Caramel White Russian

    Want something even closer to dessert?

    Make it frozen.

    Ingredients

    • 2 ounces vodka
    • 1 ounce coffee liqueur
    • 1 ounce cream
    • 1/2 ounce caramel syrup
    • Pinch of sea salt
    • About 1 cup ice

    Place everything into a blender and blend until smooth.

    Pour into a chilled glass and garnish with caramel sauce.

    The result is creamy, frosty, and somewhere between a cocktail and an adult milkshake.


    Salted Caramel White Russian Milkshake

    For the ultimate dessert version, replace some of the ice and cream with vanilla ice cream.

    Try blending:

    • 2 ounces vodka
    • 1 ounce coffee liqueur
    • 2 scoops vanilla ice cream
    • 1/2 ounce caramel syrup
    • Tiny pinch sea salt
    • Splash of milk

    Blend until smooth.

    Pour into a tall glass and finish with whipped cream, caramel sauce, and a tiny sprinkle of sea salt.

    This version is definitely dessert first and cocktail second.


    Chocolate Salted Caramel White Russian

    Coffee, chocolate, and caramel naturally complement each other.

    Add about 1/2 ounce chocolate syrup to the standard recipe.

    You can drizzle chocolate and caramel around the inside of the glass before adding the ice.

    Finish with chocolate shavings.

    The result tastes almost like a boozy chocolate-caramel coffee.


    Vanilla Salted Caramel White Russian

    Another easy variation is to add vanilla.

    Use vanilla vodka or add a tiny splash of vanilla syrup.

    Vanilla rounds out the sharper coffee flavors and enhances the caramel without completely changing the drink.

    If you’re making this cocktail for guests who enjoy sweeter drinks, the vanilla version is an excellent choice.


    Salted Caramel White Russian With Cold Brew

    Another way to strengthen the coffee character is with cold brew.

    Add 1 to 2 ounces of cold brew coffee to the recipe.

    Because cold brew adds extra liquid, you may want to slightly increase the vodka or coffee liqueur depending on how strong you want the cocktail.

    Cold brew makes the drink lighter than the espresso variation while still delivering plenty of coffee flavor.


    Turn It Into an After-Dinner Dessert

    One of the best things about this cocktail is how naturally it fits at the end of a meal.

    Instead of serving both a complicated dessert and a cocktail, the Salted Caramel White Russian can serve both roles.

    Dress it up with:

    • Whipped cream
    • Caramel sauce
    • Chocolate curls
    • Toffee pieces
    • Crushed cookies
    • Cinnamon
    • Flaky sea salt

    You can even serve it with a small cookie or piece of chocolate on the side.


    Desserts to Pair With a Salted Caramel White Russian

    If you want both dessert and cocktails, choose flavors that complement coffee and caramel.

    Great choices include:

    Chocolate Brownies

    The deep chocolate flavor works beautifully with coffee liqueur.

    Cheesecake

    Creamy cheesecake echoes the richness of the cocktail without introducing too many competing flavors.

    Chocolate Chip Cookies

    A warm chocolate chip cookie and a cold Salted Caramel White Russian make an excellent combination.

    Vanilla Ice Cream

    Simple vanilla lets the cocktail remain the star.

    Apple Pie

    Caramel and apples are natural partners, making apple pie an especially good fall pairing.

    Bread Pudding

    The warm spices and rich texture of bread pudding pair nicely with the creamy cocktail.

    Chocolate Cake

    Chocolate, coffee, caramel, and cream all belong together.


    Perfect for Fall Entertaining

    Salted caramel feels right at home during autumn.

    As temperatures drop and people begin craving warmer, richer flavors, cocktails featuring coffee and caramel become particularly inviting.

    Serve Salted Caramel White Russians for:

    • Fall dinner parties
    • Halloween gatherings
    • Thanksgiving celebrations
    • Football watch parties
    • Weekend get-togethers
    • Cozy evenings at home

    Add a small sprinkle of cinnamon to give the cocktail an additional seasonal touch.


    A Great Holiday Cocktail

    The Salted Caramel White Russian also transitions beautifully from fall into the holiday season.

    Coffee, caramel, cream, and vodka all work with traditional winter dessert flavors.

    For Christmas, garnish the cocktail with whipped cream, caramel, and chocolate shavings.

    For New Year’s Eve, serve it as an after-dinner drink before switching to sparkling beverages closer to midnight.

    You could even create a small White Russian bar where guests choose their own toppings.


    Create a Salted Caramel White Russian Bar

    If you’re hosting a party, a DIY cocktail station can make this simple drink more interactive.

    Provide the basic ingredients along with several optional additions.

    Base Ingredients

    • Vodka
    • Coffee liqueur
    • Cream or half-and-half
    • Caramel syrup
    • Ice

    Flavor Additions

    Offer small bottles or containers of:

    • Vanilla syrup
    • Chocolate syrup
    • Cold brew
    • Cinnamon
    • Nutmeg

    Garnishes

    Finish the station with:

    • Whipped cream
    • Caramel drizzle
    • Chocolate shavings
    • Crushed toffee
    • Flaky sea salt

    Guests can customize their cocktails based on how sweet, creamy, or coffee-forward they prefer them.


    Making Salted Caramel White Russians for a Crowd

    You can prepare part of the cocktail ahead of time when entertaining.

    For approximately 8 cocktails, combine:

    • 16 ounces vodka
    • 8 ounces coffee liqueur
    • 4 ounces caramel syrup

    Keep the mixture chilled.

    When it’s time to serve, fill individual glasses with ice and pour approximately 3 1/2 ounces of the prepared mixture into each glass.

    Add about 1 ounce of cream to each serving.

    Finish individually with caramel and a tiny amount of sea salt.

    Keeping the cream separate until serving preserves the cocktail’s beautiful appearance.


    Layered or Stirred?

    Both are correct.

    A layered White Russian looks more dramatic because you can see the cream swirling through the darker coffee mixture.

    It’s ideal when serving guests or photographing the cocktail.

    However, stirring produces the most consistent flavor.

    Once everything is mixed, each sip contains vodka, coffee, cream, caramel, and salt.

    For presentation, serve it layered and allow guests to stir it themselves.


    How Sweet Should It Be?

    That’s entirely up to you.

    If you enjoy dessert-style cocktails, use the full amount of caramel syrup and add caramel drizzle.

    For something more balanced, reduce the caramel syrup to about 1/4 ounce.

    If your coffee liqueur is particularly sweet, you may not need much caramel syrup at all.

    Taste is always the final judge.

    You can easily add sweetness, but it’s much harder to remove it once it’s in the glass.


    Common Mistakes to Avoid

    Although this is an easy cocktail, a few mistakes can affect the finished drink.

    Adding Too Much Caramel

    More isn’t always better.

    Too much caramel can overpower the coffee and vodka.

    Start small.

    Using Too Much Salt

    This is a salted caramel cocktail, not a salty cocktail.

    A tiny pinch is enough.

    Using Too Little Ice

    Plenty of ice helps keep the cocktail cold.

    Using Warm Ingredients

    Cold ingredients produce a more refreshing and enjoyable drink.

    Overcomplicating the Garnish

    Caramel drizzle and a little sea salt are already enough.

    Additional toppings are fun but optional.


    How to Make It Look Like a Bar-Quality Cocktail

    Presentation can turn a simple White Russian into something that looks professionally prepared.

    Start with a clean rocks glass.

    Add a thin caramel drizzle inside the glass before adding ice.

    Use large, clear ice cubes when available.

    Pour the dark ingredients first.

    Then slowly add the cream.

    Allow the cream to naturally create ribbons through the darker cocktail.

    Finish with a controlled caramel drizzle and just a few flakes of sea salt.

    Sometimes simplicity creates the most attractive cocktail.


    When Should You Serve a Salted Caramel White Russian?

    This drink works best when you’re in the mood for something richer rather than something light and refreshing.

    It’s especially suited for:

    • After-dinner drinks
    • Dessert cocktails
    • Date nights
    • Holiday celebrations
    • Fall gatherings
    • Winter parties
    • Movie nights
    • Dinner parties
    • Weekend treats
    • Cocktail nights at home

    Because it’s creamy and sweet, one well-made drink can feel very satisfying.


    Why the White Russian Remains So Popular

    Part of the White Russian’s lasting appeal is simplicity.

    There are no complicated bartending techniques required.

    No cocktail shaker is necessary.

    There aren’t ten different ingredients to measure.

    The classic formula of vodka, coffee liqueur, and cream is easy to remember and even easier to customize.

    Once you understand the basic combination, you can create dozens of variations.

    Salted caramel happens to be one of the most natural additions because coffee and caramel already work so well together.


    More Ways to Customize Your Cocktail

    Once you’ve mastered the Salted Caramel White Russian, experiment.

    Try adding:

    Cinnamon for warmth.

    Nutmeg for a holiday-inspired flavor.

    Espresso for stronger coffee notes.

    Chocolate for a mocha-style variation.

    Vanilla for additional dessert flavor.

    Cold brew for a smoother coffee-forward version.

    You can even combine several.

    A salted caramel mocha White Russian with coffee, chocolate, caramel, and cream can be particularly decadent.


    The Secret Is Balance

    The best Salted Caramel White Russian isn’t necessarily the sweetest one.

    It’s the one where you can taste everything.

    You should notice the coffee.

    You should experience the cream.

    You should detect the caramel.

    The vodka should provide warmth.

    And the salt should quietly bring everything together.

    When one ingredient dominates, the cocktail loses some of its complexity.

    That’s why starting with measured ingredients is helpful. You can always adjust future servings according to your preferences.


    A Cocktail That Feels Like Dessert

    Some cocktails are crisp and refreshing.

    Others are tart and citrusy.

    The Salted Caramel White Russian belongs firmly in another category: rich and indulgent.

    It’s designed for sipping slowly.

    The ice gradually softens the cocktail as you drink, while the caramel and cream make every sip feel luxurious.

    That makes it especially enjoyable when you’re not rushing anywhere.

    Pour one after dinner, find a comfortable place to relax, and enjoy it slowly.


    Cocktail of the Day Final Sip

    Today’s Cocktail of the Day: Salted Caramel White Russian takes a familiar classic and turns it into something even more indulgent.

    Vodka provides the foundation.

    Coffee liqueur brings deep roasted sweetness.

    Cream creates the signature silky texture.

    Caramel introduces buttery richness.

    And a tiny pinch of sea salt ties everything together with the perfect sweet-and-salty contrast.

    The beauty of this cocktail is that it can be as simple or elaborate as you want.

    Make the basic version with vodka, coffee liqueur, cream, caramel, and salt for an easy evening cocktail. Add espresso when you want stronger coffee flavor. Blend it with ice for a frozen treat. Add vanilla or chocolate when you’re craving something even more decadent. Top it with whipped cream when you’re ready to turn your cocktail into full-blown dessert.

    However you prepare it, the Salted Caramel White Russian is proof that sometimes a small twist on a classic is all it takes to create an entirely new experience.

    It’s creamy without being complicated, sweet without needing dozens of ingredients, and impressive without requiring advanced bartending skills.

    So grab your favorite rocks glass, fill it with ice, pour the vodka and coffee liqueur, add that luscious caramel, and slowly finish everything with cream.

    Then add the most important finishing touch—a tiny pinch of sea salt.

    Sweet, salty, creamy, coffee-rich, and deliciously indulgent—that’s what makes the Salted Caramel White Russian a Cocktail of the Day worth raising a glass to.

    Cheers, and enjoy responsibly!

  • Drink of the Day: Lemon Basil Gin Collins

    Drink of the Day: Lemon Basil Gin Collins

    Fresh lemon, fragrant basil, botanical gin, and sparkling club soda come together in today’s Drink of the Day: Lemon Basil Gin Collins. It’s a bright, refreshing cocktail that takes everything people love about the classic Tom Collins and gives it a fresh garden-inspired twist.

    There’s something especially inviting about the combination of lemon and basil. Lemon provides a clean, tart citrus flavor, while basil contributes an aromatic herbal character. Add gin—with its own blend of juniper, citrus, floral, and botanical notes—and you have a cocktail with several layers of flavor despite its relatively simple ingredient list.

    The finishing touch is club soda, which stretches the cocktail into a tall, bubbly drink that’s refreshing rather than heavy.

    Whether you’re relaxing outside after a long day, hosting friends for a summer barbecue, planning a weekend brunch, or simply looking for a new gin cocktail to try, the Lemon Basil Gin Collins deserves a place on your drink list.

    A Fresh Take on the Classic Tom Collins

    The inspiration behind this drink is the classic Tom Collins, traditionally made with gin, lemon juice, sugar or simple syrup, and carbonated water.

    It’s a simple formula that has stood the test of time because it delivers an excellent balance between strong, sour, sweet, and sparkling.

    The Lemon Basil Gin Collins keeps that familiar foundation while adding fresh basil.

    It’s a small addition that makes a noticeable difference.

    Fresh basil introduces an herbal aroma before you even taste the cocktail. When combined with the botanical qualities of gin, it creates a drink that feels more complex without becoming complicated.

    That’s part of the appeal of this cocktail: it feels sophisticated but remains easy enough to make at home.

    Why Lemon and Basil Work So Well Together

    Lemon and basil are familiar partners in cooking, but the combination works equally well in cocktails.

    Lemon brings acidity and brightness. Basil brings freshness, aroma, and a slightly peppery herbal character.

    Together, they create contrast.

    The acidity of the lemon prevents the drink from becoming overly sweet, while the basil softens the sharp citrus character with fresh herbal notes.

    Gin acts as the bridge between the two.

    Because gin is flavored with botanicals, many varieties naturally contain flavors that complement both citrus and herbs.

    The result is a cocktail in which every ingredient contributes something important.

    Lemon Basil Gin Collins Recipe

    Ingredients

    For one cocktail, you’ll need:

    • 2 ounces gin
    • 1 ounce freshly squeezed lemon juice
    • 3/4 ounce simple syrup
    • 4–6 fresh basil leaves
    • 2–3 ounces chilled club soda
    • Ice
    • Fresh basil sprig for garnish
    • Lemon wheel or wedge for garnish

    Equipment

    You don’t need an elaborate home bar setup, but the following items are helpful:

    • Cocktail shaker
    • Jigger or measuring tool
    • Muddler
    • Cocktail strainer
    • Fine-mesh strainer, optional
    • Collins or highball glass

    How to Make a Lemon Basil Gin Collins

    Step 1: Add the Basil

    Place 4–6 fresh basil leaves into the bottom of your cocktail shaker.

    Add the simple syrup.

    The syrup provides a little liquid that helps you gently extract the basil’s aromatic oils.

    Step 2: Gently Muddle

    Use a muddler to lightly press the basil leaves several times.

    Avoid aggressively grinding or tearing them apart.

    You aren’t trying to completely crush the basil. You simply want to release enough of its aromatic oils to flavor the cocktail.

    Once you can clearly smell the basil, you’re ready for the next step.

    Step 3: Add Gin and Lemon Juice

    Pour in:

    • 2 ounces gin
    • 1 ounce fresh lemon juice

    Freshly squeezed lemon juice is strongly recommended because lemon is one of the primary flavors in this drink.

    Step 4: Add Ice and Shake

    Fill the shaker with ice.

    Secure the lid and shake vigorously for approximately 10–15 seconds.

    Shaking accomplishes several things simultaneously. It chills the cocktail, slightly dilutes the ingredients, and thoroughly combines the lemon juice, gin, syrup, and basil.

    Step 5: Prepare Your Glass

    Fill a Collins or highball glass with fresh ice.

    Using fresh ice rather than the ice from the cocktail shaker helps keep the finished drink colder longer.

    Step 6: Strain

    Strain the cocktail mixture into your prepared glass.

    For a cleaner presentation, double-strain it through a fine-mesh strainer. This removes small pieces of basil that may have broken loose during muddling and shaking.

    Step 7: Top With Club Soda

    Slowly pour approximately 2–3 ounces of chilled club soda into the glass.

    Give the cocktail one gentle stir from the bottom upward.

    You don’t want to stir aggressively because that can cause the club soda to lose carbonation.

    Step 8: Garnish

    Add a fresh basil sprig and lemon wheel or wedge.

    Your Lemon Basil Gin Collins is ready to serve.

    What Does a Lemon Basil Gin Collins Taste Like?

    This cocktail is all about freshness and balance.

    The first thing you’ll probably notice isn’t actually the flavor—it’s the aroma.

    Fresh basil and lemon create a fragrant introduction to the cocktail.

    Take a sip and you’ll initially experience bright citrus, followed by the distinctive botanical character of gin.

    Then comes the basil.

    Rather than dominating the cocktail, basil adds a fresh herbal note that lingers behind the citrus and gin.

    Simple syrup rounds out the acidity, and club soda gives everything a clean, bubbly finish.

    Overall, expect the drink to be:

    • Refreshing
    • Citrusy
    • Herbal
    • Botanical
    • Lightly sweet
    • Slightly tart
    • Crisp
    • Bubbly
    • Aromatic

    It’s flavorful without feeling heavy.

    Choosing the Best Gin

    Gin can dramatically influence the final character of your Lemon Basil Gin Collins.

    Different gins contain different botanical combinations, so don’t be surprised if the cocktail tastes noticeably different when you switch brands or styles.

    London Dry Gin

    A traditional London dry gin usually emphasizes juniper and delivers a crisp, dry character.

    This is an excellent choice if you want the cocktail to maintain a noticeable classic gin flavor.

    Citrus-Forward Gin

    Some modern gins emphasize lemon, orange, grapefruit, or other citrus botanicals.

    These can amplify the fresh lemon in the Collins and create an especially bright drink.

    Floral Gin

    Floral-style gins may contain noticeable lavender, elderflower, rose, or similar botanical characteristics.

    These can create a softer, more aromatic version of the cocktail.

    Herbal Gin

    A gin with pronounced herbal botanicals can complement the basil and make the drink feel even more garden-inspired.

    The best gin ultimately comes down to personal preference.

    Fresh Lemon Juice Is Worth It

    If there is one ingredient besides gin that deserves extra attention, it’s the lemon juice.

    Freshly squeezed lemon juice brings natural acidity, aroma, and brightness that bottled alternatives may not duplicate.

    Since you’ll only need about one ounce per cocktail, squeezing a fresh lemon takes very little additional effort.

    Before juicing, roll the lemon firmly across the countertop using your palm. This can help release the juices inside.

    You can also cut your garnish before squeezing the rest of the lemon.

    Why You Shouldn’t Over-Muddle Basil

    One of the most common mistakes when preparing cocktails with fresh herbs is muddling too aggressively.

    Basil is delicate.

    Heavy muddling can tear the leaves into tiny pieces and potentially introduce stronger vegetal or bitter flavors.

    Instead, gently press and twist the leaves a few times.

    The goal is to release their aroma and essential oils—not turn them into a paste.

    A useful rule is to trust your nose. Once the fresh basil aroma becomes noticeable, you’ve probably muddled enough.

    How to Make Homemade Simple Syrup

    You can purchase simple syrup, but it’s extremely easy to make at home.

    Basic Simple Syrup

    Combine:

    • 1 cup granulated sugar
    • 1 cup water

    Add both ingredients to a small saucepan.

    Warm over medium-low heat while stirring until the sugar completely dissolves.

    You don’t need to aggressively boil the mixture.

    Once the liquid becomes clear and the sugar has dissolved, remove it from the heat.

    Allow it to cool completely before transferring it to a clean container and refrigerating.

    For smaller batches, simply maintain the equal-parts ratio.

    Make Basil Simple Syrup

    If you really enjoy the basil character of this cocktail, consider making basil-infused simple syrup.

    Prepare regular simple syrup and remove it from the heat.

    Add a handful of clean fresh basil leaves while the syrup is still warm.

    Allow the basil to steep as the syrup cools.

    Taste occasionally until the flavor reaches your preferred strength, then remove or strain out the basil.

    Use the basil syrup exactly as you would regular simple syrup.

    This method can be particularly convenient when preparing multiple cocktails because you won’t have to muddle basil separately for every drink.

    Adjusting the Sweetness

    Cocktail recipes should be treated as starting points rather than absolute rules.

    Lemons vary in acidity, and people have different preferences for sweetness.

    If you enjoy tart drinks, reduce the simple syrup to about 1/2 ounce.

    If you prefer sweeter cocktails, increase the syrup slightly.

    Make adjustments in small increments. Even an additional 1/4 ounce of syrup can noticeably change the balance.

    Adjusting the Strength

    You can also control how spirit-forward your Collins tastes.

    For a lighter drinking experience, increase the amount of club soda.

    Adding additional sparkling water doesn’t eliminate the alcohol, but it spreads the alcohol across a larger drink and creates a longer, lighter-tasting cocktail.

    For a stronger gin character, stay closer to 2 ounces of club soda.

    The Importance of Cold Club Soda

    Club soda may seem like a minor ingredient, but temperature matters.

    Use well-chilled club soda whenever possible.

    Cold soda helps maintain the temperature of the finished drink without requiring additional dilution.

    It also makes the cocktail feel especially crisp and refreshing.

    Open your club soda shortly before preparing the drink so you get maximum carbonation.

    Why Fresh Ice Matters

    Ice is another overlooked cocktail ingredient.

    After shaking your drink, strain it over fresh ice rather than pouring the shaker ice into your serving glass.

    The shaker ice has already begun melting and diluting the cocktail.

    Fresh ice keeps the finished drink colder longer and gives it a cleaner appearance.

    Large, solid ice cubes are especially useful because they melt more slowly.

    The Best Glass for a Lemon Basil Gin Collins

    A Collins glass is the traditional choice.

    Tall and narrow, it’s designed specifically for long, carbonated cocktails like this one.

    If you don’t own Collins glasses, don’t worry.

    A highball glass works perfectly well.

    The important thing is choosing a glass with enough room for:

    • Ice
    • Cocktail mixture
    • Club soda
    • Garnish

    A wine glass can even work in a pinch.

    Garnish Makes a Difference

    Garnish isn’t just decoration.

    With an aromatic cocktail like the Lemon Basil Gin Collins, garnish contributes to the drinking experience.

    A fresh basil sprig sits near your nose while you sip, reinforcing the herbal aroma.

    Before placing the sprig into the glass, gently clap it between your palms.

    This helps release the basil’s natural oils and makes the aroma more noticeable.

    Pair it with a lemon wheel for color and an additional citrus fragrance.

    Strawberry Basil Gin Collins

    Want to add fruit?

    Strawberry is one of the easiest variations.

    Add one or two sliced strawberries to the shaker with the basil and simple syrup.

    Gently muddle everything together before adding the gin and lemon juice.

    The strawberries introduce natural fruit sweetness and turn the cocktail a beautiful pinkish-red color.

    Blackberry Basil Gin Collins

    Fresh blackberries also work wonderfully with basil.

    Muddle 3–4 blackberries with the basil and simple syrup.

    Continue with the original recipe.

    Blackberries create a deeper berry flavor and richer color while maintaining the drink’s refreshing character.

    Raspberry Lemon Basil Collins

    Raspberries provide a slightly tart berry flavor that pairs naturally with fresh lemon.

    Muddle several raspberries with the basil before shaking.

    Double-straining is especially helpful with this variation because raspberry seeds can otherwise end up in the finished drink.

    Cucumber Basil Gin Collins

    For an incredibly refreshing variation, add cucumber.

    Place 2–3 thin cucumber slices into your shaker alongside the basil and simple syrup.

    Gently muddle and continue with the recipe.

    Cucumber, basil, lemon, and gin create a crisp combination that’s especially enjoyable during hot weather.

    Blueberry Basil Gin Collins

    Muddle a small handful of blueberries with your basil and syrup.

    The blueberries add subtle sweetness and berry flavor without completely taking over the cocktail.

    Garnish with blueberries, basil, and lemon for an attractive presentation.

    Grapefruit Basil Gin Collins

    Replace approximately half of the lemon juice with freshly squeezed grapefruit juice.

    You’ll get a slightly more bitter citrus profile that pairs beautifully with gin.

    A grapefruit peel can replace the lemon garnish.

    Honey Basil Gin Collins

    Instead of traditional simple syrup, try honey syrup.

    Because straight honey doesn’t dissolve easily in cold cocktails, mix honey with warm water first.

    A simple combination of honey and warm water creates a pourable syrup that blends easily.

    Honey adds a richer sweetness than granulated sugar and pairs nicely with lemon and basil.

    Spicy Lemon Basil Gin Collins

    If you enjoy cocktails with a little heat, add one or two thin slices of fresh jalapeño to the shaker.

    Start small.

    You want the pepper to add a gentle warmth rather than overpower the lemon, basil, and gin.

    This variation is especially good alongside grilled foods and spicy appetizers.

    Lavender Lemon Basil Collins

    For a more floral version, incorporate a small amount of lavender syrup.

    Use it sparingly because lavender can quickly dominate a cocktail.

    Combined with basil and gin botanicals, it can create a fragrant and sophisticated drink.

    Making a Pitcher for a Party

    The Lemon Basil Gin Collins can easily become a party cocktail.

    For approximately 6 servings, combine:

    • 12 ounces gin
    • 6 ounces fresh lemon juice
    • 4 1/2 ounces simple syrup
    • A generous handful of fresh basil

    Gently muddle the basil into the syrup before combining everything.

    Refrigerate the mixture until serving time.

    When guests are ready for drinks, pour the mixture over ice and top each glass individually with club soda.

    Don’t add all the club soda to the pitcher hours ahead of time because it will lose carbonation.

    Set Up a Lemon Basil Collins Bar

    For parties, consider turning this cocktail into a build-your-own drink station.

    Prepare the basic lemon-basil mixture and offer optional additions such as:

    • Strawberries
    • Blackberries
    • Raspberries
    • Blueberries
    • Cucumber slices
    • Jalapeño
    • Lemon wedges
    • Grapefruit slices
    • Fresh mint
    • Extra basil

    Guests can customize their Collins according to their preferences.

    Food Pairings

    Because the Lemon Basil Gin Collins is bright and refreshing, it pairs particularly well with foods that aren’t overly heavy.

    Grilled Chicken

    Lemon and herbs naturally complement grilled chicken, making this one of the easiest pairings.

    Seafood

    Try the cocktail with grilled shrimp, salmon, white fish, crab cakes, or seafood skewers.

    Caprese Salad

    Tomatoes, fresh mozzarella, basil, and balsamic pair beautifully with the cocktail’s basil character.

    Bruschetta

    Tomatoes, garlic, basil, and toasted bread provide a flavorful appetizer alongside the crisp drink.

    Grilled Vegetables

    Zucchini, peppers, asparagus, mushrooms, and eggplant all work well.

    Flatbread and Pizza

    Lighter pizzas topped with fresh vegetables, chicken, mozzarella, pesto, or basil can be excellent companions.

    Charcuterie

    A board filled with cheeses, crackers, fruit, olives, and cured meats gives guests plenty of flavors to enjoy alongside their cocktails.

    Perfect for Spring and Summer

    Some cocktails feel appropriate throughout the year.

    Others seem designed for a particular season.

    The Lemon Basil Gin Collins belongs to warm weather.

    Fresh citrus, basil, ice, and bubbles make it ideal for sunny afternoons and warm evenings.

    It’s particularly enjoyable during spring and summer when fresh basil is plentiful.

    If you grow basil in your garden or on your kitchen windowsill, this cocktail gives you another reason to pick a few leaves.

    A Great Backyard Barbecue Cocktail

    Barbecues often feature rich, smoky, salty, and spicy foods.

    A refreshing citrus cocktail can provide a welcome contrast.

    The acidity of lemon cuts through richer foods, while carbonation cleanses the palate between bites.

    The basil also works naturally with many grilled foods.

    Serve Lemon Basil Gin Collins cocktails alongside grilled chicken, burgers, vegetables, seafood, or kebabs.

    A Refreshing Brunch Option

    Gin cocktails aren’t only for evenings.

    The Lemon Basil Gin Collins can also be an enjoyable brunch cocktail.

    Its combination of lemon, herbs, and sparkling water feels lighter than many creamy or overly sweet drinks.

    Serve it with:

    • Eggs and toast
    • Breakfast sandwiches
    • Quiche
    • Fresh fruit
    • Avocado toast
    • Breakfast potatoes
    • Smoked salmon
    • Pastries

    Presentation Ideas

    A beautiful cocktail doesn’t require complicated decorations.

    For an attractive presentation, fill a tall clear glass with ice, strain in the pale citrus cocktail, top it with sparkling club soda, and finish with vibrant green basil and a bright yellow lemon wheel.

    You can also place a thin lemon wheel inside the glass against the side before adding ice.

    For parties, arrange several prepared glasses together with bowls of lemons and fresh basil nearby.

    The yellow-and-green color combination naturally creates a fresh summer appearance.

    Common Mistakes to Avoid

    Even simple cocktails can benefit from a little attention to technique.

    Using Too Much Basil

    Basil should complement the cocktail, not overwhelm it.

    Start with 4–6 leaves.

    Over-Muddling

    Press the basil gently rather than pulverizing it.

    Using Warm Soda

    Cold club soda produces a more refreshing cocktail.

    Adding Soda Before Shaking

    Never shake carbonated club soda in a sealed cocktail shaker.

    Shake the gin, lemon, syrup, and basil first, then add soda directly to the serving glass.

    Making It Too Sweet

    A Collins should remain bright and refreshing.

    Start with the recommended amount of syrup and adjust from there.

    Forgetting Fresh Lemon

    Fresh citrus plays a major role in this cocktail, so use freshly squeezed juice whenever possible.

    Why Simple Cocktails Can Be the Best Cocktails

    It’s easy to assume that a great cocktail needs ten ingredients, unusual syrups, elaborate garnishes, and complicated techniques.

    That’s rarely necessary.

    Some of the most enjoyable drinks rely on just a few ingredients used in the right proportions.

    The Lemon Basil Gin Collins demonstrates that perfectly.

    Gin provides the foundation.

    Lemon supplies acidity.

    Simple syrup provides balance.

    Basil adds aroma and personality.

    Club soda adds bubbles and length.

    Ice keeps everything cold.

    Nothing is there without a purpose.

    The Secret Is Balance

    A great Collins shouldn’t taste overwhelmingly sour, sweet, alcoholic, or watery.

    Everything should work together.

    If the lemon seems too aggressive, add a little more syrup.

    If the drink seems too sweet, add additional lemon or soda.

    If the gin disappears completely, use slightly less club soda.

    If the basil dominates, use fewer leaves next time.

    Learning to make cocktails isn’t only about following recipes. It’s also about tasting and adjusting.

    Why Gin and Herbs Are Natural Partners

    Gin is unusual among spirits because botanicals are central to its identity.

    Juniper is the defining botanical, but gin can also include ingredients such as citrus peel, coriander, angelica root, cardamom, herbs, flowers, spices, and countless other botanicals.

    That means fresh herbs often feel right at home in gin cocktails.

    Basil doesn’t fight against the gin. Instead, it can emphasize the spirit’s existing botanical character.

    That’s one reason this cocktail tastes more complex than its short ingredient list suggests.

    Make It Your Signature Summer Cocktail

    One of the best things about finding a versatile base recipe is being able to personalize it.

    Maybe you prefer extra basil.

    Maybe you like your Collins tart.

    Perhaps strawberry and basil becomes your favorite combination.

    Or maybe cucumber and basil becomes your go-to drink for summer gatherings.

    Once you understand the basic combination of gin, citrus, sweetness, herbs, and carbonation, you can experiment with dozens of variations.

    You might even create your own signature Collins.

    When to Serve a Lemon Basil Gin Collins

    This cocktail fits naturally into many occasions, including:

    • Backyard barbecues
    • Pool parties
    • Summer birthdays
    • Weekend brunches
    • Patio dinners
    • Cookouts
    • Garden parties
    • Holiday weekends
    • Bridal showers
    • Dinner parties
    • Happy hour
    • Date nights at home
    • Casual evenings with friends
    • Relaxing afternoons on the patio

    It’s approachable enough for casual occasions while still looking polished enough for celebrations.

    A Cocktail That Engages the Senses

    Part of what makes the Lemon Basil Gin Collins special is that it isn’t only about taste.

    There’s the bright yellow of the lemon.

    The vibrant green of fresh basil.

    The sound of club soda fizzing over ice.

    The aroma of basil and citrus as you lift the glass.

    The cold condensation on the outside of a tall Collins glass.

    And finally, there’s the combination of citrus, herbs, gin, sweetness, and bubbles.

    Sometimes the simplest drinks create the most satisfying experience.

    Drink of the Day Final Sip

    Today’s Drink of the Day: Lemon Basil Gin Collins takes a beloved cocktail formula and gives it a wonderfully fresh twist.

    The foundation remains beautifully simple: gin, fresh lemon juice, simple syrup, and sparkling club soda. But the addition of fresh basil transforms the drink, introducing a fragrant herbal character that works naturally with both the citrus and botanical gin.

    It’s crisp without being boring, sweet without becoming sugary, and flavorful without feeling heavy.

    Even better, the basic recipe offers plenty of opportunities for experimentation. Add strawberries for sweetness, cucumber for extra freshness, blackberries for deeper fruit flavor, grapefruit for bitterness, or jalapeño for a touch of heat.

    But don’t feel like you need to change anything.

    The original Lemon Basil Gin Collins is delicious precisely because of its simplicity.

    Pour it over plenty of ice, top it with cold club soda, garnish it generously with fresh basil and lemon, and enjoy a cocktail that looks every bit as refreshing as it tastes.

    Whether you’re serving drinks at a summer gathering or making one cocktail at home after a long day, the Lemon Basil Gin Collins is a refreshing reminder that sometimes all it takes is one fresh ingredient to give a classic cocktail an entirely new personality.

    Cheers to today’s Drink of the Day: Lemon Basil Gin Collins!

    Please enjoy responsibly. This recipe is intended for adults of legal drinking age.

  • Mocktail of the Day: Cucumber Mint Cooler

    Mocktail of the Day: Cucumber Mint Cooler

    When you want a drink that is crisp, refreshing, beautiful, and completely alcohol-free, it is hard to beat a Cucumber Mint Cooler.

    Today’s Mocktail of the Day combines fresh cucumber, fragrant mint, freshly squeezed lime juice, a touch of sweetness, plenty of ice, and sparkling water to create a drink that tastes as refreshing as it looks.

    There is something especially satisfying about cucumber in a cold beverage. Its mild, clean flavor immediately gives a drink a cooling quality. Pair it with fresh mint and citrus, and you have a combination that feels perfect for a warm afternoon, backyard gathering, weekend brunch, or relaxing evening at home.

    The best part is that you don’t need complicated ingredients or professional bartending skills to make it.

    With just a few fresh ingredients and about five minutes, you can turn an ordinary glass of sparkling water into a mocktail that looks like it came from a restaurant or cocktail bar.

    Whether you’re taking a break from alcohol, serving guests who don’t drink, looking for something different from soda, or simply craving a refreshing beverage, the Cucumber Mint Cooler is worth trying.


    A Refreshing Mocktail for Any Occasion

    Mocktails have come a long way.

    There was a time when ordering an alcohol-free drink often meant choosing between water, soda, iced tea, or juice. Today, mocktails are increasingly treated with the same creativity and attention as traditional cocktails.

    Fresh fruit, herbs, citrus, syrups, spices, teas, and sparkling ingredients can create surprisingly complex drinks without alcohol.

    The Cucumber Mint Cooler demonstrates that you don’t necessarily need a long ingredient list.

    Instead, this drink focuses on a few ingredients that naturally complement one another.

    Cucumber provides the crisp foundation.

    Mint introduces an aromatic herbal note.

    Lime adds brightness and acidity.

    A little sweetener balances the tartness.

    Sparkling water provides the refreshing bubbles that bring everything together.

    It’s simple, but every ingredient has a purpose.


    Cucumber Mint Cooler Recipe

    Prep Time: 5 minutes
    Total Time: 5 minutes
    Servings: 1
    Difficulty: Easy
    Best Served: Immediately
    Glass: Highball or Collins glass

    Ingredients

    • 5–6 thin cucumber slices
    • 6–8 fresh mint leaves
    • 1 ounce freshly squeezed lime juice
    • ½–1 ounce simple syrup, honey syrup, or agave syrup
    • 4–6 ounces chilled sparkling water or club soda
    • Ice
    • Fresh cucumber slice or ribbon for garnish
    • Fresh mint sprig for garnish
    • Lime wheel or wedge for garnish

    Optional Additions

    You can also experiment with:

    • Fresh strawberries
    • Watermelon
    • Blueberries
    • Raspberries
    • Lemon juice
    • Grapefruit juice
    • Ginger beer
    • Ginger ale
    • Fresh ginger
    • Jalapeño
    • Basil
    • Rosemary
    • Flavored sparkling water

    How to Make a Cucumber Mint Cooler

    Step 1: Prepare the Cucumber

    Wash your cucumber thoroughly and cut several thin slices.

    You can peel the cucumber if you prefer, but leaving the skin on adds color and makes the finished drink more visually appealing.

    English cucumbers work especially well because they have thin skins and relatively small seeds, although almost any fresh cucumber can be used.

    Set aside one particularly attractive slice for your garnish.

    Step 2: Add the Mint

    Place approximately six to eight fresh mint leaves into the bottom of a cocktail shaker or sturdy glass.

    Look for mint leaves that are bright green and fragrant.

    If your mint has been refrigerated, gently rinse it under cool water and pat it dry before using.

    Step 3: Muddle Gently

    Add the cucumber slices to the mint.

    Using a muddler or the back of a wooden spoon, gently press the cucumber and mint together.

    You aren’t trying to completely crush everything.

    The goal is simply to release some cucumber juice and the aromatic oils from the mint.

    Over-muddling mint can sometimes create bitter or grassy flavors, so a gentle touch works best.

    Step 4: Add Fresh Lime Juice

    Squeeze approximately one ounce of fresh lime juice into the mixture.

    Fresh lime is one of the ingredients that makes this drink come alive.

    Its acidity provides contrast to the mild cucumber and helps brighten the mint.

    Step 5: Add Sweetener

    Pour in approximately half an ounce of simple syrup.

    If you enjoy sweeter drinks, you can increase the amount to approximately one ounce.

    Honey syrup or agave syrup can also be used.

    The goal isn’t to make the drink extremely sweet. The sweetener should simply soften the sharpness of the lime and create balance.

    Step 6: Add Ice

    Fill your serving glass with ice.

    Don’t be afraid to use plenty.

    The Cucumber Mint Cooler is at its best when it is icy cold.

    Step 7: Pour the Cucumber Mixture

    You now have two choices.

    For a clean, polished presentation, strain the cucumber and mint mixture over fresh ice.

    For a more rustic drink, pour everything directly into the glass and allow some of the cucumber and mint to remain.

    Both approaches work.

    Step 8: Add Sparkling Water

    Top the drink with approximately four to six ounces of chilled sparkling water or club soda.

    Pour slowly to preserve as much carbonation as possible.

    Step 9: Stir

    Give the drink one or two gentle stirs.

    You want the lime, cucumber, mint, and sweetener distributed throughout the glass without stirring away all those refreshing bubbles.

    Step 10: Garnish

    Finish with a cucumber ribbon or slice, fresh mint sprig, and lime wheel.

    Serve immediately.


    What Does a Cucumber Mint Cooler Taste Like?

    The Cucumber Mint Cooler is all about balance.

    Your first sip delivers the crispness of cucumber and the brightness of fresh lime.

    Then the mint begins to appear.

    Instead of dominating the drink, the mint contributes a cooling herbal freshness that complements the cucumber.

    The sweetness remains in the background, helping soften the lime without covering up the fresh ingredients.

    Finally, the sparkling water gives everything a bubbly, refreshing finish.

    The overall flavor is:

    Crisp.

    Cool.

    Citrusy.

    Lightly sweet.

    Herbal.

    Refreshing.

    It isn’t meant to taste like fruit punch or soda.

    The appeal comes from its freshness.


    Why Cucumber Is So Good in Drinks

    Cucumber may not be the first ingredient people think about when making beverages, but it is surprisingly versatile.

    Because cucumber has a high water content and mild flavor, it can add freshness without making a drink heavy.

    Unlike stronger fruits, cucumber doesn’t overwhelm herbs or citrus.

    Instead, it acts almost like a background flavor that makes the entire drink feel lighter.

    It pairs particularly well with:

    • Mint
    • Basil
    • Lime
    • Lemon
    • Watermelon
    • Strawberry
    • Ginger
    • Jalapeño
    • Rosemary
    • Grapefruit

    That versatility makes cucumber an excellent ingredient for experimenting with homemade mocktails.


    Why Mint Makes Such a Difference

    Mint isn’t only about flavor.

    A large part of its appeal is aroma.

    Before you even taste your drink, you smell the fresh mint sitting near the top of the glass.

    That’s why a generous mint sprig makes such an effective garnish.

    Try gently clapping the mint sprig between your palms before placing it into the glass.

    You aren’t trying to crush it.

    The gentle pressure helps release some of the aromatic oils from the leaves.

    When you lift the glass to take a sip, that fresh mint aroma becomes part of the experience.


    Fresh Lime Juice Is Worth It

    If possible, use freshly squeezed lime juice.

    Because the ingredient list is relatively short, individual flavors stand out.

    Fresh lime provides a brightness that’s difficult to reproduce with some bottled alternatives.

    Roll your lime firmly against the countertop before cutting it. This can help release more juice.

    You can also garnish the drink with a lime wheel so guests immediately know there’s citrus in the cooler.


    How Sweet Should Your Cooler Be?

    That’s entirely up to you.

    One of the advantages of making mocktails at home is having complete control over sweetness.

    If you prefer tart drinks, start with approximately half an ounce of simple syrup.

    If you prefer something sweeter, use closer to one ounce.

    You can even leave the sweetener out completely.

    Taste the drink after adding sparkling water.

    If it needs more sweetness, add a small amount at a time.

    It’s much easier to add sweetness than remove it.


    How to Make Simple Syrup

    You don’t need to purchase simple syrup.

    Traditional simple syrup can be made with equal parts sugar and water.

    For example:

    • ½ cup sugar
    • ½ cup water

    Combine the sugar and water in a small saucepan.

    Warm gently while stirring until the sugar completely dissolves.

    You don’t need to aggressively boil the mixture.

    Allow it to cool before using.

    Store your homemade simple syrup in a clean, covered container in the refrigerator and use it for additional homemade drinks.


    Honey Cucumber Mint Cooler

    For a slightly different flavor, replace simple syrup with honey syrup.

    Straight honey doesn’t always dissolve easily in an ice-cold drink, which is why turning it into syrup can help.

    Combine honey with a small amount of warm water until it becomes easier to pour and mix.

    Honey adds a richer sweetness than traditional simple syrup and pairs nicely with lime and mint.


    Strawberry Cucumber Mint Cooler

    Want something fruitier?

    Add one or two strawberries.

    Muddle the strawberries with the cucumber and mint before adding lime juice.

    The strawberries provide natural sweetness and transform the drink into something slightly more colorful and fruit-forward.

    Garnish with a strawberry, cucumber slice, and mint sprig.


    Watermelon Cucumber Mint Cooler

    Few ingredients say summer quite like watermelon.

    Add several small cubes of ripe watermelon to your cucumber and mint.

    Gently muddle everything together.

    Watermelon adds sweetness without completely covering the cucumber flavor.

    It’s an excellent variation for backyard cookouts, pool parties, and summer celebrations.


    Blueberry Cucumber Mint Cooler

    Add a small handful of blueberries before muddling.

    Blueberries introduce a mild berry flavor and beautiful color.

    A combination of blueberries, cucumber, mint, and lime can create a mocktail that looks especially impressive when served in a clear glass.


    Raspberry Cucumber Mint Cooler

    Raspberries provide more tartness than some other berries.

    Muddle three or four raspberries with the cucumber and mint.

    Add lime, sweetener, ice, and sparkling water as usual.

    For a cleaner presentation, strain the muddled mixture before pouring it over ice.


    Ginger Cucumber Mint Cooler

    Cucumber may be cooling, but ginger adds warmth.

    That’s what makes this variation interesting.

    Replace some or all of the sparkling water with ginger beer.

    For a milder ginger flavor, use ginger ale.

    You can also muddle a small piece of fresh ginger with the cucumber.

    The result has considerably more personality while still maintaining the refreshing characteristics of the original cooler.


    Spicy Cucumber Mint Cooler

    If you enjoy a little heat, cucumber pairs surprisingly well with jalapeño.

    Add one thin jalapeño slice while muddling your cucumber.

    Taste before adding more.

    Pepper heat can increase quickly, and you don’t want it to overpower the delicate cucumber and mint flavors.

    The contrast between cool cucumber and spicy pepper creates a memorable mocktail.


    Cucumber Mint Lemonade

    Another easy variation is to combine the cooler with lemonade.

    Use approximately half lemonade and half sparkling water.

    Add cucumber and mint as usual.

    You’ll end up with a slightly sweeter drink that combines classic lemonade with the freshness of cucumber.

    This is an especially good version for family gatherings.


    Cucumber Mint Limeade

    If you love lime, take the citrus flavor even further.

    Increase the lime juice and sweetener slightly, then add sparkling water.

    The result falls somewhere between a sparkling limeade and a cucumber cooler.

    Serve with plenty of crushed ice for an especially refreshing presentation.


    Tropical Cucumber Mint Cooler

    Cucumber can even work with tropical flavors.

    Try adding a small splash of pineapple juice.

    You don’t need much.

    Pineapple has a stronger flavor than cucumber, so using just a small amount allows both ingredients to remain noticeable.

    Add lime, mint, and sparkling water for a tropical twist.


    Make a Cucumber Mint Cooler Pitcher

    Serving several people?

    Turn the recipe into a pitcher.

    Cucumber Mint Cooler Pitcher

    Makes approximately 6 servings

    Ingredients

    • 1 large cucumber, thinly sliced
    • ½ cup loosely packed fresh mint leaves
    • ¾ cup fresh lime juice
    • ¼–½ cup simple syrup
    • Approximately 4 cups chilled sparkling water
    • Ice
    • Lime slices
    • Extra cucumber slices
    • Extra mint for garnish

    Directions

    Add some of the cucumber and mint to the bottom of a pitcher.

    Gently muddle.

    Add the lime juice and simple syrup.

    Stir.

    Add additional cucumber and lime slices.

    Refrigerate the mixture until you’re ready to serve.

    Just before serving, add plenty of ice and chilled sparkling water.

    Stir gently.

    Pour into individual glasses and garnish.


    Don’t Add Sparkling Water Too Early

    If you’re preparing the drink for a party, this is important.

    Sparkling water should be added as close to serving time as possible.

    If you add it several hours beforehand, much of the carbonation will disappear.

    You can prepare almost everything else ahead of time.

    Make the cucumber, mint, lime, and syrup base and keep it chilled.

    Then add sparkling water and ice when your guests arrive.


    Turn It Into a Mocktail Bar

    Hosting a larger gathering?

    Instead of preparing everyone’s drinks individually, create a Cucumber Mint Cooler Mocktail Bar.

    Set out cucumber slices, mint leaves, lime wedges, lemons, berries, watermelon, ginger beer, sparkling water, simple syrup, and plenty of ice.

    Guests can customize their own drinks.

    Someone might choose cucumber, strawberry, and mint.

    Another person might prefer cucumber, ginger, and lime.

    Someone else might make a spicy version with jalapeño.

    This can turn a simple beverage station into a fun part of your gathering.


    Presentation Matters

    A mocktail can taste fantastic and still feel ordinary if it’s served without much thought.

    Fortunately, the Cucumber Mint Cooler is naturally photogenic.

    A clear highball or Collins glass allows the cucumber, mint, lime, and bubbles to remain visible.

    Try cutting a long cucumber ribbon using a vegetable peeler.

    Place the ribbon against the inside wall of the glass before adding ice.

    Then fill the glass with ice and prepare the cooler.

    The cucumber ribbon creates an elegant spiral appearance.

    Add a fresh mint bouquet and lime wheel to finish the presentation.

    Suddenly, a five-minute homemade mocktail looks like something you’d order while sitting beside a resort pool.


    Ice Can Change the Experience

    Ice seems like the simplest ingredient, but it makes a difference.

    Large, solid ice cubes melt more slowly, helping keep the drink cold without diluting it too quickly.

    Crushed ice creates a completely different experience.

    A Cucumber Mint Cooler served over crushed ice feels almost like a summer vacation drink.

    If you’re serving it outside on an especially warm day, fill the glass generously with ice.


    Try Flavored Sparkling Water

    Plain sparkling water keeps the cucumber and mint at the center of the drink.

    But flavored sparkling water can create easy variations.

    Try:

    Lime sparkling water for additional citrus.

    Lemon sparkling water for brightness.

    Berry sparkling water for subtle fruit flavor.

    Grapefruit sparkling water for a slightly more complex citrus character.

    The important thing is choosing a flavor that complements rather than overwhelms the cucumber.


    When to Serve a Cucumber Mint Cooler

    There really isn’t a wrong occasion.

    This mocktail works beautifully for:

    • Summer afternoons
    • Backyard barbecues
    • Pool parties
    • Picnics
    • Brunch
    • Lunch gatherings
    • Baby showers
    • Wedding showers
    • Birthday celebrations
    • Family dinners
    • Holiday gatherings
    • Game nights
    • Outdoor dinners
    • Graduation parties
    • Sunday brunch
    • Relaxing evenings at home

    It can also simply be something refreshing to make for yourself.

    Not every special drink needs a special occasion.


    A Great Alternative to Soda

    Sometimes you want something with more personality than water but don’t necessarily want another soda.

    That’s where simple homemade mocktails can shine.

    Sparkling water gives you the carbonation associated with soda, while cucumber, lime, and mint provide plenty of fresh flavor.

    You also control exactly how much sweetener goes into the glass.

    Make it sweet.

    Make it tart.

    Or skip the sweetener completely.

    The recipe is yours to customize.


    Mocktails Deserve a Place at the Party

    If you’re hosting a gathering where alcohol is being served, having one or two thoughtfully prepared alcohol-free choices can make your drink menu more welcoming.

    Instead of simply putting bottles of water and soda beside the cocktails, offer something everyone can enjoy.

    The Cucumber Mint Cooler is particularly useful because its appearance feels celebratory.

    A tall glass filled with ice, cucumber ribbons, mint, lime, and bubbles looks every bit as special as a traditional mixed drink.

    And that’s exactly what a good mocktail should accomplish.

    It shouldn’t feel like the backup option.

    It should be something people genuinely want to drink.


    Tips for Making the Best Cucumber Mint Cooler

    Use Fresh Ingredients

    Cucumber, mint, and lime are the stars of this recipe.

    The fresher they are, the better your drink will taste.

    Chill Your Ingredients

    Cold sparkling water helps keep your cooler refreshing without immediately melting all the ice.

    Don’t Over-Muddle Mint

    Gently press the leaves rather than aggressively crushing them.

    Start With Less Sweetener

    You can always add more.

    Use Plenty of Ice

    This drink should be served very cold.

    Add Carbonation Last

    Sparkling water should be one of the final ingredients added.

    Garnish Generously

    The cucumber and mint aren’t only ingredients—they’re also beautiful garnishes.

    Serve Immediately

    The drink tastes best while the ice is fresh and the sparkling water is still bubbly.


    Experiment and Create Your Own Version

    Once you’ve made the classic Cucumber Mint Cooler, use it as a starting point rather than a strict formula.

    That’s one of the most enjoyable things about making mocktails.

    Experiment.

    Add strawberry.

    Try watermelon.

    Introduce ginger.

    Add extra lime.

    Swap mint for basil.

    Try lemon instead of lime.

    Add a little grapefruit.

    Make it spicy.

    Make it sweeter.

    Make it more tart.

    Eventually, you may discover a combination that’s completely your own.


    Why Simple Drinks Can Be the Best Drinks

    It’s easy to assume that an impressive beverage needs ten ingredients, specialty syrups, unusual equipment, and complicated preparation.

    It doesn’t.

    Sometimes a few ingredients that work exceptionally well together are enough.

    That’s the beauty of the Cucumber Mint Cooler.

    There’s nothing complicated hiding behind the recipe.

    It’s cucumber.

    It’s mint.

    It’s lime.

    It’s a little sweetness.

    It’s sparkling water.

    And when those ingredients are combined properly and served ice-cold, the result is remarkably refreshing.


    Final Sip

    Today’s Mocktail of the Day: Cucumber Mint Cooler proves that an alcohol-free drink can be simple, sophisticated, refreshing, and worthy of being the centerpiece of your beverage menu.

    The crisp cucumber provides the foundation.

    Fresh mint brings aroma and herbal freshness.

    Lime adds the bright citrus kick.

    A small amount of sweetener creates balance.

    Sparkling water finishes everything with an energetic burst of bubbles.

    It’s a drink you can prepare in about five minutes but enjoy in countless different ways.

    Keep it classic for something clean and refreshing.

    Add strawberries or watermelon when you want something fruitier.

    Introduce ginger when you want spice.

    Add jalapeño when you want heat.

    Turn it into a pitcher when friends and family come over.

    Or make one glass, head outside, find somewhere comfortable to sit, and enjoy a few quiet minutes with an icy-cold drink.

    Sometimes the simplest refreshments are the ones that hit the spot.

    So grab a cucumber, pick some fresh mint, squeeze a lime, fill your glass with ice, and raise a glass to today’s Mocktail of the Day: Cucumber Mint Cooler.

    Question of the Day

    How would you make your Cucumber Mint Cooler—classic cucumber and mint, strawberry, watermelon, ginger, or spicy jalapeño?