Category: Recipes

  • Recipe of the Day: Heartbroken Pizza

    Recipe of the Day: Heartbroken Pizza

    Sometimes comfort comes from a warm hug, and sometimes it comes from a hot, cheesy slice of pizza. Heartbroken Pizza is the ultimate comfort food—a homemade pizza loaded with your favorite toppings and baked until golden, crispy, and irresistibly delicious. Whether you’re nursing a broken heart, enjoying a quiet night at home, or simply craving a satisfying meal, this pizza reminds us that even difficult days can end with something wonderful.

    The beauty of Heartbroken Pizza is that there are no rules. Build it with the ingredients you love most and let each slice become a small reminder that healing often starts with taking care of yourself.

    Why You’ll Love Heartbroken Pizza

    • Crispy homemade crust
    • Gooey melted mozzarella
    • Fully customizable toppings
    • Perfect for family dinners or solo comfort meals
    • Easy enough for beginners
    • Delicious leftovers for the next day

    Ingredients

    For the Dough

    • 2¼ teaspoons active dry yeast
    • 1½ cups warm water
    • 1 teaspoon sugar
    • 3½ cups all-purpose flour
    • 2 tablespoons olive oil
    • 1 teaspoon salt

    Pizza Sauce

    • ¾ cup pizza sauce or marinara

    Cheese

    • 2½ cups shredded mozzarella
    • ¼ cup grated Parmesan

    Toppings

    Choose your favorites:

    • Pepperoni
    • Italian sausage
    • Bacon
    • Mushrooms
    • Red onions
    • Bell peppers
    • Black olives
    • Fresh basil
    • Jalapeños
    • Cherry tomatoes

    Seasoning

    • Italian seasoning
    • Garlic powder
    • Crushed red pepper flakes (optional)

    Instructions

    Step 1: Prepare the Dough

    Combine warm water, sugar, and yeast in a bowl. Let it sit for about 5–10 minutes until foamy.

    Mix in flour, olive oil, and salt until a dough forms. Knead for 8–10 minutes until smooth.

    Place the dough in an oiled bowl, cover, and let rise for about one hour or until doubled in size.

    Step 2: Preheat

    Preheat your oven to 475°F (245°C).

    If using a pizza stone, place it in the oven while preheating.

    Step 3: Shape the Pizza

    Roll the dough into a 12–14-inch circle.

    Transfer to a pizza pan, baking sheet, or pizza peel dusted with cornmeal.

    Step 4: Add the Good Stuff

    Spread pizza sauce evenly.

    Top with mozzarella and Parmesan.

    Add your chosen toppings.

    Finish with Italian seasoning and a light sprinkle of garlic powder.

    Step 5: Bake

    Bake for 12–15 minutes until the crust is golden brown and the cheese is bubbling.

    Allow the pizza to cool for five minutes before slicing.

    Optional Comfort Toppings

    If today has been especially rough, consider adding:

    • Extra cheese
    • Crispy bacon
    • Caramelized onions
    • Fresh basil
    • Hot honey drizzle after baking
    • Garlic butter brushed around the crust

    Serving Suggestions

    Heartbroken Pizza pairs wonderfully with:

    • Caesar salad
    • Garlic knots
    • Breadsticks
    • Tomato soup
    • Sparkling lemonade
    • Iced tea

    Finish dinner with brownies, chocolate chip cookies, or your favorite ice cream.

    Tips for the Best Homemade Pizza

    • Let the dough come to room temperature before stretching.
    • Avoid overloading with toppings so the crust stays crisp.
    • Use freshly shredded mozzarella for better melting.
    • Bake on a preheated pizza stone whenever possible.
    • Brush the crust with garlic butter immediately after baking.

    Make It Your Own

    One of the best parts about pizza is making it personal.

    Try these combinations:

    Classic Comfort

    • Pepperoni
    • Extra mozzarella
    • Parmesan

    Garden Fresh

    • Spinach
    • Mushrooms
    • Tomatoes
    • Basil

    Meat Lover’s

    • Pepperoni
    • Sausage
    • Bacon
    • Ham

    Spicy Healing

    • Jalapeños
    • Pepperoni
    • Red onions
    • Hot honey

    Storage

    Store leftovers in an airtight container in the refrigerator for up to four days.

    Reheat in a skillet or oven for the crispiest crust.

    Final Thoughts

    Heartbreak has a way of making the world feel heavy, but taking time to prepare a homemade meal can be a small act of self-care. Heartbroken Pizza isn’t about forgetting the pain—it’s about giving yourself permission to pause, nourish your body, and enjoy a simple moment of comfort.

    Whether you’re sharing it with friends, family, or savoring a quiet evening alone, every slice is a reminder that healing happens one day—and sometimes one delicious bite—at a time. After all, even on life’s toughest days, there’s still room for good food, hope, and the promise of brighter tomorrows.


    Read More Recipes

  • Recipe of the Day: Superman Cheesecake

    Recipe of the Day: Superman Cheesecake

    Few desserts capture the excitement of childhood quite like Superman Cheesecake. Inspired by the iconic Superman ice cream flavor known for its vibrant red, blue, and yellow swirls, this colorful cheesecake combines a rich, creamy filling with a buttery graham cracker crust to create a dessert that’s as fun to look at as it is to eat.

    Perfect for birthdays, superhero-themed parties, summer celebrations, or simply adding a splash of color to your dessert table, Superman Cheesecake delivers smooth cheesecake flavor with a playful twist that everyone will remember.


    Why You’ll Love This Recipe

    Superman Cheesecake is more than just a colorful dessert. It’s:

    • Creamy and rich
    • Easy to prepare
    • Perfect for special occasions
    • Kid-friendly and adult-approved
    • Great make-ahead dessert
    • A guaranteed conversation starter

    The bright colors create a stunning marbled effect while the classic cheesecake filling remains silky smooth and delicious.


    Preparation Time

    • Prep Time: 25 minutes
    • Bake Time: 55 minutes
    • Cooling Time: 1 hour
    • Chilling Time: 6 hours (overnight preferred)
    • Total Time: About 8 hours
    • Servings: 12

    Ingredients

    Graham Cracker Crust

    • 2 cups graham cracker crumbs
    • ½ cup melted butter
    • 2 tablespoons sugar

    Cheesecake Filling

    • 24 ounces cream cheese, softened
    • 1 cup granulated sugar
    • 1 cup sour cream
    • 3 large eggs
    • 2 teaspoons vanilla extract
    • 2 tablespoons all-purpose flour

    Colors

    • Blue food coloring
    • Red food coloring
    • Yellow food coloring

    Optional Toppings

    • Whipped cream
    • Rainbow sprinkles
    • White chocolate drizzle
    • Maraschino cherries
    • Colored candy pieces

    Instructions

    Step 1: Prepare the Crust

    Preheat the oven to 325°F (163°C).

    Mix the graham cracker crumbs, sugar, and melted butter until evenly combined.

    Press firmly into the bottom of a 9-inch springform pan.

    Bake for 8 minutes and allow to cool.


    Step 2: Make the Cheesecake Batter

    Beat the softened cream cheese until completely smooth.

    Add sugar and continue mixing.

    Mix in sour cream, vanilla, and flour.

    Add the eggs one at a time, mixing on low speed until just incorporated.

    Avoid overmixing to help prevent cracks.


    Step 3: Color the Batter

    Divide the batter evenly into four bowls.

    • Leave one bowl white.
    • Color one bowl blue.
    • Color one bowl red.
    • Color one bowl yellow.

    Use gel food coloring for the brightest colors without thinning the batter.


    Step 4: Create the Superman Swirl

    Drop spoonfuls of each colored batter randomly over the crust.

    Continue layering the colors until all batter has been used.

    Using a butter knife or skewer, gently swirl the colors together.

    Do not overmix—the goal is bold, colorful ribbons.


    Step 5: Bake

    Place the cheesecake in the oven.

    Bake for 50–55 minutes, until the edges are set and the center has a slight jiggle.

    Turn off the oven.

    Leave the cheesecake inside with the door cracked open for one hour.


    Step 6: Chill

    Refrigerate for at least 6 hours.

    Overnight chilling creates the best texture.


    Optional Decorations

    Before serving, decorate with:

    • Fresh whipped cream
    • Rainbow sprinkles
    • White chocolate drizzle
    • Red, blue, and yellow candy pearls
    • Superman-themed cupcake toppers for parties

    Storage

    Refrigerator:

    Store covered for up to 5 days.

    Freezer:

    Freeze slices individually for up to 2 months.

    Thaw overnight in the refrigerator before serving.


    Tips for Success

    • Always use room-temperature cream cheese.
    • Mix slowly once eggs are added.
    • Gel food coloring produces brighter colors.
    • Avoid excessive swirling to maintain vibrant patterns.
    • Chill overnight for clean slices.
    • Wipe your knife between cuts for bakery-quality presentation.

    Delicious Variations

    Superman Oreo Cheesecake

    Replace the graham cracker crust with crushed Golden Oreos or classic Oreos.

    Superman No-Bake Cheesecake

    Skip the baking and fold whipped topping into the filling before chilling.

    Mini Superman Cheesecakes

    Prepare in muffin tins using cupcake liners for individual servings.

    Superman Cheesecake Bars

    Bake in a 9×13-inch pan and cut into colorful squares.

    Chocolate Superman Cheesecake

    Add a layer of chocolate ganache before serving for extra decadence.


    Perfect Pairings

    This colorful dessert pairs wonderfully with:

    • Vanilla milkshakes
    • Strawberry lemonade
    • Fresh berries
    • Hot coffee
    • Cold milk
    • Blue raspberry soda

    Nutritional Information (Approximate Per Serving)

    • Calories: 485
    • Carbohydrates: 33g
    • Protein: 7g
    • Fat: 36g
    • Saturated Fat: 20g
    • Sugar: 25g
    • Sodium: 290mg

    Frequently Asked Questions

    Why is it called Superman Cheesecake?

    The dessert is inspired by Superman ice cream, famous for its bright blue, red, and yellow colors that resemble the iconic superhero’s classic color scheme.

    Can I use natural food coloring?

    Yes. Natural food colors work well, although the finished cheesecake may have softer, pastel shades.

    Can I make it ahead?

    Absolutely. Cheesecake actually tastes better after chilling overnight, making it an ideal make-ahead dessert.

    Do I need a water bath?

    Not necessarily. While a water bath helps reduce cracking, slowly cooling the cheesecake in the oven also produces excellent results.


    Final Thoughts

    Superman Cheesecake transforms a classic dessert into a vibrant centerpiece that’s guaranteed to impress guests of all ages. Its smooth, creamy filling, buttery graham cracker crust, and eye-catching swirls of blue, red, and yellow make it perfect for birthdays, holidays, family gatherings, or simply brightening an ordinary day.

    Whether you’re serving superhero fans or anyone who loves colorful desserts, this cheesecake brings together fun, flavor, and unforgettable presentation in every slice. One bite is enough to understand why it’s a recipe worth saving and sharing.

    Read More Recipes

  • Recipe of the Day: Demon Ruins Cookies

    Recipe of the Day: Demon Ruins Cookies

    Sinfully Rich Chocolate Cookies with a Fiery Twist

    Some cookies are sweet. Some are indulgent. And then there are Demon Ruins Cookies—a decadent dessert born from the imagination of those who love dark chocolate, rich flavors, and just a hint of heat. Inspired by the mysterious name, these cookies combine fudgy chocolate, spicy cinnamon, and a subtle kick of cayenne pepper to create a dessert that starts sweet but finishes with a surprising warmth.

    Whether you’re baking for Halloween, game night, or simply want a cookie unlike anything you’ve tasted before, Demon Ruins Cookies are guaranteed to leave a lasting impression.


    Why They’re Called Demon Ruins Cookies

    The name captures everything about these unforgettable treats.

    Like exploring ancient ruins, every bite reveals something unexpected. It begins with deep chocolate flavor, followed by warm spices, and finishes with a subtle fiery kick that lingers just long enough to make you reach for another cookie.

    Don’t worry—they’re not painfully spicy. The heat simply enhances the chocolate and makes every bite more exciting.


    Prep Information

    Prep Time: 20 minutes

    Cook Time: 11 minutes

    Total Time: 31 minutes

    Servings: 24 cookies

    Difficulty: Easy


    Ingredients

    Dry Ingredients

    • 2¼ cups all-purpose flour
    • ¾ cup unsweetened cocoa powder
    • 1 teaspoon baking soda
    • ½ teaspoon baking powder
    • ½ teaspoon salt
    • 1 teaspoon ground cinnamon
    • ¼ teaspoon cayenne pepper (adjust to taste)

    Wet Ingredients

    • 1 cup unsalted butter, softened
    • 1 cup brown sugar
    • ½ cup granulated sugar
    • 2 large eggs
    • 2 teaspoons vanilla extract

    Mix-Ins

    • 2 cups semi-sweet chocolate chips
    • ½ cup dark chocolate chunks
    • ½ cup chopped toasted pecans (optional)

    Optional Finishing Touch

    • Flaky sea salt
    • Crushed red pepper flakes
    • Melted dark chocolate drizzle

    Instructions

    Step 1: Prepare

    Preheat your oven to 350°F (175°C).

    Line baking sheets with parchment paper.


    Step 2: Mix the Dry Ingredients

    In a medium bowl whisk together:

    • Flour
    • Cocoa powder
    • Baking soda
    • Baking powder
    • Salt
    • Cinnamon
    • Cayenne pepper

    Set aside.


    Step 3: Cream the Butter and Sugars

    Using a mixer, beat together:

    • Butter
    • Brown sugar
    • White sugar

    Mix until light and fluffy, about 3 minutes.


    Step 4: Add Eggs

    Beat in the eggs one at a time.

    Mix in the vanilla extract.


    Step 5: Combine

    Gradually mix the dry ingredients into the wet mixture until just combined.

    Do not overmix.


    Step 6: Fold in Chocolate

    Stir in:

    • Chocolate chips
    • Dark chocolate chunks
    • Pecans (optional)

    The dough will be thick and loaded with chocolate.


    Step 7: Scoop

    Drop approximately 2 tablespoons of dough onto prepared baking sheets.

    Leave about 2 inches between cookies.


    Step 8: Bake

    Bake for 10–12 minutes.

    The edges should be set while the centers remain slightly soft.

    Do not overbake.


    Step 9: Finish

    Allow cookies to cool for five minutes before transferring them to a cooling rack.

    Sprinkle with flaky sea salt or drizzle with melted chocolate for an extra dramatic finish.


    What Makes These Cookies Special?

    The magic comes from balancing flavors.

    The cocoa delivers rich bitterness.

    Brown sugar creates caramel notes.

    Cinnamon adds warmth.

    The tiny amount of cayenne doesn’t overpower—it enhances the chocolate and leaves a pleasant lingering warmth.

    Together, the flavors create something unforgettable.


    Variations

    Lava Cookies

    Place a square of dark chocolate inside each dough ball before baking.

    The center becomes molten.


    Inferno Edition

    Increase cayenne to ½ teaspoon and add a pinch of chili powder.

    Perfect for spice lovers.


    Cookies and Cream Demon

    Fold crushed chocolate sandwich cookies into the dough.


    Double Chocolate

    Replace half the chocolate chips with white chocolate for dramatic contrast.


    Peanut Butter Ruins

    Add peanut butter chips for a creamy balance to the spice.


    Storage Tips

    Store in an airtight container for up to five days.

    Freeze baked cookies for three months.

    Freeze cookie dough balls individually and bake fresh whenever desired.


    Best Drinks to Pair With

    These cookies pair wonderfully with:

    • Cold milk
    • Hot chocolate
    • Espresso
    • Coffee
    • Vanilla milkshakes
    • Red wine
    • Dark stout beer

    Baking Tips

    • Use room-temperature butter.
    • Measure flour correctly to avoid dry cookies.
    • Chill the dough for 30 minutes for thicker cookies.
    • Slightly underbake for a fudgier center.
    • Finish with sea salt to enhance the chocolate.

    Nutritional Information (Approximate Per Cookie)

    • Calories: 235
    • Protein: 3g
    • Carbohydrates: 29g
    • Fat: 12g
    • Saturated Fat: 7g
    • Sugar: 18g
    • Fiber: 2g
    • Sodium: 110mg

    Final Thoughts

    If ordinary chocolate cookies aren’t enough, Demon Ruins Cookies offer a bold twist that combines rich cocoa, warm cinnamon, and a subtle fiery finish into one unforgettable dessert. They’re perfect for parties, Halloween gatherings, family movie nights, or anytime you’re craving something indulgent with a little attitude.

    One bite delivers layers of chocolatey goodness, while the gentle heat keeps your taste buds intrigued. Just like their name suggests, these cookies are mysterious, bold, and impossible to forget.

    Once you bake a batch, don’t be surprised if they disappear faster than you expected—these devilishly delicious treats have a way of tempting everyone back for one more cookie.

    Read More Recipes

  • Recipe of the Day: Garlic Cowboy Steak Tacos

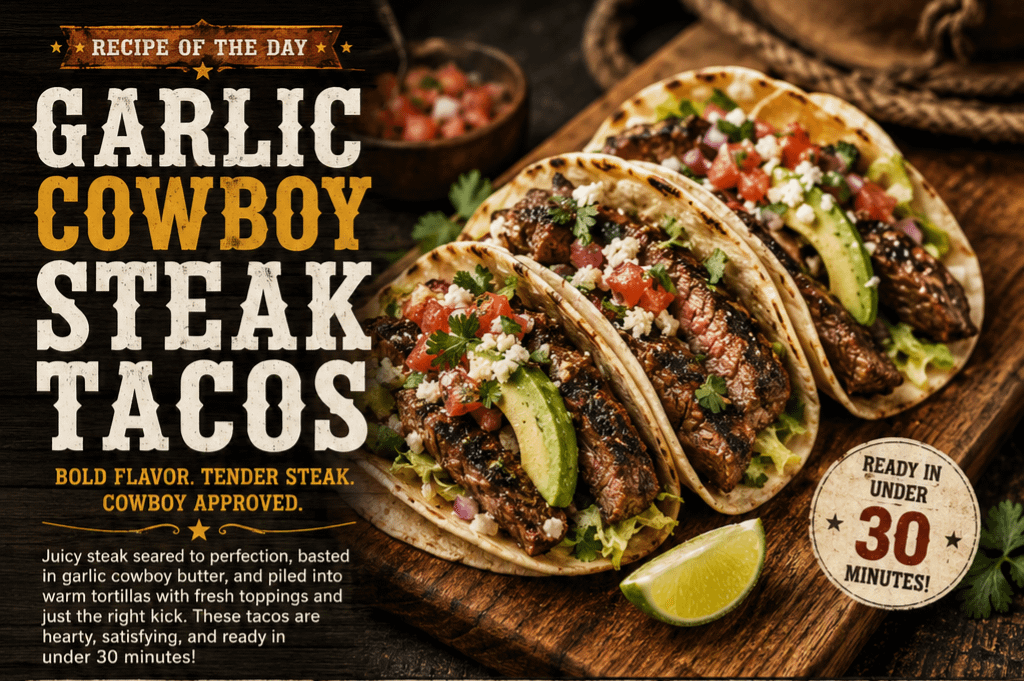
    Recipe of the Day: Garlic Cowboy Steak Tacos

    Some meals are meant to be eaten with a knife and fork. Others are meant to be picked up with both hands while surrounded by family and friends. Garlic Cowboy Steak Tacos fall squarely into the second category.

    This recipe combines tender, perfectly seasoned steak with rich roasted garlic butter, warm tortillas, fresh vegetables, creamy toppings, and just enough spice to make every bite memorable. Inspired by ranch cooking and Southwest flavors, these tacos deliver everything you love about a hearty steak dinner in an easy-to-make handheld meal.

    Whether you’re grilling outdoors, cooking on a cast-iron skillet, or planning a weekend gathering, these tacos are guaranteed to become a favorite.


    Why You’ll Love This Recipe

    These tacos are:

    • Ready in about 30 minutes
    • Packed with bold garlic flavor
    • Tender and juicy
    • Perfect for grilling season
    • Easy to customize
    • Great for weeknight dinners
    • Excellent for parties and cookouts

    The combination of garlic butter and steak creates rich flavors without requiring complicated ingredients.


    Ingredients

    For the Steak

    • 1½ pounds flank steak, skirt steak, or sirloin
    • 2 tablespoons olive oil
    • 1 teaspoon kosher salt
    • 1 teaspoon black pepper
    • 1 teaspoon smoked paprika
    • 1 teaspoon chili powder
    • ½ teaspoon cumin
    • ½ teaspoon onion powder

    Garlic Cowboy Butter

    • 4 tablespoons butter
    • 5 cloves garlic, minced
    • 1 tablespoon fresh parsley
    • 1 teaspoon Worcestershire sauce
    • ½ teaspoon crushed red pepper flakes
    • ½ teaspoon black pepper
    • Juice of half a lime

    Tacos

    • 10–12 flour or corn tortillas
    • Shredded lettuce
    • Diced tomatoes
    • Red onion
    • Fresh cilantro
    • Crumbled cotija or shredded cheddar cheese
    • Sour cream
    • Sliced avocado
    • Lime wedges

    Optional Toppings

    • Pickled jalapeños
    • Pico de gallo
    • Chipotle sauce
    • Salsa verde
    • Fresh corn
    • Grilled peppers
    • Grilled onions
    • Hot sauce

    Instructions

    Step 1: Season the Steak

    Pat the steak dry.

    Rub with olive oil before seasoning generously with:

    • Salt
    • Pepper
    • Smoked paprika
    • Chili powder
    • Cumin
    • Onion powder

    Allow the steak to rest for 15–20 minutes while preparing the garlic butter.


    Step 2: Make the Garlic Cowboy Butter

    Melt butter over medium-low heat.

    Add:

    • Garlic
    • Worcestershire sauce
    • Red pepper flakes
    • Black pepper

    Cook for about 2 minutes until fragrant.

    Remove from heat and stir in:

    • Fresh parsley
    • Lime juice

    Set aside.


    Step 3: Cook the Steak

    Heat a cast-iron skillet or grill until very hot.

    Cook steak:

    • 4–5 minutes per side for medium-rare
    • Longer if preferred

    Brush generously with garlic butter while cooking.

    Remove from heat and allow the steak to rest for at least 10 minutes.

    Slice thinly against the grain.

    Brush once more with remaining garlic butter.


    Step 4: Warm the Tortillas

    Heat tortillas:

    • On the grill
    • In a dry skillet
    • Or wrapped in foil in a warm oven

    Warm tortillas make a huge difference in flavor and texture.


    Step 5: Build the Tacos

    Fill each tortilla with:

    • Garlic steak
    • Lettuce
    • Tomatoes
    • Onion
    • Cheese
    • Avocado
    • Cilantro

    Top with:

    • Sour cream
    • Extra garlic butter
    • Fresh lime juice

    Cowboy Taco Sauce (Optional)

    Mix together:

    • ½ cup sour cream
    • 2 tablespoons mayonnaise
    • 1 teaspoon garlic powder
    • 1 teaspoon lime juice
    • 1 teaspoon hot sauce
    • Pinch of smoked paprika

    Drizzle generously over the tacos.


    Side Dish Ideas

    These tacos pair wonderfully with:

    • Mexican rice
    • Cowboy baked beans
    • Grilled corn on the cob
    • Cilantro lime rice
    • Chips and guacamole
    • Southwest pasta salad
    • Roasted potatoes

    Best Drinks to Serve

    For adults:

    • Classic margaritas
    • Ranch water
    • Mexican lager
    • Whiskey sour

    For everyone:

    • Fresh lemonade
    • Sweet tea
    • Lime sparkling water
    • Horchata

    Tips for the Perfect Steak Tacos

    Slice Against the Grain

    This keeps every bite incredibly tender.

    Use High Heat

    A hot skillet or grill creates a flavorful crust while locking in juices.

    Don’t Overcook

    Medium-rare to medium delivers the best texture.

    Let It Rest

    Resting the steak allows the juices to redistribute.

    Brush with Garlic Butter Twice

    Once while cooking.

    Again after slicing.

    This extra step makes every bite rich and flavorful.


    Make It Your Own

    You can easily customize these tacos.

    Try adding:

    • Bacon
    • Pepper jack cheese
    • Grilled mushrooms
    • Crispy onions
    • Jalapeño ranch
    • Roasted poblano peppers
    • Chipotle aioli

    Each variation adds a different layer of flavor while keeping the hearty cowboy spirit.


    Storage

    Store leftover steak in an airtight container for up to 3 days in the refrigerator.

    Reheat gently in a skillet with a little butter to maintain its tenderness.

    Store tortillas and toppings separately for the freshest leftovers.


    Final Thoughts

    Garlic Cowboy Steak Tacos combine everything people love about steak dinners and taco night into one unforgettable meal. The savory garlic butter, smoky seasoning, juicy steak, and fresh toppings create a satisfying combination that feels rustic, comforting, and packed with flavor.

    Whether you’re cooking for your family, feeding guests at a backyard barbecue, or simply craving a hearty homemade dinner, these tacos are sure to impress. They’re simple enough for a busy weeknight yet delicious enough to become a regular favorite around the table.

    So grab your skillet or fire up the grill, warm those tortillas, and enjoy a meal that’s as bold and satisfying as the cowboy spirit that inspired it. Happy cooking!

    Read More Recipes

  • Recipe of the Day: Lasagnchiladas

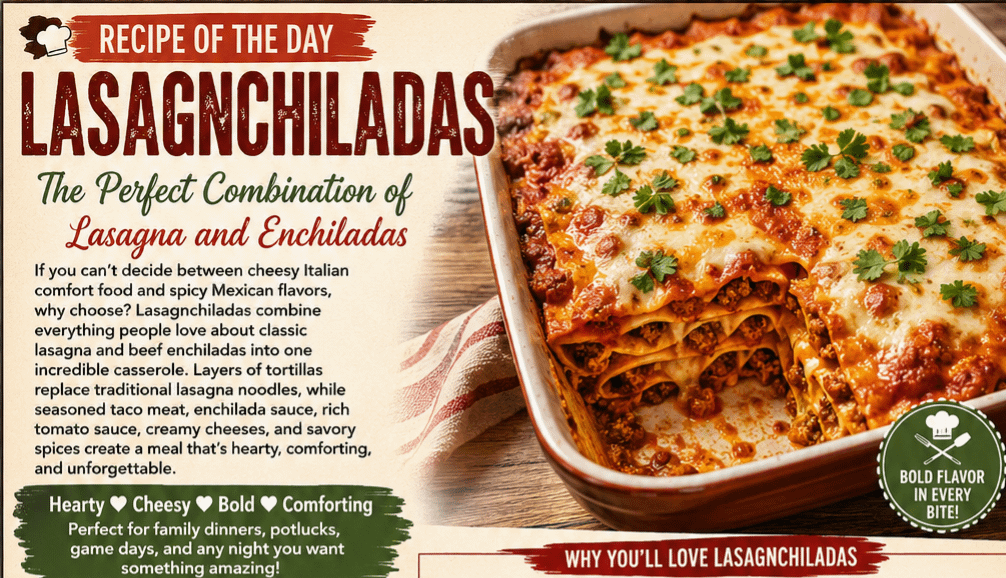
    Recipe of the Day: Lasagnchiladas

    The Perfect Combination of Lasagna and Enchiladas

    If you can’t decide between cheesy Italian comfort food and spicy Mexican flavors, why choose? Lasagnchiladas combine everything people love about classic lasagna and beef enchiladas into one incredible casserole. Layers of tortillas replace traditional lasagna noodles, while seasoned taco meat, enchilada sauce, rich tomato sauce, creamy cheeses, and savory spices create a meal that’s hearty, comforting, and unforgettable.

    This fusion recipe is perfect for family dinners, potlucks, game day parties, or anytime you’re craving something different. It’s easy to prepare, feeds a crowd, and tastes even better the next day.


    Why You’ll Love Lasagnchiladas

    Lasagnchiladas deliver the best of both worlds.

    You’ll enjoy:

    • Rich layers of gooey melted cheese
    • Bold taco-seasoned beef
    • Flavorful enchilada sauce
    • Italian-inspired tomato goodness
    • Easy-to-make casserole preparation
    • Great leftovers
    • Freezer-friendly meal

    Every bite is loaded with flavor and cheesy comfort.


    Ingredients

    Meat Filling

    • 2 pounds ground beef
    • 1 medium onion, diced
    • 4 cloves garlic, minced
    • 2 tablespoons taco seasoning
    • 1 teaspoon cumin
    • 1 teaspoon chili powder
    • ½ teaspoon smoked paprika
    • Salt and pepper to taste

    Sauce

    • 2 cups red enchilada sauce
    • 2 cups marinara sauce
    • 1 tablespoon tomato paste
    • 1 teaspoon oregano
    • 1 teaspoon basil
    • ½ teaspoon garlic powder

    Mix together until smooth.


    Cheese

    • 3 cups shredded Mexican cheese blend
    • 2 cups mozzarella cheese
    • 1 cup cheddar cheese
    • ½ cup grated Parmesan

    Layers

    • 10-12 flour tortillas
    • 1 cup ricotta cheese
    • 8 ounces cream cheese (softened)
    • 1 egg
    • ¼ cup chopped cilantro (optional)

    Optional Toppings

    • Sour cream
    • Green onions
    • Fresh cilantro
    • Diced tomatoes
    • Black olives
    • Jalapeños
    • Avocado slices
    • Crushed tortilla chips

    Instructions

    Step 1

    Preheat your oven to 375°F.

    Lightly grease a 9×13-inch baking dish.


    Step 2

    Brown the ground beef with onions.

    Drain excess grease.

    Add:

    • Garlic
    • Taco seasoning
    • Cumin
    • Chili powder
    • Paprika

    Cook another 3 minutes.


    Step 3

    In another bowl combine:

    • Ricotta
    • Cream cheese
    • Egg

    Mix until creamy.


    Step 4

    Combine the marinara sauce with enchilada sauce and tomato paste.

    Stir well.


    Step 5

    Begin assembling.

    Spread a thin layer of sauce in the baking dish.

    Add:

    • Tortillas
    • Cheese mixture
    • Meat
    • Sauce
    • Mexican cheese
    • Mozzarella

    Repeat the layers until everything is used.

    Finish with:

    • Remaining sauce
    • Mozzarella
    • Cheddar
    • Parmesan

    Step 6

    Cover with foil.

    Bake for 35 minutes.

    Remove foil.

    Bake another 15-20 minutes until bubbly and golden.


    Step 7

    Allow to rest for 15 minutes before slicing.

    This helps everything hold together beautifully.


    Serving Suggestions

    Lasagnchiladas pair wonderfully with:

    • Mexican rice
    • Refried beans
    • Corn on the cob
    • Garlic bread
    • Fresh salad
    • Chips and salsa
    • Guacamole

    Variations

    Chicken Lasagnchiladas

    Replace ground beef with shredded rotisserie chicken.


    Spicy Version

    Add:

    • Chipotle peppers
    • Jalapeños
    • Pepper Jack cheese
    • Hot enchilada sauce

    Vegetarian

    Use:

    • Black beans
    • Corn
    • Bell peppers
    • Mushrooms
    • Spinach
    • Zucchini

    Breakfast Lasagnchiladas

    Swap the beef for:

    • Scrambled eggs
    • Breakfast sausage
    • Bacon
    • Hash browns

    Storage Tips

    Refrigerate leftovers in an airtight container for up to 4 days.

    Freeze individual portions for up to 3 months.

    Reheat in the oven or microwave until heated through.


    Pro Tips

    • Slightly toast tortillas before layering to prevent sogginess.
    • Freshly shredded cheese melts better than pre-shredded varieties.
    • Let the casserole rest before slicing for cleaner portions.
    • Make it a day ahead for even deeper flavor.
    • Add a splash of heavy cream to the sauce for extra richness.

    Nutrition (Approximate Per Serving)

    • Calories: 610
    • Protein: 34g
    • Carbohydrates: 32g
    • Fat: 38g
    • Fiber: 3g
    • Sugar: 6g

    (Values vary depending on ingredients used.)


    Final Thoughts

    Lasagnchiladas prove that some of the best comfort foods come from combining favorite recipes into something completely new. The hearty layers of seasoned beef, creamy cheeses, rich sauces, and soft tortillas create a casserole that’s satisfying, flavorful, and guaranteed to become a family favorite.

    Whether you’re feeding a hungry crowd, looking for an exciting weeknight dinner, or simply wanting to try a fun twist on two classic dishes, Lasagnchiladas deliver big flavor in every bite. Once you serve this cheesy masterpiece, don’t be surprised when everyone asks for seconds—and the recipe!

  • Recipe of the Day: Death By Garlic

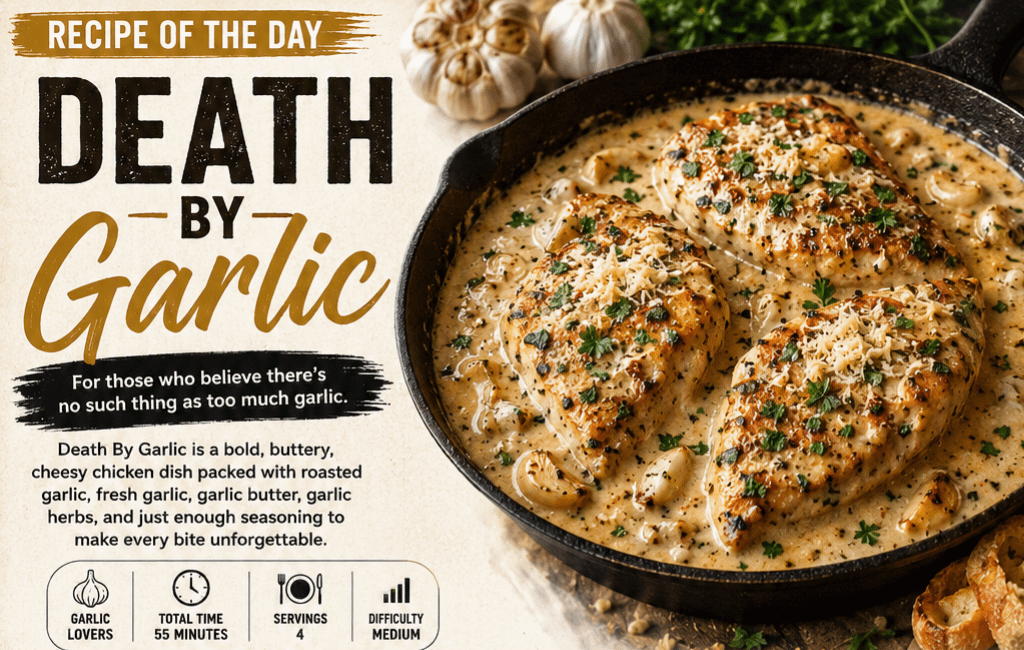
    Recipe of the Day: Death By Garlic

    For those who believe there’s no such thing as too much garlic.

    If garlic is your favorite ingredient, this recipe was made for you. Death By Garlic is a bold, buttery, cheesy chicken dish packed with roasted garlic, fresh garlic, garlic butter, garlic herbs, and just enough seasoning to make every bite unforgettable. It’s rich, comforting, and unapologetically loaded with flavor.

    Whether you’re cooking for fellow garlic lovers or simply want a hearty dinner that fills your kitchen with incredible aromas, this recipe delivers everything its name promises.


    Why You’ll Love This Recipe

    Garlic isn’t just delicious—it transforms ordinary meals into unforgettable comfort food. When roasted, garlic becomes sweet, creamy, and mellow. Fresh garlic adds boldness, while garlic butter ties everything together into one incredibly satisfying dish.

    This recipe combines multiple forms of garlic to create layers of flavor instead of overwhelming heat. The result is a creamy, savory meal that’s perfect for weeknight dinners or special occasions.


    Ingredients

    For the Chicken

    • 4 boneless, skinless chicken breasts
    • Salt and black pepper
    • 2 teaspoons garlic powder
    • 1 teaspoon onion powder
    • 1 teaspoon paprika
    • 2 tablespoons olive oil

    The Garlic Sauce

    • 2 whole heads roasted garlic
    • 12 cloves fresh garlic, minced
    • 6 tablespoons butter
    • 2 tablespoons olive oil
    • 1 cup heavy cream
    • 1 cup chicken broth
    • 1 cup freshly grated Parmesan cheese
    • 1 teaspoon Italian seasoning
    • ½ teaspoon crushed red pepper flakes (optional)
    • 1 tablespoon chopped parsley

    Optional Toppings

    • Mozzarella cheese
    • Crispy bacon
    • Fresh basil
    • Extra Parmesan
    • Toasted breadcrumbs

    Directions

    Step 1: Roast the Garlic

    Preheat your oven to 400°F (205°C).

    Slice the tops off two garlic bulbs.

    Drizzle with olive oil.

    Wrap in foil and roast for 35–40 minutes until golden and soft.

    Allow to cool before squeezing the garlic into a bowl.


    Step 2: Season the Chicken

    Season both sides with:

    • Salt
    • Pepper
    • Garlic powder
    • Onion powder
    • Paprika

    Heat olive oil in a large skillet.

    Cook chicken about 5–6 minutes per side until nearly cooked through.

    Remove and set aside.


    Step 3: Build the Garlic Sauce

    Reduce heat to medium.

    Add butter.

    Stir in the minced garlic.

    Cook about one minute until fragrant.

    Mix in the roasted garlic until smooth.

    Pour in chicken broth and heavy cream.

    Whisk well.

    Stir in:

    • Parmesan
    • Italian seasoning
    • Red pepper flakes

    Simmer for 5 minutes until slightly thickened.


    Step 4: Finish the Dish

    Return chicken to the skillet.

    Spoon garlic sauce over every piece.

    Cook another 8–10 minutes until the chicken reaches 165°F internally.

    Top with mozzarella if desired and broil for 2 minutes until bubbly.

    Finish with parsley and extra Parmesan.


    What to Serve With Death By Garlic

    This rich dish pairs beautifully with:

    • Creamy mashed potatoes
    • Garlic bread
    • Buttered pasta
    • Roasted vegetables
    • Steamed broccoli
    • Rice pilaf
    • Caesar salad
    • Crusty artisan bread

    Every side becomes even better when dipped into the garlic sauce.


    Garlic Lover Tips

    Roast Extra Garlic

    Roasted garlic keeps for nearly a week in the refrigerator and can be spread on bread, mixed into mashed potatoes, or stirred into soups.

    Fresh Parmesan Matters

    Freshly grated Parmesan melts much smoother than pre-shredded cheese.

    Don’t Burn the Garlic

    Fresh garlic becomes bitter quickly. Cook it only until fragrant before adding the liquids.

    Make It Even Richer

    Add cream cheese or mascarpone for an ultra-creamy sauce.


    Variations

    Death By Garlic Shrimp

    Replace the chicken with jumbo shrimp.

    Cook shrimp only 2–3 minutes per side before adding them back to the sauce.


    Death By Garlic Steak

    Serve sliced ribeye over mashed potatoes covered with the garlic cream sauce.


    Death By Garlic Pasta

    Toss cooked fettuccine directly into the sauce for an unforgettable garlic Alfredo.


    Death By Garlic Pork Chops

    Pan-seared pork chops work wonderfully with the same creamy garlic sauce.


    Storage

    Store leftovers in an airtight container for up to four days.

    Reheat slowly over low heat with a splash of milk or cream to restore the sauce’s smooth texture.

    Freezing is possible, although cream sauces may separate slightly after thawing.


    Nutrition (Approximate Per Serving)

    • Calories: 640
    • Protein: 48g
    • Carbohydrates: 9g
    • Fat: 45g
    • Saturated Fat: 22g
    • Fiber: 1g
    • Sodium: 710mg

    Final Thoughts

    Garlic has earned its place as one of the world’s favorite ingredients, and Death By Garlic celebrates it in spectacular fashion. The combination of roasted garlic, fresh garlic, butter, cream, and Parmesan creates a luxurious sauce that’s both comforting and bold. Whether you’re serving it over pasta, alongside mashed potatoes, or simply with warm bread to soak up every last drop, this dish is guaranteed to satisfy anyone who believes garlic deserves to be the star of the meal.

    If you’ve ever joked that there’s no such thing as too much garlic, this recipe is your proof. Rich, flavorful, and packed with irresistible aroma, Death By Garlic is a meal you’ll find yourself craving again and again.

    Read More Recipes

  • Recipe of the Day: Lemon-Garlic Baked Catfish

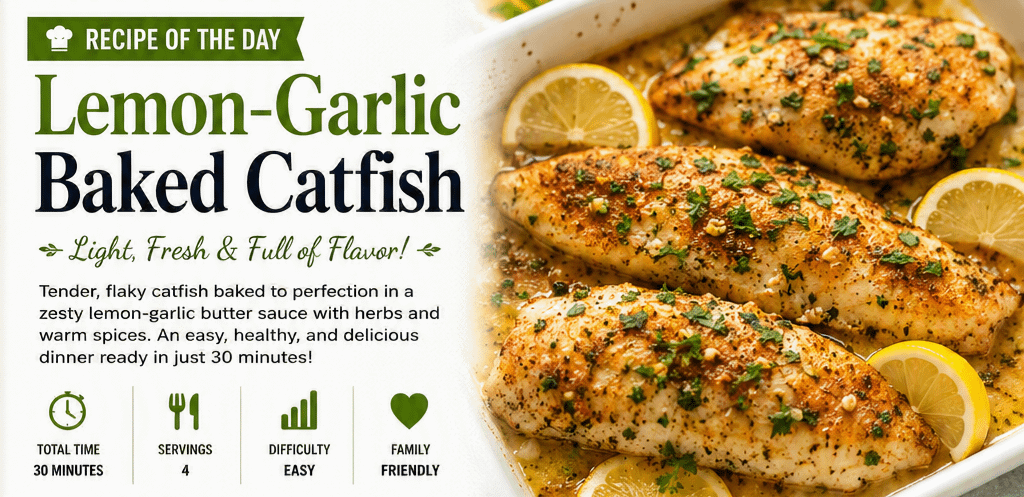
    Recipe of the Day: Lemon-Garlic Baked Catfish

    Few meals offer the perfect combination of simplicity, flavor, and nutrition quite like Lemon-Garlic Baked Catfish. This Southern favorite transforms fresh catfish fillets into a light yet satisfying meal using bright citrus, savory garlic, herbs, and butter. Whether you’re preparing a quick weeknight dinner or serving guests, this recipe delivers restaurant-quality flavor with minimal effort.

    Unlike fried catfish, baking allows the fish’s naturally mild, sweet flavor to shine while creating a tender, flaky texture that pairs beautifully with fresh vegetables, rice, potatoes, or a crisp garden salad. The addition of fresh lemon and garlic creates a vibrant sauce that keeps every bite moist and delicious.

    If you’re looking for an easy seafood recipe that’s healthy, affordable, and packed with flavor, Lemon-Garlic Baked Catfish deserves a place in your recipe collection.


    Why You’ll Love This Recipe

    There are countless reasons why this dish has become a favorite among seafood lovers.

    • Ready in about 30 minutes
    • Perfect for busy weeknights
    • High in protein
    • Naturally low in carbohydrates
    • Family-friendly
    • Minimal cleanup
    • Fresh, bright flavors
    • Easy to customize

    Best of all, the ingredients are inexpensive and easy to find at nearly every grocery store.


    Ingredients

    For the Catfish

    • 4 catfish fillets (6–8 ounces each)
    • 3 tablespoons melted butter
    • 2 tablespoons olive oil
    • 4 cloves garlic, minced
    • Juice of 1 large lemon
    • Zest of 1 lemon
    • 1 teaspoon paprika
    • 1 teaspoon onion powder
    • ½ teaspoon black pepper
    • ½ teaspoon sea salt
    • 1 teaspoon Italian seasoning
    • 1 tablespoon chopped fresh parsley
    • Lemon slices for garnish

    Optional:

    • Pinch of cayenne pepper for heat
    • Fresh thyme
    • Fresh dill
    • Grated Parmesan cheese

    Equipment Needed

    • Baking dish
    • Mixing bowl
    • Measuring spoons
    • Garlic press or knife
    • Pastry brush or spoon
    • Aluminum foil (optional)

    Instructions

    Step 1: Prepare the Oven

    Preheat your oven to 400°F (204°C).

    Lightly grease a baking dish with olive oil or cooking spray.


    Step 2: Make the Lemon Garlic Butter

    In a small bowl combine:

    • Melted butter
    • Olive oil
    • Garlic
    • Lemon juice
    • Lemon zest
    • Paprika
    • Onion powder
    • Salt
    • Pepper
    • Italian seasoning

    Whisk until fully combined.


    Step 3: Prepare the Fish

    Pat the catfish fillets dry using paper towels.

    Place them into the prepared baking dish.

    Brush or spoon the lemon garlic butter mixture generously over every fillet.


    Step 4: Bake

    Bake uncovered for 18–22 minutes, depending on the thickness of the fillets.

    The fish is finished when it flakes easily with a fork and reaches an internal temperature of 145°F.

    Avoid overcooking, as catfish can become dry.


    Step 5: Garnish

    Sprinkle with fresh parsley.

    Top each fillet with fresh lemon slices.

    Serve immediately while hot.


    What Does Catfish Taste Like?

    Many people who have never tried catfish are pleasantly surprised.

    Fresh catfish has:

    • Mild flavor
    • Slight sweetness
    • Firm texture
    • Moist flakes
    • No overpowering fish taste

    When prepared properly, catfish absorbs seasonings exceptionally well, making it perfect for lemon and garlic.


    Tips for Perfect Baked Catfish

    Use Fresh Lemon

    Fresh lemon juice provides a brighter flavor than bottled juice.

    Pat the Fish Dry

    Removing excess moisture helps the seasonings stick.

    Don’t Overcook

    Fish continues cooking after it’s removed from the oven.

    Take it out as soon as it flakes easily.

    Fresh Garlic Works Best

    Fresh minced garlic creates a richer flavor than garlic powder.


    Delicious Side Dishes

    Lemon-Garlic Baked Catfish pairs wonderfully with:

    • Garlic mashed potatoes
    • Wild rice
    • Steamed broccoli
    • Roasted asparagus
    • Green beans
    • Corn on the cob
    • Coleslaw
    • Caesar salad
    • Grilled zucchini
    • Roasted Brussels sprouts
    • Buttered noodles

    Healthy Benefits of Catfish

    Catfish isn’t just delicious—it also offers several nutritional benefits.

    Excellent Protein Source

    Protein helps build muscle while keeping you satisfied longer.

    Low in Calories

    Baked catfish is significantly lighter than fried seafood.

    Rich in Vitamin B12

    Supports healthy nerves and energy production.

    Contains Omega-3 Fatty Acids

    Although lower than salmon, catfish still provides heart-healthy fats.

    Good Source of Selenium

    Supports immune health and antioxidant protection.


    Variations

    Cajun Lemon Catfish

    Add:

    • Cajun seasoning
    • Cayenne pepper
    • Smoked paprika

    Herb Butter Catfish

    Mix fresh:

    • Dill
    • Parsley
    • Thyme
    • Chives

    into the butter.


    Parmesan Crusted

    Top with:

    • Parmesan cheese
    • Panko breadcrumbs

    during the last five minutes of baking.


    Mediterranean Style

    Add:

    • Cherry tomatoes
    • Kalamata olives
    • Capers
    • Fresh basil

    Storage

    Store leftovers in an airtight container.

    Refrigerate for up to 3 days.


    Reheating

    Reheat in a 325°F oven for about 10 minutes.

    Avoid microwaving too long, as fish can dry out.


    Frequently Asked Questions

    Can I use frozen catfish?

    Yes. Thaw completely and pat dry before seasoning.

    Can I substitute another fish?

    Absolutely.

    This recipe works well with:

    • Tilapia
    • Cod
    • Haddock
    • Halibut
    • Swai

    Can I grill this recipe?

    Yes.

    Simply brush the fish with the lemon garlic mixture and grill over medium heat for about 4–5 minutes per side.

    Can I make it dairy-free?

    Replace the butter with additional olive oil.


    Final Thoughts

    Lemon-Garlic Baked Catfish proves that an unforgettable meal doesn’t require complicated ingredients or hours in the kitchen. The fresh citrus, aromatic garlic, buttery herbs, and perfectly flaky fish come together in a dish that’s comforting, wholesome, and full of flavor.

    Whether you’re introducing your family to seafood, searching for a healthier dinner option, or simply craving a taste of Southern comfort with a fresh twist, this recipe is sure to become a favorite. Pair it with your favorite vegetables or grains, squeeze on an extra wedge of lemon, and enjoy a meal that’s as nourishing as it is delicious.


    Recipe Summary

    Prep Time: 10 minutes
    Cook Time: 20 minutes
    Total Time: 30 minutes
    Servings: 4
    Difficulty: Easy

    Nutrition (Approximate Per Serving)

    • Calories: 310
    • Protein: 33g
    • Fat: 18g
    • Carbohydrates: 3g
    • Fiber: 0g
    • Sugar: 1g

    Read More Recipes

  • Recipe of the Day: The Devil’s Revenge

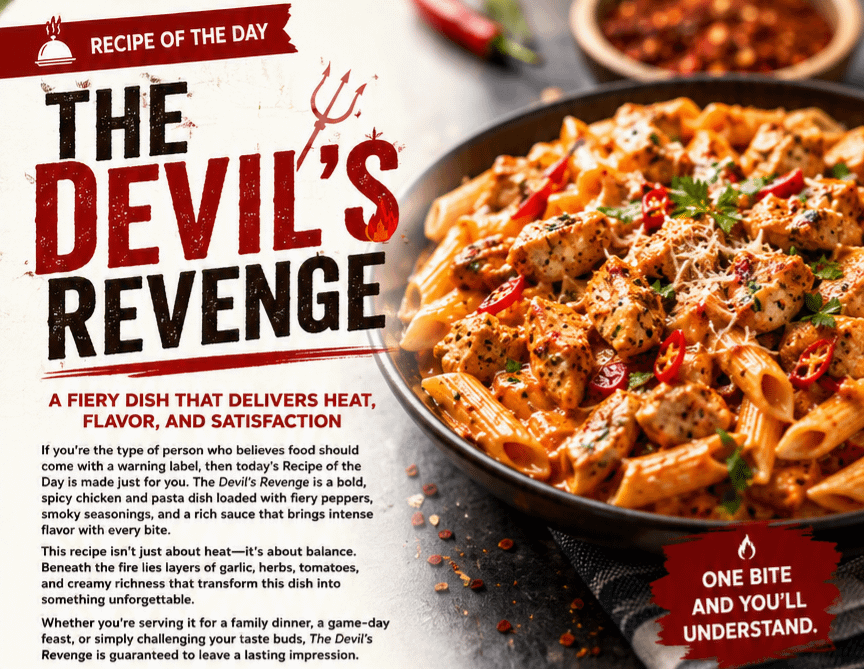
    Recipe of the Day: The Devil’s Revenge

    A Fiery Dish That Delivers Heat, Flavor, and Satisfaction

    If you’re the type of person who believes food should come with a warning label, then today’s Recipe of the Day is made just for you. The Devil’s Revenge is a bold, spicy chicken and pasta dish loaded with fiery peppers, smoky seasonings, and a rich sauce that brings intense flavor with every bite.

    This recipe isn’t just about heat—it’s about balance. Beneath the fire lies layers of garlic, herbs, tomatoes, and creamy richness that transform this dish into something unforgettable. Whether you’re serving it for a family dinner, a game-day feast, or simply challenging your taste buds, The Devil’s Revenge is guaranteed to leave a lasting impression.

    Why It’s Called The Devil’s Revenge

    One bite and you’ll understand.

    The combination of cayenne pepper, crushed red pepper flakes, jalapeños, and hot sauce creates a fiery kick that builds with every forkful. Yet the creamy sauce keeps the heat from becoming overwhelming, allowing the flavors to shine through rather than simply burn.

    It’s the kind of meal that makes your forehead sweat while simultaneously reaching for another bite.

    Ingredients

    For the Chicken

    • 2 pounds boneless skinless chicken breasts, cut into bite-sized pieces
    • 1 tablespoon olive oil
    • 1 teaspoon smoked paprika
    • 1 teaspoon cayenne pepper
    • 1 teaspoon garlic powder
    • 1 teaspoon onion powder
    • ½ teaspoon black pepper
    • 1 teaspoon salt

    For the Sauce

    • 2 tablespoons butter
    • 4 cloves garlic, minced
    • 1 jalapeño, diced
    • 1 teaspoon crushed red pepper flakes
    • 1 can (15 oz) fire-roasted tomatoes
    • 1 cup heavy cream
    • ½ cup chicken broth
    • ½ cup grated Parmesan cheese
    • 2 tablespoons hot sauce
    • 1 teaspoon Italian seasoning

    For the Pasta

    • 12 ounces penne pasta
    • Fresh parsley for garnish
    • Additional Parmesan cheese

    Instructions

    Step 1: Cook the Pasta

    Bring a large pot of salted water to a boil.

    Cook penne according to package directions until al dente. Drain and set aside.

    Step 2: Season the Chicken

    In a bowl, combine chicken pieces with paprika, cayenne, garlic powder, onion powder, salt, and pepper.

    Toss until evenly coated.

    Step 3: Sear the Chicken

    Heat olive oil in a large skillet over medium-high heat.

    Cook the chicken for 6 to 8 minutes until browned and fully cooked.

    Remove from skillet and set aside.

    Step 4: Build the Fire

    In the same skillet, melt butter.

    Add garlic, jalapeño, and red pepper flakes.

    Cook for 1 to 2 minutes until fragrant.

    Stir in fire-roasted tomatoes, chicken broth, hot sauce, and Italian seasoning.

    Allow the mixture to simmer for 5 minutes.

    Step 5: Create the Creamy Sauce

    Reduce heat to medium-low.

    Slowly stir in heavy cream and Parmesan cheese.

    Continue stirring until smooth and creamy.

    Step 6: Bring It Together

    Return chicken to the skillet.

    Add cooked pasta and toss until coated with the sauce.

    Allow everything to simmer for another 2 to 3 minutes.

    Step 7: Serve

    Top with fresh parsley and extra Parmesan cheese.

    Serve immediately while hot.

    Serving Suggestions

    The Devil’s Revenge pairs perfectly with:

    • Garlic bread
    • Caesar salad
    • Roasted vegetables
    • Cold sweet tea
    • Lemonade
    • Ice-cold beer

    The cooling sides help balance the heat while allowing the flavors to remain front and center.

    Tips for Adjusting the Heat

    Not everyone has the same tolerance for spice.

    Want It Milder?

    • Reduce the cayenne pepper.
    • Skip the red pepper flakes.
    • Use less hot sauce.

    Want It Hotter?

    • Add diced habanero peppers.
    • Increase the cayenne.
    • Use extra-hot wing sauce.
    • Finish with a few drops of ghost pepper sauce.

    Just remember: once the heat is added, there’s no turning back.

    Why You’ll Love This Recipe

    The Devil’s Revenge combines everything spicy food lovers crave:

    • Tender seasoned chicken
    • Rich creamy sauce
    • Smoky tomato flavor
    • Bold garlic notes
    • Fiery pepper heat
    • Comfort-food satisfaction

    It’s the perfect balance between a hearty pasta dinner and an unforgettable spicy challenge.

    Final Thoughts

    Some recipes are comforting. Some are exciting. The Devil’s Revenge manages to be both.

    With its creamy texture, smoky flavor, and devilishly spicy kick, this dish transforms an ordinary dinner into a memorable experience. Whether you’re a heat-seeker or simply looking to try something different, The Devil’s Revenge proves that sometimes the best meals come with a little fire.

    Just keep a glass of water nearby—you may need it.

    Read More Recipes

  • Recipe of the Day: Red Wine Braised Pork with Thyme and Apples

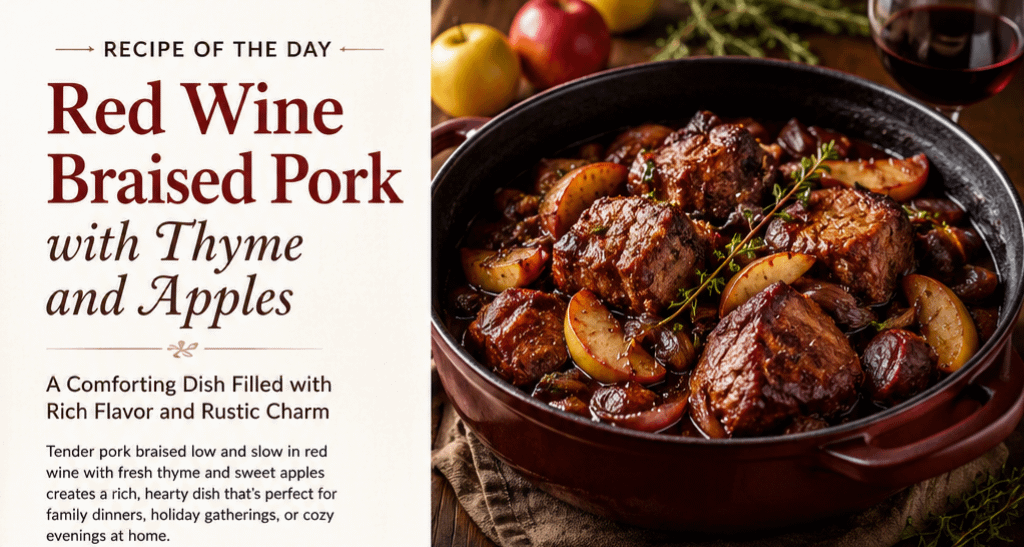
    Recipe of the Day: Red Wine Braised Pork with Thyme and Apples

    A Comforting Dish Filled with Rich Flavor and Rustic Charm

    Few meals capture the essence of comfort food quite like Red Wine Braised Pork with Thyme and Apples. This hearty dish combines tender pork, sweet apples, aromatic herbs, and a rich red wine sauce that slowly develops incredible depth of flavor as it cooks.

    Perfect for family dinners, holiday gatherings, or cozy evenings at home, this recipe brings together the savory and sweet flavors of autumn while remaining delicious any time of year. The slow braising process transforms simple ingredients into a restaurant-quality meal that feels both elegant and comforting.

    Why You’ll Love This Recipe

    Red Wine Braised Pork with Thyme and Apples offers the perfect balance of flavors:

    • Tender, fall-apart pork
    • Sweet and slightly tart apples
    • Rich red wine sauce
    • Fragrant fresh thyme
    • One-pot simplicity
    • Ideal for make-ahead meals

    The combination of apples and pork has long been a classic pairing because the fruit naturally complements the richness of the meat. The addition of red wine adds complexity and creates a luxurious sauce that ties everything together.

    Ingredients

    For the Pork

    • 3 pounds pork shoulder, cut into large chunks
    • 2 tablespoons olive oil
    • 1 teaspoon salt
    • 1 teaspoon black pepper
    • 1 teaspoon garlic powder

    For the Braising Sauce

    • 1 large onion, sliced
    • 3 cloves garlic, minced
    • 2 apples, cored and sliced
    • 2 cups dry red wine
    • 1 cup chicken broth
    • 2 tablespoons tomato paste
    • 1 tablespoon brown sugar
    • 6 sprigs fresh thyme
    • 2 bay leaves

    Optional Garnish

    • Fresh thyme leaves
    • Chopped parsley
    • Apple slices

    Instructions

    Step 1: Prepare the Pork

    Pat the pork dry with paper towels. Season generously with salt, pepper, and garlic powder.

    Heat olive oil in a large Dutch oven over medium-high heat.

    Sear the pork in batches until browned on all sides, approximately 3 to 4 minutes per side. Remove and set aside.

    Step 2: Build the Flavor Base

    Reduce heat to medium.

    Add onions to the pot and cook for 5 minutes until softened.

    Stir in garlic and cook for another minute.

    Add sliced apples and cook for 2 to 3 minutes.

    Mix in tomato paste and brown sugar, stirring until well combined.

    Step 3: Deglaze the Pot

    Pour in the red wine, scraping up any browned bits from the bottom of the pot.

    Allow the wine to simmer for 5 minutes to reduce slightly.

    Add chicken broth, thyme sprigs, and bay leaves.

    Step 4: Braise

    Return the pork to the pot.

    Bring the liquid to a gentle simmer.

    Cover with a lid and transfer to a 325°F oven.

    Cook for approximately 2½ to 3 hours, or until the pork becomes fork-tender.

    Step 5: Finish and Serve

    Remove the thyme stems and bay leaves.

    Taste and adjust seasoning if needed.

    Serve the pork over mashed potatoes, buttered noodles, rice, or roasted vegetables.

    Spoon the rich wine sauce generously over each serving.

    Serving Suggestions

    This dish pairs beautifully with:

    • Garlic mashed potatoes
    • Roasted Brussels sprouts
    • Honey-glazed carrots
    • Crusty artisan bread
    • Wild rice pilaf

    For beverages, consider serving with the same red wine used in cooking for a perfectly matched dining experience.

    Cooking Tips

    Choose the Right Wine

    Use a dry red wine such as Cabernet Sauvignon, Merlot, Pinot Noir, or Syrah. Avoid cooking wines, as they often contain added salt and preservatives.

    Select Firm Apples

    Varieties such as Honeycrisp, Granny Smith, or Pink Lady hold their shape well during cooking and provide excellent flavor.

    Make It Ahead

    Like many braised dishes, the flavors deepen overnight. Prepare it a day ahead and gently reheat before serving for even better results.

    Don’t Rush the Braise

    Low and slow cooking is the secret to achieving melt-in-your-mouth pork and a deeply flavorful sauce.

    The History Behind Braising

    Braising is one of the oldest cooking methods in culinary history. For centuries, cooks have slowly simmered tougher cuts of meat in liquid to create tender, satisfying meals. The technique became especially popular throughout Europe, where wine, herbs, and seasonal produce were often combined to transform simple ingredients into memorable dishes.

    The pairing of pork and apples dates back hundreds of years and remains a staple in many traditional cuisines because of the natural harmony between sweet fruit and savory meat.

    Final Thoughts

    Red Wine Braised Pork with Thyme and Apples is the kind of meal that fills your home with irresistible aromas and brings people together around the table. The rich wine sauce, tender pork, sweet apples, and fragrant thyme create a comforting dish that feels both rustic and refined.

    Whether you’re preparing a special Sunday dinner or looking for a comforting meal during cooler months, this recipe delivers warmth, flavor, and satisfaction in every bite.

    Take your time, let the ingredients work their magic, and enjoy a meal that proves some of the best recipes are worth the wait.

    Read More Recipes

  • Recipe of the Day: Bruschetta

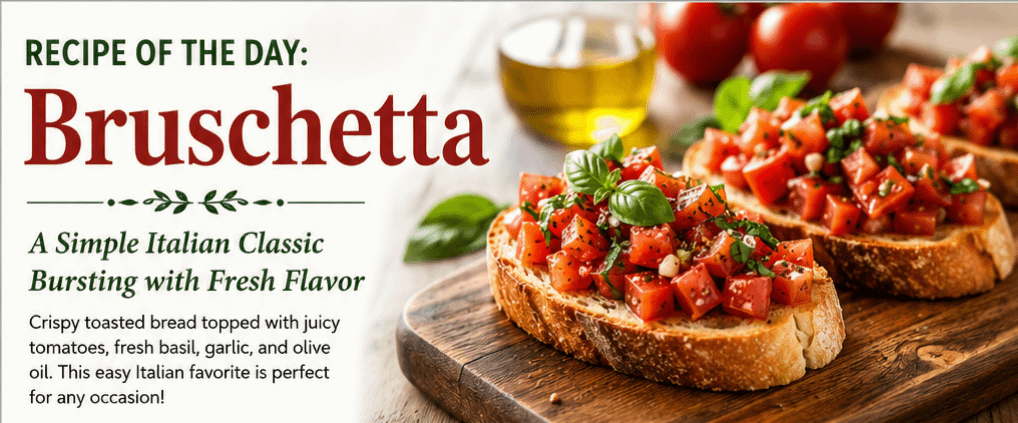
    Recipe of the Day: Bruschetta

    A Simple Italian Classic Bursting with Fresh Flavor

    When it comes to appetizers that are both elegant and incredibly easy to prepare, few dishes can compete with Bruschetta. This traditional Italian favorite combines fresh tomatoes, fragrant basil, garlic, olive oil, and toasted bread to create a dish that celebrates simple ingredients at their very best.

    Today’s Recipe of the Day highlights Bruschetta, a timeless recipe that is perfect for family gatherings, summer parties, holiday celebrations, or simply enjoying as a light snack. Every bite delivers a refreshing combination of flavors that captures the heart of Italian cuisine.

    The History of Bruschetta

    Bruschetta traces its roots back to central Italy, where farmers would grill slices of bread and top them with freshly pressed olive oil. The dish served as a way to sample the quality of newly harvested olive oil while making use of day-old bread.

    Over time, Bruschetta evolved into the beloved appetizer we know today, featuring fresh vegetables, herbs, cheeses, and various toppings. While many variations exist, the classic tomato and basil version remains the most popular around the world.

    Why People Love Bruschetta

    Bruschetta has remained popular for generations because it offers:

    • Fresh and vibrant flavors
    • Quick preparation
    • Healthy ingredients
    • Beautiful presentation
    • Endless topping variations
    • A perfect appetizer for any occasion

    Whether served before dinner or enjoyed alongside a glass of wine, Bruschetta delivers a taste of Italy that never goes out of style.

    Classic Bruschetta Recipe

    Ingredients

    For the Topping:

    • 4 large ripe tomatoes, diced
    • ¼ cup fresh basil, chopped
    • 2 cloves garlic, minced
    • 2 tablespoons extra virgin olive oil
    • 1 teaspoon balsamic vinegar
    • Salt to taste
    • Freshly ground black pepper to taste

    For the Bread:

    • 1 French baguette
    • 2 tablespoons olive oil
    • 1 garlic clove, peeled

    Instructions

    Step 1: Prepare the Tomato Mixture

    In a medium bowl, combine the diced tomatoes, basil, minced garlic, olive oil, balsamic vinegar, salt, and pepper.

    Gently stir until all ingredients are evenly mixed.

    Allow the mixture to sit for 15–20 minutes to let the flavors develop.

    Step 2: Toast the Bread

    Slice the baguette into ½-inch slices.

    Brush both sides lightly with olive oil.

    Toast on a grill, under a broiler, or in a skillet until golden brown and crisp.

    Step 3: Add Garlic Flavor

    While the bread is still warm, rub each slice lightly with the peeled garlic clove.

    This simple step adds incredible flavor without overpowering the dish.

    Step 4: Assemble

    Spoon the tomato mixture generously onto each toasted slice.

    Serve immediately while the bread remains crisp.

    Tips for Perfect Bruschetta

    Use Fresh Ingredients

    Since Bruschetta relies on only a handful of ingredients, quality matters. Fresh tomatoes, basil, and olive oil make a huge difference.

    Avoid Soggy Bread

    Serve shortly after assembling to maintain the perfect crunchy texture.

    Choose Ripe Tomatoes

    Roma or vine-ripened tomatoes work especially well because they provide excellent flavor with less excess moisture.

    Season Carefully

    Taste your tomato mixture before serving and adjust salt and pepper as needed.

    Delicious Variations

    Mozzarella Bruschetta

    Add diced fresh mozzarella for a creamy texture.

    Avocado Bruschetta

    Mix avocado into the tomato topping for a modern twist.

    Prosciutto Bruschetta

    Top with thin slices of prosciutto for a savory Italian touch.

    Balsamic Glaze Bruschetta

    Drizzle with balsamic reduction for added sweetness and depth.

    Mushroom Bruschetta

    Replace tomatoes with sautéed mushrooms and herbs for a rich variation.

    Nutritional Benefits

    Bruschetta offers several nutritional advantages:

    • Rich in vitamins from fresh tomatoes
    • Contains heart-healthy olive oil
    • Provides antioxidants from basil and garlic
    • Lower in calories than many fried appetizers
    • Naturally vegetarian

    It’s a dish that proves delicious food can also be wholesome.

    Perfect Pairings

    Bruschetta pairs wonderfully with:

    • Pasta dishes
    • Grilled chicken
    • Seafood
    • Fresh salads
    • Italian soups
    • Charcuterie boards

    It also makes an excellent addition to summer cookouts and holiday gatherings.

    Final Thoughts

    Bruschetta is proof that great food doesn’t need to be complicated. With just a few fresh ingredients and minimal preparation, you can create an appetizer that is colorful, flavorful, and universally loved.

    Whether you’re hosting guests or simply looking for a quick snack, Bruschetta delivers authentic Italian flavor in every bite. It’s a timeless recipe that continues to bring people together around the table, one crunchy, delicious slice at a time.

    Read More Recipes