Category: Recipes

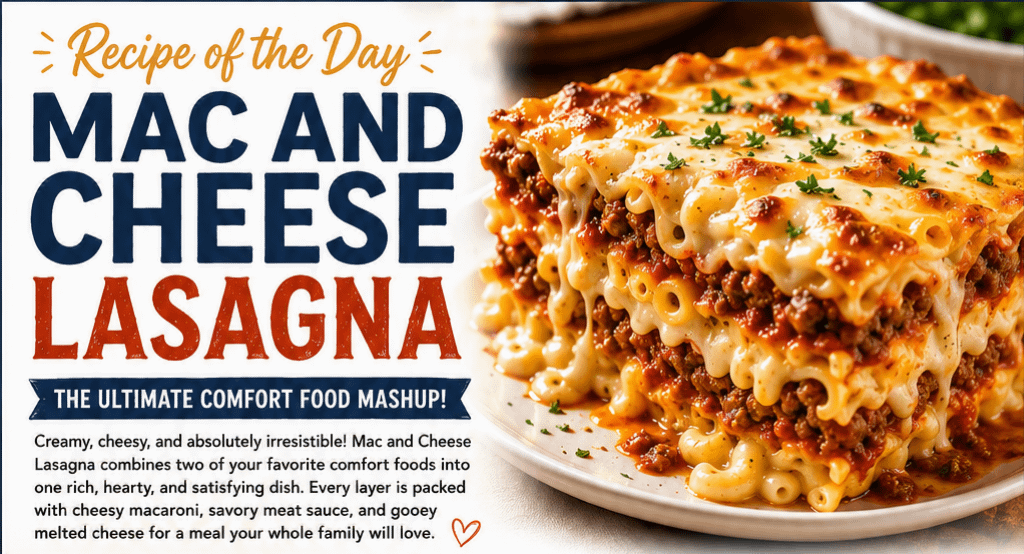
  • Recipe of the Day: Mac and Cheese Lasagna

    Recipe of the Day: Mac and Cheese Lasagna

    Creamy, Cheesy, and the Ultimate Comfort Food Mashup

    If you love macaroni and cheese and can’t resist a hearty slice of lasagna, why choose between the two? Mac and Cheese Lasagna combines two of the world’s favorite comfort foods into one incredibly rich, cheesy, and satisfying meal. Every layer is packed with creamy macaroni and cheese, savory meat sauce, gooey mozzarella, and tender lasagna noodles, creating a dish that’s perfect for family dinners, potlucks, game days, or anytime you’re craving something indulgent.

    This recipe takes classic comfort food to an entirely new level. The creamy macaroni adds a unique texture that pairs beautifully with the rich tomato sauce and melted cheeses, making every bite unforgettable.


    Why You’ll Love This Recipe

    Mac and Cheese Lasagna offers everything people love about comfort food.

    • Rich and creamy
    • Loaded with three kinds of cheese
    • Hearty enough to feed a crowd
    • Great for leftovers
    • Kid-friendly
    • Freezer-friendly
    • Perfect for holidays or gatherings

    Every slice delivers layers of creamy, cheesy goodness balanced with a flavorful meat sauce.


    Ingredients

    For the Meat Sauce

    • 1 pound ground beef
    • ½ pound Italian sausage
    • 1 small onion, diced
    • 3 cloves garlic, minced
    • 1 (24-ounce) jar marinara sauce
    • 1 (15-ounce) can tomato sauce
    • 1 teaspoon Italian seasoning
    • ½ teaspoon basil
    • Salt and pepper to taste

    For the Mac and Cheese

    • 16 ounces elbow macaroni
    • 4 tablespoons butter
    • ¼ cup flour
    • 3 cups whole milk
    • 2 cups shredded sharp cheddar
    • 1 cup Monterey Jack cheese
    • ½ cup Parmesan cheese
    • Salt
    • Pepper
    • ½ teaspoon paprika

    For the Lasagna

    • 9 lasagna noodles, cooked
    • 3 cups shredded mozzarella
    • 1 cup ricotta cheese
    • ½ cup grated Parmesan
    • Fresh parsley for garnish

    Directions

    Step 1: Prepare the Meat Sauce

    In a large skillet, brown the ground beef and Italian sausage over medium heat.

    Add:

    • Onion
    • Garlic

    Cook until softened.

    Drain excess grease.

    Stir in:

    • Marinara sauce
    • Tomato sauce
    • Italian seasoning
    • Basil
    • Salt
    • Pepper

    Simmer for 20 minutes.


    Step 2: Make the Mac and Cheese

    Cook macaroni until just al dente.

    Drain.

    In another saucepan:

    Melt butter.

    Whisk in flour and cook for one minute.

    Slowly whisk in milk until smooth.

    Cook until thickened.

    Add:

    • Cheddar
    • Monterey Jack
    • Parmesan

    Stir until melted.

    Season with:

    • Salt
    • Pepper
    • Paprika

    Mix in cooked macaroni.


    Step 3: Assemble the Lasagna

    Preheat oven to 375°F (190°C).

    Grease a 9×13-inch baking dish.

    Layer in this order:

    • Thin layer of meat sauce
    • 3 lasagna noodles
    • Half the mac and cheese
    • Ricotta dollops
    • Meat sauce
    • Mozzarella

    Repeat the layers.

    Finish with:

    • Final noodles
    • Remaining meat sauce
    • Mozzarella
    • Parmesan cheese

    Step 4: Bake

    Cover with foil.

    Bake for:

    35 minutes

    Remove foil.

    Bake another:

    15-20 minutes

    until golden and bubbly.

    Allow to rest for 15 minutes before slicing.


    Optional Add-Ins

    Customize your Mac and Cheese Lasagna with:

    • Crispy bacon
    • Diced jalapeños
    • Mushrooms
    • Spinach
    • Smoked gouda
    • Pepper jack cheese
    • Pulled chicken
    • BBQ brisket
    • Buffalo chicken
    • Caramelized onions

    What to Serve With It

    This rich dish pairs wonderfully with lighter sides.

    • Garlic bread
    • Caesar salad
    • Roasted broccoli
    • Green beans
    • Grilled asparagus
    • Italian bread
    • Garden salad
    • Roasted Brussels sprouts

    Storage Tips

    Refrigerate leftovers in an airtight container for up to 4 days.

    Freeze individual portions for up to 3 months.

    Reheat covered in the oven at 350°F until hot, or microwave individual servings for a quick meal.


    Tips for Success

    • Don’t overcook the pasta since it will continue cooking while baking.
    • Use freshly shredded cheese for the creamiest sauce.
    • Let the lasagna rest before cutting to help the layers stay together.
    • Add extra mozzarella on top for an irresistibly cheesy finish.
    • Prepare the dish a day in advance and bake just before serving for even better flavor.

    A Comfort Food Dream Come True

    Mac and Cheese Lasagna is the ultimate comfort food mashup that brings together two beloved classics into one unforgettable meal. The creamy macaroni and cheese blends perfectly with savory meat sauce, tender lasagna noodles, and bubbling layers of melted cheese to create a dinner that’s rich, filling, and guaranteed to impress.

    Whether you’re feeding a hungry family, hosting friends for game day, or simply treating yourself to an indulgent homemade meal, this recipe is sure to become a favorite. One bite is all it takes to understand why this cheesy masterpiece deserves a place on your dinner table.

    Prep Time: 30 minutes
    Cook Time: 55 minutes
    Rest Time: 15 minutes
    Total Time: 1 hour 40 minutes
    Servings: 10–12
    Read More Recipes

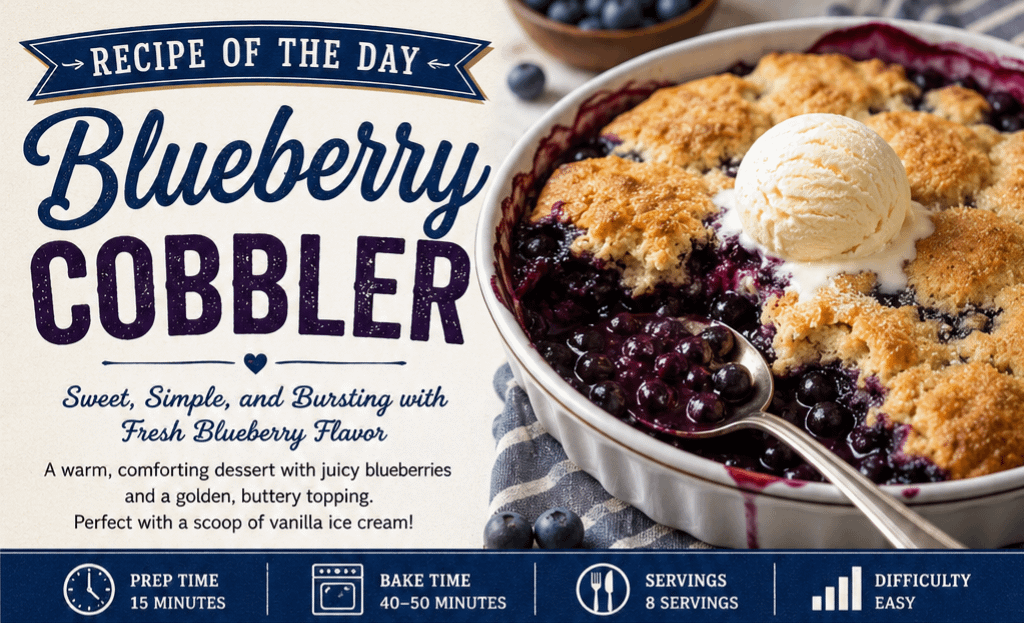
  • Recipe of the Day: Blueberry Cobbler

    Recipe of the Day: Blueberry Cobbler

    Sweet, Simple, and Bursting with Fresh Blueberry Flavor

    There are few desserts that capture the comfort of homemade baking quite like a warm blueberry cobbler. With its juicy berry filling and golden, buttery topping, blueberry cobbler is the perfect combination of rustic simplicity and irresistible flavor. Whether you’re using freshly picked summer blueberries or frozen berries from your freezer, this timeless dessert is easy to make and always a crowd-pleaser.

    Serve it fresh from the oven with a scoop of vanilla ice cream or a dollop of whipped cream, and you’ll have a dessert that’s perfect for family dinners, potlucks, holidays, or simply satisfying a sweet craving.

    Why You’ll Love Blueberry Cobbler

    Blueberry cobbler is one of those desserts that feels special without requiring complicated techniques or expensive ingredients.

    Some of the reasons it’s so popular include:

    • Ready in about one hour
    • Uses simple pantry staples
    • Works with fresh or frozen blueberries
    • Perfect balance of sweet and tart
    • Delicious warm or cold
    • Easily doubled for gatherings

    Every bite delivers tender blueberries surrounded by a soft, buttery topping that becomes lightly crisp around the edges while remaining fluffy in the center.


    The History of Cobbler

    Cobblers have been enjoyed in America since the early colonial period. Early settlers often lacked the ingredients and equipment needed to make traditional European pies. Instead, they placed fruit into baking dishes and topped it with biscuit dough before baking over open fires or in cast-iron Dutch ovens.

    The dessert became known as a “cobbler” because the uneven biscuit topping resembled old cobblestone streets.

    Over time, regional variations developed using cake batter, biscuit dough, pastry crusts, or even cookie-like toppings. Blueberry cobbler became especially popular in areas where blueberries grow abundantly, including the northeastern United States and parts of the Pacific Northwest.

    Today it remains one of America’s favorite fruit desserts.


    Ingredients

    For the Blueberry Filling

    • 6 cups fresh blueberries (or frozen)
    • ¾ cup granulated sugar
    • 2 tablespoons cornstarch
    • 1 tablespoon fresh lemon juice
    • 1 teaspoon lemon zest
    • ½ teaspoon ground cinnamon (optional)
    • 1 teaspoon vanilla extract
    • Pinch of salt

    For the Cobbler Topping

    • 1½ cups all-purpose flour
    • ½ cup granulated sugar
    • 2 teaspoons baking powder
    • ¼ teaspoon salt
    • ½ cup cold unsalted butter, cubed
    • ¾ cup milk
    • 1 teaspoon vanilla extract

    Optional:

    • Coarse sugar for sprinkling
    • Extra cinnamon

    Instructions

    Step 1: Prepare the Filling

    Preheat your oven to 375°F (190°C).

    In a large bowl combine:

    • Blueberries
    • Sugar
    • Cornstarch
    • Lemon juice
    • Lemon zest
    • Vanilla
    • Salt
    • Cinnamon

    Mix gently until evenly coated.

    Pour into a lightly greased 9×13-inch baking dish.


    Step 2: Make the Cobbler Topping

    In another bowl combine:

    • Flour
    • Sugar
    • Baking powder
    • Salt

    Cut in the cold butter until the mixture resembles coarse crumbs.

    Stir together the milk and vanilla.

    Pour into the flour mixture and stir until just combined.

    Do not overmix.


    Step 3: Assemble

    Drop spoonfuls of batter evenly over the blueberries.

    Leave small gaps so the berry filling can bubble through while baking.

    Sprinkle with coarse sugar if desired.


    Step 4: Bake

    Bake for 40–50 minutes, or until:

    • Filling is bubbling
    • Topping is golden brown
    • Toothpick inserted into topping comes out clean

    Allow to cool for 10–15 minutes before serving.


    Serving Suggestions

    Blueberry cobbler tastes amazing served with:

    • Vanilla ice cream
    • Fresh whipped cream
    • Lemon whipped cream
    • Greek yogurt
    • Fresh mint
    • Extra blueberries
    • Caramel drizzle
    • Powdered sugar

    The contrast between warm cobbler and cold ice cream is hard to beat.


    Tips for the Best Blueberry Cobbler

    Use Ripe Blueberries

    Fresh blueberries should be firm, plump, and deep blue.

    Frozen Blueberries Work Great

    No need to thaw them first.

    Simply increase baking time by 5–10 minutes.

    Don’t Skip the Lemon

    A little lemon juice brightens the berry flavor without making the dessert taste tart.

    Avoid Overmixing

    The topping stays tender when mixed only until combined.

    Let It Rest

    Cooling for about 15 minutes allows the filling to thicken.


    Delicious Variations

    Mixed Berry Cobbler

    Combine blueberries with:

    • Blackberries
    • Strawberries
    • Raspberries

    Peach Blueberry Cobbler

    Fresh peaches add sweetness and a beautiful summer flavor.


    Cinnamon Streusel Cobbler

    Top the batter with brown sugar, cinnamon, oats, and butter before baking.


    Almond Blueberry Cobbler

    Add sliced almonds and a few drops of almond extract for extra richness.


    Lemon Blueberry Cobbler

    Increase the lemon zest for a bright citrus twist.


    Storage

    Store leftovers covered in the refrigerator for up to 4 days.

    Reheat in the microwave or warm in a 325°F oven for about 15 minutes.


    Can You Freeze Blueberry Cobbler?

    Yes.

    Freeze after baking and cooling completely.

    Wrap tightly and freeze for up to 3 months.

    Thaw overnight in the refrigerator before reheating.


    Nutritional Information (Approximate Per Serving)

    Serves 8

    • Calories: 340
    • Carbohydrates: 53g
    • Protein: 4g
    • Fat: 13g
    • Saturated Fat: 8g
    • Fiber: 3g
    • Sugar: 32g
    • Sodium: 180mg

    Frequently Asked Questions

    Can I use frozen blueberries?

    Absolutely. Frozen berries make this recipe easy to enjoy year-round and bake beautifully.

    Why is my filling runny?

    The cobbler may need a few extra minutes in the oven, or it may not have rested long enough after baking. Cornstarch also needs the filling to reach a full simmer to thicken properly.

    Can I reduce the sugar?

    Yes. If your blueberries are especially sweet, you can reduce the sugar by about ¼ cup without sacrificing texture.

    What is the difference between a cobbler and a crisp?

    A cobbler has a biscuit- or cake-like topping, while a crisp is topped with a crumbly mixture that usually includes oats, butter, and brown sugar.

    Can I make it ahead of time?

    Yes. You can prepare the filling and topping separately, refrigerate them, and assemble just before baking for the freshest texture.


    Final Thoughts

    Blueberry cobbler is proof that the simplest recipes often become the most memorable. With its bubbling berry filling, tender golden topping, and comforting homemade aroma, this classic dessert is perfect for any season. Whether you’re baking with freshly picked summer blueberries or using frozen fruit in the middle of winter, every spoonful offers a delicious reminder that great desserts don’t have to be complicated.

    From family dinners to holiday celebrations, blueberry cobbler is a timeless favorite that’s sure to bring smiles around the table. Bake a pan, serve it warm with a scoop of vanilla ice cream, and enjoy a dessert that feels like home with every bite.

    Read More Recipes

  • Recipe of the Day: Chocolate Strawberry Brownies

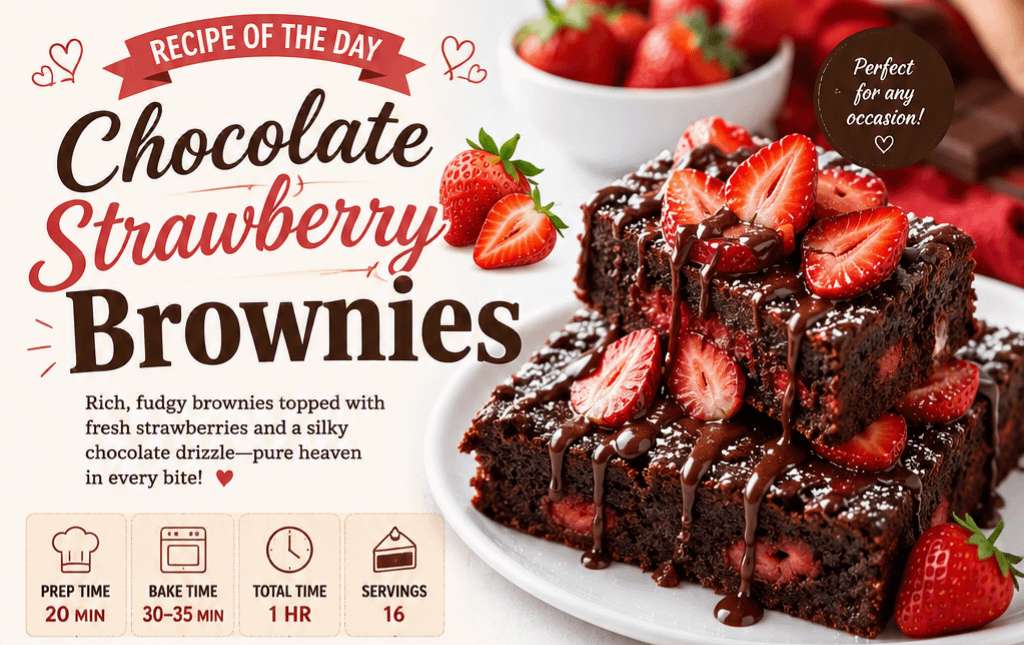
    Recipe of the Day: Chocolate Strawberry Brownies

    Chocolate Strawberry Brownies: A Decadent Dessert with a Fruity Twist

    Few desserts are as universally loved as brownies. Their rich chocolate flavor, chewy edges, and fudgy center make them a favorite for birthdays, family gatherings, holidays, and everyday indulgence. But if you’re looking to elevate the classic brownie into something truly memorable, Chocolate Strawberry Brownies are the perfect choice.

    The combination of deep, rich chocolate and fresh strawberries has been adored for generations. It’s a pairing that feels elegant enough for Valentine’s Day, Mother’s Day, anniversaries, or dinner parties while remaining simple enough to enjoy with a cup of coffee on a quiet afternoon.

    Today’s Recipe of the Day celebrates this timeless flavor combination with moist, fudgy brownies topped with juicy strawberries and finished with a silky chocolate drizzle.


    Why You’ll Love These Brownies

    These brownies offer everything people love about homemade desserts:

    • Rich, fudgy texture
    • Intense chocolate flavor
    • Fresh strawberry sweetness
    • Beautiful presentation
    • Easy ingredients
    • Ready in about an hour

    The fresh berries provide a refreshing contrast to the richness of the chocolate, making every bite perfectly balanced.


    Ingredients

    For the Brownies

    • 1 cup unsalted butter
    • 8 ounces semi-sweet chocolate, chopped
    • 1½ cups granulated sugar
    • ½ cup brown sugar
    • 4 large eggs
    • 2 teaspoons vanilla extract
    • 1 cup all-purpose flour
    • ½ cup unsweetened cocoa powder
    • ½ teaspoon salt
    • ½ teaspoon baking powder

    Strawberry Layer

    • 2 cups fresh strawberries, sliced
    • 1 tablespoon sugar (optional)

    Chocolate Drizzle

    • 1 cup semi-sweet chocolate chips
    • ¼ cup heavy cream

    Optional garnish:

    • Powdered sugar
    • Chocolate shavings
    • Fresh mint leaves

    Instructions

    Step 1: Prepare the Pan

    Preheat your oven to 350°F (175°C).

    Grease or line a 9×13-inch baking pan with parchment paper.


    Step 2: Melt the Chocolate

    In a saucepan over low heat, melt:

    • Butter
    • Chopped chocolate

    Stir until completely smooth.

    Remove from heat.


    Step 3: Mix Wet Ingredients

    Whisk together:

    • Granulated sugar
    • Brown sugar

    Add:

    • Eggs (one at a time)
    • Vanilla

    Whisk until smooth.

    Slowly stir in the melted chocolate mixture.


    Step 4: Add Dry Ingredients

    In another bowl combine:

    • Flour
    • Cocoa powder
    • Salt
    • Baking powder

    Fold the dry ingredients into the chocolate mixture until just combined.

    Do not overmix.


    Step 5: Bake

    Pour the batter into the prepared pan.

    Bake for 30–35 minutes, or until a toothpick comes out with a few moist crumbs.

    Allow brownies to cool completely.


    Step 6: Prepare Strawberries

    Slice the strawberries.

    If desired, toss them with one tablespoon of sugar and allow them to sit for 10 minutes to become extra juicy.

    Pat dry lightly before placing on the brownies.


    Step 7: Make the Ganache

    Heat the heavy cream until just simmering.

    Pour over the chocolate chips.

    Let sit for 2 minutes.

    Whisk until silky smooth.


    Step 8: Assemble

    Arrange sliced strawberries over the cooled brownies.

    Drizzle generously with the chocolate ganache.

    Finish with:

    • Chocolate curls
    • Powdered sugar
    • Fresh mint

    Tips for Perfect Brownies

    Use Good Chocolate

    Quality chocolate makes all the difference.

    Don’t Overbake

    Slightly underbaked brownies stay wonderfully fudgy.

    Let Them Cool

    Cooling allows the brownies to firm up and makes slicing much easier.

    Dry the Strawberries

    Too much moisture can make brownies soggy.


    Delicious Variations

    White Chocolate Strawberry Brownies

    Replace the drizzle with melted white chocolate.


    Triple Chocolate

    Add:

    • Milk chocolate chips
    • Dark chocolate chunks
    • Chocolate drizzle

    Cheesecake Swirl

    Swirl softened cream cheese into the batter before baking.


    Nut Lover’s Version

    Add chopped:

    • Pecans
    • Walnuts
    • Almonds

    Chocolate Covered Strawberry Brownies

    Dip whole strawberries in melted chocolate before decorating the brownies.


    Serving Suggestions

    Chocolate Strawberry Brownies pair beautifully with:

    • Vanilla ice cream
    • Fresh whipped cream
    • Hot coffee
    • Espresso
    • Cold milk
    • Strawberry milkshakes

    They’re equally perfect served warm or chilled.


    Storage

    Store in an airtight container.

    • Counter: 2 days
    • Refrigerator: up to 5 days
    • Freezer (without strawberries): up to 3 months

    For best freshness, add the strawberries shortly before serving.


    Perfect Occasions

    These brownies shine at:

    • Valentine’s Day
    • Mother’s Day
    • Baby showers
    • Bridal showers
    • Birthdays
    • Potlucks
    • Family reunions
    • Summer picnics
    • Christmas dessert tables
    • Date nights

    Their colorful presentation makes them a standout dessert for almost any celebration.


    Nutritional Information (Approximate)

    Per serving (based on 16 brownies):

    • Calories: 360
    • Fat: 20g
    • Carbohydrates: 42g
    • Protein: 5g
    • Sugar: 30g
    • Fiber: 3g

    Final Thoughts

    Chocolate Strawberry Brownies prove that sometimes the best desserts come from pairing two timeless favorites. The rich, fudgy brownie base offers deep chocolate flavor, while fresh strawberries add a burst of sweetness and a touch of brightness that keeps every bite balanced and satisfying.

    Whether you’re baking for someone special or simply treating yourself, these brownies are sure to impress. They’re beautiful enough for celebrations yet easy enough to make any day of the week. One pan is rarely enough—everyone will be coming back for another piece.

    Read More Recipes

  • Recipe of the Day: Surprise Kisses

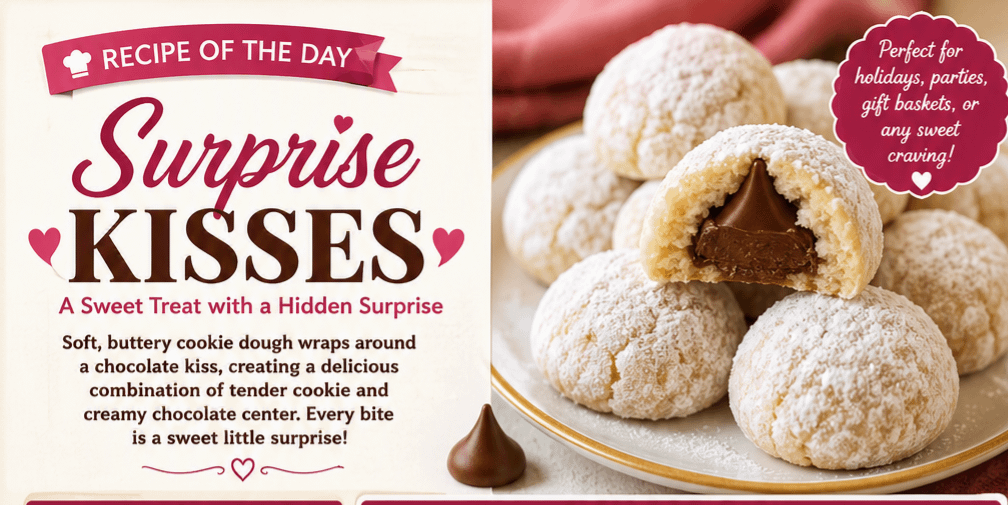
    Recipe of the Day: Surprise Kisses

    A Sweet Treat with a Hidden Surprise

    Some desserts are meant to impress with their appearance, while others delight because of the surprise waiting inside. Surprise Kisses are one of those timeless treats that bring smiles with every bite. Soft, buttery cookie dough wraps around a chocolate kiss, creating a delicious combination of tender cookie and creamy chocolate center.

    They’re easy enough for beginner bakers, fun to make with children, and perfect for holidays, parties, gift baskets, or simply satisfying a sweet craving. The hidden chocolate center makes every cookie feel like opening a tiny present.

    Why You’ll Love Surprise Kisses

    • Soft, buttery cookies with a rich chocolate center.
    • Simple ingredients you likely already have.
    • Easy to customize with different flavors of chocolate kisses.
    • Perfect for holidays, birthdays, cookie exchanges, and family gatherings.
    • Great make-ahead dessert that stays fresh for several days.

    Ingredients

    For the Cookies

    • 1 cup unsalted butter, softened
    • ½ cup granulated sugar
    • 1 teaspoon vanilla extract
    • 2 cups all-purpose flour
    • ¼ teaspoon salt

    Filling

    • 24 chocolate kisses, unwrapped

    For Rolling

    • ½ cup powdered sugar

    Instructions

    Step 1: Prepare the Dough

    Preheat your oven to 350°F (175°C).

    In a large bowl, cream together the softened butter and granulated sugar until light and fluffy. Mix in the vanilla extract.

    Gradually add the flour and salt until a soft dough forms.

    Step 2: Wrap the Chocolate

    Scoop about one tablespoon of dough and flatten it in your hand.

    Place one chocolate kiss in the center and carefully wrap the dough completely around it. Roll gently into a smooth ball.

    Repeat until all cookies are prepared.

    Step 3: Bake

    Place the cookie balls on a parchment-lined baking sheet about two inches apart.

    Bake for 10–12 minutes, just until the bottoms begin turning lightly golden. The tops should remain pale.

    Do not overbake.

    Step 4: Finish

    Allow the cookies to cool for about five minutes.

    While still slightly warm, gently roll each cookie in powdered sugar.

    Once completely cooled, roll them in powdered sugar a second time for the classic snowy appearance.

    Optional Variations

    Try putting your own twist on Surprise Kisses:

    • Peanut Butter – Use peanut butter cookie dough.
    • Chocolate Lovers – Make chocolate cookie dough around milk chocolate kisses.
    • Caramel Delight – Use caramel-filled chocolate kisses.
    • Mint Magic – Wrap mint chocolate kisses in chocolate dough.
    • Holiday Fun – Use seasonal flavored kisses for Christmas, Valentine’s Day, Halloween, or Easter.

    Serving Suggestions

    Serve Surprise Kisses:

    • Alongside hot coffee or tea.
    • With a glass of cold milk.
    • On holiday cookie trays.
    • Packaged in decorative tins as homemade gifts.
    • As a sweet ending to family dinners.

    Storage Tips

    Store in an airtight container at room temperature for up to 5 days.

    For longer storage, freeze for up to 3 months. Simply thaw at room temperature before serving.

    Baking Tips

    • Completely cover each chocolate kiss with dough to prevent melting through.
    • Chill the dough for 20 minutes if it becomes too soft.
    • Roll twice in powdered sugar for the prettiest finish.
    • Avoid overbaking to keep the cookies soft and tender.

    Final Thoughts

    Sometimes the best desserts are the simplest ones. Surprise Kisses combine buttery homemade cookies with a hidden chocolate center that makes every bite memorable. Whether you’re baking for family, sharing with friends, or preparing holiday treats, these cookies deliver warmth, sweetness, and just a little bit of surprise.

    One bite is all it takes to understand why they’ve remained a favorite for generations. Happy baking!

    Read More Recipes

  • Recipe of the Day: Patriotic Party Mix

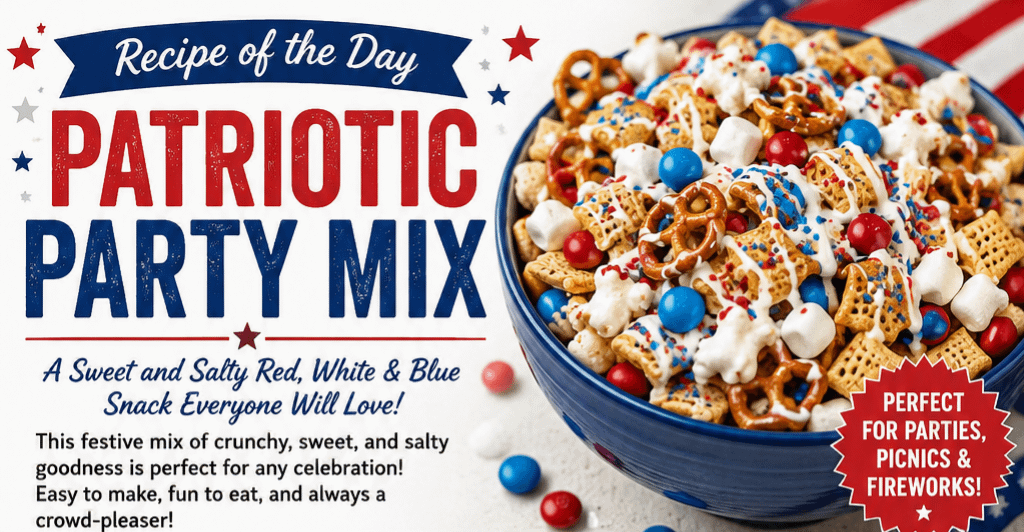
    Recipe of the Day: Patriotic Party Mix

    A Sweet and Salty Red, White & Blue Snack Everyone Will Love

    Whether you’re celebrating Independence Day, Memorial Day, Labor Day, or simply hosting a summer gathering, Patriotic Party Mix is the perfect snack to keep guests coming back for more. This colorful combination of crunchy cereal, pretzels, popcorn, candy, and white chocolate is festive, delicious, and incredibly easy to prepare.

    One of the best things about this recipe is its versatility. You can customize it with your favorite snacks, package it in festive treat bags for party favors, or serve it in a large bowl for everyone to enjoy while watching fireworks or cheering on their favorite team.

    This sweet-and-salty snack is a guaranteed crowd-pleaser for kids and adults alike.


    Why You’ll Love This Recipe

    • Ready in about 20 minutes
    • No baking required
    • Perfect for parties and picnics
    • Easy to customize
    • Great make-ahead snack
    • Fun activity to make with kids

    Ingredients

    • 4 cups Rice Chex cereal
    • 2 cups mini pretzels
    • 3 cups popped popcorn
    • 1 cup mini marshmallows
    • 1 cup red, white, and blue candy-coated chocolates
    • ½ cup red and blue M&M’s (optional)
    • ½ cup patriotic sprinkles
    • 12 ounces white chocolate chips
    • 1 tablespoon coconut oil or vegetable shortening (optional, for smoother melting)

    Instructions

    Step 1: Prepare the Mix

    In a very large mixing bowl, combine:

    • Rice Chex cereal
    • Pretzels
    • Popcorn
    • Mini marshmallows
    • Candy-coated chocolates

    Gently stir until evenly mixed.

    Step 2: Melt the White Chocolate

    Place the white chocolate chips and coconut oil into a microwave-safe bowl.

    Heat in 30-second intervals, stirring each time until completely smooth.

    Step 3: Coat the Snack Mix

    Slowly drizzle the melted white chocolate over the snack mixture.

    Using a rubber spatula, gently fold everything together until lightly coated.

    Avoid overmixing so the cereal stays crunchy.

    Step 4: Add Decorations

    Spread the mixture onto a parchment-lined baking sheet.

    Immediately sprinkle with:

    • Patriotic sprinkles
    • Additional candies
    • Extra marshmallows if desired

    Allow the chocolate to harden for about 20–30 minutes.

    Step 5: Break Apart and Serve

    Once hardened, break the mix into bite-sized clusters.

    Serve immediately or store for later.


    Storage

    Store in an airtight container at room temperature for up to one week.

    Do not refrigerate, as condensation may soften the cereal and popcorn.


    Fun Variations

    Chocolate Lovers

    Use half white chocolate and half milk chocolate drizzle.

    Peanut Butter Version

    Add peanut butter chips to the melted chocolate for a rich flavor.

    Nutty Party Mix

    Mix in:

    • Honey roasted peanuts
    • Almonds
    • Cashews
    • Pecans

    Extra Crunch

    Add:

    • Mini crackers
    • Cheese crackers
    • Bugles
    • Oyster crackers

    Dessert Mix

    Mix in:

    • Mini cookies
    • Graham cracker pieces
    • Yogurt-covered raisins
    • Chocolate-covered pretzels

    Perfect For

    • Fourth of July parties
    • Backyard barbecues
    • Memorial Day celebrations
    • Labor Day cookouts
    • Family movie nights
    • School events
    • Potlucks
    • Camping trips
    • Picnics
    • Holiday gift bags

    Tips for Success

    • Allow the popcorn to cool completely before mixing.
    • Use fresh popcorn to keep everything crisp.
    • Add sprinkles immediately before the chocolate sets.
    • Don’t overcoat the mix—you want every ingredient to remain crunchy.
    • Line your baking sheet with parchment paper for easy cleanup.

    Make It Kid Friendly

    Kids love helping make this recipe.

    They can:

    • Measure ingredients
    • Pour in the cereal
    • Sprinkle the decorations
    • Break apart the finished clusters

    It’s an easy way to create fun family memories while preparing for a celebration.


    Serving Ideas

    Serve your Patriotic Party Mix in:

    • Mason jars
    • Decorative bowls
    • Paper snack cups
    • Individual treat bags
    • Popcorn boxes
    • Red, white, and blue serving trays

    Pair it with lemonade, fruit punch, iced tea, or your favorite summer beverages for the ultimate patriotic snack table.


    Final Thoughts

    Patriotic Party Mix is everything a great party snack should be—quick, colorful, crunchy, sweet, salty, and impossible to stop eating. With minimal preparation and endless customization options, it’s a recipe you’ll find yourself making throughout the summer.

    Whether you’re hosting a neighborhood barbecue, enjoying fireworks with family, or looking for a festive homemade gift, this delicious snack mix adds a fun splash of red, white, and blue to every celebration.

    Once you make one batch, don’t be surprised if everyone asks you to bring it to the next party too!

    Read More Recipes

  • Recipe of the Day: 4th of July Fruit Salad

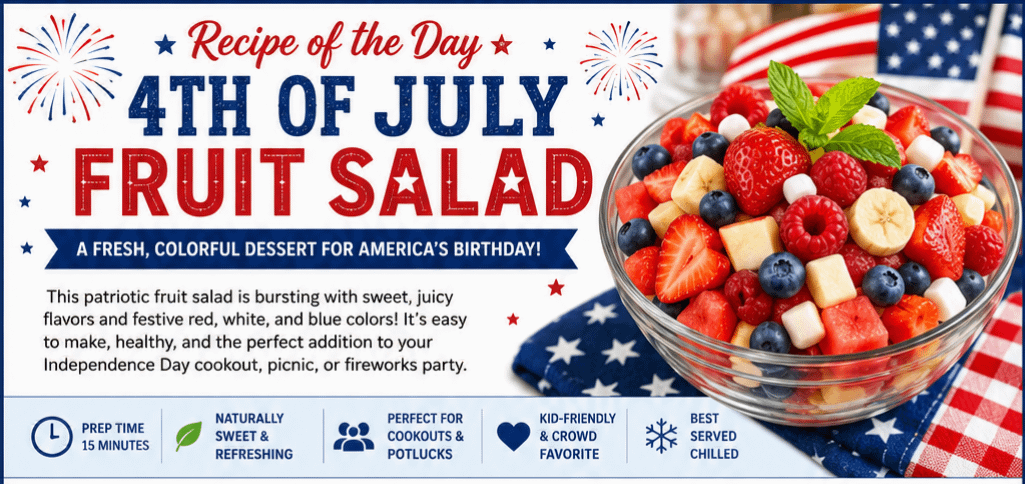
    Recipe of the Day: 4th of July Fruit Salad

    A Fresh, Colorful Dessert for America’s Birthday

    When it comes to celebrating Independence Day, nothing complements burgers, hot dogs, barbecue, and grilled favorites better than a refreshing bowl of fresh fruit. A 4th of July Fruit Salad is not only beautiful with its patriotic red, white, and blue colors, but it’s also healthy, easy to prepare, and always a crowd favorite.

    Whether you’re hosting a backyard barbecue, heading to a family picnic, or watching fireworks with friends, this festive fruit salad brings a burst of sweetness and color to the celebration. Best of all, it takes only minutes to make while showcasing some of summer’s freshest fruits.


    Why You’ll Love This Recipe

    This patriotic fruit salad is:

    • Ready in about 15 minutes
    • Naturally sweet and refreshing
    • Perfect for cookouts and potlucks
    • Kid-friendly
    • Easily made ahead of time
    • Packed with vitamins and antioxidants
    • Beautiful enough to serve as a centerpiece

    Ingredients

    Fruit

    • 2 cups strawberries, sliced
    • 2 cups blueberries
    • 2 cups watermelon, cubed
    • 2 cups apples, diced
    • 1½ cups raspberries
    • 2 bananas, sliced (add just before serving)
    • 1 cup mini marshmallows (optional)
    • Fresh mint leaves for garnish

    Honey Citrus Dressing

    • 3 tablespoons honey
    • Juice of 1 lime
    • Juice of ½ lemon
    • 1 teaspoon vanilla extract
    • 1 teaspoon finely grated lime zest

    Directions

    Step 1: Prepare the Fruit

    Wash and dry all fruit thoroughly.

    Slice the strawberries, cube the watermelon, dice the apples, and prepare the bananas just before serving to keep them fresh.


    Step 2: Make the Dressing

    In a small bowl whisk together:

    • Honey
    • Lime juice
    • Lemon juice
    • Vanilla
    • Lime zest

    Mix until completely combined.


    Step 3: Assemble

    Place all fruit except bananas into a large serving bowl.

    Pour the dressing over the fruit.

    Gently toss until evenly coated.


    Step 4: Finish

    Right before serving:

    • Fold in banana slices.
    • Add mini marshmallows if desired.
    • Garnish with fresh mint.

    Serve chilled.


    Optional Add-Ins

    Customize your fruit salad with:

    • Blackberries
    • Cherries
    • Red grapes
    • White grapes
    • Pineapple chunks
    • Coconut flakes
    • Pomegranate seeds
    • Kiwi slices
    • Mandarin oranges

    Patriotic Presentation Ideas

    Make your fruit salad extra festive by:

    • Arranging blueberries into a star shape.
    • Layering fruit in clear glass bowls.
    • Serving inside a carved watermelon.
    • Using star-shaped cookie cutters on watermelon slices.
    • Topping with whipped cream for a red, white, and blue finish.

    Tips for Success

    • Chill the fruit before mixing.
    • Don’t overmix delicate berries.
    • Add bananas last to prevent browning.
    • Prepare everything a few hours ahead and refrigerate.
    • Serve within 24 hours for the freshest flavor.

    What to Serve With It

    This fruit salad pairs perfectly with:

    • Grilled hamburgers
    • Hot dogs
    • BBQ ribs
    • Pulled pork sandwiches
    • Grilled chicken
    • Corn on the cob
    • Pasta salad
    • Potato salad
    • Lemonade
    • Sweet tea
    • Sparkling water

    Storage

    Store leftovers in an airtight container in the refrigerator for up to two days.

    For best texture, avoid freezing, as the fruit will become soft once thawed.


    Nutritional Benefits

    Fresh summer fruit provides:

    • Vitamin C
    • Fiber
    • Potassium
    • Antioxidants
    • Hydration
    • Natural energy

    It’s a healthier dessert option that still satisfies a sweet tooth.


    Make It a Family Tradition

    One of the best parts of this recipe is that everyone can help. Kids love washing berries, arranging the patriotic colors, and mixing the fruit. Preparing this salad together can become a cherished Fourth of July tradition that creates memories year after year.

    As fireworks light up the night sky and families gather around the picnic table, this simple bowl of colorful fruit reminds us that some of the best holiday moments are shared over fresh food, laughter, and time spent together.

    Happy Independence Day!

    Celebrate America’s birthday with a refreshing 4th of July Fruit Salad that’s bursting with vibrant colors, juicy flavors, and summertime freshness. Easy to make, healthy to enjoy, and beautiful to serve, it’s the perfect addition to any July 4th celebration.

    Read More Recipes

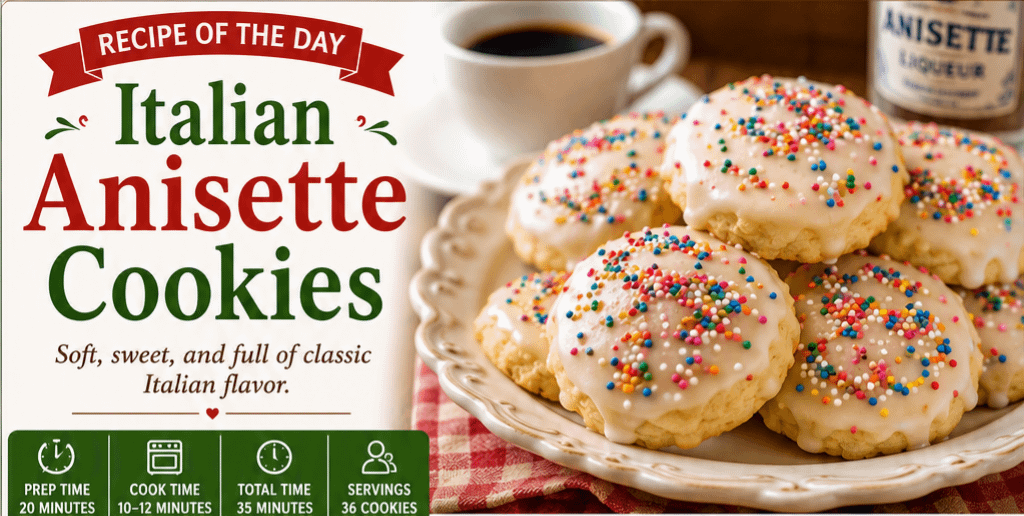
  • Recipe of the Day: Italian Anisette Cookies

    Recipe of the Day: Italian Anisette Cookies

    Italian Anisette Cookies are a timeless bakery favorite with their soft, cake-like texture, delicate anise flavor, and sweet vanilla glaze. These classic cookies are often found at weddings, Christmas celebrations, Easter gatherings, and family holidays throughout Italy and Italian-American homes. Their light sweetness and aromatic flavor make them the perfect companion to coffee, tea, or a glass of anisette liqueur.

    Recipe of the Day: Italian Anisette Cookies

    Prep Time: 20 minutes
    Cook Time: 10–12 minutes
    Total Time: 35 minutes
    Servings: 36 cookies

    A Traditional Italian Favorite

    Italian Anisette Cookies have been passed down through generations for well over a century. While every family has its own cherished recipe, they all share the same signature qualities: soft, pillowy cookies flavored with anise extract and topped with a glossy vanilla glaze finished with colorful sprinkles.

    Unlike crunchy biscotti, these cookies remain wonderfully soft for several days, making them ideal for holiday cookie trays or gifting.

    Ingredients

    For the Cookies

    • 3 cups all-purpose flour
    • 2 teaspoons baking powder
    • ¼ teaspoon salt
    • ½ cup unsalted butter, softened
    • ¾ cup granulated sugar
    • 3 large eggs
    • 1 teaspoon vanilla extract
    • 2 teaspoons anise extract
    • ¼ cup whole milk

    For the Glaze

    • 2 cups powdered sugar
    • 3–4 tablespoons milk
    • ½ teaspoon vanilla extract
    • Optional: ¼ teaspoon anise extract for extra flavor

    Topping

    • Rainbow nonpareil sprinkles

    Instructions

    Step 1: Prepare the Dough

    Preheat your oven to 350°F (175°C).

    Line baking sheets with parchment paper.

    In a medium bowl, whisk together the flour, baking powder, and salt.

    Step 2: Cream Butter and Sugar

    In a large mixing bowl, beat the softened butter and sugar until light and fluffy.

    Add the eggs one at a time, mixing well after each addition.

    Mix in the vanilla and anise extracts.

    Step 3: Combine

    Gradually add the dry ingredients to the butter mixture, alternating with the milk.

    Mix until a soft dough forms.

    The dough should be slightly sticky but easy to scoop.

    Step 4: Shape

    Using a cookie scoop or tablespoon, place rounded portions of dough about 2 inches apart on the prepared baking sheets.

    They will spread slightly during baking.

    Step 5: Bake

    Bake for 10–12 minutes until the bottoms are lightly golden while the tops remain pale.

    Do not overbake.

    Allow cookies to cool completely before glazing.

    Make the Glaze

    Whisk together:

    • Powdered sugar
    • Milk
    • Vanilla
    • Optional anise extract

    Adjust the consistency by adding a little more milk if necessary.

    The glaze should be thick enough to coat the tops of the cookies without running off completely.

    Decorate

    Dip each cooled cookie upside down into the glaze.

    Place on a wire rack.

    Immediately top with rainbow sprinkles before the glaze hardens.

    Allow 30–45 minutes for the glaze to fully set.

    Serving Suggestions

    Italian Anisette Cookies pair wonderfully with:

    • Fresh coffee
    • Espresso
    • Cappuccino
    • Tea
    • Hot chocolate
    • Anisette liqueur
    • Sweet dessert wine

    They’re equally delicious for breakfast, dessert, or an afternoon snack.

    Storage Tips

    Store the cookies in an airtight container at room temperature for up to 5 days.

    For longer storage:

    • Freeze unglazed cookies for up to 3 months.
    • Glaze after thawing for the freshest appearance.

    Recipe Variations

    Try putting your own twist on this classic recipe:

    • Add fresh lemon zest to the dough for a bright citrus flavor.
    • Substitute almond extract for the anise.
    • Top with white chocolate drizzle instead of glaze.
    • Use holiday-colored sprinkles for Christmas, Easter, weddings, or birthdays.
    • Add finely chopped pistachios for extra crunch.

    Why You’ll Love This Recipe

    • Soft and fluffy texture
    • Classic Italian bakery flavor
    • Easy enough for beginners
    • Perfect for holidays and celebrations
    • Freezes beautifully
    • Family-friendly recipe
    • Beautiful presentation with colorful glaze

    Whether you’re continuing a cherished family tradition or trying Italian baking for the first time, these Italian Anisette Cookies are sure to become a favorite. Their delicate anise aroma, tender crumb, and sweet glaze create a cookie that’s both elegant and comforting—perfect for sharing with loved ones over coffee, celebrating special occasions, or simply enjoying a taste of old-world Italian baking.

    Read More Recipes

  • Recipe of the Day: Soccer Explosion

    Recipe of the Day: Soccer Explosion

    Every unforgettable soccer match deserves equally unforgettable food. Whether you’re hosting a FIFA World Cup watch party, cheering for your favorite club, or simply enjoying an afternoon with friends and family, Soccer Explosion is the ultimate game-day recipe.

    Imagine a mountain of crispy seasoned potatoes layered with juicy grilled chicken, savory bacon, melted cheeses, fresh vegetables, and drizzled with creamy sauces—all finished with just enough spice to keep every bite exciting. It’s colorful, filling, and built for sharing, making it the perfect centerpiece for any soccer celebration.


    Why You’ll Love Soccer Explosion

    This recipe is designed for sports fans who love bold flavors.

    It offers:

    • Crispy golden potatoes
    • Tender seasoned chicken
    • Crispy bacon
    • Gooey melted cheddar and Monterey Jack cheese
    • Fresh vegetables for crunch
    • Creamy garlic ranch drizzle
    • Spicy chipotle sauce
    • Easy customization
    • Perfect for feeding a crowd

    Best of all, everyone can build their own plate exactly how they like it.


    Ingredients

    For the Crispy Base

    • 2 pounds frozen crinkle fries or potato wedges
    • 2 tablespoons olive oil
    • 1 teaspoon garlic powder
    • 1 teaspoon paprika
    • Salt and pepper

    Protein

    • 2 chicken breasts
    • 6 slices bacon
    • 1 teaspoon chili powder
    • 1 teaspoon smoked paprika
    • ½ teaspoon cumin
    • Salt and pepper

    Cheese

    • 2 cups shredded cheddar cheese
    • 1 cup Monterey Jack cheese

    Fresh Toppings

    • 1 cup diced tomatoes
    • ½ cup diced red onion
    • 1 jalapeño, sliced
    • ½ cup green onions
    • ½ cup chopped cilantro
    • 1 avocado, diced

    Sauces

    • Ranch dressing
    • Chipotle mayo
    • Sour cream

    Optional:

    • Salsa
    • Guacamole
    • Hot sauce
    • Pickled jalapeños

    Directions

    Step 1: Bake the Potatoes

    Prepare fries or potato wedges according to package directions until extra crispy.

    Season with:

    • Garlic powder
    • Paprika
    • Salt
    • Pepper

    Set aside.


    Step 2: Cook the Chicken

    Season chicken with:

    • Chili powder
    • Smoked paprika
    • Cumin
    • Salt
    • Pepper

    Grill or pan-sear over medium-high heat until fully cooked.

    Rest for five minutes before dicing into bite-sized pieces.


    Step 3: Cook the Bacon

    Cook bacon until crispy.

    Drain on paper towels before chopping.


    Step 4: Build the Explosion

    Spread the crispy potatoes onto a large serving platter or sheet pan.

    Layer with:

    • Chicken
    • Bacon
    • Cheddar cheese
    • Monterey Jack cheese

    Bake for 5 minutes or until the cheese is melted.


    Step 5: Add Fresh Ingredients

    Top with:

    • Tomatoes
    • Onion
    • Jalapeños
    • Avocado
    • Green onions
    • Cilantro

    Step 6: Finish with Sauce

    Drizzle generously with:

    • Ranch dressing
    • Chipotle mayo
    • Sour cream

    Serve immediately while hot.


    Optional Additions

    Customize Soccer Explosion with:

    • Pulled pork
    • Steak strips
    • Buffalo chicken
    • BBQ chicken
    • Chorizo
    • Black beans
    • Corn
    • Pico de gallo
    • Queso
    • Pepper jack cheese
    • Crushed tortilla chips

    Perfect Drinks

    Soccer Explosion pairs wonderfully with:

    • Lemonade
    • Sweet tea
    • Cola
    • Fruit punch
    • Iced coffee
    • Craft beer
    • Margaritas
    • Mojitos

    Tips for Success

    • Bake fries until extra crispy before adding toppings.
    • Melt the cheese just before serving.
    • Prepare vegetables ahead of time.
    • Keep sauces separate if serving a crowd.
    • Use a large platter so guests can easily grab portions.

    Great Occasions

    Soccer Explosion is ideal for:

    • Soccer watch parties
    • FIFA World Cup gatherings
    • Championship games
    • Birthday parties
    • Family movie nights
    • Tailgates
    • Summer cookouts
    • Weekend get-togethers

    Storage

    Store leftovers in an airtight container for up to three days.

    Reheat in the oven or air fryer to restore crispness before serving.


    Final Thoughts

    Soccer is all about teamwork, excitement, and unforgettable moments, and Soccer Explosion captures that same energy in every bite. Loaded with crispy potatoes, savory meats, melted cheese, colorful vegetables, and flavorful sauces, it’s the kind of dish that keeps everyone gathered around the table long after the final whistle.

    Whether your team wins or loses, this hearty recipe is guaranteed to be one of the biggest victories of the day.

    Read More Recipes

  • Recipe of the Day: Heartbroken Pizza

    Recipe of the Day: Heartbroken Pizza

    Sometimes comfort comes from a warm hug, and sometimes it comes from a hot, cheesy slice of pizza. Heartbroken Pizza is the ultimate comfort food—a homemade pizza loaded with your favorite toppings and baked until golden, crispy, and irresistibly delicious. Whether you’re nursing a broken heart, enjoying a quiet night at home, or simply craving a satisfying meal, this pizza reminds us that even difficult days can end with something wonderful.

    The beauty of Heartbroken Pizza is that there are no rules. Build it with the ingredients you love most and let each slice become a small reminder that healing often starts with taking care of yourself.

    Why You’ll Love Heartbroken Pizza

    • Crispy homemade crust
    • Gooey melted mozzarella
    • Fully customizable toppings
    • Perfect for family dinners or solo comfort meals
    • Easy enough for beginners
    • Delicious leftovers for the next day

    Ingredients

    For the Dough

    • 2¼ teaspoons active dry yeast
    • 1½ cups warm water
    • 1 teaspoon sugar
    • 3½ cups all-purpose flour
    • 2 tablespoons olive oil
    • 1 teaspoon salt

    Pizza Sauce

    • ¾ cup pizza sauce or marinara

    Cheese

    • 2½ cups shredded mozzarella
    • ¼ cup grated Parmesan

    Toppings

    Choose your favorites:

    • Pepperoni
    • Italian sausage
    • Bacon
    • Mushrooms
    • Red onions
    • Bell peppers
    • Black olives
    • Fresh basil
    • Jalapeños
    • Cherry tomatoes

    Seasoning

    • Italian seasoning
    • Garlic powder
    • Crushed red pepper flakes (optional)

    Instructions

    Step 1: Prepare the Dough

    Combine warm water, sugar, and yeast in a bowl. Let it sit for about 5–10 minutes until foamy.

    Mix in flour, olive oil, and salt until a dough forms. Knead for 8–10 minutes until smooth.

    Place the dough in an oiled bowl, cover, and let rise for about one hour or until doubled in size.

    Step 2: Preheat

    Preheat your oven to 475°F (245°C).

    If using a pizza stone, place it in the oven while preheating.

    Step 3: Shape the Pizza

    Roll the dough into a 12–14-inch circle.

    Transfer to a pizza pan, baking sheet, or pizza peel dusted with cornmeal.

    Step 4: Add the Good Stuff

    Spread pizza sauce evenly.

    Top with mozzarella and Parmesan.

    Add your chosen toppings.

    Finish with Italian seasoning and a light sprinkle of garlic powder.

    Step 5: Bake

    Bake for 12–15 minutes until the crust is golden brown and the cheese is bubbling.

    Allow the pizza to cool for five minutes before slicing.

    Optional Comfort Toppings

    If today has been especially rough, consider adding:

    • Extra cheese
    • Crispy bacon
    • Caramelized onions
    • Fresh basil
    • Hot honey drizzle after baking
    • Garlic butter brushed around the crust

    Serving Suggestions

    Heartbroken Pizza pairs wonderfully with:

    • Caesar salad
    • Garlic knots
    • Breadsticks
    • Tomato soup
    • Sparkling lemonade
    • Iced tea

    Finish dinner with brownies, chocolate chip cookies, or your favorite ice cream.

    Tips for the Best Homemade Pizza

    • Let the dough come to room temperature before stretching.
    • Avoid overloading with toppings so the crust stays crisp.
    • Use freshly shredded mozzarella for better melting.
    • Bake on a preheated pizza stone whenever possible.
    • Brush the crust with garlic butter immediately after baking.

    Make It Your Own

    One of the best parts about pizza is making it personal.

    Try these combinations:

    Classic Comfort

    • Pepperoni
    • Extra mozzarella
    • Parmesan

    Garden Fresh

    • Spinach
    • Mushrooms
    • Tomatoes
    • Basil

    Meat Lover’s

    • Pepperoni
    • Sausage
    • Bacon
    • Ham

    Spicy Healing

    • Jalapeños
    • Pepperoni
    • Red onions
    • Hot honey

    Storage

    Store leftovers in an airtight container in the refrigerator for up to four days.

    Reheat in a skillet or oven for the crispiest crust.

    Final Thoughts

    Heartbreak has a way of making the world feel heavy, but taking time to prepare a homemade meal can be a small act of self-care. Heartbroken Pizza isn’t about forgetting the pain—it’s about giving yourself permission to pause, nourish your body, and enjoy a simple moment of comfort.

    Whether you’re sharing it with friends, family, or savoring a quiet evening alone, every slice is a reminder that healing happens one day—and sometimes one delicious bite—at a time. After all, even on life’s toughest days, there’s still room for good food, hope, and the promise of brighter tomorrows.

    Read More Recipes

  • Recipe of the Day: Superman Cheesecake

    Recipe of the Day: Superman Cheesecake

    Few desserts capture the excitement of childhood quite like Superman Cheesecake. Inspired by the iconic Superman ice cream flavor known for its vibrant red, blue, and yellow swirls, this colorful cheesecake combines a rich, creamy filling with a buttery graham cracker crust to create a dessert that’s as fun to look at as it is to eat.

    Perfect for birthdays, superhero-themed parties, summer celebrations, or simply adding a splash of color to your dessert table, Superman Cheesecake delivers smooth cheesecake flavor with a playful twist that everyone will remember.


    Why You’ll Love This Recipe

    Superman Cheesecake is more than just a colorful dessert. It’s:

    • Creamy and rich
    • Easy to prepare
    • Perfect for special occasions
    • Kid-friendly and adult-approved
    • Great make-ahead dessert
    • A guaranteed conversation starter

    The bright colors create a stunning marbled effect while the classic cheesecake filling remains silky smooth and delicious.


    Preparation Time

    • Prep Time: 25 minutes
    • Bake Time: 55 minutes
    • Cooling Time: 1 hour
    • Chilling Time: 6 hours (overnight preferred)
    • Total Time: About 8 hours
    • Servings: 12

    Ingredients

    Graham Cracker Crust

    • 2 cups graham cracker crumbs
    • ½ cup melted butter
    • 2 tablespoons sugar

    Cheesecake Filling

    • 24 ounces cream cheese, softened
    • 1 cup granulated sugar
    • 1 cup sour cream
    • 3 large eggs
    • 2 teaspoons vanilla extract
    • 2 tablespoons all-purpose flour

    Colors

    • Blue food coloring
    • Red food coloring
    • Yellow food coloring

    Optional Toppings

    • Whipped cream
    • Rainbow sprinkles
    • White chocolate drizzle
    • Maraschino cherries
    • Colored candy pieces

    Instructions

    Step 1: Prepare the Crust

    Preheat the oven to 325°F (163°C).

    Mix the graham cracker crumbs, sugar, and melted butter until evenly combined.

    Press firmly into the bottom of a 9-inch springform pan.

    Bake for 8 minutes and allow to cool.


    Step 2: Make the Cheesecake Batter

    Beat the softened cream cheese until completely smooth.

    Add sugar and continue mixing.

    Mix in sour cream, vanilla, and flour.

    Add the eggs one at a time, mixing on low speed until just incorporated.

    Avoid overmixing to help prevent cracks.


    Step 3: Color the Batter

    Divide the batter evenly into four bowls.

    • Leave one bowl white.
    • Color one bowl blue.
    • Color one bowl red.
    • Color one bowl yellow.

    Use gel food coloring for the brightest colors without thinning the batter.


    Step 4: Create the Superman Swirl

    Drop spoonfuls of each colored batter randomly over the crust.

    Continue layering the colors until all batter has been used.

    Using a butter knife or skewer, gently swirl the colors together.

    Do not overmix—the goal is bold, colorful ribbons.


    Step 5: Bake

    Place the cheesecake in the oven.

    Bake for 50–55 minutes, until the edges are set and the center has a slight jiggle.

    Turn off the oven.

    Leave the cheesecake inside with the door cracked open for one hour.


    Step 6: Chill

    Refrigerate for at least 6 hours.

    Overnight chilling creates the best texture.


    Optional Decorations

    Before serving, decorate with:

    • Fresh whipped cream
    • Rainbow sprinkles
    • White chocolate drizzle
    • Red, blue, and yellow candy pearls
    • Superman-themed cupcake toppers for parties

    Storage

    Refrigerator:

    Store covered for up to 5 days.

    Freezer:

    Freeze slices individually for up to 2 months.

    Thaw overnight in the refrigerator before serving.


    Tips for Success

    • Always use room-temperature cream cheese.
    • Mix slowly once eggs are added.
    • Gel food coloring produces brighter colors.
    • Avoid excessive swirling to maintain vibrant patterns.
    • Chill overnight for clean slices.
    • Wipe your knife between cuts for bakery-quality presentation.

    Delicious Variations

    Superman Oreo Cheesecake

    Replace the graham cracker crust with crushed Golden Oreos or classic Oreos.

    Superman No-Bake Cheesecake

    Skip the baking and fold whipped topping into the filling before chilling.

    Mini Superman Cheesecakes

    Prepare in muffin tins using cupcake liners for individual servings.

    Superman Cheesecake Bars

    Bake in a 9×13-inch pan and cut into colorful squares.

    Chocolate Superman Cheesecake

    Add a layer of chocolate ganache before serving for extra decadence.


    Perfect Pairings

    This colorful dessert pairs wonderfully with:

    • Vanilla milkshakes
    • Strawberry lemonade
    • Fresh berries
    • Hot coffee
    • Cold milk
    • Blue raspberry soda

    Nutritional Information (Approximate Per Serving)

    • Calories: 485
    • Carbohydrates: 33g
    • Protein: 7g
    • Fat: 36g
    • Saturated Fat: 20g
    • Sugar: 25g
    • Sodium: 290mg

    Frequently Asked Questions

    Why is it called Superman Cheesecake?

    The dessert is inspired by Superman ice cream, famous for its bright blue, red, and yellow colors that resemble the iconic superhero’s classic color scheme.

    Can I use natural food coloring?

    Yes. Natural food colors work well, although the finished cheesecake may have softer, pastel shades.

    Can I make it ahead?

    Absolutely. Cheesecake actually tastes better after chilling overnight, making it an ideal make-ahead dessert.

    Do I need a water bath?

    Not necessarily. While a water bath helps reduce cracking, slowly cooling the cheesecake in the oven also produces excellent results.


    Final Thoughts

    Superman Cheesecake transforms a classic dessert into a vibrant centerpiece that’s guaranteed to impress guests of all ages. Its smooth, creamy filling, buttery graham cracker crust, and eye-catching swirls of blue, red, and yellow make it perfect for birthdays, holidays, family gatherings, or simply brightening an ordinary day.

    Whether you’re serving superhero fans or anyone who loves colorful desserts, this cheesecake brings together fun, flavor, and unforgettable presentation in every slice. One bite is enough to understand why it’s a recipe worth saving and sharing.

    Read More Recipes