Category: Recipes

  • Breakfast of the Day: Country BBQ Breakfast

    Breakfast of the Day: Country BBQ Breakfast

    There is something special about a hearty country breakfast. It is warm, filling, comforting, and made for mornings when a bowl of cereal simply will not do. Add the smoky, sweet flavor of barbecue, and you have a breakfast that brings together two comfort-food favorites in one satisfying meal.

    Today’s Breakfast of the Day is Country BBQ Breakfast, a loaded combination of crispy potatoes, eggs, smoky barbecue meat, melted cheese, and classic country-style toppings.

    This is the kind of breakfast that works just as well on a quiet Sunday morning as it does for brunch with family and friends. Better yet, it is easy to customize with whatever barbecue meat you already have in the refrigerator.

    What Is a Country BBQ Breakfast?

    A Country BBQ Breakfast combines traditional American breakfast ingredients with the bold flavors normally associated with a backyard barbecue.

    Instead of serving eggs, potatoes, and meat separately, everything comes together into one loaded skillet or breakfast plate. Crispy potatoes form the foundation, barbecue meat adds smoky richness, eggs make it unmistakably breakfast, and melted cheese ties everything together.

    The result falls somewhere between a country breakfast skillet and a barbecue platter.

    It is hearty.

    It is messy.

    It is packed with flavor.

    And it is exactly the kind of meal you want when you wake up hungry.

    Why BBQ Works for Breakfast

    Barbecue might not be the first thing that comes to mind when you think about breakfast, but many barbecue flavors pair naturally with traditional morning foods.

    Think about bacon.

    It is smoky, salty, slightly sweet, and commonly served alongside eggs and potatoes. Barbecue meat brings many of those same qualities to the plate, only in a bigger and bolder way.

    BBQ sauce also provides an interesting contrast with eggs and potatoes. Its sweetness and tanginess cut through the richness of the cheese and egg yolks, while the smoky meat gives the entire breakfast a satisfying savory backbone.

    If you have ever eaten leftover barbecue straight from the refrigerator the morning after a cookout, you already know there is no rule saying BBQ has to wait until lunch.

    Country BBQ Breakfast Recipe

    Servings: 4
    Prep Time: 15 minutes
    Cook Time: 30 minutes
    Total Time: About 45 minutes

    Ingredients

    • 1 pound russet or Yukon Gold potatoes, diced
    • 2 tablespoons cooking oil
    • 1 small onion, diced
    • 1 small green bell pepper, diced
    • 2 cups cooked pulled pork, shredded BBQ chicken, or chopped brisket
    • 1/2 cup barbecue sauce, plus additional sauce for serving
    • 1 cup shredded cheddar cheese
    • 4 large eggs
    • 4 slices bacon, cooked and crumbled
    • 1/2 teaspoon smoked paprika
    • 1/2 teaspoon garlic powder
    • Salt and black pepper to taste
    • 2 green onions, sliced
    • Chopped fresh parsley, optional

    For an extra country-style touch, serve it with warm biscuits, toast, or cornbread.

    How to Make Country BBQ Breakfast

    Step 1: Cook the Potatoes

    Heat the oil in a large skillet over medium-high heat.

    Add the diced potatoes and season them with smoked paprika, garlic powder, salt, and black pepper.

    Cook for approximately 12 to 15 minutes, stirring occasionally, until the potatoes become golden brown and tender.

    The trick is not moving them constantly. Allowing the potatoes to sit against the hot skillet for a few minutes at a time helps develop those crispy brown edges.

    Step 2: Add the Vegetables

    Add the diced onion and bell pepper.

    Continue cooking for another 4 to 5 minutes until the vegetables have softened.

    At this point, your kitchen should already smell like an old-fashioned country breakfast.

    Step 3: Add the BBQ Meat

    Stir your cooked meat into the potato mixture.

    Pulled pork is especially good for this recipe because it mixes easily throughout the skillet, but brisket and BBQ chicken are excellent alternatives.

    Pour approximately 1/2 cup of barbecue sauce over the meat.

    Stir everything together and cook for another 3 to 5 minutes, giving the meat enough time to heat completely.

    You can adjust the amount of sauce depending on how saucy you like your barbecue.

    Step 4: Add the Cheese

    Sprinkle shredded cheddar cheese over the entire skillet.

    Reduce the heat slightly and allow the cheese to melt.

    You can cover the skillet for a minute or two to speed up the process.

    Once the cheddar begins melting into the potatoes and BBQ meat, the dish really starts coming together.

    Step 5: Cook the Eggs

    Prepare your eggs however you prefer.

    Fried eggs work particularly well because the runny yolk becomes almost like an additional sauce when broken over the potatoes and barbecue.

    However, scrambled, over-medium, or sunny-side-up eggs are all great choices.

    Place one egg over each serving.

    Step 6: Load It Up

    Finish everything with crumbled bacon and sliced green onions.

    Add a drizzle of barbecue sauce over the top if you want even more BBQ flavor.

    Serve immediately while everything is hot and the cheese is melted.

    Choosing the Best BBQ Meat

    One of the biggest advantages of this breakfast is its flexibility.

    Pulled Pork

    Pulled pork might be the best all-around choice.

    It is tender enough to mix throughout the potatoes and absorbs barbecue sauce extremely well. If you made pulled pork the night before, this breakfast is also a great way to transform leftovers into something completely different.

    BBQ Chicken

    For something a little lighter, use shredded barbecue chicken.

    Both chicken breast and chicken thighs work, although thighs generally provide more moisture and flavor.

    Brisket

    Want to make breakfast feel especially indulgent?

    Use brisket.

    Chop leftover smoked brisket into bite-sized pieces and crisp some of the edges in the skillet before adding your barbecue sauce.

    Smoked Sausage

    Smoked sausage is another excellent country breakfast option.

    Slice it into rounds and brown the pieces alongside the potatoes.

    You could even combine sausage and pulled pork if you are feeding an especially hungry crowd.

    Don’t Forget the Egg

    The egg is what transforms this from a BBQ potato skillet into breakfast.

    For maximum richness, leave the yolk slightly runny.

    When you cut into the egg, the yolk runs over the BBQ meat, cheese, and crispy potatoes underneath.

    If runny yolks are not your thing, scrambled eggs are an easy alternative. You can even scramble the eggs directly into the skillet during the final few minutes of cooking.

    Turn It Into a Country Breakfast Platter

    If you have a big appetite, turn your Country BBQ Breakfast into a complete platter.

    Serve the skillet alongside:

    • Buttermilk biscuits
    • Country gravy
    • Buttered toast
    • Cornbread
    • Fresh fruit
    • Hash browns
    • Sliced tomatoes
    • Fresh berries

    You probably will not need all of those sides—the skillet itself is already extremely filling—but biscuits are especially good for soaking up BBQ sauce and egg yolk left on the plate.

    Make It a Breakfast Bowl

    Another option is turning the recipe into individual BBQ breakfast bowls.

    Divide crispy potatoes among several bowls.

    Add barbecue meat.

    Top each serving with cheddar cheese and an egg.

    Finish with bacon, green onions, and BBQ sauce.

    Breakfast bowls are particularly convenient when everyone wants different toppings.

    Someone can add jalapeños.

    Someone else can pile on extra cheese.

    Another person can skip the onions.

    Everyone gets exactly what they want.

    Make It Spicy

    Country BBQ Breakfast does not have to stay mild.

    If you enjoy heat, add diced jalapeños while cooking the onions and peppers.

    You can also use pepper jack instead of cheddar cheese.

    Finish the skillet with hot sauce or use a spicy barbecue sauce.

    For a sweet-and-spicy combination, drizzle a little hot honey over the finished breakfast. Sweet BBQ sauce, smoky meat, crispy potatoes, eggs, and hot honey create an incredible mixture of flavors.

    Make It Even Cheesier

    Cheddar is the classic choice, but you certainly are not limited to it.

    Try:

    Pepper jack for additional heat.

    Smoked Gouda for an even deeper smoky flavor.

    Monterey Jack for a mild, creamy melt.

    Colby Jack for a familiar breakfast-skillet flavor.

    You can also combine two cheeses.

    Sharp cheddar and smoked Gouda are particularly good together when using brisket or pulled pork.

    The Perfect Way to Use Leftover BBQ

    Some of the best recipes begin with leftovers.

    Maybe you smoked a pork shoulder over the weekend.

    Maybe you ordered too much brisket from your favorite barbecue restaurant.

    Maybe you grilled chicken and have a few pieces remaining.

    Instead of simply reheating yesterday’s dinner, turn those leftovers into tomorrow morning’s breakfast.

    The meat already contains plenty of flavor, meaning much of the hard work has been done.

    All you need are potatoes, eggs, cheese, and a skillet.

    Suddenly, leftovers become the centerpiece of an entirely new meal.

    Make It for Brunch

    Country BBQ Breakfast is also an excellent brunch recipe.

    Rather than making individual plates, prepare one large skillet and place it in the middle of the table.

    Put additional toppings nearby so everyone can customize their serving.

    Try offering:

    • BBQ sauce
    • Hot sauce
    • Sour cream
    • Diced avocado
    • Jalapeños
    • Green onions
    • Shredded cheese
    • Salsa

    Add biscuits, fruit, and coffee, and you have an easy country-style brunch spread.

    Tips for the Best Country BBQ Breakfast

    Get the potatoes crispy. Soft potatoes are fine, but crispy potatoes provide a much better contrast against tender BBQ meat and melted cheese.

    Do not drown everything in sauce. Start with a smaller amount of BBQ sauce. You can always add more at the table.

    Use leftover smoked meat whenever possible. Freshly smoked meat is wonderful, but leftover BBQ develops fantastic flavor when reheated in a hot skillet.

    Use sharp cheddar. Strong cheese holds its own against smoky BBQ flavors.

    Cook the eggs last. Eggs are best served immediately, so prepare everything else before cooking them.

    Serve it hot. This breakfast is at its best straight from the skillet while the potatoes are crispy, the cheese is melted, and the eggs are fresh.

    A Breakfast Worth Waking Up Hungry For

    There are mornings for something quick and light, and then there are mornings when you want breakfast to mean business.

    Country BBQ Breakfast belongs firmly in the second category.

    You get crispy potatoes, smoky barbecue meat, melted cheddar, bacon, vegetables, eggs, and BBQ sauce all packed into one satisfying meal.

    It is comfort food with a barbecue twist and a perfect excuse to give last night’s leftover pulled pork, chicken, brisket, or smoked sausage another moment in the spotlight.

    Make a big skillet, pour yourself a cup of coffee, grab a warm biscuit, and enjoy a breakfast built for a serious appetite.

    Would you choose pulled pork, brisket, BBQ chicken, or smoked sausage for your Country BBQ Breakfast?

  • Dessert of the Day: Orange Pound Cake

    Dessert of the Day: Orange Pound Cake

    There is something special about a homemade pound cake. It is simple, comforting, rich, and satisfying without needing layers of frosting or complicated decorations. Add the fresh, bright flavor of orange, and that traditional dessert becomes something even more memorable.

    Today’s Dessert of the Day is Orange Pound Cake, a buttery, moist cake filled with fresh citrus flavor and finished with a sweet orange glaze.

    Orange pound cake is the kind of dessert that works for almost any occasion. Serve it after dinner, bring it to a family gathering, enjoy a slice with your morning coffee, or make it as an afternoon treat when you want something sweet without going overboard.

    The combination of butter, sugar, vanilla, and orange creates a dessert that tastes both rich and refreshing. Every bite delivers the familiar comfort of pound cake along with a burst of citrus that keeps the cake from feeling too heavy.

    Why Orange Pound Cake Is So Good

    Traditional pound cake is known for its dense, buttery texture. Unlike light sponge cakes, pound cake has a substantial crumb that makes every slice feel satisfying.

    Orange brings another dimension to that richness.

    Fresh orange zest adds intense citrus aroma without adding too much liquid to the batter, while orange juice provides sweetness and acidity. When the two are combined, the cake develops a natural orange flavor that tastes much better than relying on artificial flavoring.

    Then comes the glaze.

    A simple orange glaze made with powdered sugar and fresh orange juice soaks slightly into the top of the cake while creating a sweet finish on the surface.

    The result is a dessert that is:

    • Buttery
    • Moist
    • Sweet
    • Citrusy
    • Fragrant
    • Rich without being overwhelming
    • Easy enough for home bakers to make

    It is one of those desserts where simple ingredients come together to create something impressive.

    Orange Pound Cake Recipe

    Ingredients

    For the cake:

    • 1 cup unsalted butter, softened
    • 2 cups granulated sugar
    • 4 large eggs
    • 3 cups all-purpose flour
    • 1 teaspoon baking powder
    • ½ teaspoon salt
    • 1 cup sour cream
    • ¼ cup fresh orange juice
    • 2 tablespoons orange zest
    • 1 teaspoon vanilla extract
    • ½ teaspoon orange extract, optional

    For the orange glaze:

    • 1½ cups powdered sugar
    • 2 to 3 tablespoons fresh orange juice
    • 1 teaspoon orange zest
    • ½ teaspoon vanilla extract

    Instructions

    Step 1: Prepare Your Pan

    Preheat your oven to 325°F.

    Grease and flour a 10-inch Bundt pan thoroughly. Pound cakes can stick easily because of their dense texture, so make sure you coat every section of the pan.

    You can also use baking spray containing flour.

    Step 2: Cream the Butter and Sugar

    Place the softened butter and granulated sugar in a large mixing bowl.

    Beat them together with an electric mixer for approximately four to five minutes.

    Do not rush this step.

    Creaming the butter and sugar introduces air into the mixture, helping the pound cake develop a softer texture.

    The mixture should become noticeably lighter and fluffier.

    Step 3: Add the Eggs

    Add the eggs one at a time.

    Beat well after each addition before adding the next egg.

    This helps create a smooth batter and prevents the ingredients from separating.

    Step 4: Mix the Dry Ingredients

    In another bowl, whisk together:

    • All-purpose flour
    • Baking powder
    • Salt

    Set the mixture aside.

    Step 5: Prepare the Orange Mixture

    In a small bowl or measuring cup, combine:

    • Sour cream
    • Fresh orange juice
    • Orange zest
    • Vanilla extract
    • Orange extract, if using

    The sour cream helps keep the cake exceptionally moist while giving the batter a subtle richness.

    Step 6: Combine Everything

    Gradually add the flour mixture to the butter mixture, alternating with the sour cream mixture.

    Begin and end with the flour.

    Mix only until everything is combined.

    Avoid overmixing once the flour has been added. Too much mixing can make pound cake tougher instead of tender.

    Step 7: Fill the Pan

    Spoon the batter evenly into your prepared Bundt pan.

    Smooth the top gently with a spatula.

    Tap the pan lightly against the countertop a few times to remove large air pockets.

    Step 8: Bake

    Bake for approximately 65 to 75 minutes.

    The cake is ready when a toothpick inserted near the center comes out clean or with only a few moist crumbs attached.

    Because ovens vary, begin checking around the 60-minute mark.

    If the top begins browning too quickly, loosely cover the cake with aluminum foil while it finishes baking.

    Step 9: Cool the Cake

    Remove the cake from the oven and allow it to cool in the pan for approximately 15 minutes.

    Carefully turn the cake onto a wire rack.

    Allow it to cool completely before adding the glaze.

    Making the Orange Glaze

    Place the powdered sugar in a medium bowl.

    Add two tablespoons of fresh orange juice, the orange zest, and vanilla.

    Whisk until smooth.

    If the glaze is too thick, add additional orange juice a teaspoon at a time.

    If it becomes too thin, add a little more powdered sugar.

    Drizzle the glaze over the cooled cake, allowing some of it to run naturally down the sides.

    Give the glaze a few minutes to set before slicing.

    The Secret Is Fresh Orange Zest

    If you want your Orange Pound Cake to have bold citrus flavor, orange zest is one ingredient you should not skip.

    Much of an orange’s aroma comes from the oils contained in its outer peel.

    When you zest an orange, those fragrant oils are released directly into the cake batter.

    That is why orange zest often creates a stronger orange aroma than orange juice alone.

    Only zest the brightly colored outer layer of the peel. Avoid the white portion underneath, known as the pith, because it can taste bitter.

    For the best flavor, zest your orange immediately before adding it to the batter.

    Choosing the Best Oranges

    Almost any sweet orange can work in this recipe.

    Navel oranges are especially convenient because they are widely available and usually seedless.

    Valencia oranges are another excellent choice and tend to be especially juicy.

    Cara Cara oranges can add a slightly different citrus flavor with subtle berry-like notes.

    Blood oranges can also create an interesting variation, although their color and flavor will differ from classic orange pound cake.

    Regardless of the variety you choose, look for oranges that feel heavy for their size. That usually indicates plenty of juice inside.

    Why Sour Cream Makes Pound Cake Better

    Sour cream is one of the ingredients that helps keep this cake moist.

    Pound cake contains a relatively high amount of flour, butter, sugar, and eggs, which can occasionally create a dry texture if the cake is overbaked.

    Sour cream adds both moisture and fat.

    It also gives the crumb a softer texture while contributing a subtle tang that balances the sweetness.

    You could substitute full-fat Greek yogurt if necessary, but sour cream usually provides the classic rich texture associated with pound cake.

    Orange Pound Cake Serving Ideas

    Orange Pound Cake is delicious on its own, but you can easily turn it into a more elaborate dessert.

    Try serving a slice with:

    • Fresh strawberries
    • Fresh raspberries
    • Blueberries
    • Whipped cream
    • Vanilla ice cream
    • Orange slices
    • Chocolate sauce
    • Lemon curd
    • Powdered sugar
    • Toasted almonds

    Fresh berries are especially good because their slight tartness balances the sweetness and richness of the cake.

    Vanilla ice cream is another excellent choice if you are serving the cake warm.

    Orange and Chocolate

    Orange and chocolate are a classic flavor combination.

    If you want to make this dessert even more indulgent, drizzle melted dark or semi-sweet chocolate over the finished cake after the orange glaze has set.

    You could also add miniature chocolate chips to the batter.

    Another option is serving slices with chocolate sauce on the side.

    The slight bitterness of dark chocolate works particularly well with sweet citrus.

    Orange Cranberry Pound Cake Variation

    For a holiday-inspired version, fold approximately one cup of fresh or dried cranberries into the batter.

    Orange and cranberry naturally complement each other.

    The tart cranberries provide little bursts of flavor throughout the buttery cake.

    If using dried cranberries, you can soak them briefly in orange juice before adding them to the batter.

    Orange Blueberry Pound Cake

    Blueberries also pair beautifully with orange.

    Fold one cup of blueberries into the batter just before transferring it to the Bundt pan.

    Lightly coating the blueberries with flour before folding them into the batter can help prevent them from sinking toward the bottom while baking.

    This version makes a wonderful spring or summer dessert.

    Orange Cream Pound Cake

    If you enjoy orange creamsicle flavors, add a little additional vanilla extract to the batter.

    The combination of strong vanilla and bright orange creates a flavor reminiscent of classic orange-and-cream frozen treats.

    You could even serve the cake with vanilla whipped cream for additional creamy sweetness.

    Can You Make Orange Pound Cake Ahead of Time?

    Absolutely.

    In fact, pound cake often tastes even better the following day.

    Allow the cake to cool completely before wrapping it.

    Store it tightly covered at room temperature for approximately three days.

    If you plan to keep it longer, refrigerate it.

    Allow refrigerated slices to return to room temperature before serving for the best flavor and texture.

    Can Orange Pound Cake Be Frozen?

    Yes.

    Pound cake freezes extremely well.

    For best results, freeze the cake before adding the glaze.

    Wrap the cooled cake tightly in plastic wrap followed by aluminum foil.

    Place it inside a freezer-safe container or freezer bag.

    It can generally be frozen for up to three months.

    Allow the cake to thaw overnight before glazing and serving.

    You can also freeze individual slices, which makes it easy to enjoy a single piece whenever you want dessert.

    Tips for Perfect Pound Cake

    A few small details can make a major difference when baking pound cake.

    First, use room-temperature ingredients whenever possible.

    Softened butter, room-temperature eggs, and room-temperature sour cream combine more evenly.

    Second, spend enough time creaming the butter and sugar.

    This step contributes significantly to the finished texture.

    Third, measure your flour carefully.

    Scooping flour directly with a measuring cup can pack too much flour into the cup. Instead, lightly spoon the flour into the measuring cup and level it with a knife.

    Finally, do not overbake.

    A few extra minutes can turn a moist pound cake into a dry one.

    Begin checking the cake before the maximum recommended baking time.

    A Dessert for Every Season

    Orange Pound Cake works surprisingly well throughout the year.

    During spring, serve it with berries and whipped cream.

    During summer, pair it with fresh fruit and iced tea.

    During fall, add warm spices such as cinnamon or nutmeg.

    During winter, serve it alongside coffee, hot chocolate, or tea.

    Its bright citrus flavor can even provide a refreshing contrast to heavier holiday desserts.

    Perfect With Coffee

    One of the best things about pound cake is that it does not have to wait until after dinner.

    A slice of Orange Pound Cake with coffee makes an excellent morning or afternoon treat.

    The sweetness of the cake balances the slight bitterness of coffee, while the orange aroma makes the combination feel especially refreshing.

    It also pairs wonderfully with black tea, Earl Grey, chai, or herbal citrus tea.

    Why Homemade Pound Cake Is Worth It

    You can certainly purchase pound cake from a grocery store, but homemade pound cake has something packaged versions rarely match.

    The kitchen fills with the smell of butter, sugar, vanilla, and fresh orange while the cake bakes.

    Then you get to drizzle the glaze across the top and watch it slowly run down the sides.

    The process itself becomes part of the enjoyment.

    More importantly, you control the ingredients and flavor.

    Want stronger citrus? Add more zest.

    Want a thicker glaze? Add more powdered sugar.

    Want chocolate? Add chocolate chips.

    Want berries? Fold them into the batter.

    It is a forgiving dessert that leaves plenty of room for creativity.

    Final Thoughts

    Orange Pound Cake proves that a dessert does not have to be complicated to be memorable.

    The rich buttery texture of traditional pound cake combines beautifully with fresh orange juice and fragrant orange zest. Add a simple citrus glaze, and you have a dessert that looks elegant enough for a celebration while remaining easy enough for an ordinary day.

    Serve it after dinner, bring it to a gathering, enjoy it alongside coffee, or simply cut yourself a slice when you need something sweet.

    Sometimes the best desserts are the ones built around familiar ingredients and comforting flavors.

    And with its golden crumb, sweet orange glaze, and fresh citrus aroma, Orange Pound Cake deserves its place as today’s Dessert of the Day.

    Would you enjoy your Orange Pound Cake plain, covered in orange glaze, or served with a scoop of vanilla ice cream?

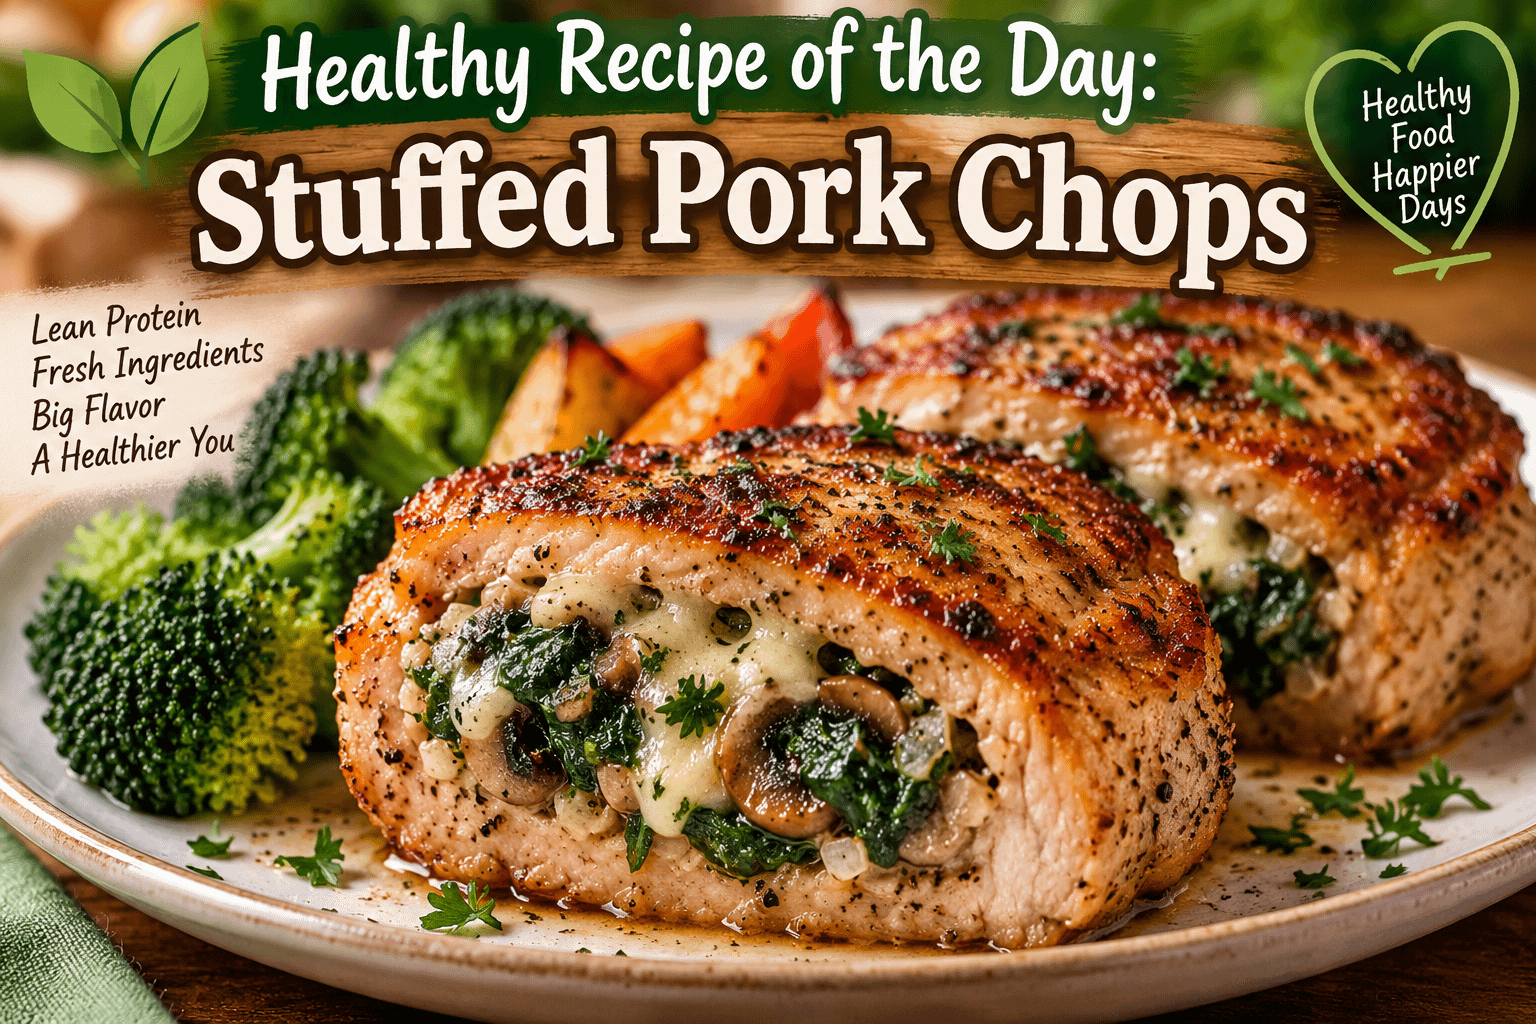
  • Healthy Recipe of the Day: Stuffed Pork Chops

    Healthy Recipe of the Day: Stuffed Pork Chops

    When you hear stuffed pork chops, you might picture a heavy meal loaded with bread stuffing, butter, cheese, and rich sauces. But stuffed pork chops can also be transformed into a wholesome, satisfying dinner packed with lean protein, vegetables, herbs, and plenty of flavor.

    Today’s Healthy Recipe of the Day: Stuffed Pork Chops replaces traditional bread-heavy stuffing with a colorful mixture of spinach, mushrooms, garlic, onion, and a small amount of cheese. The result is a juicy pork chop with a savory center that tastes indulgent without requiring a long list of heavy ingredients.

    Best of all, this recipe looks impressive enough for a special dinner while remaining simple enough for an ordinary weeknight.

    Why Stuffed Pork Chops Make a Great Dinner

    Pork chops sometimes get an unfair reputation for being dry or boring. Usually, the problem isn’t the pork itself—it’s how it’s prepared.

    A thick pork chop provides the perfect opportunity to create a pocket for flavorful ingredients. Instead of relying on sauces to make the finished meal interesting, you can build flavor directly into the pork.

    For this healthier version, the stuffing combines fresh vegetables with herbs and just enough cheese to provide creaminess.

    Every bite gives you a combination of juicy pork and savory vegetable filling.

    Another advantage is portion control. Because each pork chop is individually stuffed, you already have a satisfying main course portion ready to serve.

    Pair it with roasted vegetables, a salad, or another simple side and dinner is complete.

    Ingredients

    For the Pork Chops

    • 4 thick-cut boneless pork chops
    • 1 tablespoon olive oil
    • 1 teaspoon garlic powder
    • 1 teaspoon smoked paprika
    • 1/2 teaspoon onion powder
    • 1/2 teaspoon dried Italian seasoning
    • 1/2 teaspoon black pepper
    • 1/4 teaspoon salt

    For the Healthy Stuffing

    • 2 cups fresh baby spinach, roughly chopped
    • 1 cup mushrooms, finely chopped
    • 1/2 small onion, finely diced
    • 2 cloves garlic, minced
    • 1 teaspoon olive oil
    • 1/3 cup part-skim mozzarella cheese
    • 2 tablespoons grated Parmesan cheese
    • 1/2 teaspoon Italian seasoning
    • Black pepper to taste

    Optional Additions

    One of the best things about stuffed pork chops is how easily you can customize the filling.

    Try adding:

    • Chopped roasted red peppers
    • Sun-dried tomatoes
    • Fresh basil
    • Chopped broccoli
    • Kale
    • Fresh parsley
    • A little feta cheese
    • Finely chopped zucchini
    • Caramelized onions

    Keep the vegetable pieces relatively small so they fit comfortably inside the pork chops.

    Step 1: Prepare the Vegetable Filling

    Heat 1 teaspoon of olive oil in a skillet over medium heat.

    Add the chopped onion and mushrooms. Cook for approximately 4–5 minutes, stirring occasionally, until the mushrooms release their moisture and the onion begins to soften.

    Add the minced garlic and cook for another 30 seconds.

    Next, add the chopped spinach.

    The spinach will look like quite a lot when it first enters the pan, but it will quickly wilt down.

    Cook for another 1–2 minutes.

    Remove the skillet from the heat and allow the vegetable mixture to cool slightly.

    Once it has cooled, stir in the mozzarella, Parmesan, Italian seasoning, and black pepper.

    Your stuffing is now ready.

    Step 2: Prepare the Pork Chops

    Preheat your oven to 375°F.

    Pat the pork chops dry with paper towels.

    Using a sharp knife, carefully cut a pocket into the side of each pork chop. Don’t cut completely through the meat. You want to create a pocket large enough to hold the filling while leaving the other sides intact.

    In a small bowl, combine:

    • Garlic powder
    • Smoked paprika
    • Onion powder
    • Italian seasoning
    • Black pepper
    • Salt

    Lightly season both sides of each pork chop.

    Step 3: Stuff the Pork Chops

    Divide the spinach and mushroom mixture among the four pork chops.

    Carefully spoon the filling into each pocket.

    Don’t overstuff them. If you have a little filling left over, you can cook it alongside the pork chops or serve it as an additional topping.

    If necessary, secure the opening of each pork chop with toothpicks.

    Just remember to remove the toothpicks before serving.

    Step 4: Sear the Pork

    Heat 1 tablespoon of olive oil in a large oven-safe skillet over medium-high heat.

    Once the skillet is hot, add the stuffed pork chops.

    Sear them for approximately 2–3 minutes per side.

    You’re not trying to completely cook the pork during this step. The goal is simply to develop a flavorful golden-brown exterior.

    That quick sear makes a tremendous difference in the finished dish.

    Step 5: Finish in the Oven

    Transfer the oven-safe skillet directly into the preheated oven.

    Bake for approximately 12–18 minutes, depending on the thickness of your pork chops.

    For food safety and the best texture, use an instant-read thermometer rather than relying solely on cooking time. Pork chops should reach an internal temperature of 145°F, measured in the meat rather than the stuffing.

    Once they reach temperature, remove them from the oven.

    Allow the pork chops to rest for at least 3 minutes before serving.

    Resting allows the juices inside the pork to redistribute rather than immediately running onto your plate when you cut into it.

    Why This Version Is Healthier

    Traditional stuffed pork chop recipes often use bread stuffing, large quantities of butter, cream sauces, or generous portions of cheese.

    There’s nothing inherently wrong with enjoying those ingredients occasionally, but you don’t need them to create a satisfying stuffed pork chop.

    This recipe puts vegetables at the center of the filling.

    Lean Protein

    Pork is an excellent source of protein, which can help make a meal more satisfying.

    Choosing relatively lean pork chops and trimming excess visible fat can further reduce the amount of fat in the finished meal.

    More Vegetables

    Spinach and mushrooms add volume and nutrients without making the meal unnecessarily heavy.

    You’re essentially putting some of your side dish directly inside your entrée.

    Less Cheese

    Cheese provides plenty of flavor, so you don’t need a huge amount.

    Using a modest amount of part-skim mozzarella and Parmesan gives the stuffing creaminess and richness while allowing the vegetables to remain the star.

    Controlled Added Fat

    This recipe uses only a small amount of olive oil for cooking.

    Instead of covering the pork chops in butter or frying them, you’re quickly searing them before finishing them in the oven.

    What to Serve With Healthy Stuffed Pork Chops

    Because these pork chops already contain vegetables, you can keep the rest of the meal relatively simple.

    Try serving them with roasted broccoli, asparagus, Brussels sprouts, green beans, cauliflower, or carrots.

    For something lighter, make a large mixed-green salad with tomatoes, cucumber, red onion, and a simple vinaigrette.

    If you want a healthy carbohydrate alongside your pork, consider:

    • Brown rice
    • Quinoa
    • Wild rice
    • Roasted sweet potatoes
    • Baked potato
    • Mashed cauliflower
    • Whole-grain couscous

    One of my favorite combinations would be a stuffed pork chop with roasted green beans and a small baked sweet potato.

    It’s simple, colorful, and filling.

    Make It Mediterranean Style

    This recipe is also easy to turn into a Mediterranean-inspired dinner.

    Replace the mozzarella with a small amount of feta cheese and add chopped roasted red peppers or sun-dried tomatoes to the spinach filling.

    Season the pork with oregano, garlic, black pepper, and a squeeze of fresh lemon.

    Serve it with cucumber and tomato salad for a fresh, flavorful dinner.

    Make It Even More Vegetable-Packed

    If you’re trying to increase the vegetables in your meals, don’t stop with spinach and mushrooms.

    Finely chopped zucchini, bell peppers, broccoli, kale, or asparagus can all work.

    The trick is cooking the vegetables before stuffing the pork.

    Vegetables contain water. If you stuff the pork with large amounts of raw vegetables, that moisture can release during cooking and make the filling watery.

    Cooking them first concentrates their flavor and removes some excess moisture.

    How to Keep Pork Chops Juicy

    The biggest complaint about pork chops is usually that they’re dry.

    Fortunately, that’s avoidable.

    First, start with thick-cut pork chops. Thin pork chops aren’t ideal for stuffing and can overcook quickly.

    Second, sear the outside but don’t leave the pork sitting in the skillet for too long.

    Third—and most importantly—use a meat thermometer.

    Trying to determine doneness based solely on appearance can lead to overcooking.

    Once the pork reaches the proper temperature, take it out.

    Finally, give it a few minutes to rest before cutting.

    Those simple steps can make the difference between a tough pork chop and one that’s tender and juicy.

    Meal Prep Tip

    You can prepare the filling ahead of time.

    Cook the spinach, mushrooms, onions, and garlic and store the mixture in an airtight container in the refrigerator.

    When you’re ready to cook dinner, mix in the cheese, prepare the pork chops, stuff them, and cook.

    You can also prepare extra vegetables while making the filling. Having cooked vegetables ready in the refrigerator makes it much easier to build healthier meals throughout the week.

    Leftover Stuffed Pork Chops

    Store leftover cooked pork chops in an airtight container in the refrigerator and use them within 3–4 days.

    When reheating, avoid extremely high heat because it can dry out the pork.

    A covered skillet over lower heat works well. You can add a tablespoon or two of water or low-sodium broth to create a little steam while reheating.

    You can also slice leftover stuffed pork chops and serve them over a salad for lunch the next day.

    A Healthy Dinner Doesn’t Have to Be Boring

    One of the biggest misconceptions about healthier eating is that every meal has to consist of plain chicken, steamed vegetables, and salad.

    Healthy cooking can still involve seasoning, texture, cheese, searing, roasting, and creative combinations.

    The goal isn’t necessarily to eliminate everything you enjoy.

    It’s often about changing the proportions.

    Instead of making bread and cheese the majority of the stuffing, we’re making vegetables the foundation and using cheese as an accent.

    Instead of frying the pork in a large amount of oil, we’re giving it a quick sear and allowing the oven to finish the job.

    Small adjustments like these can transform familiar comfort foods into meals that better fit your everyday eating goals.

    Healthy Recipe of the Day

    These Spinach and Mushroom Stuffed Pork Chops prove that a healthier dinner can still feel like comfort food.

    You get juicy, seasoned pork on the outside and a warm combination of spinach, mushrooms, garlic, onion, and melted cheese on the inside.

    It’s hearty enough to satisfy a big appetite but easy to pair with vegetables and whole grains for a balanced dinner.

    Even better, the recipe is versatile.

    Change the vegetables. Experiment with different herbs. Add feta instead of mozzarella. Give it a Mediterranean twist. Serve it with whatever fresh vegetables happen to be in your refrigerator.

    Healthy eating becomes much easier when the food is something you genuinely look forward to eating.

    And this is one dinner that deserves a place in the regular rotation.

    What would you stuff inside your perfect pork chop—spinach and mushrooms, peppers and feta, or something completely different?

  • Recipe of the Day: Weeknight Skillet Fajitas

    Recipe of the Day: Weeknight Skillet Fajitas

    Some nights, you want a homemade dinner that tastes like you spent hours in the kitchen—but you definitely don’t want to spend hours making it. That is exactly where Weeknight Skillet Fajitas come in.

    Tender strips of seasoned chicken, colorful bell peppers, and onions are cooked together in a hot skillet until everything is juicy, slightly charred, and packed with smoky Tex-Mex flavor. Wrap it all inside a warm flour or corn tortilla, pile on your favorite toppings, and dinner is ready.

    The best part? You can make these fajitas in about 30 minutes, making them an excellent choice for busy weeknights.

    Whether you’re feeding the family, cooking for friends, or simply trying to make something satisfying without creating a sink full of dishes, this easy skillet meal deserves a place in your regular dinner rotation.

    Why You’ll Love These Weeknight Skillet Fajitas

    Fajitas have everything you could want from an easy dinner: protein, vegetables, bold seasonings, and endless possibilities for toppings.

    Cooking everything in one skillet also means cleanup stays relatively simple.

    These fajitas are:

    • Quick enough for a busy weeknight
    • Made with simple ingredients
    • Easy to customize
    • Loaded with peppers and onions
    • Great for feeding a family
    • Perfect for leftovers
    • Delicious with chicken, steak, shrimp, or vegetables
    • Ready in around 30 minutes

    Better yet, fajitas make dinner interactive. Put the skillet in the middle of the table alongside tortillas and bowls of toppings and let everyone build their own.

    Weeknight Skillet Fajitas Recipe

    Prep Time: 15 minutes
    Cook Time: 15 minutes
    Total Time: About 30 minutes
    Servings: 4–6

    Ingredients

    For the Fajitas

    • 1 ½ pounds boneless, skinless chicken breasts or chicken thighs
    • 1 red bell pepper
    • 1 green bell pepper
    • 1 yellow or orange bell pepper
    • 1 large yellow onion
    • 2 tablespoons olive oil, divided
    • 2 cloves garlic, minced
    • Juice of 1 lime
    • 8–12 small flour or corn tortillas

    Homemade Fajita Seasoning

    • 2 teaspoons chili powder
    • 1 teaspoon ground cumin
    • 1 teaspoon smoked paprika
    • 1 teaspoon garlic powder
    • ½ teaspoon onion powder
    • ½ teaspoon dried oregano
    • ½ teaspoon salt
    • ¼ teaspoon black pepper
    • ¼ teaspoon cayenne pepper, optional

    Optional Toppings

    • Shredded cheddar or Mexican-blend cheese
    • Sour cream
    • Guacamole
    • Sliced avocado
    • Pico de gallo
    • Salsa
    • Chopped cilantro
    • Sliced jalapeños
    • Lime wedges
    • Hot sauce
    • Shredded lettuce

    Step 1: Prepare the Ingredients

    Slice the chicken into thin strips. Try to keep the pieces roughly the same thickness so they cook evenly.

    Remove the stems and seeds from the bell peppers and slice them into strips.

    Slice the onion into thin wedges.

    Having everything prepared before you start cooking is particularly helpful with fajitas because the cooking process moves quickly once the skillet gets hot.

    Step 2: Make the Fajita Seasoning

    In a small bowl, combine the chili powder, cumin, smoked paprika, garlic powder, onion powder, oregano, salt, black pepper, and optional cayenne pepper.

    Mix thoroughly.

    Homemade fajita seasoning takes only a minute to prepare and allows you to adjust the flavor exactly how you like it.

    If you prefer milder fajitas, leave out the cayenne.

    Want more heat? Add additional cayenne or crushed red pepper flakes.

    Step 3: Season the Chicken

    Place the sliced chicken in a bowl.

    Drizzle with about 1 tablespoon of olive oil and sprinkle approximately two-thirds of the fajita seasoning over the chicken.

    Toss until every piece is evenly coated.

    For even more flavor, you can season the chicken earlier in the day and refrigerate it until dinner.

    Step 4: Cook the Chicken

    Heat a large cast-iron or heavy-bottomed skillet over medium-high heat.

    Once the skillet is hot, add the seasoned chicken.

    Spread the pieces into a relatively even layer and allow them to cook without constantly stirring them. Giving the chicken time against the hot surface helps create those delicious browned edges associated with restaurant-style fajitas.

    Cook for approximately 5–7 minutes, stirring occasionally, until the chicken is cooked through.

    The USDA recommends cooking poultry to an internal temperature of 165°F.

    Transfer the cooked chicken to a clean plate and set aside.

    Step 5: Cook the Peppers and Onions

    Add the remaining tablespoon of olive oil to the same skillet.

    Add the sliced bell peppers and onions.

    Sprinkle the remaining fajita seasoning over the vegetables.

    Cook for approximately 5–7 minutes, stirring occasionally.

    You want the vegetables tender but still slightly crisp. A little browning around the edges adds even more flavor.

    During the final minute, add the minced garlic.

    Avoid adding the garlic too early because it can burn in the hot skillet.

    Step 6: Bring Everything Together

    Return the cooked chicken to the skillet with the peppers and onions.

    Pour the fresh lime juice over everything.

    Toss until the chicken and vegetables are thoroughly combined.

    Cook for another minute or two until everything is hot.

    Taste and adjust the seasoning if necessary.

    Then bring that sizzling skillet straight to the table.

    Don’t Forget to Warm the Tortillas

    Warm tortillas make a surprisingly big difference.

    You can heat tortillas individually in a dry skillet for about 20–30 seconds per side.

    For an easier method, stack several tortillas together, wrap them in a slightly damp paper towel, and microwave them briefly until warm and flexible.

    Keep them covered until you’re ready to eat so they don’t dry out.

    Build Your Perfect Fajita

    Now comes the fun part.

    Place some chicken, peppers, and onions down the center of a warm tortilla.

    Then start adding toppings.

    One delicious combination is:

    Chicken fajita mixture, shredded cheese, pico de gallo, guacamole, sour cream, cilantro, and a squeeze of fresh lime.

    If you love spicy food, finish everything with sliced jalapeños or your favorite hot sauce.

    Fold the tortilla and enjoy.

    The Secret to Better Skillet Fajitas

    The biggest mistake when making skillet fajitas is overcrowding the pan.

    When too much food is packed into the skillet at once, moisture gets trapped. Instead of developing browned edges, the ingredients begin steaming.

    If your skillet isn’t large enough, cook the chicken in two batches.

    A cast-iron skillet works particularly well because it retains heat and helps produce a flavorful sear.

    Another important trick is getting the skillet properly hot before adding the meat.

    That initial blast of heat helps create the sizzling, slightly charred exterior that makes fajitas so good.

    Make Steak Fajitas

    Prefer beef?

    This recipe works wonderfully with steak.

    Try using:

    • Flank steak
    • Skirt steak
    • Sirloin
    • Flat iron steak

    Slice the steak thinly against the grain and season it using the same fajita mixture.

    Cook quickly over high heat and avoid overcooking it.

    Once cooked, remove the steak while preparing the vegetables and return it to the skillet at the end.

    Make Shrimp Fajitas

    Shrimp turns this already-fast recipe into an even quicker dinner.

    Use peeled and deveined shrimp and coat them with the fajita seasoning.

    Shrimp generally needs only a few minutes in a hot skillet. Cook until pink, opaque, and cooked through, remove from the skillet, and prepare the vegetables.

    Return the shrimp at the very end so it doesn’t become overcooked and rubbery.

    Make Vegetarian Skillet Fajitas

    You don’t need meat to make delicious fajitas.

    Increase the amount of peppers and onions and add vegetables such as:

    • Mushrooms
    • Zucchini
    • Corn
    • Yellow squash
    • Poblano peppers

    You could also add black beans for extra protein and texture.

    Portobello mushrooms are particularly good because their hearty texture stands up well to high-heat skillet cooking.

    Turn Them Into Fajita Bowls

    Skip the tortillas entirely and transform this recipe into fajita bowls.

    Start with rice or another grain and pile the chicken and vegetables over the top.

    Add black beans, corn, salsa, avocado, cilantro, cheese, and lime.

    You can also serve the fajita mixture over chopped lettuce for a lighter fajita salad.

    What to Serve With Skillet Fajitas

    Fajitas can easily be a complete meal by themselves, but side dishes can turn them into an even bigger dinner.

    Try serving them with:

    Mexican-style rice: A classic side that pairs perfectly with the smoky seasonings.

    Black beans: Simple, filling, and delicious alongside fajitas.

    Refried beans: Another traditional choice that’s especially good topped with cheese.

    Corn: Grilled or skillet-cooked corn complements the peppers beautifully.

    Chips and salsa: Keep things easy with a bowl of tortilla chips and your favorite salsa.

    Guacamole: Fresh avocado, lime, cilantro, onion, and seasonings create the perfect fajita companion.

    Meal Prep Idea

    Weeknight Skillet Fajitas are also excellent for meal prep.

    Cook the chicken, peppers, and onions as directed and divide the mixture into meal-prep containers.

    Add rice and beans if desired.

    Store the tortillas separately so they don’t become soggy.

    You’ll have an easy lunch or dinner ready to reheat during the week.

    Storing Leftovers

    Allow leftover fajita filling to cool before transferring it to an airtight container.

    Refrigerate promptly and use within 3–4 days.

    Keep tortillas and toppings such as sour cream, guacamole, lettuce, and salsa separate from the hot filling.

    This prevents everything from becoming soggy.

    Reheating Fajitas

    The skillet is one of the best ways to reheat leftover fajitas.

    Heat a skillet over medium heat, add the chicken and vegetables, and cook until heated thoroughly.

    You can also microwave individual portions when you’re short on time.

    Add a fresh squeeze of lime after reheating to brighten everything back up.

    Easy Ways to Change the Flavor

    One reason fajitas make such a great weeknight dinner is how easy they are to customize.

    Try adding sliced poblano peppers for a slightly smoky flavor.

    Add chipotle powder for extra heat.

    Use freshly squeezed orange and lime juice for a citrus marinade.

    Add fresh jalapeños while cooking the vegetables.

    Experiment with different proteins.

    You can even combine chicken and steak for a restaurant-style mixed fajita platter.

    A Great Dinner for Feeding a Crowd

    Fajitas are also an easy meal when friends or family come over.

    Instead of trying to figure out everyone’s favorite toppings, create a fajita bar.

    Set out warm tortillas, the sizzling fajita mixture, cheese, salsa, guacamole, sour cream, jalapeños, cilantro, lettuce, and lime wedges.

    Everyone gets to create exactly what they want.

    Double or triple the recipe depending on how many people you’re serving and cook the meat in batches so the skillet stays hot.

    Why This Recipe Works for Busy Nights

    Weeknight meals don’t have to mean frozen dinners, drive-thru food, or complicated recipes requiring an hour of preparation.

    Sometimes the simplest meals are the ones you look forward to the most.

    These Weeknight Skillet Fajitas use everyday ingredients, require minimal cleanup, and deliver plenty of flavor without requiring an elaborate cooking process.

    You’ve got juicy seasoned chicken.

    Sweet peppers.

    Tender onions.

    Smoky spices.

    Fresh lime.

    Warm tortillas.

    And whatever toppings happen to be calling your name.

    It’s colorful, satisfying, customizable, and easy enough to make even after a long day.

    Recipe of the Day Final Thought

    There is something special about bringing a hot skillet of fajitas to the table and letting everyone create their own dinner.

    The sizzling chicken and vegetables fill the kitchen with an incredible aroma, while bowls of colorful toppings turn an ordinary weeknight meal into something that feels a little more exciting.

    Best of all, you don’t have to spend your entire evening cooking.

    In about 30 minutes, Weeknight Skillet Fajitas can go from cutting board to dinner table.

    Make them with chicken tonight, steak next time, shrimp after that, or load the skillet with vegetables. Once you have the basic method down, there are countless ways to make this recipe your own.

    What are you putting on your fajitas—guacamole, sour cream, salsa, cheese, jalapeños, or all of the above?

  • Breakfast of the Day: Fried BBQ Egg Sandwich

    Breakfast of the Day: Fried BBQ Egg Sandwich

    Some mornings call for something simple. Other mornings call for something messy, smoky, cheesy, and absolutely packed with flavor. That is where today’s Fried BBQ Egg Sandwich comes in.

    This breakfast takes the familiar fried egg sandwich and gives it a barbecue-inspired upgrade. A perfectly fried egg is layered with melted cheese and tangy barbecue sauce between toasted bread or a warm bun. Add crispy bacon, caramelized onions, avocado, or even a little hot sauce, and you have a breakfast sandwich that can compete with just about anything you would order at a restaurant.

    Best of all, you do not need to spend an hour in the kitchen. The basic sandwich can be ready in about 15 minutes, making it an excellent choice for a weekend breakfast, quick weekday meal, brunch, or even breakfast-for-dinner.

    If you love savory breakfasts with big flavors, the Fried BBQ Egg Sandwich deserves a spot on your menu.

    Why BBQ Sauce Works for Breakfast

    Barbecue sauce might not be the first condiment you reach for in the morning, but it works surprisingly well with eggs.

    A good barbecue sauce brings together sweetness, acidity, smokiness, and a little spice. Eggs, meanwhile, have a rich but relatively mild flavor. Put the two together, and the barbecue sauce adds exactly the punch the egg needs.

    Then comes the cheese.

    As the warm egg melts the cheese, it creates a creamy layer that balances the stronger barbecue flavor. Toasted bread adds crunch, while optional toppings such as bacon or onions bring even more texture.

    It is familiar enough to feel like comfort food but different enough to keep breakfast interesting.

    Fried BBQ Egg Sandwich Recipe

    Prep Time: 5 minutes
    Cook Time: 10 minutes
    Total Time: 15 minutes
    Servings: 1

    Ingredients

    • 2 slices of bread, Texas toast, sourdough, or 1 hamburger-style bun
    • 2 large eggs
    • 1 tablespoon butter, divided
    • 1 to 2 tablespoons barbecue sauce
    • 1 slice cheddar, pepper jack, Monterey Jack, or American cheese
    • Salt, to taste
    • Black pepper, to taste

    Optional Toppings

    • 2 strips crispy bacon
    • Sliced avocado
    • Caramelized onions
    • Sautéed onions
    • Jalapeño slices
    • Hot sauce
    • Sliced tomato
    • Hash brown patty
    • Sausage patty
    • Crispy fried onions
    • Fresh chives
    • Extra cheese

    Directions

    1. Toast the Bread

    Heat a skillet over medium heat.

    Lightly butter the bread or bun and place it butter-side down in the skillet. Toast until the surface becomes golden brown and slightly crispy.

    Remove the bread from the skillet and set it aside.

    Toasting the bread is worth the extra couple of minutes because it prevents the barbecue sauce and egg yolk from immediately soaking into the bread.

    2. Fry the Eggs

    Add a little more butter to the skillet.

    Crack the eggs into the pan and season them lightly with salt and black pepper.

    Cook them according to your preference.

    For a runny-yolk sandwich, cook the eggs sunny-side up or over easy. For something less messy, cook them over medium. If you prefer completely cooked yolks, fry them over hard.

    You can also break the yolks while cooking if you want the eggs to fit more evenly across the sandwich.

    3. Add the Cheese

    When the eggs are nearly finished, place the cheese directly over them.

    Reduce the heat and allow the cheese to melt. Covering the skillet for 20 to 30 seconds can help speed up the melting process.

    4. Add the BBQ Sauce

    Spread barbecue sauce across the toasted side of one or both pieces of bread.

    Start with about one tablespoon. You can always add more.

    If you are using bacon, onions, avocado, jalapeños, or another topping, add them now.

    5. Build the Sandwich

    Place the cheesy fried eggs onto the bottom piece of bread.

    Add any remaining toppings.

    Drizzle a small amount of extra barbecue sauce over the eggs if desired, then place the second piece of bread on top.

    Gently press the sandwich together.

    Serve immediately while the eggs are hot, the cheese is melted, and the bread is still crispy.

    The Bacon BBQ Version

    If you want to take this breakfast to another level, add bacon.

    Cook two or three strips until crispy and place them directly over the cheesy eggs.

    The combination of smoky bacon, sweet barbecue sauce, fried egg, and melted cheddar creates a sandwich with serious barbecue flavor.

    You can even cook the egg in a small amount of the rendered bacon fat instead of butter for an extra savory bite.

    Try It With a Hash Brown

    One of the best additions to this sandwich is a crispy hash brown patty.

    Prepare a frozen hash brown patty according to the package directions until it is golden and crispy. Then layer it between the egg and bread.

    Your sandwich becomes:

    Toast + BBQ sauce + crispy hash brown + fried egg + melted cheese + BBQ sauce + toast.

    Add bacon, and you have an incredibly filling breakfast.

    The hash brown provides the crunch that a soft egg sandwich sometimes needs.

    Choosing the Right BBQ Sauce

    The barbecue sauce can completely change the personality of this sandwich.

    Sweet BBQ Sauce: A sweeter sauce pairs particularly well with salty bacon and sharp cheddar.

    Smoky BBQ Sauce: Choose a smoky sauce if you want the sandwich to taste more like something straight from a backyard barbecue.

    Spicy BBQ Sauce: A spicy sauce works beautifully with pepper jack cheese and jalapeños.

    Honey BBQ Sauce: Honey barbecue creates a sweeter breakfast sandwich that works especially well with sausage.

    Tangy BBQ Sauce: A vinegar-forward barbecue sauce cuts through the richness of the egg and cheese.

    There is no single correct choice. Use your favorite and experiment from there.

    Don’t Forget the Cheese

    Cheese might technically be optional, but it brings everything together.

    Cheddar is probably the easiest choice. Its slightly sharp flavor stands up nicely against barbecue sauce.

    Pepper jack is excellent when you want some heat.

    American cheese provides the classic creamy, ultra-melty breakfast sandwich experience.

    Monterey Jack is mild and melts beautifully.

    You could even use smoked Gouda to emphasize the barbecue theme.

    For an extra-cheesy sandwich, use two different cheeses.

    The Runny Yolk Question

    A runny fried egg makes this sandwich especially delicious—and especially messy.

    Cutting into the sandwich releases the warm yolk, which mixes with the barbecue sauce and melted cheese to create an almost sauce-like coating.

    If that sounds amazing, go with an over-easy egg.

    If you are eating the sandwich on the way to work, however, an over-medium or over-hard egg might be the smarter move.

    Either way, it will still taste great.

    Fried BBQ Egg Sandwich Variations

    Once you have mastered the basic version, there are dozens of ways to customize it.

    BBQ Bacon Egg Sandwich

    Add two or three crispy bacon strips.

    Spicy BBQ Breakfast Sandwich

    Use spicy barbecue sauce, pepper jack cheese, and sliced jalapeños.

    BBQ Sausage Egg Sandwich

    Add a cooked breakfast sausage patty beneath the fried egg.

    BBQ Avocado Egg Sandwich

    Add sliced avocado for a creamy contrast to the smoky barbecue sauce.

    Double Egg BBQ Sandwich

    Use two fried eggs and two slices of cheese for a bigger breakfast.

    BBQ Breakfast Burger

    Place a beef burger patty underneath the fried egg and serve everything on a toasted brioche bun. It is heavy for breakfast, but perfect for brunch or breakfast-for-dinner.

    BBQ Chicken & Egg Sandwich

    Have leftover grilled or shredded chicken? Toss a small portion with barbecue sauce and add it beneath the egg.

    Crispy Onion BBQ Egg Sandwich

    Top the egg with crispy fried onions for extra crunch.

    What to Serve With It

    The Fried BBQ Egg Sandwich is filling enough to stand alone, but a few sides can turn it into a complete breakfast or brunch.

    Try serving it with crispy breakfast potatoes, hash browns, fresh fruit, sliced melon, berries, home fries, or a simple fruit salad.

    For a larger weekend breakfast, add bacon or sausage on the side.

    Coffee is an obvious beverage choice, but orange juice, iced coffee, cold brew, or a fruit smoothie all work well.

    Tips for Making the Best Sandwich

    The recipe is easy, but a few small details can make a noticeable difference.

    Toast the bread. Soft bread can become soggy quickly once it meets barbecue sauce and a runny egg.

    Don’t use too much sauce. BBQ sauce has a strong flavor. You want to taste the egg, cheese, and other ingredients too.

    Melt the cheese on the egg. Putting the cheese onto the hot egg while it is still in the skillet gives you a much better melt.

    Eat it immediately. This is not a sandwich that improves by sitting around.

    Use a sturdy bread. Sourdough, Texas toast, brioche buns, English muffins, and hearty sandwich rolls are all great choices.

    Keep napkins nearby. If you choose a runny yolk and extra barbecue sauce, things might get messy—and that is part of the fun.

    Make It Your Own

    Perhaps the best thing about a breakfast sandwich is that recipes are really starting points.

    Open your refrigerator and see what you have.

    A little leftover bacon? Add it.

    Half an avocado? Slice it.

    One hash brown patty left in the freezer? Fry it.

    Some grilled onions from last night’s dinner? Throw them on.

    The basic combination of egg, barbecue sauce, cheese, and toasted bread can handle all kinds of additions.

    You could make this sandwich five different mornings and never prepare it exactly the same way twice.

    Breakfast Doesn’t Have to Be Boring

    It is easy to fall into a breakfast routine.

    Eggs.

    Toast.

    Cereal.

    Coffee.

    Repeat.

    There is nothing wrong with simple breakfasts, but occasionally it is fun to turn familiar ingredients into something completely different.

    The Fried BBQ Egg Sandwich does exactly that.

    You are still working with everyday breakfast staples—eggs, cheese, butter, and bread—but a little barbecue sauce completely changes the experience.

    Add bacon, hash browns, onions, or jalapeños, and suddenly you have a breakfast worthy of a lazy Sunday morning.

    Breakfast of the Day: Fried BBQ Egg Sandwich

    Smoky, cheesy, savory, slightly sweet, and wonderfully messy, the Fried BBQ Egg Sandwich is proof that barbecue sauce does not have to wait until lunch or dinner.

    It takes only about 15 minutes to prepare, requires simple ingredients, and can easily be customized to fit whatever you happen to have in the kitchen.

    Keep it simple with fried eggs, cheddar, and barbecue sauce, or build the ultimate version with bacon, crispy hash browns, caramelized onions, and a little extra sauce.

    Either way, serve it hot and enjoy every bite.

    Would you keep your Fried BBQ Egg Sandwich simple with egg, cheese, and BBQ sauce, or load it up with bacon, hash browns, onions, and jalapeños?

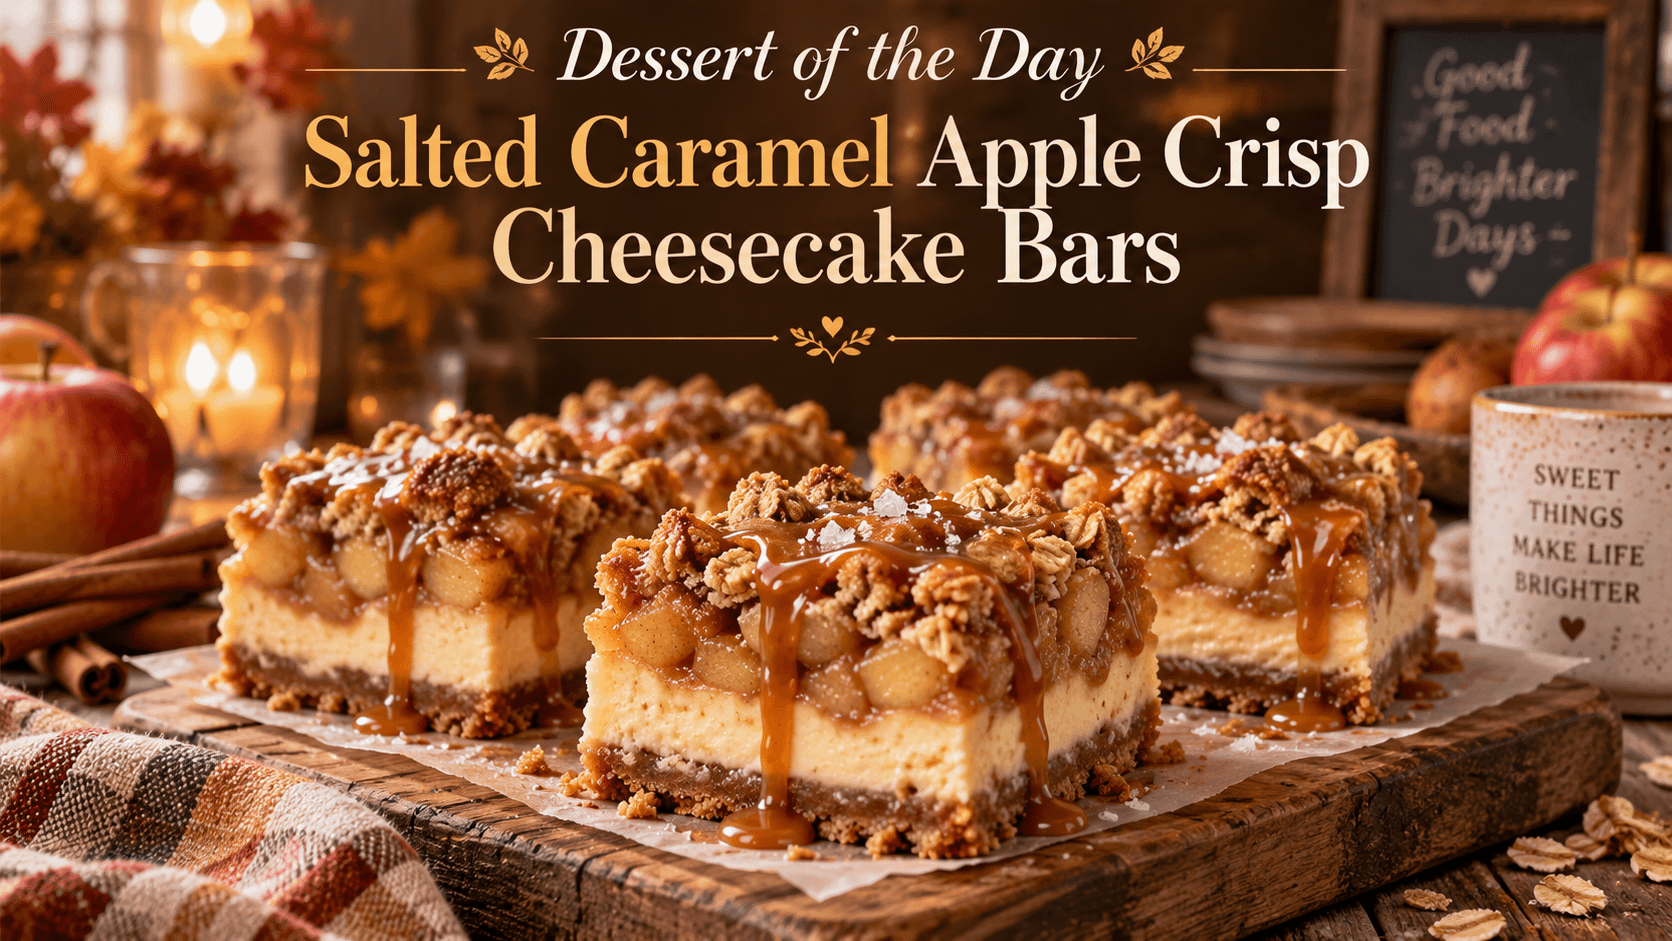
  • Dessert of the Day: Salted Caramel Apple Crisp Cheesecake Bars

    Dessert of the Day: Salted Caramel Apple Crisp Cheesecake Bars

    There are desserts that satisfy a sweet tooth, and then there are desserts that bring several favorites together into one unforgettable bite.

    Today’s Dessert of the Day: Salted Caramel Apple Crisp Cheesecake Bars combines creamy cheesecake, cinnamon-spiced apples, a buttery oat crumble, and rich salted caramel in one incredible layered dessert.

    Think of everything you love about apple crisp.

    Now imagine adding a thick layer of smooth cheesecake underneath it.

    Then drizzle salted caramel over the top.

    That is what makes these cheesecake bars so special.

    Every bite delivers something different. You get the buttery crunch of the crust, creamy cheesecake, tender cinnamon apples, crisp oat topping, and sweet-salty caramel tying everything together.

    They are perfect for fall, but there is absolutely no reason to wait for cooler weather to make them.

    Serve them for a family dinner, holiday gathering, potluck, birthday, barbecue, game night, or simply because you want something homemade waiting in the refrigerator.

    Why These Cheesecake Bars Are So Good

    Some desserts rely almost completely on flavor.

    Others rely on texture.

    These bars have both.

    The cheesecake layer is creamy and rich.

    The apples are tender but still retain enough texture that you know you are eating real fruit.

    The crumble topping adds crunch.

    The caramel brings sweetness while the salt helps keep the dessert from tasting overwhelmingly sugary.

    Then there is the crust underneath everything.

    It gives each bar enough structure that you can pick it up and eat it with your hands, although eating one with a fork and an extra drizzle of warm caramel is definitely encouraged.

    The result is somewhere between cheesecake, apple pie, apple crisp, and caramel apples.

    That is a pretty impressive combination for one dessert.

    Salted Caramel Apple Crisp Cheesecake Bars Recipe

    This recipe makes approximately 16 bars, depending on how generously you cut them.

    Ingredients

    For the Crust

    • 2 cups graham cracker crumbs
    • 6 tablespoons unsalted butter, melted
    • 3 tablespoons brown sugar
    • 1/2 teaspoon cinnamon
    • Pinch of salt

    For the Cheesecake Layer

    • 16 ounces cream cheese, softened
    • 1/2 cup granulated sugar
    • 1/4 cup sour cream
    • 2 large eggs
    • 1 teaspoon vanilla extract
    • 1 tablespoon all-purpose flour
    • Pinch of salt

    For the Apple Layer

    • 3 medium apples
    • 2 tablespoons brown sugar
    • 1 tablespoon granulated sugar
    • 1 teaspoon ground cinnamon
    • 1/4 teaspoon ground nutmeg
    • 1 teaspoon lemon juice
    • 1 tablespoon all-purpose flour

    For the Crisp Topping

    • 3/4 cup old-fashioned oats
    • 1/2 cup all-purpose flour
    • 1/2 cup brown sugar
    • 1/2 teaspoon cinnamon
    • Pinch of salt
    • 6 tablespoons cold unsalted butter, cubed

    For Finishing

    • Salted caramel sauce
    • Flaky sea salt, optional

    Step 1: Prepare the Baking Pan

    Preheat your oven to 350°F.

    Line an 8-by-8-inch or 9-by-9-inch baking pan with parchment paper, leaving some paper hanging over the sides.

    That extra parchment will act as handles later, making it much easier to lift the chilled cheesecake from the pan before cutting it.

    Lightly grease the parchment if desired.

    Step 2: Make the Graham Cracker Crust

    Combine the graham cracker crumbs, melted butter, brown sugar, cinnamon, and pinch of salt in a medium bowl.

    Stir until everything resembles damp sand.

    Pour the mixture into your prepared baking pan.

    Use the bottom of a measuring cup or drinking glass to press the crust firmly and evenly across the bottom.

    Bake the crust for approximately 8 to 10 minutes.

    Remove it from the oven and allow it to cool slightly while you prepare the remaining layers.

    Do not turn off the oven.

    Step 3: Prepare the Apple Filling

    Peel and core the apples.

    Cut them into small cubes.

    Keeping the pieces relatively small is important because larger apple chunks may not become tender before the cheesecake finishes baking.

    Place the apples in a mixing bowl and add the brown sugar, granulated sugar, cinnamon, nutmeg, lemon juice, and flour.

    Toss everything together until the apples are evenly coated.

    Set them aside.

    What Apples Work Best?

    You want apples that maintain some structure while baking.

    Excellent choices include:

    • Granny Smith
    • Honeycrisp
    • Pink Lady
    • Braeburn
    • Fuji
    • Gala

    You can also combine two varieties.

    For example, Granny Smith apples bring tartness while Honeycrisp apples provide more natural sweetness.

    That combination creates excellent balance against the rich cheesecake and caramel.

    Step 4: Make the Cheesecake Filling

    Place the softened cream cheese in a mixing bowl and beat until smooth.

    Add the sugar and continue mixing until creamy.

    Add the sour cream, vanilla, flour, and salt.

    Mix until combined.

    Add the eggs one at a time, mixing only until incorporated.

    Try not to overmix once the eggs have been added.

    Too much air can cause cheesecake to rise dramatically in the oven and then sink while cooling.

    For cheesecake bars, smooth and gentle mixing works best.

    Step 5: Make the Crisp Topping

    Combine the oats, flour, brown sugar, cinnamon, and salt in another bowl.

    Add the cold cubed butter.

    Use your fingers, a pastry cutter, or two forks to work the butter into the dry ingredients.

    Continue until you have coarse crumbs with some larger buttery clusters.

    Those clusters become beautifully crisp and golden while baking.

    Step 6: Assemble the Cheesecake Bars

    Pour the cheesecake mixture over the prepared crust.

    Spread it into an even layer.

    Scatter the cinnamon apples evenly over the cheesecake.

    Try to distribute them all the way to the edges so every bar receives plenty of apple.

    Sprinkle the oat crumble evenly over the apples.

    Now you have four distinct layers:

    Graham cracker crust.

    Creamy cheesecake.

    Cinnamon apples.

    Buttery oat crumble.

    Everything is ready for the oven.

    Step 7: Bake

    Bake for approximately 40 to 50 minutes.

    The edges should look set while the center may still have a slight jiggle.

    The crumble topping should look lightly golden.

    Avoid baking until the entire cheesecake becomes completely firm.

    Cheesecake continues setting as it cools.

    Overbaking can make the filling dry rather than silky and creamy.

    Step 8: Cool Completely

    This might be the hardest part of the recipe.

    You need to wait.

    Allow the cheesecake bars to cool to room temperature.

    Then refrigerate them for at least 4 hours, although overnight is even better.

    Chilling gives the cheesecake enough time to completely set and makes the bars much easier to slice.

    Step 9: Add the Salted Caramel

    Once completely chilled, lift the cheesecake from the pan using the parchment paper.

    Cut it into squares.

    Drizzle salted caramel sauce generously across the tops.

    For an extra salty-sweet contrast, sprinkle each bar with a tiny amount of flaky sea salt.

    Now they are ready to serve.

    Warm Caramel Makes Them Even Better

    Cold cheesecake and slightly warm caramel create an amazing combination.

    Place some caramel sauce in a microwave-safe container and warm it briefly until pourable.

    Do not make it extremely hot.

    Drizzle the warm caramel over the chilled cheesecake bars immediately before serving.

    The contrast between the cool creamy cheesecake and warm caramel makes the dessert feel especially indulgent.

    Homemade or Store-Bought Caramel?

    Either works.

    Homemade salted caramel can give the dessert a deeper buttery flavor, but good-quality store-bought caramel makes this recipe much easier.

    If you use regular caramel instead of salted caramel, simply add a small sprinkle of flaky sea salt over the finished bars.

    You still get that irresistible sweet-and-salty combination.

    Add Pecans for Extra Crunch

    If you love nuts in apple desserts, chopped pecans are a fantastic addition.

    Add approximately 1/2 cup chopped pecans to the crumble topping.

    Walnuts work too.

    Toast the nuts briefly before adding them if you want an even deeper flavor.

    Apple, cinnamon, caramel, cheesecake, and toasted pecans together taste almost like fall in dessert form.

    Turn Them Into Caramel Apple Pie Cheesecake Bars

    Want even more apple pie flavor?

    Increase the cinnamon slightly and add a pinch of ground cloves or allspice to the apples.

    You could also substitute the graham cracker crust with a buttery shortbread crust.

    Suddenly the dessert feels even closer to apple pie while retaining the creamy cheesecake center.

    Make a Biscoff Version

    For another delicious variation, replace the graham crackers with crushed Biscoff cookies.

    Their caramelized spice flavor pairs beautifully with apples and cheesecake.

    Use approximately 2 cups finely crushed cookies and enough melted butter to hold the crumbs together.

    You may want to reduce the added sugar in the crust because the cookies are already sweet.

    Then continue with the recipe normally.

    Caramel drizzle over a Biscoff apple cheesecake is difficult to beat.

    Make It Extra Caramel

    If you are a serious caramel lover, you do not have to stop with the drizzle on top.

    After spreading the cheesecake mixture over the crust, add several spoonfuls of caramel sauce.

    Gently swirl it through the cheesecake with a knife.

    Then add the apples and crumble topping.

    You will have ribbons of caramel running through the cheesecake itself.

    Finish with even more caramel after chilling.

    There is no pretending this is a light dessert.

    If you are making caramel apple cheesecake, you might as well commit to it.

    Add White Chocolate

    Apple and white chocolate work surprisingly well together.

    Fold approximately 1/2 cup white chocolate chips into the cheesecake mixture or sprinkle them over the apple layer before adding the crumble.

    They melt slightly while baking and add small pockets of creamy sweetness throughout the dessert.

    White chocolate chips also make an attractive garnish when sprinkled over the finished bars.

    Make Mini Cheesecakes

    This recipe can also become individual cheesecake cups.

    Line a muffin pan with paper liners.

    Place a spoonful of crust mixture into each liner and press it down.

    Add cheesecake filling, apples, and crumble.

    Bake until the centers are set.

    Once cooled and refrigerated, drizzle each mini cheesecake with caramel.

    Mini versions are excellent for parties because guests can simply grab one without needing plates or a cheesecake server.

    How to Get Clean Cheesecake Slices

    Cheesecake can become messy when cutting.

    For bakery-style slices, use a large sharp knife.

    Dip the knife in hot water.

    Dry it.

    Make one cut.

    Then wipe the blade clean and repeat.

    It takes slightly longer, but the results are worth it.

    You will get cleaner layers instead of dragging cheesecake, apples, crumble, and caramel through every slice.

    How to Store the Bars

    Because these contain cream cheese and eggs, store them in the refrigerator.

    Place the cheesecake bars in an airtight container.

    They should remain delicious for approximately 4 to 5 days when properly refrigerated.

    If you are planning to serve them at a gathering, making them the night before is actually ideal.

    Cheesecake benefits from plenty of chilling time.

    Prepare everything the previous evening, refrigerate overnight, and add the caramel shortly before serving.

    One less dessert to worry about on party day.

    Can You Freeze Cheesecake Bars?

    Yes.

    Cheesecake generally freezes very well.

    For the best results, freeze the bars before adding the caramel drizzle.

    Wrap individual bars tightly in plastic wrap and place them inside an airtight freezer container.

    When you want one, transfer it to the refrigerator and allow it to thaw.

    Add fresh caramel before eating.

    Freezing individual portions is also a good strategy if you do not want an entire pan of cheesecake tempting you every time you open the refrigerator.

    Although there are worse problems to have.

    What to Serve With Apple Cheesecake Bars

    These bars are rich enough to stand alone, but a few additions can make them even better.

    Try serving them with:

    • Vanilla ice cream
    • Cinnamon ice cream
    • Caramel ice cream
    • Whipped cream
    • Fresh apple slices
    • Toasted pecans
    • Hot coffee
    • Espresso
    • Chai tea
    • Hot apple cider
    • Cold milk

    A warm mug of coffee alongside a chilled caramel apple cheesecake bar makes an especially comforting combination.

    Perfect for Fall Gatherings

    Apple desserts naturally feel right when fall arrives.

    The smell of cinnamon apples baking in the oven immediately creates that cozy autumn atmosphere.

    These bars are perfect for:

    • Fall parties
    • Halloween gatherings
    • Thanksgiving
    • Family dinners
    • Football weekends
    • Potlucks
    • Bake sales
    • Church gatherings
    • Office parties
    • Birthday celebrations
    • Friendsgiving
    • Weekend baking

    They are also much easier to transport than a traditional cheesecake.

    Instead of carrying around a large round cheesecake and worrying about cutting it perfectly, you can prepare the bars ahead of time and transport them in a covered container.

    A Great Thanksgiving Alternative

    Pumpkin pie and pecan pie may dominate Thanksgiving dessert tables, but there is always room for something different.

    Salted Caramel Apple Crisp Cheesecake Bars fit perfectly alongside traditional holiday desserts.

    They still have recognizable fall flavors—apple, cinnamon, brown sugar, oats, and caramel—but present them in a completely different way.

    Cut them into smaller bite-sized squares and guests can sample one without having to give up their slice of pie.

    Although some people may end up returning for a second piece.

    Why Salt Makes Caramel Better

    Salt might seem strange in something designed to be sweet, but that contrast is exactly what makes salted caramel so appealing.

    Caramel contains a lot of sweetness.

    A small amount of salt helps balance it.

    You are not trying to make the caramel taste salty.

    Instead, the salt enhances the caramel flavor while preventing the sweetness from becoming overwhelming.

    That balance becomes especially useful in a dessert containing cheesecake, sweetened apples, brown sugar, and a cookie crust.

    A tiny sprinkle of flaky salt can change the entire dessert.

    Dessert of the Day

    Today’s Dessert of the Day: Salted Caramel Apple Crisp Cheesecake Bars takes several classic desserts and combines them into something worthy of becoming a new favorite.

    You have buttery graham cracker crust.

    Smooth vanilla cheesecake.

    Tender cinnamon apples.

    Crunchy brown sugar oat topping.

    And finally, rich salted caramel flowing across everything.

    It has the familiar comfort of homemade apple crisp combined with the creamy indulgence of cheesecake.

    Make a batch for your next family dinner or gathering.

    Prepare them ahead of time and keep them chilled until dessert.

    Then warm the caramel slightly, drizzle it generously over the top, and watch how quickly the pan starts disappearing.

    Just remember to save one for yourself.

    Would you top your Salted Caramel Apple Crisp Cheesecake Bar with extra caramel, vanilla ice cream, whipped cream, toasted pecans—or all four?

  • Healthy Recipe of the Day: Mediterranean Chicken Quinoa Bowls

    Healthy Recipe of the Day: Mediterranean Chicken Quinoa Bowls

    Eating healthier doesn’t mean giving up satisfying meals or settling for bland food. Some of the best healthy recipes are loaded with fresh ingredients, bright flavors, lean protein, colorful vegetables, and just enough seasoning to make you look forward to dinner.

    Today’s Healthy Recipe of the Day: Mediterranean Chicken Quinoa Bowls checks all of those boxes.

    Tender seasoned chicken is served over fluffy quinoa with crisp cucumber, juicy tomatoes, red onion, spinach, creamy hummus, and a refreshing homemade lemon-herb dressing. Everything comes together in one colorful bowl that feels fresh while still being filling enough for lunch or dinner.

    Even better, these bowls are easy to customize and excellent for meal prep.

    If you’re trying to add more wholesome meals to your routine without making healthy eating complicated, this is a recipe worth keeping.

    Why You’ll Love Mediterranean Chicken Quinoa Bowls

    There is a lot to love about meals served in bowls.

    You get a little bit of everything in each bite, and you can easily adjust the ingredients according to what you have available.

    These Mediterranean Chicken Quinoa Bowls are especially good because they combine several different textures and flavors.

    You get:

    • Juicy, seasoned chicken
    • Fluffy quinoa
    • Crunchy cucumber
    • Sweet tomatoes
    • Fresh spinach
    • Creamy hummus
    • Tangy lemon
    • Fresh herbs
    • Optional salty feta cheese

    The result is a meal that tastes fresh without leaving you hungry an hour later.

    It also looks fantastic on the plate. With red tomatoes, green cucumber and spinach, golden chicken, white feta, and colorful herbs, this is the kind of healthy meal that actually makes you excited to sit down and eat.

    Ingredients

    For the Chicken

    • 1 1/2 pounds boneless, skinless chicken breasts
    • 1 tablespoon olive oil
    • 1 tablespoon fresh lemon juice
    • 1 teaspoon dried oregano
    • 1 teaspoon garlic powder
    • 1 teaspoon smoked paprika
    • 1/2 teaspoon onion powder
    • 1/2 teaspoon salt
    • 1/4 teaspoon black pepper

    For the Quinoa Bowls

    • 1 cup uncooked quinoa
    • 2 cups water or low-sodium chicken broth
    • 2 cups fresh baby spinach
    • 1 large cucumber, diced
    • 1 1/2 cups cherry tomatoes, halved
    • 1/2 small red onion, thinly sliced
    • 1/2 cup hummus
    • 1/3 cup crumbled feta cheese, optional
    • 1/4 cup chopped fresh parsley
    • Lemon wedges for serving

    For the Lemon-Herb Dressing

    • 3 tablespoons extra-virgin olive oil
    • 2 tablespoons fresh lemon juice
    • 1 teaspoon Dijon mustard
    • 1 small garlic clove, minced
    • 1/2 teaspoon dried oregano
    • 1 tablespoon chopped fresh parsley
    • Pinch of salt
    • Freshly ground black pepper

    Step 1: Season the Chicken

    Place the chicken breasts in a bowl.

    Add the olive oil, lemon juice, oregano, garlic powder, smoked paprika, onion powder, salt, and black pepper.

    Rub the seasoning mixture over the chicken until every piece is evenly coated.

    If you have time, allow the chicken to marinate in the refrigerator for about 30 minutes. You can also prepare it immediately when you’re short on time.

    Step 2: Cook the Quinoa

    Rinse the quinoa thoroughly under cold running water.

    Add the quinoa and water or chicken broth to a medium saucepan.

    Bring everything to a boil.

    Once boiling, reduce the heat to low, cover the saucepan, and simmer for approximately 15 minutes or until the liquid has been absorbed.

    Remove it from the heat and allow it to sit covered for another 5 minutes.

    Fluff the quinoa gently with a fork.

    Using low-sodium chicken broth instead of water is an easy way to add extra flavor without adding a heavy sauce.

    Step 3: Cook the Chicken

    Heat a large skillet or grill pan over medium-high heat.

    Add the seasoned chicken.

    Cook for approximately 5–7 minutes per side, depending on thickness, until the chicken is completely cooked through and reaches an internal temperature of 165°F.

    Remove the chicken from the pan and let it rest for about 5 minutes.

    Resting helps the chicken retain its juices instead of losing them when you immediately slice it.

    After resting, slice the chicken into strips or bite-sized pieces.

    Step 4: Make the Lemon-Herb Dressing

    While the chicken rests, prepare the dressing.

    In a small bowl or jar, combine:

    • Olive oil
    • Lemon juice
    • Dijon mustard
    • Garlic
    • Oregano
    • Parsley
    • Salt
    • Black pepper

    Whisk everything together until combined.

    Taste and adjust the seasoning if necessary.

    If you prefer a stronger lemon flavor, squeeze in a little more fresh lemon juice.

    Step 5: Assemble Your Bowls

    Now comes the fun part.

    Divide the cooked quinoa among four bowls.

    Add a handful of baby spinach to each bowl.

    Arrange the cucumber, tomatoes, red onion, and sliced chicken over the quinoa.

    Add a spoonful of hummus.

    Sprinkle with feta cheese and fresh parsley if desired.

    Drizzle the lemon-herb dressing over everything.

    Finish each bowl with a lemon wedge.

    Serve immediately and enjoy.

    Why This Is a Great Healthy Meal

    Healthy eating works best when your meals are satisfying enough that you actually want to eat them.

    That’s one reason these Mediterranean Chicken Quinoa Bowls work so well.

    Instead of focusing on removing everything from your plate, this recipe focuses on filling your bowl with nutritious ingredients.

    Lean Protein From Chicken

    Chicken breast provides plenty of protein while remaining relatively lean.

    Protein can also help make a meal more satisfying.

    Instead of eating a bowl containing mostly vegetables and feeling hungry shortly afterward, the chicken turns this into a substantial meal.

    Quinoa Makes a Great Base

    Quinoa is an excellent alternative when you want something different from white rice or pasta.

    It provides carbohydrates along with protein and fiber and has a mild, slightly nutty flavor that pairs particularly well with Mediterranean ingredients.

    It also absorbs the lemon-herb dressing beautifully.

    Plenty of Vegetables

    One of the easiest ways to improve everyday meals is simply to add more vegetables.

    This bowl makes that easy.

    You have:

    Cucumber.

    Tomatoes.

    Spinach.

    Red onion.

    Parsley.

    You can add even more vegetables if you want.

    Try roasted zucchini, bell peppers, broccoli, carrots, or eggplant.

    The goal isn’t to follow the recipe perfectly.

    Build a bowl you’ll enjoy eating.

    Meal Prep Made Easy

    These Mediterranean Chicken Quinoa Bowls are particularly useful for meal prep.

    Prepare the chicken and quinoa ahead of time and divide them among meal-prep containers.

    Keep the fresh vegetables and dressing separate when possible.

    When you’re ready to eat, combine everything together.

    You can prepare several lunches at once instead of trying to figure out what to eat every afternoon.

    That can make healthier choices much easier during a busy week.

    Keep the Dressing Separate

    If you’re preparing these bowls several days ahead, store the dressing in a small separate container.

    Otherwise, the vegetables and greens can become soggy.

    Add the dressing immediately before eating.

    Serve It Warm or Cold

    Another advantage of this recipe is that it doesn’t necessarily need to be served piping hot.

    You can warm the chicken and quinoa while leaving the vegetables cold, or enjoy the entire bowl chilled.

    That makes it particularly convenient for work lunches.

    Easy Recipe Variations

    One of the best parts about bowl recipes is how easily you can change them.

    Use Brown Rice

    Don’t have quinoa?

    Use brown rice instead.

    Try Grilled Chicken

    During warmer weather, cook the chicken outside on the grill.

    The slightly smoky flavor is delicious with the fresh vegetables and lemon dressing.

    Make It Vegetarian

    Skip the chicken and add chickpeas.

    Roasted chickpeas are especially good because they add texture and plant-based protein.

    Add Avocado

    Sliced avocado adds another creamy element and pairs beautifully with lemon and hummus.

    Add Olives

    If you enjoy olives, add sliced Kalamata olives for a stronger Mediterranean flavor.

    Because olives can be salty, you may want to reduce some of the added salt elsewhere in the recipe.

    Add Roasted Vegetables

    Turn this into an even bigger vegetable bowl by adding roasted:

    • Zucchini
    • Bell peppers
    • Eggplant
    • Broccoli
    • Cauliflower
    • Carrots

    This is also a great way to use vegetables already sitting in your refrigerator.

    Don’t Be Afraid of Healthy Fats

    Sometimes people assume that healthy meals should contain almost no fat.

    But fat isn’t automatically something that needs to disappear from your plate.

    This recipe uses ingredients such as olive oil and hummus to provide richness and flavor.

    The key is portion awareness.

    A little olive oil goes a long way, particularly when combined with lemon juice, garlic, mustard, and herbs.

    Instead of drowning your bowl in a heavy bottled dressing, you’re creating a flavorful dressing from a few simple ingredients.

    Fresh Lemon Makes a Difference

    Don’t underestimate what fresh lemon juice can do for a recipe.

    Lemon brightens almost everything in this bowl.

    It works with the chicken.

    It complements the quinoa.

    It cuts through the richness of the hummus.

    It brings the vegetables together.

    And it helps create a dressing that tastes fresh rather than heavy.

    Keep a few extra lemon wedges on the table.

    Some people will definitely want another squeeze.

    How to Make the Chicken Extra Flavorful

    If you have additional time, marinate the chicken for several hours before cooking it.

    Combine the chicken with olive oil, lemon juice, oregano, garlic, paprika, salt, and pepper.

    Cover and refrigerate.

    The extra time allows those flavors to season the chicken more deeply.

    Just remember that you don’t need an overnight marinade to make this recipe taste good.

    Even 20–30 minutes can help.

    Make Healthy Eating Convenient

    One reason people abandon healthier eating plans is inconvenience.

    You’re tired.

    You’re hungry.

    You’ve had a long day.

    The last thing you want to do is spend an hour figuring out dinner.

    That’s where simple recipes and meal preparation become useful.

    Cook a larger batch of quinoa.

    Prepare several chicken breasts.

    Wash and chop vegetables ahead of time.

    Make a jar of dressing.

    Suddenly, assembling a nutritious meal takes minutes instead of an hour.

    Healthy eating doesn’t always require more willpower.

    Sometimes it simply requires making the healthier choice easier.

    Build the Bowl Your Way

    Think of this recipe as a starting point rather than a strict formula.

    Start with your grain.

    Add protein.

    Pile on vegetables.

    Include something creamy.

    Add herbs.

    Finish with a flavorful dressing.

    You could make dozens of different meals using that basic idea.

    That’s useful because eating healthier doesn’t have to mean eating the exact same chicken-and-vegetable dinner every night.

    Variety helps keep healthy food interesting.

    Mediterranean Chicken Quinoa Bowl Meal Prep Formula

    If you want to remember this recipe without looking it up every time, keep this simple formula in mind:

    Base: Quinoa

    Protein: Lemon-herb chicken

    Greens: Spinach

    Fresh vegetables: Cucumber, tomato, and red onion

    Creamy addition: Hummus

    Optional topping: Feta

    Fresh flavor: Parsley and lemon

    Dressing: Lemon, olive oil, Dijon, garlic, and herbs

    Once you know that formula, you can change ingredients based on whatever is available in your kitchen.

    A Healthy Dinner Doesn’t Have to Be Complicated

    There is a misconception that healthier recipes require unusual ingredients, complicated cooking techniques, or hours of preparation.

    They don’t.

    Sometimes a great healthy dinner is simply good ingredients prepared well.

    Season the chicken.

    Cook the quinoa.

    Chop some vegetables.

    Whisk together a simple dressing.

    Put everything in a bowl.

    Dinner is ready.

    And because every component has its own flavor and texture, the meal doesn’t feel like you’re sacrificing anything.

    Healthy Recipe of the Day

    Mediterranean Chicken Quinoa Bowls are fresh, colorful, filling, and easy enough to become part of your regular meal rotation.

    They combine lean chicken, quinoa, vegetables, hummus, herbs, and a bright lemon dressing in a single satisfying meal.

    Make them for dinner tonight.

    Prepare several bowls for lunches this week.

    Change the vegetables depending on what’s in season.

    Add avocado when you want extra creaminess.

    Swap chicken for chickpeas when you want a meatless version.

    A healthier lifestyle doesn’t have to begin with a complete overhaul of everything you eat.

    Sometimes it begins with one meal.

    Then another.

    Then another.

    Small choices repeated consistently can become habits, and those habits can eventually become part of the way you live.

    What would you add to your Mediterranean Chicken Quinoa Bowl—avocado, olives, roasted vegetables, extra hummus, or something else?

  • Recipe of the Day: Honey Garlic Chicken Orzo

    Recipe of the Day: Honey Garlic Chicken Orzo

    Some dinners are worth keeping in your back pocket for those nights when you want something comforting, flavorful, and satisfying without spending hours in the kitchen. Honey Garlic Chicken Orzo is exactly that kind of recipe.

    Tender pieces of chicken are cooked until golden, then combined with soft orzo pasta in a sweet and savory honey garlic sauce. Everything comes together in one skillet, allowing the orzo to soak up the chicken broth, garlic, honey, and seasonings as it cooks.

    The result is a warm, hearty meal filled with flavor in every bite.

    Even better, this is the kind of recipe that works just as well for a busy weeknight as it does for a relaxed weekend dinner.

    Why You’ll Love Honey Garlic Chicken Orzo

    There are plenty of reasons to add this recipe to your regular dinner rotation.

    It’s a one-pan meal. Most of the cooking happens in a single skillet, which means fewer dishes to wash afterward.

    It’s packed with flavor. Honey brings sweetness, garlic adds plenty of savory flavor, and soy sauce gives the dish a salty, umami finish.

    It’s family-friendly. The sweet-and-savory combination makes this an approachable meal for adults and kids alike.

    It’s ready relatively quickly. You can have a comforting homemade dinner on the table in about 30–40 minutes.

    It’s easy to customize. Add vegetables, change the seasonings, or adjust the sweetness to make the recipe your own.

    Ingredients

    For the Chicken

    • 1 1/2 pounds boneless, skinless chicken breasts or thighs
    • 1 tablespoon olive oil
    • 1 teaspoon garlic powder
    • 1 teaspoon onion powder
    • 1/2 teaspoon smoked paprika
    • 1/2 teaspoon salt
    • 1/4 teaspoon black pepper

    For the Honey Garlic Sauce

    • 4 cloves garlic, minced
    • 1/3 cup honey
    • 3 tablespoons low-sodium soy sauce
    • 1 tablespoon apple cider vinegar
    • 1 tablespoon butter
    • 1/4 teaspoon crushed red pepper flakes, optional

    For the Orzo

    • 1 1/2 cups dry orzo pasta
    • 3 cups chicken broth
    • 2 cups fresh baby spinach
    • 1/4 cup grated Parmesan cheese
    • 1 tablespoon fresh parsley, chopped
    • Salt and black pepper to taste

    Step 1: Prepare the Chicken

    Cut the chicken into bite-sized pieces.

    Place the chicken in a bowl and season it with garlic powder, onion powder, smoked paprika, salt, and black pepper.

    Toss everything together until the chicken is evenly coated.

    Cutting the chicken into similar-sized pieces will help it cook evenly and quickly.

    Step 2: Brown the Chicken

    Heat the olive oil in a large skillet over medium-high heat.

    Once the oil is hot, add the seasoned chicken.

    Cook for approximately 5–7 minutes, turning occasionally, until the pieces are golden brown and cooked through.

    Transfer the chicken to a plate and set it aside.

    Don’t worry about cleaning the skillet. Those browned bits left behind from the chicken will add even more flavor to the finished dish.

    Step 3: Make the Honey Garlic Sauce

    Reduce the heat to medium.

    Add the butter to the same skillet.

    Once melted, add the minced garlic and cook for about 30 seconds, stirring constantly.

    Garlic can burn quickly, so don’t walk away from the skillet during this step.

    Add the honey, soy sauce, apple cider vinegar, and crushed red pepper flakes.

    Stir everything together and allow the sauce to simmer for about 1–2 minutes.

    You’ll immediately begin smelling that wonderful combination of sweet honey and fresh garlic.

    Step 4: Toast the Orzo

    Add the dry orzo directly to the skillet.

    Stir it into the honey garlic mixture and cook for approximately 1 minute.

    Lightly toasting the orzo before adding the broth gives it a slightly nutty flavor and helps build another layer of flavor in the dish.

    Step 5: Add the Chicken Broth

    Pour the chicken broth into the skillet.

    Stir well, scraping the bottom of the skillet to release any browned bits.

    Bring the mixture to a gentle boil.

    Reduce the heat to low or medium-low and allow the orzo to simmer for approximately 10–12 minutes.

    Stir occasionally to prevent the pasta from sticking to the bottom.

    The orzo will gradually absorb the broth and become tender.

    If it becomes too dry before the pasta is fully cooked, add another splash of chicken broth.

    Step 6: Add the Spinach

    Once the orzo is almost tender, add the baby spinach.

    Stir the spinach into the hot pasta.

    It should begin wilting within a minute or two.

    This is an easy way to add vegetables without changing the comforting nature of the dish.

    Step 7: Return the Chicken

    Return the cooked chicken and any juices from the plate to the skillet.

    Stir everything together until the chicken is completely coated in the honey garlic sauce.

    Continue cooking for another 2–3 minutes so the chicken can warm through and absorb some of the sauce.

    Step 8: Add Parmesan

    Remove the skillet from the heat.

    Stir in the grated Parmesan cheese.

    The Parmesan adds a little richness and helps make the orzo even creamier.

    Taste the dish and adjust the salt and black pepper if necessary.

    Step 9: Serve

    Spoon the Honey Garlic Chicken Orzo into bowls or onto dinner plates.

    Sprinkle freshly chopped parsley and a little additional Parmesan over the top.

    Serve immediately while everything is warm and creamy.

    What Makes Honey and Garlic Work So Well Together?

    Honey and garlic might seem like two completely different ingredients, but that’s exactly why they complement each other.

    Honey provides sweetness while garlic brings a strong savory flavor. Soy sauce adds saltiness and depth, while apple cider vinegar provides enough acidity to prevent the sauce from becoming overly sweet.

    Together, these ingredients create a balanced sauce that hits several different flavor notes at once.

    When the orzo cooks directly in that sauce and chicken broth, it absorbs those flavors instead of simply being covered with sauce afterward.

    That’s what makes this dish particularly delicious.

    Why Cook Orzo in the Same Pan?

    Orzo looks like rice, but it’s actually a small pasta.

    One of the best ways to prepare it is by cooking it directly in broth rather than boiling it separately in water.

    As the orzo cooks, it releases starch into the skillet. That starch combines with the broth and sauce to create a naturally creamy consistency.

    There’s no need for a heavy cream sauce.

    The pasta essentially creates its own sauce while it cooks.

    Chicken Breasts or Chicken Thighs?

    Either works beautifully.

    Chicken breasts are leaner and have a mild flavor that lets the honey garlic sauce take center stage.

    Chicken thighs are richer, juicier, and more forgiving if they’re cooked slightly longer.

    If you’re looking for maximum flavor and tenderness, boneless chicken thighs are an excellent choice.

    If you prefer leaner meals, chicken breast works perfectly.

    Add Some Vegetables

    Spinach is included in this recipe, but there’s plenty of room for additional vegetables.

    Try adding:

    • Broccoli florets
    • Sliced mushrooms
    • Bell peppers
    • Zucchini
    • Asparagus
    • Green beans
    • Peas
    • Kale

    For firmer vegetables such as broccoli or bell peppers, sauté them before adding the orzo.

    Quick-cooking vegetables such as spinach and peas can be added near the end.

    Make It Spicy

    The basic recipe has only a small amount of crushed red pepper, making it more sweet and savory than spicy.

    If you like some heat, increase the crushed red pepper flakes.

    You could also add:

    • Sriracha
    • Chili garlic sauce
    • Cayenne pepper
    • Hot honey
    • Fresh sliced jalapeños

    Hot honey is particularly good because it enhances both the sweet and spicy sides of the recipe.

    Don’t Overcook the Orzo

    Orzo can go from perfectly tender to overly soft fairly quickly.

    Start checking it around the 9- or 10-minute mark.

    You’re looking for pasta that’s tender but still has a little structure.

    Remember that the orzo will continue absorbing liquid for a few minutes after you remove the skillet from the heat.

    What to Serve With Honey Garlic Chicken Orzo

    This recipe can easily stand alone as a complete dinner, especially with spinach included.

    If you’d like something alongside it, try serving it with:

    • Garlic bread
    • Roasted broccoli
    • Steamed green beans
    • Caesar salad
    • Garden salad
    • Roasted asparagus
    • Glazed carrots

    A simple vegetable or salad is usually all you need because the chicken and orzo are already filling.

    Make It Extra Creamy

    For an even richer version, stir in a splash of heavy cream after the orzo finishes cooking.

    You can also add a couple tablespoons of cream cheese.

    However, don’t add too much. You still want the honey garlic flavor to shine through.

    Meal Prep

    Honey Garlic Chicken Orzo makes a convenient meal-prep option.

    Divide the cooked dish among airtight containers and refrigerate.

    When you’re ready to eat, reheat individual portions in the microwave or gently warm them in a skillet.

    Because orzo continues absorbing moisture while refrigerated, you may want to add a splash of chicken broth or water before reheating.

    How to Store Leftovers

    Allow leftovers to cool before transferring them to an airtight container.

    Store them in the refrigerator for up to 3–4 days.

    Reheat until steaming hot throughout.

    The sauce will thicken considerably after refrigeration, so adding a small amount of broth while reheating will help bring back the creamy texture.

    Tips for the Best Honey Garlic Chicken Orzo

    Don’t burn the garlic. Garlic only needs about 30 seconds before the other sauce ingredients are added.

    Use low-sodium broth and soy sauce. This gives you more control over the final saltiness.

    Stir the orzo periodically. Small pasta has a tendency to settle on the bottom of the skillet.

    Adjust the honey. If you prefer a less sweet dinner, reduce the honey slightly.

    Use freshly grated Parmesan. It generally melts more smoothly than pre-shredded cheese.

    Let it rest before serving. Giving the finished dish 2–3 minutes to sit allows the sauce to thicken.

    A Comforting Dinner Made in One Skillet

    There is something particularly satisfying about a meal that tastes like you spent hours making it when the entire thing actually came together in one skillet.

    Honey Garlic Chicken Orzo delivers that combination.

    You get juicy chicken, tender pasta, fresh spinach, Parmesan, and a sticky-sweet garlic sauce all together in one comforting dish.

    It’s flavorful without being complicated, filling without requiring a dozen side dishes, and versatile enough to change based on whatever you already have in your refrigerator.

    Most importantly, it’s the type of dinner you’ll probably find yourself making again.

    Sometimes a great Recipe of the Day doesn’t need unusual ingredients or complicated techniques.

    It simply needs to taste good, bring everyone to the table, and make you look forward to the leftovers.

    Would you make your Honey Garlic Chicken Orzo sweet and savory, or would you add some extra heat with hot honey and crushed red pepper?

  • Breakfast of the Day: Sausage Gravy Breakfast Biscuit Casserole

    Breakfast of the Day: Sausage Gravy Breakfast Biscuit Casserole

    There are mornings when a light breakfast is exactly what you want.

    And then there are mornings when you want something warm, hearty, cheesy, and completely satisfying.

    That is where Sausage Gravy Breakfast Biscuit Casserole comes in.

    Today’s Breakfast of the Day takes two classic breakfast favorites—biscuits and sausage gravy—and turns them into one comforting casserole loaded with fluffy biscuits, savory breakfast sausage, creamy homemade gravy, eggs, and melted cheese.

    Every serving has a little bit of everything.

    You get buttery biscuit pieces soaking up the rich sausage gravy, fluffy baked eggs, seasoned sausage, and gooey melted cheese across the top.

    It is the kind of breakfast that fills the kitchen with an incredible smell before it even comes out of the oven.

    Better yet, it is perfect when you need to feed several people at once.

    Instead of standing at the stove cooking individual plates of eggs, sausage, biscuits, and gravy, you can put everything into one baking dish and let the oven handle most of the work.

    Whether you make it for Sunday breakfast, a family gathering, holiday brunch, or simply because you are craving serious comfort food, this casserole deserves a place on the breakfast table.

    Why You’ll Love This Breakfast Casserole

    Breakfast casseroles are popular for a reason.

    They combine several breakfast favorites into one easy dish while giving you plenty of opportunities to customize the recipe.

    This Sausage Gravy Breakfast Biscuit Casserole is especially satisfying because it combines different flavors and textures.

    The biscuits are soft and buttery.

    The sausage is savory and slightly salty.

    The gravy is rich and creamy.

    The eggs give the casserole its traditional breakfast character.

    And melted cheddar cheese ties everything together.

    It is also:

    • Hearty and filling
    • Easy to serve
    • Great for families
    • Perfect for brunch
    • Customizable
    • Excellent for holidays
    • Made with familiar ingredients
    • Easy to reheat
    • Ideal for feeding a crowd

    If you love traditional biscuits and gravy, this casserole gives you those familiar flavors with a little something extra.

    Ingredients

    For approximately 8 servings, you’ll need:

    For the Casserole

    • 1 can refrigerated biscuits, about 16 ounces
    • 1 pound breakfast sausage
    • 6 large eggs
    • 1/2 cup milk
    • 1 1/2 cups shredded cheddar cheese
    • 1/4 teaspoon salt
    • 1/4 teaspoon black pepper
    • 1/4 teaspoon garlic powder
    • Chopped green onions or parsley for garnish, optional

    For the Sausage Gravy

    • Cooked sausage from above
    • 3 tablespoons all-purpose flour
    • 2 1/2 cups whole milk
    • 1/2 teaspoon black pepper
    • 1/4 teaspoon garlic powder
    • 1/4 teaspoon onion powder
    • Salt to taste

    You can use mild, regular, hot, or maple breakfast sausage depending on the flavor you want.

    How to Make Sausage Gravy Breakfast Biscuit Casserole

    Step 1: Preheat the Oven

    Preheat your oven to 350°F.

    Lightly grease a 9×13-inch baking dish with cooking spray or butter.

    Set it aside while you prepare the remaining ingredients.

    Step 2: Cut the Biscuits

    Open the refrigerated biscuits and separate them.

    Cut each biscuit into approximately four pieces.

    Spread the biscuit pieces evenly across the bottom of your prepared baking dish.

    They do not have to be arranged perfectly.

    Leaving a little space between the pieces allows them room to expand while baking.

    Step 3: Cook the Sausage

    Place the breakfast sausage in a large skillet over medium heat.

    Break it apart with a spatula or wooden spoon as it cooks.

    Continue cooking until the sausage is browned and completely cooked through.

    Do not drain all of the fat from the skillet.

    A small amount of sausage drippings helps give the gravy additional flavor.

    If your sausage produces a large amount of grease, remove some while leaving approximately 2 to 3 tablespoons behind.

    Step 4: Make the Sausage Gravy

    Sprinkle the flour over the cooked sausage.

    Stir until the sausage is evenly coated.

    Cook for approximately one minute.

    This helps eliminate the raw flour flavor.

    Slowly pour in the milk while stirring continuously.

    Add black pepper, garlic powder, and onion powder.

    Continue cooking over medium-low heat until the gravy begins to thicken.

    This usually takes several minutes.

    The gravy should be creamy but still pourable.

    Remember that it will thicken more while the casserole bakes.

    Taste and add salt if necessary.

    Breakfast sausage can already contain plenty of salt, so tasting before adding more is important.

    Step 5: Prepare the Eggs

    Crack the eggs into a medium bowl.

    Add 1/2 cup milk, salt, black pepper, and garlic powder.

    Whisk until everything is thoroughly combined.

    Pour the egg mixture evenly over the biscuit pieces.

    Step 6: Add the Cheese

    Sprinkle approximately half of the shredded cheddar cheese over the biscuits and egg mixture.

    Try to distribute it evenly so every serving gets plenty of cheese.

    Step 7: Add the Sausage Gravy

    Carefully spoon or pour the warm sausage gravy over everything.

    Spread the gravy gently across the casserole.

    Don’t worry if some biscuit pieces remain visible.

    As the casserole cooks, the biscuits will expand around the eggs, gravy, and cheese.

    Step 8: Add More Cheese

    Sprinkle the remaining cheddar cheese over the top.

    If you really love cheese, nobody is stopping you from adding a little extra.

    Step 9: Bake

    Place the casserole in the preheated oven.

    Bake for approximately 35 to 45 minutes.

    Because ovens vary, begin checking around the 35-minute mark.

    The eggs should be set, the biscuits should be cooked through, and the cheese should be melted and lightly golden.

    If the top begins browning before the center is finished, loosely cover the casserole with aluminum foil and continue baking.

    Step 10: Rest Before Serving

    Remove the casserole from the oven and let it rest for approximately 5 to 10 minutes.

    This gives everything time to settle and makes the casserole much easier to slice.

    Sprinkle chopped green onions or parsley over the top if desired.

    Then serve it warm.

    The Homemade Sausage Gravy Makes the Difference

    You could certainly use packaged gravy when you are short on time.

    But homemade sausage gravy is surprisingly easy.

    You only need sausage, flour, milk, and a few seasonings.

    More importantly, making the gravy in the same skillet used for the sausage means you capture all those browned bits and savory flavors.

    The flour combines with the sausage drippings to create the base of the gravy.

    Then the milk transforms everything into a creamy sauce.

    Black pepper is particularly important.

    Traditional sausage gravy should have a noticeable pepper flavor.

    If you enjoy plenty of pepper, add a little more.

    What Kind of Sausage Should You Use?

    Regular breakfast sausage is the easiest choice, but there are plenty of options.

    Mild Sausage

    This is a great family-friendly option and lets the gravy and cheese remain prominent.

    Hot Breakfast Sausage

    If you like a little heat in the morning, hot sausage works beautifully.

    Maple Sausage

    Maple sausage creates a sweet-and-savory combination.

    It is especially good if you like pouring maple syrup over sausage or biscuits.

    Turkey Sausage

    Turkey breakfast sausage can also be used if you want an alternative to pork sausage.

    Just remember that leaner sausage may not produce enough fat for the gravy.

    If necessary, add a tablespoon or two of butter before adding the flour.

    Change the Cheese

    Cheddar is the classic choice, but you don’t have to stop there.

    Try:

    • Pepper Jack
    • Monterey Jack
    • Colby Jack
    • Smoked cheddar
    • Sharp cheddar
    • Mozzarella
    • A cheddar and Monterey Jack blend

    Pepper Jack is particularly good if you’re using spicy sausage.

    For an especially rich casserole, combine sharp cheddar with Monterey Jack.

    Add Bacon

    Want to make this breakfast even more indulgent?

    Add bacon.

    Cook about six strips of bacon until crispy.

    Crumble them and sprinkle the pieces over the egg mixture before adding the gravy.

    You will end up with biscuits, eggs, sausage, bacon, gravy, and cheese all in one casserole.

    That is about as close as you can get to putting an entire diner breakfast into one baking dish.

    Add Some Vegetables

    You can also bring vegetables into the casserole.

    Good additions include:

    • Diced bell peppers
    • Diced onions
    • Mushrooms
    • Spinach
    • Jalapeños
    • Green onions

    Sauté vegetables before adding them so they don’t release too much moisture while the casserole cooks.

    Bell peppers and onions work particularly well with sausage.

    For a spicy Southwestern variation, use sausage, jalapeños, pepper Jack cheese, and diced green chiles.

    Serve it with salsa on the side.

    Make It Spicy

    If you like breakfast with some heat, there are several easy ways to turn up the flavor.

    Use hot breakfast sausage.

    Add diced jalapeños.

    Use pepper Jack cheese.

    Add crushed red pepper flakes to the gravy.

    Serve the finished casserole with your favorite hot sauce.

    You can even add a little cayenne pepper to the sausage gravy.

    Start small.

    You can always add more heat, but you can’t easily take it away.

    Add a Touch of Maple Syrup

    This may sound unusual until you think about how good maple syrup tastes with sausage and biscuits.

    Drizzle a small amount of warm maple syrup over an individual serving.

    You get sweet maple syrup followed by salty sausage, creamy gravy, buttery biscuits, eggs, and melted cheese.

    It creates that sweet-and-savory breakfast combination that makes pancakes with sausage so satisfying.

    You can also use maple breakfast sausage inside the casserole.

    What to Serve With It

    This casserole is already filling enough to serve as a complete breakfast, but simple sides can turn it into a full brunch.

    Fresh Fruit

    Serve strawberries, blueberries, pineapple, grapes, melon, or oranges alongside the casserole.

    The fresh fruit provides a lighter contrast to the rich gravy and cheese.

    Hash Browns

    If you want a serious breakfast feast, add crispy hash browns or breakfast potatoes.

    Bacon

    Yes, there is already sausage.

    That doesn’t mean bacon isn’t welcome.

    Cinnamon Rolls

    For a big holiday breakfast, serve the savory casserole alongside warm cinnamon rolls.

    Fresh Biscuits

    For the person who believes there can never be too many biscuits, serve additional biscuits on the side with butter, honey, or jam.

    Don’t Forget the Coffee

    A hearty breakfast casserole practically demands a hot cup of coffee.

    Regular black coffee works perfectly because its slight bitterness balances the richness of the gravy and cheese.

    You could also serve:

    • Vanilla coffee
    • Hazelnut coffee
    • Caramel coffee
    • Cappuccino
    • Café latte
    • Cold brew
    • Hot tea
    • Orange juice

    For a weekend brunch, put out several drink options and let everyone choose their favorite.

    Perfect for Sunday Breakfast

    There is something different about Sunday breakfast.

    Weekday mornings often involve alarms, work, school, appointments, and trying to get out the door.

    Sunday gives you an opportunity to slow things down.

    Put on the coffee.

    Make something warm.

    Sit around the table.

    Talk.

    Eat.

    Go back for another serving.

    A breakfast like this isn’t simply about getting something into your stomach before starting the day.

    It can become part of the morning itself.

    Great for Holiday Mornings

    This casserole is also perfect for holidays when you have several people to feed.

    Think about Christmas morning.

    Nobody wants to spend the entire morning standing over the stove making individual orders of eggs.

    A casserole makes things easier.

    Prepare one large dish, put it into the oven, and let everyone serve themselves.

    It works equally well for:

    • Christmas morning
    • Thanksgiving weekend
    • Easter brunch
    • Mother’s Day
    • Father’s Day
    • Birthdays
    • Family reunions
    • Weekend guests

    Add fruit, coffee, juice, and something sweet, and you have an easy breakfast spread.

    Can You Prepare It Ahead?

    You can prepare several parts of this casserole ahead of time.

    Cook the sausage and prepare the gravy the night before.

    Refrigerate them in airtight containers.

    You can also shred your cheese and prepare any vegetables.

    In the morning, assemble the casserole and bake.

    This saves time without sacrificing the freshly baked texture of the biscuits.

    If you assemble the entire casserole in advance, the biscuits may absorb more liquid and become softer.

    Some people enjoy that texture, but if you want more distinct biscuit pieces, assembling shortly before baking is better.

    How to Store Leftovers

    Allow leftover casserole to cool.

    Transfer individual portions to airtight containers or cover the baking dish tightly.

    Refrigerate promptly.

    For best quality, enjoy the leftovers within about three to four days.

    Reheat individual servings in the microwave until thoroughly hot.

    You can also place several portions in a covered baking dish and warm them in a 325°F oven.

    Adding a spoonful of milk or extra gravy before reheating can help keep everything creamy.

    Turn Leftovers Into a Breakfast Bowl

    Here is another idea.

    Instead of simply reheating a square of casserole, chop a leftover portion into smaller pieces.

    Warm it in a skillet.

    Put it into a bowl and add:

    • Scrambled eggs
    • Extra shredded cheese
    • Green onions
    • Salsa
    • Hot sauce
    • Avocado
    • Crispy bacon

    Now yesterday’s casserole becomes an entirely different breakfast.

    Make Individual Breakfast Cups

    You can even turn the basic idea into individual servings.

    Grease a muffin pan.

    Place small biscuit pieces into each cup.

    Add a little egg mixture.

    Top with sausage gravy and cheese.

    Bake until the biscuits and eggs are cooked.

    These smaller portions are excellent for brunch buffets and family gatherings because people can simply grab one.

    They are also easier to portion.

    Why Biscuits and Gravy Are Such Great Comfort Food

    There is nothing particularly complicated about biscuits and gravy.

    That is part of their appeal.

    Soft biscuits.

    Savory sausage.

    Creamy peppered gravy.

    Simple ingredients come together to create something incredibly satisfying.

    Adding eggs and cheese turns those familiar flavors into a complete breakfast casserole.

    It feels homemade.

    It feels filling.

    And it is the kind of breakfast that makes you want to sit down and enjoy your meal instead of rushing through it.

    Breakfast of the Day

    Sausage Gravy Breakfast Biscuit Casserole is the kind of breakfast made for mornings when cereal simply isn’t going to do the job.

    It combines fluffy biscuits, seasoned breakfast sausage, creamy peppered gravy, eggs, and melted cheddar cheese in one warm, comforting dish.

    Make the classic version first.

    Then start experimenting.

    Add bacon.

    Make it spicy.

    Try maple sausage.

    Add peppers and onions.

    Switch the cheese.

    Drizzle a little maple syrup over your serving.

    Or pile on some extra sausage gravy.

    Breakfast doesn’t always need to be complicated to be memorable.

    Sometimes you just need a baking dish filled with biscuits, eggs, sausage, gravy, and plenty of melted cheese.

    Would you keep your Sausage Gravy Breakfast Biscuit Casserole classic, or would you add bacon, jalapeños, extra cheese, or maple sausage?

  • Dessert of the Day: Salted Caramel Apple Blondies

    Dessert of the Day: Salted Caramel Apple Blondies

    There are certain desserts that seem made for the moment when summer begins giving way to fall.

    Fresh apples start appearing everywhere. Cinnamon suddenly sounds better than it did a few weeks earlier. Caramel becomes nearly impossible to resist, and warm desserts begin replacing the lighter treats of summer.

    That makes Salted Caramel Apple Blondies a perfect Dessert of the Day.

    These soft, buttery blondies combine tender pieces of apple, brown sugar, cinnamon, vanilla, and rich caramel in one dessert that feels somewhere between an apple pie, a cookie bar, and a caramel cake.

    Then a light sprinkle of flaky sea salt takes everything to another level.

    The salt doesn’t make the dessert taste salty. Instead, it balances the sweetness of the caramel and brown sugar while bringing out the flavor of the apples.

    The result is a dessert that is chewy around the edges, soft in the center, filled with warm apple flavor, and finished with ribbons of caramel.

    Best of all, blondies are much easier to make than many traditional apple desserts.

    There is no pie crust to roll.

    There is no complicated layering.

    You simply prepare the batter, fold in the apples, spread everything into a baking pan, and let the oven do the rest.

    Serve them warm with vanilla ice cream, enjoy them at room temperature with coffee, or pack them up for a fall gathering.

    However you serve them, Salted Caramel Apple Blondies are the kind of dessert that rarely lasts long.

    What Are Blondies?

    Blondies are often described as the vanilla or brown-sugar cousin of brownies.

    Traditional brownies get much of their flavor and color from cocoa or melted chocolate.

    Blondies usually rely on brown sugar, butter, and vanilla instead.

    That creates a dessert with a rich caramel-like flavor even before actual caramel is added.

    A good blondie should have a texture somewhere between a soft cookie and a dense cake.

    You want the center to remain moist and chewy rather than becoming dry and crumbly.

    Brown sugar plays a major role in creating that texture.

    Because brown sugar contains molasses, it contributes moisture as well as a deeper flavor.

    When you combine brown sugar with butter, vanilla, cinnamon, apples, and caramel, you get a dessert that tastes especially comforting.

    Why Apples Work So Well in Blondies

    Apples bring more than flavor to this recipe.

    They also add moisture and texture.

    As the blondies bake, the small apple pieces soften without completely disappearing.

    You still get little bites of apple throughout each square.

    The fruit also helps keep the blondies tender.

    Apple and caramel are already one of the most familiar dessert combinations.

    Think about caramel apples at fairs, apple pie drizzled with caramel, caramel apple cheesecake, or warm apple crisp topped with caramel sauce.

    Putting those same flavors into blondies simply gives them a different form.

    And unlike a whole caramel apple, these are much easier to eat.

    Salted Caramel Makes the Difference

    Regular caramel would already make these blondies delicious.

    Salted caramel makes them even better.

    Sweet desserts often benefit from a little contrast.

    Without that contrast, caramel can sometimes become overwhelmingly sweet.

    A small amount of salt sharpens the caramel flavor and balances the sweetness.

    You don’t need much.

    A light sprinkle of flaky sea salt over the finished blondies is enough.

    You can also use salted caramel sauce instead of regular caramel sauce if you prefer.

    Just be careful not to overdo the salt.

    The goal is balance.

    Ingredients

    For approximately 12 to 16 blondies, you’ll need:

    For the Blondies

    • 1 cup unsalted butter, melted and slightly cooled
    • 1 3/4 cups packed light brown sugar
    • 2 large eggs
    • 2 teaspoons vanilla extract
    • 2 cups all-purpose flour
    • 1 teaspoon ground cinnamon
    • 1/2 teaspoon baking powder
    • 1/2 teaspoon salt
    • 2 medium apples, peeled and diced small
    • 1 tablespoon lemon juice
    • 1/2 cup caramel sauce, plus more for serving
    • Flaky sea salt for finishing

    Optional Additions

    • 1/2 cup chopped pecans
    • 1/2 cup chopped walnuts
    • 1/2 teaspoon apple pie spice
    • Vanilla ice cream for serving
    • Whipped cream
    • Extra cinnamon
    • Powdered sugar

    Choosing the Best Apples

    Not every apple behaves exactly the same when baked.

    For this recipe, you want an apple that holds some shape and has enough tartness to balance the sweet blondie batter.

    Good choices include:

    • Granny Smith
    • Honeycrisp
    • Pink Lady
    • Braeburn
    • Fuji
    • Jonagold

    Granny Smith apples are especially good if you enjoy a stronger sweet-and-tart contrast.

    Honeycrisp provides a sweeter flavor while still maintaining good texture.

    You can also combine two varieties.

    For example, use one Granny Smith apple and one Honeycrisp apple.

    That creates a nice mixture of sweetness and tartness.

    How to Make Salted Caramel Apple Blondies

    Step 1: Prepare the Pan

    Preheat your oven to 350°F.

    Line an 8×8-inch or 9×9-inch baking pan with parchment paper.

    Leave enough parchment hanging over the sides so you can lift the blondies out after they cool.

    Lightly grease the parchment paper.

    This makes slicing much easier later.

    Step 2: Prepare the Apples

    Peel and core the apples.

    Dice them into relatively small pieces.

    You don’t want large chunks because they can make the blondies difficult to cut and may release too much moisture in one area.

    Aim for pieces around 1/4 inch.

    Place the diced apples in a bowl and toss them with the lemon juice.

    The lemon helps prevent browning and adds a subtle brightness that complements the caramel.

    Set the apples aside.

    Step 3: Combine Butter and Brown Sugar

    In a large mixing bowl, combine the melted butter and brown sugar.

    Whisk until smooth.

    The mixture should look thick, glossy, and caramel-colored.

    This butter-and-brown-sugar base is responsible for much of the blondie’s flavor.

    Step 4: Add Eggs and Vanilla

    Add the eggs one at a time.

    Whisk well after each addition.

    Then stir in the vanilla extract.

    At this point, the batter should become smoother and slightly lighter.

    Step 5: Mix the Dry Ingredients

    In another bowl, combine:

    • Flour
    • Cinnamon
    • Baking powder
    • Salt

    Whisk briefly so everything is evenly distributed.

    Step 6: Combine Wet and Dry Ingredients

    Gradually add the dry mixture to the wet ingredients.

    Use a spatula or wooden spoon to stir everything together.

    Stop mixing as soon as you no longer see dry streaks of flour.

    Overmixing can make blondies tougher rather than soft and chewy.

    Step 7: Fold in the Apples

    Add the diced apples.

    Gently fold them through the batter until they are evenly distributed.

    If you are adding chopped pecans or walnuts, fold them in at this stage.

    The batter will be fairly thick.

    That is normal.

    Step 8: Add the Caramel

    Spread about half of the blondie batter into the prepared pan.

    Drizzle approximately half of the caramel sauce over the batter.

    Add the remaining blondie batter.

    Smooth the surface as evenly as possible.

    Drizzle the remaining caramel over the top.

    Use the tip of a knife or a toothpick to gently swirl the caramel into the batter.

    Don’t completely mix it in.

    You want visible ribbons and pockets of caramel.

    Step 9: Bake

    Bake for approximately 30 to 38 minutes.

    The exact baking time will depend on your oven and the size of the pan.

    The edges should look set and lightly golden.

    The center should be cooked but still slightly soft.

    Insert a toothpick near the center.

    A few moist crumbs are fine.

    You do not want completely wet batter, but you also don’t want the toothpick absolutely dry.

    If it comes out totally clean, the blondies may already be slightly overbaked.

    Step 10: Cool

    Allow the blondies to cool in the pan for at least 20 to 30 minutes.

    For the cleanest slices, allow them to cool completely.

    Use the parchment paper to lift the entire batch from the pan.

    Step 11: Finish With Caramel and Salt

    Drizzle additional caramel sauce over the top.

    Sprinkle lightly with flaky sea salt.

    Slice into squares and serve.

    Serve Them Warm With Vanilla Ice Cream

    One of the best ways to serve Salted Caramel Apple Blondies is slightly warm.

    Place one blondie on a plate and add a scoop of vanilla ice cream.

    Drizzle warm caramel sauce over everything.

    The contrast between the warm blondie and cold ice cream is hard to beat.

    As the ice cream begins melting, it mixes with the caramel and apple juices.

    You almost end up with a plated version of caramel apple pie.

    For an extra finishing touch, add:

    • Chopped pecans
    • Cinnamon
    • Whipped cream
    • Caramel drizzle

    This makes a very simple dessert look restaurant-worthy.

    Try Them With Cinnamon Ice Cream

    Vanilla is the obvious choice, but cinnamon ice cream can be even better.

    The cinnamon flavor reinforces the warm spices already inside the blondies.

    Caramel ice cream is another option.

    If you really love caramel, serve a warm blondie with caramel ice cream and a drizzle of salted caramel sauce.

    That is definitely a rich dessert, but sometimes that is exactly what Dessert of the Day should be.

    Add Pecans for Crunch

    Apples and pecans work beautifully together.

    If you enjoy some crunch in your blondies, add about 1/2 cup of chopped pecans.

    Toast them first for even better flavor.

    Spread the pecans on a baking sheet and toast them for approximately 5 to 7 minutes at 350°F.

    Let them cool before folding them into the batter.

    Toasting brings out their nutty flavor and gives them a slightly crisp texture.

    Walnuts work well too.

    Make Them Extra Cinnamon-Spiced

    The standard recipe uses cinnamon, but you can easily increase the fall flavor.

    Add:

    • 1/4 teaspoon nutmeg
    • 1/4 teaspoon ground ginger
    • Pinch of cloves

    Or simply substitute apple pie spice for part of the cinnamon.

    A little spice goes a long way.

    You still want to taste the apple, caramel, butter, and brown sugar.

    Brown the Butter for Even More Flavor

    If you want to take these blondies one step further, brown the butter before making the batter.

    Place the butter in a saucepan over medium heat.

    Cook it while stirring or swirling the pan.

    The butter will melt, foam, and eventually develop golden-brown milk solids at the bottom.

    Once it smells nutty and toasted, remove it from the heat.

    Let it cool slightly before continuing with the recipe.

    Brown butter adds a deep, toasted flavor that works incredibly well with apples and caramel.

    It requires a few extra minutes, but it can make the blondies taste much more complex.

    Turn Them Into Caramel Apple Cheesecake Blondies

    Want an even richer version?

    Add a cheesecake swirl.

    Beat together:

    • 4 ounces softened cream cheese
    • 2 tablespoons sugar
    • 1 egg yolk
    • 1/2 teaspoon vanilla

    Drop spoonfuls of the cheesecake mixture over the blondie batter.

    Add caramel sauce.

    Then swirl everything together lightly before baking.

    Now you have caramel apple cheesecake blondies.

    They are richer and slightly softer than the original version.

    Make a Caramel Apple Blondie Sundae

    For a special dessert night, turn each blondie into a sundae.

    Start with a warm blondie.

    Add a scoop of vanilla ice cream.

    Then top it with:

    • Warm caramel
    • Chopped pecans
    • Whipped cream
    • Cinnamon
    • Apple slices
    • Flaky sea salt

    Finish with a cherry if you want the full sundae treatment.

    This is an especially fun dessert for family dinners or fall parties.

    How to Keep Blondies Soft

    The biggest mistake with blondies is overbaking them.

    Blondies continue cooking slightly as they cool.

    That means you should remove them from the oven when the center still appears just a little soft.

    If you wait until they look completely firm in the oven, they may become dry once cooled.

    Another important factor is measuring the flour correctly.

    Too much flour can make blondies cakey and dry.

    Spoon flour lightly into your measuring cup and level it off.

    Do not pack flour tightly into the cup.

    Should You Peel the Apples?

    You technically do not have to.

    However, I recommend peeling them for this recipe.

    Apple skin can remain slightly chewy even after baking.

    Because blondies have such a soft texture, pieces of skin can feel out of place.

    Peeling the apples produces a smoother overall dessert.

    If you enjoy the texture of apple skin, though, leaving it on will not ruin the recipe.

    How Small Should the Apples Be?

    Small dice is best.

    Large apple pieces release more moisture and make the blondies harder to slice cleanly.

    Small apple pieces distribute more evenly throughout the batter.

    That means almost every bite gets some apple.

    It also prevents any single area from becoming too wet.

    Can You Use Caramel Bits?

    Yes.

    Caramel baking bits are another fun option.

    Fold about 1/2 cup into the batter.

    They will create small caramel pockets inside the blondies.

    You can still drizzle caramel sauce over the top.

    Just remember that caramel bits add extra sweetness, so you may want to use slightly less caramel sauce.

    Storage

    Store leftover blondies in an airtight container.

    At room temperature, they are generally best within about two days.

    Because they contain fresh apples, refrigeration is a good option for longer storage.

    Refrigerated blondies can remain good for several days.

    Let them come back toward room temperature before serving, or microwave an individual square for approximately 10 to 15 seconds.

    That softens the blondie and warms the caramel.

    Can You Freeze Apple Blondies?

    Yes.

    Allow the blondies to cool completely.

    Slice them into individual portions.

    Wrap each piece tightly in plastic wrap, then place them in a freezer-safe container or bag.

    Freeze for up to a few months.

    Thaw them overnight in the refrigerator or at room temperature.

    Warm them briefly before serving if desired.

    I recommend waiting to add the final caramel drizzle and flaky salt until after thawing.

    Perfect for Fall Gatherings

    Salted Caramel Apple Blondies are especially good for:

    • Fall parties
    • Family dinners
    • Potlucks
    • Football gatherings
    • Halloween parties
    • Thanksgiving dessert tables
    • School events
    • Bake sales
    • Weekend baking
    • Coffee with friends

    Because they are bars rather than individual plated desserts, they are easy to transport.

    You can also cut them into smaller squares when feeding a crowd.

    A Great Thanksgiving Alternative

    Apple pie may be traditional, but not everyone wants to make pie crust.

    These blondies deliver many of the same flavors with considerably less effort.

    They also give guests something different from the usual pumpkin pie, pecan pie, and apple pie lineup.

    Cut them into small squares and place them on a dessert tray.

    Serve caramel sauce on the side.

    They can become one of those desserts people unexpectedly keep going back for.

    Make Mini Blondie Bites

    Instead of baking one large pan and cutting full-sized portions, cut the blondies into small bite-sized squares.

    Drizzle each one with caramel.

    Add just a couple grains of flaky sea salt.

    These mini portions work well for parties when guests want to sample several desserts.

    You could even add a tiny swirl of whipped cream to each piece shortly before serving.

    Pair Them With Coffee

    These blondies aren’t only an after-dinner dessert.

    They are also excellent with coffee.

    The rich brown sugar and caramel flavors pair naturally with roasted coffee.

    Try them with:

    • Regular brewed coffee
    • Vanilla coffee
    • Cinnamon coffee
    • Caramel latte
    • Pumpkin spice latte
    • Cappuccino
    • Cold brew

    A small blondie and hot coffee can make a very satisfying afternoon treat.

    Pair Them With Hot Apple Cider

    For the ultimate fall combination, serve Salted Caramel Apple Blondies with hot apple cider.

    Add cinnamon sticks and orange slices to the cider.

    The warm apple and spice flavors complement the blondies perfectly.

    You could even drizzle caramel into the cider for an extra-indulgent version.

    Why This Dessert Works

    This recipe succeeds because it combines several different elements.

    The blondie itself provides a soft, buttery foundation.

    Brown sugar creates moisture and caramel flavor.

    Apples add freshness and slight tartness.

    Cinnamon provides warmth.

    Caramel increases richness.

    Sea salt balances the sweetness.

    Each ingredient has a job.

    Nothing feels unnecessary.

    The result is familiar enough to feel comforting while still being different from a standard apple pie or apple crisp.

    Dessert of the Day

    Salted Caramel Apple Blondies bring together some of the best flavors of the season in one simple dessert.

    You get the buttery chewiness of a blondie.

    You get tender pieces of apple.

    You get warm cinnamon.

    You get sweet caramel running through the batter.

    Then a tiny sprinkle of sea salt keeps everything balanced.

    They are easy enough for an ordinary weekend but impressive enough for a party or holiday dessert table.

    Serve them plain for a quick treat, drizzle them with extra caramel, or turn them into a full dessert with vanilla ice cream and whipped cream.

    However you serve them, make sure you save one for yourself before everyone else discovers the pan.

    Would you eat your Salted Caramel Apple Blondie warm with vanilla ice cream and extra caramel, or enjoy it straight from the pan?