Author: Brett Murphy

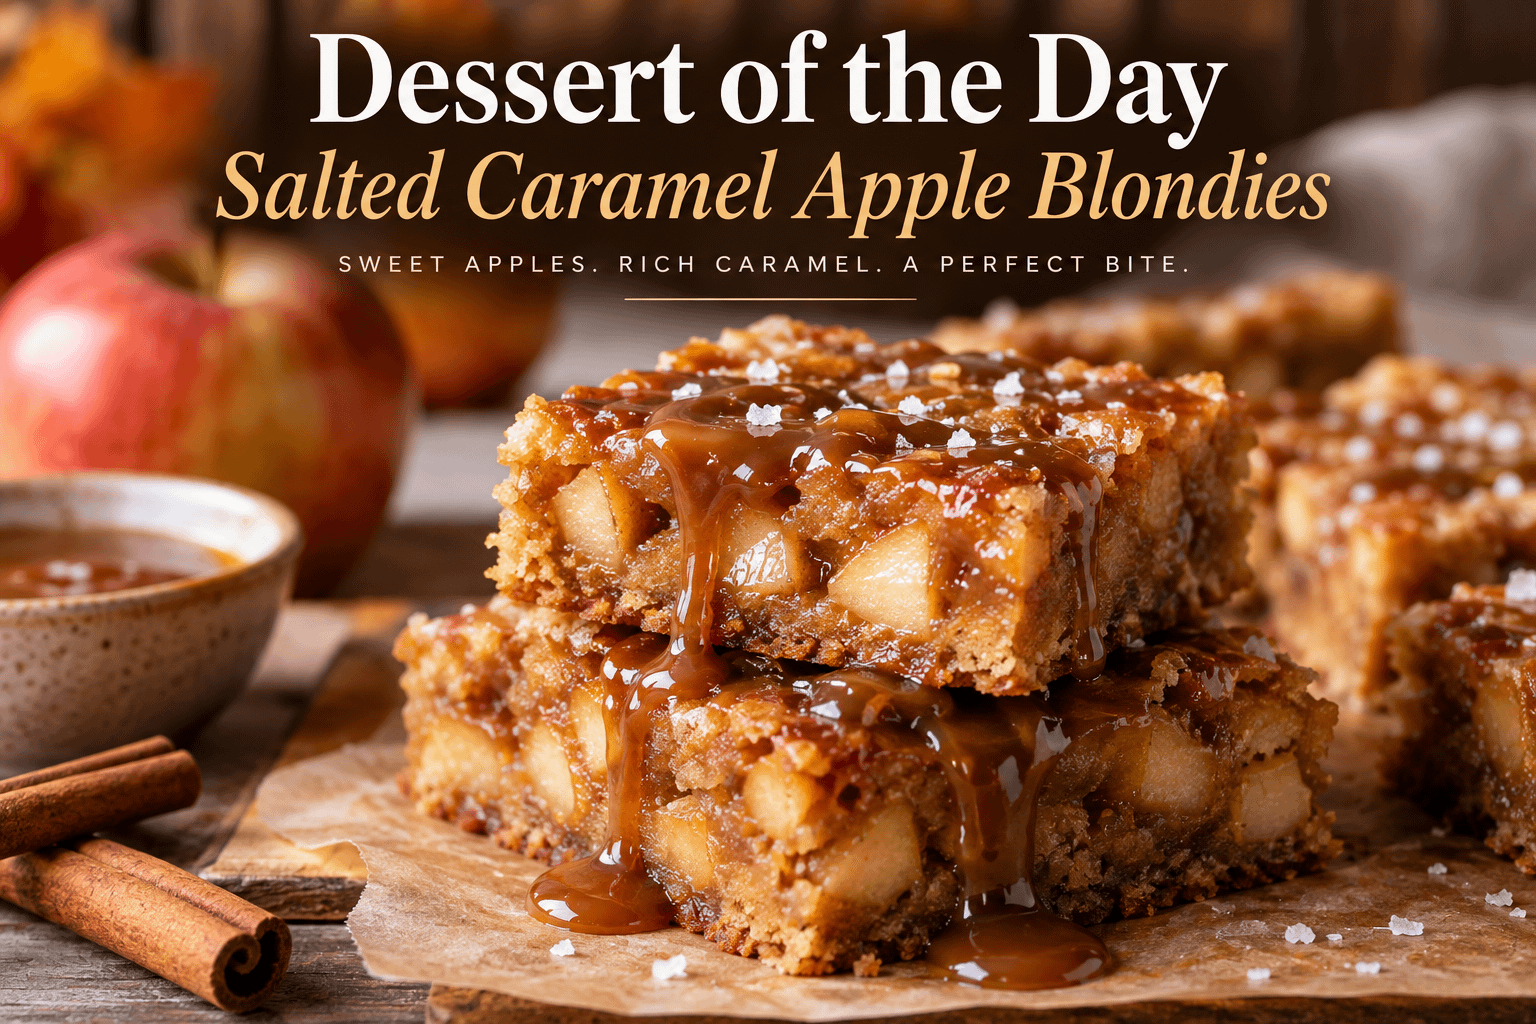
  • Dessert of the Day: Salted Caramel Apple Blondies

    Dessert of the Day: Salted Caramel Apple Blondies

    There are certain desserts that seem made for the moment when summer begins giving way to fall.

    Fresh apples start appearing everywhere. Cinnamon suddenly sounds better than it did a few weeks earlier. Caramel becomes nearly impossible to resist, and warm desserts begin replacing the lighter treats of summer.

    That makes Salted Caramel Apple Blondies a perfect Dessert of the Day.

    These soft, buttery blondies combine tender pieces of apple, brown sugar, cinnamon, vanilla, and rich caramel in one dessert that feels somewhere between an apple pie, a cookie bar, and a caramel cake.

    Then a light sprinkle of flaky sea salt takes everything to another level.

    The salt doesn’t make the dessert taste salty. Instead, it balances the sweetness of the caramel and brown sugar while bringing out the flavor of the apples.

    The result is a dessert that is chewy around the edges, soft in the center, filled with warm apple flavor, and finished with ribbons of caramel.

    Best of all, blondies are much easier to make than many traditional apple desserts.

    There is no pie crust to roll.

    There is no complicated layering.

    You simply prepare the batter, fold in the apples, spread everything into a baking pan, and let the oven do the rest.

    Serve them warm with vanilla ice cream, enjoy them at room temperature with coffee, or pack them up for a fall gathering.

    However you serve them, Salted Caramel Apple Blondies are the kind of dessert that rarely lasts long.

    What Are Blondies?

    Blondies are often described as the vanilla or brown-sugar cousin of brownies.

    Traditional brownies get much of their flavor and color from cocoa or melted chocolate.

    Blondies usually rely on brown sugar, butter, and vanilla instead.

    That creates a dessert with a rich caramel-like flavor even before actual caramel is added.

    A good blondie should have a texture somewhere between a soft cookie and a dense cake.

    You want the center to remain moist and chewy rather than becoming dry and crumbly.

    Brown sugar plays a major role in creating that texture.

    Because brown sugar contains molasses, it contributes moisture as well as a deeper flavor.

    When you combine brown sugar with butter, vanilla, cinnamon, apples, and caramel, you get a dessert that tastes especially comforting.

    Why Apples Work So Well in Blondies

    Apples bring more than flavor to this recipe.

    They also add moisture and texture.

    As the blondies bake, the small apple pieces soften without completely disappearing.

    You still get little bites of apple throughout each square.

    The fruit also helps keep the blondies tender.

    Apple and caramel are already one of the most familiar dessert combinations.

    Think about caramel apples at fairs, apple pie drizzled with caramel, caramel apple cheesecake, or warm apple crisp topped with caramel sauce.

    Putting those same flavors into blondies simply gives them a different form.

    And unlike a whole caramel apple, these are much easier to eat.

    Salted Caramel Makes the Difference

    Regular caramel would already make these blondies delicious.

    Salted caramel makes them even better.

    Sweet desserts often benefit from a little contrast.

    Without that contrast, caramel can sometimes become overwhelmingly sweet.

    A small amount of salt sharpens the caramel flavor and balances the sweetness.

    You don’t need much.

    A light sprinkle of flaky sea salt over the finished blondies is enough.

    You can also use salted caramel sauce instead of regular caramel sauce if you prefer.

    Just be careful not to overdo the salt.

    The goal is balance.

    Ingredients

    For approximately 12 to 16 blondies, you’ll need:

    For the Blondies

    • 1 cup unsalted butter, melted and slightly cooled
    • 1 3/4 cups packed light brown sugar
    • 2 large eggs
    • 2 teaspoons vanilla extract
    • 2 cups all-purpose flour
    • 1 teaspoon ground cinnamon
    • 1/2 teaspoon baking powder
    • 1/2 teaspoon salt
    • 2 medium apples, peeled and diced small
    • 1 tablespoon lemon juice
    • 1/2 cup caramel sauce, plus more for serving
    • Flaky sea salt for finishing

    Optional Additions

    • 1/2 cup chopped pecans
    • 1/2 cup chopped walnuts
    • 1/2 teaspoon apple pie spice
    • Vanilla ice cream for serving
    • Whipped cream
    • Extra cinnamon
    • Powdered sugar

    Choosing the Best Apples

    Not every apple behaves exactly the same when baked.

    For this recipe, you want an apple that holds some shape and has enough tartness to balance the sweet blondie batter.

    Good choices include:

    • Granny Smith
    • Honeycrisp
    • Pink Lady
    • Braeburn
    • Fuji
    • Jonagold

    Granny Smith apples are especially good if you enjoy a stronger sweet-and-tart contrast.

    Honeycrisp provides a sweeter flavor while still maintaining good texture.

    You can also combine two varieties.

    For example, use one Granny Smith apple and one Honeycrisp apple.

    That creates a nice mixture of sweetness and tartness.

    How to Make Salted Caramel Apple Blondies

    Step 1: Prepare the Pan

    Preheat your oven to 350°F.

    Line an 8×8-inch or 9×9-inch baking pan with parchment paper.

    Leave enough parchment hanging over the sides so you can lift the blondies out after they cool.

    Lightly grease the parchment paper.

    This makes slicing much easier later.

    Step 2: Prepare the Apples

    Peel and core the apples.

    Dice them into relatively small pieces.

    You don’t want large chunks because they can make the blondies difficult to cut and may release too much moisture in one area.

    Aim for pieces around 1/4 inch.

    Place the diced apples in a bowl and toss them with the lemon juice.

    The lemon helps prevent browning and adds a subtle brightness that complements the caramel.

    Set the apples aside.

    Step 3: Combine Butter and Brown Sugar

    In a large mixing bowl, combine the melted butter and brown sugar.

    Whisk until smooth.

    The mixture should look thick, glossy, and caramel-colored.

    This butter-and-brown-sugar base is responsible for much of the blondie’s flavor.

    Step 4: Add Eggs and Vanilla

    Add the eggs one at a time.

    Whisk well after each addition.

    Then stir in the vanilla extract.

    At this point, the batter should become smoother and slightly lighter.

    Step 5: Mix the Dry Ingredients

    In another bowl, combine:

    • Flour
    • Cinnamon
    • Baking powder
    • Salt

    Whisk briefly so everything is evenly distributed.

    Step 6: Combine Wet and Dry Ingredients

    Gradually add the dry mixture to the wet ingredients.

    Use a spatula or wooden spoon to stir everything together.

    Stop mixing as soon as you no longer see dry streaks of flour.

    Overmixing can make blondies tougher rather than soft and chewy.

    Step 7: Fold in the Apples

    Add the diced apples.

    Gently fold them through the batter until they are evenly distributed.

    If you are adding chopped pecans or walnuts, fold them in at this stage.

    The batter will be fairly thick.

    That is normal.

    Step 8: Add the Caramel

    Spread about half of the blondie batter into the prepared pan.

    Drizzle approximately half of the caramel sauce over the batter.

    Add the remaining blondie batter.

    Smooth the surface as evenly as possible.

    Drizzle the remaining caramel over the top.

    Use the tip of a knife or a toothpick to gently swirl the caramel into the batter.

    Don’t completely mix it in.

    You want visible ribbons and pockets of caramel.

    Step 9: Bake

    Bake for approximately 30 to 38 minutes.

    The exact baking time will depend on your oven and the size of the pan.

    The edges should look set and lightly golden.

    The center should be cooked but still slightly soft.

    Insert a toothpick near the center.

    A few moist crumbs are fine.

    You do not want completely wet batter, but you also don’t want the toothpick absolutely dry.

    If it comes out totally clean, the blondies may already be slightly overbaked.

    Step 10: Cool

    Allow the blondies to cool in the pan for at least 20 to 30 minutes.

    For the cleanest slices, allow them to cool completely.

    Use the parchment paper to lift the entire batch from the pan.

    Step 11: Finish With Caramel and Salt

    Drizzle additional caramel sauce over the top.

    Sprinkle lightly with flaky sea salt.

    Slice into squares and serve.

    Serve Them Warm With Vanilla Ice Cream

    One of the best ways to serve Salted Caramel Apple Blondies is slightly warm.

    Place one blondie on a plate and add a scoop of vanilla ice cream.

    Drizzle warm caramel sauce over everything.

    The contrast between the warm blondie and cold ice cream is hard to beat.

    As the ice cream begins melting, it mixes with the caramel and apple juices.

    You almost end up with a plated version of caramel apple pie.

    For an extra finishing touch, add:

    • Chopped pecans
    • Cinnamon
    • Whipped cream
    • Caramel drizzle

    This makes a very simple dessert look restaurant-worthy.

    Try Them With Cinnamon Ice Cream

    Vanilla is the obvious choice, but cinnamon ice cream can be even better.

    The cinnamon flavor reinforces the warm spices already inside the blondies.

    Caramel ice cream is another option.

    If you really love caramel, serve a warm blondie with caramel ice cream and a drizzle of salted caramel sauce.

    That is definitely a rich dessert, but sometimes that is exactly what Dessert of the Day should be.

    Add Pecans for Crunch

    Apples and pecans work beautifully together.

    If you enjoy some crunch in your blondies, add about 1/2 cup of chopped pecans.

    Toast them first for even better flavor.

    Spread the pecans on a baking sheet and toast them for approximately 5 to 7 minutes at 350°F.

    Let them cool before folding them into the batter.

    Toasting brings out their nutty flavor and gives them a slightly crisp texture.

    Walnuts work well too.

    Make Them Extra Cinnamon-Spiced

    The standard recipe uses cinnamon, but you can easily increase the fall flavor.

    Add:

    • 1/4 teaspoon nutmeg
    • 1/4 teaspoon ground ginger
    • Pinch of cloves

    Or simply substitute apple pie spice for part of the cinnamon.

    A little spice goes a long way.

    You still want to taste the apple, caramel, butter, and brown sugar.

    Brown the Butter for Even More Flavor

    If you want to take these blondies one step further, brown the butter before making the batter.

    Place the butter in a saucepan over medium heat.

    Cook it while stirring or swirling the pan.

    The butter will melt, foam, and eventually develop golden-brown milk solids at the bottom.

    Once it smells nutty and toasted, remove it from the heat.

    Let it cool slightly before continuing with the recipe.

    Brown butter adds a deep, toasted flavor that works incredibly well with apples and caramel.

    It requires a few extra minutes, but it can make the blondies taste much more complex.

    Turn Them Into Caramel Apple Cheesecake Blondies

    Want an even richer version?

    Add a cheesecake swirl.

    Beat together:

    • 4 ounces softened cream cheese
    • 2 tablespoons sugar
    • 1 egg yolk
    • 1/2 teaspoon vanilla

    Drop spoonfuls of the cheesecake mixture over the blondie batter.

    Add caramel sauce.

    Then swirl everything together lightly before baking.

    Now you have caramel apple cheesecake blondies.

    They are richer and slightly softer than the original version.

    Make a Caramel Apple Blondie Sundae

    For a special dessert night, turn each blondie into a sundae.

    Start with a warm blondie.

    Add a scoop of vanilla ice cream.

    Then top it with:

    • Warm caramel
    • Chopped pecans
    • Whipped cream
    • Cinnamon
    • Apple slices
    • Flaky sea salt

    Finish with a cherry if you want the full sundae treatment.

    This is an especially fun dessert for family dinners or fall parties.

    How to Keep Blondies Soft

    The biggest mistake with blondies is overbaking them.

    Blondies continue cooking slightly as they cool.

    That means you should remove them from the oven when the center still appears just a little soft.

    If you wait until they look completely firm in the oven, they may become dry once cooled.

    Another important factor is measuring the flour correctly.

    Too much flour can make blondies cakey and dry.

    Spoon flour lightly into your measuring cup and level it off.

    Do not pack flour tightly into the cup.

    Should You Peel the Apples?

    You technically do not have to.

    However, I recommend peeling them for this recipe.

    Apple skin can remain slightly chewy even after baking.

    Because blondies have such a soft texture, pieces of skin can feel out of place.

    Peeling the apples produces a smoother overall dessert.

    If you enjoy the texture of apple skin, though, leaving it on will not ruin the recipe.

    How Small Should the Apples Be?

    Small dice is best.

    Large apple pieces release more moisture and make the blondies harder to slice cleanly.

    Small apple pieces distribute more evenly throughout the batter.

    That means almost every bite gets some apple.

    It also prevents any single area from becoming too wet.

    Can You Use Caramel Bits?

    Yes.

    Caramel baking bits are another fun option.

    Fold about 1/2 cup into the batter.

    They will create small caramel pockets inside the blondies.

    You can still drizzle caramel sauce over the top.

    Just remember that caramel bits add extra sweetness, so you may want to use slightly less caramel sauce.

    Storage

    Store leftover blondies in an airtight container.

    At room temperature, they are generally best within about two days.

    Because they contain fresh apples, refrigeration is a good option for longer storage.

    Refrigerated blondies can remain good for several days.

    Let them come back toward room temperature before serving, or microwave an individual square for approximately 10 to 15 seconds.

    That softens the blondie and warms the caramel.

    Can You Freeze Apple Blondies?

    Yes.

    Allow the blondies to cool completely.

    Slice them into individual portions.

    Wrap each piece tightly in plastic wrap, then place them in a freezer-safe container or bag.

    Freeze for up to a few months.

    Thaw them overnight in the refrigerator or at room temperature.

    Warm them briefly before serving if desired.

    I recommend waiting to add the final caramel drizzle and flaky salt until after thawing.

    Perfect for Fall Gatherings

    Salted Caramel Apple Blondies are especially good for:

    • Fall parties
    • Family dinners
    • Potlucks
    • Football gatherings
    • Halloween parties
    • Thanksgiving dessert tables
    • School events
    • Bake sales
    • Weekend baking
    • Coffee with friends

    Because they are bars rather than individual plated desserts, they are easy to transport.

    You can also cut them into smaller squares when feeding a crowd.

    A Great Thanksgiving Alternative

    Apple pie may be traditional, but not everyone wants to make pie crust.

    These blondies deliver many of the same flavors with considerably less effort.

    They also give guests something different from the usual pumpkin pie, pecan pie, and apple pie lineup.

    Cut them into small squares and place them on a dessert tray.

    Serve caramel sauce on the side.

    They can become one of those desserts people unexpectedly keep going back for.

    Make Mini Blondie Bites

    Instead of baking one large pan and cutting full-sized portions, cut the blondies into small bite-sized squares.

    Drizzle each one with caramel.

    Add just a couple grains of flaky sea salt.

    These mini portions work well for parties when guests want to sample several desserts.

    You could even add a tiny swirl of whipped cream to each piece shortly before serving.

    Pair Them With Coffee

    These blondies aren’t only an after-dinner dessert.

    They are also excellent with coffee.

    The rich brown sugar and caramel flavors pair naturally with roasted coffee.

    Try them with:

    • Regular brewed coffee
    • Vanilla coffee
    • Cinnamon coffee
    • Caramel latte
    • Pumpkin spice latte
    • Cappuccino
    • Cold brew

    A small blondie and hot coffee can make a very satisfying afternoon treat.

    Pair Them With Hot Apple Cider

    For the ultimate fall combination, serve Salted Caramel Apple Blondies with hot apple cider.

    Add cinnamon sticks and orange slices to the cider.

    The warm apple and spice flavors complement the blondies perfectly.

    You could even drizzle caramel into the cider for an extra-indulgent version.

    Why This Dessert Works

    This recipe succeeds because it combines several different elements.

    The blondie itself provides a soft, buttery foundation.

    Brown sugar creates moisture and caramel flavor.

    Apples add freshness and slight tartness.

    Cinnamon provides warmth.

    Caramel increases richness.

    Sea salt balances the sweetness.

    Each ingredient has a job.

    Nothing feels unnecessary.

    The result is familiar enough to feel comforting while still being different from a standard apple pie or apple crisp.

    Dessert of the Day

    Salted Caramel Apple Blondies bring together some of the best flavors of the season in one simple dessert.

    You get the buttery chewiness of a blondie.

    You get tender pieces of apple.

    You get warm cinnamon.

    You get sweet caramel running through the batter.

    Then a tiny sprinkle of sea salt keeps everything balanced.

    They are easy enough for an ordinary weekend but impressive enough for a party or holiday dessert table.

    Serve them plain for a quick treat, drizzle them with extra caramel, or turn them into a full dessert with vanilla ice cream and whipped cream.

    However you serve them, make sure you save one for yourself before everyone else discovers the pan.

    Would you eat your Salted Caramel Apple Blondie warm with vanilla ice cream and extra caramel, or enjoy it straight from the pan?

  • Healthy Recipe of the Day: Lemon Garlic Turkey Zucchini Meatballs

    Healthy Recipe of the Day: Lemon Garlic Turkey Zucchini Meatballs

    Eating healthier doesn’t mean giving up the foods that are comforting, satisfying, and full of flavor. Sometimes it simply means taking familiar ingredients and preparing them in a way that gives you plenty of protein, vegetables, and fresh flavor without making dinner complicated.

    Today’s Healthy Recipe of the Day: Lemon Garlic Turkey Zucchini Meatballs is exactly that kind of meal.

    These tender turkey meatballs combine lean ground turkey with shredded zucchini, garlic, herbs, lemon, and Parmesan cheese. The zucchini helps keep the meatballs moist while adding a vegetable right into the main dish, and the lemon and garlic give every bite a bright, savory flavor.

    They’re baked rather than fried, which keeps preparation simple and cuts down on the amount of added oil needed.

    Serve them with roasted vegetables, brown rice, quinoa, a crisp salad, or whole-grain pasta for a complete meal.

    Best of all, these meatballs are excellent for meal prep. Make a batch at the beginning of the week and you’ll have an easy protein option ready for lunches and dinners.

    Why You’ll Love These Turkey Zucchini Meatballs

    Healthy meals are much easier to stick with when you actually look forward to eating them.

    These meatballs have plenty going for them.

    They’re:

    • High in protein
    • Made with lean ground turkey
    • Packed with zucchini
    • Baked instead of fried
    • Easy to prepare
    • Family-friendly
    • Great for meal prep
    • Freezer-friendly
    • Easy to customize
    • Delicious with several different side dishes

    They also prove that vegetables don’t always have to be served separately.

    Adding shredded zucchini directly to the turkey mixture gives the meatballs additional moisture while helping you work more vegetables into your meal.

    Ingredients

    For the Turkey Zucchini Meatballs

    • 1 pound lean ground turkey
    • 1 medium zucchini, finely grated
    • 2 cloves garlic, minced
    • 1 large egg
    • 1/3 cup whole-wheat breadcrumbs
    • 1/4 cup grated Parmesan cheese
    • 2 tablespoons finely chopped fresh parsley
    • 1 teaspoon dried oregano
    • 1 teaspoon onion powder
    • 1/2 teaspoon garlic powder
    • 1/2 teaspoon salt
    • 1/4 teaspoon black pepper
    • Zest of 1 lemon
    • 1 tablespoon fresh lemon juice
    • 1 tablespoon olive oil

    Optional Lemon Yogurt Sauce

    • 1/2 cup plain Greek yogurt
    • 1 tablespoon fresh lemon juice
    • 1 teaspoon lemon zest
    • 1 small garlic clove, finely minced
    • 1 tablespoon chopped parsley or dill
    • Pinch of salt
    • Black pepper to taste

    Preparing the Zucchini

    The zucchini is one of the ingredients that makes these meatballs special, but preparing it correctly matters.

    Start by washing the zucchini and trimming off the ends.

    Using a box grater, finely grate the zucchini.

    Place the shredded zucchini in a clean kitchen towel or several layers of paper towels. Gather everything together and gently squeeze out as much excess moisture as possible.

    Zucchini contains a surprising amount of water.

    If all of that liquid goes directly into your meatball mixture, the mixture can become too wet and difficult to shape.

    You don’t need to remove every drop of moisture. The goal is simply to remove the excess.

    Once squeezed, set the zucchini aside.

    How to Make Lemon Garlic Turkey Zucchini Meatballs

    Step 1: Preheat the Oven

    Preheat your oven to 400°F.

    Line a large baking sheet with parchment paper or lightly coat it with cooking spray.

    Using parchment makes cleanup especially easy.

    Step 2: Make the Meatball Mixture

    Place the ground turkey in a large mixing bowl.

    Add the prepared zucchini, minced garlic, egg, breadcrumbs, Parmesan, parsley, oregano, onion powder, garlic powder, salt, black pepper, lemon zest, lemon juice, and olive oil.

    Gently combine everything with clean hands or a large spoon.

    Avoid aggressively mixing or squeezing the meat.

    Overworking ground turkey can produce meatballs that are dense rather than tender.

    Mix just until everything is evenly distributed.

    Step 3: Shape the Meatballs

    Scoop approximately 1 1/2 tablespoons of the turkey mixture and gently roll it between your hands.

    Place the meatball on the prepared baking sheet.

    Continue until all the mixture has been used.

    Depending on their size, you should end up with approximately 16–20 meatballs.

    Try to keep them reasonably similar in size so they cook evenly.

    Step 4: Bake

    Bake for approximately 18–22 minutes, or until the meatballs are cooked through.

    Ground turkey should reach an internal temperature of 165°F in the center.

    Cooking time can vary depending on the exact size of your meatballs and your oven, so checking with a food thermometer is the most reliable method.

    Step 5: Add Fresh Lemon

    When the meatballs come out of the oven, squeeze a little additional fresh lemon juice over the top if desired.

    Sprinkle with chopped parsley.

    That final burst of lemon adds freshness and helps bring together the garlic, herbs, turkey, and zucchini.

    Make the Lemon Greek Yogurt Sauce

    While the meatballs are baking, prepare the optional sauce.

    In a small bowl, combine:

    Greek yogurt, lemon juice, lemon zest, minced garlic, parsley or dill, salt, and black pepper.

    Stir until smooth.

    Taste and adjust the lemon or seasonings as desired.

    Refrigerate until you’re ready to serve.

    This simple sauce provides a creamy contrast without needing a heavy cream-based sauce.

    You can drizzle it over the meatballs or serve it on the side for dipping.

    Why Turkey Works So Well

    Ground turkey is an incredibly versatile ingredient.

    Its mild flavor means it absorbs seasonings very well.

    Garlic, lemon, oregano, parsley, Parmesan, and black pepper all stand out rather than being overwhelmed by the meat.

    Turkey is also a convenient source of protein.

    The key when cooking lean turkey is preventing it from drying out.

    That’s where the zucchini becomes especially helpful.

    The combination of zucchini, egg, Parmesan, olive oil, and lemon juice helps produce a tender meatball while still keeping the recipe relatively light.

    Don’t Skip the Lemon Zest

    It might be tempting to use only lemon juice, but lemon zest adds something different.

    The outer yellow portion of the lemon peel contains fragrant oils that provide intense citrus flavor without adding additional liquid.

    Before cutting your lemon, zest the yellow exterior.

    Avoid grating deeply into the white portion underneath because it can taste bitter.

    Combining zest and juice gives the meatballs a much stronger fresh-lemon character.

    A Delicious Way to Eat More Vegetables

    One reason this recipe works so well is that the zucchini becomes part of the meatball rather than simply sitting beside it.

    This can be especially useful for families trying to include more vegetables in their meals.

    The zucchini doesn’t overpower the turkey.

    Instead, it blends into the mixture and helps create a tender texture.

    You could even experiment with other finely shredded vegetables.

    Finely grated carrot can add a subtle sweetness.

    Chopped spinach can add another green vegetable.

    Very finely diced bell peppers can provide additional flavor.

    Recipes like this are excellent foundations for experimentation.

    What to Serve With Turkey Zucchini Meatballs

    These meatballs can become part of several completely different meals.

    Quinoa Bowl

    Add cooked quinoa to a bowl and top with:

    • Turkey zucchini meatballs
    • Cucumber
    • Tomatoes
    • Spinach
    • Red onion
    • Lemon yogurt sauce

    Finish with fresh parsley and a squeeze of lemon.

    Brown Rice Bowl

    Serve the meatballs over brown rice with roasted broccoli, zucchini, bell peppers, or asparagus.

    Add the yogurt sauce or simply drizzle everything with fresh lemon.

    Mediterranean-Style Salad

    Make a large salad with:

    • Romaine lettuce
    • Cucumber
    • Tomatoes
    • Red onion
    • Bell peppers
    • A small amount of feta cheese
    • Turkey zucchini meatballs

    Finish with lemon juice, olive oil, and herbs.

    Whole-Grain Pasta

    Turkey meatballs don’t always need tomato sauce.

    Toss whole-grain pasta with olive oil, garlic, spinach, lemon juice, black pepper, and a small amount of Parmesan.

    Add the meatballs on top.

    You have a light but satisfying pasta dinner.

    Roasted Vegetable Plate

    Keep things especially simple by serving the meatballs with a large portion of roasted vegetables.

    Try:

    • Broccoli
    • Cauliflower
    • Brussels sprouts
    • Carrots
    • Green beans
    • Asparagus
    • Bell peppers
    • Zucchini

    Season your vegetables with herbs, garlic, pepper, and a small amount of olive oil before roasting.

    Turn Them Into a Healthy Wrap

    Another easy way to serve these meatballs is inside a whole-wheat pita or wrap.

    Cut several meatballs in half and add:

    • Lettuce
    • Tomato
    • Cucumber
    • Red onion
    • Spinach
    • Lemon yogurt sauce

    Roll everything together.

    This is an especially convenient way to use leftover meatballs for lunch the following day.

    Meal Prep Made Easy

    One of the biggest challenges with healthier eating isn’t knowing what foods to eat.

    It’s having something ready when you’re hungry.

    That’s why meal preparation can be so helpful.

    Make a full batch of these meatballs and portion them into containers with different sides.

    For example:

    Meal One: Turkey meatballs, brown rice, and broccoli.

    Meal Two: Turkey meatballs, quinoa, cucumber, tomato, and spinach.

    Meal Three: Turkey meatballs with roasted vegetables.

    Meal Four: Turkey meatball whole-wheat wrap.

    Using the same main ingredient in different ways keeps meal prep from feeling repetitive.

    How to Store Leftovers

    Allow leftover meatballs to cool before transferring them to an airtight container.

    Store them in the refrigerator and use them within about 3–4 days.

    Keep the yogurt sauce in a separate container.

    When reheating the meatballs, warm only the portion you’re planning to eat.

    They can be reheated in the microwave, oven, or air fryer.

    Freezing the Meatballs

    These are also great freezer meatballs.

    Once cooked, allow them to cool completely.

    Arrange them on a baking sheet and freeze until firm.

    Then transfer them into a freezer-safe container or freezer bag.

    Freezing them individually first helps prevent them from sticking together.

    You can then remove only the number you need.

    Label the container with the date so you know when they were prepared.

    Air Fryer Option

    If you prefer using an air fryer, these meatballs work there too.

    Arrange the meatballs in a single layer with enough space for air to circulate around them.

    Because air fryers vary considerably, check them frequently and cook until the centers reach 165°F.

    You may need to cook them in batches depending on the size of your air fryer.

    Add a Little Heat

    If you enjoy spicy food, this recipe is easy to adjust.

    Add:

    • Crushed red pepper flakes
    • Cayenne pepper
    • Finely chopped jalapeño
    • Hot paprika

    You can also add a small amount of hot sauce to the yogurt dipping sauce.

    The heat works particularly well against the fresh lemon flavor.

    Make Them More Mediterranean

    The base recipe already has Mediterranean-inspired flavors, but you can take that idea further.

    Add chopped fresh dill, parsley, oregano, and a small amount of crumbled feta directly into the meatball mixture.

    Serve with cucumber, tomato, olives, greens, and the lemon yogurt sauce.

    You’ll have an easy Mediterranean-inspired meal that tastes completely different from traditional spaghetti and meatballs.

    Tips for the Best Turkey Meatballs

    Don’t Overmix

    Mix only until the ingredients are combined.

    Remove Excess Zucchini Water

    This prevents the mixture from becoming overly wet.

    Keep the Meatballs Similar in Size

    Uniform meatballs cook more evenly.

    Use a Food Thermometer

    Ground turkey needs to reach 165°F internally.

    Don’t Overcook Them

    Once they’re safely cooked through, remove them from the oven.

    Use Fresh Lemon

    Fresh lemon juice and zest provide much better flavor than bottled juice for this particular recipe.

    Add Fresh Herbs at the End

    A little parsley or dill sprinkled over the finished dish makes everything taste fresher.

    Easy Ingredient Swaps

    Don’t have every ingredient?

    That’s okay.

    You can easily adapt the recipe.

    Instead of whole-wheat breadcrumbs, use regular breadcrumbs or panko.

    Instead of parsley, try dill, cilantro, or basil.

    Instead of Parmesan, try a small amount of feta.

    Instead of ground turkey, lean ground chicken can work.

    Instead of zucchini, experiment with finely grated carrots or chopped spinach.

    Healthy cooking becomes much easier when you learn how to adjust recipes based on what you already have.

    Build a Balanced Plate

    Rather than focusing only on making one ingredient “healthy,” think about the entire plate.

    Start with the turkey zucchini meatballs as your protein.

    Then add plenty of vegetables.

    Include a sensible portion of a whole-grain or other carbohydrate source such as quinoa, brown rice, potatoes, beans, or whole-grain pasta.

    Finish with fresh herbs, lemon, or yogurt sauce for flavor.

    This creates a meal that is colorful, satisfying, and much more interesting than the stereotypical plain chicken-and-broccoli diet plate.

    Healthy Food Should Still Taste Good

    One of the reasons people sometimes abandon healthier eating habits is that they make their meals too restrictive.

    Everything becomes plain.

    Plain chicken.

    Plain vegetables.

    Plain rice.

    Eventually, you’re craving something with actual flavor.

    Healthy cooking doesn’t have to work that way.

    Garlic adds flavor.

    Lemon adds brightness.

    Fresh herbs add freshness.

    Black pepper adds warmth.

    Parmesan adds savory richness.

    Red pepper flakes add heat.

    Vegetables add texture and color.

    You can create flavorful meals while still being thoughtful about the ingredients and portions you’re choosing.

    Make Healthy Eating Convenient

    Convenience matters.

    When you’re tired after a long day, you’re probably not going to want to spend an hour preparing dinner.

    That’s another reason recipes like these meatballs are useful.

    Prepare them ahead of time.

    Cook some rice or quinoa.

    Wash and chop vegetables.

    Make the yogurt sauce.

    Suddenly, putting together dinner takes only a few minutes.

    Healthy choices become much easier when the ingredients are already waiting for you.

    Healthy Recipe of the Day

    Today’s Lemon Garlic Turkey Zucchini Meatballs are proof that a healthier dinner doesn’t need to be boring or complicated.

    You get lean turkey, zucchini, garlic, lemon, herbs, and Parmesan packed into tender baked meatballs that can be served in countless ways.

    Put them over quinoa.

    Add them to a salad.

    Serve them with roasted vegetables.

    Stuff them into a whole-wheat pita.

    Pair them with brown rice.

    Or simply grab a few from the refrigerator when you need an easy protein-packed lunch.

    Sometimes the best healthy recipes aren’t the ones requiring unusual ingredients or complicated cooking techniques.

    They’re the recipes that are simple enough to make again.

    Because ultimately, healthier eating isn’t about creating one perfect meal.

    It’s about finding delicious meals you genuinely enjoy enough to keep making.

    Would you serve these Lemon Garlic Turkey Zucchini Meatballs with quinoa, roasted vegetables, a Mediterranean salad, or inside a whole-wheat pita?

  • Recipe of the Day: Creamy Garlic Parmesan Chicken and Potatoes

    Recipe of the Day: Creamy Garlic Parmesan Chicken and Potatoes

    There are some nights when you want a homemade dinner that feels comforting, filling, and full of flavor without spending hours in the kitchen. Creamy Garlic Parmesan Chicken and Potatoes is exactly that kind of meal.

    Tender, seasoned chicken is paired with golden potatoes and covered in a rich garlic Parmesan cream sauce. Everything comes together in one skillet, creating a satisfying dinner that’s perfect for busy weeknights, relaxed weekends, or whenever you’re craving some serious comfort food.

    The combination of garlic, Parmesan cheese, cream, chicken, and potatoes delivers plenty of flavor while keeping the ingredients familiar and easy to find.

    Why You’ll Love This Recipe

    One of the best things about Creamy Garlic Parmesan Chicken and Potatoes is how much flavor you can create with relatively simple ingredients.

    The chicken provides the hearty centerpiece, while the potatoes soak up the creamy garlic sauce as they cook. Parmesan brings a salty, nutty richness that ties everything together.

    There are several reasons this recipe deserves a place in your dinner rotation:

    • It’s hearty enough to serve as a complete meal.
    • Most ingredients are everyday grocery-store staples.
    • Everything can be prepared primarily in one skillet.
    • It’s easy to customize.
    • The creamy Parmesan sauce is packed with flavor.
    • Leftovers make an excellent lunch the following day.

    Best of all, this is the type of meal that looks and tastes impressive without requiring complicated cooking techniques.

    Ingredients

    For the Chicken

    • 4 boneless, skinless chicken breasts
    • 1 teaspoon garlic powder
    • 1 teaspoon onion powder
    • 1 teaspoon Italian seasoning
    • ½ teaspoon smoked paprika
    • ½ teaspoon salt
    • ¼ teaspoon black pepper
    • 2 tablespoons olive oil

    For the Potatoes

    • 1½ pounds baby potatoes, halved
    • 1 tablespoon olive oil
    • ½ teaspoon garlic powder
    • ½ teaspoon Italian seasoning
    • Salt and black pepper to taste

    For the Creamy Garlic Parmesan Sauce

    • 3 tablespoons butter
    • 5 cloves garlic, minced
    • 1 cup chicken broth
    • 1 cup heavy cream
    • 1 cup freshly grated Parmesan cheese
    • ½ teaspoon Italian seasoning
    • ¼ teaspoon red pepper flakes, optional
    • Salt and black pepper to taste
    • 2 tablespoons chopped fresh parsley

    Step 1: Prepare the Chicken

    Pat the chicken breasts dry with paper towels.

    If your chicken breasts are especially thick, gently pound them until they’re relatively even in thickness. This helps them cook more evenly.

    Season both sides with garlic powder, onion powder, Italian seasoning, smoked paprika, salt, and black pepper.

    Don’t be afraid to season generously. The seasoning on the chicken creates the first layer of flavor in the finished dish.

    Step 2: Brown the Chicken

    Heat 2 tablespoons of olive oil in a large skillet over medium-high heat.

    Once the skillet is hot, add the seasoned chicken.

    Cook for approximately 4 to 5 minutes on each side, or until the outside develops a beautiful golden-brown crust.

    The chicken doesn’t necessarily need to be completely cooked through at this point because it will finish cooking later in the sauce.

    Transfer the chicken to a plate and set it aside.

    Step 3: Cook the Potatoes

    Reduce the heat slightly and add another tablespoon of olive oil if necessary.

    Place the halved baby potatoes into the skillet with the cut sides facing downward whenever possible.

    Season with garlic powder, Italian seasoning, salt, and pepper.

    Cook for approximately 8 to 10 minutes, turning occasionally, until the potatoes begin developing a golden crust.

    If they’re browning too quickly before becoming tender, add a small splash of chicken broth and cover the skillet for several minutes.

    Once the potatoes are nearly fork-tender, remove them temporarily from the skillet.

    Step 4: Make the Garlic Sauce

    This is where the recipe really comes together.

    Lower the heat to medium.

    Add the butter to the same skillet.

    Once melted, add the minced garlic and cook for approximately 30 to 60 seconds.

    You want the garlic fragrant but not browned. Burnt garlic can quickly become bitter.

    Pour in the chicken broth and use a wooden spoon to gently scrape the browned pieces from the bottom of the skillet.

    Those little browned bits contain tremendous flavor.

    Allow the broth to simmer for approximately 2 minutes.

    Step 5: Make It Creamy

    Pour the heavy cream into the skillet and stir.

    Reduce the heat to medium-low and allow the mixture to gently simmer.

    Gradually add the Parmesan cheese while stirring constantly.

    Continue stirring until the cheese has melted and the sauce becomes smooth and creamy.

    Add Italian seasoning and optional red pepper flakes.

    Taste the sauce before adding additional salt because Parmesan cheese already contains quite a bit of salt.

    Season with black pepper and additional salt if needed.

    Step 6: Bring Everything Together

    Return the potatoes to the skillet and gently toss them in the garlic Parmesan sauce.

    Nestle the chicken breasts among the potatoes.

    Spoon some of the sauce over each piece of chicken.

    Cover the skillet and allow everything to simmer over low heat until the chicken is completely cooked and the potatoes are tender.

    The chicken should reach an internal temperature of 165°F at its thickest point.

    Depending on the thickness of your chicken breasts, this should take approximately 5 to 10 additional minutes.

    Step 7: Finish and Serve

    Remove the skillet from the heat.

    Sprinkle freshly chopped parsley over the chicken and potatoes.

    For an extra burst of Parmesan flavor, grate a little additional cheese over the top just before serving.

    Spoon plenty of that creamy garlic sauce over each serving.

    Serve immediately while everything is hot.

    What Makes the Sauce So Good?

    The sauce may be the best part of this entire recipe.

    Garlic begins the flavor foundation, while chicken broth picks up all those delicious browned pieces left behind from cooking the chicken.

    Heavy cream creates richness.

    Then Parmesan cheese transforms the mixture into a thick, savory sauce that clings beautifully to the chicken and potatoes.

    The key is allowing the sauce to simmer gently rather than aggressively boiling it.

    High heat can sometimes cause cream-based sauces to separate.

    Low and slow is the way to go once the cream and cheese have been added.

    Choosing the Best Potatoes

    Baby gold or yellow potatoes are excellent for this recipe because they develop crispy edges while maintaining a creamy interior.

    Baby red potatoes are another great choice.

    If you don’t have baby potatoes, Yukon Gold potatoes work beautifully. Simply cut them into bite-sized pieces before cooking.

    Try to keep your potato pieces approximately the same size so they finish cooking at roughly the same time.

    Chicken Thigh Variation

    Chicken breasts aren’t your only option.

    Boneless, skinless chicken thighs work exceptionally well with creamy sauces because they remain juicy and tender.

    Season and brown the thighs exactly as you would the chicken breasts.

    Cooking time may vary slightly depending on their thickness.

    Always rely on internal temperature rather than cooking time alone when determining whether chicken is done.

    Add Some Vegetables

    Want to turn this into an even more complete one-pan meal?

    Add vegetables.

    Broccoli florets are an excellent choice and pair naturally with garlic and Parmesan.

    You could also try:

    • Fresh spinach
    • Mushrooms
    • Green beans
    • Asparagus
    • Peas
    • Bell peppers
    • Chopped kale

    Fresh spinach is especially easy. Simply stir a couple of handfuls into the sauce during the final few minutes of cooking.

    The spinach will wilt quickly without adding much additional preparation time.

    Make It Spicy

    The optional red pepper flakes provide a gentle background heat.

    If you prefer something spicier, increase the red pepper flakes or add a small amount of cayenne pepper to the chicken seasoning.

    You could also drizzle a little hot sauce over the finished dish.

    Just remember that the goal is to complement the creamy Parmesan flavor rather than completely overpower it.

    What to Serve With Creamy Garlic Parmesan Chicken and Potatoes

    Because the recipe already includes chicken and potatoes, you don’t necessarily need many additional sides.

    A simple vegetable works perfectly.

    Try serving it with:

    Roasted Broccoli: The slightly crispy broccoli provides a nice contrast to the creamy sauce.

    Green Beans: Garlic green beans complement the flavors beautifully.

    Side Salad: A crisp salad with vinaigrette helps balance the richness of the meal.

    Roasted Asparagus: Simple, flavorful, and easy.

    Garlic Bread: If you’re embracing comfort food completely, use garlic bread to soak up every last drop of Parmesan sauce.

    Don’t Waste That Sauce

    Seriously.

    The sauce is one of those things you’ll probably find yourself scraping from the skillet.

    Serve the meal with warm crusty bread, dinner rolls, or garlic bread and use them to soak up whatever remains on the plate.

    You can also make a little additional sauce by increasing the cream, broth, and Parmesan while keeping approximately the same proportions.

    How to Store Leftovers

    Allow leftovers to cool before transferring them into an airtight container.

    Store them in the refrigerator for up to 3 to 4 days.

    Because this recipe contains a cream sauce, reheating it gently produces the best results.

    Place leftovers in a skillet over low heat and add a splash of chicken broth, milk, or cream.

    Cover and heat until warmed through.

    You can also microwave individual servings, but use shorter intervals and stir the sauce whenever possible.

    Meal Prep Tip

    If you know you’ll be busy later in the week, do some of the preparation ahead of time.

    Cut the potatoes and store them appropriately in the refrigerator.

    Mix your chicken seasonings together.

    Grate the Parmesan.

    Chop the parsley.

    Having everything ready can significantly reduce the amount of work required at dinner time.

    Tips for the Best Creamy Garlic Parmesan Chicken

    Use freshly grated Parmesan.

    Pre-shredded Parmesan can contain anti-caking ingredients that sometimes prevent it from melting as smoothly.

    Don’t burn the garlic.

    Garlic cooks quickly. About 30 to 60 seconds is usually enough before adding liquid.

    Don’t boil the cream sauce.

    A gentle simmer creates a smoother consistency.

    Cut potatoes evenly.

    Similar-sized potatoes cook more consistently.

    Don’t overcook the chicken.

    Use a meat thermometer and remove the skillet from the heat once the chicken reaches a safe internal temperature.

    Taste before adding salt.

    Chicken broth and Parmesan can both contribute plenty of saltiness.

    Easy Recipe Variations

    Once you’ve made this recipe once, there are plenty of ways to make it your own.

    Bacon Garlic Parmesan Chicken

    Cook several strips of bacon first. Crumble them and sprinkle the bacon over the finished dish.

    Mushroom Parmesan Chicken

    Sauté sliced mushrooms after browning the chicken and add them back when you return the potatoes to the skillet.

    Spinach Garlic Parmesan Chicken

    Stir several handfuls of baby spinach into the finished sauce until wilted.

    Sun-Dried Tomato Version

    Add chopped sun-dried tomatoes to the sauce for a slightly tangy Mediterranean-inspired flavor.

    Extra Cheesy Version

    Add shredded mozzarella during the final few minutes, cover the skillet, and allow it to melt.

    Why One-Skillet Dinners Are Worth Keeping Around

    One-skillet recipes are incredibly useful when you want homemade food without creating a sink full of dishes.

    They’re also great for building flavor.

    Instead of cooking each ingredient separately and losing all those browned bits, you’re layering flavors in the same pan.

    The chicken seasons the skillet.

    The potatoes absorb some of those flavors.

    The broth loosens everything from the bottom.

    Finally, the garlic, cream, and Parmesan bring all those flavors together.

    The result tastes like something that required considerably more effort than it actually did.

    Comfort Food Doesn’t Have to Be Complicated

    Some of the most satisfying meals aren’t built around unusual ingredients or complicated techniques.

    They’re simply combinations that work.

    Chicken.

    Potatoes.

    Garlic.

    Butter.

    Cream.

    Parmesan.

    Put those ingredients together correctly and you have a warm, filling meal that’s difficult to resist.

    Creamy Garlic Parmesan Chicken and Potatoes is the kind of recipe you can serve on an ordinary Tuesday night and still feel like you’ve made something special.

    It’s rich without being overly complicated, versatile enough to customize, and hearty enough to satisfy a hungry family.

    Best of all, when dinner is finished, you’ll only have one main skillet waiting to be washed.

    Sometimes that’s reason enough to call a recipe a winner.

    Would you keep this Creamy Garlic Parmesan Chicken and Potatoes exactly as it is, or would you add bacon, mushrooms, spinach, or another favorite ingredient?

  • Breakfast of the Day: Lemon Blueberry Ricotta Pancakes

    Breakfast of the Day: Lemon Blueberry Ricotta Pancakes

    There is something special about starting the morning with a stack of warm, fluffy pancakes. Add creamy ricotta cheese, fresh blueberries, and bright lemon flavor, and an ordinary pancake breakfast becomes something worth slowing down for.

    Today’s Breakfast of the Day is Lemon Blueberry Ricotta Pancakes, a delicious combination of sweet berries, refreshing citrus, and incredibly tender pancakes.

    These pancakes have everything you could want from a memorable breakfast. They are light and fluffy on the inside, lightly golden around the edges, and filled with juicy blueberries that burst with sweetness as they cook. Lemon zest gives every bite a fresh citrus flavor, while ricotta cheese creates a soft, almost creamy texture.

    Top the finished stack with butter, maple syrup, powdered sugar, additional blueberries, or even a spoonful of whipped cream, and you have a breakfast that looks impressive without requiring complicated cooking techniques.

    Whether you’re preparing a relaxing weekend breakfast, celebrating a special occasion, or simply looking for something different from your usual morning meal, Lemon Blueberry Ricotta Pancakes are worth trying.

    Why Ricotta Makes Pancakes So Good

    Ricotta might not be the first ingredient you think about when making pancakes, but it can completely transform their texture.

    Traditional pancakes rely primarily on flour, milk, eggs, and a leavening ingredient such as baking powder. Ricotta adds moisture and richness without making the pancakes excessively heavy.

    The result is a pancake that feels substantial while remaining wonderfully tender.

    Ricotta also has a mild flavor, which means it doesn’t overpower the other ingredients. Instead, it provides the perfect background for the lemon and blueberries.

    The combination works especially well because each ingredient contributes something different.

    The ricotta provides creaminess.

    The lemon provides brightness.

    The blueberries provide natural sweetness.

    Together, they create a breakfast that tastes fresh, comforting, and indulgent at the same time.

    Ingredients

    To make approximately 10 to 12 pancakes, you will need:

    • 1 1/2 cups all-purpose flour
    • 2 tablespoons granulated sugar
    • 2 teaspoons baking powder
    • 1/2 teaspoon baking soda
    • 1/4 teaspoon salt
    • 1 cup ricotta cheese
    • 3/4 cup milk
    • 2 large eggs
    • 2 tablespoons melted butter
    • 1 teaspoon vanilla extract
    • Zest of 1 lemon
    • 1 tablespoon fresh lemon juice
    • 1 cup fresh blueberries
    • Butter or cooking spray for the skillet

    Optional Toppings

    • Pure maple syrup
    • Powdered sugar
    • Fresh blueberries
    • Lemon zest
    • Butter
    • Whipped cream
    • Honey
    • Blueberry preserves
    • Sliced strawberries

    How to Make Lemon Blueberry Ricotta Pancakes

    Step 1: Prepare the Dry Ingredients

    In a large mixing bowl, combine the flour, sugar, baking powder, baking soda, and salt.

    Whisk everything together until evenly distributed.

    Combining the dry ingredients separately helps prevent pockets of baking powder or baking soda from ending up in the finished pancakes.

    Set the bowl aside.

    Step 2: Mix the Wet Ingredients

    In another bowl, add the ricotta cheese, milk, eggs, melted butter, vanilla extract, lemon zest, and lemon juice.

    Whisk gently until everything is combined.

    Don’t worry if the mixture isn’t completely smooth. Ricotta naturally creates a slightly textured batter, and that’s perfectly fine.

    Step 3: Combine the Batter

    Pour the wet ingredients into the bowl containing the dry ingredients.

    Using a spatula or wooden spoon, gently fold everything together.

    One of the most important pancake-making rules is not to overmix the batter.

    A few small lumps are perfectly acceptable.

    Overmixing develops too much gluten in the flour, which can produce tougher pancakes instead of the light and tender texture we’re looking for.

    Step 4: Add the Blueberries

    Gently fold the blueberries into the batter.

    Another option is to wait until you’ve poured the pancake batter onto the skillet and then scatter several blueberries across each pancake.

    This method can help distribute the berries more evenly.

    Step 5: Heat the Skillet

    Place a large nonstick skillet or griddle over medium heat.

    Allow it to warm for a few minutes before adding a small amount of butter.

    You want the cooking surface hot enough that the pancakes begin cooking immediately, but not so hot that the outside burns before the center finishes cooking.

    Step 6: Cook the Pancakes

    Pour approximately 1/4 cup of batter onto the skillet for each pancake.

    Leave enough room between pancakes so you can easily flip them.

    Cook for approximately 2 to 3 minutes.

    You’ll know it’s almost time to flip when bubbles begin appearing across the surface and the edges start looking set.

    Carefully slide a spatula underneath each pancake and flip.

    Cook the second side for another 1 to 2 minutes or until golden brown.

    Because ricotta pancakes can be slightly more delicate than traditional pancakes, flip them gently.

    Step 7: Serve Immediately

    Transfer the pancakes to plates and serve while warm.

    For a classic presentation, stack three or four pancakes and add a small pat of butter.

    Scatter fresh blueberries around the top, sprinkle lightly with powdered sugar, and finish with warm maple syrup.

    A little fresh lemon zest over the finished stack adds another burst of citrus aroma.

    The Perfect Balance of Lemon and Blueberry

    Lemon and blueberry have become a classic combination for good reason.

    Blueberries are naturally sweet with a subtle tartness, while lemon has a bright acidity that keeps sweet dishes from becoming overly rich.

    The lemon isn’t supposed to make these pancakes taste sour.

    Instead, it lifts the other flavors.

    The zest is particularly important because much of the recognizable lemon aroma comes from the natural oils found in the peel.

    That’s why freshly grated lemon zest can provide significant citrus flavor without adding excessive liquid or acidity.

    When zesting your lemon, remove only the yellow outer layer. Avoid digging deeply into the white portion underneath, known as the pith, because it can taste bitter.

    Fresh or Frozen Blueberries?

    Fresh blueberries are excellent when they’re available, but frozen blueberries can also work.

    If using frozen blueberries, don’t thaw them first.

    Thawed berries release a lot of juice, which can turn the pancake batter purple and introduce additional moisture.

    Instead, take the blueberries directly from the freezer and gently add them to the batter immediately before cooking.

    Fresh berries usually maintain their shape better, while frozen berries may create more streaks of blueberry juice.

    Either option can produce delicious pancakes.

    Don’t Overcrowd the Pan

    It can be tempting to cook as many pancakes as possible at once, especially when everyone is waiting for breakfast.

    Give yourself enough room to work.

    Leaving space between pancakes makes flipping much easier and helps them cook evenly.

    If you’re making breakfast for several people, keep finished pancakes warm by placing them on a baking sheet in a low-temperature oven while you cook the remaining batches.

    Make Them Extra Lemon-Flavored

    If you love lemon, there are several easy ways to increase the citrus flavor.

    Add additional lemon zest to the batter or sprinkle fresh zest over the finished pancakes.

    You can also make a quick lemon glaze by combining powdered sugar with a small amount of fresh lemon juice.

    Drizzle it lightly over the pancakes instead of maple syrup.

    Another option is lemon curd.

    A spoonful of lemon curd alongside blueberries turns these pancakes into an especially decadent brunch dish.

    Make a Blueberry Sauce

    Want to take these pancakes another step further?

    Make a simple homemade blueberry topping.

    Add about 1 cup of blueberries to a saucepan with 2 tablespoons of sugar, 1 tablespoon of water, and a squeeze of lemon juice.

    Cook over medium-low heat until the berries begin breaking down and releasing their juices.

    Stir occasionally until the mixture develops a syrup-like consistency.

    Spoon the warm blueberry sauce over the pancakes.

    Add powdered sugar or whipped cream, and you have a breakfast that could easily come from a brunch restaurant.

    Topping Ideas

    Maple syrup will always be a pancake favorite, but these Lemon Blueberry Ricotta Pancakes give you plenty of opportunities to experiment.

    Try them with Greek yogurt and berries for something fresh.

    Add whipped cream for a sweeter breakfast.

    Spread blueberry preserves between the pancake layers.

    Top them with sliced strawberries, raspberries, or blackberries.

    Add chopped almonds or pecans for some crunch.

    For a special occasion, layer pancakes with whipped cream and berries to create a beautiful breakfast stack.

    Sometimes the toppings are half the fun.

    Make Breakfast Feel Special

    Breakfast doesn’t always have to be something you rush through before starting the day.

    Weekend mornings, birthdays, holidays, family gatherings, and quiet days at home give us opportunities to make breakfast an experience rather than simply another meal.

    Put on some coffee.

    Make a stack of pancakes.

    Sit down at the table.

    Enjoy the morning.

    Food has a way of creating memories, and breakfast can be one of the easiest meals to turn into a tradition.

    You could even make Lemon Blueberry Ricotta Pancakes your signature spring or summer weekend breakfast.

    What to Serve With Them

    These pancakes can easily stand on their own, but they’re also great as part of a larger breakfast.

    Serve them alongside scrambled eggs, crispy bacon, breakfast sausage, or roasted breakfast potatoes for a hearty meal.

    For something lighter, pair them with a bowl of fresh fruit.

    A fruit salad made with strawberries, blueberries, pineapple, grapes, and oranges complements the bright flavors of the pancakes particularly well.

    And of course, don’t forget the coffee.

    Freshly brewed coffee, hot tea, orange juice, or a cold glass of milk all work beautifully alongside this breakfast.

    Can You Make the Batter Ahead of Time?

    Pancake batter is generally best prepared shortly before cooking because baking powder and baking soda begin working once they’re combined with the wet ingredients.

    However, you can save time by preparing portions of the recipe in advance.

    Mix the dry ingredients the night before and store them in a covered bowl.

    Measure the ricotta and other refrigerated ingredients separately.

    In the morning, combine everything and cook.

    You’ll save preparation time without sacrificing the pancakes’ fluffy texture.

    Storing Leftover Pancakes

    If you happen to have leftovers, allow the pancakes to cool completely.

    Place them in an airtight container and refrigerate them.

    For longer storage, freeze the pancakes individually.

    One helpful method is to place parchment paper between each pancake before putting them into a freezer-safe container or bag.

    This prevents them from freezing together into one large stack.

    When you’re ready for breakfast, remove only the amount you need and reheat them.

    It’s a great way to enjoy a homemade breakfast on a busy weekday morning without starting from scratch.

    Tips for Perfect Ricotta Pancakes

    The difference between good pancakes and great pancakes often comes down to a few small details.

    Use fresh baking powder so your pancakes rise properly.

    Don’t overmix the batter.

    Allow your skillet or griddle to preheat before cooking.

    Keep the temperature around medium rather than turning it too high.

    Wait until bubbles form and the edges begin setting before flipping.

    Use a wide spatula because ricotta pancakes can be delicate.

    And perhaps most importantly, serve them warm.

    Pancakes are at their absolute best shortly after leaving the griddle.

    A Breakfast Worth Waking Up For

    There are breakfasts designed for convenience, and then there are breakfasts that make you happy you got out of bed.

    Lemon Blueberry Ricotta Pancakes belong in the second category.

    They take familiar pancakes and give them something extra without making the recipe unnecessarily complicated.

    The creamy ricotta creates an incredibly tender texture. Fresh lemon gives them a refreshing brightness. Blueberries provide juicy bursts of sweetness throughout every stack.

    Then comes the finishing touch: melted butter and warm maple syrup running down the sides.

    It’s simple comfort food with a fresh twist.

    Make them for Sunday breakfast, surprise someone with breakfast in bed, serve them for brunch, or prepare them simply because you want something better than your usual morning routine.

    Sometimes a delicious breakfast is all it takes to start the day on a better note.

    Would you top your Lemon Blueberry Ricotta Pancakes with maple syrup, homemade blueberry sauce, whipped cream, or all three?

  • National Crème de Menthe Day – September 15

    National Crème de Menthe Day – September 15

    Every year on September 15, cocktail lovers, dessert fans, and anyone who enjoys the refreshing flavor of mint have a reason to celebrate National Crème de Menthe Day.

    Known for its unmistakable mint flavor and often brilliant green color, crème de menthe has been part of cocktail culture for generations. It can transform an ordinary drink into something cool and refreshing, add a burst of mint to desserts, or provide the finishing touch to an after-dinner treat.

    Whether you prefer the famous Grasshopper cocktail, a creamy mint dessert, or simply enjoy discovering classic liqueurs, National Crème de Menthe Day is a great opportunity to explore this distinctive spirit.

    What Is Crème de Menthe?

    Crème de menthe is a sweet, mint-flavored liqueur traditionally made by flavoring alcohol with mint and adding sugar.

    Despite the word “crème” in its name, crème de menthe doesn’t necessarily contain cream. In the world of liqueurs, “crème” generally refers to the drink’s high sugar content and rich, syrupy character.

    Crème de menthe is commonly sold in two varieties:

    Green crème de menthe has the bright emerald color most people associate with the liqueur.

    White or clear crème de menthe delivers essentially the same mint-forward character without adding green color to a cocktail.

    This difference becomes important when bartenders want the mint flavor without dramatically changing the appearance of a drink.

    A Brief History of Crème de Menthe

    Crème de menthe has roots stretching back to 19th-century France.

    One commonly cited milestone in its history comes from 1885, when French pharmacist Émile Giffard developed a mint liqueur after experimenting with peppermint. His creation became associated with the beginnings of the Giffard liqueur company.

    Over time, mint liqueurs became popular beyond France.

    Bartenders discovered that the intense flavor of crème de menthe worked especially well when combined with chocolate, cream, brandy, and other rich ingredients.

    That combination helped establish some of the classic cocktails that remain associated with crème de menthe today.

    Why Is Crème de Menthe Green?

    One of the first things people notice about crème de menthe is its incredible green appearance.

    Interestingly, the green color isn’t necessary for producing the mint flavor.

    Clear crème de menthe is also widely available.

    The green coloring primarily gives cocktails and desserts a dramatic visual appearance. When green crème de menthe is mixed with cream or other ingredients, it can create everything from soft pastel-green drinks to intensely colored cocktails.

    That visual appeal has helped make crème de menthe especially popular for celebrations such as St. Patrick’s Day and Christmas.

    But on September 15, the mint liqueur gets a celebration all its own.

    The Famous Grasshopper Cocktail

    If there’s one cocktail most closely associated with crème de menthe, it’s probably the Grasshopper.

    The classic drink typically combines:

    • Green crème de menthe
    • White crème de cacao
    • Cream

    The ingredients are shaken with ice and strained into a chilled cocktail glass.

    The result is a creamy, mint-chocolate cocktail with a distinctive pale-green appearance.

    It’s almost like drinking a mint-chocolate dessert.

    The origins of the Grasshopper are generally associated with New Orleans, and the drink became particularly popular during the 20th century.

    Its combination of chocolate and mint remains one of the most recognizable uses for crème de menthe.

    The Stinger

    Another classic crème de menthe cocktail takes a completely different approach.

    The Stinger traditionally combines brandy with white crème de menthe.

    Unlike the creamy Grasshopper, the Stinger is stronger and more spirit-forward. The brandy’s warmth is balanced by the cooling peppermint character of the liqueur.

    The cocktail became especially popular as an after-dinner drink during the early and middle decades of the 20th century.

    It’s also an excellent example of why clear crème de menthe can be useful. It provides plenty of mint flavor without turning the cocktail bright green.

    Crème de Menthe and Chocolate

    Few flavor combinations are as recognizable as mint and chocolate.

    Crème de menthe naturally fits into this pairing.

    The cooling sensation of mint contrasts beautifully with the richness of chocolate, which is why the liqueur appears in so many dessert-style cocktails.

    Chocolate syrup, chocolate liqueur, crème de cacao, ice cream, brownies, cakes, and chocolate mousse can all work with mint flavors.

    For National Crème de Menthe Day, you could even create a simple adult dessert by adding a small amount of crème de menthe to vanilla or chocolate ice cream.

    More Ways to Enjoy Crème de Menthe

    Cocktails might receive most of the attention, but crème de menthe can be surprisingly versatile.

    It can be incorporated into milkshakes, coffee drinks, hot chocolate, ice cream, cakes, dessert sauces, frosting, chocolate desserts, and other sweet creations.

    A small amount can provide a surprisingly powerful mint flavor, so it usually doesn’t take much.

    One particularly simple dessert idea is a crème de menthe sundae.

    Add vanilla ice cream to a bowl, drizzle a small amount of crème de menthe over the top, and finish it with chocolate sauce and whipped cream.

    For adults who enjoy mint-chocolate flavors, it’s an easy way to turn ordinary ice cream into a celebration-worthy dessert.

    Make a Mint-Chocolate Crème de Menthe Shake

    National Crème de Menthe Day is also an excuse to create an indulgent adult milkshake.

    Ingredients

    • 2 cups vanilla ice cream
    • 1 ounce green crème de menthe
    • 1 ounce chocolate liqueur
    • Splash of milk
    • Whipped cream
    • Chocolate syrup
    • Chocolate shavings

    Directions

    Add the vanilla ice cream, crème de menthe, chocolate liqueur, and a small splash of milk to a blender.

    Blend until smooth.

    Pour into a chilled glass.

    Top with whipped cream, chocolate syrup, and chocolate shavings.

    The result is somewhere between a cocktail and dessert—perfect for anyone who loves mint chocolate.

    Crème de Menthe in Coffee and Hot Chocolate

    Mint isn’t only refreshing in cold drinks.

    It can also complement warm beverages beautifully.

    A splash of crème de menthe can add a peppermint character to coffee or hot chocolate.

    Try combining hot chocolate with a small amount of crème de menthe, then topping it with whipped cream and chocolate shavings.

    As September begins transitioning toward cooler fall evenings, it’s a fitting way to celebrate.

    Green vs. White Crème de Menthe

    If you’re shopping for crème de menthe, you may wonder which variety to choose.

    It depends on what you’re making.

    Choose green crème de menthe when you want the drink’s appearance to be part of the experience. It’s especially useful for Grasshoppers and festive green cocktails.

    Choose white crème de menthe when you want mint flavor without changing the color of the other ingredients.

    Having both available gives you more flexibility when experimenting with cocktails.

    Fun Facts About Crème de Menthe

    The word menthe is French for mint.

    Despite its name, crème de menthe isn’t typically a cream-based liqueur.

    Green and clear varieties can provide similar mint characteristics even though they look completely different.

    Crème de menthe has traditionally been served as both a cocktail ingredient and an after-dinner drink.

    Mint and chocolate remain among the most popular flavor combinations involving crème de menthe.

    A little can go a long way because the mint flavor is usually quite pronounced.

    How to Celebrate National Crème de Menthe Day

    There are plenty of ways to celebrate September 15.

    Make a classic Grasshopper and experience one of the most famous crème de menthe cocktails.

    Try a Stinger if you’d rather have something stronger and less dessert-like.

    Create a mint-chocolate dessert using crème de menthe.

    Experiment with green and clear versions of the liqueur to see how they affect different cocktails.

    You could even host a small mint-themed dessert and cocktail night featuring Grasshoppers, mint brownies, chocolate-mint ice cream, and other treats.

    Just remember that crème de menthe is an alcoholic liqueur, so alcoholic drinks and desserts should be enjoyed responsibly by adults of legal drinking age.

    A Celebration of a Classic Mint Liqueur

    National Crème de Menthe Day may not be one of the biggest celebrations on the calendar, but that’s part of what makes these food and drink holidays fun.

    They give us an opportunity to discover—or rediscover—ingredients that have been part of culinary and cocktail traditions for generations.

    Crème de menthe has survived changing drinking trends because its flavor is unmistakable.

    It’s sweet.

    It’s refreshing.

    It’s intensely minty.

    And when you combine it with chocolate or cream, it can produce some wonderfully indulgent drinks and desserts.

    So when September 15 arrives, raise a Grasshopper, experiment with a classic Stinger, make a mint-chocolate dessert, or discover your own favorite way to enjoy this iconic liqueur.

    Happy National Crème de Menthe Day!

    Are you celebrating National Crème de Menthe Day with a classic Grasshopper, a mint-chocolate dessert, or your own crème de menthe creation?

  • National Cheese Toast Day – September 15

    National Cheese Toast Day – September 15

    There are some foods that don’t need to be complicated to be delicious. A slice of bread, plenty of melted cheese, a little heat, and a few minutes are all it takes to create one of the simplest comfort foods around.

    September 15 is National Cheese Toast Day, a day dedicated to celebrating the warm, crispy, cheesy combination that has been enjoyed in kitchens, diners, cafés, and restaurants for generations.

    Cheese toast may be simple, but that is part of its charm. You can make it for breakfast, serve it alongside a bowl of soup for lunch, turn it into an afternoon snack, or enjoy it late at night when you want something warm without preparing an entire meal.

    Whether you prefer classic cheddar melted over toasted bread or a loaded version topped with bacon, tomatoes, herbs, garlic, or several different cheeses, National Cheese Toast Day is the perfect excuse to turn on the oven and make a slice.

    What Is National Cheese Toast Day?

    National Cheese Toast Day is celebrated annually on September 15.

    The holiday celebrates cheese toast in all its forms. At its most basic, cheese toast consists of bread topped with cheese and heated until the bread becomes toasted and the cheese melts.

    But there are countless ways to make it.

    Some people toast the bread first and then add cheese. Others place the cheese on fresh bread before putting everything under the broiler. Butter, garlic, seasonings, herbs, and additional toppings can transform the basic recipe into something completely different.

    That versatility is one reason cheese toast remains such a popular comfort food.

    You don’t necessarily need a complicated recipe or a long list of ingredients. If you have bread and cheese, you already have the foundation.

    The History Behind Cheese Toast

    Combining bread and cheese certainly isn’t a modern invention.

    Bread and cheese have been staple foods in different cultures for centuries, so people naturally discovered that heating the two together created something particularly satisfying.

    Many cultures developed their own variations.

    Welsh rarebit, for example, became famous for serving a rich cheese sauce over toasted bread. Open-faced cheese sandwiches and cheese-topped breads became common in European and American kitchens as well.

    Eventually, modern appliances made preparing cheese toast even easier.

    Home ovens, broilers, toaster ovens, and eventually countertop appliances gave people quick ways to melt cheese while crisping bread.

    The result was an inexpensive dish that could be prepared in only a few minutes.

    Cheese Toast vs. Grilled Cheese

    At first glance, cheese toast and a grilled cheese sandwich may seem almost identical.

    They share the same essential ingredients: bread, cheese, and heat.

    The biggest difference is usually how they’re prepared.

    A traditional grilled cheese sandwich places cheese between two slices of bread and cooks the sandwich on a griddle or in a frying pan, usually with butter or another fat on the outside.

    Cheese toast is generally open-faced.

    A piece of bread is topped with cheese and heated from above or baked until the cheese becomes melted, bubbly, and sometimes slightly browned.

    That exposed layer of cheese creates a different texture.

    The edges can become crispy while the center remains soft and gooey.

    Of course, there are no strict rules on National Cheese Toast Day. If your favorite version falls somewhere between cheese toast and grilled cheese, enjoy it anyway.

    Why Cheese Toast Is Such Great Comfort Food

    There is something comforting about melted cheese and warm bread.

    Part of that comes from the combination of textures.

    You get crispy toasted edges, soft bread underneath, and creamy melted cheese across the top.

    Then there is the aroma.

    Few kitchen smells can compete with bread toasting while cheese bubbles under the broiler.

    Cheese toast can also bring back memories.

    Maybe it was something your parents made when you were young. Perhaps you ate it with tomato soup after coming home from school. Maybe it was one of the first foods you learned to prepare yourself.

    Simple foods often become some of our strongest food memories.

    National Cheese Toast Day gives us a reason to enjoy one of those familiar favorites again.

    Easy Classic Cheese Toast Recipe

    You don’t need much to celebrate.

    Ingredients

    • 2 slices of your favorite bread
    • 1 cup shredded cheddar cheese
    • 1 tablespoon softened butter
    • Garlic powder, optional
    • Black pepper, optional
    • Chopped parsley or green onions, optional

    Directions

    Preheat your oven’s broiler or set a toaster oven to a high baking temperature.

    Lightly butter one side of each slice of bread.

    Place the bread on a baking sheet with the buttered side facing upward.

    Toast for a minute or two until the bread begins to become lightly golden.

    Remove the baking sheet and generously cover each piece of bread with shredded cheddar cheese.

    Add a small sprinkle of garlic powder or black pepper if desired.

    Return the bread to the oven.

    Broil until the cheese has completely melted and begins bubbling around the edges. Watch it carefully because cheese can go from beautifully browned to burned very quickly under a broiler.

    Remove from the oven, allow it to cool for a minute, and add parsley or green onions if desired.

    Serve immediately while the cheese is still hot and gooey.

    Choosing the Best Cheese

    Cheddar may be one of the most familiar choices for cheese toast, but there is no reason to stop there.

    Different cheeses completely change the flavor.

    Sharp cheddar provides a bold, traditional flavor.

    Mozzarella gives you the stretchy cheese pull everyone loves.

    Pepper jack adds a little heat.

    Monterey Jack melts beautifully and has a mild flavor that works well with additional toppings.

    Swiss adds a slightly nutty taste.

    Provolone gives cheese toast an Italian-inspired character.

    Gouda can provide a rich, slightly sweet flavor.

    You can also combine cheeses.

    Try cheddar and mozzarella for flavor and stretch, or Monterey Jack and pepper jack for a creamy cheese toast with a spicy finish.

    Experimenting is half the fun.

    Don’t Forget About the Bread

    The cheese may receive most of the attention, but good bread can make a huge difference.

    Standard sandwich bread works perfectly when you’re craving something simple and nostalgic.

    For something heartier, try sourdough.

    French bread produces excellent cheese toast because it develops crispy edges while maintaining a softer center.

    Texas toast provides a thick base that can handle plenty of cheese and toppings.

    Whole-grain bread can add additional texture and a slightly nutty flavor.

    You can even slice a baguette into smaller pieces and create bite-sized cheese toasts for appetizers.

    The goal is to find a bread sturdy enough to support the melted cheese without becoming too soggy.

    Delicious Cheese Toast Variations

    Once you’ve mastered basic cheese toast, start experimenting.

    Garlic Cheese Toast

    Spread garlic butter over the bread before adding mozzarella and Parmesan. Finish with parsley for an easy side dish that pairs beautifully with pasta.

    Bacon Cheddar Cheese Toast

    Add cooked, crumbled bacon underneath a generous layer of sharp cheddar.

    Jalapeño Cheese Toast

    Top your bread with cheddar or pepper jack and thinly sliced jalapeños.

    Tomato Basil Cheese Toast

    Add sliced tomatoes, mozzarella, basil, and a little black pepper for a fresh Italian-inspired variation.

    Pizza Cheese Toast

    Spread a thin layer of pizza sauce over the bread before adding mozzarella and pepperoni.

    It’s essentially a miniature open-faced pizza.

    Three-Cheese Toast

    Combine cheddar, mozzarella, and Parmesan for an especially cheesy version.

    Breakfast Cheese Toast

    Top cheese toast with a fried or poached egg.

    Add bacon, sausage, avocado, or tomato to turn it into a filling breakfast.

    Buffalo Chicken Cheese Toast

    Add shredded buffalo chicken and mozzarella or Monterey Jack before baking.

    Finish it with a drizzle of ranch or blue cheese dressing.

    What Goes Well With Cheese Toast?

    Cheese toast can certainly stand on its own, but it also makes an excellent companion to other dishes.

    The classic pairing is tomato soup.

    Dip crispy cheese toast into a bowl of warm tomato soup and you’ve got one of the ultimate comfort-food combinations.

    Cheese toast also works well with chili, vegetable soup, chicken noodle soup, salads, pasta dishes, eggs, and breakfast potatoes.

    Smaller pieces can even be served as appetizers at parties.

    Make a Cheese Toast Bar

    If you’re celebrating National Cheese Toast Day with family or friends, create a cheese toast bar.

    Put out several types of bread, cheeses, seasonings, and toppings and allow everyone to create their own combination.

    Topping possibilities could include:

    • Bacon
    • Pepperoni
    • Tomatoes
    • Jalapeños
    • Caramelized onions
    • Mushrooms
    • Green onions
    • Fresh basil
    • Garlic
    • Hot sauce
    • Avocado
    • Shredded chicken
    • Parmesan
    • Everything bagel seasoning

    Everyone can build their own slice before the cheese toast goes into the oven.

    It turns an incredibly simple food into a fun meal.

    How to Celebrate National Cheese Toast Day

    The easiest way to celebrate September 15 is obvious: make cheese toast.

    But you can make the day more interesting by trying something new.

    Use a cheese you’ve never tried on toast before. Buy a loaf of fresh sourdough from a local bakery. Experiment with different toppings. Make several varieties and have your family vote for their favorite.

    You could also introduce someone else to your favorite recipe.

    If you have children, let them create their own cheese toast combinations. It’s a simple way to get them involved in the kitchen.

    And if cooking isn’t part of your plans, look for a local restaurant, café, diner, bakery, or pub serving a cheesy toast-inspired dish.

    Fun Cheese Toast Facts

    Cheese toast proves that great food doesn’t necessarily require complicated preparation.

    The basic combination can be made with only two ingredients.

    It can be eaten for breakfast, lunch, dinner, or as a snack.

    Almost any cheese that melts well can be used.

    Cheese toast appears in different forms across numerous cuisines.

    It can be sweet, savory, spicy, smoky, or loaded with toppings depending on the ingredients.

    And perhaps most importantly, it is extremely difficult to resist when you pull it from the oven and the cheese is bubbling.

    A Simple Food Worth Celebrating

    Not every food holiday needs to celebrate an elaborate dish.

    Sometimes the simplest foods deserve their own day.

    National Cheese Toast Day reminds us that comfort can come from something as basic as warm bread covered with melted cheese.

    It’s affordable.

    It’s customizable.

    It’s quick.

    And when prepared correctly, it’s absolutely delicious.

    So on September 15, grab your favorite bread, choose a cheese, add whatever toppings sound good, and make yourself a hot slice of cheese toast.

    Keep it classic with cheddar or create something completely new.

    Either way, National Cheese Toast Day is a celebration that’s easy to enjoy.

    What cheese would you choose for the ultimate slice of cheese toast?

  • National Double Cheeseburger Day – September 15

    National Double Cheeseburger Day – September 15

    September 15 is National Double Cheeseburger Day, a celebration dedicated to one of America’s biggest, beefiest, and most satisfying comfort foods. If one juicy burger patty covered in melted cheese is good, doubling it makes the occasion even better.

    The double cheeseburger is wonderfully uncomplicated: two beef patties, plenty of melted cheese, a soft bun, and whatever toppings make your perfect burger. Some people keep it traditional with lettuce, tomato, onions, pickles, ketchup, and mustard. Others pile on bacon, grilled onions, jalapeños, mushrooms, barbecue sauce, or even an extra slice of cheese.

    No matter how you build yours, National Double Cheeseburger Day gives burger lovers an excellent excuse to go big.

    What Is National Double Cheeseburger Day?

    National Double Cheeseburger Day is observed annually on September 15 and celebrates the double cheeseburger in all its delicious variations.

    While the exact origin of the observance isn’t well documented, its subject certainly deserves a day of recognition. Burgers have become an important part of American food culture, appearing everywhere from backyard cookouts and neighborhood diners to fast-food restaurants and upscale burger bars.

    The double cheeseburger takes the familiar cheeseburger formula and makes one major adjustment: more burger.

    Instead of a single beef patty, you get two. Cheese is typically melted between or over the patties, creating layers of beef and gooey cheese in every bite.

    It’s simple, indulgent, and unmistakably American.

    The Story Behind the Cheeseburger

    Before there could be a double cheeseburger, there had to be the hamburger.

    The history of the hamburger is filled with competing origin stories. Various restaurants and cooks have been credited with creating early versions of the hamburger sandwich in the United States around the late 19th and early 20th centuries.

    The basic idea was revolutionary in its simplicity: put a cooked ground-beef patty between pieces of bread or a bun.

    It was portable, inexpensive, filling, and easy to customize.

    Then someone had an even better idea:

    Add cheese.

    Several establishments and individuals have claimed credit for inventing or popularizing the cheeseburger during the 1920s and 1930s. Regardless of exactly who deserves the title of inventor, cheese and hamburgers proved to be an ideal combination.

    Once the cheeseburger became popular, doubling the patties was almost inevitable.

    Why Two Patties Can Be Better Than One

    A double cheeseburger isn’t simply about eating more meat.

    Using two thinner patties instead of one extremely thick patty can change the entire burger experience.

    Each patty develops its own browned exterior when cooked on a hot grill or griddle. That means a double burger can provide more of those savory, caramelized surfaces that make a freshly cooked burger so satisfying.

    Then there’s the cheese.

    Place cheese between two hot patties and it melts into the meat, creating a rich middle layer. Add another slice on top if you’re feeling particularly ambitious.

    The result is a burger with layers rather than one giant piece of beef.

    You get bun, toppings, cheese, beef, cheese, beef, sauce, and bun all working together.

    What Makes the Perfect Double Cheeseburger?

    Ask ten burger lovers to describe the perfect double cheeseburger and you’ll probably receive ten different answers.

    That’s part of the fun.

    Still, several elements can turn a good burger into a memorable one.

    The Beef

    The beef is obviously the star.

    Ground beef with enough fat to remain juicy tends to produce a flavorful burger. Extremely lean meat can dry out quickly, especially when making thinner patties.

    Seasoning doesn’t need to be complicated.

    Salt and black pepper can be enough.

    The key is allowing the beef itself to shine.

    The Cheese

    American cheese remains a classic burger choice because it melts exceptionally well and creates that familiar creamy layer.

    But you aren’t limited to American cheese.

    Try:

    • Sharp cheddar
    • Pepper Jack
    • Swiss
    • Provolone
    • Smoked Gouda
    • Monterey Jack
    • Blue cheese

    Each creates a completely different double cheeseburger.

    The Bun

    A great burger needs a bun strong enough to hold everything together without overwhelming the fillings.

    Potato buns and brioche buns are popular choices, while sesame-seed buns deliver classic burger-joint nostalgia.

    Lightly toasting the inside of the bun can also help prevent sauces and burger juices from making it soggy too quickly.

    The Toppings

    This is where your personality enters the burger.

    Classic toppings include lettuce, tomato, pickles, and onions.

    But National Double Cheeseburger Day isn’t necessarily the day for restraint.

    You could add:

    • Crispy bacon
    • Caramelized onions
    • Sautéed mushrooms
    • Jalapeños
    • Avocado
    • Onion rings
    • Fried egg
    • Coleslaw
    • Crispy fried onions
    • Roasted peppers

    You can keep things traditional or build something completely outrageous.

    The Importance of Burger Sauce

    Never underestimate the sauce.

    Ketchup and mustard are classics for a reason, but combining a few simple ingredients can create an easy homemade burger sauce.

    Try mixing:

    • Mayonnaise
    • Ketchup
    • Yellow mustard
    • Finely chopped pickles or relish
    • A splash of pickle juice

    Mix everything together and adjust it according to taste.

    Want sweetness? Add a little more ketchup or relish.

    Want tanginess? Add mustard or pickle juice.

    Want heat? Add hot sauce.

    A good burger sauce can tie together the beef, cheese, vegetables, and bun.

    Make a Classic Double Cheeseburger at Home

    National Double Cheeseburger Day is the perfect opportunity to fire up the grill or heat a cast-iron skillet.

    Ingredients

    For one double cheeseburger, you’ll need:

    • 6 to 8 ounces ground beef
    • Salt
    • Freshly ground black pepper
    • 2 slices American or cheddar cheese
    • 1 hamburger bun
    • Lettuce
    • Tomato slices
    • Thinly sliced onion
    • Pickles
    • Ketchup
    • Mustard
    • Mayonnaise, optional

    Directions

    Divide the ground beef into two equal portions and gently form them into thin patties. Avoid overworking the meat.

    Season both sides with salt and pepper.

    Heat a skillet, griddle, or grill until hot.

    Cook the patties until they develop a nicely browned exterior. Flip and continue cooking until they reach a safe internal temperature.

    Place cheese over the patties near the end of cooking and allow it to melt.

    Meanwhile, lightly toast your hamburger bun.

    Spread your preferred sauces onto the bun.

    Stack the first cheeseburger patty onto the bottom bun, followed by the second.

    Add lettuce, tomato, onions, and pickles.

    Finish with the top bun.

    Then comes the most important step:

    Take a big bite.

    Try a Smash-Style Double Cheeseburger

    Another great way to celebrate is with a double smash burger.

    Instead of shaping traditional patties beforehand, divide your beef into loose balls.

    Place them onto a very hot griddle or cast-iron skillet and immediately press each one into a thin patty using a sturdy spatula or burger press.

    The intense contact between the beef and hot cooking surface creates a deeply browned crust.

    Flip the patties, add cheese, and stack them together.

    Smash burgers are particularly well suited to double cheeseburgers because the patties are thin.

    Instead of one enormous burger that’s difficult to eat, you get two crispy-edged patties layered with melted cheese.

    Build a Bacon Double Cheeseburger

    Want to take National Double Cheeseburger Day to another level?

    Add bacon.

    Cook several strips until crispy and place them between the burger patties or directly underneath the toppings.

    For an even bigger flavor combination, try:

    Double beef + cheddar + bacon + grilled onions + barbecue sauce.

    The smoky bacon and barbecue sauce complement the beef while grilled onions add sweetness.

    It isn’t exactly a light lunch.

    But that’s not really the point of Double Cheeseburger Day.

    Turn Up the Heat

    If you like spicy food, build a fiery double cheeseburger.

    Start with two beef patties and Pepper Jack cheese.

    Then add:

    • Fresh or pickled jalapeños
    • Grilled onions
    • Spicy mayonnaise
    • Hot sauce
    • Pepperoncini

    For serious heat lovers, add sliced serrano peppers or your favorite extra-hot sauce.

    Just make sure you have something cold nearby.

    Go Old-School Diner Style

    Sometimes simple wins.

    Create a classic diner double cheeseburger with two thin griddle-cooked patties, American cheese, pickles, diced onions, ketchup, and mustard.

    Serve it with crispy French fries and a milkshake.

    There’s something nostalgic about that combination.

    You don’t need exotic ingredients or complicated techniques. It’s simply hot beef, melted cheese, a soft bun, salty fries, and an ice-cold drink.

    Double Cheeseburgers and American Food Culture

    Few foods represent casual American dining quite like the hamburger.

    Burgers are everywhere.

    They’re served at diners, drive-ins, fast-food restaurants, sports stadiums, fairs, neighborhood bars, backyard cookouts, and family gatherings.

    They’re also incredibly adaptable.

    A burger can be a quick inexpensive meal or a carefully crafted restaurant creation featuring premium beef, artisan cheese, house-made sauces, and freshly baked buns.

    The double cheeseburger sits somewhere beautifully in the middle.

    It can be humble.

    It can be extravagant.

    But it should always be satisfying.

    Host a Double Cheeseburger Night

    National Double Cheeseburger Day can also become an excuse to gather friends or family around the grill.

    Set up a burger bar with several toppings and allow everyone to build their own double cheeseburger.

    Put out bowls and trays containing:

    • Lettuce
    • Tomatoes
    • Pickles
    • Raw onions
    • Grilled onions
    • Jalapeños
    • Bacon
    • Mushrooms
    • Several cheeses
    • Ketchup
    • Mustard
    • Mayonnaise
    • Barbecue sauce
    • Hot sauce

    Cook the patties and let everyone handle the rest.

    You could even vote on who creates the best burger.

    Don’t Forget the Sides

    A double cheeseburger deserves a great side.

    French fries are the obvious choice, but they’re certainly not the only one.

    Try serving your burger with onion rings, sweet potato fries, potato wedges, coleslaw, potato salad, macaroni salad, grilled corn, baked beans, or even a simple green salad.

    And if you’re going all-in on classic burger-joint food, finish everything with a chocolate, vanilla, or strawberry milkshake.

    Fun Ways to Celebrate National Double Cheeseburger Day

    There are plenty of ways to enjoy September 15.

    Visit your favorite local burger restaurant and order its signature double cheeseburger.

    Make homemade burgers and experiment with new toppings.

    Host a backyard cookout.

    Challenge friends or family to create their ultimate burger combination.

    Try a cheese you’ve never used on a hamburger before.

    Or recreate a nostalgic burger from your childhood.

    You can also share a photo of your creation on social media and ask other burger lovers to reveal their favorite toppings.

    Just be prepared for the great burger debates.

    Pickles or no pickles?

    Raw onions or grilled?

    Ketchup or no ketchup?

    American cheese or cheddar?

    And perhaps the biggest question of all:

    Is two patties enough?

    Celebrate National Double Cheeseburger Day on September 15

    National Double Cheeseburger Day is a celebration of a food that doesn’t pretend to be complicated.

    It’s beef.

    It’s cheese.

    It’s a bun.

    And it’s delicious.

    The double cheeseburger has earned its place as an American comfort-food favorite because it can be customized almost endlessly while keeping its basic identity intact.

    Whether you prefer a simple diner-style double with American cheese and pickles, a bacon-loaded barbecue burger, a spicy jalapeño creation, or a crispy-edged double smash burger, September 15 is the day to enjoy your favorite version.

    So heat the grill, toast the buns, melt the cheese, and stack those patties high.

    If you could build your ultimate double cheeseburger with any cheese, sauce, and toppings you wanted, what would you put on it?

  • History & Culture of the Day – September 15

    History & Culture of the Day – September 15

    September 15 is a date filled with moments that have influenced nations, culture, science, entertainment, and the way people understand the world around them. From independence movements in Central America to the birth of an internationally celebrated writer, September 15 offers a fascinating look at how individual events can leave lasting marks on history.

    It is also a day that reminds us that history is more than wars, governments, and famous leaders. History is created through books, music, inventions, social movements, exploration, traditions, and ordinary people whose actions eventually become part of a much larger story.

    Here is a look back at some of the memorable events, cultural milestones, famous birthdays, and historical developments connected to September 15.


    1821 – Central American Nations Declare Independence

    One of the most important events associated with September 15 occurred in 1821, when much of Central America declared independence from Spanish rule.

    The Act of Independence of Central America was signed in Guatemala City, beginning a major political transformation for the region.

    Today, Costa Rica, El Salvador, Guatemala, Honduras, and Nicaragua all celebrate their independence on September 15.

    The independence movement was part of a much larger transformation taking place throughout Latin America during the early 19th century. For centuries, Spain had controlled enormous territories in the Americas. Political unrest in Europe, changing economic conditions, Enlightenment ideas, and successful independence movements elsewhere encouraged people throughout Latin America to challenge colonial rule.

    September 15 therefore represents much more than a historical date. Across Central America, it remains a celebration of national identity and heritage.

    Independence Day celebrations often include parades, music, traditional clothing, dancing, patriotic ceremonies, food, flags, and community gatherings.

    One particularly memorable tradition is the carrying of the Torch of Independence, which symbolizes the spread of the news of independence through Central America.

    More than two centuries later, September 15 remains one of the most culturally significant dates in the region.


    1830 – The Liverpool and Manchester Railway Opens

    September 15, 1830, marked an important moment in transportation history with the formal opening of the Liverpool and Manchester Railway in England.

    Railways existed before this event, but the Liverpool and Manchester line became an important milestone in the development of modern passenger and freight rail transportation.

    The railway connected two major industrial cities and demonstrated how steam-powered transportation could move people and goods efficiently over significant distances.

    The Industrial Revolution was already transforming Britain, and railroads accelerated those changes.

    Factories could receive raw materials faster. Finished products could reach markets more efficiently. People could travel farther and more quickly than previous generations had imagined.

    Railroads would eventually reshape entire countries.

    Cities expanded around railway stations. New communities developed along transportation routes. Commerce accelerated, and travel became accessible to growing numbers of people.

    The opening was also marked by tragedy. British politician William Huskisson was struck by George Stephenson’s locomotive Rocket during the opening ceremonies and later died from his injuries.

    Despite the tragedy, the railway demonstrated the enormous potential of steam transportation.

    Within decades, railroad networks would spread across Europe, North America, and other parts of the world.


    1857 – William Howard Taft Is Born

    William Howard Taft was born on September 15, 1857, in Cincinnati, Ohio.

    Taft would eventually become the 27th president of the United States, serving from 1909 to 1913.

    His place in history is particularly unusual because the presidency was not the only major national office he would hold.

    Years after leaving the White House, Taft became Chief Justice of the United States, serving from 1921 until 1930.

    He remains the only person in American history to have served both as president of the United States and as chief justice of the Supreme Court.

    Taft’s career demonstrates how public service can take many different forms. Although presidents often dominate historical discussions, Taft reportedly felt more comfortable in the legal world than in electoral politics.

    His life therefore connects two of America’s most powerful institutions: the presidency and the Supreme Court.


    1890 – Agatha Christie Is Born

    One of the world’s most famous mystery writers was born on September 15, 1890.

    Agatha Christie was born in Torquay, England, and would eventually become one of the most successful authors in literary history.

    Christie’s stories introduced readers to legendary fictional detectives including Hercule Poirot and Miss Marple.

    Her novels became famous for carefully constructed mysteries, unexpected clues, suspicious characters, and endings that often surprised readers.

    Among her best-known works are:

    • Murder on the Orient Express
    • Death on the Nile
    • The Murder of Roger Ackroyd
    • And Then There Were None
    • The ABC Murders

    Her influence extended beyond novels.

    Christie’s stage play The Mousetrap became famous for its extraordinarily long theatrical run in London’s West End.

    Her work has also inspired countless movies, television adaptations, radio productions, stage performances, and modern mystery writers.

    The popularity of Agatha Christie demonstrates something important about culture: a great story can survive long after the era in which it was written.

    Generations continue discovering her mysteries and trying to solve them before the final pages reveal the truth.


    1916 – Tanks Enter Battle

    September 15, 1916, became a significant date in military history when tanks were used in battle during the Battle of the Somme in World War I.

    The battlefield of World War I had become dominated by trenches, machine guns, barbed wire, and artillery.

    Military leaders searched for ways to break through heavily defended enemy positions.

    The tank represented a new approach.

    Early tanks were slow, mechanically unreliable, uncomfortable, and extremely difficult to operate. Many broke down or became stuck.

    Yet their appearance suggested how warfare was beginning to change.

    Over the following decades, armored vehicles became increasingly important to military strategy.

    By World War II, tanks had become central to major land campaigns.

    The first battlefield appearance of tanks on September 15 therefore represents an early stage in a technological transformation that would dramatically influence modern warfare.


    1928 – Alexander Fleming and the Discovery That Led to Penicillin

    September 1928 is closely associated with one of the most important medical discoveries of the modern era.

    Scottish scientist Alexander Fleming returned to his laboratory after time away and noticed something unusual in a dish containing bacteria.

    Mold had contaminated the dish.

    Instead of simply throwing it away, Fleming observed that bacteria surrounding the mold were being destroyed.

    The mold belonged to the Penicillium genus.

    Fleming’s observation eventually contributed to the development of penicillin, the world’s first widely effective antibiotic.

    The discovery would eventually transform medicine.

    Before antibiotics, bacterial infections that are routinely treated today could become deadly. Pneumonia, infected wounds, and many other infections posed enormous risks.

    Penicillin eventually saved countless lives, particularly after methods were developed to manufacture it on a large scale.

    The story has also become an enduring example of scientific curiosity.

    An unexpected observation became important because someone stopped to investigate it.


    1935 – The Nuremberg Laws Are Announced

    Not every historical anniversary represents progress.

    September 15, 1935, is associated with one of the darkest developments in Nazi Germany.

    During the Nazi Party rally in Nuremberg, the regime introduced laws that stripped German Jews of important citizenship rights and prohibited marriages and certain relationships between Jews and people classified as being of “German or related blood.”

    These measures became known as the Nuremberg Laws.

    They helped transform antisemitic ideology into government policy.

    The laws demonstrate how discrimination can become increasingly dangerous when prejudice is supported and enforced by institutions.

    In the years that followed, persecution intensified dramatically, eventually contributing to the systematic murder of six million Jews during the Holocaust.

    Remembering events like this is an essential part of studying history.

    History does not exist only to celebrate human achievement. It also provides warnings about what can happen when hatred, dehumanization, authoritarianism, and discrimination are allowed to grow unchecked.


    1940 – The Battle of Britain Reaches a Critical Day

    September 15, 1940, became one of the most famous days of the Battle of Britain during World War II.

    German forces launched major air attacks against Britain, and the Royal Air Force responded.

    The fighting that day became so significant that September 15 is now commemorated as Battle of Britain Day in the United Kingdom.

    The broader battle was crucial because Nazi Germany hoped to gain air superiority over Britain.

    British resistance prevented Germany from achieving that goal.

    The Battle of Britain became a powerful cultural symbol of endurance and national determination.

    It also highlighted the growing importance of aircraft, radar, intelligence, communications, and coordinated air defense in modern warfare.


    1949 – The Lone Ranger Comes to Television

    On September 15, 1949, The Lone Ranger premiered on American television.

    The masked Western hero had already become popular through radio, but television introduced the character to a new audience.

    With his horse Silver and his companion Tonto, the Lone Ranger became one of the recognizable heroes of early American television.

    The character’s famous cry of “Hi-Yo, Silver!” became part of popular culture.

    Western programs would become enormously popular during television’s early decades.

    Cowboys, frontier towns, sheriffs, outlaws, horses, and open landscapes filled American television screens.

    Although modern audiences often examine older Westerns more critically—particularly their portrayals of Native Americans and the mythology surrounding westward expansion—the genre remains an important part of American entertainment history.


    1963 – Birmingham Church Bombing

    September 15, 1963, became one of the most heartbreaking dates of the American Civil Rights Movement.

    A bomb exploded at the 16th Street Baptist Church in Birmingham, Alabama.

    Four Black girls were killed:

    Addie Mae Collins, Cynthia Wesley, Carole Robertson, and Denise McNair.

    The church had served as an important gathering place for civil rights activists.

    The bombing shocked the country and became a devastating example of the racist violence faced by Black Americans and those fighting segregation.

    Rather than stopping the movement, the tragedy increased national attention on racial injustice.

    The bombing remains an important part of American history because it reminds us that major social changes often come with enormous human costs.

    The four girls are remembered not simply as names in a history book, but as children whose lives were taken by hatred.

    Their memory became intertwined with the continuing struggle for equality and civil rights.


    1971 – Greenpeace Begins Its First Major Protest Voyage

    September 15, 1971, is closely associated with the beginnings of Greenpeace.

    A group of activists sailed from Vancouver aboard a vessel called the Phyllis Cormack, hoping to protest a planned U.S. nuclear test near Amchitka Island in Alaska.

    The group originally operated under the name “Don’t Make a Wave Committee,” but the idea of combining environmental concern with peace activism helped inspire the Greenpeace identity.

    The voyage helped create an organization that would later become internationally known for environmental activism.

    Over the decades, environmental movements have influenced public discussions about nuclear testing, pollution, wildlife conservation, climate change, forests, oceans, and energy.

    Whatever one’s views on individual environmental organizations or campaigns, the rise of environmental activism became a major cultural and political development during the second half of the 20th century.


    September 15 and Hispanic Heritage Month

    September 15 also holds major cultural importance in the United States because it marks the beginning of National Hispanic Heritage Month, which runs from September 15 through October 15.

    The starting date was deliberately chosen because September 15 is the independence anniversary of Costa Rica, El Salvador, Guatemala, Honduras, and Nicaragua.

    Mexico celebrates its independence on September 16, while Chile celebrates on September 18.

    Hispanic Heritage Month recognizes the history, cultures, achievements, and contributions of Americans whose families have roots in Spain, Mexico, the Caribbean, Central America, and South America.

    The month celebrates contributions in countless areas, including:

    music, art, literature, science, sports, military service, business, education, government, agriculture, entertainment, food, and community leadership.

    Hispanic and Latino cultures have profoundly influenced American life.

    You can hear that influence in music.

    You can taste it in food.

    You can see it in architecture and art.

    You can find it in language, festivals, neighborhoods, literature, family traditions, and everyday American culture.

    The observance is therefore not simply about looking backward at history.

    It is also about recognizing living cultures that continue shaping the United States.


    Famous People Born on September 15

    September 15 has also been the birthday of numerous influential figures from politics, literature, entertainment, sports, and other areas.

    William Howard Taft – 1857

    The 27th president of the United States and later Chief Justice of the United States.

    Agatha Christie – 1890

    Legendary British mystery writer and creator of Hercule Poirot and Miss Marple.

    Roy Acuff – 1903

    American country music performer who became one of the influential figures associated with the Grand Ole Opry.

    Fay Wray – 1907

    Actress remembered especially for her role in the 1933 film King Kong.

    Jackie Cooper – 1922

    Actor whose career stretched from childhood stardom into decades of film and television work.

    Cannonball Adderley – 1928

    Influential American jazz saxophonist known for his energetic performances and important contributions to jazz.

    Tommy Lee Jones – 1946

    Academy Award-winning American actor known for films including The Fugitive, Men in Black, No Country for Old Men, and Lincoln.

    Oliver Stone – 1946

    American filmmaker known for movies including Platoon, Wall Street, Born on the Fourth of July, and JFK.

    Dan Marino – 1961

    Legendary NFL quarterback best known for his career with the Miami Dolphins.

    Tom Hardy – 1977

    English actor known for roles in Inception, The Dark Knight Rises, Mad Max: Fury Road, The Revenant, and Venom.

    Prince Harry – 1984

    Born on September 15, 1984, the younger son of King Charles III and Diana, Princess of Wales.


    A Day of Independence, Discovery, Culture, and Remembrance

    Looking across the centuries, September 15 tells several very different stories.

    It is a story of independence, as Central American nations celebrate freedom from Spanish colonial rule.

    It is a story of innovation, represented by the development of rail transportation and the scientific observations that helped lead to penicillin.

    It is a story of culture, through writers such as Agatha Christie and entertainers who shaped literature, television, film, jazz, country music, and sports.

    It is a story of courage and resistance, from the Battle of Britain to the American Civil Rights Movement.

    And it is also a story of warning and remembrance, particularly when we look back at the Nuremberg Laws and the bombing of Birmingham’s 16th Street Baptist Church.

    History contains moments worth celebrating and moments that should never be forgotten.

    Both matter.

    The achievements of previous generations can inspire us, while their mistakes can warn us.

    That is one of the reasons learning about history remains so important.


    Why September 15 Still Matters

    A date on a calendar can appear ordinary until we begin exploring what happened on it.

    September 15 connects us with independence celebrations throughout Central America, the beginning of Hispanic Heritage Month in the United States, advances in transportation and medicine, unforgettable cultural figures, and defining moments in struggles for freedom and equality.

    These events happened in different countries, centuries, and circumstances, yet they share something important.

    Each became part of the world inherited by later generations.

    History is not simply a collection of old dates.

    It is the accumulated story of decisions, discoveries, struggles, creativity, courage, tragedy, and change.

    Every generation adds another chapter.

    And when we take a few minutes to look back, we gain a better understanding of how the world we know today came to be.

    Which September 15 moment do you think had the greatest impact on history or culture—and why?

  • This Day in American History – September 15

    This Day in American History – September 15

    September 15 has witnessed moments in American history that shaped the federal government, introduced a future president, demonstrated American military power overseas, and exposed the terrible violence faced by Americans fighting for civil rights.

    From the earliest years of the United States to the Civil Rights Movement of the 20th century, September 15 reminds us that American history is a combination of progress, conflict, courage, tragedy, and change.

    Here is a look back at some of the most significant events connected to September 15 in American history.

    1789 – The Department of State Gets Its Name

    On September 15, 1789, during the first year of George Washington’s presidency, the young United States continued building the institutions necessary to operate its new federal government.

    Congress passed legislation changing the name of the Department of Foreign Affairs to the Department of State. The change reflected the department’s expanded responsibilities, which included several domestic duties in addition to handling foreign relations.

    Among its early responsibilities were preserving federal laws and important government records, handling presidential commissions, and maintaining custody of the Great Seal of the United States.

    The department had originally been established as the Department of Foreign Affairs in July 1789. The September legislation helped transform it into the institution we recognize today as the Department of State.

    Thomas Jefferson would become the nation’s first Secretary of State.

    More than two centuries later, the Department of State remains one of the most important departments in the federal government, representing the United States diplomatically around the world.

    September 15, therefore, marks an important milestone in the creation of America’s federal government.

    1857 – Future President William Howard Taft Is Born

    William Howard Taft was born in Cincinnati, Ohio, on September 15, 1857.

    Taft would eventually become one of the most unusual figures in American political history.

    He served as the 27th President of the United States from 1909 to 1913, succeeding Theodore Roosevelt.

    But the presidency was not the only major position Taft would hold.

    His career included service as a judge, U.S. Solicitor General, governor in the Philippines, Secretary of War, president, and eventually Chief Justice of the United States.

    That final position made Taft unique.

    He remains the only person in American history to have served as both President of the United States and Chief Justice of the United States Supreme Court.

    Taft became Chief Justice in 1921 and served until shortly before his death in 1930.

    His life demonstrated something rare in American history: reaching the highest levels of both the executive and judicial branches of government.

    1950 – The Inchon Landing During the Korean War

    September 15 also became an important date in American military history.

    On September 15, 1950, United Nations forces led by the United States launched the amphibious landing at Inchon, South Korea, during the Korean War.

    The operation was directed by General Douglas MacArthur and involved U.S. Navy and Marine forces.

    The landing was extremely risky.

    Inchon presented military planners with difficult tides, narrow waterways, fortified positions, and other geographic challenges. Despite those obstacles, American forces successfully landed and began securing the area.

    The operation dramatically changed the momentum of the war.

    North Korean forces had pushed South Korean and United Nations troops into a relatively small defensive area around Pusan. The Inchon landing placed forces behind North Korean lines and helped create an opportunity for UN troops to break out of their defensive positions.

    Seoul was subsequently recaptured.

    The Korean War would continue for nearly three more years, but the Inchon landing remains one of the most famous amphibious operations in U.S. military history.

    1963 – The 16th Street Baptist Church Bombing

    One of the darkest events associated with September 15 occurred in Birmingham, Alabama.

    On Sunday morning, September 15, 1963, a bomb exploded at the 16th Street Baptist Church, a prominent African American church and an important gathering place for Birmingham’s Civil Rights Movement.

    Members of the Ku Klux Klan had planted dynamite at the church.

    Four young girls were killed:

    Addie Mae Collins, age 14
    Denise McNair, age 11
    Carole Robertson, age 14
    Cynthia Wesley, age 14

    The girls were preparing for the church’s Youth Day activities when the explosion occurred.

    Many others were injured.

    The attack shocked Americans across the country.

    The bombing wasn’t simply an attack against a building. The church had become an important center for Birmingham’s African American community and the struggle against segregation.

    Civil rights leaders and community members frequently gathered there, making the church a symbol of the movement.

    The bombing demonstrated the extreme violence that could be directed against people challenging racial segregation.

    But the attackers failed to destroy the movement.

    Instead, the deaths of the four girls became another powerful symbol of why change was urgently needed.

    The National Park Service notes that the attack shocked the nation and helped galvanize the Civil Rights Movement. The struggle in Birmingham and events surrounding it contributed to growing public pressure for federal civil rights legislation.

    The Civil Rights Act would eventually be signed into law on July 2, 1964.

    Remembering Addie Mae, Denise, Carole, and Cynthia

    When discussing September 15, it is important that the four girls are remembered as more than names in a history book.

    They were children.

    They had families.

    They had friends, dreams, personalities, and futures that should have been theirs to experience.

    They had gone to church that Sunday morning expecting an ordinary day.

    Instead, they became victims of racial terrorism.

    Their deaths remain among the most heartbreaking reminders of the human cost of segregation and racial hatred in the United States.

    Remembering them keeps the focus where it belongs—not only on the political consequences of the bombing but also on the lives that were stolen.

    A Date That Shows Different Sides of the American Story

    September 15 offers a striking cross-section of American history.

    In 1789, Americans were building the institutions of their new constitutional government.

    In 1857, William Howard Taft was born, a man who would eventually lead two of America’s three branches of government at different points in his career.

    In 1950, American troops participated in the daring Inchon landing during the Korean War.

    And in 1963, four young girls were murdered while attending church because racial hatred and resistance to integration had turned Birmingham into a battleground in the struggle for civil rights.

    These events are very different, but together they reveal something important about studying history.

    History isn’t simply a collection of dates.

    It is the story of decisions and their consequences.

    It is about institutions being created, wars being fought, people seeking power, ordinary citizens demanding equality, and families experiencing moments that permanently change their lives.

    Why September 15 Still Matters

    Studying American history requires us to remember achievements without ignoring failures.

    There are moments worth celebrating.

    There are moments worth honoring.

    And there are moments that should make us uncomfortable because they reveal how badly Americans have sometimes failed to live up to the nation’s ideals.

    All of them belong in the story.

    The creation of the Department of State demonstrates the work required to build a functioning republic.

    William Howard Taft’s life shows the many ways individuals can influence America’s institutions.

    The Inchon landing reminds us of the sacrifices made by American service members during the Korean War—a conflict sometimes overshadowed by World War II and Vietnam.

    And the bombing of the 16th Street Baptist Church reminds us that progress toward equality has often come at an enormous human cost.

    History becomes valuable when we do more than memorize it.

    We should ask what happened, why it happened, who was affected, and what lessons can still be carried forward.

    Final Thoughts

    September 15 is a day containing both achievement and tragedy in American history.

    It reminds us of a young nation creating its government, a future president and Chief Justice beginning his life, American troops undertaking a daring military operation, and four innocent girls whose deaths became forever connected to America’s struggle for civil rights.

    Some historical moments inspire pride.

    Others demand reflection.

    Both deserve to be remembered.

    Because understanding America’s history means looking at the entire story—the victories, the sacrifices, the injustice, the courage, and the people whose lives helped shape the country we know today.

    Which September 15 event do you believe had the greatest impact on American history, and why?

  • Mocktail of the Day: Pear Ginger Fizz

    Mocktail of the Day: Pear Ginger Fizz

    Some mocktails are sweet and fruity. Others are crisp and refreshing. Then there are drinks that manage to bring several flavors together while still tasting light, balanced, and incredibly easy to enjoy.

    Today’s Mocktail of the Day: Pear Ginger Fizz does exactly that.

    Juicy pear brings a naturally mellow sweetness, fresh lemon adds brightness, ginger provides a warm little kick, and sparkling water finishes everything with a refreshing burst of bubbles.

    The result is an alcohol-free drink that feels sophisticated without requiring complicated ingredients or bartending techniques.

    Whether you’re looking for something refreshing after a long day, putting together drinks for a dinner party, hosting friends who don’t drink alcohol, or simply trying something new, the Pear Ginger Fizz deserves a spot on your mocktail list.

    🍐 Mocktail of the Day: Pear Ginger Fizz

    Pear doesn’t always get the attention it deserves when it comes to drinks.

    Lemon, lime, strawberry, pineapple, peach, and watermelon tend to dominate mocktail recipes. Pear, however, has a naturally delicate sweetness that works beautifully with stronger flavors.

    That’s where ginger comes in.

    Ginger gives the drink a warm, slightly spicy character that keeps the pear from becoming overly sweet.

    Add fresh lemon juice for acidity and sparkling water for bubbles, and you’ve got a drink that’s crisp, refreshing, slightly spicy, and wonderfully balanced.

    Ingredients

    For one Pear Ginger Fizz, you’ll need:

    • 2 ounces pear nectar or pear juice
    • ¾ ounce fresh lemon juice
    • ½ ounce ginger syrup
    • 3–4 ounces sparkling water or club soda
    • Ice
    • Fresh pear slice for garnish
    • Thin slice of fresh ginger for garnish, optional
    • Rosemary sprig for garnish, optional

    For Homemade Ginger Syrup

    If you’d like to make your own ginger syrup, you’ll need:

    • ½ cup water
    • ½ cup granulated sugar
    • About 2 inches fresh ginger, peeled and sliced

    How to Make Homemade Ginger Syrup

    Making ginger syrup at home is surprisingly easy.

    Add the water, sugar, and sliced ginger to a small saucepan.

    Heat over medium heat while stirring until the sugar completely dissolves.

    Once the mixture begins to simmer, reduce the heat and allow it to gently simmer for about five minutes.

    Remove it from the heat and let the ginger steep for another 15–20 minutes.

    The longer it sits, the stronger the ginger flavor becomes.

    Strain out the ginger pieces and allow the syrup to cool completely.

    Store the finished syrup in a covered container in the refrigerator.

    Now you’ve got ginger syrup ready for today’s Pear Ginger Fizz and plenty of other mocktails.

    How to Make a Pear Ginger Fizz

    Step 1: Fill Your Glass

    Fill a tall glass or stemless wine glass with ice.

    Large cubes work especially well because they melt more slowly and keep the drink cold without quickly watering it down.

    Step 2: Add the Pear

    Pour approximately 2 ounces of pear nectar or pear juice over the ice.

    Pear nectar tends to produce a richer and slightly sweeter drink, while pear juice creates something lighter.

    Either works.

    Step 3: Add Lemon

    Pour in ¾ ounce of freshly squeezed lemon juice.

    Fresh lemon makes a noticeable difference here.

    Its bright acidity balances the sweetness of the pear and ginger syrup.

    Step 4: Add Ginger Syrup

    Add approximately ½ ounce ginger syrup.

    If you love ginger, increase it slightly.

    If you’re unsure about the spice, start with less. You can always add more after tasting.

    Step 5: Add the Fizz

    Top the drink with sparkling water or club soda.

    Gently stir everything together.

    You don’t want to stir aggressively because you’ll lose some of those refreshing bubbles.

    Step 6: Garnish

    Finish with a thin pear slice.

    For additional aroma and presentation, add a small piece of fresh ginger or a rosemary sprig.

    Serve immediately.

    What Does a Pear Ginger Fizz Taste Like?

    The first sip is bright and refreshing.

    Pear provides a soft, almost floral sweetness.

    Then the lemon arrives with enough tartness to keep everything balanced.

    Ginger follows with a subtle warming sensation.

    Finally, the carbonation gives the entire drink a clean, refreshing finish.

    It’s not overwhelmingly sweet.

    It’s not aggressively spicy.

    And it doesn’t taste like you’re simply drinking fruit juice with ice.

    Instead, the flavors work together to create something that feels much more like a carefully crafted cocktail—without the alcohol.

    Why Pear and Ginger Work So Well Together

    Pear has a subtle flavor.

    That’s actually one of its greatest strengths.

    Because pear isn’t extremely acidic or overpoweringly sweet, it pairs well with ingredients that have stronger personalities.

    Ginger is almost the opposite.

    It’s aromatic, spicy, warm, and instantly recognizable.

    Put the two together and each ingredient helps the other.

    Pear softens ginger’s sharpness.

    Ginger gives pear additional depth.

    Lemon ties the flavors together by introducing acidity.

    Sparkling water keeps everything light.

    It’s a simple combination, but that’s often where the best drinks begin.

    Choosing Your Pear Juice

    You have several options when making this mocktail.

    Pear nectar usually produces the richest flavor.

    Because nectar can be thicker and sweeter than regular juice, it creates a fuller-bodied mocktail.

    Regular pear juice produces a lighter version.

    Fresh pear purée is another possibility.

    If you have ripe pears available, peel and core one, then blend it until smooth.

    You can add a spoonful or two of the purée directly to the drink.

    Just remember that fresh pear purée will give your mocktail a thicker texture.

    For an especially smooth drink, strain the purée before using it.

    Use Ripe Pears for Garnish

    The garnish might seem like a small detail, but a beautiful pear slice makes this mocktail look much more impressive.

    Choose a pear that’s ripe but still firm enough to slice cleanly.

    Bartlett, Anjou, Bosc, and Comice pears can all work.

    Cut a thin slice and place it against the inside of the glass or attach it to the rim.

    If you’re preparing garnishes ahead of time, lightly coat the pear slices with lemon juice.

    This helps slow down browning.

    Make the Ginger Stronger

    Ginger lovers can easily turn up the heat.

    One option is simply increasing the amount of ginger syrup.

    Another is muddling a thin piece of fresh ginger in the bottom of your shaker or glass before adding the other ingredients.

    For an even stronger ginger experience, replace the sparkling water with alcohol-free ginger beer.

    That changes the personality of the drink considerably.

    Instead of being delicately fizzy with a mild ginger background, it becomes bold, spicy, and intensely refreshing.

    Try both versions and see which one you prefer.

    Pear Ginger Beer Fizz

    For the bolder variation, combine:

    • 2 ounces pear nectar
    • ¾ ounce fresh lemon juice
    • ¼ ounce ginger syrup
    • 4 ounces ginger beer
    • Ice

    Build everything over ice and gently stir.

    Because ginger beer already contains plenty of ginger flavor and sweetness, you’ll probably want less ginger syrup.

    Taste before adding more.

    Garnish with pear and lime or lemon.

    Add Rosemary

    Pear, ginger, and rosemary make a surprisingly elegant combination.

    Rosemary contributes a piney, herbal aroma that immediately makes the drink feel more sophisticated.

    You don’t need much.

    Simply place a rosemary sprig between your palms and gently clap once.

    This releases some of the aromatic oils.

    Place the sprig in the finished drink alongside the pear garnish.

    Every time you bring the glass toward your face, you’ll smell the rosemary before tasting the pear and ginger.

    That little detail can dramatically change the drinking experience.

    Try Cinnamon for Fall

    The Pear Ginger Fizz works year-round, but it can easily become an autumn mocktail.

    Add a tiny pinch of cinnamon or garnish the glass with a cinnamon stick.

    Pear, ginger, and cinnamon naturally create flavors associated with cooler weather.

    You could even make a spiced ginger syrup using ginger, cinnamon, and a small piece of star anise.

    Serve it at Thanksgiving, autumn gatherings, Halloween parties, or any chilly evening when you want something festive without alcohol.

    Turn It Into a Holiday Mocktail

    Want something elegant enough for Thanksgiving, Christmas, or New Year’s Eve?

    The Pear Ginger Fizz is an excellent starting point.

    Use pear nectar, lemon juice, ginger syrup, and sparkling water as usual.

    Then add:

    • Rosemary
    • Fresh cranberries
    • Pear slices
    • Cinnamon stick
    • Star anise

    You don’t need to use all of them.

    Even a rosemary sprig with a few floating cranberries can transform the presentation.

    Serve the drink in a wine glass or champagne flute for an even more festive appearance.

    Make It Sweeter

    If you prefer sweeter mocktails, there are several ways to adjust the Pear Ginger Fizz.

    Increase the ginger syrup slightly.

    You can also add simple syrup, honey syrup, or maple syrup.

    Maple syrup works particularly well with pear during autumn.

    Just remember that a little goes a long way.

    Start with about a teaspoon, stir, taste, and adjust.

    You want to enhance the pear rather than completely cover it.

    Make It Less Sweet

    Maybe you prefer something crisp and dry.

    That’s easy too.

    Use regular pear juice instead of nectar.

    Reduce the ginger syrup.

    Increase the lemon juice slightly.

    Then add plenty of club soda.

    You’ll end up with a lighter, more refreshing drink where pear becomes a subtle background flavor instead of the dominant sweetness.

    This version is especially enjoyable with dinner.

    Make a Frozen Pear Ginger Mocktail

    When the weather is hot, turn this recipe into a frozen drink.

    Add to a blender:

    • 3 ounces pear nectar
    • ¾ ounce lemon juice
    • ½ ounce ginger syrup
    • 1 cup ice

    Blend until smooth.

    Pour into a chilled glass and add just a small splash of sparkling water on top.

    Garnish with pear.

    You’ll get a completely different texture while keeping the same pear-ginger flavor combination.

    Add Fresh Mint

    Mint provides another simple variation.

    Gently muddle four or five mint leaves in the bottom of your glass before adding the pear juice.

    Don’t pulverize them.

    A gentle press is enough to release the oils.

    Add ice, pear nectar, lemon, ginger syrup, and sparkling water.

    The mint makes the drink even more refreshing and creates a version that’s particularly good during spring and summer.

    Try Pear and Cucumber

    For an ultra-refreshing version, add cucumber.

    Muddle two or three thin cucumber slices with the lemon juice.

    Add pear nectar, ginger syrup, and ice.

    Top with sparkling water.

    Cucumber adds freshness without competing heavily with the pear.

    Garnish with alternating cucumber and pear slices for a beautiful presentation.

    Make a Pear Ginger Punch

    Hosting a party?

    There’s no reason to make every glass individually.

    You can turn this recipe into a pitcher.

    For approximately eight servings, combine:

    • 2 cups pear nectar
    • ¾ cup fresh lemon juice
    • ½ cup ginger syrup

    Mix these ingredients in a pitcher and refrigerate until cold.

    When you’re ready to serve, add approximately 3 cups of chilled sparkling water.

    Add pear slices and lemon wheels.

    Serve over ice.

    The important part is waiting until close to serving time before adding the sparkling water.

    If you add it hours beforehand, the punch will lose much of its carbonation.

    Perfect for Baby Showers and Family Celebrations

    Mocktails are especially useful when you’re entertaining a mixed crowd.

    Not everyone drinks alcohol.

    Some people are driving.

    Others simply prefer alcohol-free beverages.

    Instead of giving those guests only water or soda, a thoughtfully prepared mocktail makes everyone feel included in the celebration.

    The Pear Ginger Fizz works beautifully for:

    • Baby showers
    • Bridal showers
    • Birthday parties
    • Family dinners
    • Holiday gatherings
    • Brunches
    • Backyard parties
    • Graduation celebrations
    • New Year’s Eve
    • Dinner parties

    Its elegant appearance makes it suitable for special occasions, but the recipe is easy enough for an ordinary afternoon.

    Create a Mocktail Station

    For larger gatherings, consider creating a build-your-own mocktail station.

    Set out pear nectar, ginger syrup, lemon juice, sparkling water, ginger beer, and plenty of ice.

    Then provide garnishes such as:

    • Pear slices
    • Lemon wheels
    • Lime wedges
    • Mint
    • Rosemary
    • Cucumber
    • Fresh berries
    • Cinnamon sticks

    Guests can adjust their drinks according to their own preferences.

    Someone who loves ginger can use ginger beer.

    Someone who wants something lighter can add extra sparkling water.

    Someone who enjoys tart drinks can squeeze in more lemon.

    It’s interactive, easy, and gives everyone control over their own drink.

    What to Serve With a Pear Ginger Fizz

    Because this mocktail is refreshing rather than extremely sweet, it works with a wide variety of foods.

    Try serving it with:

    • Grilled chicken
    • Charcuterie boards
    • Soft cheeses
    • Salads
    • Turkey sandwiches
    • Pork dishes
    • Roasted vegetables
    • Seafood
    • Light pasta dishes
    • Brunch foods

    Pear also pairs particularly well with cheese.

    A Pear Ginger Fizz alongside a cheese board featuring brie, goat cheese, cheddar, walnuts, crackers, and fresh fruit makes an easy but impressive appetizer combination.

    Make the Presentation Special

    You don’t need professional bartending equipment to make a beautiful mocktail.

    Start with a clear glass.

    Add plenty of fresh ice.

    Pour the drink slowly so you can see the bubbles rising through the pear mixture.

    Add a thin pear slice.

    Finish with rosemary, mint, or ginger.

    For parties, you can even use dehydrated pear slices as garnishes.

    The goal isn’t perfection.

    It’s simply making the drink look as enjoyable as it tastes.

    Why Mocktails Deserve More Attention

    For a long time, alcohol-free drink choices at gatherings were fairly predictable.

    Water.

    Soda.

    Juice.

    Maybe lemonade.

    Today’s mocktails prove that choosing not to drink alcohol doesn’t mean choosing a boring beverage.

    You can still experiment with fresh fruit, herbs, spices, syrups, citrus, carbonation, teas, and creative garnishes.

    The Pear Ginger Fizz is a perfect example.

    There’s no alcohol missing from this drink.

    Pear, ginger, lemon, and bubbles provide plenty of flavor on their own.

    Make It Your Own

    One of the best things about mocktails is how easy they are to customize.

    Think of this recipe as your starting point.

    Want it sweeter?

    Add more pear nectar.

    Want it spicier?

    Increase the ginger.

    Want more tartness?

    Squeeze in additional lemon.

    Want something herbal?

    Add rosemary.

    Want maximum refreshment?

    Add cucumber and mint.

    Want a holiday version?

    Bring in cranberries and cinnamon.

    Want something tropical?

    Try a small splash of pineapple juice.

    Experiment until you find the version that tastes best to you.

    Mocktail of the Day

    Today’s Mocktail of the Day: Pear Ginger Fizz proves that a great alcohol-free drink doesn’t need dozens of ingredients.

    Pear brings mellow fruit sweetness.

    Ginger adds warmth and spice.

    Fresh lemon delivers brightness.

    Sparkling water gives the drink its refreshing finish.

    Together, they create a mocktail that’s easy enough to make at home but elegant enough to serve at a celebration.

    Make the classic version, turn up the ginger with ginger beer, add rosemary for an herbal touch, introduce cinnamon for autumn, or create an entire pitcher for your next gathering.

    No matter how you customize it, don’t forget that final pear slice.

    Sometimes a simple garnish is all it takes to turn an everyday drink into something that feels special.

    Would you make your Pear Ginger Fizz extra spicy with ginger beer, sweet and fruity, or crisp with lots of sparkling water?