Author: Brett Murphy

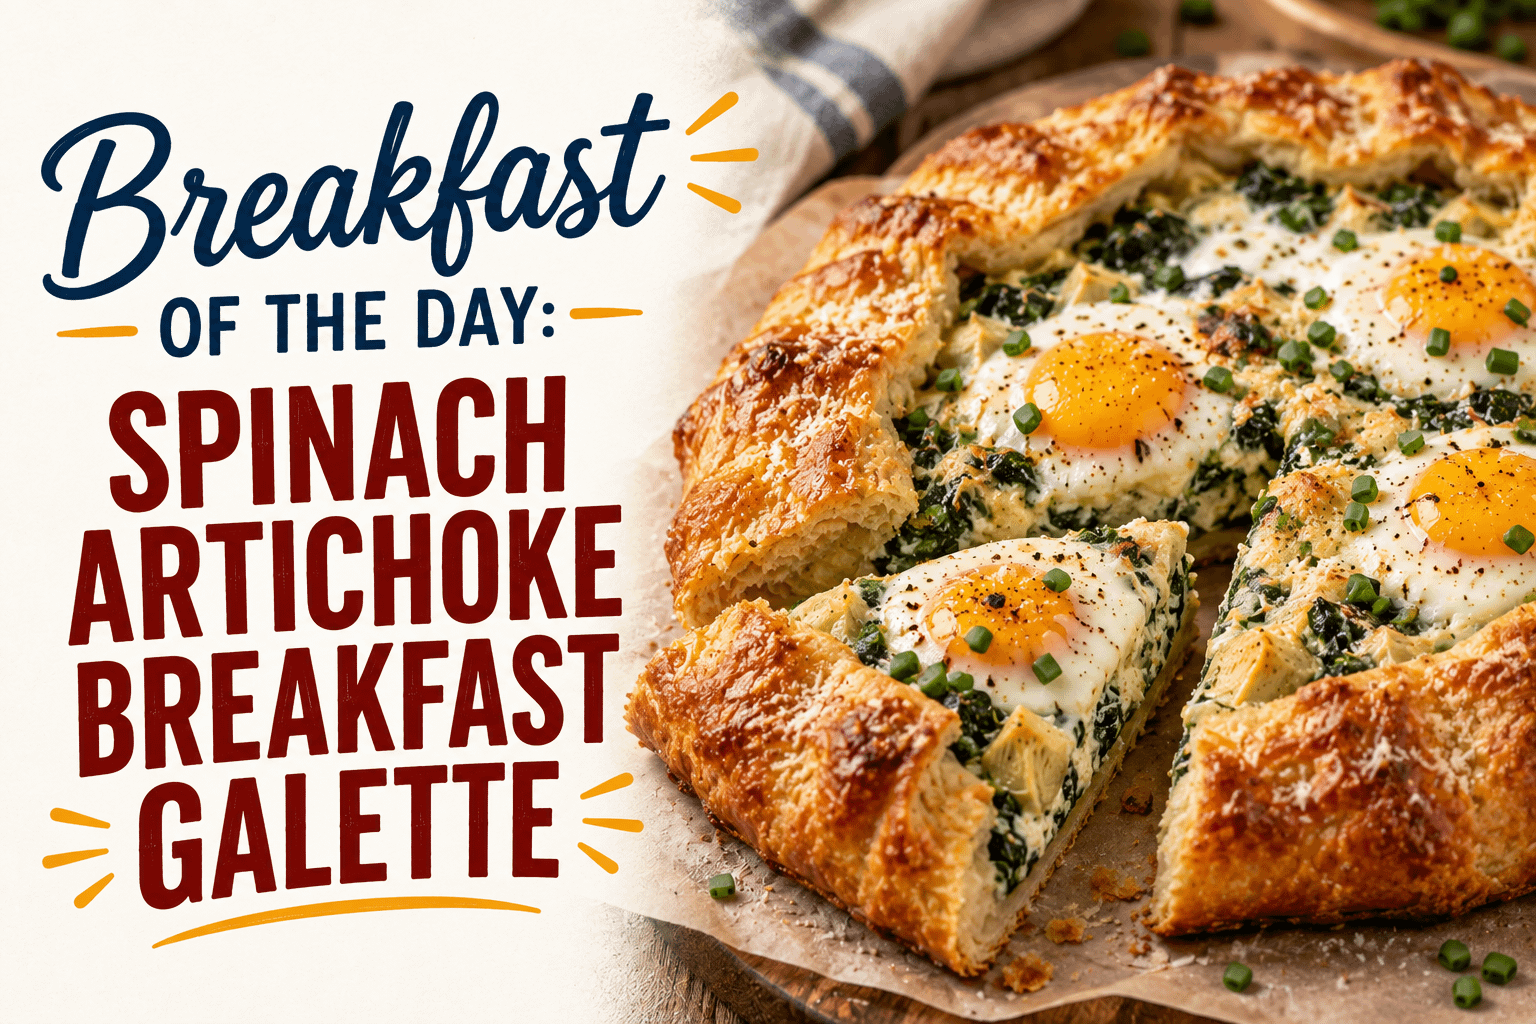
  • Breakfast of the Day: Spinach Artichoke Breakfast Galette

    Breakfast of the Day: Spinach Artichoke Breakfast Galette

    Some breakfasts are comforting because they are familiar. Others feel special because they turn simple ingredients into something beautiful enough to serve at a weekend brunch. This Spinach Artichoke Breakfast Galette delivers both experiences in one golden, satisfying dish.

    A flaky pastry crust surrounds a creamy filling made with spinach, artichoke hearts, garlic, cream cheese, mozzarella, and Parmesan. Eggs are baked directly into the filling, giving every slice a hearty breakfast centerpiece. The rustic folded edges make the galette look impressive without requiring the careful shaping of a traditional pie or tart.

    That relaxed appearance is part of its charm. A galette is meant to look handmade. The edges do not need to be perfectly even, and the folds do not need to match. Once the crust becomes crisp and deeply golden, the cheese melts, and the egg yolks turn glossy and rich, every imperfect fold adds character.

    This breakfast galette is an excellent choice when you want something different from an ordinary omelet, breakfast casserole, or toast. It can be served warm for a leisurely family breakfast, sliced into smaller portions for brunch, or prepared in stages so that the morning assembly is quick and manageable.

    What Is a Breakfast Galette?

    A galette is a free-form pastry with filling placed in the center and the outer edges of the dough folded inward. Unlike a traditional pie, it does not require a pie plate. Unlike a tart, it does not need a special pan with fluted edges. The galette is assembled directly on parchment paper and baked on a sheet pan.

    Many galettes are filled with fruit, but the same simple technique works beautifully with savory ingredients. For this breakfast version, the pastry holds a creamy spinach and artichoke mixture along with baked eggs. The exposed center allows the filling to brown while the folded crust becomes crisp and flaky.

    The result falls somewhere between a savory breakfast tart, a spinach-artichoke dip, and baked eggs in pastry. It is rich enough to feel special, but fresh spinach, artichokes, lemon, and chives keep the flavors from becoming too heavy.

    Why This Spinach Artichoke Galette Works

    Spinach and artichokes are a classic combination because they provide contrasting flavors and textures. Spinach adds an earthy freshness, while artichoke hearts bring a mild tang and tender bite. Cream cheese binds everything together, mozzarella provides a soft melt, and Parmesan contributes a salty, nutty finish.

    The eggs turn the galette into a complete breakfast. As they bake, the whites settle into the creamy filling while the yolks remain rich and golden. You can adjust the baking time depending on whether you prefer softer or firmer yolks.

    The recipe is also flexible. A refrigerated pie crust makes it convenient, while homemade pastry can be used when you have extra time. Frozen spinach works in place of fresh spinach, different cheeses can be substituted, and cooked bacon, sausage, mushrooms, or roasted peppers can be added.

    Most importantly, the technique is approachable. The rustic shape eliminates pressure to produce a perfect pastry. If the dough tears, it can be patched. If one fold is wider than another, the finished galette will still look inviting.

    Ingredients

    This recipe makes one 11- to 12-inch galette and serves approximately 6.

    For the Galette

    • 1 refrigerated pie crust, about 9 to 10 ounces, or one disk of homemade pie dough
    • 1 tablespoon olive oil
    • 2 cloves garlic, finely minced
    • 5 ounces fresh baby spinach, roughly chopped
    • 1 cup canned or jarred artichoke hearts, drained, patted dry, and chopped
    • 4 ounces cream cheese, softened
    • 1/2 cup shredded low-moisture mozzarella cheese
    • 1/3 cup finely grated Parmesan cheese, divided
    • 1 teaspoon finely grated lemon zest
    • 1/4 teaspoon crushed red pepper flakes, optional
    • 1/4 teaspoon ground black pepper
    • 1/4 teaspoon salt, plus more to taste
    • 4 large eggs
    • 1 tablespoon chopped fresh chives, plus more for serving

    For the Egg Wash

    • 1 large egg
    • 1 teaspoon water

    Optional Garnishes

    • Additional chopped chives
    • Freshly ground black pepper
    • Crumbled feta cheese
    • Hot sauce
    • Fresh arugula
    • Lemon wedges

    Choosing and Preparing the Ingredients

    Pie Dough

    A store-bought refrigerated pie crust keeps this breakfast recipe simple. Let it sit at room temperature for about 10 minutes before unrolling so it becomes flexible without turning warm and sticky. If the crust cracks, press the crack together with your fingers.

    Homemade all-butter pie dough can also be used. Roll it into a circle approximately 13 inches wide and about one-eighth inch thick. The dough should stay cold throughout assembly so the butter remains firm and creates flaky layers in the oven.

    Spinach

    Fresh baby spinach cooks quickly and has a mild flavor. It must be sautéed before going into the galette because raw spinach releases a surprising amount of water. After cooking, let it cool and squeeze out any remaining moisture.

    Frozen chopped spinach is a practical substitute. Thaw it completely and squeeze it very dry before measuring. About 1/2 cup of thawed, drained frozen spinach can replace the 5 ounces of fresh spinach.

    Artichoke Hearts

    Plain canned artichoke hearts packed in water are dependable and easy to use. Drain them thoroughly, blot them with a clean towel, and chop them into bite-size pieces. Marinated artichoke hearts can also be used, but drain away excess oil and consider reducing the added salt because marinades are often seasoned.

    Cheese

    Full-fat cream cheese produces the smoothest filling, but reduced-fat cream cheese works if preferred. Low-moisture mozzarella is better than fresh mozzarella because it contributes less liquid. Freshly grated Parmesan gives the filling a sharper flavor and helps the pastry edges brown.

    How to Make a Spinach Artichoke Breakfast Galette

    1. Cook the Spinach

    Heat the olive oil in a large skillet over medium heat. Add the minced garlic and cook for approximately 30 seconds, stirring constantly. The garlic should become fragrant but should not brown.

    Add the chopped spinach. Cook for 2 to 4 minutes, stirring and turning the leaves until they are completely wilted. Transfer the spinach to a plate and allow it to cool for several minutes.

    Place the cooled spinach in a clean kitchen towel or several layers of paper towels. Squeeze firmly to remove as much liquid as possible. This step is essential for preventing a soggy galette. Chop the squeezed spinach again if long pieces remain.

    2. Prepare the Filling

    In a medium bowl, combine the softened cream cheese, mozzarella, 1/4 cup of the Parmesan, lemon zest, red pepper flakes, black pepper, and salt. Stir until mostly smooth.

    Fold in the drained spinach, chopped artichoke hearts, and chives. Taste a small amount and adjust the seasoning if needed. Remember that Parmesan is salty, so add extra salt carefully.

    Cover the filling and refrigerate it while you prepare the pastry. Keeping the filling cool helps the dough remain firm during assembly.

    3. Prepare the Oven and Baking Sheet

    Place one oven rack in the lower-middle position. Preheat the oven to 400 degrees Fahrenheit.

    Lay a piece of parchment paper on the counter. Unroll or roll the pie dough directly on the parchment into a circle approximately 13 inches wide. Transfer the parchment and dough to a large rimmed baking sheet.

    If the dough has become soft, place the baking sheet in the refrigerator for 10 minutes before adding the filling.

    4. Add the Spinach Artichoke Filling

    Spoon the filling into the center of the dough. Spread it into an even circle, leaving a clean border approximately 2 inches wide around the outside.

    Use the back of a spoon to make four shallow wells in the filling. Space the wells evenly so that each egg will have its own area. Do not add the eggs yet. Beginning the baking process without them allows the pastry to crisp before the egg whites are introduced.

    5. Fold the Crust

    Lift one section of the uncovered dough and fold it over the outside edge of the filling. Continue working around the galette, folding and lightly pleating the dough as you go. Leave the center exposed.

    Press overlapping folds gently so they stay together. If the dough tears, pinch it closed or patch it with a small piece taken from a thicker edge.

    Whisk the egg with 1 teaspoon of water to make the egg wash. Brush it over the folded pastry. Sprinkle the remaining Parmesan across the crust.

    6. Begin Baking the Galette

    Bake the galette for 16 to 18 minutes. At this stage, the crust should look set and should be beginning to turn pale gold, but it will not be fully browned.

    Carefully remove the pan from the oven. If any of the egg wells have filled in as the cheese melted, redefine them gently with the back of a spoon.

    7. Add the Eggs

    Crack each egg into a separate small bowl before placing it on the galette. This makes it easier to remove a piece of shell and gives you greater control when adding the egg.

    Gently slide one egg into each well. If the eggs are especially large and the filling looks crowded, hold back a small amount of each egg white while keeping the yolk intact. The yolks should remain separated and visible.

    Season the eggs lightly with salt and black pepper.

    8. Finish Baking

    Return the galette to the oven and bake for another 8 to 13 minutes. For softer yolks, begin checking after 8 minutes. For firmer yolks, continue baking until they reach your preferred consistency.

    The galette is ready when the crust is deeply golden, the cheese is bubbling in places, and the egg whites are opaque and set. Remember that the eggs will continue cooking slightly from residual heat after the pan leaves the oven.

    9. Rest and Serve

    Allow the galette to rest on the baking sheet for 8 to 10 minutes. Resting helps the filling settle and makes the pastry easier to slice.

    Finish with chopped chives and freshly ground black pepper. Use a sharp knife or pizza cutter to divide the galette into wedges, positioning the cuts so each serving receives part of an egg.

    Helpful Preparation Tips

    Remove as Much Moisture as Possible

    Excess moisture is the greatest threat to a crisp galette. Squeeze the cooked spinach thoroughly and blot the artichoke hearts before adding them to the filling. If using marinated artichokes, drain them especially well.

    Keep the Pastry Cold

    Warm pie dough can become difficult to fold and may spread in the oven. If the dough feels soft or greasy at any stage, refrigerate the assembled galette for 10 to 15 minutes before baking.

    Do Not Overfill the Center

    It can be tempting to add more spinach mixture, but an overfilled galette is harder to fold and more likely to leak. Keep a full 2-inch border and spread the filling in an even layer.

    Bake on the Lower-Middle Rack

    Positioning the baking sheet slightly below the center of the oven encourages the bottom crust to brown. For an even crisper base, preheat a heavy baking sheet in the oven and carefully place the galette’s baking sheet on top of it.

    Add the Eggs Partway Through Baking

    Adding the eggs after the crust has begun baking prevents the yolks from becoming overcooked before the pastry is crisp. It also makes it easier to control the final consistency of the eggs.

    Let the Galette Rest Before Cutting

    Cutting immediately can cause the warm filling to spread. A brief rest gives the cheeses time to settle while the galette remains pleasantly warm.

    Substitutions and Variations

    Add Bacon or Sausage

    Fold 1/2 cup of cooked, crumbled bacon or breakfast sausage into the spinach mixture. Drain the meat well before adding it so excess grease does not soften the pastry.

    Include Mushrooms

    Sauté 4 ounces of sliced mushrooms until their moisture evaporates and their edges begin to brown. Let them cool before stirring them into the filling. Mushrooms bring a deeper, earthy flavor that pairs naturally with spinach and eggs.

    Use Roasted Red Peppers

    Add 1/3 cup of well-drained, chopped roasted red peppers for sweetness and color. Their deep red color also makes the sliced galette look especially attractive on a brunch table.

    Change the Cheese

    Replace the mozzarella with shredded Gruyère, fontina, Monterey Jack, or white cheddar. Crumbled feta or goat cheese can replace part of the cream cheese for a tangier filling.

    Make a Mediterranean Version

    Use feta instead of mozzarella and add chopped sun-dried tomatoes, fresh dill, and a small amount of oregano. Finish the baked galette with diced tomatoes and a squeeze of lemon.

    Add More Heat

    Increase the red pepper flakes or add chopped pickled jalapeños. A drizzle of hot sauce just before serving gives each person control over the spice level.

    Make Individual Galettes

    Divide the pastry into four smaller circles and prepare individual portions. Use one egg in the center of each galette. Smaller galettes may bake more quickly, so begin checking the pastry after approximately 12 minutes and the eggs after 6 minutes.

    Make It Without Eggs

    For an egg-free savory galette, spread the filling evenly without making wells and bake until the crust is golden and the center is hot. Add sliced tomatoes, mushrooms, or roasted peppers to make the filling more substantial.

    What to Serve With a Breakfast Galette

    Because the galette already includes pastry, vegetables, cheese, and eggs, it can stand on its own as a complete breakfast. A simple bowl of fruit or a citrus salad provides a refreshing contrast to the creamy filling.

    For brunch, serve it with mixed greens dressed in a light lemon vinaigrette. The acidity cuts through the richness of the pastry and cheese. Roasted breakfast potatoes, crispy bacon, chicken sausage, or sliced ham can turn it into a larger meal.

    A small dish of hot sauce, pesto, or tomato relish also works well on the side. Coffee and tea are natural morning choices, while sparkling water with lemon keeps the meal light and refreshing.

    If serving a crowd, cut the galette into smaller wedges and place it alongside yogurt, fruit, muffins, and other brunch favorites. It is attractive enough to become the centerpiece without requiring elaborate decoration.

    Make-Ahead Instructions

    The spinach-artichoke filling can be prepared up to two days in advance. Store it in an airtight container in the refrigerator. Stir it before assembling the galette and drain away any liquid that has collected.

    The pastry can be rolled out and refrigerated between sheets of parchment paper for up to one day. Keep it covered so it does not dry out.

    You can assemble the galette with the filling, fold the crust, and refrigerate it for up to 8 hours before baking. Do not add the egg wash or whole eggs until you are ready to bake. Cover the assembled galette loosely to protect the dough.

    For the freshest result, bake the galette shortly before serving. The pastry is at its crispest during the first few hours after it leaves the oven.

    Storage and Reheating

    Allow leftovers to cool, then transfer them to an airtight container and refrigerate them within two hours. Properly stored galette will keep for up to three days.

    Reheat individual slices in a 350-degree oven or toaster oven for 8 to 12 minutes. This restores some of the crust’s crispness and warms the filling evenly. The egg yolks will become firmer during reheating, but the flavor remains delicious.

    The microwave can be used when time is limited, but the pastry will soften. Heat one slice in short intervals until warmed through.

    Freezing is possible, although the texture of the eggs may change. For the best freezer results, prepare and bake the galette without the eggs, cool it completely, and freeze the individual slices. Reheat the slices in the oven and serve them with freshly cooked eggs.

    A Breakfast Worth Sharing

    Spinach Artichoke Breakfast Galette proves that an impressive breakfast does not have to be complicated or perfectly shaped. A simple round of pastry becomes a golden frame for creamy spinach, tender artichokes, melted cheese, and baked eggs. Every wedge offers crisp edges, a rich center, and enough fresh flavor to keep the dish balanced.

    It is the kind of breakfast that can make an ordinary weekend morning feel more memorable. Prepare the filling in advance, keep the dough cold, and let the rustic folds work in your favor. Once the galette reaches the table, its golden crust and colorful center will do the rest.

    Would you keep this Spinach Artichoke Breakfast Galette vegetarian, or add bacon, sausage, mushrooms, or roasted peppers?
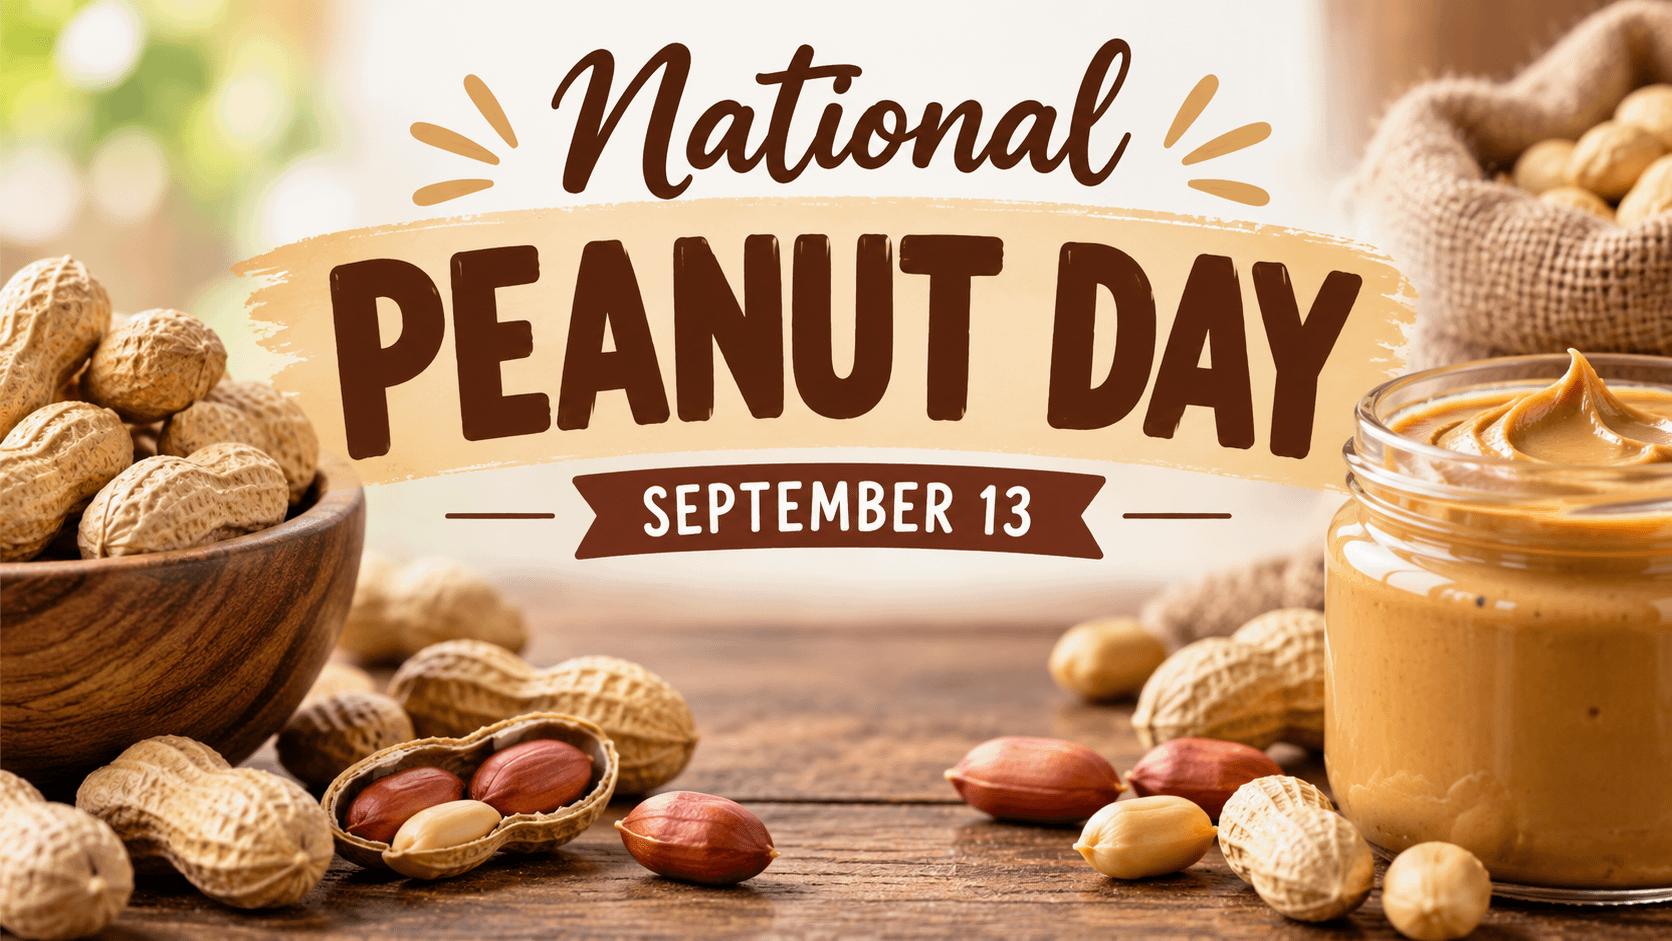
  • National Peanut Day – September 13: Celebrating America’s Favorite Little Legume

    National Peanut Day – September 13: Celebrating America’s Favorite Little Legume

    Every year on September 13, peanut lovers have an excellent excuse to grab a handful of roasted peanuts, make a classic peanut butter sandwich, or enjoy a favorite peanut-filled dessert. It’s National Peanut Day, a celebration dedicated to one of the most familiar and versatile foods in American kitchens.

    Peanuts may be small, but their influence is enormous. They appear at baseball games, in candy bars, in trail mixes, in sauces, in baked goods, and, of course, in jars of peanut butter. They can be sweet, salty, crunchy, creamy, roasted, boiled, ground, or incorporated into an impressive range of dishes.

    National Peanut Day is more than an opportunity to snack. It is also a chance to appreciate the history of the peanut, learn how peanuts grow, recognize their role in American agriculture, and discover a few new ways to enjoy them.

    When Is National Peanut Day?

    National Peanut Day is celebrated annually on September 13.

    It should not be confused with National Peanut Butter Day, which is celebrated on January 24. September 13 puts the spotlight on the peanut itself and all the different ways people use it.

    From a simple bowl of salted peanuts to peanut brittle, peanut sauces, peanut butter cookies, and peanut-topped ice cream, there are plenty of ways to participate.

    Peanuts Aren’t Actually Nuts

    Here is one of the most interesting facts about peanuts: they aren’t true nuts.

    Botanically, peanuts are legumes.

    That puts them in the same general plant family as foods such as beans, peas, and lentils. Unlike tree nuts such as walnuts, almonds, and pecans, peanuts develop underground.

    The peanut plant produces small yellow flowers above the soil. After pollination, a structure called a peg grows downward and enters the ground. The peanut pods then develop beneath the soil.

    This unusual growing process is one of the characteristics that makes peanuts so fascinating.

    So while we call them “nuts” in everyday conversation, scientifically, the peanut belongs to an entirely different category.

    A Brief History of Peanuts

    Peanuts have been part of the human diet for thousands of years.

    Evidence points to peanuts originating in South America, where Indigenous peoples cultivated and consumed them long before they became common elsewhere in the world.

    European exploration and expanding global trade eventually helped carry peanuts to other continents. They became established in parts of Africa and Asia and later became an important crop in North America.

    Peanuts grew in importance in the United States during the 19th century.

    Their popularity increased considerably during and after the Civil War, when both soldiers and civilians became more familiar with them as an inexpensive and portable source of food.

    By the late 1800s and early 1900s, peanuts were becoming increasingly associated with American entertainment and everyday life.

    Roasted peanuts became a familiar concession at circuses and sporting events. Vendors selling peanuts at baseball games helped establish a tradition that remains recognizable generations later.

    And then there was peanut butter.

    The Rise of Peanut Butter

    For many Americans, it is almost impossible to talk about peanuts without talking about peanut butter.

    The development of modern peanut butter involved several inventors and food innovators rather than one single person. Various forms of ground peanut paste existed long before the familiar jars found in supermarkets today.

    During the late 19th and early 20th centuries, new processing techniques helped turn peanut butter into a commercially successful product.

    Eventually, peanut butter became an American household staple.

    The classic peanut butter and jelly sandwich became especially iconic. It is inexpensive, easy to prepare, portable, and endlessly customizable.

    Crunchy or creamy?

    Grape or strawberry jelly?

    White bread, wheat bread, toast, or something completely different?

    People may disagree about the perfect combination, but PB&J has earned its place as one of America’s most recognizable sandwiches.

    George Washington Carver and the Peanut

    One of the most famous names associated with peanuts is George Washington Carver.

    Carver was an agricultural scientist and educator whose work helped farmers understand the value of crop diversification and soil conservation.

    He encouraged farmers, particularly in the South, to rotate crops rather than continuously planting cotton. Crops such as peanuts and sweet potatoes offered farmers alternatives while helping improve agricultural practices.

    Carver also investigated numerous practical uses for agricultural crops, including peanuts.

    An important misconception, however, deserves correcting: George Washington Carver did not invent peanut butter.

    His connection to peanuts came primarily through agricultural research, education, and efforts to encourage new uses and markets for crops that could benefit farmers.

    His work nevertheless helped make the peanut an important symbol of agricultural innovation in American history.

    Why Peanuts Became So Popular

    Part of the peanut’s success comes from its versatility.

    You can eat peanuts straight from the shell, roast them, season them, grind them, bake with them, add them to candy, sprinkle them over desserts, or incorporate them into savory meals.

    They also work well with an enormous variety of flavors.

    Chocolate and peanuts are an obvious pairing. So are peanuts and caramel.

    But peanuts can also complement chili peppers, garlic, soy sauce, ginger, lime, honey, cinnamon, and numerous other ingredients.

    Different cultures have developed their own ways of using peanuts and peanut-based sauces, demonstrating that the peanut’s appeal extends far beyond American peanut butter sandwiches.

    Peanuts at the Ballpark

    Few foods have a stronger connection to American baseball culture than peanuts.

    For generations, spectators have cracked peanut shells while watching innings unfold.

    The association became so strong that peanuts are even immortalized in the famous baseball song “Take Me Out to the Ball Game,” with its reference to peanuts and Cracker Jack.

    That connection represents something larger about food and tradition.

    Sometimes a food becomes special because of where and when we eat it.

    A bag of peanuts at home might simply be a snack. A bag of peanuts shared while sitting in the stands at a baseball game can become part of a memory.

    National Peanut Day celebrates those traditions too.

    Popular Ways to Enjoy Peanuts

    You certainly don’t need an elaborate recipe to celebrate National Peanut Day.

    Sometimes the simplest options are the best.

    Try a handful of dry-roasted peanuts for an afternoon snack. Add chopped peanuts to oatmeal, yogurt, or a smoothie bowl for extra crunch.

    Peanut butter can be spread over toast and topped with sliced bananas, apples, strawberries, or a drizzle of honey.

    For something sweeter, peanuts are fantastic in cookies, brownies, fudge, chocolate bark, cakes, pies, and homemade candies.

    If you prefer savory flavors, use chopped peanuts as a topping for noodles, salads, stir-fries, or vegetables.

    Peanut-based sauces can also transform an ordinary meal into something much more interesting.

    Classic Peanut Butter Cookies

    National Peanut Day is an ideal excuse to make a batch of peanut butter cookies.

    Ingredients

    • 1/2 cup unsalted butter, softened
    • 1/2 cup creamy peanut butter
    • 1/2 cup granulated sugar
    • 1/2 cup packed brown sugar
    • 1 large egg
    • 1 teaspoon vanilla extract
    • 1 1/4 cups all-purpose flour
    • 3/4 teaspoon baking soda
    • 1/4 teaspoon salt
    • Extra granulated sugar for rolling, optional

    Directions

    Preheat the oven to 350°F and line a baking sheet with parchment paper.

    Cream the softened butter, peanut butter, granulated sugar, and brown sugar together until smooth and fluffy.

    Add the egg and vanilla extract and mix until combined.

    In a separate bowl, whisk together the flour, baking soda, and salt.

    Gradually add the dry ingredients to the peanut butter mixture.

    Scoop the dough into small balls. Roll them lightly in granulated sugar if desired and arrange them on the prepared baking sheet.

    Use a fork to gently press each cookie in one direction and then the other, creating the familiar crisscross peanut butter cookie pattern.

    Bake for approximately 9–11 minutes, or until the edges are lightly golden.

    Allow the cookies to cool for several minutes on the baking sheet before transferring them to a cooling rack.

    Pour yourself a glass of milk, grab a warm cookie, and National Peanut Day suddenly feels complete.

    Make Your Own Peanut Trail Mix

    Another easy celebration idea is creating homemade peanut trail mix.

    There really isn’t a wrong combination.

    Start with roasted peanuts and add ingredients such as:

    • Almonds
    • Cashews
    • Raisins
    • Dried cranberries
    • Banana chips
    • Pretzels
    • Chocolate chips
    • Dark chocolate pieces
    • Sunflower seeds
    • Pumpkin seeds
    • Toasted coconut
    • Cereal

    Mix everything together and store it in an airtight container.

    You can customize the proportions depending on whether you want something sweet, salty, crunchy, or a combination of all three.

    Sweet and Savory Peanut Ideas

    National Peanut Day is also a great opportunity to experiment.

    For a sweet treat, melt chocolate and spoon small portions onto parchment paper. Sprinkle chopped peanuts over the chocolate and allow it to set. You have an incredibly simple homemade peanut chocolate bark.

    For something savory, toss roasted peanuts with a little smoked paprika, garlic powder, chili powder, or cayenne pepper.

    You can also combine peanut butter with ingredients such as soy sauce, lime juice, garlic, ginger, and a little sweetness to create a flavorful sauce for noodles or vegetables.

    Peanuts don’t have to stay in the snack bowl.

    Peanuts and Nutrition

    Peanuts pack considerable nutrition into a small serving.

    They provide plant-based protein, along with unsaturated fats, fiber, and several vitamins and minerals.

    Because peanuts are calorie-dense, portion size can matter, particularly when they’re eaten as a casual snack. Choosing varieties without excessive added salt or sugar can also be useful depending on your dietary needs.

    Peanut butter can offer similar nutritional benefits, although products vary considerably. Some contain primarily peanuts and salt, while others include added sugars and oils.

    Reading the ingredient label makes it easier to choose the option that works best for you.

    A Serious Note About Peanut Allergies

    While National Peanut Day is fun for many people, peanuts can pose a serious health risk to people with peanut allergies.

    Peanut allergies can cause severe and potentially life-threatening reactions.

    If you’re preparing peanut-containing foods for a school, workplace, party, community gathering, or other shared environment, always consider whether anyone has a peanut allergy.

    Cross-contact can also be dangerous, so simply removing visible peanuts from a dish may not make it safe.

    Celebrating responsibly means making sure everyone can participate safely, even if their celebration involves choosing a completely peanut-free treat.

    Fun Peanut Facts

    Peanuts are full of surprises.

    They grow underground even though the plant flowers above ground.

    They are legumes rather than true botanical nuts.

    They can be eaten raw in some preparations, roasted, boiled, ground into peanut butter, pressed for oil, or incorporated into countless recipes.

    Peanut shells also have uses beyond simply protecting the kernels.

    And despite the peanut’s close association with the United States, its history stretches much farther back and reaches across cultures and continents.

    That’s quite an impressive story for something that can fit in the palm of your hand.

    How to Celebrate National Peanut Day

    There are countless ways to make September 13 a little more peanut-filled.

    Make a peanut butter and jelly sandwich you haven’t eaten since childhood. Bake peanut butter cookies with your family. Try boiled peanuts if you’ve never experienced them. Make homemade peanut brittle. Add chopped peanuts to your favorite ice cream sundae.

    You could also prepare a savory peanut sauce, experiment with spicy roasted peanuts, make peanut butter banana toast for breakfast, or assemble homemade trail mix.

    Another fun idea is holding a creamy versus crunchy peanut butter taste test.

    Set out several varieties and see which one wins.

    For families with children, National Peanut Day can even become a small educational activity. Learn how peanut plants grow and discover why something we call a nut is actually a legume.

    Just remember to verify that everyone participating can safely consume peanuts.

    The Power of Simple Foods

    National food days can seem silly on the surface, but they often provide an opportunity to appreciate the ordinary things that become woven into our lives.

    Peanuts are a perfect example.

    Maybe they remind you of cracking shells at a baseball game.

    Maybe it’s the peanut butter sandwich packed in your childhood lunchbox.

    Perhaps it’s your grandmother’s peanut butter cookies, peanut brittle during the holidays, chocolate peanut candies from the corner store, or the peanut butter toast you still make when you need a quick breakfast.

    Food has an extraordinary ability to connect us to memories.

    A smell or taste can suddenly transport us to another place and time.

    That’s part of what makes days like National Peanut Day enjoyable. We aren’t merely celebrating an ingredient. We’re celebrating all the recipes, traditions, memories, and moments connected to it.

    Celebrate the Peanut on September 13

    From its South American origins to its enormous role in American agriculture and food culture, the humble peanut has traveled an impressive journey.

    Today, peanuts appear everywhere from ballparks and lunchboxes to restaurant kitchens and dessert tables.

    They can become something as simple as a handful of roasted peanuts or something as indulgent as a chocolate peanut butter dessert.

    However you choose to celebrate, September 13 is a great day to appreciate one of the world’s most versatile little legumes.

    Grab your favorite peanut snack, make something delicious, share it with someone you care about, and enjoy National Peanut Day.

    What is your favorite way to enjoy peanuts—roasted, boiled, covered in chocolate, baked into a dessert, or turned into creamy or crunchy peanut butter?

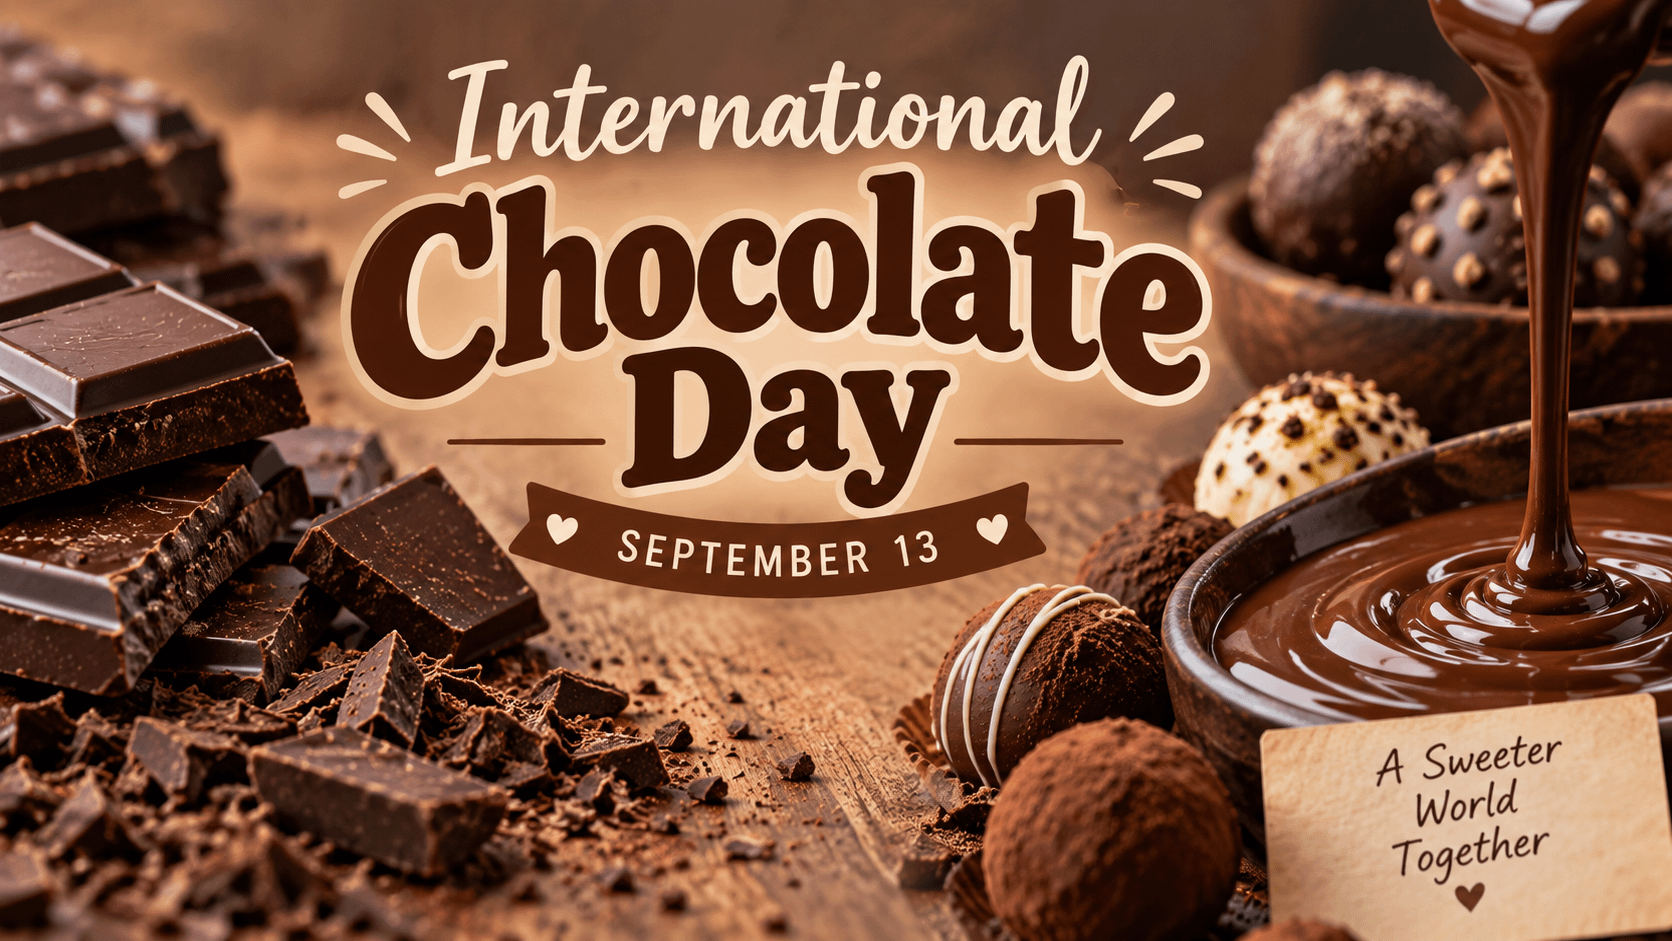
  • International Chocolate Day: Celebrating the Sweet Story of Chocolate

    International Chocolate Day: Celebrating the Sweet Story of Chocolate

    Few foods have the power to make people smile quite like chocolate. Whether it comes in the form of a creamy milk chocolate bar, a rich dark chocolate truffle, a warm brownie fresh from the oven, or a cup of comforting hot chocolate, chocolate has earned a special place in cultures and kitchens around the world.

    Every year on September 13, International Chocolate Day gives chocolate lovers an excellent reason to celebrate one of the world’s most beloved treats.

    But chocolate is much more than candy.

    Its story stretches back thousands of years, beginning with cacao in the ancient Americas and eventually developing into the enormous worldwide chocolate industry we know today. Chocolate has been used ceremonially, enjoyed as a beverage, given as a gift, incorporated into countless desserts, and associated with everything from romance to holidays.

    International Chocolate Day is a chance to enjoy your favorite chocolate treat while also appreciating the remarkable history behind it.

    When Is International Chocolate Day?

    International Chocolate Day is celebrated annually on September 13.

    The date is often associated with the birthday of Milton S. Hershey, who was born on September 13, 1857. Hershey became one of the most influential figures in the development of America’s chocolate industry.

    There are several other chocolate-related celebrations throughout the year, including World Chocolate Day on July 7 and numerous days devoted to particular varieties of chocolate and chocolate desserts.

    But September 13 gives chocolate lovers another opportunity to recognize the treat that has become a worldwide favorite.

    Chocolate Has an Ancient History

    The chocolate bar sitting on a grocery store shelf may seem like a modern creation, but the story behind its primary ingredient goes back thousands of years.

    Chocolate begins with the cacao tree, Theobroma cacao, which is native to the tropical Americas.

    Long before Europeans encountered cacao, Indigenous civilizations of Mesoamerica were cultivating and consuming it.

    The Olmec civilization is often connected with some of the earliest known uses of cacao. Later civilizations, particularly the Maya and Aztecs, incorporated cacao into their cultures.

    However, ancient chocolate looked very different from the sweet candy we recognize today.

    Cacao was commonly prepared as a beverage rather than made into solid bars.

    The resulting drink could be bitter and might be flavored with ingredients such as spices or chili peppers.

    For the Maya, cacao beverages could play roles in celebrations, ceremonies, and social gatherings.

    The Aztecs also valued cacao tremendously. Cacao beans were so valuable that they could even function as a form of exchange.

    Chocolate wasn’t simply dessert.

    It could represent wealth, status, tradition, and cultural significance.

    Chocolate Makes Its Way to Europe

    European encounters with cacao eventually introduced chocolate to a completely different audience.

    Spanish explorers and colonists encountered cacao traditions in the Americas, and chocolate beverages gradually became popular in Spain.

    Europeans began adapting chocolate to their own tastes.

    Instead of consuming the bitter versions associated with earlier cacao traditions, they increasingly sweetened chocolate with sugar. Other flavorings, including cinnamon and vanilla, could also be added.

    Chocolate drinking eventually spread through European aristocratic circles.

    For a long period, chocolate remained expensive and was largely associated with wealthy consumers.

    Then industrialization transformed chocolate.

    How Chocolate Became the Treat We Know Today

    The 18th and 19th centuries brought technological advances that dramatically changed chocolate production.

    Manufacturers discovered better methods for processing cacao beans, separating cocoa solids and cocoa butter, refining chocolate, and creating smoother textures.

    One particularly important development came in 1828 when Dutch chemist Coenraad van Houten patented a cocoa press that helped remove cocoa butter from roasted cacao.

    Chocolate manufacturing continued evolving throughout the century.

    In 1847, the British chocolate company J. S. Fry & Sons is commonly credited with producing one of the first modern solid eating chocolate bars by combining cocoa powder, sugar, and cocoa butter.

    Another major breakthrough followed with the development of milk chocolate.

    Swiss chocolatier Daniel Peter worked with milk products to create a commercially successful milk chocolate during the 1870s.

    Then came another important innovation: conching.

    Swiss chocolatier Rodolphe Lindt developed a conching process in 1879 that helped create smoother, more refined chocolate.

    These innovations gradually transformed chocolate from a luxury beverage into the smooth confection enjoyed around the world today.

    Milton Hershey and September 13

    The September 13 celebration has an especially strong connection to American chocolate history because it is the birthday of Milton Snavely Hershey.

    Hershey was born on September 13, 1857, in Pennsylvania.

    His road to success wasn’t immediate.

    Before becoming famous for chocolate, Hershey experienced business failures and eventually found success producing caramel.

    After recognizing the possibilities of milk chocolate, he shifted his attention toward chocolate manufacturing.

    The Hershey Chocolate Company helped make milk chocolate affordable and widely available to American consumers.

    Hershey also developed the Pennsylvania community that became known as Hershey, creating an entire town around his growing business.

    His influence went beyond chocolate production. Milton Hershey and his wife, Catherine, established a school for orphaned boys in 1909. The institution eventually became the Milton Hershey School.

    Today, Hershey remains one of the names most closely associated with American chocolate.

    That makes September 13 a fitting day to celebrate chocolate and its evolution.

    From Cacao Bean to Chocolate Bar

    Chocolate has a surprisingly complicated journey before reaching your kitchen.

    It begins with cacao pods growing on cacao trees in warm tropical climates.

    Inside the pods are cacao beans surrounded by pulp.

    After harvesting, the beans typically go through several important stages.

    They are fermented, dried, roasted, cracked, processed, refined, and eventually transformed into chocolate.

    Fermentation is particularly important because it helps develop the flavor compounds that ultimately contribute to chocolate’s distinctive taste.

    The beans are later roasted, which develops their flavor further.

    After processing, cacao can eventually become ingredients such as cocoa solids and cocoa butter.

    Manufacturers combine and process these components differently depending on the type of chocolate being produced.

    It’s a long journey from tropical cacao tree to chocolate bar.

    Dark Chocolate

    Dark chocolate typically contains cocoa solids, cocoa butter, and sugar, although exact recipes vary considerably.

    Generally, the higher the percentage of cacao, the stronger and less sweet the chocolate tastes.

    A 50% cacao chocolate bar, for example, will usually taste considerably sweeter than an 85% cacao bar.

    Dark chocolate can have an impressive range of flavors.

    Depending on the cacao variety, growing region, processing, and recipe, you may notice notes reminiscent of fruit, nuts, coffee, caramel, earth, or spices.

    Much like coffee and wine, chocolate can reveal surprisingly complex flavors when tasted carefully.

    Milk Chocolate

    Milk chocolate is one of the most familiar forms of chocolate in the United States.

    It combines chocolate ingredients with sugar and milk ingredients, producing the sweet, creamy flavor many people associate with classic candy bars.

    Its mild flavor also makes it extremely versatile.

    Milk chocolate appears in everything from candy bars and cookies to cakes, ice cream, sauces, and holiday treats.

    For many people, milk chocolate was their introduction to the world of chocolate.

    What About White Chocolate?

    The name occasionally causes debate among chocolate enthusiasts because white chocolate doesn’t contain the cocoa solids responsible for the familiar brown color of milk and dark chocolate.

    However, genuine white chocolate contains cocoa butter, the natural fat derived from cacao.

    It is generally combined with ingredients such as sugar and milk solids.

    The result is a creamy, sweet product with a very different flavor profile from dark or milk chocolate.

    Whether it’s your favorite or not, white chocolate still has a connection to the cacao bean through cocoa butter.

    Why Do We Love Chocolate So Much?

    Part of chocolate’s popularity comes from its remarkable sensory experience.

    Chocolate contains cocoa butter, which melts near body temperature. That’s one reason good chocolate seems to melt so smoothly in your mouth.

    Then there is the combination of sweetness, aroma, texture, and cocoa flavor.

    But chocolate’s appeal isn’t purely physical.

    Chocolate is also connected to memories.

    Think about birthday cakes.

    Halloween candy.

    Christmas stockings.

    Valentine’s Day boxes.

    Easter baskets.

    S’mores around a campfire.

    Chocolate chip cookies coming out of the oven.

    Brownies cooling on the counter.

    A mug of hot chocolate on a cold evening.

    Chocolate frequently appears during moments of celebration, comfort, friendship, and family tradition.

    Sometimes the memory surrounding the chocolate is every bit as important as the chocolate itself.

    Chocolate Around the World

    One of the best things about International Chocolate Day is recognizing how widely chocolate is enjoyed.

    Different countries and cultures have developed their own chocolate traditions and specialties.

    Belgium is famous for pralines and beautifully crafted chocolates.

    Switzerland has a long history of chocolate innovation and is strongly associated with smooth milk chocolate.

    Mexico maintains deep connections to cacao’s ancient history, with chocolate appearing in both sweet and savory preparations.

    France is famous for elegant chocolate pastries, mousses, ganaches, and artisan chocolates.

    Italy has contributed favorites such as gianduja, the chocolate-and-hazelnut combination associated with the Piedmont region.

    In the United States, chocolate appears in countless iconic desserts, including chocolate chip cookies, brownies, chocolate cake, fudge, and s’mores.

    Chocolate truly has become an international food.

    Fun Ways to Celebrate International Chocolate Day

    Celebrating September 13 doesn’t have to be complicated.

    The obvious choice is simply to enjoy some chocolate.

    But you can make the occasion more memorable by turning it into an experience.

    Try several varieties of chocolate side by side. Pick up milk chocolate and a few dark chocolates with different cacao percentages and compare their flavors.

    You may be surprised by how different they taste.

    Another option is to make a homemade chocolate dessert.

    Try baking:

    • Chocolate chip cookies
    • Fudge brownies
    • Chocolate cupcakes
    • Chocolate cheesecake
    • Chocolate mousse
    • Chocolate cream pie
    • Chocolate-covered strawberries
    • Chocolate lava cakes
    • Chocolate fudge
    • Homemade hot chocolate

    International Chocolate Day is also a perfect excuse to visit a local chocolate shop or bakery.

    Look for something you haven’t tried before.

    Create a Chocolate Tasting

    Want to turn International Chocolate Day into something fun for friends or family?

    Create your own chocolate tasting.

    Purchase several chocolates ranging from milk chocolate to increasingly darker varieties.

    For example, you might include:

    Milk chocolate

    50% dark chocolate

    60% dark chocolate

    70% dark chocolate

    85% dark chocolate

    Taste them from the mildest to the strongest.

    Instead of immediately chewing each piece, allow the chocolate to melt slowly.

    Notice the aroma.

    Pay attention to the texture.

    Look for different flavor notes.

    You might detect caramel, berries, nuts, coffee, vanilla, citrus, or roasted flavors.

    Everyone can rank their favorites afterward.

    It’s an easy activity that turns a simple chocolate bar into an experience.

    Try Chocolate in a Savory Dish

    Chocolate doesn’t always have to mean dessert.

    Cacao and chocolate can also appear in savory cooking.

    Perhaps the most famous example is Mexican mole, although mole recipes vary widely and not all versions contain chocolate.

    Unsweetened cocoa can also be incorporated carefully into certain chili recipes, spice rubs, sauces, and braised dishes.

    The goal isn’t necessarily to make the meal taste like a chocolate bar.

    Instead, cacao can add bitterness, richness, color, and depth.

    International Chocolate Day can therefore be an opportunity to discover a completely different side of chocolate.

    Pair Chocolate With Other Flavors

    Chocolate works beautifully with an enormous variety of ingredients.

    Classic pairings include:

    Chocolate and peanut butter for a salty-sweet combination.

    Chocolate and strawberries for a fresh, romantic favorite.

    Chocolate and caramel for sweetness and richness.

    Chocolate and mint for a refreshing contrast.

    Chocolate and orange for a bright citrus flavor.

    Chocolate and raspberry for a tart, fruity balance.

    Chocolate and coffee for deep roasted flavors.

    Chocolate and hazelnut for a rich European-inspired combination.

    Chocolate and sea salt for a simple pairing that enhances sweetness and cocoa flavor.

    Experimenting with pairings is one of the easiest ways to celebrate.

    Support a Local Chocolatier

    International Chocolate Day can also be an opportunity to support small businesses.

    Instead of grabbing your usual candy bar, visit an independent chocolatier, candy shop, bakery, café, or dessert business.

    Many artisan chocolate makers produce bonbons, truffles, caramels, chocolate bars, chocolate-covered nuts, and other specialty treats.

    Ask what’s made locally or what the shop recommends.

    You may discover a new favorite while supporting a business in your community.

    Learn Where Your Chocolate Comes From

    Chocolate is enjoyable, but International Chocolate Day can also encourage us to think about where cacao comes from.

    Cacao is primarily grown in tropical regions close to the equator, and West Africa is particularly important to global cocoa production.

    The cocoa industry has also faced serious challenges involving farmer livelihoods, labor conditions, deforestation, and sustainability.

    Consumers interested in these issues can learn more about how particular chocolate companies source their cacao.

    Certifications and sourcing programs aren’t all identical, so it’s worth looking beyond packaging claims and learning what a producer actually does.

    Celebrating chocolate can include appreciating the farmers whose work makes it possible.

    Share Chocolate With Someone

    Chocolate might taste even better when it’s shared.

    Bring chocolate treats to coworkers.

    Give a friend their favorite candy bar.

    Bake cookies with your children or grandchildren.

    Surprise someone with brownies.

    Drop off chocolate for a neighbor.

    Send a box of chocolates to someone you haven’t seen recently.

    Food has always been one of the simplest ways people show kindness.

    You don’t need a major occasion.

    Sometimes handing someone a chocolate treat and saying, “I thought you’d enjoy this,” is enough to brighten their day.

    Interesting Chocolate Facts

    Chocolate has accumulated plenty of interesting stories throughout its long history.

    The scientific name of the cacao tree is Theobroma cacao. The genus name comes from Greek roots commonly translated as “food of the gods.”

    Cacao trees thrive in warm, humid tropical environments.

    Chocolate’s familiar smooth texture depends heavily on cocoa butter.

    Dark, milk, and white chocolate have noticeably different compositions and flavor profiles.

    Chocolate can be used in beverages, desserts, candy, baked goods, sauces, and savory dishes.

    And although chocolate feels like an everyday food today, it spent centuries as something relatively expensive and exclusive.

    That’s quite a transformation for a seed growing inside a tropical fruit.

    A Day for Chocolate Lovers Everywhere

    International Chocolate Day isn’t one of those celebrations that requires elaborate planning.

    That’s part of what makes it fun.

    You can celebrate with a single square of your favorite chocolate.

    You can bake a tray of brownies.

    You can visit a local chocolatier.

    You can make chocolate-covered strawberries with your family.

    You can experiment with dark chocolate you’ve never tried.

    Or you can simply open your favorite candy bar and enjoy it.

    But behind that small piece of chocolate is an extraordinary story.

    It is a story that begins with cacao trees in the tropical Americas, travels through ancient civilizations, crosses oceans, changes through centuries of experimentation and industrial innovation, and eventually becomes one of the world’s favorite foods.

    Happy International Chocolate Day!

    On September 13, give yourself permission to enjoy a little chocolate.

    Choose your longtime favorite or try something completely new. Bake something chocolatey, share a treat with someone you care about, support a local chocolate maker, or learn a little more about where cacao comes from.

    International Chocolate Day reminds us that sometimes life’s simplest pleasures can have surprisingly fascinating stories behind them.

    Chocolate has crossed cultures, continents, and centuries, yet its ability to bring people a moment of enjoyment remains remarkably simple.

    So unwrap the chocolate bar.

    Cut yourself a piece of chocolate cake.

    Bake those brownies.

    Pour the hot chocolate.

    Share something sweet with somebody else.

    And enjoy a celebration thousands of years in the making.

    What’s your all-time favorite chocolate treat—the one you’d choose above everything else?

  • Uncle Sam Day: Celebrating the Iconic Symbol of the United States

    Uncle Sam Day: Celebrating the Iconic Symbol of the United States

    Every September 13, Americans have an opportunity to recognize one of the most familiar figures in the nation’s history: Uncle Sam. With his white hair, pointed beard, stern expression, tall top hat, and red, white, and blue clothing, Uncle Sam has represented the United States government and the American nation for generations.

    Uncle Sam Day celebrates much more than a famous character. It offers a chance to explore American history, patriotism, symbolism, military recruitment, political art, and the fascinating story of how an ordinary man’s name became permanently connected with the United States.

    Most people immediately recognize Uncle Sam, particularly from the legendary recruiting poster featuring the words “I Want You.” Yet the history behind the character stretches back much further than that famous image.

    From barrels of meat supplied to soldiers during the War of 1812 to one of the most recognizable patriotic images in American culture, the story of Uncle Sam is an unusual piece of American history worth remembering.

    When Is Uncle Sam Day?

    Uncle Sam Day is observed annually on September 13.

    The date is traditionally associated with the birthday of Samuel Wilson, a businessman and meat supplier whose name became connected with the nickname “Uncle Sam.”

    Wilson was born on September 13, 1766.

    Although the character Americans recognize today evolved over many decades, Samuel Wilson is traditionally regarded as the inspiration behind the national nickname.

    Who Was Samuel Wilson?

    Samuel Wilson was born on September 13, 1766, in what is now Arlington, Massachusetts.

    As a young man, Wilson served during the American Revolutionary War. He later moved to Troy, New York, where he and his brother Ebenezer established successful business ventures.

    Samuel became a respected member of the Troy community and was reportedly known locally as “Uncle Sam.”

    His connection with American history became especially important during the War of 1812.

    Wilson worked as a meat packer and supplied beef to American soldiers. The meat was transported in barrels marked with the initials “U.S.”

    Officially, those letters represented the United States.

    According to the traditional story, workers and soldiers familiar with Samuel Wilson jokingly began saying that the initials meant “Uncle Sam.”

    The nickname caught on.

    Before long, “Uncle Sam” began appearing as another way of referring to the United States government.

    Whether every detail of the popular story happened exactly as later retellings describe is debated by historians, but Samuel Wilson’s association with Uncle Sam became firmly established in American tradition.

    The War of 1812 and the Rise of Uncle Sam

    The War of 1812 helped provide the environment in which the nickname became popular.

    The conflict between the United States and Great Britain lasted from 1812 until 1815. American forces required enormous amounts of food, clothing, weapons, ammunition, and other supplies.

    Contractors such as Samuel Wilson played an important role in keeping soldiers supplied.

    As the “U.S.” markings appeared on government property and supplies, the Uncle Sam nickname became increasingly associated with the federal government.

    The expression eventually moved beyond soldiers and workers.

    Newspapers began using Uncle Sam as a personification of the United States.

    Once the nickname entered popular culture, artists began imagining what Uncle Sam might actually look like.

    That process would eventually create the familiar patriotic character recognized around the world today.

    Uncle Sam Didn’t Always Look the Same

    The earliest versions of Uncle Sam did not necessarily resemble today’s character.

    Political cartoonists gradually developed his appearance throughout the 19th century.

    Before Uncle Sam became dominant, another character called Brother Jonathan was commonly used to represent the United States.

    Brother Jonathan was often portrayed as a thin, rural New Englander and appeared in political cartoons and publications during the country’s early history.

    Over time, Uncle Sam largely replaced Brother Jonathan as the most familiar human representation of the United States.

    Artists increasingly portrayed Uncle Sam as a tall, thin older man with white hair and facial hair.

    His clothing incorporated America’s national colors and symbols.

    Eventually, several visual characteristics became closely associated with him:

    • A tall top hat, frequently decorated with stars
    • White hair
    • A white goatee
    • A blue coat
    • Red-and-white striped trousers
    • A serious or determined expression

    By the late 19th and early 20th centuries, the basic image of Uncle Sam was already familiar.

    Then came the poster that transformed him into an international icon.

    The Famous “I Want You” Uncle Sam Poster

    Perhaps no image of Uncle Sam is more recognizable than the recruiting poster showing him pointing directly toward the viewer.

    Underneath his face are the famous words:

    “I WANT YOU FOR U.S. ARMY.”

    Artist James Montgomery Flagg created the famous image during World War I.

    The illustration originally appeared on the cover of Leslie’s Weekly in 1916 before being adapted into the well-known Army recruiting poster in 1917.

    Flagg’s Uncle Sam looks directly at the viewer while pointing outward.

    It was a remarkably effective design.

    Instead of Uncle Sam simply appearing in a patriotic scene, he seemed to be speaking personally to every individual who looked at the poster.

    He wanted you.

    That direct connection made the image powerful.

    Millions of copies were printed during World War I, and the design was used again during World War II.

    More than a century later, the pointing Uncle Sam remains instantly recognizable.

    The Poster Had an Earlier Inspiration

    Flagg’s famous composition was not created entirely from scratch.

    A British recruiting poster featuring Lord Kitchener had appeared earlier during World War I.

    The British image showed Kitchener pointing toward the viewer with a message encouraging people to enlist.

    Flagg adapted the direct, pointing composition for an American audience.

    His version became so successful that it ultimately became one of the most famous examples of American wartime artwork.

    Interestingly, Flagg reportedly used his own face as a model for Uncle Sam, modifying it to make the character appear older.

    The result helped establish the version of Uncle Sam that generations of Americans would recognize.

    Uncle Sam Becomes an Official National Symbol

    Samuel Wilson’s connection to Uncle Sam eventually received formal recognition from the United States government.

    In 1961, Congress passed a resolution recognizing Samuel Wilson of Troy, New York, as the progenitor of America’s national symbol of Uncle Sam.

    President John F. Kennedy signed the resolution.

    By then, Uncle Sam had been part of American culture for well over a century.

    The congressional recognition helped cement Samuel Wilson’s place in the story behind the symbol.

    Uncle Sam and American Patriotism

    Uncle Sam has frequently represented patriotism, national service, and civic responsibility.

    During wartime, his image encouraged Americans to join the military, purchase war bonds, conserve resources, support troops, and participate in national efforts.

    But Uncle Sam has never represented only military service.

    His image has been used to represent practically every aspect of the federal government.

    Taxes, elections, government spending, foreign policy, national security, and political debates have all featured Uncle Sam.

    Sometimes he appears strong and confident.

    Sometimes he appears worried.

    Sometimes cartoonists portray him celebrating American achievements.

    At other times, he is shown frustrated or disappointed with the country’s direction.

    That flexibility is part of what has kept Uncle Sam relevant for so long.

    Uncle Sam in Political Cartoons

    Political cartoonists have used Uncle Sam extensively.

    Rather than drawing the entire American population or federal government, an artist can simply draw Uncle Sam.

    Readers immediately understand what he represents.

    His facial expression can communicate the artist’s message before the reader sees a single word.

    A smiling Uncle Sam might represent national prosperity or victory.

    A tired Uncle Sam might symbolize economic struggles.

    An angry Uncle Sam could represent America’s response to an international crisis.

    A worried Uncle Sam could represent concern about government debt or political division.

    Because the symbol is so familiar, artists can use him to communicate complicated political ideas very quickly.

    Uncle Sam in Advertising and Popular Culture

    Uncle Sam eventually moved beyond government posters and political cartoons.

    His image has appeared in advertisements, television programs, movies, comic books, magazines, toys, costumes, decorations, and countless pieces of patriotic merchandise.

    Businesses have used Uncle Sam imagery for everything from holiday sales to tax-season promotions.

    He is especially visible around patriotic holidays such as Independence Day, Memorial Day, and Veterans Day.

    The character has also been parodied countless times.

    A poster might replace “I Want You” with almost any imaginable message while maintaining the famous pointing pose.

    The fact that people immediately understand the reference demonstrates just how deeply Uncle Sam has become embedded in American culture.

    Uncle Sam and the American Flag

    The American flag is naturally one of the most important visual elements associated with Uncle Sam.

    His clothing frequently incorporates the stars and stripes.

    Red, white, and blue dominate his appearance.

    His top hat often features white stars against a blue band.

    His trousers may feature red and white stripes.

    These elements make it immediately clear that Uncle Sam represents America rather than simply being an individual historical character.

    He essentially became the American flag transformed into a human personality.

    Uncle Sam Is Different From Other American Symbols

    America has several major national symbols, but each communicates something slightly different.

    The American flag represents the nation itself.

    The bald eagle represents qualities such as freedom, strength, and independence.

    The Statue of Liberty represents liberty, democracy, hope, and America’s historic connection with immigration.

    Uncle Sam is different.

    He often represents the government, national responsibility, and the American people collectively.

    When Uncle Sam asks someone to serve, pay taxes, vote, volunteer, or contribute to the country, the message feels as though America itself is speaking.

    That human quality gives Uncle Sam a unique place among American symbols.

    How to Observe Uncle Sam Day

    Uncle Sam Day can be both patriotic and educational.

    One of the best ways to observe the day is simply to learn more about Samuel Wilson and the history of the Uncle Sam character.

    You can also explore historical political cartoons and military recruitment posters to see how the character changed over time.

    Other ways to recognize September 13 include displaying the American flag, learning about the War of 1812, visiting a local history museum, researching American patriotic symbols, thanking a veteran or active-duty service member, or teaching children about the history behind Uncle Sam.

    It is also an excellent opportunity to discuss citizenship.

    Patriotism does not have to mean agreeing with every decision made by a government. American history is filled with debate, disagreement, reform, protest, service, sacrifice, and people working to make their country better.

    Learning about Uncle Sam can therefore become the beginning of a much larger conversation about what citizenship means.

    Visit Troy, New York

    Anyone especially interested in Uncle Sam history may want to learn more about Troy, New York.

    Samuel Wilson lived and worked there for many years.

    He died in 1854 and is buried at Oakwood Cemetery in Troy.

    The city has embraced its connection with the Uncle Sam story, making Troy an important destination for people interested in the history behind the national symbol.

    It is remarkable to think that a local businessman from a New York community would eventually become connected with one of the most recognizable characters in American history.

    Why Uncle Sam Day Matters

    Uncle Sam Day reminds us that national symbols often develop in unexpected ways.

    Samuel Wilson could hardly have imagined that generations after his death, millions of people would recognize a character connected with his nickname.

    What may have begun as a joke involving the letters “U.S.” eventually developed into something much larger.

    Artists shaped the character.

    Newspapers spread it.

    Wars increased its visibility.

    Political cartoonists reinvented it.

    Government campaigns made it famous.

    Popular culture ensured that it survived.

    Today, Uncle Sam is more than an old recruiting poster.

    He represents more than two centuries of evolving American identity.

    A Symbol That Can Ask Something of Us

    Perhaps the most interesting feature of Uncle Sam is that he rarely seems passive.

    The Statue of Liberty stands.

    The bald eagle soars.

    The American flag waves.

    But Uncle Sam often asks something from us.

    That is especially true in James Montgomery Flagg’s famous poster.

    The pointing finger transforms the viewer from an observer into a participant.

    Although the original message involved military recruitment, the idea can be understood much more broadly today.

    What can we contribute to our communities?

    How can we help our neighbors?

    How can we participate responsibly in civic life?

    How can we honor those who served before us?

    How can we help leave our country and communities stronger for the generations that follow?

    Those questions give Uncle Sam’s famous pointing finger a meaning beyond the circumstances in which the poster was originally created.

    The Lasting Legacy of Uncle Sam

    More than 200 years after the War of 1812, Uncle Sam remains one of America’s most recognizable characters.

    His appearance has changed over time, but his identity has remained remarkably durable.

    He has represented America through wars, economic struggles, political changes, technological revolutions, cultural transformations, and generations of national debate.

    He has been celebrated, criticized, parodied, modernized, and repeatedly reinvented.

    Yet the white beard, top hat, stars and stripes, and pointing finger remain immediately familiar.

    That kind of cultural staying power is rare.

    Celebrating Uncle Sam Day

    On September 13, Uncle Sam Day provides an opportunity to look beyond the familiar red, white, and blue character and discover the history behind him.

    From Samuel Wilson’s work supplying American soldiers during the War of 1812 to James Montgomery Flagg’s legendary World War I recruiting poster, Uncle Sam’s story spans generations of American history.

    It is a story involving ordinary people, military history, art, advertising, politics, patriotism, and popular culture.

    Most importantly, it reminds us that America’s symbols are not simply decorations from the past.

    They tell stories about how Americans have understood their country, their government, and their responsibilities to one another.

    So when September 13 arrives and Uncle Sam points his famous finger in our direction, perhaps the question isn’t simply what Uncle Sam wants from us.

    It is also worth asking:

    What does Uncle Sam—and being an American—mean to you?

  • History & Culture of the Day: September 13

    History & Culture of the Day: September 13

    September 13 is a date filled with moments that have influenced politics, literature, music, science, entertainment, and international relations. From battles that changed the future of nations to the birth of one of the world’s most imaginative children’s authors, the events connected to September 13 reveal how history and culture constantly shape one another.

    It is the 256th day of the year in a non-leap year, leaving 109 days before the beginning of a new year.

    Here is a journey through some of the most fascinating history and culture associated with September 13.

    1609 — Henry Hudson Reaches the River That Would Bear His Name

    One of the earliest major events associated with September 13 occurred in 1609, when English explorer Henry Hudson reached the river that would eventually become known as the Hudson River.

    Hudson was sailing aboard the Half Moon while searching for a navigable route to Asia. Instead of discovering the passage he hoped for, his expedition explored the waterway running through what is now New York.

    The river would eventually become enormously important to the development of the region. Settlements grew along its banks, trade expanded, and New York became one of the most economically significant areas in North America.

    Hudson’s voyage is also part of the much larger and more complicated history of European colonization. Indigenous peoples had inhabited and traveled throughout the Hudson River Valley for generations before Europeans arrived.

    Today, the Hudson remains both a geographic landmark and a cultural symbol closely associated with New York.

    1759 — The Battle of the Plains of Abraham

    September 13, 1759, brought one of the decisive battles of the Seven Years’ War in North America.

    British forces commanded by General James Wolfe defeated French troops under General Louis-Joseph de Montcalm near Quebec City in what became known as the Battle of the Plains of Abraham.

    Although the battle itself was relatively brief, its consequences were enormous.

    The British victory helped pave the way for Britain’s conquest of New France. The eventual outcome of the larger war fundamentally changed the political map of North America.

    Yet the cultural consequences were equally significant.

    French language, traditions, religion, and identity did not disappear with British rule. Instead, French-speaking communities maintained a powerful cultural presence, particularly in Quebec.

    That mixture of French and British historical influences remains one of the defining characteristics of modern Canada.

    1788 — America Prepares for Its First Presidential Election

    On September 13, 1788, the Congress of the Confederation took important steps toward establishing the new government created by the United States Constitution.

    Congress set dates connected with the country’s first presidential election and designated New York City as the temporary national capital.

    The following year, George Washington would become the first president of the United States.

    This period represented an extraordinary political experiment. The young nation was attempting to create a federal government capable of balancing national authority with the rights and responsibilities of individual states.

    Many of the institutions established during this era continue to influence American government more than two centuries later.

    1814 — The Bombardment That Inspired “The Star-Spangled Banner”

    One of the most culturally significant events associated with September 13 began during the War of 1812.

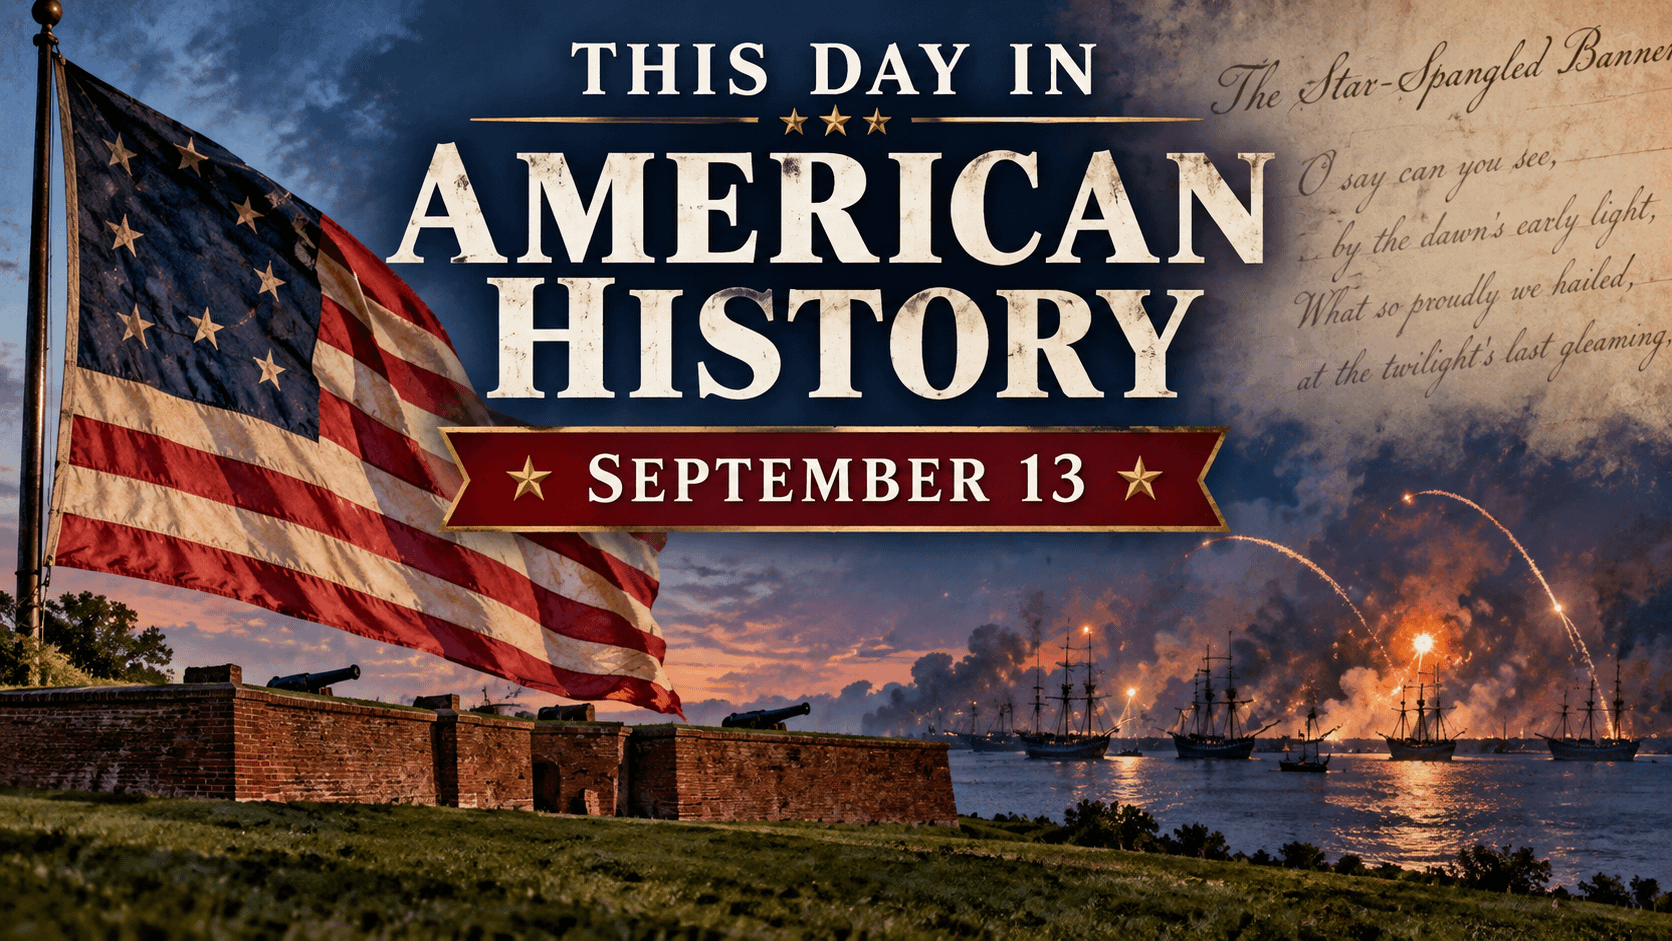
    On the evening of September 13, 1814, British forces began bombarding Fort McHenry while attempting to capture Baltimore.

    American lawyer Francis Scott Key witnessed the attack from a vessel in Baltimore Harbor.

    Throughout the night, British ships fired rockets and artillery toward the fort. When daylight arrived the following morning, Key saw that the American flag was still flying over Fort McHenry.

    The sight inspired him to write a poem originally titled “Defence of Fort M’Henry.”

    The words were later paired with an existing melody and became known as “The Star-Spangled Banner.” The song gradually became a national symbol before Congress officially recognized it as the United States national anthem in 1931.

    What began as one man’s reaction to a battle eventually became part of American ceremonies, sporting events, schools, military traditions, and public life.

    1847 — The Niños Héroes and the Battle of Chapultepec

    September 13 holds particular historical significance in Mexico.

    During the Mexican-American War, American forces attacked Chapultepec Castle outside Mexico City in 1847.

    Mexican tradition particularly remembers six young military cadets who died defending the castle. They became known as the Niños Héroes — the Heroic Children.

    Their story became an important symbol of courage and national sacrifice in Mexican culture.

    September 13 is consequently commemorated in Mexico as Día de los Niños Héroes, honoring those remembered for defending Chapultepec.

    The event demonstrates something important about history: nations are shaped not only by victories but also by the stories they choose to remember about sacrifice, courage, and identity.

    1848 — The Remarkable Survival of Phineas Gage

    September 13 also includes one of the most famous cases in the history of neuroscience.

    On September 13, 1848, railroad worker Phineas Gage survived an extraordinary accident in Vermont.

    An iron tamping rod was driven through his skull during an explosion.

    Remarkably, Gage survived.

    Reports about changes in his personality and behavior following the accident became influential in discussions about how different areas of the brain may affect personality, decision-making, and behavior.

    Modern scholars continue to debate aspects of the traditional story surrounding Gage, but his case remains one of the best-known episodes in the history of brain science.

    His survival helped encourage questions that neuroscience continues exploring today: How does the physical brain influence personality? What happens when particular areas are damaged? And how adaptable is the human brain?

    1862 — Union Soldiers Discover Robert E. Lee’s Battle Plans

    During the American Civil War, an extraordinary intelligence discovery occurred on September 13, 1862.

    Union soldiers near Frederick, Maryland, discovered a lost copy of Confederate General Robert E. Lee’s Special Order 191.

    The document revealed important details about the movements of Confederate forces.

    Suddenly, Union commander George B. McClellan possessed information military commanders rarely receive: insight into an opponent’s operational plans.

    The discovery helped set the stage for the Battle of Antietam, fought several days later.

    Antietam became the bloodiest single day in American military history and gave President Abraham Lincoln the opportunity he had been waiting for to announce the preliminary Emancipation Proclamation.

    A few pieces of paper accidentally left behind helped influence one of the most consequential periods of the Civil War.

    1916 — Roald Dahl Is Born

    September 13 also holds a special place in literary history.

    Roald Dahl was born September 13, 1916, in South Wales.

    He would eventually become one of the world’s best-known children’s authors.

    His books included beloved titles such as:

    • Charlie and the Chocolate Factory
    • Matilda
    • James and the Giant Peach
    • Fantastic Mr Fox
    • The BFG
    • The Witches

    Dahl’s stories frequently combined imagination, strange characters, dark humor, mischievous children, frightening adults, and unexpected lessons.

    His influence expanded far beyond books.

    Many of his stories became movies, stage productions, musicals, and television adaptations.

    Dahl also worked as a screenwriter, including on Chitty Chitty Bang Bang and the James Bond film You Only Live Twice.

    Roald Dahl Day

    Because Dahl was born on September 13, the date is celebrated as Roald Dahl Day.

    The observance encourages readers to revisit his stories and celebrate imagination, reading, and children’s literature.

    It is especially popular among schools, libraries, bookstores, teachers, parents, and young readers.

    The celebration is a reminder that literature can become part of culture long after a writer is gone.

    Characters imagined by one person can eventually become familiar to millions.

    1933 — Elizabeth McCombs Makes Political History in New Zealand

    Another significant milestone for women in politics occurred on September 13, 1933.

    Elizabeth McCombs became the first woman elected to New Zealand’s Parliament.

    The achievement was particularly meaningful because New Zealand had already become a global leader in women’s political rights. In 1893, it became the first self-governing country in which women won the right to vote in parliamentary elections.

    McCombs’ election demonstrated another important step: women were not simply voters but political leaders capable of directly representing citizens in national government.

    1948 — Margaret Chase Smith Makes U.S. Political History

    September 13 also produced an important milestone for women in American government.

    In 1948, Margaret Chase Smith of Maine was elected to the United States Senate.

    Having already served in the House of Representatives, she became the first woman elected to both chambers of Congress.

    Smith eventually became one of the most prominent women in American political life during the mid-20th century.

    Her career helped demonstrate that women could build long-term careers at the highest levels of American government during an era when national politics remained overwhelmingly dominated by men.

    1971 — The Attica Prison Uprising Ends

    September 13, 1971, marks one of the most controversial events in the history of the American prison system.

    Several days earlier, incarcerated people at Attica Correctional Facility in New York had taken control of part of the prison and demanded reforms involving conditions and treatment.

    On September 13, authorities moved to retake the facility.

    The confrontation ended with 43 people dead, including incarcerated people and hostages.

    Attica became a lasting part of American discussions surrounding prisoners’ rights, incarceration, government power, law enforcement, and criminal justice reform.

    Decades later, the name “Attica” still carries cultural and political meaning far beyond the prison itself.

    1985 — Super Mario Bros. Arrives in Japan

    History isn’t limited to wars, elections, and political movements.

    Sometimes cultural history begins with a video game.

    On September 13, 1985, Super Mario Bros. was released in Japan for Nintendo’s Family Computer, commonly known as the Famicom.

    The game’s influence would be enormous.

    Mario evolved into one of the most recognizable fictional characters in entertainment.

    The franchise helped transform Nintendo into a global entertainment powerhouse while contributing to the revival and expansion of the home video game industry.

    Generations of players grew up exploring the Mushroom Kingdom, rescuing Princess Peach, collecting coins, jumping on Goombas, and hearing some of the most recognizable music in gaming history.

    Video games eventually became one of the world’s largest entertainment industries, and Mario became one of its defining cultural icons.

    1993 — The Oslo Accord Is Signed at the White House

    September 13, 1993, produced one of the most recognizable political images of the late 20th century.

    At the White House, Israeli Prime Minister Yitzhak Rabin and Palestine Liberation Organization Chairman Yasser Arafat participated in the ceremony surrounding the signing of the Declaration of Principles commonly known as the Oslo Accord.

    The agreement established a framework for Palestinian interim self-government and negotiations concerning the Israeli-Palestinian conflict.

    The famous handshake between Rabin and Arafat, with U.S. President Bill Clinton standing behind them, became an international symbol of hopes for peace.

    The peace process ultimately encountered profound obstacles, and many of the conflict’s central disputes remained unresolved.

    That makes September 13, 1993, both historically important and complicated: it represents the possibilities of diplomacy while also demonstrating how difficult lasting peace can be.

    1996 — The Death of Tupac Shakur

    September 13 also occupies a major place in modern music history.

    American rapper, actor, and cultural figure Tupac Shakur died on September 13, 1996, several days after being shot in Las Vegas.

    He was only 25 years old.

    Despite his short life, Tupac became one of the most influential figures in hip-hop history.

    His music frequently explored poverty, racism, violence, inequality, ambition, family relationships, street life, and personal vulnerability.

    His cultural influence continued growing after his death.

    Decades later, his music remains widely listened to and discussed, while his image has become deeply embedded in hip-hop culture.

    Famous People Born on September 13

    September 13 has produced notable figures across literature, entertainment, business, sports, and music.

    Among them are children’s author Roald Dahl, born in 1916; composer and pianist Clara Schumann, born in 1819; and Australian cricket legend Shane Warne, born in 1969.

    Other notable September 13 birthdays include chocolate entrepreneur Milton Hershey, born in 1857, and actor, writer, director, and producer Tyler Perry, born in 1969.

    The variety itself is remarkable — literature, classical music, chocolate, filmmaking, sports, and popular entertainment all have connections to this single calendar date.

    September 13 in Popular Culture

    Several lighter observances also fall on September 13.

    Along with Roald Dahl Day, the date is associated with Positive Thinking Day and Hug Your Hound Day.

    These modern observances illustrate how calendars evolve.

    A date can simultaneously carry memories of battles hundreds of years old, political breakthroughs, literary anniversaries, scientific discoveries, entertainment milestones, and playful contemporary celebrations.

    That combination is exactly what makes exploring history and culture day by day so interesting.

    What September 13 Teaches Us

    September 13 demonstrates that history isn’t one continuous story.

    It is thousands of interconnected stories.

    A battle in Quebec helped reshape North America.

    A bombardment in Baltimore inspired words that eventually became America’s national anthem.

    An extraordinary railroad accident contributed to discussions about the human brain.

    A writer born in Wales created imaginary worlds enjoyed by generations of children.

    A plumber named Mario became an international entertainment icon.

    Political leaders stood together at the White House hoping diplomacy could overcome decades of conflict.

    And musicians such as Tupac created art that continued influencing culture long after their deaths.

    Some events changed governments. Others changed science, literature, entertainment, or popular culture.

    Together, they demonstrate the extraordinary range of human experience contained within a single date.

    Remembering September 13

    Looking back at September 13 reminds us that history isn’t simply something stored in textbooks.

    We encounter it constantly.

    It appears when we stand for “The Star-Spangled Banner.”

    It appears when children open Charlie and the Chocolate Factory.

    It appears when someone starts a classic Mario game.

    It appears in debates about criminal justice, political representation, diplomacy, and war.

    And it appears in the music people continue playing decades after an artist is gone.

    Every generation inherits pieces of the past and decides what those stories mean for the future.

    Which September 13 moment do you think has had the greatest impact on the world we live in today?

  • This Day in American History – September 13

    This Day in American History – September 13

    September 13 holds a special place in American history. It was on this date that one of the most dramatic battles of the War of 1812 unfolded, creating the scene that would inspire the words of the United States national anthem.

    From British warships firing rockets and exploding shells toward Fort McHenry in 1814 to major legislation signed nearly two centuries later, September 13 has witnessed moments connected to American identity, resilience, law, security, and national recovery.

    Here is a look back at some of the important events connected to September 13 in American history.

    1814 – The Bombardment of Fort McHenry Begins

    The defining American historical event associated with September 13 occurred during the War of 1812.

    On the morning of September 13, 1814, British naval forces began an intense bombardment of Fort McHenry, which guarded the entrance to Baltimore Harbor.

    Baltimore was an important American port and commercial center. After British forces had invaded Washington and burned important government buildings only weeks earlier, Baltimore became their next major target.

    American defenders knew that losing Fort McHenry could leave Baltimore vulnerable.

    The British fleet began bombarding the fort at approximately 6:30 in the morning. Rockets and mortar shells rained toward the American defenses during an attack that continued for roughly 25 hours.

    Inside Fort McHenry, approximately 1,000 defenders under the command of Major George Armistead endured the attack.

    The British possessed weapons capable of firing from distances that initially placed much of their fleet beyond the effective range of the fort’s cannons.

    American forces nevertheless refused to surrender.

    Throughout September 13 and into the night, British rockets streaked across the sky while exploding shells illuminated Baltimore Harbor.

    Those terrifying sights would soon become some of the most recognizable words in American history.

    Francis Scott Key Watches the Battle

    Among those witnessing the bombardment was a 35-year-old American lawyer named Francis Scott Key.

    Key had traveled with American prisoner-exchange agent John Stuart Skinner to negotiate the release of Dr. William Beanes, who was being held by the British.

    The Americans succeeded in securing Beanes’ release, but because Key and his companions had learned information about the planned attack on Baltimore, they were not immediately permitted to return to shore.

    As a result, Key found himself watching the attack from a vessel in Baltimore Harbor.

    From his position several miles away, he could see rockets and exploding shells over Fort McHenry.

    Throughout the night, an enormous question remained:

    Had the fort surrendered?

    As long as the American flag remained above Fort McHenry, Key knew the defenders were still holding their position.

    But darkness, smoke and bad weather made it difficult to determine what was happening.

    The battle continued through the night.

    The Rockets’ Red Glare

    Today, millions of Americans recognize the phrase about the rockets’ red glare from “The Star-Spangled Banner.”

    Those words weren’t simply poetic imagery.

    They described something Key had actually witnessed.

    British forces used Congreve rockets during their attack on Fort McHenry, while mortar vessels fired explosive shells high into the air.

    The flashes from those weapons helped Key determine during the darkness that the battle was continuing.

    The Smithsonian notes that the rockets and bombs described in the national anthem reflect the real weapons being used against Fort McHenry on the night of September 13, 1814.

    Every explosion meant the American defenders were still under attack.

    Yet Fort McHenry did not surrender.

    A Massive American Flag Waited at Fort McHenry

    The flag associated with the battle had been created before the British attack.

    Major George Armistead wanted an American flag large enough that approaching forces would have no trouble recognizing who controlled Fort McHenry.

    Baltimore flagmaker Mary Pickersgill and others created the enormous garrison flag.

    It measured approximately 30 feet by 42 feet.

    The flag contained 15 stars and 15 stripes, representing the states recognized under the flag design used at the time.

    Because heavy rain accompanied much of the bombardment, a smaller storm flag was flown during the battle.

    But the enormous garrison flag would soon have its historic moment.

    September 14 – The Flag Was Still There

    Although the bombardment began on September 13, the moment that completed the story occurred the following morning.

    By dawn on September 14, British forces had failed to force Fort McHenry into surrender.

    The bombardment ended, and the British fleet began withdrawing.

    At Fort McHenry, the smaller storm flag was lowered and the enormous garrison flag was raised.

    From his distant position, Francis Scott Key saw the American flag flying above the fort.

    Baltimore had survived.

    The fort had held.

    The British had failed to capture the city.

    For Key, the sight was overwhelming.

    The Library of Congress describes how Key saw the American flag still flying after the nightlong bombardment, inspiring the words that became “The Star-Spangled Banner.”

    The Birth of “The Star-Spangled Banner”

    Inspired by what he had witnessed, Key began writing words describing the experience.

    His poem was originally titled “Defence of Fort M’Henry.”

    Its opening asked whether the American flag could still be seen after the violent night of battle.

    The imagery reflected the uncertainty Key had experienced aboard the vessel.

    Could he see the flag?

    Had Fort McHenry survived?

    Was Baltimore still in American hands?

    The answer came with the morning light.

    Yes.

    The flag was still there.

    Key’s words were eventually set to the melody of a popular tune of the era, and the song became increasingly associated with American patriotism.

    More than a century later, in 1931, Congress officially recognized “The Star-Spangled Banner” as the national anthem of the United States.

    What began as one man’s description of a terrifying night in Baltimore had become part of America’s national identity.

    Why the Battle of Baltimore Mattered

    The importance of the defense of Baltimore extended far beyond the creation of the national anthem.

    Only weeks earlier, Americans had experienced the humiliation of seeing British troops enter Washington.

    The British burned several public buildings, including the Capitol and the President’s House, later known as the White House.

    Baltimore presented another opportunity for Britain to deliver a devastating blow.

    But American defenses were considerably stronger.

    Thousands of defenders had prepared positions around the city while Fort McHenry protected the harbor.

    British troops encountered American resistance on land at the Battle of North Point on September 12. The following day, the naval assault against Fort McHenry began.

    Neither effort succeeded in capturing Baltimore.

    The National Park Service describes the bombardment of Fort McHenry on September 13–14 as one of the longest bombardments in North American history.

    The British eventually abandoned their attempt to capture the city.

    For Americans who had recently watched their capital attacked, the successful defense of Baltimore provided an important boost in morale.

    The Original Star-Spangled Banner Survives

    The flag that inspired Francis Scott Key survived as well.

    Today, the original Star-Spangled Banner is preserved by the Smithsonian’s National Museum of American History in Washington, D.C.

    Its age, enormous size and fragile fibers require careful conservation.

    More than two centuries after the Battle of Baltimore, Americans can still see the actual flag connected to the creation of their national anthem.

    Few historical artifacts provide such a direct connection between a famous piece of American music and the event that inspired it.

    The anthem isn’t merely describing an imaginary battlefield.

    The flag existed.

    The fort exists.

    The battle happened.

    And the enormous banner that Key saw over Fort McHenry remains part of America’s national collection.

    1994 – The Violence Against Women Act Is Signed

    Another major event in American history occurred on September 13, 1994, exactly 180 years after the bombardment of Fort McHenry began.

    President Bill Clinton signed the Violence Against Women Act, commonly known as VAWA, as part of broader federal crime legislation.

    The law represented a major change in the federal government’s approach to domestic violence, sexual assault and stalking.

    It strengthened federal criminal provisions, supported victim services and provided funding to communities working to address violence and assist survivors.

    The U.S. Department of Justice notes that the legislation was signed on September 13, 1994, and helped establish a more coordinated national response to domestic violence, sexual assault and stalking.

    VAWA has subsequently been reauthorized and modified over the years, becoming an important part of federal policy surrounding violence prevention and victim assistance.

    2001 – America Begins Reopening Its Skies After September 11

    September 13 also carries significance in the aftermath of one of America’s darkest days.

    Following the terrorist attacks of September 11, 2001, civilian air traffic across the United States was brought to an extraordinary halt.

    Thousands of aircraft had been grounded as the nation attempted to understand what had happened and authorities reassessed aviation security.

    On September 13, 2001, most U.S. airports began reopening and limited commercial air travel started returning.

    The reopening occurred under dramatically heightened security procedures and on a case-by-case basis.

    Travel was far from normal.

    Passengers faced new restrictions, delays and uncertainty as the aviation system attempted to restart after an unprecedented nationwide grounding.

    The changes that followed September 11 would ultimately transform airport security and the experience of flying in the United States.

    September 13 therefore became one of the first days in America’s difficult effort to resume ordinary life after the attacks.

    A Date Connected to American Resilience

    When looking across the history of September 13, one theme appears repeatedly:

    resilience.

    In 1814, American soldiers inside Fort McHenry endured hours of bombardment while refusing to surrender.

    Their defense helped save Baltimore and inspired the words that became the national anthem.

    In 1994, federal legislation attempted to strengthen America’s response to domestic violence, sexual assault and stalking.

    In 2001, Americans began the difficult process of reopening the nation’s aviation system only two days after terrorist attacks had shocked the country.

    These events occurred in completely different eras and circumstances, but each reflects moments when Americans faced serious challenges and responded to them.

    The Lasting Meaning of September 13, 1814

    Of all the events connected to this date, however, the bombardment of Fort McHenry remains the most iconic.

    Imagine standing aboard a vessel in Baltimore Harbor on that September night.

    The sky flashes.

    Rockets streak overhead.

    Explosions illuminate the darkness.

    Rain falls.

    Smoke hangs over the harbor.

    Somewhere in the distance stands Fort McHenry.

    Francis Scott Key could not know exactly what was happening inside the fort. He could only watch and wait.

    Then morning arrived.

    Through the early light, he could see an American flag.

    That single sight answered the question he had been asking throughout the night.

    The fort had survived.

    Baltimore had survived.

    And the flag was still there.

    More than two centuries later, Americans continue singing about that night.

    At sporting events, military ceremonies, schools, national celebrations and countless public gatherings, the opening notes of “The Star-Spangled Banner” bring people back—whether they realize it or not—to September 13, 1814.

    They return to Fort McHenry.

    They return to the rockets illuminating Baltimore Harbor.

    They return to Francis Scott Key searching through the darkness for a flag.

    Remembering September 13

    History often becomes easier to understand when we remember that famous events were once uncertain moments experienced by real people.

    The defenders of Fort McHenry did not know they were creating the story behind America’s future national anthem.

    Francis Scott Key did not know that generations of Americans would eventually stand for the words he was inspired to write.

    They were simply living through an uncertain night.

    That is part of what makes September 13 such a fascinating day in American history.

    A battle became a poem.

    A poem became a song.

    And a song became a national anthem.

    The flag that survived the bombardment became one of America’s most treasured historical artifacts, while the words inspired by its survival became familiar to generations.

    If you had the opportunity to witness one moment from September 13 in American history firsthand, which event would you choose and why?

  • Mocktail of the Day: Cucumber Pear Sparkler

    Mocktail of the Day: Cucumber Pear Sparkler

    Some mocktails are sweet and fruity. Others are creamy enough to double as dessert. Then there are drinks that are light, crisp, refreshing, and sophisticated enough to feel like something you would order at a nice restaurant.

    Today’s Mocktail of the Day: Cucumber Pear Sparkler belongs firmly in that last category.

    Fresh cucumber, sweet pear nectar, bright lime juice, and sparkling water come together to create an alcohol-free drink that is refreshing without being overly sweet. A little fresh mint adds an herbal note, while plenty of ice keeps every sip cool and crisp.

    The result is a beautiful pale-green mocktail with subtle fruit flavor, refreshing bubbles, and just enough sweetness to make you want another glass.

    It is simple enough to prepare on an ordinary afternoon but elegant enough for a dinner party, baby shower, brunch, holiday gathering, wedding reception, or any occasion when you want something more interesting than plain sparkling water.

    Best of all, the Cucumber Pear Sparkler proves that an alcohol-free drink does not need complicated syrups, expensive ingredients, or dozens of steps to feel special.

    Why Cucumber and Pear Work So Well Together

    Cucumber and pear might not be the first flavor combination that comes to mind when you think about mocktails, but they complement one another beautifully.

    Pear has a delicate natural sweetness.

    Unlike some tropical fruits that can dominate a drink, pear tends to have a softer flavor. It adds sweetness and fruitiness without overwhelming everything else in the glass.

    Cucumber brings almost the opposite characteristics.

    It is cool, clean, crisp, and refreshing.

    Combining the two creates balance.

    The pear provides enough sweetness to make the drink satisfying, while the cucumber keeps everything tasting fresh and light.

    Fresh lime juice becomes the bridge between them.

    Its acidity brightens the pear and sharpens the cucumber flavor so the mocktail never feels flat.

    Mint adds another refreshing layer, and sparkling water provides the bubbles that transform the mixture from fruit juice into a proper sparkling mocktail.

    It is simple, but every ingredient has a purpose.

    Cucumber Pear Sparkler Recipe

    This recipe makes one generous serving.

    Ingredients

    • 3 thin cucumber slices
    • 3 ounces pear nectar or pear juice
    • 3/4 ounce fresh lime juice
    • 1/2 ounce simple syrup, optional
    • 4 to 6 fresh mint leaves
    • 3 to 4 ounces chilled sparkling water or club soda
    • Ice
    • Thin cucumber ribbon or cucumber slice for garnish
    • Fresh pear slice for garnish
    • Fresh mint sprig for garnish

    The simple syrup is completely optional.

    Some pear nectars are naturally quite sweet, so taste your mixture before adding additional sweetener.

    If your pear juice is less sweet or you enjoy a slightly sweeter mocktail, the small amount of syrup works beautifully.

    How to Make a Cucumber Pear Sparkler

    Step 1: Prepare the Cucumber

    Place three thin cucumber slices into the bottom of a cocktail shaker.

    Add the mint leaves.

    Gently muddle the cucumber and mint several times.

    You are not trying to completely crush everything into pulp.

    The goal is simply to release the cucumber juice and the aromatic oils from the mint.

    Over-muddling mint can occasionally create a slightly bitter flavor, so gentle pressure works best.

    Step 2: Add the Pear

    Pour the pear nectar or pear juice into the shaker.

    Pear nectar generally produces a slightly richer and sweeter mocktail, while pear juice creates something lighter.

    Either option works.

    Step 3: Add Fresh Lime Juice

    Squeeze fresh lime juice directly into the shaker.

    Fresh citrus makes a noticeable difference here.

    Bottled lime juice can work when necessary, but fresh lime has a brighter aroma and cleaner flavor that works especially well with cucumber.

    Step 4: Adjust the Sweetness

    Taste a tiny amount of the mixture.

    If your pear nectar already provides enough sweetness, skip the simple syrup.

    If you would like something sweeter, add about 1/2 ounce of simple syrup.

    You can always add more later.

    Step 5: Add Ice and Shake

    Fill the shaker approximately halfway with ice.

    Secure the lid and shake for about 10 to 15 seconds.

    This chills the ingredients while helping the cucumber, pear, lime, and mint flavors blend together.

    Step 6: Strain Into Your Glass

    Fill a tall glass with fresh ice.

    Strain the cucumber-pear mixture over the ice.

    For an especially smooth mocktail, you can double-strain it through a fine-mesh strainer to remove tiny cucumber and mint pieces.

    If you enjoy a more rustic presentation, regular straining is perfectly fine.

    Step 7: Add the Sparkle

    Slowly top the glass with chilled sparkling water or club soda.

    Start with about three ounces and add more depending on how strong you want the pear flavor.

    Stir gently once or twice.

    Avoid aggressive stirring because you want to preserve as many bubbles as possible.

    Step 8: Garnish

    Finish the Cucumber Pear Sparkler with a thin cucumber ribbon, fresh pear slice, and mint sprig.

    Serve immediately while everything is cold and sparkling.

    Making a Beautiful Cucumber Ribbon

    A cucumber ribbon instantly makes this simple drink look more impressive.

    You do not need special bartending equipment.

    Use a vegetable peeler to carefully slice a long strip of cucumber from one end to the other.

    Choose a fairly straight cucumber and peel lengthwise.

    Once you have your ribbon, gently curl it around the inside of the glass before adding ice.

    The ribbon will press against the glass and create an elegant green spiral.

    You can also fold the ribbon back and forth onto a cocktail pick.

    If you do not want to bother with ribbons, a simple cucumber wheel placed on the rim looks great too.

    Presentation should make the drink more enjoyable, not make the recipe complicated.

    Choosing the Best Pear Juice

    Pear juice comes in several forms.

    You may find pear nectar, pure pear juice, pear juice blends, or even bottled pear purée.

    For this mocktail, pear nectar is one of the easiest choices.

    It typically has enough body and sweetness to stand up to sparkling water without disappearing.

    Pure pear juice also works beautifully, especially if you prefer a lighter drink.

    If using pear purée, you may want to reduce the amount slightly because it is considerably thicker.

    Start with about two ounces and adjust from there.

    You can also make your own fresh pear purée.

    Simply peel and core a ripe pear, blend it until smooth, and add a splash of water or pear juice to achieve a pourable consistency.

    Fresh pear can produce an incredible flavor when the fruit is perfectly ripe.

    The Importance of Fresh Lime

    Cucumber and pear are both relatively gentle flavors.

    That means this mocktail needs acidity.

    Without lime, the drink can taste pleasantly sweet but slightly one-dimensional.

    Fresh lime juice wakes everything up.

    It brings contrast to the pear, enhances the cucumber, and balances the sweetness.

    If your first sip tastes too sweet, add another small squeeze of lime.

    If it tastes too tart, add a little more pear nectar or a small splash of simple syrup.

    This balance between sweetness and acidity is one of the easiest ways to make homemade mocktails taste more like professionally prepared drinks.

    Try It With Lemon

    No limes available?

    Fresh lemon works too.

    The drink will taste slightly different because lemon has its own distinctive citrus character, but cucumber, pear, and lemon are still excellent partners.

    Use approximately the same amount.

    You could also combine the two.

    Try half lime juice and half lemon juice for a bright citrus combination that adds another layer of flavor.

    Make It Extra Fizzy

    People have different preferences when it comes to sparkling drinks.

    If you want a stronger pear flavor, use approximately three ounces of sparkling water.

    For something lighter and more refreshing, increase the sparkling water to five or six ounces.

    You can even serve the cucumber-pear mixture in a larger glass and fill the remaining space with sparkling water.

    This creates an easy alcohol-free spritzer that is perfect for warm afternoons.

    Just remember that additional sparkling water will dilute both the sweetness and fruit flavor.

    Taste and adjust as necessary.

    Turn It Into a Cucumber Pear Ginger Sparkler

    Ginger adds a wonderful spicy kick.

    Instead of sparkling water, top the mocktail with ginger beer or ginger ale.

    Ginger beer will produce a stronger and spicier flavor.

    Ginger ale creates something sweeter and gentler.

    Both work extremely well with pear.

    For the ginger version, you may want to skip the simple syrup because ginger ale and many ginger beers already contain plenty of sweetness.

    Garnish with cucumber, pear, and perhaps a thin slice of fresh ginger.

    Add Fresh Basil

    Mint is refreshing, but basil gives the drink an entirely different personality.

    Replace the mint with three or four fresh basil leaves.

    Gently muddle the basil with the cucumber before adding the remaining ingredients.

    The herbal flavor of basil gives this mocktail a slightly more sophisticated character.

    Pear and basil work surprisingly well together, especially when balanced with citrus.

    You can also combine a few mint leaves with one or two basil leaves.

    Make a Rosemary Pear Version

    For a cooler-weather variation, replace the mint with rosemary.

    Do not muddle rosemary aggressively.

    Simply place a small rosemary sprig in the shaker and gently press it once or twice to release its aroma.

    Pear and rosemary are a wonderful combination during fall and winter.

    You could even garnish the finished mocktail with a rosemary sprig and thin pear fan.

    The presentation becomes especially attractive for Thanksgiving, Christmas, New Year’s Eve, or other holiday gatherings.

    Make It Sweeter With Honey

    Simple syrup is convenient, but honey adds additional character.

    Combine equal parts honey and warm water to create an easy honey syrup.

    For example, stir one tablespoon of honey with one tablespoon of warm water until completely dissolved.

    Allow it to cool.

    Then add approximately 1/2 ounce to your mocktail.

    Honey pairs naturally with pear and adds a slightly richer sweetness.

    Try Elderflower Syrup

    If you enjoy floral mocktails, add a small amount of alcohol-free elderflower syrup or cordial.

    Start with approximately 1/4 ounce.

    You do not need much.

    Elderflower can become dominant quickly, but in small amounts it works wonderfully with pear, cucumber, mint, and lime.

    The finished mocktail becomes floral, refreshing, and especially elegant.

    This variation would be excellent for brunches, garden parties, baby showers, wedding showers, or spring celebrations.

    Make a Frozen Cucumber Pear Mocktail

    The basic recipe can also become a frozen drink.

    Add the cucumber, pear nectar, lime juice, mint, and about one cup of ice to a blender.

    Blend until smooth.

    Pour into a chilled glass.

    Instead of mixing sparkling water into the blender, add a small splash after blending.

    This keeps some carbonation while giving you a refreshing frozen texture.

    The result is somewhere between a slushie and a sophisticated frozen mocktail.

    Create a Spicy Version

    A little heat works surprisingly well with cucumber.

    Add one thin jalapeño slice to the shaker before muddling.

    Start carefully.

    Fresh peppers vary dramatically in heat.

    One slice might be barely noticeable while another can make the drink surprisingly spicy.

    For even more contrast, garnish with a thin jalapeño wheel.

    The combination of sweet pear, refreshing cucumber, tart lime, and spicy pepper creates a completely different drinking experience.

    Make It With Fresh Pear

    If pears are in season, you can incorporate fresh fruit directly into the drink.

    Dice approximately 1/4 of a ripe pear.

    Place it into your cocktail shaker with the cucumber and gently muddle.

    Add the lime juice, mint, and approximately two ounces of pear juice.

    Shake everything with ice.

    Because fresh pear produces pulp, double-straining works especially well for this version.

    Fresh fruit creates a slightly more natural flavor and can reduce the amount of bottled juice you need.

    A Great Brunch Mocktail

    The Cucumber Pear Sparkler fits beautifully into brunch.

    It is refreshing enough to serve alongside breakfast foods without feeling heavy or excessively sweet.

    Serve it with:

    Egg dishes, breakfast casseroles, pastries, French toast, pancakes, waffles, fresh fruit, yogurt parfaits, avocado toast, breakfast sandwiches, or brunch boards.

    Because the drink has a light flavor profile, it complements food instead of competing with it.

    You can even serve it in a champagne flute for a more elegant brunch presentation.

    Perfect for Baby Showers and Wedding Showers

    Alcohol-free drinks are especially useful when hosting gatherings where guests may have different preferences.

    The Cucumber Pear Sparkler looks sophisticated enough to feel celebratory without containing alcohol.

    Create a large self-serve drink station with pear juice, sparkling water, lime wedges, cucumber ribbons, mint, and plenty of ice.

    Guests can build their drinks themselves.

    For an even prettier display, arrange sliced pears, cucumbers, mint, lemons, and limes around the serving area.

    It creates a beautiful beverage station without requiring complicated decorations.

    How to Make a Pitcher

    Hosting several people?

    You can easily turn this recipe into a pitcher.

    For approximately six servings, combine:

    • 18 ounces pear nectar
    • 4 1/2 ounces fresh lime juice
    • 12 to 15 cucumber slices
    • About 20 mint leaves
    • 2 to 3 ounces simple syrup, optional

    Gently muddle the cucumber and mint.

    Add the remaining ingredients except sparkling water.

    Refrigerate until thoroughly chilled.

    When ready to serve, add ice to individual glasses and pour in the pear mixture.

    Top each glass separately with sparkling water.

    Avoid adding sparkling water to the pitcher too far in advance because it will gradually lose its carbonation.

    Make It Ahead

    The cucumber-pear base can be prepared several hours before your gathering.

    Combine the pear juice and lime juice.

    Lightly muddle the cucumber and mint and add them to the mixture.

    Keep everything refrigerated.

    For a cleaner presentation, strain the mixture before storing.

    Wait until serving time to add sparkling water and fresh garnishes.

    This keeps the bubbles lively and the drink looking fresh.

    Keeping Pear Slices From Turning Brown

    Fresh pear slices can oxidize quickly once cut.

    If you are preparing garnishes ahead of time, lightly coat your pear slices with lemon or lime juice.

    The acidity slows browning.

    Store the slices covered in the refrigerator until serving time.

    For the best appearance, however, prepare the pear garnishes shortly before serving.

    Choosing Your Glassware

    You do not need specialized glassware.

    A tall Collins glass or highball glass works beautifully because it gives you plenty of room for ice and sparkling water.

    A stemmed wine glass provides a slightly more elegant presentation.

    A champagne flute creates a celebratory feel.

    Even a simple mason jar works for casual outdoor gatherings.

    Use whatever you already have.

    The cucumber ribbon, pear slice, mint, and sparkling bubbles will make almost any glass look impressive.

    Why This Mocktail Works for Almost Any Season

    The Cucumber Pear Sparkler feels especially refreshing during spring and summer, but its flavors can easily transition into fall.

    During warm weather, emphasize cucumber, mint, lime, and plenty of sparkling water.

    During fall, add rosemary, ginger, cinnamon, or honey.

    For winter celebrations, serve it with rosemary and fresh cranberries as garnish.

    The basic pear foundation is versatile enough to move through the seasons simply by changing the herbs, spices, and presentation.

    Mocktails Should Feel Special Too

    One of the best things about making mocktails is realizing that alcohol is not what makes a drink interesting.

    Flavor does.

    Presentation does.

    Fresh ingredients do.

    Balance does.

    A thoughtfully prepared alcohol-free beverage can be every bit as enjoyable as a traditional cocktail.

    The Cucumber Pear Sparkler demonstrates that perfectly.

    You have delicate sweetness from pear, freshness from cucumber, acidity from lime, herbal character from mint, and lively carbonation from sparkling water.

    Nothing complicated.

    Nothing overpowering.

    Just a refreshing combination of ingredients that work beautifully together.

    Mocktail of the Day

    Today’s Cucumber Pear Sparkler is the kind of mocktail you can make once and immediately start imagining different versions.

    Keep it classic with cucumber, pear, lime, mint, and sparkling water.

    Add ginger beer for spice.

    Use basil for an herbal variation.

    Add rosemary for cooler weather.

    Introduce jalapeño for heat.

    Blend it with ice for a frozen summer drink.

    Or prepare a pitcher for your next brunch, shower, party, or family gathering.

    The beauty of this mocktail is its simplicity.

    It looks elegant, tastes refreshing, and requires ingredients that are easy to work with.

    Most importantly, it proves that an alcohol-free drink can still feel thoughtfully crafted and worth slowing down to enjoy.

    So grab a cucumber, pour some pear nectar, squeeze a fresh lime, add a few mint leaves, and finish everything with plenty of sparkling bubbles.

    Sometimes the most refreshing drinks are also the simplest.

    Would you try your Cucumber Pear Sparkler with mint, basil, rosemary, or a spicy slice of jalapeño?

  • Shot of the Day: Campfire Cookie Shot

    Shot of the Day: Campfire Cookie Shot

    There are some flavors that immediately bring back memories of sitting around a fire, roasting marshmallows, telling stories, laughing with friends, and enjoying something sweet after the sun goes down.

    Chocolate, toasted marshmallow, vanilla, and graham cracker are among those flavors.

    Today’s Shot of the Day: Campfire Cookie Shot takes that familiar combination and transforms it into a creamy dessert shot made for anyone who likes their drinks sweet, smooth, and a little indulgent.

    Instead of bringing out the graham crackers, chocolate bars, and marshmallows, you can capture many of those same flavors in a tiny glass.

    The Campfire Cookie Shot combines vanilla vodka, chocolate liqueur, Irish cream, and a touch of marshmallow flavor, finished with an optional graham cracker rim.

    It is creamy.

    It is chocolatey.

    It is sweet.

    And most importantly, it tastes like something you might enjoy beside a campfire after dessert.

    Whether you’re planning a backyard gathering, camping-themed party, fall celebration, holiday get-together, or simply want to try a different dessert shot, the Campfire Cookie deserves a place on your shot menu.

    What Is a Campfire Cookie Shot?

    The Campfire Cookie Shot is a dessert-style shooter inspired by the flavors associated with toasted marshmallows, chocolate, vanilla, and graham crackers.

    While it has some similarities to a s’mores-inspired drink, the goal here is a little broader.

    Think about a warm chocolate cookie topped with melted marshmallow and served beside a campfire.

    That is the flavor experience we’re trying to capture.

    The vanilla vodka provides the alcoholic backbone while adding a soft vanilla character.

    Chocolate liqueur provides the rich chocolate flavor.

    Irish cream makes everything creamy and smooth.

    Marshmallow syrup adds the final campfire-inspired sweetness.

    Then there is the graham cracker rim.

    Technically, you can make the shot without it.

    But if you want the complete Campfire Cookie experience, don’t skip it.

    Campfire Cookie Shot Recipe

    Serves: 1
    Preparation Time: About 5 minutes

    Ingredients

    • ½ ounce vanilla vodka
    • ½ ounce Irish cream liqueur
    • ½ ounce chocolate liqueur
    • ¼ ounce marshmallow syrup
    • Ice
    • Crushed graham crackers for the rim, optional
    • Chocolate syrup for the rim, optional
    • Mini marshmallow for garnish, optional

    How to Make the Campfire Cookie Shot

    Step 1: Prepare the Graham Cracker Rim

    Crush a graham cracker into fine crumbs and place them on a small plate.

    Put a small amount of chocolate syrup on another plate.

    Lightly dip the rim of your shot glass into the chocolate syrup.

    You don’t need much.

    Then immediately dip the chocolate-coated rim into the graham cracker crumbs.

    Rotate the glass gently until the rim is evenly coated.

    This simple step adds flavor and makes the finished shot look much more impressive.

    Step 2: Fill Your Shaker With Ice

    Add a handful of ice to a cocktail shaker.

    You want enough ice to chill the ingredients thoroughly.

    Dessert shots like this taste best extremely cold.

    Step 3: Add the Ingredients

    Pour the vanilla vodka, Irish cream, chocolate liqueur, and marshmallow syrup into the shaker.

    Step 4: Shake

    Secure the shaker and shake vigorously for approximately 10–15 seconds.

    The outside of the shaker should become noticeably cold.

    Shaking does more than chill the drink.

    It also introduces a small amount of dilution, helping the creamy and alcoholic ingredients blend into a smoother shot.

    Step 5: Strain and Serve

    Strain the mixture into your prepared shot glass.

    If desired, garnish it with a mini marshmallow.

    Serve immediately.

    What Does the Campfire Cookie Shot Taste Like?

    Imagine taking several classic dessert flavors and putting them into one creamy sip.

    That’s essentially what happens here.

    Vanilla is one of the first flavors you’ll notice.

    Then comes the chocolate.

    The Irish cream gives the drink a rich, velvety character that makes the shot taste more like dessert than a traditional shooter.

    Finally, the marshmallow sweetness comes through.

    If you’ve added the graham cracker and chocolate rim, every sip gets another combination of chocolate and graham cracker.

    The overall flavor is:

    Creamy. Chocolatey. Vanilla-forward. Sweet. Smooth. Dessert-like.

    This isn’t designed to be an aggressive shot.

    It’s designed to be enjoyable.

    If you’re someone who normally avoids shots because you don’t enjoy the harsh taste of straight spirits, dessert shooters like the Campfire Cookie may be more approachable.

    Just remember that sweet flavors can make the alcohol less noticeable.

    It is still an alcoholic drink and should be enjoyed responsibly.

    Why Vanilla Vodka Works

    Regular vodka would technically work in this recipe.

    Vanilla vodka works better.

    The vanilla flavor ties everything together.

    Chocolate and vanilla naturally complement one another, while vanilla also pairs beautifully with cream and marshmallow.

    Using flavored vodka means you’re adding another layer without adding another ingredient.

    You still get vodka’s strength, but instead of tasting neutral, it contributes to the dessert theme.

    If vanilla vodka isn’t available, regular vodka can be substituted.

    Simply add a tiny drop of vanilla syrup if you want to recreate some of the missing flavor.

    Don’t overdo it.

    This shot already contains several sweet ingredients.

    Choosing the Chocolate Liqueur

    Chocolate is an important part of the Campfire Cookie Shot, so your choice of chocolate liqueur can influence the finished drink.

    A darker chocolate liqueur can create a deeper cocoa character.

    A creamier chocolate liqueur will make the shot richer.

    White chocolate liqueur creates an entirely different version, with more sweetness and less pronounced cocoa flavor.

    There isn’t necessarily a wrong choice.

    For the classic Campfire Cookie, however, a traditional chocolate liqueur provides the strongest contrast against the vanilla and marshmallow.

    Why Irish Cream Makes the Difference

    Without Irish cream, this would still be a good shot.

    With Irish cream, it becomes much more dessert-like.

    Irish cream adds richness, sweetness, and a creamy texture.

    It also helps soften the stronger alcohol flavors from the vodka.

    That is important because the Campfire Cookie should feel smooth rather than sharp.

    When properly chilled, the combination of Irish cream and chocolate liqueur becomes almost milkshake-like without requiring actual ice cream.

    Adding the Marshmallow Flavor

    Marshmallow is what pushes this recipe into campfire territory.

    You can use marshmallow-flavored syrup commonly used for coffee or desserts.

    Only a small amount is necessary.

    Marshmallow syrup is usually quite sweet, and adding too much can overpower the chocolate and vanilla.

    Start with approximately ¼ ounce.

    If you’re making another round and want more marshmallow flavor, increase it slightly.

    The goal isn’t to make the shot taste like pure sugar.

    You still want chocolate, cream, and vanilla to have their moment.

    The Graham Cracker Rim Is Worth the Extra Minute

    You could pour the Campfire Cookie into a plain shot glass and serve it.

    But the graham cracker rim changes the entire experience.

    First, it creates texture.

    The drink itself is creamy, while the cracker crumbs add a little crunch.

    Second, graham cracker immediately makes the flavor combination more recognizable.

    Chocolate plus marshmallow plus graham cracker naturally reminds people of campfires.

    Finally, it simply looks better.

    A dessert shot should be fun.

    Presentation is part of that.

    Make It Extra Chocolatey

    Chocolate lovers can easily intensify this shot.

    Increase the chocolate liqueur slightly or drizzle a little chocolate syrup around the inside of the glass before pouring.

    You can also use chocolate syrup instead of water or simple syrup to attach the graham cracker crumbs to the rim.

    Another fun option is mixing finely grated chocolate with the graham cracker crumbs.

    Now every sip begins with chocolate before the creamy shot even reaches your taste buds.

    Make It Extra Marshmallow

    Want the toasted marshmallow flavor to dominate?

    Increase the marshmallow syrup slightly.

    You could also garnish the glass with a toasted mini marshmallow.

    If you choose to toast the marshmallow, toast it separately and allow it to cool before placing it near the drink.

    Never use an open flame around spilled alcohol or bottles of spirits.

    Safety matters much more than presentation.

    A toasted marshmallow garnish gives you the aroma associated with an actual campfire while keeping the drink itself simple.

    Turn It Into a Cookies-and-Cream Shot

    The Campfire Cookie is easy to modify.

    For a cookies-and-cream version, replace the graham cracker rim with crushed chocolate sandwich cookies.

    Use:

    • ½ ounce vanilla vodka
    • ½ ounce Irish cream
    • ½ ounce chocolate liqueur
    • Small splash of cream

    Shake everything with ice and strain it into a cookie-rimmed shot glass.

    It loses some of the campfire character but becomes an excellent dessert shooter of its own.

    Make a Salted Caramel Campfire Cookie

    Caramel works beautifully with chocolate, vanilla, and marshmallow.

    Add approximately ¼ ounce caramel liqueur or a very small splash of caramel syrup.

    Then add the tiniest pinch of flaky salt to the graham cracker rim.

    The salt helps balance the sweetness while making the caramel and chocolate flavors stand out.

    For an even more dramatic presentation, drizzle a small amount of caramel around the inside of the shot glass.

    Try a Peanut Butter Campfire Cookie

    Chocolate and peanut butter fans can take the recipe in another direction.

    Replace part of the chocolate liqueur with peanut butter whiskey.

    For example:

    • ½ ounce vanilla vodka
    • ½ ounce Irish cream
    • ¼ ounce chocolate liqueur
    • ¼ ounce peanut butter whiskey
    • Small splash marshmallow syrup

    Shake with ice and strain.

    Chocolate, peanut butter, vanilla, and marshmallow create a much richer version of the original.

    Turn It Into a Full Dessert Cocktail

    Sometimes one small shot isn’t what you’re looking for.

    The Campfire Cookie flavors can easily become a full cocktail.

    Try:

    • 1 ounce vanilla vodka
    • 1 ounce Irish cream
    • 1 ounce chocolate liqueur
    • ½ ounce marshmallow syrup
    • 1 ounce half-and-half or cream

    Shake everything vigorously with ice.

    Strain into a chilled cocktail glass with a chocolate-and-graham-cracker rim.

    Garnish with a marshmallow or a small piece of chocolate.

    Now you’ve transformed the Campfire Cookie from a quick shooter into a creamy after-dinner cocktail you can enjoy slowly.

    Make It Frozen

    Want to go even further?

    Turn the recipe into a frozen dessert drink.

    Blend vanilla vodka, Irish cream, chocolate liqueur, marshmallow syrup, vanilla ice cream, and a small handful of ice.

    Drizzle chocolate syrup inside the glass.

    Pour in the frozen mixture and top it with whipped cream, graham cracker crumbs, and a marshmallow.

    At that point, you’re somewhere between a cocktail and an adult milkshake.

    And there is absolutely nothing wrong with that.

    Campfire Cookie Party Batch

    Dessert shots can be excellent party drinks because they can often be prepared in larger quantities.

    For approximately eight servings, combine:

    • 4 ounces vanilla vodka
    • 4 ounces Irish cream
    • 4 ounces chocolate liqueur
    • 2 ounces marshmallow syrup

    Mix everything together and refrigerate until very cold.

    Shortly before serving, shake the mixture with ice in batches and strain into prepared shot glasses.

    Prepare the graham cracker rims ahead of time to make serving easier.

    Keep the mixture refrigerated because it contains cream-based liqueur.

    Perfect Occasions for the Campfire Cookie Shot

    The name gives this drink an obvious place at outdoor gatherings, but you certainly don’t need an actual campfire to enjoy it.

    Try serving Campfire Cookie Shots at:

    • Backyard parties
    • Camping-themed gatherings
    • Fall celebrations
    • Halloween parties
    • Birthday parties
    • Holiday gatherings
    • Christmas parties
    • Game nights
    • Bonfires
    • Cookouts
    • Friendsgiving celebrations
    • After-dinner gatherings

    It can be especially fun during cooler weather.

    Chocolate, vanilla, marshmallow, and cream naturally feel comforting when temperatures start dropping.

    Create a Campfire Dessert Bar

    If you’re entertaining guests, don’t stop with the shots.

    Build an entire campfire dessert station.

    Set out graham crackers, marshmallows, chocolate bars, chocolate-covered pretzels, cookies, brownies, and other small desserts.

    Then serve Campfire Cookie Shots alongside them for adults of legal drinking age.

    You could even prepare several different rims.

    One with graham cracker crumbs.

    One with crushed chocolate cookies.

    One with cinnamon sugar.

    One with chocolate sprinkles.

    Guests can choose whichever version sounds best.

    Food Pairings

    Because the Campfire Cookie is essentially a dessert shot, it works best alongside sweet foods.

    Try it with:

    • Chocolate chip cookies
    • Brownies
    • Cheesecake bites
    • Chocolate cake
    • Vanilla cupcakes
    • S’mores
    • Peanut butter cookies
    • Chocolate-covered pretzels
    • Caramel popcorn
    • Cinnamon cookies
    • Chocolate truffles
    • Vanilla ice cream

    You don’t necessarily need an elaborate dessert.

    A warm chocolate chip cookie alongside a cold Campfire Cookie Shot can be more than enough.

    Chill the Glasses

    Here’s one of the easiest ways to improve this shot.

    Freeze your shot glasses for approximately 15–30 minutes before serving.

    A frosty glass keeps the creamy mixture colder and makes the presentation more appealing.

    Prepare the graham cracker rim after removing the glasses from the freezer.

    If freezer space is limited, fill each glass with ice water while you’re mixing the drink, then empty and dry the rim before decorating.

    Don’t Make It Too Sweet

    One potential problem with dessert shots is sweetness.

    Vanilla vodka may contain sweetness.

    Irish cream is sweet.

    Chocolate liqueur is sweet.

    Marshmallow syrup is definitely sweet.

    That means balance matters.

    Resist the temptation to pour large amounts of syrup into the mixture.

    Start small.

    You can always add more to the next batch.

    If the shot becomes too sweet, reduce the marshmallow syrup or choose a darker chocolate liqueur.

    A tiny pinch of salt in the graham cracker rim can also help balance everything.

    Why Dessert Shots Are So Much Fun

    Not every shot needs to be tequila with salt and lime.

    Not every shooter needs to burn on the way down.

    Dessert shots take an entirely different approach.

    They borrow recognizable flavors from cakes, cookies, candies, ice cream, and other desserts and turn them into small alcoholic drinks.

    That makes them perfect for experimenting.

    Once you understand the basic Campfire Cookie combination, you can create countless variations.

    Chocolate.

    Vanilla.

    Cream.

    Marshmallow.

    Graham cracker.

    From there, add caramel, peanut butter, coffee, cinnamon, coconut, or another flavor you enjoy.

    The possibilities are nearly endless.

    A Small Shot With Big Dessert Flavor

    The Campfire Cookie Shot isn’t complicated, and that’s part of what makes it work.

    Four primary ingredients create nearly everything you need.

    Vanilla vodka provides strength and vanilla flavor.

    Chocolate liqueur provides cocoa richness.

    Irish cream provides smoothness.

    Marshmallow syrup provides the campfire-inspired finishing touch.

    Then the chocolate-and-graham-cracker rim brings the entire idea together.

    It’s familiar without being boring.

    Sweet without requiring a dozen ingredients.

    And visually interesting without requiring advanced bartending techniques.

    Final Sip

    Today’s Shot of the Day: Campfire Cookie Shot proves that sometimes the best inspiration for a drink comes directly from the dessert table.

    Chocolate, vanilla, Irish cream, marshmallow, and graham cracker combine to create a smooth little shooter that feels like dessert served in a shot glass.

    Keep the original recipe simple or customize it.

    Add caramel.

    Bring in peanut butter.

    Turn up the chocolate.

    Toast a marshmallow for the garnish.

    Transform it into a cocktail.

    Or blend it with ice cream and turn the whole thing into an adult milkshake.

    However you make it, serve it cold and don’t forget the graham cracker rim.

    That little detail is what takes this from a creamy chocolate shot to a true Campfire Cookie.

    Please enjoy responsibly. This recipe is intended only for adults of legal drinking age. Never drink and drive, and always make sure everyone has a safe way home.

    Would you make your Campfire Cookie Shot extra chocolatey, loaded with marshmallow, or with a salted caramel twist?

  • Cocktail of the Day: Maple Blackberry Bourbon Sour

    Cocktail of the Day: Maple Blackberry Bourbon Sour

    There is something special about a cocktail that can bridge the gap between the final warm days of summer and the first cool evenings of fall. The Maple Blackberry Bourbon Sour does exactly that.

    Fresh blackberries bring deep berry flavor and a beautiful rich color. Bourbon adds warmth, oak, vanilla, and caramel notes. Fresh lemon juice keeps everything bright and refreshing, while pure maple syrup provides a smooth sweetness that feels warmer and more complex than ordinary simple syrup.

    Put them together, and you get a cocktail that is fruity without tasting overly sweet, bold without being too heavy, and sophisticated without requiring complicated bartending techniques.

    Today’s Cocktail of the Day: Maple Blackberry Bourbon Sour is an excellent drink for relaxing on the patio, serving at a fall gathering, enjoying around a backyard fire pit, or simply making something a little more interesting at home.

    Why Blackberry, Bourbon, and Maple Work Together

    One of the secrets to a memorable cocktail is finding ingredients that complement each other instead of competing for attention.

    Blackberries, bourbon, maple, and lemon accomplish that beautifully.

    Blackberries have a natural combination of sweetness and tartness. Their flavor is strong enough to stand beside whiskey without disappearing.

    Bourbon brings another layer entirely.

    Depending on the bottle you choose, bourbon may offer flavors reminiscent of vanilla, caramel, toasted oak, brown sugar, spice, nuts, or fruit. Those deeper flavors naturally complement both blackberries and maple syrup.

    Then there is maple syrup.

    Instead of simply making the drink sweeter, pure maple syrup contributes its own distinctive flavor. Its caramel-like richness works particularly well with barrel-aged spirits such as bourbon.

    Fresh lemon juice completes the drink.

    Without enough acidity, blackberry, bourbon, and maple could become too rich. Lemon cuts through that sweetness and gives the cocktail the crisp edge expected from a good whiskey sour.

    The result is a drink where every ingredient has a purpose.

    Maple Blackberry Bourbon Sour Recipe

    Serves: 1
    Prep Time: About 5 minutes

    Ingredients

    • 2 ounces bourbon
    • 4–5 fresh blackberries
    • 3/4 ounce fresh lemon juice
    • 1/2 ounce pure maple syrup
    • 1/2 ounce egg white or aquafaba, optional
    • 2 dashes aromatic bitters, optional
    • Ice
    • Fresh blackberries for garnish
    • Lemon peel or lemon wheel for garnish
    • Fresh rosemary sprig for garnish, optional

    How to Make a Maple Blackberry Bourbon Sour

    1. Muddle the Blackberries

    Place four or five fresh blackberries in the bottom of your cocktail shaker.

    Add the maple syrup.

    Gently muddle the berries until they release their juice.

    You don’t need to pulverize them completely. Pressing them several times is usually enough to extract their flavor and gorgeous dark-purple color.

    2. Add the Remaining Ingredients

    Pour the bourbon and freshly squeezed lemon juice into the shaker.

    If you’re using egg white or aquafaba, add it now.

    Add the optional bitters.

    3. Dry Shake if Using Egg White

    When using egg white or aquafaba, shake the ingredients vigorously without ice for approximately 10–15 seconds.

    This is called a dry shake.

    It helps create the smooth, foamy top traditionally associated with many sour cocktails.

    4. Add Ice and Shake Again

    Fill the shaker with ice.

    Shake vigorously for another 15 seconds.

    You want the cocktail thoroughly chilled while allowing just enough dilution to soften the bourbon and citrus.

    5. Strain

    Fill a rocks glass with fresh ice.

    Double-strain the cocktail into the glass using your cocktail strainer and a fine-mesh strainer.

    Double-straining removes blackberry seeds and pieces of fruit, producing a smoother finished cocktail.

    You can also serve it straight up in a coupe glass without ice.

    6. Garnish and Serve

    Garnish with several fresh blackberries and a lemon peel.

    For a more dramatic fall presentation, add a small sprig of fresh rosemary.

    Serve immediately.

    What Does a Maple Blackberry Bourbon Sour Taste Like?

    The Maple Blackberry Bourbon Sour begins with ripe berry flavor.

    Blackberries provide both sweetness and a pleasant tartness, followed quickly by the brightness of fresh lemon.

    Then the bourbon begins to show itself.

    You may notice vanilla, caramel, oak, spice, or toasted flavors depending on the bourbon you’re using.

    Maple syrup appears more subtly.

    Instead of tasting like pancakes covered in syrup, it creates a deeper sweetness behind the berries and bourbon.

    The finish is smooth, warming, fruity, and slightly tart.

    If you include egg white or aquafaba, the texture becomes silkier and the drink develops a creamy foam on top.

    It’s a cocktail with plenty going on without becoming complicated.

    Choosing the Right Bourbon

    You don’t need to reach for your most expensive bourbon.

    A good everyday bourbon that you already enjoy is perfect.

    Look for something with noticeable vanilla, caramel, brown sugar, oak, or baking-spice characteristics.

    A sweeter bourbon will emphasize the maple and blackberry.

    A spicier bourbon can create an interesting contrast against the fruit.

    Higher-proof bourbon can also work well because the blackberry, maple, lemon, and ice soften some of the alcohol’s intensity.

    The most important rule is simple: use bourbon you actually enjoy drinking.

    If you wouldn’t enjoy the bourbon on its own, adding berries probably isn’t going to magically transform it.

    Why Pure Maple Syrup Matters

    This is one place where the ingredient you choose makes a noticeable difference.

    Use pure maple syrup rather than pancake syrup.

    Pancake syrup is often primarily corn syrup with added flavorings. Pure maple syrup has a much more complex flavor that works naturally with bourbon.

    You don’t need much.

    About half an ounce provides enough sweetness and maple character for one cocktail.

    If your blackberries are extremely ripe and sweet, you might reduce the maple syrup slightly.

    If they’re particularly tart, add a little more.

    Cocktail recipes provide a starting point, but fruit naturally varies in sweetness.

    Taste and adjust.

    Fresh Lemon Juice Makes a Difference

    Fresh lemon juice is one of the easiest ways to improve homemade cocktails.

    Bottled lemon juice may be convenient, but freshly squeezed citrus provides brighter flavor and aroma.

    Because this cocktail contains several rich ingredients, that fresh acidity is especially important.

    Three-quarters of an ounce creates a traditional sweet-and-sour balance.

    If you love tart cocktails, increase it slightly.

    If you prefer something sweeter, reduce the lemon juice or increase the maple syrup by a small amount.

    Do You Need Egg White?

    No.

    The Maple Blackberry Bourbon Sour is delicious with or without egg white.

    Traditional sour-style cocktails sometimes include egg white because it creates a silky texture and thick layer of foam.

    It doesn’t make the drink taste like eggs.

    If you’re uncomfortable using raw egg white or simply don’t have any available, leave it out.

    Aquafaba—the liquid from canned chickpeas—is a popular alternative that can create a similar foamy texture.

    Use approximately half an ounce.

    You can also skip both ingredients entirely and make a simple blackberry bourbon sour over ice.

    Frozen Blackberries Work Too

    Fresh blackberries are wonderful when they’re available, but frozen berries can also work.

    Allow frozen blackberries to thaw slightly before muddling.

    They will release plenty of juice and color.

    In fact, frozen berries can sometimes create an even darker cocktail.

    Because thawed berries may contain additional liquid, you might need to adjust the lemon or maple syrup slightly after tasting.

    Make a Blackberry Maple Syrup

    If you’re planning to make several cocktails, you can prepare a blackberry-maple mixture ahead of time.

    Combine:

    • 1 cup fresh or frozen blackberries
    • 1/2 cup pure maple syrup
    • 1/4 cup water

    Place everything in a small saucepan over low heat.

    Gently simmer for approximately 5–8 minutes while crushing the berries with a spoon.

    Remove the mixture from the heat and allow it to cool.

    Strain it through a fine-mesh strainer and refrigerate.

    Use approximately 1/2 to 3/4 ounce in each cocktail.

    This method is especially convenient when entertaining because you won’t need to muddle individual servings.

    Turn It Into a Sparkling Cocktail

    Want something lighter?

    Prepare the basic cocktail and strain it over fresh ice.

    Then top it with approximately 1–2 ounces of club soda.

    The bubbles make the drink more refreshing and reduce some of the bourbon’s intensity.

    For more flavor, ginger beer can replace the club soda.

    Ginger’s spicy character works particularly well with blackberry, lemon, maple, and bourbon.

    Try It With Rye Whiskey

    Bourbon is the star of today’s recipe, but rye whiskey makes an excellent variation.

    Rye tends to have a spicier and drier personality than bourbon.

    That additional spice creates a stronger contrast with the sweet blackberry and maple flavors.

    Use the same measurements and simply replace the bourbon with rye.

    You’ll end up with a familiar cocktail that has a noticeably different personality.

    Make It Smoky

    If you enjoy smoky cocktails, there are several ways to give this drink another dimension.

    The easiest is to rinse the glass with a very small amount of smoky Scotch before pouring in the cocktail.

    You can also replace approximately 1/4 ounce of the bourbon with a smoky whiskey.

    Don’t overdo it.

    Blackberry and maple are relatively delicate compared with heavily smoky spirits.

    The goal should be a hint of smoke rather than allowing it to dominate the entire drink.

    Add Fresh Herbs

    Blackberries pair beautifully with herbs.

    Rosemary is particularly good with bourbon and maple.

    You can lightly slap a rosemary sprig between your palms before using it as a garnish. This helps release its aroma without putting strong pieces of rosemary directly into the drink.

    Thyme is another excellent option.

    For something brighter and more summery, try basil.

    Mint creates the freshest variation of all.

    Each herb changes the personality of the cocktail while leaving the basic recipe intact.

    Make It Spicier

    Bourbon and maple already have warming qualities, but you can push the drink further.

    Add a very small pinch of cinnamon.

    A dash of ginger syrup can provide another layer of spice.

    For something adventurous, muddle a very thin jalapeño slice with the blackberries.

    Just be careful with fresh peppers.

    Their heat can vary dramatically, and you want enough spice to make the cocktail interesting—not enough to overwhelm every other flavor.

    Make a Pitcher for a Gathering

    The Maple Blackberry Bourbon Sour can easily become a party cocktail.

    For approximately eight servings, use:

    • 2 cups bourbon
    • 1 cup fresh lemon juice
    • 1/2 cup pure maple syrup
    • 2 cups fresh blackberries
    • 8–12 dashes aromatic bitters, optional

    Muddle the blackberries with the maple syrup in a pitcher.

    Add the bourbon, lemon juice, and bitters.

    Stir thoroughly.

    Refrigerate until well chilled.

    Before serving, strain the mixture if you don’t want blackberry pulp and seeds in the drinks.

    Serve over fresh ice and garnish each glass with blackberries and lemon.

    For a lighter party version, add club soda immediately before serving.

    When batching cocktails, avoid adding ice too early because it will melt and dilute the entire pitcher.

    Foods to Serve With a Maple Blackberry Bourbon Sour

    One of the advantages of bourbon cocktails is how well they pair with food.

    Barbecue

    Smoked ribs, pulled pork, brisket, or barbecue chicken work especially well.

    The bourbon complements smoky flavors while blackberry and lemon provide a refreshing contrast.

    Charcuterie

    Serve the cocktail with aged cheddar, smoked gouda, prosciutto, salami, crackers, nuts, and fresh fruit.

    Blackberry and cheese are particularly good partners.

    Grilled Meat

    Steak, pork chops, and grilled chicken all work well with bourbon-based cocktails.

    Spicy Foods

    The fruit and maple sweetness can balance moderately spicy foods such as wings or spicy barbecue.

    Desserts

    Try pairing the cocktail with blackberry cobbler, apple crisp, bread pudding, cheesecake, dark chocolate, or vanilla ice cream.

    A dessert containing caramel or toasted nuts can be particularly good because those flavors often echo characteristics found in bourbon.

    A Great Cocktail for Late Summer and Early Fall

    Some drinks belong clearly to one season.

    Frozen tropical cocktails scream summer.

    Hot toddies belong beside a fireplace in winter.

    The Maple Blackberry Bourbon Sour sits comfortably between seasons.

    Blackberries keep the cocktail fruity, fresh, and colorful enough for warm afternoons.

    Maple and bourbon bring the richer flavors we begin craving as evenings become cooler.

    That makes it particularly well suited for late summer and early fall.

    Serve it at a September barbecue.

    Make it for an early football gathering.

    Enjoy one beside a backyard fire pit.

    Or serve it at Thanksgiving as an alternative to heavier holiday cocktails.

    It’s versatile enough to work in all of those situations.

    Presentation Ideas

    A beautiful cocktail doesn’t need complicated decorations.

    The Maple Blackberry Bourbon Sour already has a gorgeous color.

    Let that do most of the work.

    Serve it in a clear rocks glass over one large ice cube.

    Thread three blackberries onto a cocktail pick and place it across the glass.

    Add a thin lemon wheel or twisted lemon peel.

    A rosemary sprig adds another layer of color and aroma.

    If you’re serving these at a fall party, a dehydrated lemon wheel makes an especially attractive garnish.

    Tips for the Best Maple Blackberry Bourbon Sour

    Use ripe blackberries whenever possible.

    Always use freshly squeezed lemon juice.

    Choose pure maple syrup rather than artificially flavored pancake syrup.

    Use a bourbon you already enjoy.

    Don’t over-muddle the berries.

    Shake the cocktail thoroughly so it becomes properly chilled.

    Double-strain if you prefer a smooth drink without blackberry seeds.

    Taste your cocktail before serving and adjust the sweet-and-sour balance if necessary.

    And use fresh ice in the serving glass instead of pouring the shaker ice into the drink.

    Small details can make a surprisingly large difference.

    Cocktail of the Day

    The Maple Blackberry Bourbon Sour proves that a cocktail doesn’t need a long list of unusual ingredients to feel special.

    It starts with bourbon—a spirit already filled with warm notes of vanilla, caramel, oak, and spice.

    Fresh blackberries add sweet-tart fruit and a striking natural color.

    Lemon keeps the cocktail bright.

    Pure maple syrup replaces ordinary simple syrup with something deeper, warmer, and more flavorful.

    Bring everything together over ice, add a few fresh blackberries and a twist of lemon, and you’ve got a cocktail that feels equally appropriate on a sunny patio or beside a fire on a cool evening.

    You can keep it simple, give it a silky foam, make it sparkling, add herbs, introduce some spice, or prepare an entire pitcher for friends.

    However you make it, the Maple Blackberry Bourbon Sour offers exactly what a Cocktail of the Day should: familiar ingredients combined in a way that makes you want to try something new.

    Please enjoy responsibly. This recipe is intended for adults of legal drinking age. Never drink and drive.

    Would you make your Maple Blackberry Bourbon Sour smooth and classic, sparkling with club soda, or spicy with a touch of jalapeño?

  • Drink of the Day: Maple Pear Bourbon Fizz

    Drink of the Day: Maple Pear Bourbon Fizz

    Some drinks are made for hot summer afternoons. Others belong beside a warm fire on a cold winter night. Then there are those special drinks that seem perfectly suited for the transition between seasons.

    The Maple Pear Bourbon Fizz is one of those drinks.

    Juicy pear, smooth bourbon, fresh lemon juice, rich maple syrup, and sparkling club soda come together in a drink that is refreshing, slightly sweet, warming, and incredibly easy to enjoy.

    Pear gives the drink a delicate fruitiness without overwhelming the bourbon. Maple syrup adds a deeper sweetness than ordinary simple syrup, while lemon juice keeps everything bright and balanced. A final splash of club soda gives the drink its refreshing fizz.

    The result is a cocktail that feels sophisticated without being complicated.

    Whether you’re relaxing after a long day, entertaining friends, enjoying a quiet evening on the patio, or looking for a seasonal drink to serve at a fall gathering, today’s Drink of the Day: Maple Pear Bourbon Fizz deserves a place in your recipe collection.

    Why Pear and Bourbon Work So Well Together

    Bourbon has a naturally rich flavor profile.

    Depending on the bourbon you choose, you may notice flavors such as vanilla, caramel, toasted oak, baking spices, honey, nuts, or even fruit.

    Pear works especially well because its flavor is relatively delicate.

    Instead of competing with the whiskey, pear complements it.

    A ripe pear provides gentle sweetness and fresh fruit flavor while allowing the bourbon to remain noticeable.

    Then maple syrup brings everything together.

    Maple and bourbon are natural partners because both can have deep caramelized flavors. Add fresh lemon juice for acidity and sparkling water for freshness, and you’ve created a drink with several layers of flavor.

    You get fruit.

    You get sweetness.

    You get citrus.

    You get bourbon warmth.

    And finally, you get a crisp sparkling finish.

    Maple Pear Bourbon Fizz Recipe

    This recipe makes one cocktail.

    Ingredients

    • 2 ounces bourbon
    • 1/2 ripe pear, diced
    • 3/4 ounce freshly squeezed lemon juice
    • 1/2 ounce pure maple syrup
    • 2–3 ounces club soda
    • Ice
    • Thin pear slices for garnish
    • Lemon peel for garnish, optional
    • Cinnamon stick for garnish, optional

    How to Make a Maple Pear Bourbon Fizz

    1. Prepare the Pear

    Cut a ripe pear in half and remove the core.

    Dice approximately half of the pear into small pieces.

    Place the diced pear into the bottom of a cocktail shaker.

    The riper the pear, the easier it will be to muddle and the more natural sweetness it will contribute to the drink.

    2. Add the Maple Syrup

    Pour approximately 1/2 ounce of pure maple syrup over the pear.

    Gently muddle the pear and maple syrup together.

    You want to break down the fruit enough to release its juice and flavor without turning everything into complete puree.

    3. Add Bourbon and Lemon

    Pour in:

    • 2 ounces bourbon
    • 3/4 ounce fresh lemon juice

    Fill the shaker with ice.

    4. Shake Until Cold

    Shake vigorously for approximately 10–15 seconds.

    The shaking chills the bourbon while helping the pear, maple, lemon, and whiskey combine.

    5. Strain

    Fill a rocks glass or tall glass with fresh ice.

    Strain the cocktail mixture over the ice.

    If you want a smoother drink, double-strain it through a fine mesh strainer to remove small pieces of pear.

    If you prefer a more rustic drink, a regular cocktail strainer is perfectly fine.

    6. Add the Fizz

    Top the cocktail with approximately 2–3 ounces of club soda.

    Stir gently.

    You don’t want to stir aggressively because you’ll lose some of the carbonation.

    7. Garnish

    Add a thin slice or fan of fresh pear.

    For an autumn presentation, add a cinnamon stick.

    A strip of lemon peel is another simple garnish that adds a fresh citrus aroma.

    Serve immediately.

    Choosing the Best Pear

    The pear may seem like a supporting ingredient, but it has an important job in this cocktail.

    You want a pear that is ripe enough to release plenty of juice when muddled.

    Bartlett pears are an excellent option because they become wonderfully juicy and aromatic when ripe.

    Anjou pears are another good choice. They tend to have a mild sweetness and hold their shape nicely, making them particularly useful if you’re also using pear slices as a garnish.

    Bosc pears have a slightly firmer texture and a more distinctive flavor that works beautifully with bourbon and warm spices.

    Whatever variety you choose, ripeness matters.

    A rock-hard pear won’t provide nearly as much juice or flavor.

    If your pears aren’t ripe yet, leave them at room temperature until they soften slightly.

    Why Use Real Maple Syrup?

    Maple syrup isn’t simply included to make the cocktail sweet.

    It adds flavor.

    Ordinary simple syrup is mostly neutral sweetness. Pure maple syrup contributes richer caramel, vanilla, woody, and toasted characteristics that work naturally with bourbon.

    You don’t need much.

    Approximately half an ounce provides enough sweetness for most people.

    If you prefer a drier cocktail, start with 1/4 ounce.

    If you enjoy sweeter drinks, increase it slightly.

    The important part is tasting and adjusting.

    Different pears have different levels of sweetness, so you may need less maple syrup when using extremely ripe fruit.

    Fresh Lemon Keeps Everything Balanced

    Pear and maple syrup are both sweet ingredients.

    Bourbon can also have naturally sweet flavor characteristics.

    Without acidity, the drink could become heavy.

    That’s why fresh lemon juice matters.

    Lemon provides the brightness necessary to balance the maple syrup and fruit.

    It also makes the cocktail feel more refreshing.

    Freshly squeezed lemon juice is strongly recommended because it has a brighter flavor than most bottled alternatives.

    If you make the drink and it tastes a little too sweet, add another small squeeze of lemon.

    Sometimes that tiny adjustment completely transforms the cocktail.

    Choosing a Bourbon

    You don’t need to use an extremely expensive bottle of bourbon for a Maple Pear Bourbon Fizz.

    A good everyday bourbon works beautifully.

    Look for something with flavors that lean toward:

    • Vanilla
    • Caramel
    • Oak
    • Baking spice
    • Honey
    • Toasted nuts
    • Fruit

    Higher-proof bourbon can also work because the pear, maple syrup, lemon, ice, and club soda soften some of the alcohol’s intensity.

    However, the best bourbon is ultimately one you already enjoy.

    If you wouldn’t enjoy the bourbon on its own, putting it into a cocktail probably won’t magically make you love it.

    Why the Club Soda Matters

    Club soda turns this drink from a rich bourbon cocktail into something considerably lighter and more refreshing.

    The carbonation lifts the fruit and citrus aromas while diluting the bourbon just enough to make the cocktail easy to sip.

    Start with approximately 2 ounces.

    Taste the drink.

    If you’d like something lighter, add another ounce or two.

    This is particularly useful when serving the drink during the afternoon or alongside food.

    For a stronger bourbon-forward drink, use less club soda.

    For a lighter highball-style drink, use more.

    Make a Maple Pear Syrup

    If you’re planning to make several Maple Pear Bourbon Fizzes, muddling fresh pear for every cocktail can become inconvenient.

    That’s where homemade maple pear syrup comes in.

    Maple Pear Syrup Ingredients

    • 1 ripe pear, diced
    • 1 cup water
    • 1/2 cup pure maple syrup
    • 1/2 cup sugar

    Directions

    Combine the diced pear, water, maple syrup, and sugar in a small saucepan.

    Bring everything to a gentle simmer.

    Cook for approximately 8–10 minutes while occasionally stirring and gently pressing the pear pieces.

    Remove the saucepan from the heat.

    Allow the mixture to cool and steep.

    Strain it through a fine mesh strainer into a clean container.

    Store the syrup in the refrigerator.

    When you’re ready to make your cocktail, replace the muddled pear and maple syrup with approximately 3/4 ounce of your homemade pear-maple syrup.

    It’s a convenient way to prepare several drinks quickly.

    Turn It Into a Pitcher

    Having friends over?

    You can transform this single-serving cocktail into a pitcher.

    For approximately six drinks, use:

    • 12 ounces bourbon
    • 3 ripe pears
    • 4 1/2 ounces fresh lemon juice
    • 3 ounces pure maple syrup
    • 12–18 ounces club soda
    • Pear slices
    • Lemon slices
    • Ice

    Muddle the pears with the maple syrup in the bottom of a pitcher.

    Add the bourbon and lemon juice.

    Stir everything together.

    Refrigerate until thoroughly chilled.

    When you’re ready to serve, strain the mixture if desired.

    Add club soda immediately before serving.

    Don’t add the carbonation too early because it will gradually go flat.

    It’s also better to put ice into individual glasses rather than filling the pitcher with ice and allowing it to become diluted.

    Make It a Maple Pear Bourbon Highball

    Want an even lighter version?

    Turn the recipe into a highball.

    Use:

    • 1 1/2 ounces bourbon
    • 1/2 ounce maple syrup
    • Several muddled pear pieces
    • 1/2 ounce lemon juice
    • 4–5 ounces club soda

    Build everything in a tall glass over plenty of ice.

    This version contains more sparkling water, making it lighter and especially refreshing.

    Add Ginger

    Pear and ginger are another fantastic combination.

    Instead of club soda, top your cocktail with ginger ale or ginger beer.

    Ginger ale creates a sweeter and milder version.

    Ginger beer gives the cocktail considerably more spice.

    For a Maple Pear Bourbon Ginger Fizz, prepare the original recipe but finish it with approximately 2–3 ounces of ginger beer.

    Garnish with fresh pear and a thin slice of fresh ginger.

    Add Cinnamon

    Few flavors say fall quite like cinnamon.

    You don’t need much.

    Add a tiny pinch of ground cinnamon to the shaker before mixing the cocktail.

    Another option is simply garnishing the drink with a cinnamon stick.

    The cinnamon aroma reaches you every time you lift the glass without overwhelming the pear.

    Add Rosemary

    For an herbal variation, try rosemary.

    Lightly clap a rosemary sprig between your hands before adding it as a garnish.

    This releases some of the aromatic oils.

    Pear, rosemary, lemon, maple, and bourbon create a surprisingly sophisticated combination.

    Just avoid overdoing the rosemary.

    You want a gentle herbal aroma rather than something that tastes like you’re drinking a Christmas tree.

    Try Apple Instead of Pear

    No pears available?

    Use apple.

    Muddle several pieces of crisp apple with maple syrup and prepare the rest of the cocktail normally.

    You’ll get a Maple Apple Bourbon Fizz that has a slightly sharper fruit character.

    You can even combine apple and pear for the best of both.

    Make It Extra Pear-Forward

    If you’re a big fan of pear flavor, there are several ways to intensify it.

    You can use pear nectar in addition to fresh pear.

    Try adding approximately 1 ounce of pear nectar to the shaker.

    Reduce the maple syrup slightly because pear nectar may already contain plenty of sweetness.

    Another option is using pear sparkling water instead of regular club soda.

    You’ll get more pear aroma without dramatically increasing the sweetness.

    Make It Smoky

    Want a deeper version?

    Try replacing a small portion of the bourbon with a smoky spirit.

    For example:

    • 1 1/2 ounces bourbon
    • 1/2 ounce smoky Scotch
    • Pear
    • Maple syrup
    • Lemon
    • Club soda

    The smoky flavor creates an entirely different experience.

    Pear and maple remain noticeable, but a subtle smoky finish gives the drink a fireside personality.

    Maple Pear Bourbon Fizz for Fall

    Although you can make this drink throughout the year, it really shines during fall.

    Pear season, maple, bourbon, and warming spices naturally fit the cooler months.

    Serve it at:

    • Fall dinners
    • Football gatherings
    • Halloween parties
    • Thanksgiving celebrations
    • Friendsgiving
    • Backyard fire-pit evenings
    • Holiday gatherings

    You can make the basic recipe for an early fall gathering when the weather is still warm.

    As temperatures get colder, start adding cinnamon, ginger, rosemary, or other warming flavors.

    One basic drink can evolve throughout the season.

    A Holiday Version

    For Thanksgiving or Christmas, dress the Maple Pear Bourbon Fizz up slightly.

    Prepare the original recipe and garnish it with:

    • Fresh pear
    • Rosemary sprig
    • Cinnamon stick
    • A few fresh cranberries

    The cranberries don’t need to contribute much flavor. Their bright color simply makes the drink look more festive.

    For additional cranberry flavor, add approximately 1/2 ounce of cranberry juice.

    That creates a beautiful seasonal variation with pear, cranberry, maple, citrus, and bourbon.

    What to Serve With a Maple Pear Bourbon Fizz

    Because this cocktail combines fruit, citrus, sweetness, and whiskey, it pairs nicely with many foods.

    Try it with:

    • Roasted chicken
    • Pork chops
    • Grilled pork tenderloin
    • Glazed ham
    • Charcuterie
    • Sharp cheddar
    • Smoked Gouda
    • Brie
    • Roasted nuts
    • Caramelized onions
    • Roasted vegetables
    • Turkey
    • Barbecue

    The maple and bourbon components work particularly well with smoky, savory, and roasted foods.

    Dessert Pairings

    Don’t forget dessert.

    Try the cocktail alongside:

    • Apple pie
    • Pear tart
    • Bread pudding
    • Maple cheesecake
    • Cinnamon rolls
    • Pecan pie
    • Caramel cake
    • Vanilla ice cream
    • Apple crisp
    • Pear crisp

    A Maple Pear Bourbon Fizz can even function as a light after-dinner cocktail by itself.

    How to Adjust the Sweetness

    Everyone has a different idea of what makes a perfectly balanced drink.

    That’s why cocktail recipes should be treated as starting points rather than absolute rules.

    If the drink is too sweet, add more lemon juice or club soda.

    If it’s too tart, add another teaspoon of maple syrup.

    If the bourbon is too strong, add additional club soda.

    If you can’t taste enough bourbon, reduce the club soda.

    If the pear flavor is too subtle, add pear nectar or additional muddled pear.

    Taste as you go.

    Small changes can make a big difference.

    Make It Frozen

    Yes, you can turn the Maple Pear Bourbon Fizz into a frozen cocktail.

    Add to a blender:

    • 2 ounces bourbon
    • 1/2 ripe pear
    • 3/4 ounce lemon juice
    • 1/2 ounce maple syrup
    • Approximately 1 cup ice

    Blend until smooth.

    Pour into a chilled glass.

    Instead of blending club soda, add a small splash over the finished drink.

    Never put carbonated ingredients into a sealed blender.

    Garnish with fresh pear and cinnamon.

    Garnish Ideas

    Presentation is part of the fun of making drinks at home.

    You don’t need anything elaborate.

    Try:

    • Thin pear fan
    • Single pear slice
    • Lemon wheel
    • Lemon twist
    • Cinnamon stick
    • Rosemary sprig
    • Star anise
    • Fresh cranberries
    • Candied ginger

    For a beautiful autumn presentation, combine a pear slice with a cinnamon stick.

    For the holidays, use pear, rosemary, and cranberries.

    Maple Pear Bourbon Fizz Variations

    Once you’ve mastered the original recipe, there are plenty of directions you can take it.

    Ginger Maple Pear Bourbon Fizz

    Replace club soda with ginger beer.

    Cinnamon Pear Bourbon Fizz

    Add a tiny pinch of cinnamon.

    Rosemary Pear Bourbon Fizz

    Garnish with fresh rosemary.

    Cranberry Pear Bourbon Fizz

    Add 1/2–1 ounce cranberry juice.

    Apple Pear Bourbon Fizz

    Muddle apple and pear together.

    Sparkling Pear Bourbon Fizz

    Replace club soda with extra-dry sparkling wine for an adults-only celebratory variation.

    Honey Pear Bourbon Fizz

    Replace maple syrup with honey syrup.

    Spiced Pear Bourbon Fizz

    Add cinnamon, ginger, and a tiny pinch of nutmeg.

    Each variation keeps the original character of the drink while creating a noticeably different experience.

    Tips for the Best Maple Pear Bourbon Fizz

    A few simple details can make this drink even better.

    Use ripe pears. You’ll get considerably more fruit flavor.

    Use pure maple syrup. Artificial pancake syrup won’t provide the same flavor.

    Squeeze the lemon fresh. Citrus is one of the most important balancing ingredients.

    Use fresh ice. Old freezer ice can pick up unwanted flavors.

    Add carbonation last. Never shake club soda in your cocktail shaker.

    Taste before serving. Pear sweetness varies tremendously.

    Don’t overcomplicate it. Pear, maple, bourbon, lemon, and bubbles are already a great combination.

    Why This Drink Deserves a Place in Your Collection

    Some of the most enjoyable drinks are built around ingredients that naturally belong together.

    That’s exactly what happens here.

    Bourbon provides warmth, vanilla, caramel, oak, and spice.

    Pear provides gentle fruit sweetness.

    Maple syrup deepens the cocktail with rich, almost caramel-like sweetness.

    Lemon prevents everything from becoming heavy.

    Club soda lifts the entire drink with refreshing carbonation.

    Nothing needs to dominate.

    Each ingredient has a job.

    And when they’re balanced correctly, the result is a drink that’s refreshing enough for a sunny afternoon but warming enough for a cool evening.

    Drink of the Day: Maple Pear Bourbon Fizz

    The Maple Pear Bourbon Fizz proves that a memorable drink doesn’t need a long list of unusual ingredients.

    Sometimes all you need is a great combination.

    Juicy pear.

    Smooth bourbon.

    Real maple syrup.

    Fresh lemon.

    Sparkling club soda.

    Put them together and you get a cocktail that’s fruity without being overly sweet, bourbon-forward without being heavy, and seasonal without limiting you to only one time of year.

    Make the classic version over ice, spice it up with ginger, add cinnamon for fall, bring in cranberry for the holidays, or turn it into a lighter highball.

    However you choose to make it, give the pear enough room to shine.

    Pour it over plenty of fresh ice, add that final splash of bubbles, garnish with a beautiful pear slice, and enjoy.

    Please enjoy responsibly. This recipe is intended for adults of legal drinking age, and never drink and drive.

    Would you try your Maple Pear Bourbon Fizz classic, spicy with ginger beer, or dressed up with cinnamon and cranberry for fall?