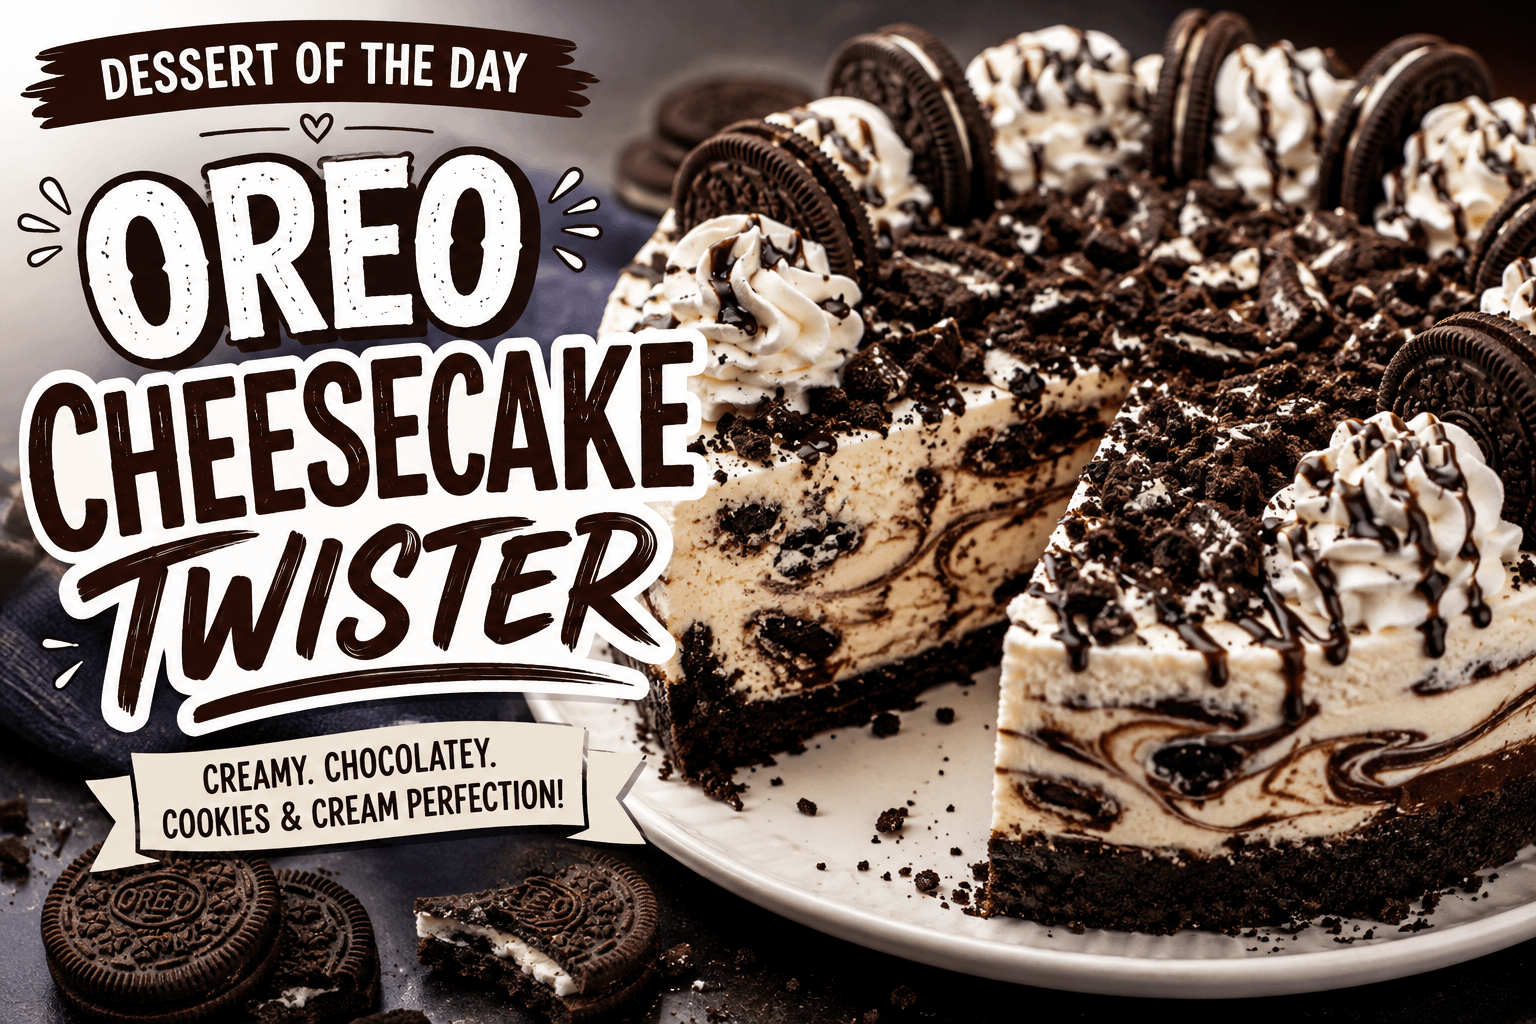
There are desserts you enjoy, and then there are desserts that make you stop after the first bite and wonder why you don’t make them more often. Today’s Dessert of the Day: Oreo Cheesecake Twister belongs firmly in the second category.
Imagine everything you love about a classic cheesecake—its thick, velvety filling, slight tanginess, buttery crust, and incredible richness—combined with one of America’s most recognizable cookies.
Now add chunks of Oreos throughout the filling, a chocolate cookie crust underneath, ribbons of chocolate twisted through the cheesecake, fluffy whipped cream on top, and another generous helping of crushed Oreos.
That’s the Oreo Cheesecake Twister.
It’s rich.
It’s creamy.
It’s crunchy.
It’s chocolatey.
And it’s definitely not shy about being dessert.
This is the kind of cheesecake you bring to the table when you want people to immediately ask, “Who made that?”
The beautiful part is that despite its impressive appearance, you don’t need to be a professional baker to make it. Cheesecake requires patience more than complicated techniques. Give the ingredients time to reach the proper temperature, mix everything gently, bake it slowly, and—perhaps most importantly—allow it plenty of time to chill.
Your reward is a thick, creamy cheesecake loaded with cookies-and-cream goodness.
So grab the Oreos.
Today’s dessert is going big.
Why Oreos and Cheesecake Work So Well Together
Some dessert combinations just make sense.
Chocolate and peanut butter.
Strawberries and cream.
Apples and cinnamon.
Oreos and cheesecake deserve a place on that list.
Traditional cheesecake has a rich but relatively simple flavor profile. Cream cheese provides richness and tanginess, sugar brings sweetness, vanilla adds warmth, and sour cream helps create that luxurious texture.
That makes cheesecake the perfect canvas for additional flavors.
Oreos bring something completely different.
Their dark chocolate cookies add crunch and cocoa flavor, while the sweet cream centers blend beautifully into the cheesecake.
The contrast is what makes the combination so satisfying.
You aren’t simply eating something creamy.
You aren’t simply eating something crunchy.
You’re getting both textures in practically every bite.
What Makes It a “Twister”?
This isn’t simply an Oreo cheesecake.
The twister comes from swirling melted chocolate through portions of the cheesecake batter.
Instead of mixing everything completely, you gently drag a knife or skewer through the chocolate and vanilla cheesecake.
That creates beautiful ribbons throughout the dessert.
When you slice into the finished cheesecake, every piece has its own unique pattern.
Some bites have more chocolate.
Others have more vanilla cheesecake.
Others contain large chunks of Oreo.
The result is a dessert that feels slightly different with every forkful.
Oreo Cheesecake Twister Recipe
Prep Time: 25–30 minutes
Bake Time: 50–60 minutes
Cooling Time: About 1 hour
Chilling Time: At least 6 hours
Best Chilling Time: Overnight
Servings: 10–12 generous slices
Equipment You’ll Need
You don’t need a professional kitchen, but having the right equipment makes cheesecake preparation easier.
You’ll want:
- 9-inch springform pan
- Large mixing bowl
- Electric hand mixer or stand mixer
- Food processor or resealable bag and rolling pin
- Rubber spatula
- Measuring cups and spoons
- Butter knife or wooden skewer
- Aluminum foil
- Large roasting pan if using a water bath
Ingredients
For the Oreo Cookie Crust
- 24 Oreo cookies
- 5 tablespoons unsalted butter, melted
For the Oreo Cheesecake Filling
- 24 ounces full-fat cream cheese, softened
- 1 cup granulated sugar
- 1 cup full-fat sour cream, room temperature
- 1 teaspoon pure vanilla extract
- 3 large eggs, room temperature
- 12 Oreo cookies, roughly chopped
- 1/2 cup semi-sweet chocolate chips, melted and slightly cooled
For the Oreo Topping
- 1 cup whipped cream or whipped topping
- 6–8 Oreo cookies, crushed
- 4–6 Oreo cookies, whole or halved
- Chocolate sauce or hot fudge, optional
- Chocolate curls or mini chocolate chips, optional
Before You Begin: Bring Ingredients to Room Temperature
This might seem like an unnecessary step, but it can make a noticeable difference.
Cream cheese, sour cream, and eggs combine much more smoothly when they’re closer to room temperature.
Cold cream cheese is particularly troublesome.
You can beat cold cream cheese for several minutes and still end up with tiny lumps throughout your cheesecake batter.
Softened cream cheese creates a much smoother filling.
Take your cream cheese, eggs, and sour cream out of the refrigerator before beginning the recipe and give them enough time to lose their chill.
Step 1: Prepare Your Springform Pan
Preheat your oven to 325°F.
Lightly grease the inside of a 9-inch springform pan.
You can also place a round piece of parchment paper on the bottom for easier removal.
If you’re planning to bake your cheesecake in a water bath, wrap the outside of your springform pan tightly with several layers of heavy-duty aluminum foil.
Springform pans aren’t completely watertight.
The foil creates a protective barrier that helps prevent water from reaching your Oreo crust.
Step 2: Crush the Oreos
Place 24 Oreo cookies into a food processor.
Yes—the whole Oreo.
There’s no need to scrape out the cream filling.
Pulse the cookies until they become fine crumbs.
Don’t have a food processor?
Place the Oreos inside a sturdy resealable plastic bag, remove most of the air, seal it, and crush the cookies using a rolling pin.
You’re looking for fine crumbs rather than large chunks.
Step 3: Make the Oreo Cookie Crust
Transfer your Oreo crumbs into a bowl.
Pour the melted butter over them.
Mix until every crumb is coated and the mixture resembles wet sand.
Transfer the mixture into your prepared springform pan.
Press it firmly across the bottom.
The tighter you pack the crust, the better it will hold together when slicing.
A flat-bottomed measuring cup works extremely well for this.
Press firmly but evenly.
Bake the crust for approximately 8–10 minutes.
Remove it from the oven and allow it to cool while you prepare the filling.
Step 4: Beat the Cream Cheese
Place your softened cream cheese into a large mixing bowl.
Beat on medium-low speed until completely smooth.
Scrape down the sides and bottom of the bowl.
This is one of the most important moments for removing lumps.
Once other ingredients are added, it becomes much more difficult to smooth out pieces of cream cheese.
Step 5: Add Sugar, Sour Cream, and Vanilla
Add the granulated sugar.
Beat until combined.
Next, add the sour cream and vanilla extract.
Continue mixing just until everything becomes smooth.
Sour cream plays an important role in cheesecake.
It adds subtle tanginess while helping create a softer, creamier texture.
Step 6: Add the Eggs Carefully
Add your eggs one at a time.
Mix on low speed after each addition.
As soon as the egg disappears into the batter, add the next one.
Once all three eggs are incorporated, stop mixing.
Why?
Overmixing eggs introduces additional air into cheesecake batter.
That trapped air expands while baking, causing the cheesecake to rise.
As it cools, the cheesecake contracts.
Too much expansion and contraction can contribute to cracks.
A cracked cheesecake still tastes delicious, but gentle mixing gives you a better chance at that smooth bakery-style surface.
Step 7: Fold in the Oreo Pieces
Roughly chop approximately 12 Oreos.
These shouldn’t be pulverized like the cookies used for the crust.
You actually want noticeable chunks.
Gently fold them into the cheesecake batter using a rubber spatula.
Try not to overmix.
Those chunks will soften slightly while baking but should still provide little pockets of Oreo throughout every slice.
Step 8: Melt the Chocolate
Place your semi-sweet chocolate chips into a microwave-safe bowl.
Microwave in short intervals, stirring between each interval, until smooth.
Let the chocolate cool slightly.
You don’t want piping-hot chocolate going directly into your cheesecake batter.
Step 9: Build the Cheesecake
Pour approximately two-thirds of your Oreo cheesecake filling over the cooled crust.
Smooth the surface gently.
Drizzle some melted chocolate across the batter.
Add the remaining cheesecake filling.
Drizzle additional chocolate across the top.
Now you’re ready to create the signature twist.
Step 10: Create the Chocolate Twister Effect
Take a butter knife, toothpick, or wooden skewer.
Insert it slightly into the cheesecake batter.
Slowly drag it through the chocolate using circular motions, S-shapes, or figure-eight patterns.
Here’s the important part:
Don’t overdo it.
If you swirl repeatedly, the chocolate and cheesecake will simply blend together.
You want ribbons.
A handful of deliberate swirls is usually enough.
The goal is to create contrast between the pale cheesecake and dark chocolate.
Step 11: Add a Water Bath for Extra Creaminess
A water bath isn’t absolutely required, but it can help your cheesecake bake more evenly.
Place your foil-wrapped springform pan into a large roasting pan.
Carefully pour hot water into the roasting pan until the water reaches approximately halfway up the outside of the springform pan.
The hot water creates a humid environment inside the oven.
That moisture helps prevent the cheesecake’s exterior from cooking much faster than its center.
It can also reduce cracking.
Step 12: Bake Slowly
Bake the cheesecake at 325°F for approximately 50–60 minutes.
Start checking toward the lower end of that range.
You’re looking for a specific texture.
The outside several inches should appear set.
The center should still jiggle slightly when the pan is gently moved.
Think of gelatin rather than liquid.
If the entire cheesecake looks completely firm while still inside the oven, there’s a good chance it has been overbaked.
Remember that cheesecake continues cooking from residual heat as it cools.
Step 13: Cool the Cheesecake Gradually
Once the cheesecake is finished baking, turn off the oven.
Crack the oven door open slightly.
Leave the cheesecake inside for approximately 45–60 minutes.
This allows the temperature to decrease gradually.
Sudden temperature changes can contribute to cracking.
Afterward, remove the cheesecake from the oven and water bath.
Allow it to finish cooling at room temperature.
Step 14: Refrigerate Until Completely Set
Once the cheesecake reaches room temperature, cover it and transfer it to the refrigerator.
Refrigerate for at least 6 hours.
But if possible?
Leave it overnight.
Cheesecake needs this time.
The filling firms.
The flavors develop.
The texture becomes dense and creamy.
And the cheesecake becomes significantly easier to slice.
This is why cheesecake is such a great dessert for entertaining—you can do almost all the work the day before.
Step 15: Decorate Your Oreo Cheesecake Twister
Once completely chilled, carefully release the springform pan.
Now you get to make your cheesecake look spectacular.
Pipe whipped cream around the outside edge.
Sprinkle crushed Oreos over the whipped cream and across the center.
Arrange Oreo halves vertically around the edge.
Drizzle chocolate sauce over everything.
For even more chocolate, add chocolate curls or mini chocolate chips.
There really isn’t a wrong way to decorate an Oreo cheesecake.
How to Get Perfect Cheesecake Slices
You’ve waited overnight.
You’ve decorated your masterpiece.
Don’t destroy those beautiful layers with messy cuts.
Fill a tall glass with hot water.
Dip a sharp knife into the water.
Remove it and wipe it completely dry.
Make one clean cut.
Then clean the knife and repeat before making the next cut.
It takes a little longer, but the slices will look dramatically better.
What Does Oreo Cheesecake Twister Taste Like?
The first thing you’ll notice is the creaminess.
A properly baked cheesecake should feel rich and almost velvety.
Then comes the chocolate.
The Oreo crust provides a deep cocoa flavor while the chocolate swirl adds additional richness.
Next comes texture.
The cookie chunks hidden throughout the filling provide small bursts of chocolate-cookie flavor.
And finally, there’s that slight tanginess from the cream cheese and sour cream.
That’s important because it prevents the dessert from tasting like pure sugar.
Everything balances.
Creamy.
Crunchy.
Sweet.
Tangy.
Chocolatey.
That’s what makes Oreo cheesecake so difficult to resist.
Make It Even More Decadent
The basic Oreo Cheesecake Twister is already impressive.
But sometimes dessert calls for excess.
Try warming hot fudge sauce and pouring a little over each slice immediately before serving.
The contrast between cold cheesecake and warm chocolate is fantastic.
You could also add a scoop of cookies-and-cream ice cream alongside each slice.
Want even more Oreos?
Crush another cookie over each serving.
At that point, you’re basically declaring Oreo victory.
Oreo Cheesecake Twister Variations
One of the best things about cheesecake is how easily the basic recipe can be customized.
Double Chocolate Oreo Twister
Add melted chocolate to approximately one-third of your cheesecake batter.
Alternate spoonfuls of chocolate and vanilla Oreo batter before swirling them together.
Finish with chocolate ganache.
Peanut Butter Oreo Twister
Chocolate and peanut butter rarely disappoint.
Beat approximately 1/2 cup creamy peanut butter into part of your cheesecake batter.
Swirl the peanut butter mixture throughout the Oreo filling.
Top with chocolate sauce and chopped peanut butter cups.
Salted Caramel Oreo Twister
Replace some or all of the melted chocolate swirl with thick caramel sauce.
After chilling, drizzle additional caramel across the cheesecake and add a very light sprinkle of flaky sea salt.
The salty-sweet combination works beautifully with Oreos.
Mint Chocolate Oreo Twister
Add a small amount of mint extract to your cheesecake filling.
Be conservative—mint extract is powerful.
Finish with crushed chocolate cookies and chocolate drizzle.
Cookies-and-Cream Overload Twister
Use Oreo crumbs in the crust.
Oreos in the filling.
Oreos on top.
And crushed Oreos around the sides.
If you’re making dessert for a serious Oreo fan, this is the version.
Turn It Into Mini Oreo Cheesecakes
Hosting a party?
Instead of making one large cheesecake, make individual versions.
Line a muffin pan with cupcake liners.
Place one whole Oreo at the bottom of each liner.
Spoon cheesecake batter over the cookies.
Add your chocolate swirl.
Bake until the centers are just set.
Once chilled, decorate each miniature cheesecake with whipped cream and an Oreo half.
They’re easier to serve and perfect for parties, showers, birthdays, or dessert tables.
Make It a Birthday Cheesecake
Not everyone wants traditional birthday cake.
For the Oreo lover in your family, turn this cheesecake into the birthday centerpiece.
Pipe tall swirls of whipped cream around the outside.
Place Oreo cookies between each swirl.
Add colorful sprinkles.
Drizzle chocolate over the center.
Then add candles.
You might permanently replace birthday cake.
What to Serve With Oreo Cheesecake Twister
This cheesecake is rich enough to stand alone, but a few accompaniments can complement it beautifully.
Consider serving it with:
- Fresh strawberries
- Fresh raspberries
- Vanilla ice cream
- Cookies-and-cream ice cream
- Chocolate ice cream
- Hot fudge
- Chocolate ganache
- Caramel sauce
- Whipped cream
- Chocolate-covered strawberries
- Fresh coffee
- Espresso
- Cold milk
Fresh berries are especially good because their natural tartness cuts through the richness of the cheesecake.
The Coffee and Cheesecake Combination
If you’re serving Oreo Cheesecake Twister after dinner, don’t overlook coffee.
A strong cup of black coffee or espresso balances the cheesecake’s sweetness surprisingly well.
Coffee’s bitterness contrasts with the sugar and chocolate while complementing the cocoa flavor of the Oreo crust.
It’s a simple pairing, but a very good one.
How to Store Leftover Oreo Cheesecake
Cheesecake should always be refrigerated.
Cover the cheesecake tightly or place individual slices inside airtight containers.
Properly stored, your Oreo Cheesecake Twister should remain delicious for approximately 4–5 days.
For best texture, keep it toward the back of the refrigerator where temperatures tend to remain more consistent.
Can You Freeze Oreo Cheesecake?
Absolutely.
Cheesecake freezes surprisingly well.
First, chill the cheesecake completely.
Cut it into individual slices.
Wrap each slice tightly in plastic wrap and place the wrapped pieces inside a freezer-safe container or freezer bag.
For best quality, enjoy frozen cheesecake within approximately 1–2 months.
When the craving hits, move a slice from the freezer to the refrigerator and let it thaw slowly.
Having homemade Oreo cheesecake waiting in the freezer is rarely a bad thing.
Common Cheesecake Mistakes to Avoid
Cheesecake isn’t difficult, but a few mistakes can affect the final result.
Using Cold Cream Cheese
Cold cream cheese doesn’t blend smoothly.
Give it enough time to soften.
Overmixing the Batter
More mixing isn’t always better.
Once your eggs are added, mix as little as necessary.
Overbaking
The center should still have a slight jiggle when the cheesecake leaves the oven.
Cooling Too Quickly
Allowing the cheesecake to cool gradually helps prevent dramatic shrinking and cracking.
Cutting It Too Soon
This might be the hardest rule.
Don’t cut warm cheesecake.
Even if it smells incredible.
Even if you’re impatient.
Even if everyone keeps asking when dessert will be ready.
Let it chill.
You’ll be glad you did.
What If My Cheesecake Cracks?
Don’t panic.
A cracked cheesecake isn’t ruined.
In fact, it tastes exactly the same.
And this particular cheesecake gives you the perfect solution:
Cover it with Oreos.
Add whipped cream.
Add crushed cookies.
Add chocolate drizzle.
Nobody has to know.
Sometimes dessert decorating is really just delicious problem-solving.
Why This Dessert Is Perfect for Celebrations
Cheesecake naturally feels special.
Unlike cookies or brownies, which are often everyday treats, a full cheesecake arriving at the table feels like an occasion.
That’s why Oreo Cheesecake Twister works beautifully for:
- Birthdays
- Anniversaries
- Family dinners
- Holiday gatherings
- Potlucks
- Graduation parties
- Game nights
- Summer cookouts
- Dinner parties
- Weekend celebrations
You can make it ahead, keep it refrigerated, and bring it out when everyone is ready for dessert.
Then watch how quickly the slices disappear.
A Dessert Worth Slowing Down For
Some desserts are eaten quickly.
This shouldn’t be one of them.
Oreo Cheesecake Twister is rich enough that you want to slow down and enjoy each bite.
Notice the crunch of the cookie crust.
The smoothness of the cheesecake.
The little chunks of Oreo.
The ribbons of chocolate.
The fluffy whipped cream.
The extra cookie crumbs falling onto the plate.
It’s indulgent, and that’s exactly the point.
Dessert doesn’t always have to be practical.
Sometimes dessert exists simply because something delicious can make an ordinary day feel a little more special.
Dessert of the Day: Oreo Cheesecake Twister
Today’s Dessert of the Day: Oreo Cheesecake Twister takes two beloved desserts and turns them into one unforgettable creation.
You get the deep chocolate crunch of an Oreo crust, a thick layer of creamy vanilla cheesecake, chunks of Oreo cookies hidden throughout, beautiful chocolate swirls, fluffy whipped cream, and plenty of extra cookies on top.
It’s dramatic enough for a birthday.
It’s convenient enough to prepare ahead for a family gathering.
And it’s delicious enough to make simply because you’re craving cheesecake.
Best of all, you can customize it endlessly.
Add peanut butter.
Add caramel.
Double the chocolate.
Turn it into mini cheesecakes.
Pile on even more Oreos.
Make it your own.
Because when you’re making an Oreo Cheesecake Twister, there’s really only one rule:
Don’t be stingy with the Oreos.
Grab a fork, pour yourself a cup of coffee or a cold glass of milk, and enjoy today’s decadent Dessert of the Day.
Sometimes happiness really can be served one cheesecake slice at a time.
Leave a Reply