Halloween is the perfect time to get creative in the kitchen, especially when making desserts that are as fun to look at as they are delicious to eat. While chocolate cupcakes, decorated cookies, and pumpkin treats often steal the spotlight, sometimes the simplest desserts make the biggest impression.
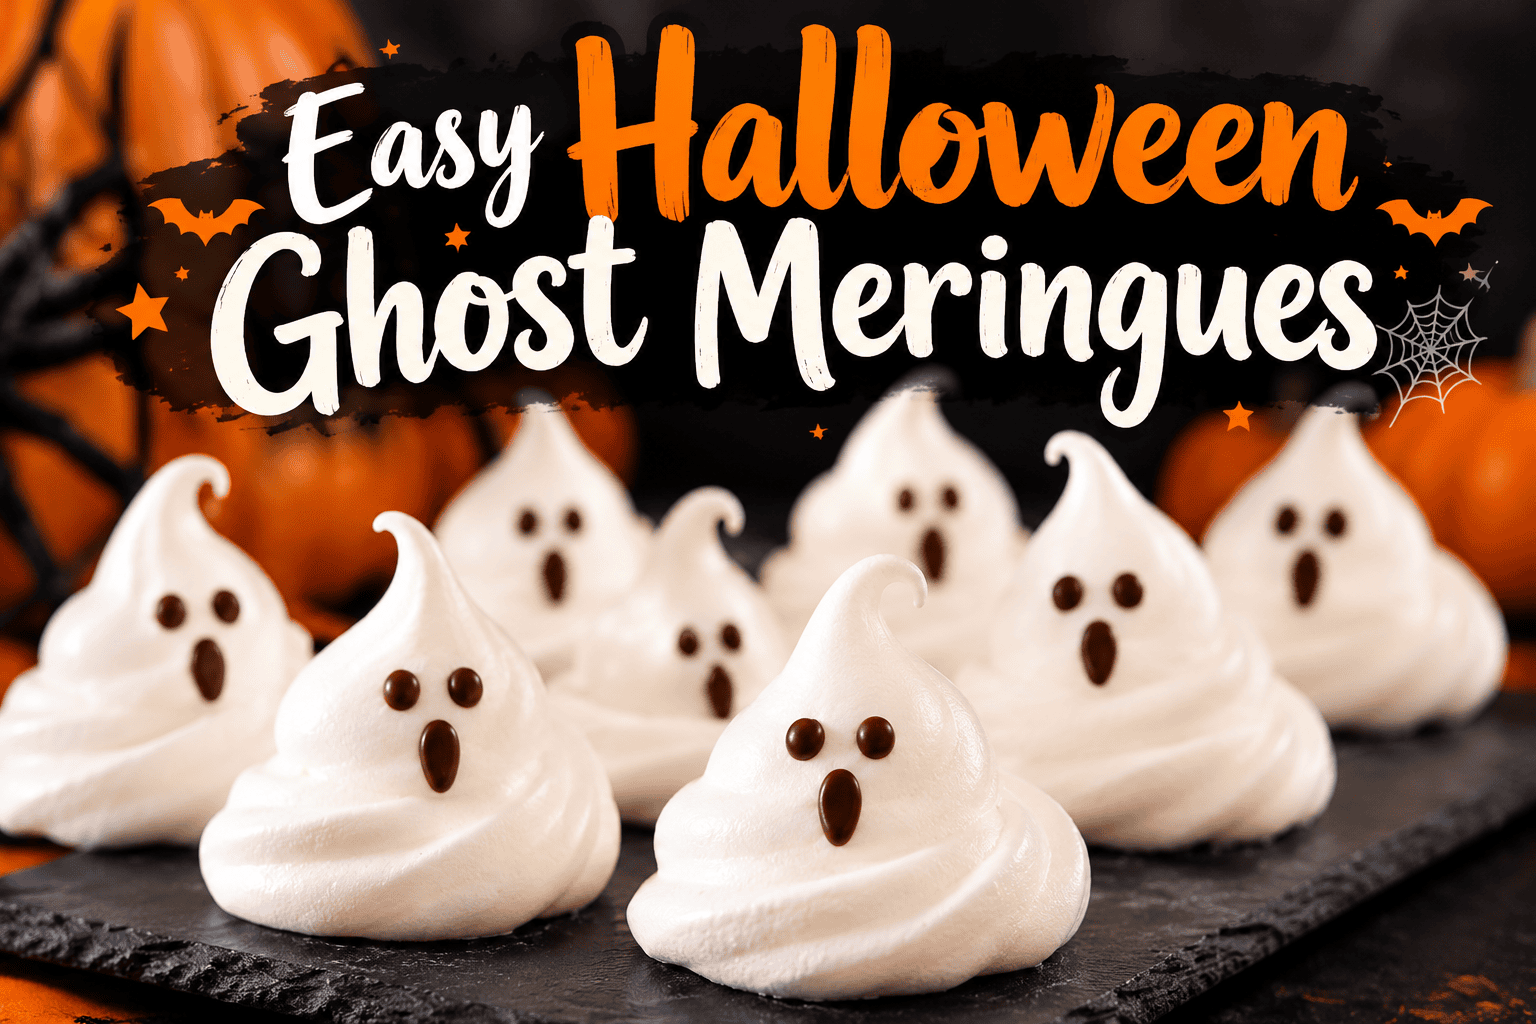
Easy Halloween Ghost Meringues are adorable, light, crispy treats that bring a little spooky charm to any Halloween celebration. Made with just a handful of ingredients, these ghost-shaped meringue cookies have a delicate crunch on the outside and a sweet, airy texture that melts in your mouth.
Their bright white appearance, playful ghost shapes, and tiny chocolate faces make them especially appealing for Halloween parties, classroom celebrations, dessert tables, and family baking activities.
Best of all, these homemade Halloween ghost meringues are naturally gluten-free when made with gluten-free ingredients, require no complicated decorating techniques, and can be prepared ahead of time.
Whether you are an experienced baker or trying meringues for the first time, this easy Halloween recipe is a delightful way to celebrate the spooky season.
Why You’ll Love These Halloween Ghost Meringues
There are plenty of reasons these little ghost cookies deserve a place on your Halloween dessert menu.
-
Only a few ingredients: Egg whites, sugar, cream of tartar, vanilla, and chocolate are all you need.
-
Adorable Halloween appearance: Each meringue resembles a tiny ghost with a playful personality.
-
Light and crispy texture: These cookies offer a delicate crunch without feeling heavy.
-
Naturally gluten-free: No flour is required.
-
Perfect for making ahead: Properly stored meringues can stay crisp for several days.
-
Kid-friendly decorating: Children can help add chocolate eyes and mouths after the cookies have cooled.
-
Great for parties: Their small size makes them easy to serve on Halloween dessert platters.
These Halloween ghost cookies prove that impressive holiday desserts do not have to be complicated.
Easy Halloween Ghost Meringues Recipe
Preparation and Cooking Time
| Detail | Time |
|---|---|
| Preparation | 20 minutes |
| Baking | 1 hour 30 minutes |
| Cooling | 30 minutes or longer |
| Oven temperature | 200°F (93°C) |
| Servings | 24–30 small meringues |
Cooling time may vary depending on the size of the meringues and the humidity in your kitchen.
Ingredients
For the Ghost Meringues
-
3 large egg whites, at room temperature
-
3/4 cup superfine granulated sugar
-
1/4 teaspoon cream of tartar
-
1/2 teaspoon pure vanilla extract
-
1 pinch of salt (optional)
For Decorating
– 1/4 cup semisweet chocolate chips or melted dark chocolate
Equipment Needed
-
Electric hand mixer or stand mixer
-
Large, clean mixing bowl
-
Baking sheet
-
Parchment paper
-
Piping bag
-
Large round piping tip
-
Small piping bag or toothpick for decorating
How to Make Easy Halloween Ghost Meringues
Step 1: Prepare Your Baking Sheet
Preheat your oven to 200°F (93°C).
Line a large baking sheet with parchment paper. Avoid greasing the parchment because meringues work best on a clean, dry surface.
Make sure your mixing bowl and beaters are completely clean and free of grease. Even a small amount of fat can prevent egg whites from whipping properly.
Step 2: Beat the Egg Whites
Place the room-temperature egg whites in your mixing bowl.
Using an electric mixer, beat on medium speed until the egg whites become foamy.
Add the cream of tartar and continue beating until soft peaks begin to form.
Soft peaks should gently curl over when the beaters are lifted.
Step 3: Gradually Add the Sugar
Increase the mixer speed to medium-high.
Add the sugar gradually, about one tablespoon at a time, beating well between additions.
Continue mixing until the meringue becomes thick, glossy, and forms stiff peaks.
This process typically takes approximately 7–10 minutes, depending on your mixer.
Rub a small amount of meringue between your fingers. It should feel mostly smooth rather than noticeably gritty.
Step 4: Add the Vanilla
Add the vanilla extract and gently mix until incorporated.
The finished meringue should hold its shape when lifted with a spoon.
Avoid overmixing once the egg whites have reached stiff peaks.
Step 5: Pipe the Ghost Shapes
Transfer the meringue mixture into a piping bag fitted with a large round tip.
Hold the piping bag vertically over the prepared baking sheet.
Pipe a small mound, then continue squeezing while slowly lifting the bag upward to create a tall, rounded ghost shape.
Release pressure and pull the piping bag upward to form a little pointed top.
Repeat until all the meringue has been used.
Leave approximately one inch between each ghost.
Don’t worry about making every ghost identical. Slightly different shapes give them personality.
Step 6: Bake Slowly
Place the baking sheet in the preheated oven.
Bake for approximately 90 minutes, or until the meringues feel dry and lift easily from the parchment paper.
The cookies should remain white or very pale rather than turning golden brown.
If the meringues are still sticky underneath, continue baking in 10–15-minute increments.
Step 7: Cool the Meringues
Turn off the oven and allow the meringues to cool inside with the door slightly open for approximately 30 minutes.
For especially crisp meringues, let them cool longer in the switched-off oven.
This gradual cooling helps reduce cracking caused by sudden temperature changes.
Step 8: Add the Ghost Faces
Melt the chocolate chips in a microwave-safe bowl using 15–20-second intervals, stirring between each interval.
Allow the chocolate to cool slightly.
Using a toothpick or a small piping bag, carefully add two tiny chocolate eyes to each ghost.
Add a small oval-shaped mouth for a surprised expression.
Let the chocolate set completely before serving or storing.
Your adorable Halloween ghost meringues are ready to enjoy!
Tips for Making Perfect Ghost Meringues
Although this recipe uses simple ingredients, meringues require a little patience and attention.
Use Room-Temperature Egg Whites
Room-temperature egg whites generally whip more easily and create greater volume.
Separate your eggs while cold, then allow the whites to come to room temperature before mixing.
Keep Everything Grease-Free
Fat can interfere with the whipping process.
Always use clean, dry equipment and make sure no egg yolk gets into the whites.
Add Sugar Slowly
Adding sugar too quickly can result in grainy meringues or a mixture that struggles to hold its shape.
Gradual additions help create a smooth, stable foam.
Avoid Humid Weather
Meringues absorb moisture from the air.
On especially humid days, they may become sticky or lose their crisp texture.
Store finished cookies promptly in airtight containers.
Bake at a Low Temperature
Meringues need to dry out rather than brown.
A low oven temperature helps them maintain their bright white color and delicate texture.
Allow Complete Cooling
Warm meringues are fragile and may break during decorating.
Wait until they are fully cooled before adding chocolate faces.
Creative Halloween Ghost Meringue Variations
One of the best things about this recipe is how easily you can customize the ghosts.
Chocolate-Dipped Ghost Meringues
Dip the bottoms of cooled meringues into melted dark chocolate.
Place them on parchment paper until the chocolate sets.
The chocolate adds richness and creates a delicious contrast with the sweet meringue.
Mini Ghost Meringues
Pipe smaller ghosts for bite-sized Halloween treats.
Reduce the baking time as needed, checking for dryness after approximately 60 minutes.
These miniature versions are excellent for decorating cakes, cupcakes, and dessert boards.
Vanilla Bean Ghost Meringues
Replace the vanilla extract with a small amount of vanilla bean paste.
This adds a richer vanilla flavor, although it may create tiny visible specks.
Ghost Meringue Cake Toppers
Use the finished ghosts to decorate Halloween layer cakes, chocolate cupcakes, or pumpkin desserts.
Add them shortly before serving to help preserve their crisp texture.
Spooky Ghost Meringue Kisses
Instead of tall ghosts, pipe small meringue kisses and decorate each one with chocolate eyes.
These are particularly easy for beginners.
Common Mistakes to Avoid
Why Are My Meringues Sticky?
Sticky meringues are usually caused by excess moisture, underbaking, or humid storage conditions.
Return undecorated meringues to a low-temperature oven for additional drying if necessary.
Why Did My Meringues Crack?
Cracking may occur because of rapid temperature changes, overly high baking temperatures, or unstable meringue.
Allowing the cookies to cool gradually can help.
Small cracks are harmless and can even give your Halloween ghosts extra character.
Why Are My Meringues Brown?
Browning generally means the oven temperature is too high or the meringues have baked too long.
Use an oven thermometer if your oven runs hot.
Why Won’t My Egg Whites Form Stiff Peaks?
Possible causes include traces of egg yolk, greasy equipment, or adding sugar before the whites have developed enough structure.
Start with clean equipment and follow the mixing instructions carefully.
How to Store Halloween Ghost Meringues
Proper storage is essential for maintaining the delicate crunch of these cookies.
At room temperature: Store completely cooled meringues in an airtight container in a cool, dry location for up to one week.
In the refrigerator: Refrigeration is generally not recommended because condensation can make meringues sticky.
In the freezer: Undecorated meringues can be frozen in a rigid, airtight container for up to one month. Allow them to return to room temperature inside the closed container before opening to minimize condensation.
Keep layers separated with parchment paper and avoid placing heavy desserts on top of these fragile cookies.
Frequently Asked Questions
Can I Make Halloween Ghost Meringues Ahead of Time?
Yes. These cookies are excellent make-ahead Halloween treats.
Prepare them several days before your celebration and store them in an airtight container away from moisture.
Can I Make Ghost Meringues Without a Piping Bag?
Absolutely.
Use a sturdy plastic food-storage bag with one corner snipped off.
You can also create rustic ghost shapes using two spoons.
Can I Use Regular Granulated Sugar?
Yes. Superfine sugar dissolves more easily, but regular granulated sugar can work if added slowly and beaten thoroughly.
Are Ghost Meringues Gluten-Free?
The basic recipe contains no flour or gluten-based ingredients.
However, always check chocolate and flavoring labels if preparing them for someone with celiac disease or gluten sensitivity.
Can I Add Food Coloring?
Yes, although white meringues create the most recognizable ghost appearance.
You can use small amounts of gel food coloring to create purple, green, or other Halloween-themed meringues.
Why Are My Meringues Chewy Inside?
A slightly chewy center may result from larger meringues or insufficient drying time.
If you prefer completely crisp cookies, bake them a little longer at a low temperature.
Serving Ideas for Halloween Parties
Halloween ghost meringues look especially festive when displayed creatively.
Arrange them on a black serving platter to highlight their white appearance. Surround them with chocolate cookies, candy corn, or other Halloween treats for a colorful dessert display.
They also make charming additions to Halloween snack boards and dessert buffets.
For individual party favors, place several fully cooled meringues into food-safe treat bags and tie them with orange or purple ribbon. Package them close to the event and protect them from humidity.
You can even arrange the ghosts around a Halloween cake to create a miniature haunted scene.
Because they are lightweight and easy to portion, these treats work well for both small family gatherings and larger celebrations.
Final Thoughts: A Sweet and Spooky Halloween Treat
Easy Halloween Ghost Meringues are proof that some of the most memorable holiday desserts come from the simplest ingredients.
With their crispy texture, sweet vanilla flavor, adorable ghost shapes, and playful chocolate faces, these homemade Halloween cookies bring fun and creativity to the dessert table without requiring expensive ingredients or elaborate decorating skills.
They’re perfect for Halloween parties, family baking traditions, festive dessert platters, or simply enjoying a sweet treat during a spooky movie night.
The secret to success is patience: whip the egg whites properly, add the sugar gradually, bake at a low temperature, and allow the cookies to cool completely.
Once you’ve mastered the basic recipe, you can experiment with different sizes, flavors, and decorations to create your own little collection of Halloween ghosts.
This Halloween, skip the complicated desserts and let these adorable ghost meringues bring a little sweetness, a little spookiness, and plenty of smiles to your celebration.
What’s your favorite homemade Halloween treat: spooky cookies, decorated cupcakes, or fun little ghost-shaped desserts?


Leave a Reply