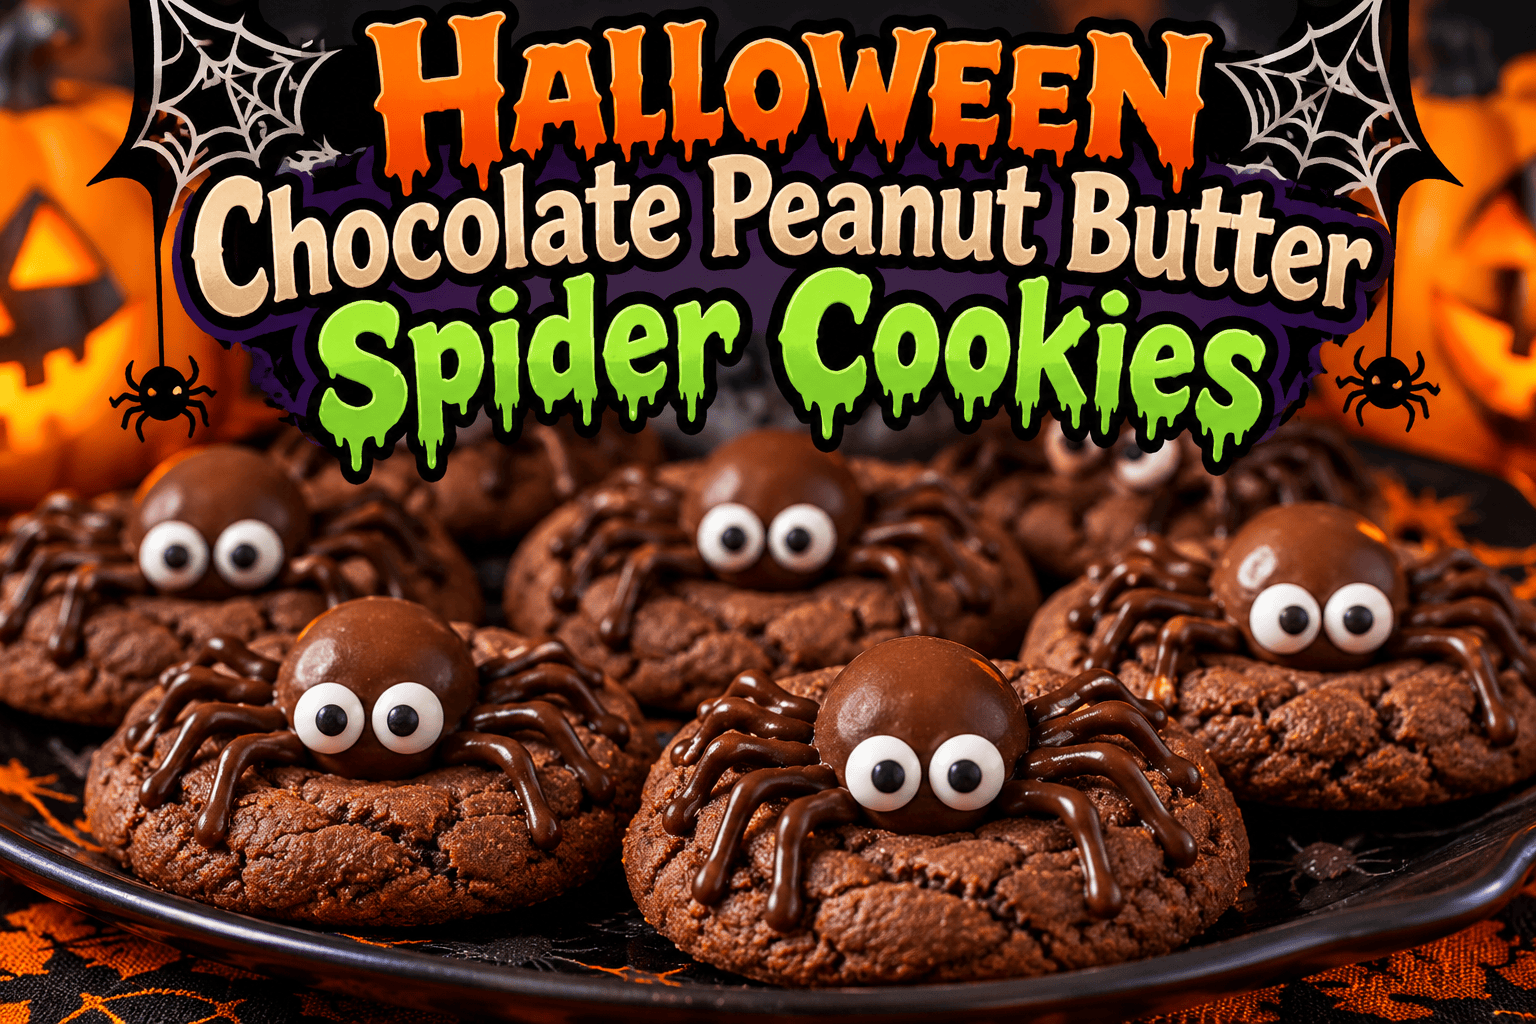
Halloween is the perfect time to get creative in the kitchen, and these Halloween Chocolate Peanut Butter Spider Cookies are a fun, delicious way to celebrate the spooky season. Combining rich chocolate, creamy peanut butter, and adorable spider decorations, these cookies are guaranteed to be a hit at Halloween parties, family gatherings, and trick-or-treat celebrations.
These Halloween spider cookies feature a soft, chewy chocolate peanut butter cookie base topped with a chocolate candy spider, complete with chocolate legs and tiny candy eyes. They look impressive but are surprisingly easy to make, even for beginner bakers.
Whether you are preparing treats for a classroom Halloween party, hosting a spooky movie night, or simply looking for a festive dessert to enjoy with your family, these homemade spider cookies bring Halloween fun to every bite.
Why You’ll Love These Halloween Spider Cookies
There are plenty of reasons these chocolate peanut butter spider cookies deserve a place on your Halloween dessert table.
- Perfect for Halloween: The chocolate spiders create a spooky but adorable appearance that kids and adults will love.
- Delicious flavor combination: Chocolate and peanut butter create a rich, sweet, and satisfying dessert.
- Easy to make: The recipe uses simple baking ingredients and straightforward instructions.
- Fun for families: Children can help decorate the cookies and create their own spooky spiders.
- Great for Halloween parties: These cookies make eye-catching additions to dessert platters.
- Easy to customize: Change the decorations, candy eyes, or chocolate toppings to create unique spider designs.
Best of all, these cookies taste just as wonderful as they look.
Halloween Chocolate Peanut Butter Spider Cookies Recipe
Recipe Details
- Prep Time: 20 minutes
- Cook Time: 10–12 minutes
- Cooling and Decorating Time: 30 minutes
- Total Time: Approximately 1 hour
- Servings: 24 cookies
- Difficulty: Easy
- Category: Dessert
- Cuisine: American
- Occasion: Halloween
Ingredients
For the Chocolate Peanut Butter Cookies
- 1 cup creamy peanut butter
- ½ cup unsalted butter, softened
- ¾ cup granulated sugar
- ½ cup packed brown sugar
- 1 large egg
- 1 teaspoon vanilla extract
- 1½ cups all-purpose flour
- ⅓ cup unsweetened cocoa powder
- 1 teaspoon baking soda
- ½ teaspoon salt
- 2 tablespoons milk, if needed
For the Spider Decorations
- 24 round chocolate candies or chocolate truffles
- ½ cup semisweet chocolate chips
- 48 small candy eyes
- 1 teaspoon coconut oil, optional, for thinning melted chocolate
Optional Decorations
- Halloween sprinkles
- Orange and purple candy melts
- Mini chocolate chips
- Colored decorating icing
How to Make Halloween Chocolate Peanut Butter Spider Cookies
Step 1: Prepare Your Baking Equipment
Preheat your oven to 350°F (175°C).
Line two baking sheets with parchment paper to prevent sticking and make cleanup easier.
Gather all your ingredients before beginning.
Step 2: Cream the Butter and Sugars
In a large mixing bowl, combine the softened butter, creamy peanut butter, granulated sugar, and brown sugar.
Using an electric mixer, beat the mixture for approximately 2–3 minutes until light and creamy.
Creaming the ingredients properly helps create cookies with a soft texture.
Step 3: Add the Egg and Vanilla
Add the egg and vanilla extract to the peanut butter mixture.
Mix until everything is thoroughly combined.
Scrape down the sides of the bowl to ensure all ingredients are evenly incorporated.
Step 4: Combine the Dry Ingredients
In a separate bowl, whisk together the flour, cocoa powder, baking soda, and salt.
Gradually add the dry ingredients to the wet mixture, mixing on low speed until a soft dough forms.
If the dough seems unusually dry or crumbly, add milk one tablespoon at a time until it holds together.
Avoid overmixing, which can make the cookies tough.
Step 5: Shape the Cookies
Scoop approximately 1½ tablespoons of cookie dough for each cookie.
Roll the dough into balls and place them on the prepared baking sheets, leaving about 2 inches between cookies.
Gently flatten each dough ball slightly with your palm.
Step 6: Bake the Cookies
Bake for 10–12 minutes, or until the edges appear set and the centers are still slightly soft.
Avoid overbaking because chocolate peanut butter cookies can become dry.
Remove the cookies from the oven and let them rest on the baking sheet for approximately 5 minutes.
Step 7: Create the Spider Body
While the cookies are still warm, gently press the rounded back of a teaspoon into the center of each cookie to create a shallow indentation.
Allow the cookies to cool completely.
Place a small dab of melted chocolate in each indentation, then attach one round chocolate candy to form the spider’s body.
Step 8: Make the Chocolate Spider Legs
Place the chocolate chips in a microwave-safe bowl.
Microwave in 20-second intervals, stirring between each interval until smooth.
If necessary, add a small amount of coconut oil to make the chocolate easier to pipe.
Transfer the melted chocolate into a piping bag or small resealable plastic bag.
Snip a tiny opening in one corner.
Pipe four thin, bent spider legs extending from each side of the chocolate candy, creating eight legs per spider.
Step 9: Add the Candy Eyes
Using a tiny dab of melted chocolate, attach two candy eyes to the front of each chocolate spider.
Allow the chocolate decorations to set completely before serving.
For faster setting, refrigerate the cookies for approximately 10 minutes.
Your spooky Halloween chocolate peanut butter spider cookies are now ready to enjoy!
Tips for Making the Best Halloween Spider Cookies
Use Creamy Peanut Butter
Traditional creamy peanut butter generally works best because it provides a smooth texture and consistent results.
Natural peanut butter that separates easily may change the dough’s consistency.
Avoid Overbaking
For soft and chewy cookies, remove them when the edges are set but the centers remain slightly tender.
The cookies will continue firming as they cool.
Let the Cookies Cool Before Decorating
If the cookies are too warm, the chocolate candies may melt or slide off.
Allow them to cool completely before attaching the spider bodies.
Use a Small Piping Tip
Thin chocolate lines create more realistic spider legs.
A small piping bag opening provides better control and helps keep the decorations neat.
Make the Spiders Different Sizes
Try using different sizes of chocolate candies to create a mixture of baby spiders and larger spiders.
This adds personality to your Halloween dessert platter.
Creative Halloween Spider Cookie Variations
One of the best things about this recipe is how easily you can customize it.
1. Double Chocolate Spider Cookies
Add ½ cup of mini chocolate chips to the cookie dough for an extra-rich chocolate flavor.
2. Peanut Butter Cup Spider Cookies
Replace the round chocolate candies with miniature peanut butter cups.
Attach candy eyes and pipe chocolate legs around each cup.
3. White Chocolate Spider Cookies
Use white chocolate candies for the spider bodies and dark chocolate for the legs.
The contrasting colors make the spiders stand out.
4. Colorful Halloween Spider Cookies
Use orange, green, or purple candy melts to create brightly colored spiders.
These are especially fun for children’s Halloween parties.
5. Spiderweb Chocolate Cookies
Before attaching the chocolate spiders, drizzle thin lines of white chocolate across the cookies to resemble spiderwebs.
6. Mini Halloween Spider Cookies
Make smaller dough balls and use miniature chocolate candies to create bite-sized treats.
Reduce the baking time and watch closely for doneness.
How to Decorate Spider Cookies for Halloween Parties
Presentation can make these cookies even more exciting.
Arrange the cookies on a black serving platter and scatter Halloween-themed sprinkles around them.
Place them beside other Halloween desserts, such as ghost cookies, pumpkin brownies, and monster cupcakes, to create a festive dessert table.
For individual party favors, package completely set cookies in clear treat bags decorated with orange and black ribbons.
You can also place each cookie in a Halloween-themed cupcake liner to make serving easier.
Remember to label the cookies clearly as containing peanuts, especially when serving them at parties or school events.
How to Store Halloween Chocolate Peanut Butter Spider Cookies
Proper storage helps maintain their soft texture and keeps the decorations looking their best.
Room Temperature: Store the cookies in an airtight container at a cool room temperature for up to 4 days. Separate layers with parchment paper to protect the spider decorations.
Refrigerator: Refrigerate in an airtight container for up to one week. Allow the cookies to reach room temperature before serving for the best texture.
Freezer: Freeze undecorated baked cookies for up to 3 months. Thaw completely before adding the chocolate spiders and candy eyes.
Make-Ahead Tip: Prepare the cookie dough up to 48 hours in advance and refrigerate it in a covered container. Let it soften slightly before shaping and baking.
Frequently Asked Questions
Can I Make Halloween Spider Cookies Ahead of Time?
Yes. You can bake the cookies one or two days before your Halloween celebration and decorate them closer to serving time.
This is especially helpful when preparing several desserts for a party.
Can I Use Crunchy Peanut Butter?
Yes, although crunchy peanut butter will add small peanut pieces and create a slightly different texture.
Creamy peanut butter is recommended for a smoother cookie.
What Can I Use Instead of Candy Eyes?
You can use tiny dots of white chocolate with miniature chocolate chip pupils.
Small dots of colored icing also work well.
Can Kids Help Make These Spider Cookies?
Absolutely! Children can help roll the dough, place the chocolate candy bodies, and attach the candy eyes.
Adults should handle the oven and hot melted chocolate.
Why Did My Chocolate Peanut Butter Cookies Turn Out Dry?
Dry cookies may result from too much flour, overmixing, or baking too long.
Measure the flour carefully and remove the cookies when the edges are set.
Can I Make These Cookies Without Peanut Butter?
You can try a commercial peanut-free spread designed for baking, but the dough’s texture and flavor may change. Check all ingredient labels for allergens and cross-contact warnings.
Perfect Occasions for Halloween Spider Cookies
These cookies aren’t limited to Halloween night.
They are wonderful for school Halloween celebrations, neighborhood parties, fall bake sales, costume parties, family baking activities, and spooky movie nights.
Their playful appearance makes them particularly appealing to children, while the chocolate peanut butter flavor makes them enjoyable for adults.
They also make thoughtful homemade Halloween treats for friends and neighbors when packaged carefully and labeled with their ingredients.
Final Thoughts: A Spooky Halloween Cookie Everyone Will Love
Halloween Chocolate Peanut Butter Spider Cookies combine everything that makes Halloween baking enjoyable: delicious flavors, creative decorations, and a little spooky fun.
The soft chocolate peanut butter cookies provide a rich and chewy base, while the chocolate candy spiders transform an ordinary homemade dessert into an unforgettable Halloween treat.
Whether you’re baking with your children, preparing for a Halloween party, or adding something special to your seasonal dessert collection, these spider cookies are a simple way to make the celebration more memorable.
The best Halloween recipes don’t have to be complicated. Sometimes, a batch of homemade cookies, a little melted chocolate, and a few candy eyes are all you need to create something wonderfully spooky.
Would you make your Halloween spider cookies cute and colorful, or dark and creepy? Share your favorite decorating idea in the comments!
Leave a Reply