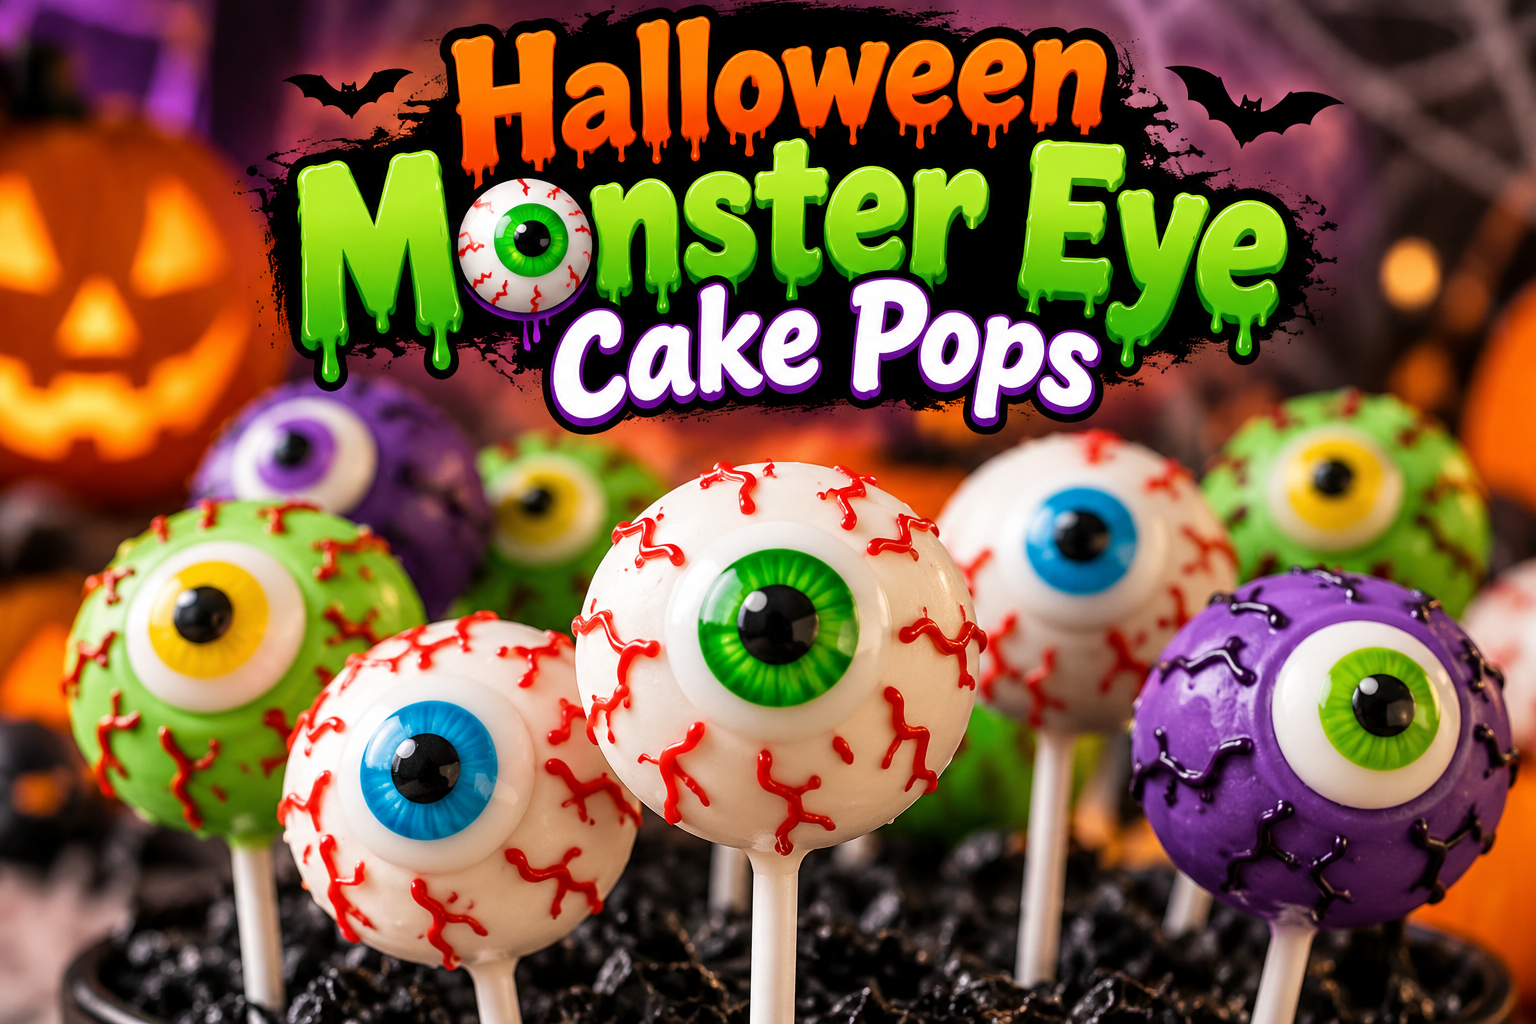
Halloween is the perfect time to get creative in the kitchen, and nothing brings spooky fun to a dessert table quite like Halloween Monster Eye Cake Pops. These creepy, colorful, and delicious bite-sized treats look like monster eyeballs staring right back at your guests. With their bright candy coatings, eerie bloodshot details, and edible eyeball decorations, they are guaranteed to become a Halloween party favorite.
Whether you’re hosting a Halloween celebration, preparing treats for a school party, or looking for a fun baking activity with the family, these monster eye cake pops are surprisingly easy to make. They combine moist cake, creamy frosting, and a smooth candy coating to create a dessert that’s just as delicious as it is spooky.
Best of all, you can customize the colors, eye designs, and decorations to create an entire collection of creepy monster eyeballs.
Why You’ll Love These Halloween Monster Eye Cake Pops
Halloween desserts should be fun, festive, and delicious. These monster eyeball cake pops deliver all three.
-
Perfect for Halloween parties: Their creepy eyeball appearance makes them an eye-catching addition to any Halloween dessert table.
-
Easy to customize: Use different candy colors, edible decorations, and spooky designs.
-
Kid-friendly activity: Children can help roll cake balls, decorate monster eyes, and create unique designs.
-
Great for making ahead: Prepare the cake pops in advance and store them until your celebration.
-
Delicious combination: Moist cake, creamy frosting, and a crunchy candy coating create an irresistible treat.
-
Perfect individual servings: Each cake pop is conveniently served on a stick.
These spooky cake pops are especially popular for Halloween birthday parties, classroom celebrations, costume parties, and festive family gatherings.
Halloween Monster Eye Cake Pops Recipe
Servings: Approximately 24 cake pops
Difficulty: Easy to moderate
Category: Halloween Desserts
Method: Baking and decorating
Ingredients
For the cake pops:
-
1 box (15.25 ounces) vanilla or chocolate cake mix
-
Eggs, oil, and water as directed on the cake mix package
-
1/3 cup vanilla frosting, plus a little extra if needed
-
24 cake pop sticks
For the candy coating:
-
12 ounces white candy melts
-
6 ounces green candy melts
-
6 ounces purple candy melts
-
1–2 teaspoons vegetable shortening, optional, for thinning the coating
For the monster eye decorations:
-
24 large edible candy eyeballs, or candy eye decorations
-
Red decorating icing
-
Black decorating icing
-
Green, yellow, or blue decorating icing for additional eye details
-
Halloween sprinkles, optional
How to Make Halloween Monster Eye Cake Pops
Step 1: Bake the Cake
Preheat your oven according to the instructions on the cake mix package.
Prepare the cake batter using the required eggs, oil, and water. Mix until the batter is smooth and well combined.
Pour the batter into a greased baking pan and bake according to the package directions, usually about 25–30 minutes for a 9-by-13-inch pan.
Check that the cake is fully baked by inserting a toothpick into the center. If it comes out clean or with a few moist crumbs, the cake is ready.
Remove the cake from the oven and allow it to cool completely.
Helpful tip: Never mix frosting into warm cake. The heat can make the cake mixture overly soft and difficult to shape.
Step 2: Crumble the Cake
Once the cake has cooled, break it into smaller pieces and place them in a large mixing bowl.
Using clean hands or a fork, crumble the cake until it resembles fine breadcrumbs.
Make sure there are no large chunks remaining. A fine, even texture helps create smooth cake balls that hold together properly.
Step 3: Mix in the Frosting
Add approximately 1/3 cup of vanilla frosting to the cake crumbs.
Mix everything together until the cake begins forming a soft, dough-like consistency.
The mixture should hold together when squeezed without feeling excessively wet or sticky.
If the cake is too dry, add a small amount of additional frosting.
Avoid adding too much frosting because overly moist cake pops may slide off their sticks or fall apart during dipping.
Step 4: Shape the Monster Eyeballs
Scoop approximately 1 tablespoon of cake mixture and roll it between your palms to form a smooth ball.
Repeat until you have approximately 24 cake balls.
Place them on a baking sheet lined with parchment paper.
For a realistic eyeball appearance, try to make each ball as round and smooth as possible.
Refrigerate the cake balls for approximately 20–30 minutes until firm.
Step 5: Insert the Cake Pop Sticks
Melt a small amount of white candy melts according to the package instructions.
Dip the end of each cake pop stick approximately 1/2 inch into the melted candy.
Insert the coated end into the center of a chilled cake ball, pushing it approximately halfway through.
The melted candy acts as glue and helps secure the cake ball to the stick.
Return the cake pops to the refrigerator for another 10 minutes to allow the candy to harden.
Step 6: Melt the Candy Coating
Place the white, green, and purple candy melts into separate microwave-safe bowls.
Heat each bowl in 20–30-second intervals, stirring thoroughly between intervals until smooth.
Avoid overheating the candy melts because they can become thick, grainy, or difficult to work with.
If necessary, stir in a small amount of vegetable shortening to create a smoother dipping consistency.
The coating should be fluid enough to cover each cake ball without forming an excessively thick layer.
Step 7: Dip the Cake Pops
Remove a few chilled cake pops from the refrigerator at a time.
Hold each cake pop by its stick and carefully dip it into the melted candy coating.
Submerge the entire cake ball, then lift it straight out.
Gently tap the stick against the edge of the bowl while rotating the cake pop to remove excess coating.
Avoid aggressively shaking the cake pop, which could cause the cake ball to loosen.
Place the dipped cake pop upright in a cake pop stand or a sturdy foam block.
Repeat using white, green, and purple candy melts to create different monster eyeball colors.
Step 8: Add the Monster Eyes
While the candy coating is still slightly soft, gently press a large edible candy eyeball onto the front of each cake pop.
If the coating has already hardened, attach the candy eye using a small amount of melted candy coating.
Position the eye near the center of the cake ball for a classic monster eyeball appearance.
For a more unusual monster design, place the eye slightly off-center or add multiple smaller candy eyes.
Step 9: Create Creepy Bloodshot Details
Once the candy coating has hardened, use red decorating icing to draw thin, crooked lines extending outward from the candy eye.
These lines create the appearance of bloodshot monster eyeballs.
For an extra-creepy effect, add several branching red veins around the surface.
You can also use black icing to outline the eye or add unusual monster details.
Allow the decorating icing to set before serving.
Creative Halloween Monster Eye Cake Pop Ideas
One of the best things about this recipe is how easily you can create different monster designs.
Classic Bloodshot Eyeballs
Use white candy coating, a large candy eye, and thin red icing veins.
These look like spooky floating eyeballs and are perfect for a haunted-house-themed party.
Green Zombie Monster Eyes
Dip cake pops into bright green candy melts.
Add a yellow or black candy eye and decorate with dark green lines to create a creepy zombie appearance.
For additional detail, add small purple veins or irregular black markings.
Purple Alien Eyeballs
Cover the cake pops in purple candy melts and add bright green candy eyes.
Decorate with black icing to create an otherworldly appearance.
These colorful monster eyes are especially fun for younger Halloween party guests.
Three-Eyed Monsters
Instead of using one large candy eye, attach three smaller candy eyes to each cake pop.
Arrange the eyes in a triangle or an uneven pattern.
Finish with colorful icing details for a playful monster design.
Glowing-Look Monster Eyes
Use neon green, bright yellow, or vivid orange candy coatings.
Add contrasting dark candy eyes to create a dramatic appearance under party lighting.
These vibrant colors work especially well on Halloween dessert tables decorated with black tablecloths and spooky decorations.
Tips for Making Perfect Halloween Cake Pops
Although cake pops are simple to prepare, a few important techniques can make a significant difference.
Use the right amount of frosting. Too much frosting creates heavy, sticky cake balls that may not stay attached to their sticks. Start with a small amount and add more only when necessary.
Chill the cake balls before dipping. Firm cake balls are easier to handle and less likely to break apart. However, avoid dipping frozen cake balls directly into warm candy coating, since sudden temperature changes can cause cracking.
Keep the candy coating smooth. Thick candy melts can pull cake balls off their sticks. Thin the coating with a little shortening if needed.
Avoid oversized cake balls. Smaller cake pops are easier to dip, decorate, and serve. Approximately 1 tablespoon of cake mixture per pop works well.
Work in small batches. Keep most of the cake balls refrigerated while decorating a few at a time.
Allow the decorations to set. Give the finished cake pops enough time to harden before packaging or displaying them.
How to Display Halloween Monster Eye Cake Pops
Presentation can transform these already spooky treats into a memorable Halloween centerpiece.
For a haunted graveyard dessert table, arrange the cake pops upright in a black foam block hidden inside a decorative Halloween container.
Surround the display with artificial spiderwebs, plastic spiders, miniature pumpkins, and battery-operated candles.
For a mad scientist theme, place the cake pops in a decorated stand beside plastic laboratory props and colorful Halloween decorations.
You can also create a monster eyeball bouquet by arranging different colored cake pops at varying heights.
If you’re preparing individual party favors, wrap each completely set cake pop in a food-safe clear treat bag and tie it with orange, purple, or black ribbon.
Make-Ahead and Storage Instructions
Halloween Monster Eye Cake Pops are excellent for preparing before a party.
Refrigerator Storage
Store finished cake pops in an airtight container in the refrigerator for up to 5 days.
Place parchment paper between layers if necessary to prevent the decorations from sticking together.
Allow refrigerated cake pops to sit briefly at room temperature before serving for the best cake texture. Keep them chilled if the ingredients or room conditions require it.
Freezer Storage
Undecorated cake balls can be frozen in an airtight container for up to 2 months for best quality.
Thaw them in the refrigerator before inserting sticks and dipping.
Freezing fully decorated cake pops is possible, but condensation during thawing may affect the candy coating and decorations.
Room Temperature
For parties, display the cake pops in a cool indoor location away from direct sunlight or heat.
If using frosting or fillings that require refrigeration, keep the cake pops refrigerated until shortly before serving and follow appropriate food-safety limits.
Common Mistakes to Avoid
Cake Pops Falling Off the Sticks
This usually happens when the cake balls are too large, too soft, or not properly secured.
Use melted candy to anchor each stick and chill the cake balls before dipping.
Candy Coating Cracking
Cracks can develop when very cold cake balls expand slightly beneath the hardened coating.
Avoid dipping frozen cake balls and let refrigerated cake balls warm for a few minutes if they are extremely cold.
Uneven Cake Pop Coating
Thick candy coating can produce lumps and uneven surfaces.
Melt the candy slowly, stir thoroughly, and thin it slightly when necessary.
Decorations Sliding Off
Candy eyes may slide if the coating is too wet or if the cake pop is moved before setting.
Attach the decorations when the coating begins to thicken but has not fully hardened.
Frequently Asked Questions
Can I use homemade cake instead of boxed cake mix?
Absolutely. Homemade vanilla, chocolate, or red velvet cake works well. Make sure the cake is completely cooled before crumbling it and mixing it with frosting.
Can I make Halloween Monster Eye Cake Pops without sticks?
Yes. Simply prepare the cake balls, dip them in candy coating, and place them on parchment paper. Decorate them as monster eyeball cake truffles.
What cake flavor works best?
Chocolate and vanilla are both excellent choices. Red velvet cake is especially fun because the red interior adds an unexpected spooky surprise when someone takes a bite.
Can I use melted chocolate instead of candy melts?
Yes. White chocolate can be used, although it requires careful melting and may benefit from proper tempering to achieve a firm, attractive finish.
How far in advance can I prepare these cake pops?
You can make them 1–3 days before your Halloween celebration. Store them in an airtight container in the refrigerator to maintain freshness.
Can children help decorate these cake pops?
Definitely. Children can help roll the cake mixture, attach candy eyes, and create funny monster designs. Adults should supervise hot melted candy and other potentially hazardous steps.
Why Halloween Monster Eye Cake Pops Are Perfect for Parties
Halloween treats are about more than satisfying a sweet tooth. They’re also about creating memorable experiences.
Monster Eye Cake Pops bring an element of surprise to the dessert table because they combine familiar cake flavors with unusual, creepy decorations.
Guests can choose their favorite monster eye color, compare spooky designs, and enjoy a dessert that’s easy to eat while socializing.
They’re also a great alternative to traditional Halloween cupcakes or cookies because they require no plates or forks.
Whether you’re planning a large costume party or a small family celebration, these cake pops provide an easy way to make the occasion feel extra special.
Final Thoughts
Halloween Monster Eye Cake Pops are a fun combination of spooky creativity and delicious homemade dessert. Their moist cake centers, sweet candy coatings, and creepy eyeball decorations make them a fantastic addition to almost any Halloween celebration.
With just a few ingredients and some imagination, you can create everything from bloodshot zombie eyes to colorful alien monsters.
They’re easy to customize, convenient to prepare ahead of time, and entertaining to decorate with family and friends.
This Halloween, skip the ordinary desserts and surprise your guests with a tray of monster eyeballs that are almost too creepy to eat.
Which would you choose for your Halloween party: creepy bloodshot eyeballs, green zombie eyes, or colorful purple alien eyes?

Leave a Reply