Category: Recipes

  • Dessert of the Day: Peanut Butter Chocolate Chip Cookies

    Dessert of the Day: Peanut Butter Chocolate Chip Cookies

    There are some desserts that never go out of style, and Peanut Butter Chocolate Chip Cookies are at the top of that list. Soft, chewy, and packed with the irresistible combination of creamy peanut butter and rich chocolate chips, these cookies are the perfect balance of sweet and salty. They have a comforting homemade taste that instantly brings back memories of family kitchens, holiday baking, and enjoying a warm cookie with a cold glass of milk.

    Whether you’re an experienced baker or trying your hand at homemade cookies for the first time, this recipe is simple, dependable, and guaranteed to impress. Every bite offers a tender cookie filled with melted chocolate and the unmistakable flavor of peanut butter, making these cookies a favorite for children and adults alike.

    The Perfect Peanut Butter and Chocolate Combination

    Peanut butter and chocolate are one of the most beloved flavor pairings in the world of desserts. The creamy, slightly salty richness of peanut butter complements the sweetness of chocolate perfectly, creating a dessert that is both satisfying and indulgent.

    Unlike cookies that rely only on butter, peanut butter adds extra moisture and flavor to the dough. This results in cookies that stay soft longer while offering a rich, nutty taste that stands out in every bite.

    Chocolate chips add bursts of sweetness throughout the cookie, creating an irresistible contrast that keeps you reaching for another.

    Why Everyone Loves Peanut Butter Chocolate Chip Cookies

    These cookies have remained popular for generations because they offer everything people love in a homemade dessert.

    Soft and Chewy Texture

    The centers remain soft while the edges become lightly crisp, creating the perfect cookie texture.

    Rich Flavor

    Peanut butter provides depth and richness that makes these cookies more flavorful than traditional chocolate chip cookies.

    Easy to Make

    With common pantry ingredients and straightforward instructions, this recipe is ideal for beginner bakers.

    Great for Every Occasion

    Whether you’re baking for holidays, birthdays, school events, office parties, or simply satisfying a craving, these cookies fit every occasion.

    Kid-Friendly

    Children love helping scoop the dough, press the classic fork pattern into the cookies, and, of course, eating the finished product.

    Ingredients

    • 1 cup creamy peanut butter
    • ½ cup unsalted butter, softened
    • ½ cup granulated sugar
    • ½ cup packed light brown sugar
    • 1 large egg
    • 1 teaspoon vanilla extract
    • 1¼ cups all-purpose flour
    • ½ teaspoon baking soda
    • ¼ teaspoon baking powder
    • ¼ teaspoon salt
    • 1½ cups semi-sweet chocolate chips

    Optional additions:

    • Peanut butter chips
    • Chopped roasted peanuts
    • White chocolate chips
    • Dark chocolate chunks
    • Mini chocolate chips
    • Toffee bits
    • Crushed pretzels
    • Mini marshmallows

    Step-by-Step Directions

    Step 1: Preheat the Oven

    Preheat your oven to 350°F (175°C).

    Line two baking sheets with parchment paper or silicone baking mats to prevent sticking and ensure even baking.

    Step 2: Cream the Butter and Sugars

    In a large mixing bowl, beat together:

    • Softened butter
    • Peanut butter
    • Brown sugar
    • Granulated sugar

    Mix for about three minutes until the mixture becomes smooth, creamy, and fluffy.

    Properly creaming the ingredients helps create lighter cookies.

    Step 3: Add the Wet Ingredients

    Beat in:

    • Egg
    • Vanilla extract

    Mix until everything is fully incorporated.

    Step 4: Mix the Dry Ingredients

    In another bowl, whisk together:

    • Flour
    • Baking soda
    • Baking powder
    • Salt

    Slowly add the dry mixture to the peanut butter mixture while mixing on low speed.

    Stop mixing as soon as the flour disappears to avoid overworking the dough.

    Step 5: Fold in Chocolate Chips

    Using a spatula, gently stir the chocolate chips into the dough until evenly distributed.

    You can reserve a handful of chocolate chips to press onto the tops before baking for a bakery-style appearance.

    Step 6: Scoop the Dough

    Use a cookie scoop or tablespoon to portion the dough.

    Place each cookie about two inches apart on the baking sheet.

    If desired, lightly press each cookie with a fork in a crisscross pattern for the traditional peanut butter cookie look.

    Step 7: Bake

    Bake for 9–11 minutes.

    The edges should be lightly golden while the centers still appear slightly underdone.

    Do not overbake.

    The cookies will continue cooking from residual heat while cooling on the baking sheet.

    Step 8: Cool

    Allow cookies to cool for five minutes before transferring them to a cooling rack.

    This helps them firm up without becoming dry.

    Serve warm for wonderfully melted chocolate in every bite.

    Tips for Bakery-Quality Cookies

    Use Room Temperature Ingredients

    Soft butter and room-temperature eggs combine more easily and create a smoother dough.

    Don’t Overmix

    Mix only until the ingredients are combined.

    Overmixing develops too much gluten, resulting in tougher cookies.

    Chill the Dough

    If you prefer thicker cookies, refrigerate the dough for 30–60 minutes before baking.

    Use High-Quality Chocolate

    Premium chocolate chips or chopped chocolate bars melt more smoothly and provide richer flavor.

    Finish with Sea Salt

    A light sprinkle of flaky sea salt before baking enhances both the peanut butter and chocolate flavors.

    Fun Recipe Variations

    These cookies are incredibly versatile.

    Double Chocolate Peanut Butter Cookies

    Add cocoa powder to the dough for a rich chocolate base.

    Peanut Butter Cup Cookies

    Fold chopped peanut butter cups into the dough.

    Triple Chocolate Cookies

    Mix together milk, semi-sweet, and white chocolate chips.

    Crunch Lovers

    Add chopped peanuts, walnuts, or pecans.

    Salted Pretzel Cookies

    Mix crushed pretzels into the dough for a delicious sweet-and-salty crunch.

    Marshmallow Surprise

    Fold miniature marshmallows into the dough during the final minute of mixing.

    Serving Ideas

    These cookies are delicious on their own, but they’re even better when paired with your favorite beverages and desserts.

    Serve them with:

    • Cold milk
    • Chocolate milk
    • Fresh coffee
    • Espresso
    • Hot chocolate
    • Vanilla latte

    For an extra-special dessert, sandwich vanilla ice cream between two cookies for homemade ice cream sandwiches.

    They also crumble beautifully over:

    • Ice cream
    • Yogurt parfaits
    • Milkshakes
    • Cheesecake
    • Brownies

    Make Them Ahead

    One reason bakers love this recipe is that the dough freezes exceptionally well.

    Simply scoop the dough into balls and freeze on a baking sheet.

    Once frozen, transfer to a freezer-safe bag.

    Bake directly from frozen by adding just one or two extra minutes to the baking time.

    Fresh homemade cookies are always just minutes away.

    Storage Tips

    Store cookies in an airtight container:

    • Room temperature: Up to 5 days
    • Refrigerator: Up to 1 week
    • Freezer: Up to 3 months

    To keep cookies extra soft, place a slice of bread in the storage container. The bread helps retain moisture, keeping the cookies fresh longer.

    Nutritional Highlights

    While these cookies are certainly a sweet treat, peanut butter provides several nutritional benefits, including:

    • Protein
    • Healthy fats
    • Vitamin E
    • Magnesium
    • Niacin

    Of course, these cookies are best enjoyed in moderation as part of a balanced lifestyle.

    Perfect for Every Celebration

    Peanut Butter Chocolate Chip Cookies fit nearly every occasion.

    Bake them for:

    • Birthday parties
    • School lunches
    • Holiday cookie exchanges
    • Family reunions
    • Potluck dinners
    • Office celebrations
    • Bake sales
    • Weekend movie nights
    • Care packages
    • After-school snacks

    They’re also a thoughtful homemade gift when packaged in decorative tins or cellophane bags tied with ribbon.

    The Joy of Baking Together

    One of the best parts about this recipe is the memories it creates. Baking cookies is more than simply making dessert—it’s an opportunity to spend time with loved ones, teach children basic kitchen skills, and create traditions that last for generations.

    The aroma of peanut butter and chocolate filling the kitchen is enough to bring everyone together before the cookies even leave the oven.

    Whether you’re baking with children, surprising a neighbor, or making a batch just for yourself, these cookies remind us that life’s simplest pleasures are often the most meaningful.

    Final Thoughts

    Few desserts can match the timeless appeal of Peanut Butter Chocolate Chip Cookies. Their soft texture, rich peanut butter flavor, and generous pockets of melted chocolate make them one of the most satisfying homemade treats you can bake.

    Simple ingredients, easy preparation, and consistently delicious results have made this recipe a favorite for generations. Whether you enjoy them warm from the oven, paired with a glass of milk, or shared with friends and family, every cookie delivers comfort, sweetness, and a little taste of home.

    Today’s Dessert of the Day celebrates a classic recipe that never disappoints. Bake a batch, savor every bite, and enjoy the simple happiness that comes from homemade cookies fresh from the oven.
    Read More Recipes

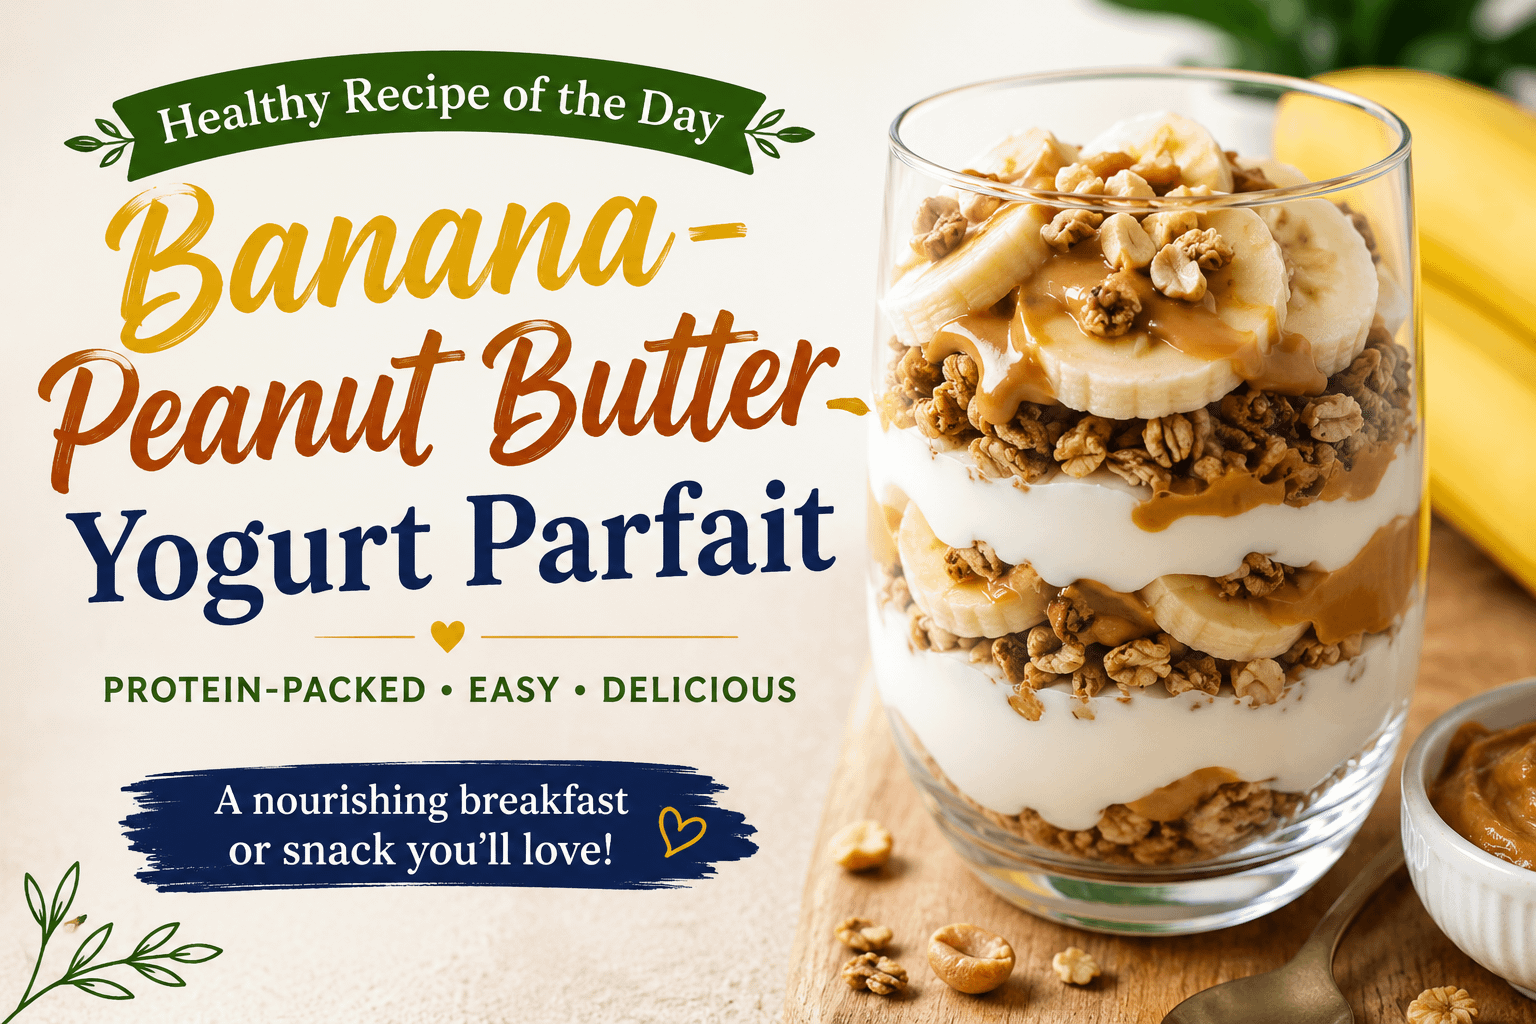
  • Healthy Recipe of the Day: Banana–Peanut Butter Yogurt Parfait

    Healthy Recipe of the Day: Banana–Peanut Butter Yogurt Parfait

    A Creamy, Protein-Packed Treat That’s Perfect Any Time of Day

    Healthy eating doesn’t have to mean sacrificing flavor. In fact, some of the most nutritious meals are also the simplest to prepare. Today’s Healthy Recipe of the Day: Banana–Peanut Butter Yogurt Parfait is proof that wholesome ingredients can come together to create something incredibly satisfying, delicious, and nourishing.

    Whether you’re looking for a quick breakfast before work, a post-workout snack, a healthy afternoon pick-me-up, or even a guilt-free dessert, this parfait delivers everything your body needs. It combines creamy Greek yogurt, naturally sweet bananas, rich peanut butter, crunchy granola, and optional fresh berries into layers of flavor and texture that feel indulgent while supporting a healthy lifestyle.

    Unlike many breakfast parfaits found at restaurants or coffee shops that are loaded with added sugars, this homemade version lets you control every ingredient. You get the protein your muscles need, the fiber your digestive system loves, healthy fats for long-lasting energy, and natural sweetness from fresh fruit instead of relying on processed ingredients.

    The best part? It takes less than ten minutes to make.


    Why This Parfait Is a Healthy Choice

    Every ingredient in this recipe contributes something valuable to your health.

    Greek yogurt provides high-quality protein and probiotics to support digestion and muscle repair.

    Bananas offer natural carbohydrates that fuel your body while providing potassium to support healthy muscles and heart function.

    Natural peanut butter supplies healthy fats and additional protein that help keep you full longer.

    Granola adds satisfying crunch along with whole grains and fiber.

    Fresh berries contribute antioxidants, vitamins, and vibrant color.

    When these ingredients are layered together, they create a balanced meal that can help stabilize blood sugar, reduce cravings, and keep you energized for hours.


    Ingredients

    For One Serving

    • 1 cup plain or vanilla Greek yogurt
    • 1 medium ripe banana, sliced
    • 2 tablespoons natural peanut butter
    • ¼ cup low-sugar granola
    • 1 teaspoon honey or pure maple syrup (optional)
    • 1 tablespoon chopped roasted peanuts
    • ½ teaspoon cinnamon
    • Fresh blueberries or strawberries (optional)
    • 1 teaspoon chia seeds or ground flaxseed (optional)
    • Fresh mint leaves for garnish (optional)

    Step-by-Step Instructions

    Step 1: Prepare Your Ingredients

    Slice the banana into even rounds. If your peanut butter is thick, microwave it for about 10 seconds to make it easier to drizzle.

    Wash any fresh berries you plan to use.


    Step 2: Build the First Layer

    Add half of the Greek yogurt to the bottom of a serving glass, bowl, or mason jar.

    Top with half of the banana slices.

    Drizzle half of the peanut butter over the bananas.

    Sprinkle a little cinnamon across the layer.


    Step 3: Add Crunch

    Scatter half of the granola over the yogurt mixture.

    Add a few chopped peanuts for extra crunch.

    If using chia seeds or flaxseed, sprinkle some here for additional fiber and omega-3 fatty acids.


    Step 4: Repeat the Layers

    Add the remaining yogurt.

    Layer the rest of the banana slices.

    Drizzle the remaining peanut butter.

    Top with the remaining granola and chopped peanuts.

    Finish with fresh berries if desired.


    Step 5: Garnish

    Drizzle lightly with honey if you prefer additional sweetness.

    Add another sprinkle of cinnamon and garnish with a small mint leaf.

    Serve immediately.


    Nutritional Benefits

    Greek Yogurt: The Protein Powerhouse

    Greek yogurt contains nearly twice the protein of regular yogurt. Protein helps repair muscles, supports healthy metabolism, and keeps you feeling satisfied long after eating.

    It also provides probiotics that help maintain a healthy digestive system by supporting beneficial gut bacteria.

    Additional nutrients include:

    • Calcium
    • Vitamin B12
    • Phosphorus
    • Potassium

    Bananas: Nature’s Energy Bar

    Bananas are one of the world’s most popular fruits—and for good reason.

    They provide:

    • Natural energy
    • Potassium
    • Vitamin B6
    • Vitamin C
    • Dietary fiber

    Potassium helps muscles function properly while supporting healthy blood pressure levels.

    Bananas also contain resistant starch, especially when slightly green, which may support digestive health.


    Peanut Butter: Healthy Fats That Satisfy

    Natural peanut butter contains:

    • Monounsaturated fats
    • Plant-based protein
    • Vitamin E
    • Magnesium
    • Niacin

    Healthy fats slow digestion, helping you stay full longer while providing steady energy throughout the day.

    Choose peanut butter with only peanuts (and perhaps a little salt) listed in the ingredients for the healthiest option.


    Granola: Crunch with Whole Grains

    Granola provides texture while adding:

    • Fiber
    • Whole grains
    • Iron
    • Magnesium

    Choose a granola that’s low in added sugars and made with oats, nuts, and seeds.


    Chia Seeds: Tiny but Mighty

    If you choose to include chia seeds, you’ll gain:

    • Omega-3 fatty acids
    • Fiber
    • Calcium
    • Plant protein
    • Antioxidants

    These tiny seeds absorb liquid, helping you stay hydrated and full longer.


    Health Benefits of This Recipe

    Supports Muscle Recovery

    The protein from Greek yogurt and peanut butter helps repair muscles after exercise, making this an excellent post-workout meal.


    Provides Lasting Energy

    Unlike sugary breakfast foods that cause energy crashes, this parfait combines carbohydrates, protein, and healthy fats to provide sustained energy throughout your morning.


    Promotes Heart Health

    Peanuts, oats, bananas, and chia seeds all contain nutrients associated with heart health, including healthy fats, potassium, and soluble fiber.


    Supports Digestive Health

    Probiotics from yogurt and fiber from fruit, oats, and seeds work together to support healthy digestion.


    Helps Control Hunger

    Protein and healthy fats digest more slowly than refined carbohydrates, helping reduce unnecessary snacking later in the day.


    Easy Ways to Customize Your Parfait

    One of the reasons parfaits are so popular is their versatility.

    Chocolate Banana

    Mix cocoa powder into the yogurt and sprinkle dark chocolate chips between the layers.


    Berry Explosion

    Replace half the bananas with:

    • Blueberries
    • Strawberries
    • Blackberries
    • Raspberries

    Tropical Delight

    Use:

    • Mango
    • Pineapple
    • Coconut flakes
    • Macadamia nuts

    Apple Cinnamon

    Replace bananas with diced apples.

    Add extra cinnamon and chopped walnuts for a fall-inspired version.


    High-Protein Athlete Version

    Increase the protein by:

    • Mixing vanilla protein powder into the yogurt
    • Adding hemp hearts
    • Using extra Greek yogurt
    • Adding chopped almonds

    Vegan Version

    Replace the Greek yogurt with dairy-free yogurt and use almond or sunflower seed butter.


    Meal Prep Made Easy

    This recipe is ideal for meal prepping because it stores well.

    Prepare several jars on Sunday evening for the workweek.

    Store yogurt, fruit, and peanut butter together.

    Keep granola separate until serving so it remains crunchy.

    Prepared parfaits without granola typically stay fresh for up to three days in the refrigerator.


    Serving Ideas

    Enjoy this parfait:

    • Before work
    • After the gym
    • As a healthy lunch side
    • As an afternoon snack
    • After dinner instead of ice cream
    • During road trips
    • At picnics
    • As a healthy option for kids

    Tips for the Best Parfait

    • Use ripe bananas for maximum sweetness.
    • Choose thick Greek yogurt for creamier layers.
    • Toast chopped peanuts for even more flavor.
    • Add granola immediately before eating.
    • Freeze sliced bananas for a colder, smoothie-like texture.
    • Use clear glasses or mason jars to showcase the beautiful layers.

    Approximate Nutrition (Per Serving)

    • Calories: 420–470
    • Protein: 28–32 grams
    • Carbohydrates: 40–45 grams
    • Fat: 17–20 grams
    • Fiber: 6–8 grams
    • Calcium: About 20% of the Daily Value
    • Potassium: Approximately 700 mg

    Values vary depending on ingredients used.


    Frequently Asked Questions

    Can I make this the night before?

    Yes. For the best texture, add the granola just before serving so it stays crisp.

    Can I freeze it?

    Freezing isn’t recommended because yogurt and bananas change texture after thawing.

    Is it good for weight management?

    Yes. Thanks to its high protein and fiber content, this parfait can help you stay fuller for longer, making it easier to avoid unnecessary snacking.

    Can kids enjoy this recipe?

    Absolutely. Kids love the naturally sweet bananas and creamy peanut butter. You can even let them build their own parfaits using healthy toppings.

    What type of yogurt is healthiest?

    Plain Greek yogurt generally contains the most protein and the least added sugar. If you prefer vanilla yogurt, look for one with minimal added sugars.


    Final Thoughts

    Healthy recipes don’t have to be complicated, expensive, or time-consuming. Sometimes the most nourishing meals come from combining simple, whole ingredients into something both beautiful and satisfying.

    The Banana–Peanut Butter Yogurt Parfait is more than just a quick breakfast—it’s a balanced meal that fuels your body with protein, fiber, vitamins, minerals, and healthy fats while delivering flavors that feel comforting and indulgent.

    Whether you’re trying to eat healthier, support your fitness goals, prepare easy grab-and-go breakfasts, or simply enjoy wholesome food that tastes amazing, this parfait is a recipe you’ll come back to again and again. It’s customizable, family-friendly, meal-prep approved, and ready in minutes.

    Start your day with this delicious parfait, and you’ll discover that eating healthy can be every bit as enjoyable as your favorite treat.

    Read More Recipes

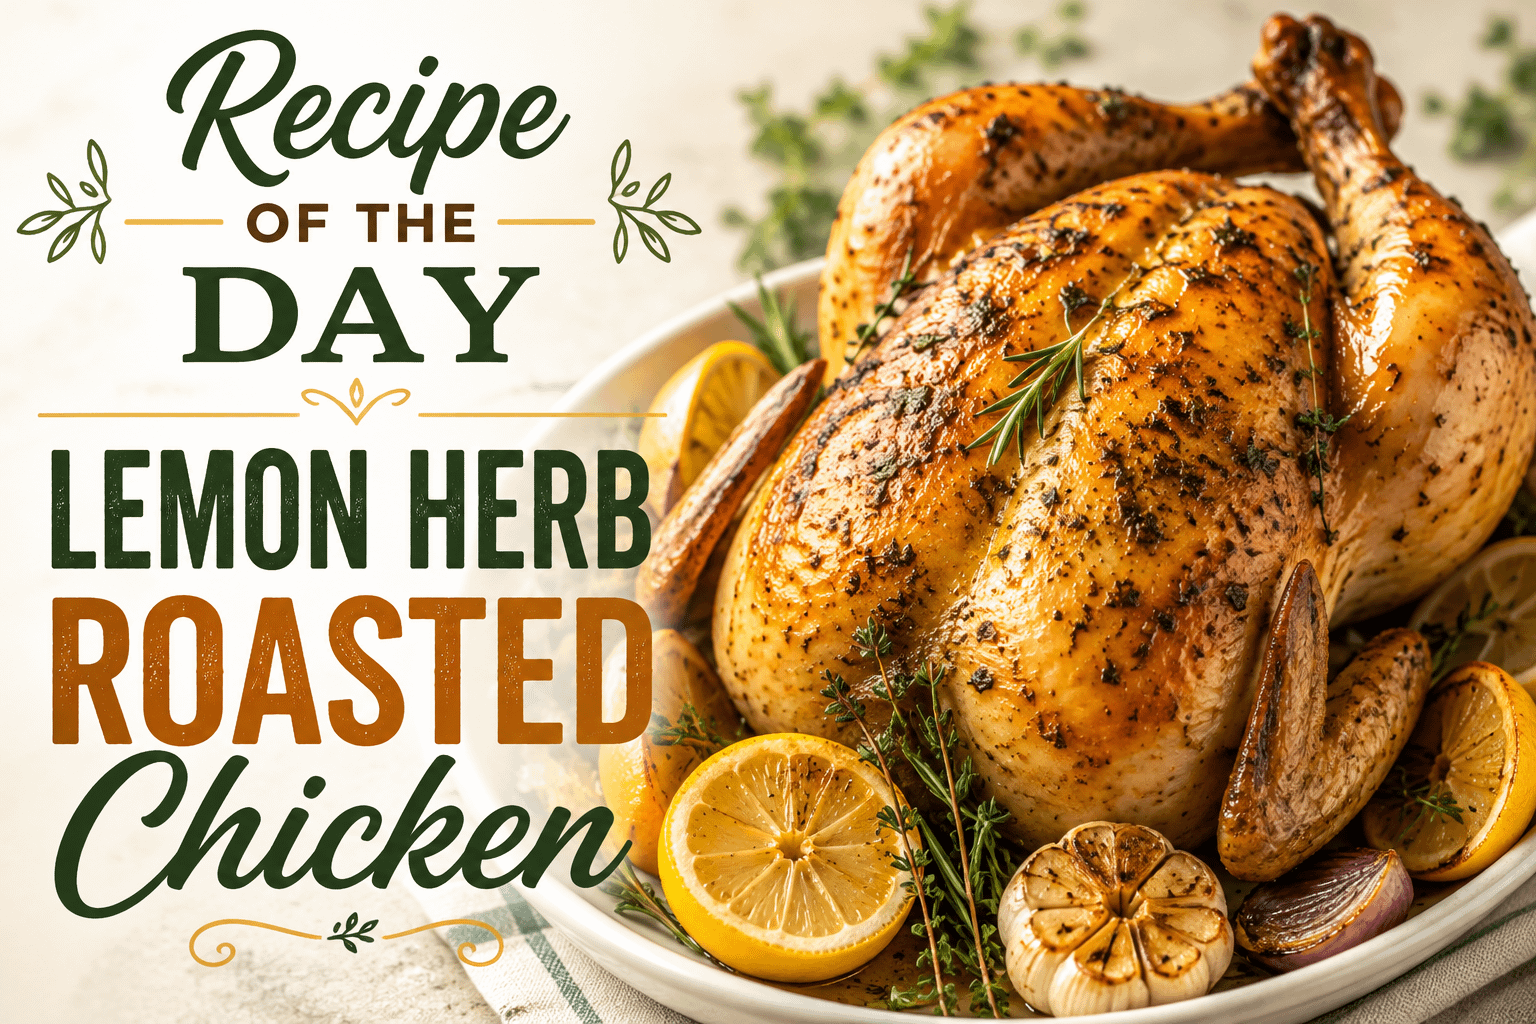
  • Recipe of the Day: Lemon Herb Roasted Chicken

    Recipe of the Day: Lemon Herb Roasted Chicken

    There is something timeless and comforting about a beautifully roasted chicken. The sound of the skin crisping in the oven, the aroma of garlic and herbs filling the kitchen, and the anticipation of carving into a perfectly juicy bird make this one of the most beloved home-cooked meals around the world. Whether you’re preparing a cozy family dinner, hosting guests for a special occasion, or meal prepping for the week ahead, Lemon Herb Roasted Chicken is a recipe that never goes out of style.

    The combination of fresh lemons, fragrant herbs, garlic, and butter transforms an ordinary chicken into a flavorful centerpiece worthy of any table. The citrus brightens the rich flavors, while rosemary, thyme, and parsley create an earthy, aromatic seasoning that penetrates every bite. The result is tender meat, crispy golden skin, and a meal that feels both elegant and comforting.

    If you’ve never roasted a whole chicken before, don’t worry. This recipe is straightforward, forgiving, and rewarding. Even beginners can achieve delicious results by following a few simple techniques. Once you master this classic dish, you’ll find yourself returning to it again and again.


    Why You’ll Love This Recipe

    Lemon Herb Roasted Chicken has remained a favorite for generations because it delivers incredible flavor with minimal effort. Unlike complicated recipes requiring dozens of ingredients, this dish relies on fresh, wholesome components that work together naturally.

    You’ll love this recipe because it is:

    • Perfectly juicy and tender
    • Packed with fresh citrus flavor
    • Crispy on the outside
    • Budget-friendly
    • Great for entertaining
    • Excellent for meal prep
    • Naturally high in protein
    • Easy enough for weeknight dinners
    • Elegant enough for holidays
    • Delicious served hot or as leftovers

    One roasted chicken can easily feed a family while providing enough leftovers for lunches and additional meals throughout the week.


    The Secret Behind Great Roasted Chicken

    Many people believe roasting a whole chicken is difficult, but the secret lies in a few simple steps.

    The first key is drying the chicken thoroughly before seasoning. Moisture on the skin creates steam, preventing it from becoming crispy. A dry surface allows the skin to roast beautifully into a golden, crunchy exterior.

    The second secret is seasoning underneath the skin. Gently separating the skin from the breast meat allows the herb butter to melt directly onto the meat, creating incredible flavor and moisture.

    Finally, allowing the chicken to rest after cooking is essential. Resting gives the juices time to redistribute throughout the meat instead of running out when carved.

    These three simple techniques elevate an ordinary roast chicken into something truly memorable.


    Ingredients

    For the Chicken

    • 1 whole chicken (4–5 pounds)
    • 3 tablespoons softened butter
    • 2 tablespoons olive oil
    • 5 garlic cloves, minced
    • 2 teaspoons kosher salt
    • 1 teaspoon freshly ground black pepper
    • 2 teaspoons dried thyme
    • 2 teaspoons dried rosemary
    • 1 teaspoon dried parsley
    • 1 teaspoon paprika
    • 2 lemons
    • Fresh rosemary sprigs
    • Fresh thyme sprigs
    • 1 onion, quartered

    Optional Vegetables

    Turn this into a complete one-pan meal by roasting vegetables around the chicken.

    Excellent choices include:

    • Baby potatoes
    • Carrots
    • Brussels sprouts
    • Sweet potatoes
    • Parsnips
    • Celery
    • Mushrooms
    • Red onions

    The vegetables absorb the flavorful juices as they roast, becoming tender, caramelized, and incredibly delicious.


    Kitchen Equipment

    You’ll need:

    • Roasting pan or baking dish
    • Roasting rack (optional)
    • Small mixing bowl
    • Sharp carving knife
    • Meat thermometer
    • Kitchen twine (optional)

    A meat thermometer is one of the most valuable tools for roasting chicken because it guarantees perfectly cooked meat every time.


    Step-by-Step Instructions

    Step 1: Prepare the Chicken

    Preheat your oven to 425°F (220°C).

    Remove the chicken from its packaging and take out any giblets from the cavity.

    Pat the chicken completely dry using paper towels.

    Dry skin equals crispy skin.

    Allow the chicken to sit at room temperature for about 20 minutes while preparing the seasoning.


    Step 2: Prepare the Herb Butter

    In a small bowl combine:

    • Softened butter
    • Olive oil
    • Garlic
    • Salt
    • Pepper
    • Rosemary
    • Thyme
    • Parsley
    • Paprika

    Mix thoroughly until the herbs are evenly distributed.

    The butter will become fragrant immediately from the garlic and herbs.


    Step 3: Season Under the Skin

    Using your fingers, carefully loosen the skin over the chicken breasts without tearing it.

    Spread approximately half of the herb butter underneath the skin.

    Massage it gently over both breasts.

    This step adds incredible flavor while helping keep the meat juicy during roasting.


    Step 4: Season the Outside

    Rub the remaining herb butter over the entire outside of the chicken.

    Make sure to coat:

    • Legs
    • Wings
    • Breast
    • Back

    Even coverage creates beautifully browned, flavorful skin.


    Step 5: Stuff the Cavity

    Place inside the chicken:

    • Quartered onion
    • One sliced lemon
    • Fresh rosemary
    • Fresh thyme

    These ingredients release steam and aromatic oils while cooking, naturally flavoring the meat from the inside.


    Step 6: Roast

    Place the chicken breast-side up on a roasting rack.

    If using vegetables, arrange them around the chicken.

    Roast uncovered for approximately:

    20 minutes per pound

    Cooking times:

    • 4-pound chicken: 80 minutes
    • 4½-pound chicken: 90 minutes
    • 5-pound chicken: 100 minutes

    The internal temperature should reach:

    • 165°F in the thickest part of the breast
    • 175°F in the thigh

    Avoid touching the bone with the thermometer for the most accurate reading.


    Step 7: Rest

    Transfer the chicken to a cutting board.

    Squeeze fresh lemon juice over the top.

    Cover loosely with foil.

    Allow it to rest for 15–20 minutes.

    This important step helps preserve moisture and makes carving much easier.


    Carving Tips

    Begin by removing the legs.

    Next, separate the thighs from the drumsticks.

    Slice the breast meat against the grain.

    Finish by removing the wings.

    Arrange everything on a serving platter and drizzle with the pan juices.


    Serving Suggestions

    Lemon Herb Roasted Chicken pairs wonderfully with countless side dishes.

    Classic favorites include:

    • Garlic mashed potatoes
    • Roasted baby potatoes
    • Steamed green beans
    • Buttered corn
    • Rice pilaf
    • Wild rice
    • Creamy macaroni and cheese
    • Caesar salad
    • Garden salad
    • Dinner rolls
    • Roasted asparagus
    • Honey-glazed carrots

    For dessert, consider:

    • Lemon bars
    • Apple pie
    • Peach cobbler
    • Berry shortcake
    • Cheesecake
    • Vanilla ice cream with fresh berries

    Delicious Sauce Ideas

    Enhance your roasted chicken with one of these sauces:

    • Garlic butter sauce
    • Lemon cream sauce
    • White wine pan sauce
    • Mushroom gravy
    • Herb butter drizzle
    • Homemade chicken gravy

    Each complements the bright citrus flavors beautifully.


    Storage Instructions

    Allow leftovers to cool completely before refrigerating.

    Store in airtight containers for:

    Refrigerator: Up to 4 days

    Freezer: Up to 3 months

    Freeze sliced or shredded chicken in meal-sized portions for quick weeknight dinners.


    Creative Leftover Ideas

    One of the best things about roasting a whole chicken is how versatile the leftovers are.

    Try using them in:

    • Chicken noodle soup
    • Chicken Caesar salad
    • BBQ chicken pizza
    • Chicken enchiladas
    • Chicken Alfredo pasta
    • Chicken pot pie
    • Chicken quesadillas
    • Chicken tacos
    • Buffalo chicken wraps
    • Chicken fried rice
    • Chicken sandwiches
    • Chicken salad
    • Stuffed baked potatoes
    • Grain bowls

    Don’t forget to save the bones.

    Simmer them with onions, celery, carrots, garlic, and herbs to make rich homemade chicken stock.


    Nutritional Benefits

    Chicken is an excellent source of lean protein that supports muscle growth and repair. It also provides essential nutrients like niacin, selenium, phosphorus, and vitamin B6, which contribute to energy production and immune health.

    Lemons provide vitamin C and brighten the flavor without adding excess calories. Herbs such as rosemary and thyme contain natural antioxidants and aromatic oils that enhance taste while contributing beneficial plant compounds.

    When paired with roasted vegetables, this meal becomes a well-rounded dinner full of vitamins, minerals, fiber, and satisfying protein.


    Recipe Variations

    Once you’ve mastered the classic version, experiment with these delicious twists.

    Garlic Parmesan

    Add grated Parmesan cheese to the herb butter and sprinkle more over the chicken during the final 15 minutes of roasting.

    Mediterranean

    Stuff the cavity with lemons, olives, garlic, oregano, and fresh parsley.

    Honey Lemon

    Brush the chicken with a mixture of honey, lemon juice, and butter during the final 15 minutes for a lightly sweet glaze.

    Herb Garden

    Use fresh basil, oregano, sage, rosemary, and thyme instead of dried herbs.

    Spicy Citrus

    Add cayenne pepper, smoked paprika, and crushed red pepper flakes for a little heat.


    Frequently Asked Questions

    Should I cover the chicken while roasting?

    No. Leaving it uncovered creates crisp, golden skin.

    How do I know when it’s done?

    Use a meat thermometer. The breast should reach 165°F, while the thighs should be around 175°F.

    Can I prepare it ahead of time?

    Absolutely. Season the chicken up to 24 hours before roasting and refrigerate uncovered. This actually helps create even crispier skin.

    Can I use fresh herbs?

    Yes. Fresh herbs provide an even brighter flavor. Use about three times the amount compared to dried herbs.

    Why should I let the chicken rest?

    Resting allows the juices to redistribute throughout the meat, keeping every slice moist and flavorful.


    Final Thoughts

    Lemon Herb Roasted Chicken is one of those recipes that never goes out of style. It combines simple ingredients with classic cooking techniques to create a meal that is both comforting and impressive. The golden, crispy skin, juicy meat, fragrant herbs, and bright citrus flavors make every bite satisfying.

    Whether you’re serving it as a comforting Sunday dinner, preparing a holiday feast, or simply looking for a dependable meal that delivers amazing flavor, this recipe is sure to become a favorite. With plenty of leftovers to enjoy throughout the week, it’s a practical choice that offers exceptional value without sacrificing taste.

    Gather your ingredients, preheat your oven, and let the irresistible aroma of roasted lemon, garlic, and herbs fill your kitchen. Your family and guests will be asking for this Lemon Herb Roasted Chicken recipe again and again.

    Read More Recipes

  • Breakfast of the Day: Bacon & Avocado Breakfast Sandwich

    Breakfast of the Day: Bacon & Avocado Breakfast Sandwich

    Breakfast has long been called the most important meal of the day, and for good reason. A balanced breakfast helps replenish your energy after a night’s sleep, supports mental focus, and gives your body the nutrients it needs to start the day strong. If you’re looking for a breakfast that’s both comforting and nutritious, today’s Breakfast of the Day: Bacon & Avocado Breakfast Sandwich is a winning choice.

    Combining crispy bacon, creamy avocado, fluffy eggs, melted cheese, and toasted bread creates a breakfast that is rich in flavor, satisfying in texture, and packed with protein and healthy fats. It’s the kind of meal that feels indulgent while still providing plenty of nutritional value. Whether you’re making a quick weekday breakfast, a leisurely weekend brunch, or treating guests to something special, this sandwich is guaranteed to impress.


    Why This Breakfast Sandwich Is So Popular

    The Bacon & Avocado Breakfast Sandwich has become a favorite in coffee shops and brunch restaurants because it brings together ingredients that naturally complement one another.

    The smoky crunch of bacon contrasts beautifully with the smooth creaminess of avocado. The eggs provide a soft, fluffy texture, while melted cheese ties every bite together. Toasted bread adds just the right amount of crunch and structure, making each bite satisfying from beginning to end.

    Unlike many fast-food breakfast sandwiches that can be heavy on processed ingredients, this homemade version allows you to use fresh, high-quality ingredients while customizing every layer to your taste.


    Ingredients

    Main Ingredients

    • 2 slices thick-cut bacon
    • 2 large eggs
    • 1 ripe avocado
    • 2 slices cheddar, Swiss, provolone, gouda, or pepper jack cheese
    • 2 slices sourdough bread, brioche, whole wheat bread, or a toasted English muffin
    • 1 tablespoon butter
    • Salt
    • Freshly ground black pepper

    Optional Additions

    • Tomato slices
    • Baby spinach
    • Arugula
    • Red onion
    • Everything bagel seasoning
    • Garlic aioli
    • Chipotle mayo
    • Dijon mustard
    • Sriracha
    • Hot honey
    • Fresh herbs like chives or parsley

    Step-by-Step Directions

    Step 1: Cook the Bacon

    Place the bacon in a cold skillet before turning the heat to medium. This method allows the fat to slowly render, producing evenly crispy bacon.

    Cook for approximately 8–10 minutes, turning occasionally until perfectly crisp.

    Transfer the bacon to a paper towel-lined plate to absorb excess grease.


    Step 2: Prepare the Eggs

    Drain most of the bacon grease, leaving just enough in the skillet for flavor.

    Cook your eggs however you prefer:

    Fried Eggs

    Cook until the whites are fully set while leaving the yolk runny or fully cooked.

    Scrambled Eggs

    Whisk eggs with a splash of milk for extra fluffiness before cooking slowly over medium-low heat.

    Folded Omelet

    Create a thin omelet, fold it neatly, and trim it to fit the sandwich.

    Season lightly with salt and pepper.


    Step 3: Toast the Bread

    Butter each slice of bread lightly.

    Toast until golden brown and slightly crisp.

    A sturdy toast keeps the sandwich from becoming soggy while adding delicious texture.


    Step 4: Slice the Avocado

    Cut the avocado in half.

    Remove the pit.

    Peel the skin.

    Slice into thin pieces or mash lightly with:

    • Salt
    • Pepper
    • Lemon juice
    • Everything bagel seasoning

    The lemon juice helps prevent browning while adding brightness.


    Step 5: Melt the Cheese

    Place the cheese directly on the hot eggs during the final minute of cooking.

    Cover the skillet briefly to allow the cheese to melt completely.


    Step 6: Assemble the Sandwich

    Layer in this order:

    1. Toasted bread
    2. Cheese
    3. Eggs
    4. Bacon
    5. Avocado
    6. Tomatoes (optional)
    7. Spinach or arugula
    8. Favorite sauce
    9. Top slice of toasted bread

    Slice diagonally and serve immediately.


    Why Avocados Make This Sandwich Better

    Avocados aren’t just trendy—they’re one of the most nutrient-rich fruits available.

    They provide:

    • Heart-healthy monounsaturated fats
    • Nearly 20 vitamins and minerals
    • Potassium
    • Magnesium
    • Folate
    • Vitamin K
    • Vitamin E
    • Fiber
    • Antioxidants

    Healthy fats also help your body absorb vitamins found in other foods.


    The Nutritional Benefits of Eggs

    Eggs remain one of the highest-quality protein sources available.

    Benefits include:

    • Complete protein containing all nine essential amino acids
    • Vitamin D
    • Vitamin B12
    • Choline for brain health
    • Selenium
    • Iron
    • Healthy fats

    Protein also helps keep you full longer, reducing mid-morning cravings.


    Bacon in Moderation

    Although bacon is considered an indulgence, it can absolutely fit into a balanced breakfast when enjoyed in moderation.

    Its rich smoky flavor means you only need a couple slices to make the sandwich satisfying.

    You can also substitute:

    • Turkey bacon
    • Chicken bacon
    • Canadian bacon
    • Lean ham

    for lighter alternatives.


    Choosing the Best Bread

    The bread plays an important role in both flavor and structure.

    Excellent choices include:

    Sourdough

    Tangy flavor with a sturdy texture.

    Brioche

    Rich and buttery.

    Whole Wheat

    Higher in fiber and nutrients.

    English Muffin

    Classic breakfast sandwich choice.

    Ciabatta

    Chewy with a crispy crust.

    Croissant

    Extra buttery for a more indulgent brunch.


    Cheese Pairings

    Different cheeses create entirely different sandwiches.

    Try:

    • Sharp cheddar
    • Mild cheddar
    • Pepper jack
    • Swiss
    • Gouda
    • Havarti
    • Monterey Jack
    • Provolone
    • Mozzarella

    Each brings its own unique texture and flavor profile.


    Delicious Variations

    Southwest Breakfast Sandwich

    Add:

    • Pepper jack cheese
    • Salsa
    • Jalapeños
    • Avocado
    • Chipotle mayo

    California Style

    Use:

    • Turkey bacon
    • Swiss cheese
    • Tomato
    • Baby spinach
    • Avocado

    Fresh and light while remaining filling.


    Steakhouse Breakfast Sandwich

    Replace bacon with sliced steak.

    Add:

    • Caramelized onions
    • Swiss cheese
    • Garlic aioli

    Veggie Lover

    Skip the bacon.

    Instead include:

    • Mushrooms
    • Spinach
    • Tomato
    • Roasted peppers
    • Avocado

    Spicy Version

    Top with:

    • Sriracha
    • Hot honey
    • Pickled jalapeños
    • Crushed red pepper flakes

    Perfect Side Dishes

    Complete your breakfast with:

    • Crispy hash browns
    • Breakfast potatoes
    • Fresh fruit salad
    • Greek yogurt
    • Cottage cheese
    • Mixed berries
    • Banana slices
    • Oatmeal
    • Smoothie

    Beverage Pairings

    This sandwich pairs wonderfully with:

    • Fresh coffee
    • Cold brew
    • Cappuccino
    • Latte
    • Orange juice
    • Apple juice
    • Iced tea
    • Fresh lemonade
    • Green smoothie

    Meal Prep Tips

    This breakfast works well for busy mornings.

    You can:

    • Cook bacon several days ahead.
    • Store cooked bacon in the refrigerator.
    • Pre-slice cheese.
    • Toast bread fresh.
    • Cook eggs just before serving.
    • Slice avocado at the last minute to maintain freshness.

    Entertaining With Breakfast Sandwiches

    Hosting brunch?

    Set up a breakfast sandwich bar featuring:

    • Multiple breads
    • Various cheeses
    • Bacon
    • Sausage
    • Ham
    • Fried eggs
    • Scrambled eggs
    • Avocados
    • Tomatoes
    • Spinach
    • Sauces
    • Fresh fruit

    Guests can build their own customized sandwiches.


    Fun Facts About Avocados

    • Avocados are technically a fruit.
    • They originated in Central America and Mexico thousands of years ago.
    • Hass avocados account for most avocados sold in the United States.
    • One avocado contains more potassium than a banana.
    • Avocados naturally contain no cholesterol or sodium.

    Breakfast That Keeps You Going

    Unlike sugary breakfast pastries that often lead to an energy crash, this sandwich provides a steady source of fuel.

    Its combination of:

    • Protein
    • Healthy fats
    • Fiber
    • Complex carbohydrates

    helps maintain energy levels, supports concentration, and keeps hunger at bay for hours.

    It’s an excellent breakfast for students, professionals, athletes, and anyone with a busy schedule.


    Final Thoughts

    Today’s Breakfast of the Day: Bacon & Avocado Breakfast Sandwich proves that a homemade breakfast can be every bit as delicious as something from your favorite café. Every bite delivers a satisfying blend of smoky bacon, creamy avocado, fluffy eggs, gooey melted cheese, and perfectly toasted bread.

    The beauty of this recipe lies in its versatility. You can customize it with your favorite cheeses, vegetables, sauces, or breads, making it easy to enjoy again and again without ever getting bored.

    Whether you’re preparing a quick weekday breakfast, enjoying a slow weekend brunch, or serving family and friends, this sandwich offers the perfect combination of comfort, flavor, and nutrition. Skip the drive-thru, gather a few fresh ingredients, and create a breakfast that’s as memorable as it is satisfying. After one bite, you’ll understand why the Bacon & Avocado Breakfast Sandwich has earned its place among the all-time breakfast favorites.

    Read More Recipes

  • Dessert of the Day: Cinnamon Roll Cookies

    Dessert of the Day: Cinnamon Roll Cookies

    There’s something magical about the comforting aroma of cinnamon, butter, and vanilla filling your kitchen. It’s the scent of cozy mornings, holiday gatherings, and homemade treats shared with family and friends. Cinnamon Roll Cookies capture all of that comforting goodness in one delightful dessert. Combining the rich, buttery flavor of a classic sugar cookie with the irresistible cinnamon swirl of a traditional cinnamon roll, these cookies offer the best of both worlds.

    Unlike cinnamon rolls, which require yeast, rising time, and careful preparation, Cinnamon Roll Cookies are much easier to make while still delivering that familiar cinnamon-sugar flavor everyone loves. Their beautiful spiral design makes them look impressive on cookie trays, and the sweet vanilla glaze adds the perfect finishing touch. Whether you’re baking for a holiday celebration, preparing gifts for neighbors, or simply satisfying a sweet craving, these cookies are guaranteed to become a favorite.


    What Are Cinnamon Roll Cookies?

    Cinnamon Roll Cookies are slice-and-bake cookies made by rolling buttery cookie dough around a cinnamon-sugar filling, creating a beautiful spiral pattern that resembles miniature cinnamon rolls. After baking, the cookies are finished with a drizzle of vanilla glaze, making them taste remarkably similar to the breakfast pastry that inspired them.

    They offer everything people love about cinnamon rolls without the lengthy preparation. There’s no yeast to activate, no waiting for dough to rise, and no complicated techniques. Simply prepare the dough, roll it up with the cinnamon filling, chill, slice, bake, and glaze.

    The result is a soft, buttery cookie with swirls of sweet cinnamon goodness in every bite.


    Why You’ll Love This Dessert

    There are countless reasons Cinnamon Roll Cookies have become a favorite among home bakers.

    Beautiful Presentation

    The spiral design makes every cookie look professionally baked. They’re perfect for holiday platters, bake sales, gift boxes, or special occasions.

    Soft and Buttery Texture

    The cookie dough bakes into a tender, melt-in-your-mouth cookie that complements the cinnamon filling perfectly.

    Classic Cinnamon Roll Flavor

    Every bite delivers buttery dough, sweet brown sugar, warm cinnamon, and creamy vanilla glaze.

    Easy to Make Ahead

    The dough can be prepared several days in advance and stored in the refrigerator or freezer until you’re ready to bake.

    Perfect for Any Season

    While they are especially popular during fall and winter holidays, Cinnamon Roll Cookies are delicious year-round.


    Ingredients

    Cookie Dough

    • 1 cup unsalted butter, softened
    • 1 cup granulated sugar
    • 1 large egg
    • 2 teaspoons vanilla extract
    • 2½ cups all-purpose flour
    • ½ teaspoon baking powder
    • ¼ teaspoon salt

    Cinnamon Filling

    • 3 tablespoons melted butter
    • ½ cup packed brown sugar
    • 1 tablespoon ground cinnamon

    Vanilla Glaze

    • 1 cup powdered sugar
    • 2 tablespoons milk
    • ½ teaspoon vanilla extract

    Optional:

    • Pinch of cinnamon
    • Maple extract
    • Cream cheese instead of milk for a richer glaze

    Step-by-Step Instructions

    Step 1: Make the Dough

    Using a stand mixer or hand mixer, cream together the softened butter and sugar until light and fluffy, about three minutes.

    Add the egg and vanilla extract, mixing until fully incorporated.

    In a separate bowl, whisk together the flour, baking powder, and salt before gradually adding the dry ingredients to the butter mixture. Mix until a soft dough forms.

    Avoid overmixing, which can make the cookies tougher after baking.


    Step 2: Roll the Dough

    Place the dough between two sheets of parchment paper.

    Roll it into a rectangle approximately 10 by 15 inches and about ¼-inch thick.

    Keeping the dough between parchment prevents sticking and eliminates the need for extra flour.


    Step 3: Prepare the Cinnamon Filling

    Brush the rolled dough evenly with melted butter.

    In a small bowl, combine the brown sugar and cinnamon.

    Sprinkle the mixture evenly over the butter, gently pressing it into the dough.

    The butter helps the filling stay in place while baking and creates those signature cinnamon swirls.


    Step 4: Roll Into a Log

    Starting with the long edge, carefully roll the dough into a tight log.

    Take your time to keep the roll even so each cookie has a consistent spiral.

    Wrap the log tightly in plastic wrap.


    Step 5: Chill the Dough

    Refrigerate the dough for at least two hours.

    For even cleaner slices, refrigerate overnight.

    If you’re short on time, freeze the dough for about 45 minutes.


    Step 6: Slice the Cookies

    Using a very sharp knife or unflavored dental floss, slice the dough into ¼-inch thick cookies.

    Arrange them on parchment-lined baking sheets approximately two inches apart.


    Step 7: Bake

    Bake at 350°F (175°C) for 10–12 minutes.

    The cookies should remain pale with lightly golden edges.

    Avoid overbaking to keep the centers soft.

    Allow them to cool for five minutes before transferring to a wire rack.


    Step 8: Add the Glaze

    Whisk together:

    • Powdered sugar
    • Milk
    • Vanilla extract

    Drizzle generously over the cooled cookies.

    Allow the glaze to harden for about 15 minutes before serving.


    Tips for Bakery-Style Cookies

    Chill Thoroughly

    Cold dough slices cleaner and holds its spiral shape much better during baking.

    Use Fresh Cinnamon

    Fresh cinnamon provides a stronger, richer flavor than older spices.

    Roll Evenly

    An even thickness ensures all cookies bake uniformly.

    Don’t Overbake

    Soft centers create a texture that’s much closer to an actual cinnamon roll.

    Cool Before Glazing

    Warm cookies will melt the glaze instead of allowing it to set beautifully.


    Delicious Variations

    Cream Cheese Cinnamon Roll Cookies

    Replace the vanilla glaze with cream cheese frosting.

    Mix:

    • 4 ounces softened cream cheese
    • 2 tablespoons butter
    • 1½ cups powdered sugar
    • Splash of vanilla

    The flavor becomes nearly identical to a traditional cinnamon roll.


    Maple Cinnamon Cookies

    Add one teaspoon of maple extract to the glaze for a warm autumn flavor.

    Perfect for Thanksgiving dessert trays.


    Pecan Cinnamon Roll Cookies

    Sprinkle finely chopped pecans over the cinnamon filling before rolling.

    The nuts add wonderful crunch and buttery richness.


    Pumpkin Spice Version

    Replace half of the cinnamon with pumpkin pie spice.

    Serve these during the fall alongside hot apple cider.


    Chocolate Lovers

    Sprinkle mini chocolate chips inside the cinnamon filling before rolling.

    Chocolate and cinnamon are an underrated combination.


    Caramel Drizzle

    After glazing, drizzle warm caramel sauce over the cookies.

    Top with flaky sea salt for an irresistible sweet-and-salty finish.


    Serving Ideas

    These cookies are incredibly versatile.

    Serve them:

    • With fresh coffee
    • Alongside hot cocoa
    • At brunch
    • On holiday dessert platters
    • For Christmas cookie exchanges
    • At baby showers
    • During afternoon tea
    • As edible gifts
    • With vanilla bean ice cream
    • Alongside warm apple cider

    Make-Ahead Instructions

    The dough can be prepared:

    • Up to 3 days ahead in the refrigerator
    • Frozen for up to 3 months

    Simply thaw slightly before slicing and baking.

    This makes Cinnamon Roll Cookies ideal for holiday baking when preparing desserts ahead of time saves valuable time.


    Storage Tips

    Room Temperature

    Store in an airtight container for up to 5 days.

    Refrigerator

    If using cream cheese frosting, refrigerate for up to 1 week.

    Freezer

    Freeze baked cookies for up to 3 months.

    Freeze unglazed for best results.

    Add fresh glaze after thawing.


    Nutritional Highlights

    While these cookies are certainly a sweet indulgence, they offer a satisfying homemade alternative to many store-bought desserts that contain preservatives and artificial ingredients.

    Making them from scratch allows you to:

    • Control the amount of sugar
    • Use high-quality butter
    • Choose pure vanilla extract
    • Avoid unnecessary additives

    Enjoyed in moderation, they make a delightful treat that pairs wonderfully with coffee or tea.


    Frequently Asked Questions

    Can I freeze the dough?

    Yes. Wrap the cookie log tightly in plastic wrap and then foil. Freeze for up to three months.


    Why did my cookies lose their swirl?

    Usually because the dough wasn’t chilled long enough before slicing and baking.


    Can I make these without glaze?

    Absolutely. They’re delicious on their own and have a slightly less sweet flavor.


    Can I use store-bought sugar cookie dough?

    Yes, although homemade dough creates a softer, richer cookie.


    How do I get perfectly round cookies?

    After slicing, gently reshape the edges with your fingers if needed before baking.


    The History Behind Cinnamon Rolls

    The cinnamon roll has roots in Northern Europe, particularly Sweden, where the famous kanelbulle has been enjoyed for generations. Over time, cinnamon rolls became popular around the world, especially in North America, where they evolved into larger, sweeter pastries topped with icing.

    Cinnamon Roll Cookies take inspiration from this beloved pastry, transforming its iconic flavors into an easy-to-share cookie that captures the same warmth and nostalgia.


    Final Thoughts

    Few desserts deliver comfort quite like Cinnamon Roll Cookies. Their buttery texture, warm cinnamon filling, elegant swirls, and sweet vanilla glaze make them a treat that’s as beautiful as it is delicious. They’re easy enough for beginner bakers yet impressive enough for holiday gatherings, cookie exchanges, and special celebrations.

    Whether you’re baking on a cozy weekend afternoon, preparing homemade gifts for loved ones, or adding something special to your dessert table, Cinnamon Roll Cookies are a recipe you’ll find yourself returning to again and again. One bite is all it takes to understand why this delightful combination of cookie and cinnamon roll has become a favorite for bakers everywhere.

    So preheat your oven, gather your ingredients, and enjoy the comforting aroma of cinnamon and vanilla filling your home. Your family and friends will be reaching for seconds before the first batch has even cooled.

    Read More Recipes

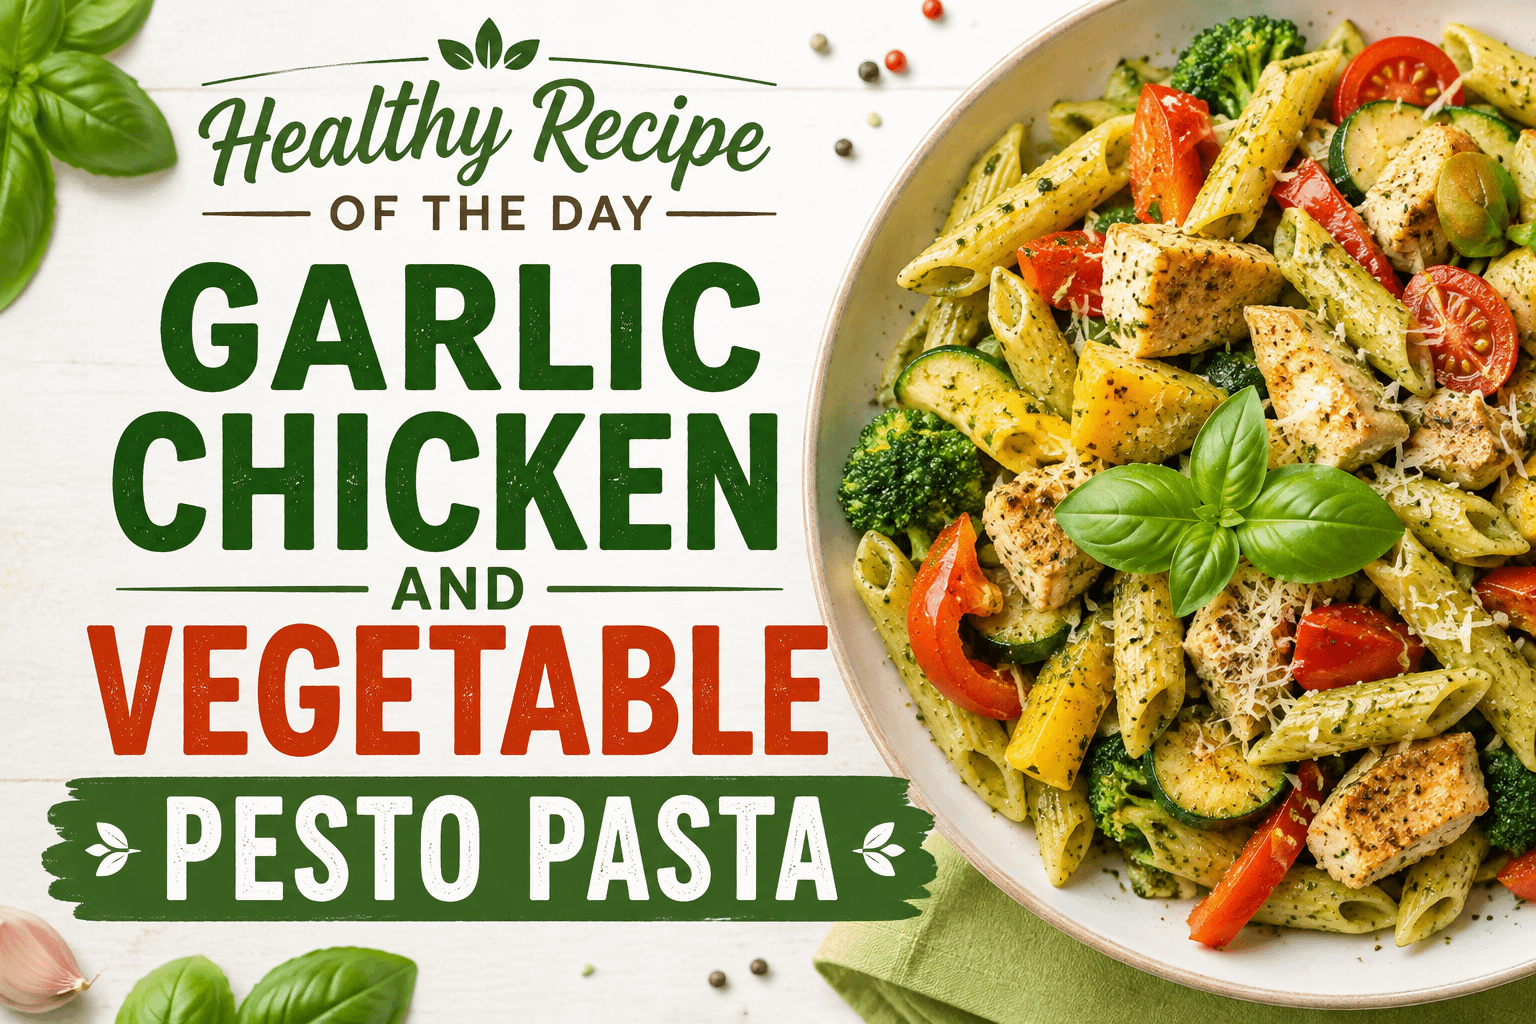
  • Healthy Recipe of the Day: Garlic Chicken and Vegetable Pesto Pasta

    Healthy Recipe of the Day: Garlic Chicken and Vegetable Pesto Pasta

    When you’re looking for a meal that’s wholesome, colorful, and bursting with fresh flavor, Garlic Chicken and Vegetable Pesto Pasta is an excellent choice. Combining tender, seasoned chicken breast, vibrant vegetables, hearty whole wheat pasta, and fragrant basil pesto, this dish proves that healthy eating can be both satisfying and delicious.

    Unlike heavy pasta dishes loaded with cream and excess calories, this recipe relies on fresh ingredients to create incredible flavor. The garlic provides a savory foundation, the vegetables add natural sweetness and crunch, and the basil pesto ties everything together with its rich, herbaceous taste. The result is a balanced meal packed with protein, fiber, vitamins, minerals, and healthy fats that will leave you feeling energized instead of weighed down.

    Whether you’re preparing dinner for your family, cooking ahead for busy weekdays, or simply trying to add more vegetables to your meals, Garlic Chicken and Vegetable Pesto Pasta is a recipe you’ll find yourself making again and again.


    Why This Recipe Is a Healthy Choice

    Healthy meals don’t have to be boring or restrictive. This recipe focuses on whole, nutritious ingredients that work together to nourish your body while delivering restaurant-quality flavor.

    Every serving provides a satisfying balance of:

    • Lean protein
    • Complex carbohydrates
    • Fiber
    • Healthy fats
    • Vitamins
    • Minerals
    • Antioxidants

    Instead of relying on heavy sauces or excessive cheese, this pasta lets fresh ingredients take center stage.


    Why You’ll Love Garlic Chicken and Vegetable Pesto Pasta

    There are plenty of reasons this dish deserves a place in your weekly meal rotation.

    Quick and Easy

    Dinner comes together in about 30 minutes, making it ideal for busy weeknights.

    Full of Fresh Flavor

    Garlic, basil pesto, lemon juice, and colorful vegetables create layers of bright, fresh flavor in every bite.

    High in Protein

    Chicken breast helps keep you feeling satisfied while supporting muscle growth and recovery.

    Packed with Vegetables

    Each serving includes several vegetables that contribute important nutrients and natural color.

    Great for Meal Prep

    This recipe reheats beautifully, making it perfect for lunches throughout the week.

    Family Friendly

    Even picky eaters often enjoy pesto because it’s flavorful without being spicy.


    Ingredients

    For the Pasta

    • 12 ounces whole wheat penne or rotini pasta
    • 2 boneless, skinless chicken breasts, diced
    • 2 tablespoons extra virgin olive oil
    • 4 cloves garlic, minced
    • 1 zucchini, sliced into half moons
    • 1 yellow squash, sliced
    • 1 red bell pepper, chopped
    • 1 cup broccoli florets
    • 1 cup cherry tomatoes, halved
    • 1 teaspoon Italian seasoning
    • Salt and freshly ground black pepper to taste

    For the Sauce

    • ½ cup basil pesto
    • 2 tablespoons fresh lemon juice
    • 2–4 tablespoons reserved pasta water
    • 2 tablespoons grated Parmesan cheese (optional)
    • Fresh basil leaves for garnish

    Step-by-Step Instructions

    Step 1: Cook the Pasta

    Bring a large pot of salted water to a rolling boil.

    Cook the whole wheat pasta according to package directions until al dente. Whole wheat pasta has a firmer texture and holds sauces exceptionally well.

    Before draining, reserve about half a cup of the cooking water. This starchy water will help create a silky sauce later.

    Drain the pasta and set aside.


    Step 2: Prepare the Chicken

    While the pasta cooks, season the diced chicken with:

    • Salt
    • Pepper
    • Italian seasoning

    Heat olive oil in a large skillet over medium-high heat.

    Cook the chicken for approximately 6–8 minutes, stirring occasionally until golden brown and fully cooked.

    Remove from the skillet and set aside.


    Step 3: Cook the Vegetables

    Reduce the heat slightly.

    Add the minced garlic to the same skillet and sauté for about 30 seconds until fragrant.

    Next, add:

    • Zucchini
    • Yellow squash
    • Bell pepper
    • Broccoli

    Cook for 5–7 minutes, stirring frequently.

    The vegetables should remain slightly crisp, preserving both texture and nutrients.

    Finally, stir in the cherry tomatoes and cook for one additional minute.


    Step 4: Build the Sauce

    Return the cooked chicken to the skillet.

    Add the cooked pasta.

    Mix together:

    • Basil pesto
    • Fresh lemon juice
    • Reserved pasta water

    Toss everything together until every piece of pasta is coated in the flavorful pesto sauce.

    If the sauce appears too thick, simply add another tablespoon of reserved pasta water.

    Sprinkle with Parmesan cheese if desired.


    Step 5: Garnish and Serve

    Finish with:

    • Fresh basil
    • Extra Parmesan
    • Fresh cracked pepper
    • Lemon wedges

    Serve immediately while warm.


    Nutritional Benefits

    One of the greatest strengths of this meal is how nutritionally balanced it is.

    Lean Chicken Breast

    Chicken breast is one of the healthiest protein choices available.

    Benefits include:

    • High-quality protein
    • Low saturated fat
    • Rich in niacin
    • Excellent source of vitamin B6
    • Supports muscle maintenance
    • Helps keep you full longer

    Protein also plays an important role in repairing tissues and supporting a healthy metabolism.


    Whole Wheat Pasta

    Whole wheat pasta offers several advantages over traditional refined pasta.

    It contains:

    • More fiber
    • More magnesium
    • More iron
    • More B vitamins

    Fiber helps stabilize blood sugar, improves digestion, and promotes longer-lasting fullness.


    Garlic

    Garlic has been valued for centuries for both its flavor and potential health benefits.

    Garlic may help support:

    • Heart health
    • Healthy blood pressure
    • Immune function
    • Antioxidant protection

    Even a few cloves add tremendous flavor without adding significant calories.


    Broccoli

    Broccoli is considered one of the most nutrient-dense vegetables available.

    It’s loaded with:

    • Vitamin C
    • Vitamin K
    • Folate
    • Fiber
    • Potassium
    • Plant antioxidants

    Broccoli also adds a satisfying crunch to the dish.


    Bell Peppers

    Red bell peppers contain exceptionally high amounts of vitamin C.

    They’re also rich in:

    • Vitamin A
    • Vitamin B6
    • Folate
    • Lycopene
    • Antioxidants

    Their natural sweetness perfectly balances the savory pesto.


    Zucchini and Yellow Squash

    These vegetables are:

    • Low in calories
    • High in water
    • Rich in potassium
    • Good sources of vitamin C
    • Easy to digest

    They absorb the pesto beautifully while adding volume without excess calories.


    Cherry Tomatoes

    Cherry tomatoes contribute:

    • Lycopene
    • Vitamin C
    • Potassium
    • Natural sweetness
    • Bright acidity

    Cooking them briefly allows them to soften while maintaining their fresh flavor.


    Basil Pesto

    Pesto brings much more than flavor.

    Traditional pesto includes:

    • Fresh basil
    • Olive oil
    • Pine nuts
    • Garlic
    • Parmesan cheese

    These ingredients provide healthy unsaturated fats, antioxidants, and anti-inflammatory compounds.

    Because pesto is naturally flavorful, you only need a modest amount to coat the entire dish.


    Healthy Cooking Tips

    To make this recipe even healthier:

    • Use homemade pesto to control sodium.
    • Choose whole wheat or high-protein pasta.
    • Increase the vegetables if you want fewer carbohydrates.
    • Add spinach during the last minute of cooking.
    • Use freshly grated Parmesan instead of pre-shredded cheese.
    • Limit added salt since pesto already contains seasoning.

    Easy Ways to Customize

    This recipe is incredibly versatile.

    Add More Vegetables

    Try adding:

    • Mushrooms
    • Asparagus
    • Spinach
    • Kale
    • Green beans
    • Snap peas
    • Artichokes

    Change the Protein

    Instead of chicken, use:

    • Shrimp
    • Turkey breast
    • Grilled salmon
    • Rotisserie chicken
    • Tofu
    • Chickpeas
    • White beans

    Try Different Pastas

    Great alternatives include:

    • Chickpea pasta
    • Lentil pasta
    • Gluten-free pasta
    • Protein pasta
    • Brown rice pasta

    Meal Prep Made Easy

    Garlic Chicken and Vegetable Pesto Pasta is one of those meals that tastes just as good the next day.

    Store leftovers in airtight containers in the refrigerator for up to four days.

    To reheat:

    • Microwave with a splash of water.
    • Warm gently in a skillet.
    • Add a little extra pesto if needed.

    It also makes a delicious cold pasta salad for lunch.


    Perfect Side Dishes

    Pair this healthy pasta with:

    • Mixed green salad
    • Roasted asparagus
    • Garlic green beans
    • Fresh fruit
    • Whole grain bread
    • Sparkling lemon water

    These simple sides round out the meal without overpowering the fresh flavors.


    Frequently Asked Questions

    Can I make this recipe vegetarian?

    Absolutely. Replace the chicken with chickpeas, white beans, tofu, or extra vegetables.

    Can I freeze it?

    While it can be frozen, the vegetables may soften after thawing. For the best texture, enjoy it fresh or refrigerated.

    Is homemade pesto better?

    Homemade pesto offers fresher flavor and lets you control the amount of oil, cheese, and salt, but a quality store-bought pesto works well when you’re short on time.

    Can I use regular pasta?

    Yes. Whole wheat pasta boosts the fiber content, but traditional, gluten-free, or legume-based pasta all work well.


    Final Thoughts

    Garlic Chicken and Vegetable Pesto Pasta is the kind of meal that makes healthy eating feel effortless. It’s colorful, nourishing, and full of fresh ingredients that come together in perfect harmony. Every forkful offers tender chicken, crisp vegetables, wholesome pasta, and the bold, aromatic flavor of basil pesto.

    Whether you’re feeding a family, meal-prepping for the week, or simply looking for a healthier alternative to heavy pasta dishes, this recipe delivers both nutrition and satisfaction. It’s easy enough for a weeknight dinner yet impressive enough to serve guests, making it a versatile addition to your recipe collection.

    The best healthy meals are the ones you’ll actually look forward to eating, and this Garlic Chicken and Vegetable Pesto Pasta is sure to become one of those favorites. From its vibrant colors to its fresh flavors and wholesome ingredients, it’s a dish that proves eating well can be both simple and incredibly delicious.

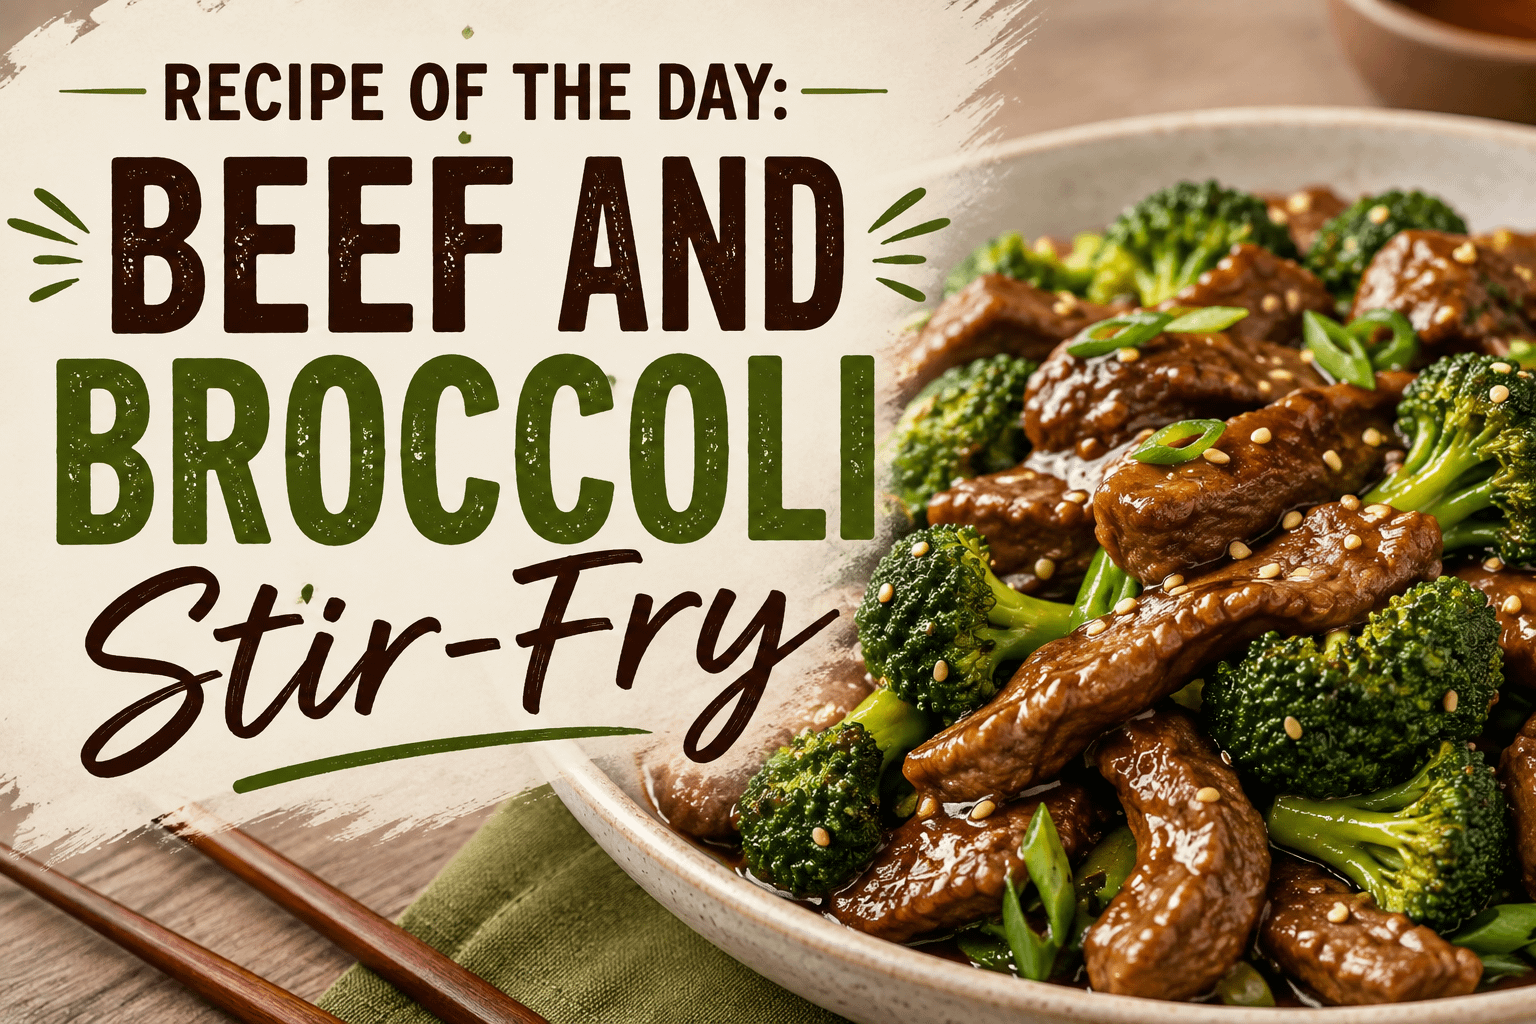
  • Recipe of the Day: Beef and Broccoli Stir-Fry

    Recipe of the Day: Beef and Broccoli Stir-Fry

    When it comes to quick, flavorful, and satisfying meals, few dishes are as beloved as Beef and Broccoli Stir-Fry. This classic Asian-inspired recipe combines tender slices of beef with crisp, vibrant broccoli, all coated in a rich garlic-ginger soy sauce that perfectly balances savory, slightly sweet, and umami flavors. It’s the kind of meal that tastes like it came from your favorite restaurant but can be made right in your own kitchen in about 30 minutes.

    One of the reasons this recipe has stood the test of time is its simplicity. With just a handful of fresh ingredients and a few pantry staples, you can create a wholesome dinner that’s packed with protein, vegetables, and incredible flavor. Whether you’re cooking for your family on a busy weeknight, preparing lunches for the week ahead, or looking to impress guests without spending hours in the kitchen, Beef and Broccoli Stir-Fry is always a winning choice.

    Making this dish at home also gives you complete control over the ingredients. You can choose lean cuts of beef, reduce the sodium, increase the vegetables, adjust the sweetness, or add a spicy kick to suit your tastes. It’s healthier, more affordable, and often even tastier than takeout.


    Why You’ll Love This Recipe

    There are countless reasons why Beef and Broccoli Stir-Fry has become a staple in kitchens around the world.

    Ready in About 30 Minutes

    From slicing the beef to serving dinner, this recipe comes together quickly, making it ideal for busy evenings when time is limited.

    Better Than Takeout

    Homemade stir-fry lets you use fresh ingredients without the excess oil, sugar, or sodium often found in restaurant versions.

    Packed with Protein

    Lean beef provides plenty of high-quality protein that helps keep you feeling full and energized.

    Loaded with Vegetables

    Broccoli adds color, texture, fiber, vitamins, and minerals, making this a balanced meal that’s as nutritious as it is delicious.

    Budget-Friendly

    A relatively inexpensive cut of beef combined with affordable broccoli creates a hearty meal that feeds several people without breaking the budget.

    Perfect for Meal Prep

    The flavors become even better after a day in the refrigerator, making leftovers ideal for lunches.


    The History Behind Beef and Broccoli

    Although many people think Beef and Broccoli Stir-Fry is a traditional Chinese dish, the version commonly found in North America is actually a Chinese-American creation inspired by Cantonese cooking.

    Chinese cuisine often features stir-fried beef with Chinese broccoli (also called gai lan), a leafy green vegetable with thick stems and slightly bitter leaves. As Chinese immigrants adapted their recipes using ingredients readily available in the United States, traditional Chinese broccoli was replaced with the broccoli commonly found in American grocery stores.

    Over time, Beef and Broccoli became one of the most popular dishes served in Chinese restaurants across North America. Today, it remains a favorite because of its comforting flavors, quick cooking time, and versatility.


    Choosing the Best Beef

    The key to tender stir-fry is selecting the right cut of meat.

    Excellent choices include:

    • Flank steak
    • Sirloin steak
    • Flat iron steak
    • Ribeye
    • Top round
    • Skirt steak

    Flank steak remains the most popular choice because it cooks quickly and absorbs marinades beautifully.

    Slice Against the Grain

    Always slice the meat across the grain rather than with it. This shortens the muscle fibers, resulting in much more tender bites.

    Freeze Before Slicing

    Place the steak in the freezer for 20–30 minutes before cutting. The slight firmness makes it much easier to slice into thin, even strips.


    Ingredients

    For the Beef

    • 1½ pounds flank steak or sirloin, thinly sliced
    • 2 tablespoons cornstarch
    • 1 tablespoon soy sauce
    • 1 tablespoon vegetable oil

    Coating the beef with cornstarch helps create a tender texture while allowing the sauce to cling beautifully.


    For the Vegetables

    • 4 cups broccoli florets
    • 3 cloves garlic, minced
    • 1 tablespoon fresh ginger, grated
    • 2 tablespoons vegetable oil

    Optional vegetables include:

    • Mushrooms
    • Bell peppers
    • Snow peas
    • Carrots
    • Baby corn
    • Water chestnuts
    • Bok choy
    • Snap peas

    For the Sauce

    • ½ cup low-sodium soy sauce
    • ¼ cup beef broth
    • 2 tablespoons brown sugar
    • 1 tablespoon sesame oil
    • 2 teaspoons rice vinegar
    • 1 tablespoon oyster sauce
    • 1 tablespoon cornstarch
    • ½ teaspoon black pepper

    Optional additions:

    • Hoisin sauce
    • Chili garlic sauce
    • Honey
    • Red pepper flakes
    • Sriracha

    Step-by-Step Instructions

    Step 1: Marinate the Beef

    Mix the sliced beef with:

    • Soy sauce
    • Cornstarch
    • Vegetable oil

    Let it sit for 15–20 minutes.

    This simple marinade creates incredibly tender meat while helping lock in moisture.


    Step 2: Prepare the Sauce

    Whisk together:

    • Soy sauce
    • Beef broth
    • Brown sugar
    • Sesame oil
    • Rice vinegar
    • Oyster sauce
    • Cornstarch
    • Pepper

    Set aside.


    Step 3: Cook the Broccoli

    Bring water to a boil.

    Blanch the broccoli for two minutes.

    Drain immediately and rinse with cold water.

    This keeps the broccoli bright green and perfectly crisp-tender.


    Step 4: Sear the Beef

    Heat a large skillet or wok over high heat.

    Add oil.

    Cook the beef in batches for 1–2 minutes per side.

    Avoid overcrowding the pan.

    A good sear develops rich flavor while keeping the beef juicy.


    Step 5: Cook the Aromatics

    Reduce the heat slightly.

    Add garlic and ginger.

    Cook for about 30 seconds until fragrant.


    Step 6: Finish the Dish

    Return the beef to the skillet.

    Add the broccoli.

    Pour the prepared sauce over everything.

    Stir continuously for 2–3 minutes until the sauce thickens and coats every piece.


    Step 7: Garnish and Serve

    Top with:

    • Sesame seeds
    • Green onions
    • Red pepper flakes

    Serve immediately.


    What Makes the Sauce So Good?

    The sauce is what transforms simple ingredients into an unforgettable meal.

    Each ingredient plays an important role:

    Soy Sauce provides salty umami depth.

    Brown Sugar balances the savory flavors.

    Garlic creates bold aroma.

    Fresh Ginger adds brightness and warmth.

    Sesame Oil delivers a rich, nutty finish.

    Rice Vinegar brings a slight tang that keeps the sauce from feeling heavy.

    Oyster Sauce enhances the savory richness.

    Together, these ingredients create a glossy, flavorful coating that clings perfectly to the beef and broccoli.


    Tips for Success

    Use High Heat

    Stir-frying works best with very high heat. This quickly browns the meat while preserving the vegetables’ texture.

    Have Everything Ready

    Since stir-frying happens quickly, prepare all ingredients before turning on the stove.

    Don’t Skip the Cornstarch

    Cornstarch not only thickens the sauce but also helps create incredibly tender beef.

    Dry the Broccoli

    After blanching, remove excess moisture so the sauce doesn’t become watery.

    Taste Before Serving

    Everyone’s preference is different. Add extra soy sauce, sesame oil, or brown sugar if needed.


    Delicious Variations

    Spicy Beef and Broccoli

    Add:

    • Chili oil
    • Sriracha
    • Sambal oelek
    • Red pepper flakes

    Garlic Lover’s Version

    Double the garlic for an extra bold flavor.


    Mushroom Beef Stir-Fry

    Add sliced:

    • Cremini mushrooms
    • Shiitake mushrooms
    • Button mushrooms

    Sweet and Savory

    Mix in:

    • Honey
    • Hoisin sauce
    • Orange zest

    Extra Vegetable Stir-Fry

    Increase the nutrition by adding:

    • Carrots
    • Bell peppers
    • Snow peas
    • Baby corn
    • Snap peas
    • Bok choy
    • Green beans

    Healthy Benefits

    Beef and Broccoli Stir-Fry isn’t just delicious—it also provides a variety of nutrients.

    Lean Beef Provides

    • Protein
    • Iron
    • Zinc
    • Vitamin B12
    • Selenium

    These nutrients support muscle growth, energy production, and immune health.

    Broccoli Provides

    • Vitamin C
    • Vitamin K
    • Fiber
    • Folate
    • Potassium
    • Antioxidants

    Broccoli is widely recognized as one of the most nutrient-dense vegetables you can eat.

    Garlic and Ginger

    Both ingredients contain compounds known for their antioxidant and anti-inflammatory properties and contribute to the dish’s signature flavor.


    What to Serve with Beef and Broccoli

    This stir-fry pairs wonderfully with:

    • Steamed jasmine rice
    • Brown rice
    • Garlic fried rice
    • Vegetable fried rice
    • Lo mein noodles
    • Rice noodles
    • Udon noodles
    • Cauliflower rice
    • Quinoa

    For appetizers, consider:

    • Egg rolls
    • Spring rolls
    • Crab rangoons
    • Potstickers
    • Steamed dumplings
    • Edamame
    • Asian cucumber salad
    • Miso soup

    Storage Instructions

    Allow leftovers to cool completely.

    Store in an airtight container in the refrigerator for up to 4 days.

    The flavors often deepen overnight, making leftovers even more delicious.


    Freezing Instructions

    Freeze cooled portions in airtight freezer-safe containers for up to 3 months.

    Thaw overnight in the refrigerator before reheating.


    Frequently Asked Questions

    Can I use frozen broccoli?

    Yes. Thaw and drain it well before cooking to prevent excess moisture from thinning the sauce.

    Can I make it gluten-free?

    Absolutely. Substitute regular soy sauce with gluten-free tamari or coconut aminos, and use a gluten-free oyster sauce if desired.

    Can I use chicken instead of beef?

    Yes. Thinly sliced chicken breast or thighs work beautifully with the same sauce and cooking method.

    Can I prepare this ahead of time?

    Yes. Slice the beef, prepare the vegetables, and mix the sauce up to a day in advance. When you’re ready to cook, everything comes together in minutes.

    Why is restaurant stir-fry so tender?

    Many restaurants use a technique called “velveting,” where the meat is briefly marinated with cornstarch, soy sauce, and sometimes egg white before cooking. This helps create an exceptionally tender texture.


    Final Thoughts

    Beef and Broccoli Stir-Fry is a timeless recipe that proves simple ingredients can create extraordinary meals. Tender beef, vibrant broccoli, and a rich garlic-ginger sauce come together in perfect harmony, delivering restaurant-quality flavor right from your own kitchen.

    Whether you’re looking for a quick weeknight dinner, a healthier alternative to takeout, or a satisfying meal that everyone at the table will enjoy, this recipe checks every box. It’s easy to customize, ideal for meal prepping, and versatile enough to serve with rice, noodles, or low-carb alternatives.

    Once you’ve mastered this classic stir-fry, you’ll find yourself coming back to it again and again. With its bold flavors, wholesome ingredients, and fast cooking time, Beef and Broccoli Stir-Fry is more than just a recipe—it’s a dependable favorite that deserves a place in every home cook’s collection.

    Read More Recipes

  • Breakfast of the Day: Banana Oat Breakfast Muffins

    Breakfast of the Day: Banana Oat Breakfast Muffins

    A Healthy, Delicious Start to Every Morning

    There’s something comforting about the aroma of freshly baked muffins filling your kitchen first thing in the morning. When those muffins are made with wholesome ingredients like ripe bananas and hearty oats, they’re not only delicious—they’re also a nutritious way to fuel your day. Banana Oat Breakfast Muffins combine the natural sweetness of bananas with the satisfying texture of oats to create a breakfast that’s easy to make, simple to customize, and perfect for busy lifestyles.

    Whether you’re rushing out the door, packing lunches for the family, or simply looking for a healthier alternative to sugary breakfast pastries, these muffins deliver the perfect balance of flavor and nutrition. They’re moist, tender, naturally sweet, and packed with ingredients that provide lasting energy throughout the morning.

    One of the best things about Banana Oat Breakfast Muffins is their versatility. You can enjoy them warm with a cup of coffee, pair them with fresh fruit and yogurt for a complete breakfast, or grab one as an afternoon snack. They also freeze beautifully, making them an ideal meal-prep recipe for anyone with a busy schedule.


    Why Banana Oat Breakfast Muffins Are So Popular

    Breakfast muffins have become a favorite among home cooks because they combine convenience with homemade goodness. Unlike many store-bought muffins that are high in refined sugars, unhealthy fats, and artificial ingredients, homemade banana oat muffins allow you to control exactly what goes into each bite.

    These muffins offer:

    • Naturally sweet flavor from ripe bananas
    • Fiber-rich whole grain oats
    • Protein from eggs and Greek yogurt
    • Long-lasting energy
    • Easy portability
    • Family-friendly appeal
    • Endless customization options

    Because they’re filling without feeling heavy, they’re suitable for children, adults, athletes, students, and anyone trying to eat healthier.


    The Health Benefits of Bananas

    Bananas are often called one of nature’s perfect foods, and for good reason. They’re packed with nutrients that support overall health while adding natural sweetness to baked goods.

    Bananas provide:

    • Potassium for heart health
    • Vitamin B6 for brain function
    • Vitamin C to support immunity
    • Fiber for digestion
    • Natural carbohydrates for energy
    • Antioxidants that help protect cells

    Using very ripe bananas also means you can reduce the amount of added sugar needed in the recipe.


    Why Oats Make a Better Breakfast

    Old-fashioned rolled oats are one of the healthiest grains you can eat.

    They contain:

    • Soluble fiber
    • Complex carbohydrates
    • Iron
    • Magnesium
    • Zinc
    • Plant-based protein

    The soluble fiber found in oats helps you stay full longer while supporting healthy cholesterol levels and steady blood sugar.

    Unlike refined breakfast foods that may leave you hungry an hour later, oats digest slowly, providing sustained energy throughout your morning.


    Ingredients

    Dry Ingredients

    • 1½ cups old-fashioned rolled oats
    • 1 cup whole wheat flour
    • 2 teaspoons baking powder
    • ½ teaspoon baking soda
    • ½ teaspoon ground cinnamon
    • ¼ teaspoon salt

    Wet Ingredients

    • 2 large ripe bananas, mashed
    • 2 eggs
    • ¼ cup honey or pure maple syrup
    • ¼ cup plain Greek yogurt
    • 2 tablespoons melted coconut oil or butter
    • 1 teaspoon vanilla extract

    Optional Add-Ins

    Customize each batch with:

    • Chopped walnuts
    • Pecans
    • Almonds
    • Blueberries
    • Strawberries
    • Raisins
    • Cranberries
    • Chia seeds
    • Ground flaxseed
    • Hemp hearts
    • Pumpkin seeds
    • Sunflower seeds
    • Unsweetened coconut
    • Dark chocolate chips

    Step-by-Step Instructions

    Step 1: Prepare the Oven

    Preheat your oven to 350°F (175°C).

    Line a muffin tin with paper liners or lightly grease each cup.


    Step 2: Mix the Dry Ingredients

    In a large bowl combine:

    • Oats
    • Flour
    • Baking powder
    • Baking soda
    • Cinnamon
    • Salt

    Whisk until evenly mixed.


    Step 3: Prepare the Wet Ingredients

    In another bowl mash the bananas until smooth.

    Whisk together:

    • Mashed bananas
    • Eggs
    • Greek yogurt
    • Honey
    • Coconut oil
    • Vanilla

    Mix until fully combined.


    Step 4: Combine Everything

    Slowly pour the wet ingredients into the dry ingredients.

    Mix gently until no dry flour remains.

    Avoid overmixing, as this can make the muffins dense instead of fluffy.

    Fold in any optional ingredients.


    Step 5: Fill the Muffin Cups

    Divide the batter evenly among 12 muffin cups.

    Each cup should be approximately three-quarters full.


    Step 6: Bake

    Bake for 18–22 minutes.

    The muffins are done when:

    • The tops are lightly golden.
    • A toothpick inserted into the center comes out clean.
    • The muffins spring back when lightly touched.

    Allow them to cool for several minutes before removing from the pan.


    Delicious Serving Ideas

    Banana Oat Breakfast Muffins taste wonderful with:

    • Greek yogurt and berries
    • Peanut butter
    • Almond butter
    • Honey drizzle
    • Cottage cheese
    • Fresh strawberries
    • Apple slices
    • Fresh orange segments
    • Smoothies
    • Coffee
    • Tea
    • Milk

    For an even heartier breakfast, serve them alongside scrambled eggs or turkey sausage.


    Make Them Your Own

    One reason this recipe is so popular is that every batch can be different.

    Blueberry Banana Muffins

    Add one cup of fresh blueberries.


    Chocolate Banana Muffins

    Mix in dark chocolate chips for a healthier dessert-style breakfast.


    Apple Cinnamon Muffins

    Replace one banana with grated apple and increase the cinnamon.


    Tropical Muffins

    Add shredded coconut and diced pineapple.


    Nut Lover’s Version

    Fold in walnuts, pecans, and almonds for extra crunch.


    Protein Power Muffins

    Mix in:

    • Vanilla protein powder
    • Chia seeds
    • Hemp hearts
    • Flaxseed

    These additions make the muffins especially satisfying after a workout.


    Meal Prep Made Easy

    These muffins are excellent for weekly meal planning.

    Room Temperature

    Store in an airtight container for up to 4 days.

    Refrigerator

    Keeps fresh for up to one week.

    Freezer

    Wrap individually and freeze for up to 3 months.

    Simply microwave for 20–30 seconds before eating.


    Tips for Perfect Muffins Every Time

    Use Extra-Ripe Bananas

    Brown-speckled bananas produce the sweetest flavor.


    Don’t Overmix

    Overmixing develops gluten, making muffins tougher.


    Let the Batter Rest

    Allow the batter to sit for five minutes before baking so the oats soften.


    Fill Evenly

    Using an ice cream scoop helps every muffin bake evenly.


    Check Early

    Every oven is different, so begin checking around 18 minutes.


    Nutritional Highlights

    These muffins contain nutrients that support overall wellness.

    Bananas

    • Potassium
    • Fiber
    • Vitamin B6
    • Natural sugars

    Oats

    • Whole grains
    • Fiber
    • Protein
    • Magnesium

    Greek Yogurt

    • Protein
    • Calcium
    • Probiotics

    Eggs

    • Complete protein
    • Healthy fats
    • Choline
    • Vitamin D

    Together, these ingredients create a balanced breakfast that helps you feel energized and satisfied.


    Why They’re Great for Families

    Parents love these muffins because they’re easy to make in advance and simple to pack in lunchboxes. Kids enjoy their naturally sweet flavor, while adults appreciate the wholesome ingredients and satisfying texture.

    They’re also a fun recipe to make together. Children can help mash the bananas, stir the batter, or choose their favorite mix-ins, making breakfast preparation a family activity everyone can enjoy.


    Frequently Asked Questions

    Can I make them gluten-free?

    Yes. Use certified gluten-free rolled oats and a gluten-free all-purpose flour blend.

    Can I make them dairy-free?

    Absolutely. Replace the Greek yogurt with a dairy-free yogurt alternative and use coconut oil instead of butter.

    Can I reduce the sweetener?

    Yes. Very ripe bananas often provide enough sweetness that you can cut back on the honey or maple syrup.

    Can I freeze them?

    Yes. These muffins freeze exceptionally well. Store individually wrapped muffins in a freezer-safe bag and thaw overnight or warm them in the microwave.

    Can I use quick oats?

    Yes, but old-fashioned rolled oats provide a heartier texture and hold up better during baking.


    Final Thoughts

    Banana Oat Breakfast Muffins are proof that healthy eating doesn’t have to be complicated or boring. They’re easy to prepare, packed with wholesome ingredients, and versatile enough to fit almost any lifestyle. Whether you’re looking for a nutritious breakfast, a convenient meal-prep option, or a satisfying snack, these muffins check every box.

    With their naturally sweet banana flavor, hearty oats, and endless customization possibilities, they’re a recipe you’ll return to again and again. Bake a batch at the beginning of the week, freeze extras for later, and enjoy the comfort of a homemade breakfast that’s as nourishing as it is delicious.

    Read More Recipes

  • Dessert of the Day: Irish Apple Cake

    Dessert of the Day: Irish Apple Cake

    There are desserts that impress with towering layers of frosting or elaborate decorations, and then there are desserts that win hearts through warmth, simplicity, and tradition. Irish Apple Cake belongs to the second category. This humble yet delicious dessert has been enjoyed in Ireland for centuries, bringing families together around the kitchen table with its comforting aroma of baked apples, cinnamon, and buttery crumb.

    Unlike an American-style apple pie or a heavily frosted cake, Irish Apple Cake is wonderfully rustic. Every bite showcases tender chunks of fresh apples nestled inside a lightly sweet cake with a crisp, buttery streusel topping. It’s the kind of dessert that feels like home, whether you’re enjoying it after Sunday dinner, sharing it with friends over coffee, or serving it warm with homemade vanilla custard.

    Today’s Dessert of the Day celebrates one of Ireland’s most beloved homemade treats—a dessert that proves simple ingredients can create unforgettable flavors.

    The History of Irish Apple Cake

    Irish Apple Cake has deep roots in rural Ireland, where home cooks relied on ingredients that were readily available. Apples grew abundantly in many regions, while butter, flour, eggs, milk, and sugar were common staples in farmhouse kitchens.

    Because imported ingredients were once expensive and difficult to obtain, Irish baking focused on creating hearty, satisfying desserts using local produce. Apples naturally became one of the country’s favorite fruits for baking, leading to recipes that have been passed down through generations.

    Every Irish family has its own version of apple cake. Some recipes resemble a dense tea cake, while others are lighter and more cake-like. Some include raisins or currants, while others remain beautifully simple with nothing more than apples, cinnamon, and butter.

    One tradition has remained remarkably consistent: serving Irish Apple Cake with warm vanilla custard. In Ireland, the custard isn’t just an optional topping—it’s often considered an essential part of the dessert.

    What Makes Irish Apple Cake Different?

    Many people expect Irish Apple Cake to taste like apple pie in cake form, but it’s quite different.

    Instead of being overly sweet, Irish Apple Cake allows the apples to be the star of the dessert. The cake itself is only lightly sweetened, letting the natural sweetness of the fruit shine through.

    The texture is also unique. Rather than being soft and fluffy like a birthday cake, Irish Apple Cake has a slightly firmer, buttery crumb similar to a rich scone or coffee cake. This makes it incredibly satisfying while allowing the juicy apples to remain the centerpiece.

    The crunchy streusel topping provides the perfect contrast to the moist interior, creating a combination of textures that keeps every bite interesting.

    Why You’ll Love Irish Apple Cake

    There are countless reasons this classic dessert continues to be enjoyed around the world.

    • Packed with fresh apples in every slice
    • Warm cinnamon flavor without being overpowering
    • Crispy buttery streusel topping
    • Moist interior filled with tender fruit
    • Uses simple pantry ingredients
    • Perfect for beginner bakers
    • Delicious warm or cold
    • Wonderful for breakfast, dessert, or afternoon tea
    • Easy to customize with nuts, raisins, or caramel
    • Even better the next day

    It is one of those desserts that tastes homemade because it truly is.

    Choosing the Best Apples

    The quality of your apples greatly influences the final cake.

    Firm apples that hold their shape while baking work best because they remain tender without becoming mushy.

    Excellent choices include:

    • Granny Smith
    • Honeycrisp
    • Braeburn
    • Pink Lady
    • Jonagold
    • Fuji
    • Gala

    Many bakers enjoy combining tart and sweet apples to create more complex flavor.

    The tart apples balance the sweetness of the cake, while sweeter apples become soft and almost caramel-like during baking.

    Ingredients You’ll Need

    For the Cake

    • All-purpose flour
    • Baking powder
    • Salt
    • Unsalted butter
    • Granulated sugar
    • Eggs
    • Whole milk
    • Vanilla extract
    • Ground cinnamon
    • Fresh apples

    For the Streusel

    • Flour
    • Brown sugar
    • Cold butter
    • Cinnamon

    Optional Toppings

    • Warm vanilla custard
    • Fresh whipped cream
    • Vanilla ice cream
    • Salted caramel sauce
    • Powdered sugar
    • Chopped toasted pecans
    • Toasted walnuts

    Step-by-Step Instructions

    Prepare the Apples

    Wash, peel, and core the apples before cutting them into evenly sized chunks.

    Uniform pieces help the apples bake evenly throughout the cake.

    Mix the Batter

    Cream together softened butter and sugar until pale and fluffy.

    Add the eggs individually, mixing well after each addition.

    Combine the dry ingredients separately before alternating them with the milk while mixing.

    Finally, gently fold in the apples without overmixing.

    Make the Streusel

    Combine flour, cinnamon, brown sugar, and butter until coarse crumbs form.

    Cold butter creates the crispiest topping.

    Assemble

    Spread the batter evenly into a prepared baking pan.

    Sprinkle the streusel across the entire surface.

    Bake

    Bake at 350°F (175°C) for approximately 55 minutes.

    The cake is ready when the top is golden brown and a toothpick inserted near the center comes out clean.

    Cool

    Allow the cake to cool for about 20 minutes before slicing.

    This gives the apples time to settle and helps the cake hold together beautifully.

    Baking Tips for Perfect Results

    A few simple techniques can make your Irish Apple Cake even better.

    Use room-temperature ingredients for smoother mixing.

    Avoid overmixing the batter, as doing so develops gluten and can make the cake tougher.

    Dice the apples into similar-sized pieces for even baking.

    Leave some larger chunks if you enjoy bursts of juicy apple in every bite.

    Don’t skip the streusel topping—it provides the signature crunch that makes this dessert so memorable.

    If the top browns too quickly, loosely cover the cake with aluminum foil during the final portion of baking.

    Delicious Variations

    Irish Apple Raisin Cake

    Fold in raisins soaked in warm tea or apple juice.

    Maple Apple Cake

    Replace part of the sugar with real maple syrup.

    Walnut Apple Cake

    Add chopped walnuts for a rich, nutty flavor.

    Pecan Streusel Apple Cake

    Mix chopped pecans into the crumb topping for added crunch.

    Caramel Apple Cake

    Drizzle warm salted caramel over each slice before serving.

    Cranberry Apple Cake

    Fresh cranberries add a tart burst of color and flavor during the holidays.

    Spiced Apple Cake

    Add nutmeg, cloves, ginger, and allspice for a richer autumn flavor.

    Serving Suggestions

    Irish Apple Cake is incredibly versatile.

    Serve it warm with:

    • Fresh whipped cream
    • Vanilla bean ice cream
    • Irish custard sauce
    • Hot caramel drizzle
    • Maple whipped cream
    • Cinnamon whipped cream

    Pair it with:

    • Hot coffee
    • Black tea
    • Earl Grey tea
    • Irish Breakfast Tea
    • Hot apple cider
    • Chai latte

    The cake is equally enjoyable chilled the next morning with coffee.

    Perfect Occasions

    Irish Apple Cake fits almost every gathering.

    Serve it during:

    • Thanksgiving
    • Christmas
    • St. Patrick’s Day
    • Autumn dinner parties
    • Family reunions
    • Potluck dinners
    • Birthday brunches
    • Weekend baking
    • Holiday breakfasts
    • Afternoon tea

    Its rustic appearance makes it feel welcoming instead of overly formal.

    Nutritional Benefits

    Although Irish Apple Cake is certainly a dessert, fresh apples contribute nutritional value.

    Apples provide:

    • Dietary fiber
    • Vitamin C
    • Potassium
    • Natural antioxidants
    • Plant compounds that support heart health

    Using fresh fruit means each slice contains more than just sweetness—it also includes beneficial nutrients.

    Frequently Asked Questions

    Can I leave the apple peels on?

    Yes. Leaving the peels on adds texture and additional fiber, although peeling creates a softer cake.

    Can I freeze Irish Apple Cake?

    Absolutely.

    Wrap individual slices tightly before freezing for up to three months.

    What is the best way to reheat it?

    Warm slices in the microwave for about 20 seconds or heat them in a 300°F oven until warmed through.

    Can I make it ahead of time?

    Yes.

    Many people believe Irish Apple Cake tastes even better the following day because the flavors continue developing overnight.

    What custard should I serve with it?

    A simple vanilla custard is the traditional choice and perfectly complements the warm cinnamon and apples.

    Storage Tips

    Store covered at room temperature for two days.

    Refrigerate for up to five days.

    Freeze tightly wrapped slices for up to three months.

    For the freshest taste, reheat slightly before serving.

    Fun Facts About Irish Apple Cake

    • It’s considered one of Ireland’s most beloved homemade desserts.
    • Many Irish grandmothers have their own family recipe.
    • Traditionally served with warm custard rather than frosting.
    • Often baked in round springform pans.
    • Some recipes date back well over 100 years.
    • It’s commonly enjoyed with afternoon tea throughout Ireland.
    • The dessert is especially popular during apple harvest season.

    Final Thoughts

    Irish Apple Cake is more than just a dessert—it’s a celebration of family traditions, comforting flavors, and simple baking done well. Every slice offers tender apples, warm cinnamon, buttery cake, and a crisp streusel topping that has delighted generations of home bakers.

    Whether you’re introducing your family to a classic Irish recipe, baking for a holiday gathering, or simply craving something cozy on a cool afternoon, this timeless dessert is sure to become a favorite. Pair it with a steaming cup of tea or coffee, add a generous spoonful of vanilla custard, and enjoy a taste of Ireland from the comfort of your own kitchen.

    Sometimes the most memorable desserts aren’t the fanciest—they’re the ones made with fresh ingredients, shared with loved ones, and enjoyed one warm slice at a time.

    Read More Recipes

  • Healthy Recipe of the Day: Loaded Chopped Taco Salad Bowl

    Healthy Recipe of the Day: Loaded Chopped Taco Salad Bowl

    When you’re craving the bold, zesty flavors of taco night but want something lighter and more nutritious, a Loaded Chopped Taco Salad Bowl is the perfect choice. This colorful recipe combines crisp lettuce, juicy tomatoes, crunchy peppers, creamy avocado, seasoned lean protein, hearty black beans, sweet corn, and a tangy Greek yogurt dressing into a satisfying meal that’s packed with flavor and nutrition.

    Unlike traditional tacos that often rely on fried shells, heavy cheeses, and high-calorie toppings, this healthy version focuses on fresh, whole ingredients that provide lasting energy without sacrificing taste. Every bite offers a balance of textures—from crunchy vegetables and tender taco meat to creamy avocado and protein-rich beans—making it one of those meals you’ll look forward to eating again and again.

    Whether you’re preparing lunch for the week, feeding your family on a busy weeknight, or trying to eat healthier without giving up your favorite comfort foods, this Loaded Chopped Taco Salad Bowl delivers everything you need in one delicious bowl.


    Why You’ll Love This Recipe

    One of the best things about this recipe is how incredibly versatile it is. It’s easy enough for beginner cooks yet flavorful enough to impress guests. Because everything is chopped into small pieces, each forkful includes a little bit of every ingredient, creating the perfect balance of flavor and texture.

    You’ll love this recipe because it is:

    • Ready in about 30 minutes
    • High in protein
    • Rich in fiber
    • Naturally gluten-free (when using gluten-free taco seasoning)
    • Easy to customize
    • Perfect for meal prep
    • Kid-friendly
    • Full of fresh vegetables
    • Budget-friendly
    • Great for lunch or dinner

    Why Taco Salads Can Be Healthy

    Many restaurant taco salads are loaded with oversized fried tortilla bowls, excess cheese, sour cream, and heavy dressings that can easily push a meal over 1,200 calories.

    This healthier homemade version keeps all the bold Southwestern flavors while emphasizing nutrient-dense ingredients.

    Instead of relying on processed toppings, this recipe uses:

    • Lean protein
    • Fresh vegetables
    • Healthy fats
    • Fiber-rich beans
    • Homemade dressing
    • Fresh herbs
    • Lime juice for natural brightness

    The result is a meal that’s filling without leaving you feeling overly full or sluggish.


    Health Benefits of the Main Ingredients

    Lean Ground Turkey or Chicken

    Lean poultry is one of the best protein choices for healthy eating. Protein helps repair muscle tissue, supports metabolism, and keeps hunger under control.

    Benefits include:

    • High-quality complete protein
    • Lower saturated fat than regular ground beef
    • Rich in B vitamins
    • Excellent source of selenium
    • Helps maintain muscle mass

    Extra-lean ground beef can also be used if preferred.


    Romaine Lettuce

    Romaine is far more nutritious than many people realize.

    It’s an excellent source of:

    • Vitamin A
    • Vitamin K
    • Folate
    • Vitamin C
    • Potassium
    • Antioxidants

    It also adds satisfying crunch while being very low in calories.


    Tomatoes

    Tomatoes provide vibrant color and natural sweetness while offering important nutrients including:

    • Vitamin C
    • Potassium
    • Lycopene
    • Antioxidants

    Lycopene has been studied for its potential role in supporting heart health and protecting cells from oxidative stress.


    Bell Peppers

    Bell peppers are among the richest natural sources of Vitamin C.

    They’re also loaded with:

    • Vitamin A
    • Fiber
    • Antioxidants
    • Potassium

    Using multiple colors creates an even wider variety of beneficial plant compounds.


    Black Beans

    Beans are nutritional powerhouses.

    They provide:

    • Plant protein
    • Dietary fiber
    • Iron
    • Magnesium
    • Folate
    • Complex carbohydrates

    Fiber supports digestive health while helping you stay satisfied longer after meals.


    Corn

    Corn often gets overlooked, but it contributes valuable nutrients such as:

    • Fiber
    • B vitamins
    • Magnesium
    • Natural antioxidants

    Its slight sweetness perfectly balances the spicy taco seasoning.


    Avocados

    Avocados supply heart-healthy monounsaturated fats that help increase satiety and support cardiovascular health.

    They’re also excellent sources of:

    • Potassium
    • Vitamin E
    • Folate
    • Fiber
    • Vitamin K

    The creamy texture ties the entire salad together naturally.


    Greek Yogurt Dressing

    Replacing sour cream with plain Greek yogurt dramatically increases protein while reducing saturated fat.

    Greek yogurt also provides:

    • Calcium
    • Probiotics
    • Protein
    • Creamy texture
    • Tangy flavor

    The result is a dressing that’s just as satisfying as traditional taco sauce but considerably lighter.


    Ingredients

    Taco Meat

    • 1 pound lean ground turkey, chicken, or 93% lean beef
    • 2 tablespoons low-sodium taco seasoning
    • 2 tablespoons water
    • 1 teaspoon olive oil (optional)

    Salad Base

    • 6 cups chopped romaine lettuce
    • 2 cups chopped iceberg lettuce
    • 1 cup cherry tomatoes, halved
    • 1 cup cucumber, diced
    • 1 red bell pepper, diced
    • ½ cup chopped red onion
    • 1 cup black beans, rinsed and drained
    • 1 cup corn kernels
    • 1 avocado, diced
    • ¼ cup chopped fresh cilantro
    • Lime wedges

    Healthy Creamy Taco Dressing

    • ½ cup plain Greek yogurt
    • 2 tablespoons fresh salsa
    • Juice of one lime
    • 1 teaspoon taco seasoning
    • 1 teaspoon garlic powder
    • ½ teaspoon onion powder
    • Salt and pepper to taste

    Step-by-Step Directions

    Step 1: Prepare the Taco Meat

    Heat a large skillet over medium heat.

    Add the lean ground meat and cook until browned, breaking it apart with a spoon as it cooks.

    Drain excess liquid if needed.

    Stir in taco seasoning and water.

    Allow the mixture to simmer for several minutes until the seasoning thickens and coats the meat.

    Set aside to cool slightly.


    Step 2: Chop the Vegetables

    Wash all produce thoroughly.

    Dice everything into small, uniform pieces.

    The smaller the ingredients, the easier it is to enjoy every flavor together.


    Step 3: Make the Dressing

    Combine all dressing ingredients in a bowl.

    Whisk until smooth.

    Taste and adjust seasoning by adding:

    • More lime for brightness
    • More salsa for spice
    • Extra garlic for bold flavor

    Refrigerate until ready to serve.


    Step 4: Build the Bowl

    In a large serving bowl combine:

    • Romaine
    • Iceberg lettuce
    • Tomatoes
    • Cucumber
    • Bell pepper
    • Onion
    • Black beans
    • Corn
    • Cilantro

    Top with:

    • Warm taco meat
    • Avocado
    • Creamy dressing
    • Fresh lime juice

    Serve immediately.


    Optional Healthy Add-Ins

    This salad is incredibly customizable.

    Try adding:

    • Grilled shrimp
    • Grilled chicken breast
    • Rotisserie chicken
    • Quinoa
    • Brown rice
    • Cauliflower rice
    • Sliced jalapeños
    • Pickled onions
    • Pico de gallo
    • Fresh mango
    • Roasted sweet potatoes
    • Pumpkin seeds
    • Sunflower seeds
    • Fresh radishes
    • Green onions

    Ways to Add More Flavor

    If you enjoy restaurant-style taco salads, consider adding:

    • Fresh cilantro
    • Fresh lime zest
    • Smoked paprika
    • Chipotle powder
    • Homemade pico de gallo
    • Fire-roasted corn
    • Roasted poblano peppers
    • Fresh avocado salsa

    Small additions can dramatically change the flavor profile.


    Meal Prep Instructions

    One reason this recipe is so popular is because it stores beautifully.

    Store Separately

    Keep:

    • Lettuce
    • Vegetables
    • Meat
    • Dressing
    • Avocado

    in separate containers.

    This prevents the salad from becoming soggy.

    Assemble fresh each day in less than five minutes.


    Storage

    Prepared taco meat will stay fresh in the refrigerator for up to four days.

    Chopped vegetables remain crisp for three to four days when stored in airtight containers.

    The dressing keeps well for about five days.

    Slice avocados just before serving for the freshest taste and appearance.


    Healthy Swaps

    Looking to make it even healthier?

    Try these ideas:

    • Replace beef with turkey.
    • Add spinach or kale.
    • Use homemade taco seasoning.
    • Skip cheese entirely.
    • Add extra vegetables.
    • Increase black beans.
    • Use cauliflower rice instead of traditional rice.
    • Add grilled zucchini.
    • Include roasted broccoli.
    • Top with fresh salsa instead of bottled dressing.

    Nutrition Highlights

    Approximate nutrition per serving:

    • Calories: 430
    • Protein: 34g
    • Carbohydrates: 28g
    • Fiber: 11g
    • Fat: 18g
    • Saturated Fat: 4g
    • Sugar: 6g

    Actual nutrition will vary depending on ingredients and toppings used.


    Perfect Occasions for This Recipe

    This recipe fits almost any occasion.

    It’s perfect for:

    • Healthy weeknight dinners
    • Summer lunches
    • Meal prep Sundays
    • Backyard gatherings
    • Taco Tuesday
    • High-protein meal plans
    • Weight-management goals
    • Family dinners
    • Potluck contributions
    • Quick work lunches

    Because everyone can customize their own bowl, it’s also a fantastic choice for serving groups with different dietary preferences.


    Serving Suggestions

    Pair your Loaded Chopped Taco Salad Bowl with:

    • Fresh fruit
    • Grilled vegetables
    • Homemade salsa
    • Baked tortilla chips
    • Mexican-style cauliflower rice
    • Cilantro-lime quinoa
    • Sparkling water with fresh lime
    • Unsweetened iced tea

    These lighter pairings keep the meal balanced while complementing the salad’s bold flavors.


    Final Thoughts

    A Loaded Chopped Taco Salad Bowl is proof that healthy eating can be exciting, colorful, and incredibly satisfying. Packed with lean protein, crisp vegetables, fiber-rich beans, creamy avocado, and a light homemade dressing, this recipe transforms classic taco flavors into a nourishing meal that fuels your body without sacrificing taste.

    Whether you’re looking to improve your eating habits, prepare healthy lunches for the week, or simply enjoy a fresh twist on taco night, this salad is an excellent addition to your recipe collection. With endless customization options and easy preparation, it’s a dish that fits nearly every lifestyle—from busy professionals and active families to anyone striving to make healthier choices one meal at a time.

    Healthy eating doesn’t have to mean giving up the foods you love. Sometimes, all it takes is using fresh ingredients, smart substitutions, and a little creativity to turn a comfort food favorite into a wholesome meal you’ll feel good about serving and sharing.

    Read More Recipes