Category: Recipes

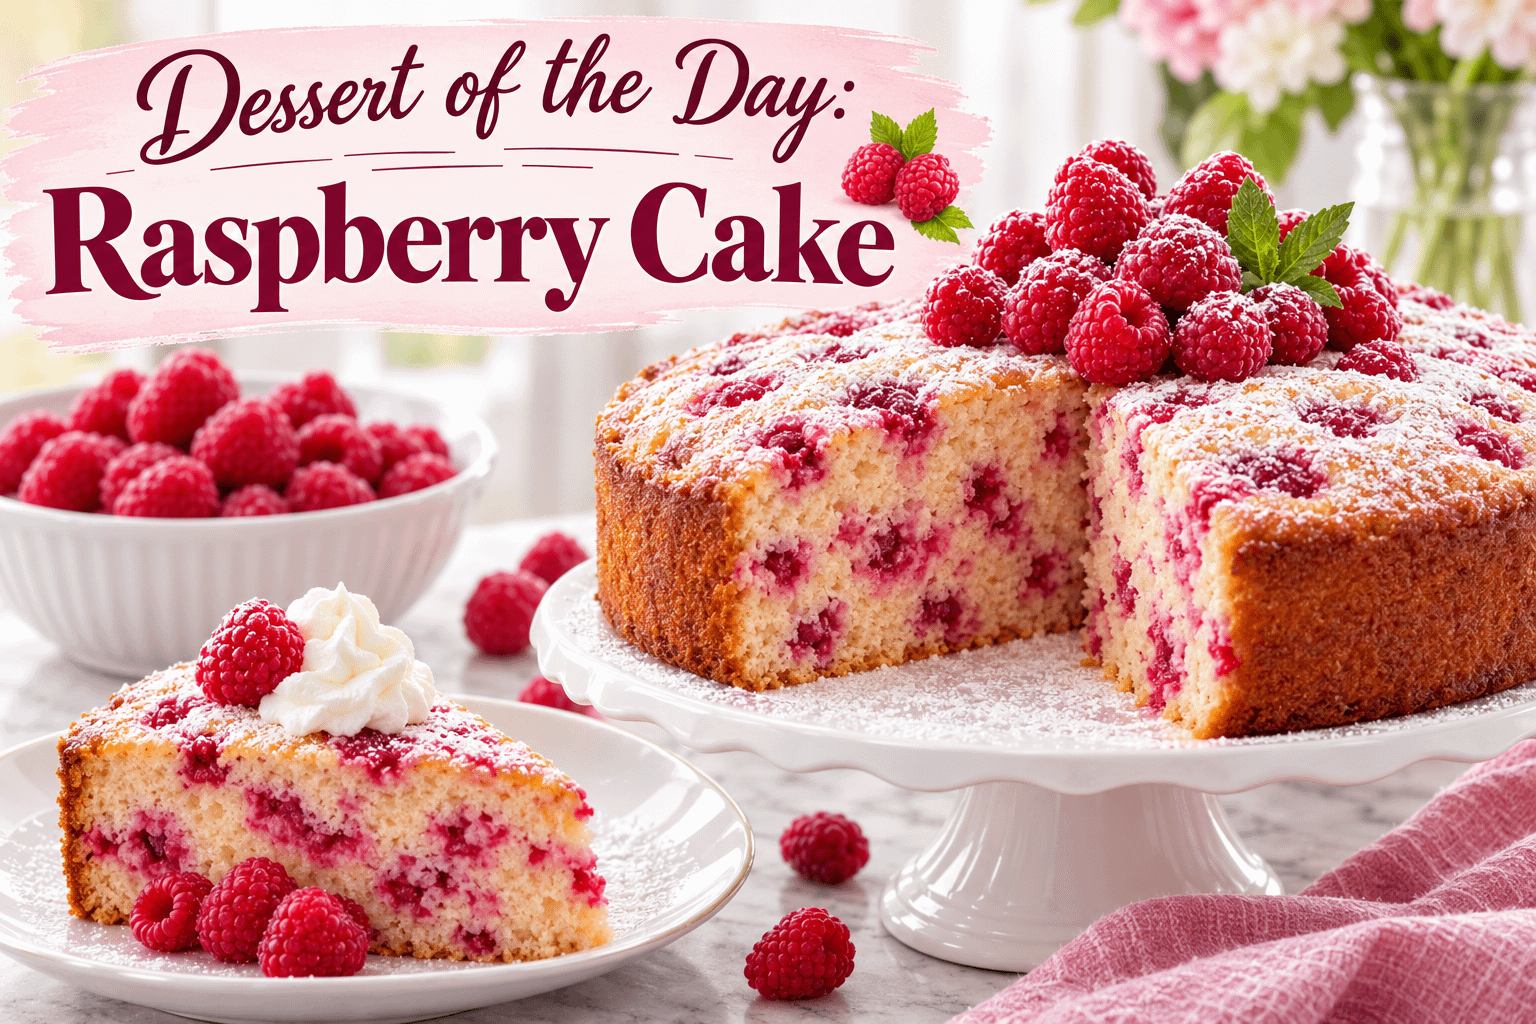
  • Dessert of the Day: Raspberry Cake

    Dessert of the Day: Raspberry Cake

    Few desserts capture the bright, fresh flavors of summer quite like a homemade raspberry cake. Moist, tender, and bursting with juicy berries, raspberry cake is a timeless treat that looks as beautiful as it tastes. Its combination of sweet cake and tart raspberries creates the perfect balance of flavors, making it an excellent dessert for birthdays, family dinners, afternoon tea, holiday celebrations, or simply satisfying a sweet craving.

    One of the best things about raspberry cake is its versatility. It can be served plain with a dusting of powdered sugar, topped with whipped cream, layered with cream cheese frosting, or paired with a scoop of vanilla ice cream. Whether baked as a rustic single-layer cake or transformed into an elegant celebration centerpiece, raspberry cake always leaves a lasting impression.

    If you’re looking for a dessert that’s simple enough for a weeknight yet impressive enough for guests, today’s Dessert of the Day: Raspberry Cake deserves a place in your baking rotation.


    Why Raspberry Cake Is So Popular

    Raspberries are one of nature’s most flavorful fruits. Their bright red color and sweet-tart taste bring freshness to every dessert they touch. Unlike desserts that rely heavily on sugar, raspberry cake lets the fruit shine while adding just enough sweetness to create a perfectly balanced bite.

    People love raspberry cake because it is:

    • Moist and buttery
    • Filled with fresh berry flavor
    • Beautiful enough for special occasions
    • Easy to customize
    • Great with coffee or tea
    • Delicious during every season

    While raspberries are at their peak during the summer months, frozen berries make it possible to enjoy this dessert year-round.


    The History of Raspberry Cakes

    Fruit cakes have been enjoyed throughout Europe for centuries. Bakers traditionally used whatever berries were in season to create simple cakes that celebrated fresh ingredients. Raspberries quickly became a favorite because of their vibrant color and natural tartness.

    As baking techniques evolved, raspberry cake became a staple in bakeries, tea rooms, and home kitchens across the world. Today, you’ll find countless variations—from classic sponge cakes to layered celebration cakes and rustic coffee cakes.

    No matter the version, the heart of raspberry cake remains the same: fresh berries baked into a soft, flavorful cake.


    Ingredients

    For the Cake

    • 2 cups all-purpose flour
    • 2 teaspoons baking powder
    • ½ teaspoon salt
    • ½ cup unsalted butter, softened
    • 1 cup granulated sugar
    • 2 large eggs
    • 1 teaspoon vanilla extract
    • ½ cup whole milk
    • 2 cups fresh raspberries

    Optional Toppings

    • Powdered sugar
    • Lemon glaze
    • Vanilla glaze
    • Fresh whipped cream
    • Cream cheese frosting
    • Fresh raspberries
    • Mint leaves

    Step-by-Step Instructions

    Step 1: Prepare Your Oven

    Preheat your oven to 350°F (175°C).

    Grease a 9-inch round cake pan and lightly dust it with flour or line the bottom with parchment paper.


    Step 2: Mix the Dry Ingredients

    In a medium bowl combine:

    • Flour
    • Baking powder
    • Salt

    Whisk until evenly blended.


    Step 3: Cream the Butter and Sugar

    Using a stand mixer or hand mixer, beat the butter until smooth.

    Gradually add the sugar and continue beating for about 3–4 minutes until the mixture becomes light and fluffy.

    This step creates air pockets that help produce a soft, tender cake.


    Step 4: Add Eggs and Vanilla

    Beat in the eggs one at a time.

    Add vanilla extract and continue mixing until fully incorporated.


    Step 5: Combine Wet and Dry Ingredients

    Alternate adding the flour mixture and milk.

    Mix just until combined.

    Avoid overmixing, as this can make the cake dense instead of fluffy.


    Step 6: Fold in the Raspberries

    Using a rubber spatula, gently fold about 1½ cups of raspberries into the batter.

    Reserve the remaining berries for the top.


    Step 7: Bake

    Pour the batter into the prepared cake pan.

    Scatter the remaining raspberries across the top.

    Bake for 40–45 minutes, or until a toothpick inserted into the center comes out clean.

    Allow the cake to cool for 15 minutes before removing it from the pan.

    Cool completely before decorating.


    Optional Raspberry Glaze

    For an extra burst of sweetness, drizzle a simple glaze over the cooled cake.

    Ingredients

    • 1 cup powdered sugar
    • 2 tablespoons raspberry juice or milk
    • ½ teaspoon vanilla

    Whisk until smooth and drizzle over the cake.


    Cream Cheese Frosting Option

    For birthdays or celebrations, try this frosting.

    Ingredients

    • 8 ounces cream cheese
    • ¼ cup butter
    • 3 cups powdered sugar
    • 1 teaspoon vanilla

    Beat until light and creamy before spreading over the cooled cake.


    Delicious Variations

    One reason raspberry cake is so popular is how easily it can be customized.

    Lemon Raspberry Cake

    Add:

    • 2 tablespoons fresh lemon juice
    • Zest from one lemon

    The citrus brightens the raspberry flavor beautifully.


    White Chocolate Raspberry Cake

    Fold one cup of white chocolate chips into the batter.

    The creamy sweetness pairs perfectly with tart raspberries.


    Almond Raspberry Cake

    Replace the vanilla with almond extract and sprinkle sliced almonds over the top before baking.


    Chocolate Raspberry Cake

    Mix cocoa powder into the batter or drizzle melted dark chocolate over the finished cake.

    Chocolate and raspberries create an irresistible combination.


    Mixed Berry Cake

    Combine raspberries with:

    • Blueberries
    • Blackberries
    • Strawberries

    The result is a colorful summer dessert bursting with flavor.


    Tips for Baking the Perfect Raspberry Cake

    Use Fresh Ingredients

    Fresh butter, eggs, and baking powder make a noticeable difference.


    Don’t Overmix

    Overmixing develops gluten, which creates a tougher cake.


    Toss Berries in Flour

    Lightly coating raspberries with a tablespoon of flour helps keep them from sinking to the bottom of the batter.


    Let the Cake Cool

    Warm cake can crumble easily.

    Cooling allows the structure to set properly.


    Use Room Temperature Ingredients

    Butter, eggs, and milk blend together much more smoothly when they’re not cold.


    Serving Suggestions

    Raspberry cake is delicious on its own, but it becomes even more special when served with:

    • Fresh whipped cream
    • Vanilla bean ice cream
    • Lemon sorbet
    • Raspberry sauce
    • Chocolate drizzle
    • Fresh berries
    • Hot coffee
    • Earl Grey tea
    • Sparkling lemonade
    • Champagne for celebrations

    Perfect Occasions for Raspberry Cake

    This versatile dessert fits almost any celebration.

    It’s perfect for:

    • Birthday parties
    • Baby showers
    • Bridal showers
    • Mother’s Day
    • Easter
    • Summer picnics
    • Fourth of July gatherings
    • Afternoon tea
    • Family reunions
    • Holiday dinners
    • Sunday desserts

    Its vibrant red berries make it especially attractive during spring and summer festivities.


    Nutritional Highlights

    While raspberry cake is certainly a treat, raspberries contribute several nutritional benefits.

    Raspberries are naturally rich in:

    • Vitamin C
    • Dietary fiber
    • Manganese
    • Antioxidants
    • Polyphenols

    These nutrients support immune health and help protect the body from oxidative stress. While the cake itself is an indulgence, the fresh fruit adds both flavor and nutritional value.


    Storage Tips

    Store covered at room temperature for up to 2 days.

    Refrigerate for up to 5 days if topped with whipped cream or cream cheese frosting.

    Freeze slices individually for up to 3 months.

    Simply thaw overnight in the refrigerator before serving.


    Frequently Asked Questions

    Can I use frozen raspberries?

    Yes. Use them straight from the freezer without thawing to prevent excess moisture from affecting the batter.

    Can I make this cake gluten-free?

    Yes. Substitute a high-quality 1:1 gluten-free baking flour.

    Can I make cupcakes instead?

    Absolutely. Fill cupcake liners about two-thirds full and bake for 18–22 minutes.

    What frosting goes best with raspberry cake?

    Cream cheese frosting, whipped cream, vanilla buttercream, lemon buttercream, and white chocolate frosting all pair wonderfully.

    Can I make it ahead of time?

    Yes. In fact, many bakers find the flavor is even better the next day after the cake has had time to rest.


    Final Thoughts

    Raspberry cake is one of those desserts that never goes out of style. Its light, buttery texture combined with the bright flavor of fresh raspberries creates a dessert that’s both elegant and comforting. Whether you’re baking for a celebration, bringing dessert to a family gathering, or simply treating yourself to something homemade, this cake is sure to impress.

    The beauty of raspberry cake lies in its simplicity. It doesn’t need elaborate decorations or complicated techniques to shine. Fresh berries, quality ingredients, and a little care in the kitchen are all it takes to create a dessert that tastes as wonderful as it looks.

    So the next time you’re looking for a crowd-pleasing dessert, let Dessert of the Day: Raspberry Cake inspire you. With every tender slice filled with juicy raspberries and buttery goodness, you’ll understand why this classic favorite continues to be loved by bakers and dessert enthusiasts around the world.

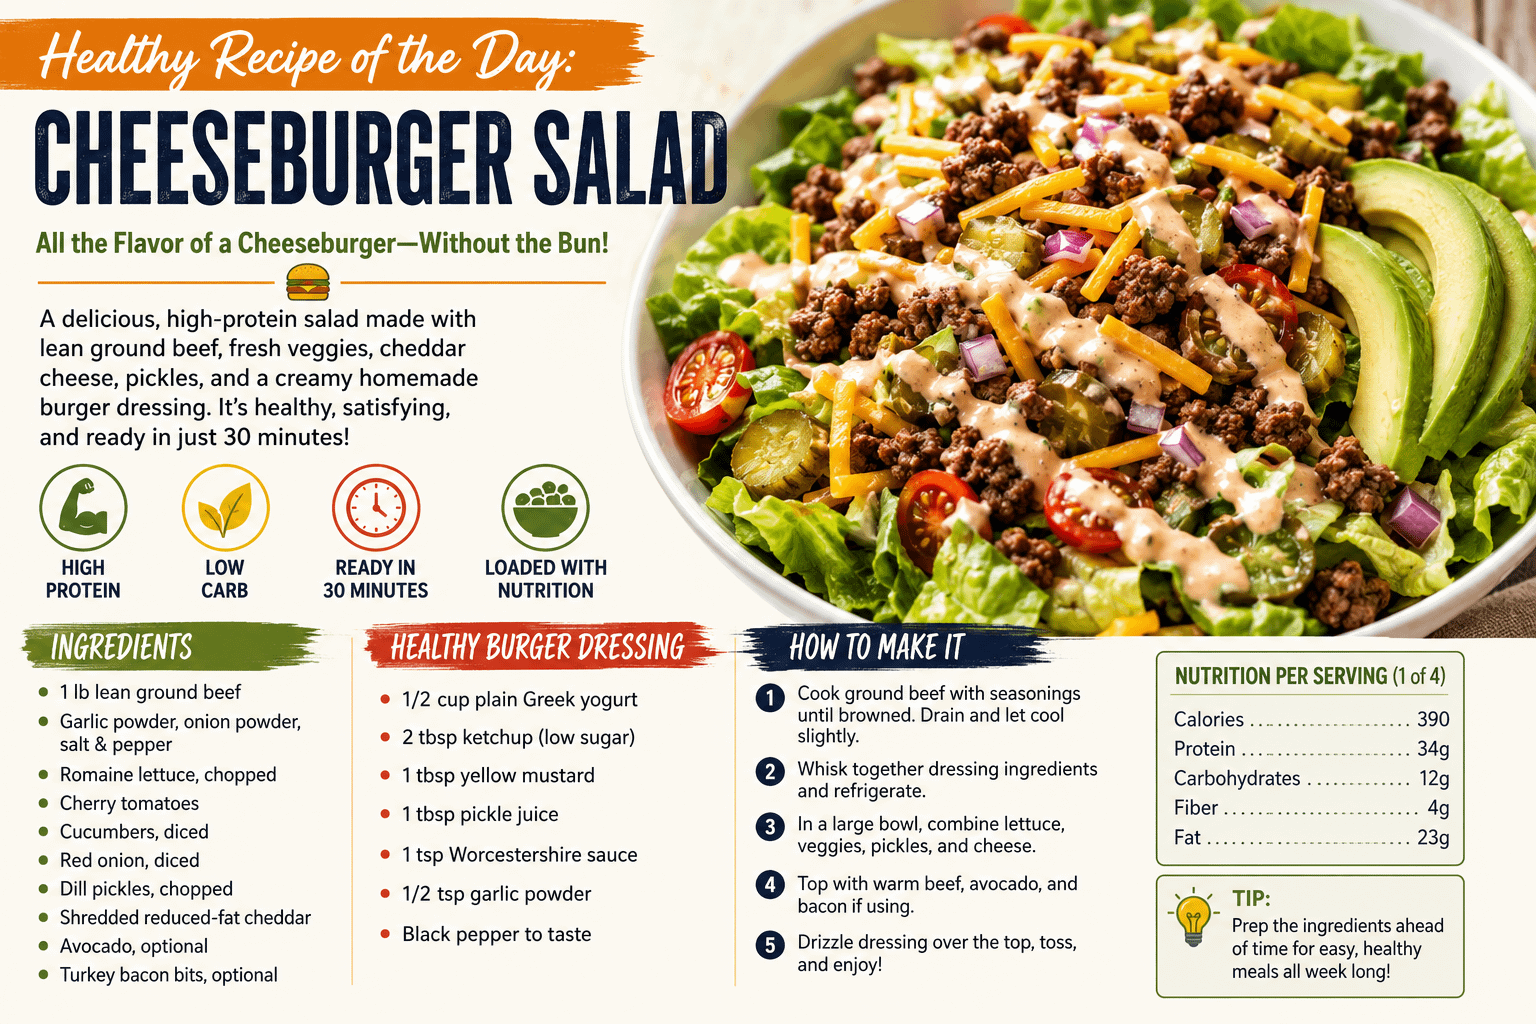
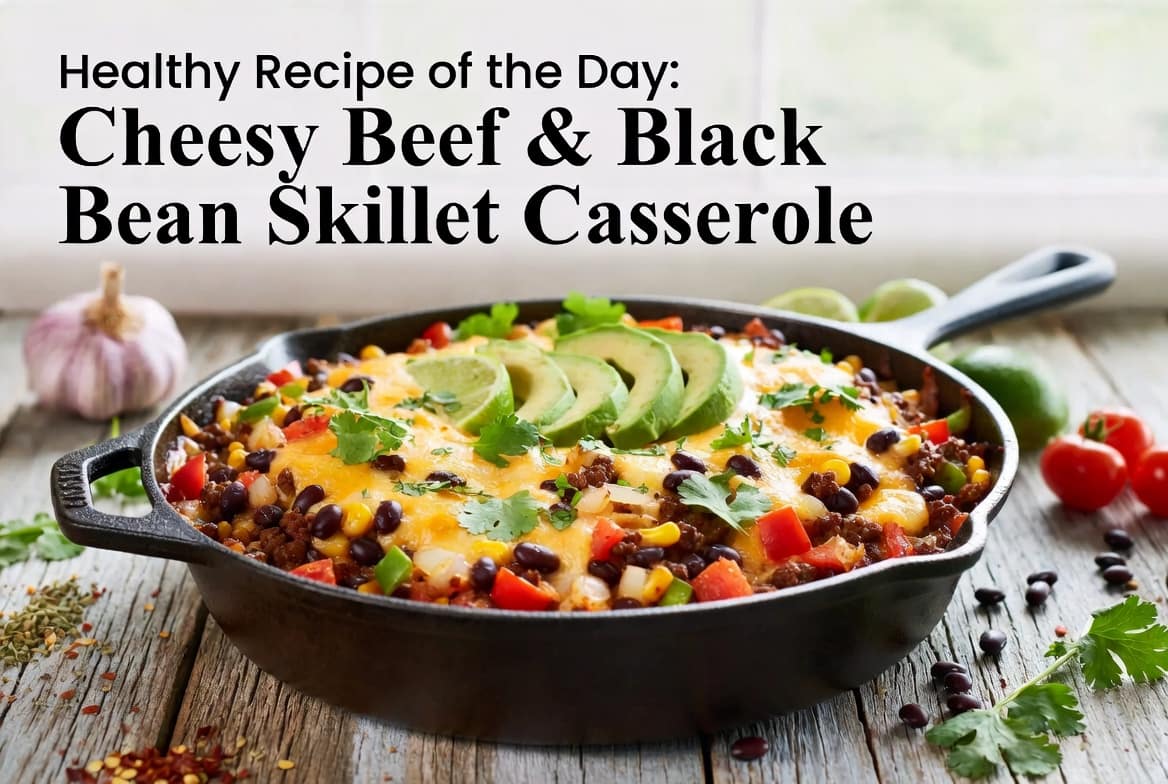
  • Healthy Recipe of the Day: Cheeseburger Salad

    Healthy Recipe of the Day: Cheeseburger Salad

    Enjoy Everything You Love About a Cheeseburger in a Fresh, Healthy Bowl

    Few foods are as comforting and satisfying as a classic cheeseburger. The juicy beef, melted cheese, crisp lettuce, tangy pickles, onions, and flavorful sauce all come together to create one of America’s favorite meals. But what if you could enjoy those same delicious flavors while eating more vegetables, fewer refined carbohydrates, and a meal that’s packed with nutrients?

    That’s exactly what Cheeseburger Salad delivers.

    This healthy twist on the traditional cheeseburger replaces the bun with a generous bed of crisp greens and colorful vegetables while keeping the savory ingredients that make cheeseburgers so irresistible. The result is a protein-rich, low-carb meal that’s filling, flavorful, and surprisingly refreshing.

    Whether you’re trying to lose weight, build muscle, reduce carbohydrates, or simply eat more nutritious meals, Cheeseburger Salad is proof that healthy eating doesn’t mean sacrificing the foods you love.


    Why Cheeseburger Salad Has Become So Popular

    Healthy comfort food has become one of the biggest trends in home cooking. People want meals that satisfy cravings while supporting healthier lifestyles, and Cheeseburger Salad checks every box.

    It offers:

    • Familiar comfort food flavors
    • Plenty of lean protein
    • Fiber-rich vegetables
    • Healthy fats
    • Fewer processed carbohydrates
    • Quick preparation
    • Endless customization options

    Unlike many restrictive diets, this recipe doesn’t feel like you’re giving something up. Instead, it feels like enjoying your favorite burger in a lighter, fresher way.


    Why You’ll Love This Recipe

    There are plenty of reasons Cheeseburger Salad deserves a regular place in your meal rotation.

    It’s Surprisingly Filling

    Protein and fiber work together to help you stay satisfied longer than many traditional fast-food meals. Instead of feeling hungry an hour later, you’ll likely stay full for much of the afternoon or evening.

    It’s Perfect for Busy Families

    Dinner can be ready in about 30 minutes, making it ideal for hectic weeknights.

    Great for Meal Prep

    Prepare the vegetables, dressing, and cooked beef separately, then assemble fresh salads throughout the week.

    Low-Carb Without Feeling Restrictive

    By eliminating the bun rather than the flavor, this recipe naturally reduces carbohydrates while keeping the meal enjoyable.

    Budget Friendly

    Most ingredients are inexpensive pantry or refrigerator staples that can feed an entire family.


    Ingredients

    For the Salad

    • 1 pound lean ground beef (93% lean)
    • 1 teaspoon garlic powder
    • 1 teaspoon onion powder
    • ½ teaspoon smoked paprika
    • Salt and pepper
    • 6 cups chopped romaine lettuce
    • 2 cups mixed greens
    • 1 cup cherry tomatoes, halved
    • 1 cup cucumber, diced
    • ½ cup red onion, diced
    • ½ cup chopped dill pickles
    • 1 cup shredded reduced-fat cheddar cheese
    • 1 avocado, sliced
    • Optional turkey bacon crumbles
    • Optional sesame seeds

    Healthy Burger Dressing

    • ½ cup plain non-fat Greek yogurt
    • 2 tablespoons ketchup
    • 1 tablespoon yellow mustard
    • 1 tablespoon dill pickle juice
    • 1 teaspoon Worcestershire sauce
    • ½ teaspoon garlic powder
    • ½ teaspoon onion powder
    • Fresh black pepper

    Step-by-Step Instructions

    Step 1: Brown the Beef

    Heat a large skillet over medium heat.

    Add the lean ground beef along with:

    • Garlic powder
    • Onion powder
    • Smoked paprika
    • Salt
    • Pepper

    Cook for about 8–10 minutes until browned.

    Drain excess fat if needed.

    Allow the beef to cool for several minutes before adding it to the salad.


    Step 2: Make the Dressing

    Combine all dressing ingredients in a bowl.

    Whisk until smooth and creamy.

    Taste and adjust:

    • More mustard for tanginess
    • More ketchup for sweetness
    • More pickle juice for classic burger flavor

    Refrigerate until serving.


    Step 3: Build the Salad

    Arrange the lettuce and mixed greens in a large serving bowl.

    Top with:

    • Tomatoes
    • Cucumbers
    • Red onion
    • Pickles
    • Cheese
    • Avocado

    Finish by adding the warm seasoned beef.

    Sprinkle with turkey bacon or sesame seeds if desired.


    Step 4: Add the Dressing

    Drizzle generously over the salad.

    Toss lightly.

    Serve immediately.


    Nutritional Benefits

    Lean Ground Beef

    Lean beef provides:

    • High-quality protein
    • Iron
    • Zinc
    • Vitamin B12
    • Niacin

    Protein supports muscle growth, recovery, and helps keep you feeling full.


    Romaine Lettuce

    Romaine is rich in:

    • Vitamin A
    • Vitamin K
    • Folate
    • Fiber

    It provides crunch while adding very few calories.


    Tomatoes

    Tomatoes contain:

    • Vitamin C
    • Potassium
    • Lycopene
    • Antioxidants

    Lycopene has been studied for its potential heart health benefits.


    Cucumbers

    Cucumbers are:

    • Hydrating
    • Low calorie
    • Rich in antioxidants
    • Refreshing

    They add texture without adding many calories.


    Red Onion

    Red onions provide:

    • Vitamin C
    • Fiber
    • Natural antioxidants
    • Flavor without extra calories

    Pickles

    Pickles bring:

    • Crunch
    • Tanginess
    • Classic burger flavor

    Using pickle juice in the dressing enhances the authentic cheeseburger taste.


    Greek Yogurt

    Replacing mayonnaise with Greek yogurt provides:

    • More protein
    • Less saturated fat
    • Calcium
    • Probiotics (in many varieties)

    The result is a creamy dressing that’s lighter without sacrificing flavor.


    Healthy Ingredient Swaps

    Want to make the recipe even healthier?

    Try these substitutions.

    Ground Turkey

    Provides lean protein with less saturated fat.

    Ground Chicken

    A lighter alternative that’s still satisfying.

    Plant-Based Crumbles

    Perfect for vegetarians while maintaining the cheeseburger experience.

    Reduced-Fat Cheese

    Cuts calories while keeping cheesy goodness.

    Spinach

    Mix spinach with romaine for extra vitamins and minerals.

    Extra Vegetables

    Add:

    • Bell peppers
    • Mushrooms
    • Radishes
    • Shredded carrots
    • Roasted zucchini

    Nutrition Information

    Approximate per serving (4 servings)

    • Calories: 390
    • Protein: 35g
    • Carbohydrates: 13g
    • Fiber: 5g
    • Fat: 22g

    Actual values depend on ingredients used.


    Tips for the Best Cheeseburger Salad

    Don’t Overcook the Beef

    Lean beef cooks quickly.

    Overcooking can make it dry.

    Use Fresh Lettuce

    Crisp greens make a huge difference.

    Avoid wilted lettuce.

    Shred Your Own Cheese

    Freshly shredded cheese melts slightly on the warm beef and tastes much better than pre-packaged varieties.

    Chill the Vegetables

    Cold vegetables paired with warm beef create a wonderful contrast.

    Dress Just Before Serving

    This keeps the lettuce crisp and fresh.


    Delicious Variations

    Bacon Cheeseburger Salad

    Add turkey bacon, crispy onions, and extra cheddar.


    BBQ Cheeseburger Salad

    Mix barbecue sauce into the dressing.

    Top with grilled onions.


    Mushroom Swiss Burger Salad

    Swap cheddar for Swiss cheese.

    Add sautéed mushrooms.


    Jalapeño Burger Salad

    Add:

    • Fresh jalapeños
    • Pepper Jack cheese
    • Spicy mustard

    Big Mac Inspired Salad

    Use shredded lettuce, pickles, onions, lean beef, reduced-fat cheddar, and a homemade “special sauce” using Greek yogurt, ketchup, mustard, relish, garlic powder, and paprika.


    Southwest Cheeseburger Salad

    Include:

    • Corn
    • Black beans
    • Cilantro
    • Avocado
    • Lime dressing

    Perfect Side Dishes

    Pair Cheeseburger Salad with:

    • Roasted sweet potato wedges
    • Fresh fruit
    • Grilled asparagus
    • Air fryer zucchini fries
    • Cauliflower tots
    • Vegetable soup
    • Fresh watermelon

    Meal Prep Guide

    Cheeseburger Salad is excellent for weekly meal planning.

    Store separately:

    Container 1

    Cooked ground beef

    Container 2

    Prepared vegetables

    Container 3

    Cheese

    Container 4

    Dressing

    Assemble fresh each day for the best texture.

    Everything keeps well for 3–4 days in the refrigerator.


    Frequently Asked Questions

    Can I eat this cold?

    Yes. Many people enjoy it cold straight from the refrigerator.

    Can I freeze it?

    Freeze only the cooked beef. Fresh vegetables should always be prepared fresh.

    Is it keto-friendly?

    Yes. Simply choose a low-sugar ketchup and avoid sweet toppings.

    Can kids enjoy this?

    Absolutely. Many children love building their own cheeseburger salad with their favorite toppings.

    Can I grill burgers instead?

    Definitely. Grill burger patties and slice them over the salad for even more flavor.


    Why Cheeseburger Salad Fits a Healthy Lifestyle

    Healthy eating isn’t about perfection—it’s about making smart choices that you can stick with over time. Cheeseburger Salad is a great example of how simple substitutions can transform a beloved comfort food into a balanced meal.

    Instead of refined bread, you enjoy crisp greens and vegetables. Instead of a heavy mayonnaise-based sauce, you get a lighter, protein-rich dressing made with Greek yogurt. Lean ground beef supplies satisfying protein, while fresh vegetables add vitamins, minerals, fiber, and color.

    This recipe is also highly adaptable. Whether you’re following a low-carb, high-protein, or balanced eating plan, you can tailor the ingredients to fit your goals without sacrificing flavor. It’s a meal that feels indulgent while supporting healthier habits, making it easier to stay consistent over the long term.


    Final Thoughts

    Cheeseburger Salad proves that healthy eating doesn’t have to mean giving up your favorite comfort foods. Every bite delivers the savory satisfaction of a cheeseburger while adding the freshness and nutrition of a hearty salad. From the seasoned beef and melted cheddar to the crunchy pickles, crisp lettuce, and creamy homemade dressing, this dish strikes the perfect balance between indulgence and nourishment.

    Whether you’re preparing a quick family dinner, planning healthy lunches for the week, or searching for a meal that satisfies cravings without weighing you down, Cheeseburger Salad is a recipe you’ll want to make again and again. It’s simple, customizable, and packed with wholesome ingredients that help you feel your best while enjoying every bite.

    Give this Healthy Recipe of the Day a try, and you may discover that your favorite cheeseburger tastes even better served over a fresh, colorful salad.

    Read More Recipes

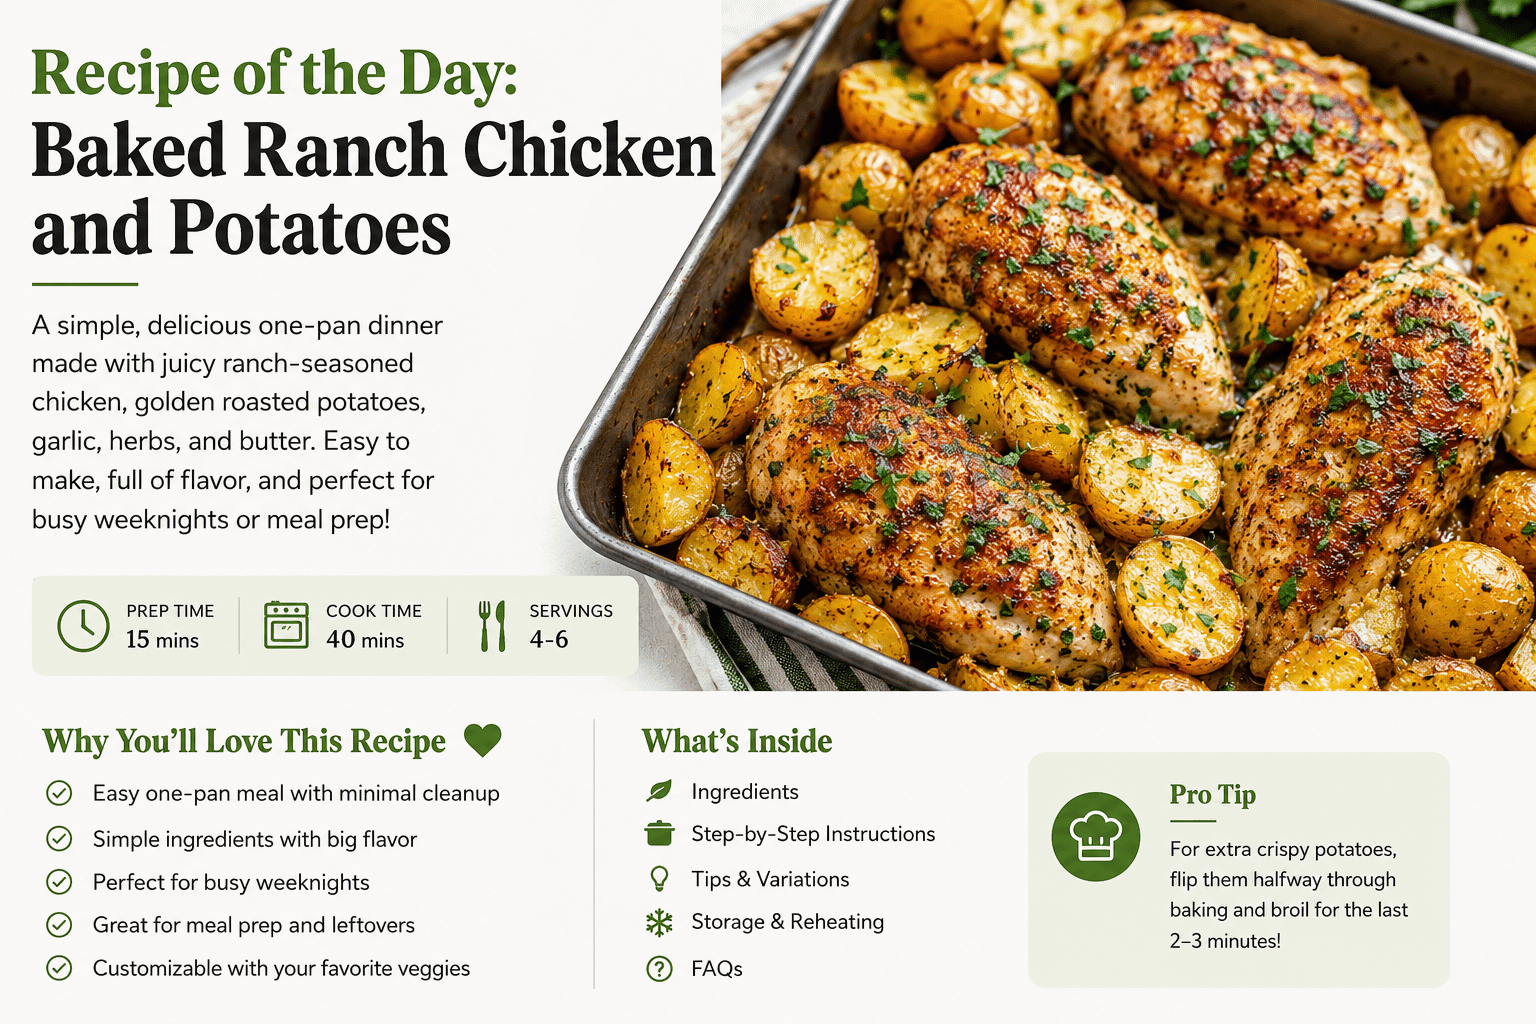
  • Recipe of the Day: Baked Ranch Chicken and Potatoes

    Recipe of the Day: Baked Ranch Chicken and Potatoes

    Some recipes become household favorites because they strike the perfect balance between simplicity and flavor. Baked Ranch Chicken and Potatoes is one of those meals. It combines tender, juicy chicken with golden roasted potatoes, all coated in a savory blend of ranch seasoning, garlic, herbs, and butter. Best of all, everything cooks together in one pan, making it a practical choice for busy weeknights while still being satisfying enough for Sunday family dinners.

    This comforting recipe is proof that you don’t need a long list of ingredients or complicated techniques to create a meal that everyone at the table will enjoy. Whether you’re cooking for a family, preparing meals for the week ahead, or simply looking for a dependable dinner that tastes as good as it smells, Baked Ranch Chicken and Potatoes is a recipe you’ll find yourself making again and again.


    Why This Recipe Is So Popular

    One-pan meals have become increasingly popular because they save both time and effort. Instead of juggling multiple pots and pans, everything cooks together, allowing the flavors to blend while reducing cleanup afterward.

    The ranch seasoning creates a flavorful crust on the chicken while also seasoning the potatoes as they roast. As the chicken cooks, its juices mingle with the butter, olive oil, herbs, and garlic, creating potatoes that are rich, savory, and packed with flavor.

    This meal is:

    • Ready in about an hour
    • Perfect for beginners
    • Family-friendly
    • Budget-conscious
    • Easy to customize
    • Great for leftovers
    • Excellent for weekly meal prep
    • Made using ingredients found in almost every grocery store

    Ingredients

    For the Chicken

    • 4 boneless, skinless chicken breasts (or chicken thighs)
    • 2 tablespoons olive oil
    • 1 packet ranch seasoning mix
    • 1 teaspoon garlic powder
    • 1 teaspoon onion powder
    • 1 teaspoon smoked paprika
    • ½ teaspoon black pepper
    • Salt to taste

    For the Potatoes

    • 2 pounds baby Yukon Gold potatoes, halved
    • 3 tablespoons butter, melted
    • 2 tablespoons olive oil
    • 4 cloves garlic, minced
    • 1 teaspoon dried parsley
    • 1 teaspoon dried thyme
    • ½ teaspoon dried oregano
    • Salt and black pepper to taste

    Optional Toppings

    • Fresh chopped parsley
    • Green onions
    • Fresh chives
    • Shredded cheddar cheese
    • Parmesan cheese
    • Crumbled bacon
    • Sour cream

    Choosing the Right Chicken

    Although chicken breasts are the most common choice, nearly any cut of chicken works well in this recipe.

    Chicken Breasts

    Lean, healthy, and easy to slice for serving.

    Chicken Thighs

    Naturally juicier and slightly richer in flavor.

    Bone-In Chicken

    Offers even more flavor but will require additional cooking time.

    Chicken Tenders

    Cook more quickly and are great for feeding children.


    The Best Potatoes for Roasting

    Different potatoes create slightly different textures.

    Yukon Gold

    Creamy inside with crisp golden edges.

    Baby Red Potatoes

    Hold their shape well and roast beautifully.

    Russet Potatoes

    Develop extra crispy edges while remaining fluffy inside.

    Fingerling Potatoes

    Perfect for a more elegant presentation.

    No matter which variety you choose, cutting the potatoes into similarly sized pieces ensures they cook evenly.


    Step-by-Step Instructions

    Step 1: Preheat the Oven

    Preheat your oven to 400°F (200°C).

    Lightly grease a large baking dish or rimmed sheet pan.


    Step 2: Prepare the Chicken

    Pat the chicken dry with paper towels.

    In a small bowl combine:

    • Ranch seasoning
    • Garlic powder
    • Onion powder
    • Smoked paprika
    • Pepper
    • Olive oil

    Rub the mixture generously over every piece of chicken, coating both sides.

    Allow the chicken to rest while preparing the potatoes so the seasoning has time to absorb.


    Step 3: Prepare the Potatoes

    In a large bowl combine:

    • Potatoes
    • Melted butter
    • Olive oil
    • Garlic
    • Parsley
    • Thyme
    • Oregano
    • Salt
    • Pepper

    Mix thoroughly until every potato is evenly coated.


    Step 4: Assemble

    Spread the potatoes across the baking dish.

    Place the chicken between the potatoes, ensuring everything is arranged in a single layer.

    Avoid stacking ingredients, as overcrowding can cause steaming instead of roasting.


    Step 5: Bake

    Bake uncovered for 35–45 minutes.

    Cooking time will vary depending on the thickness of your chicken.

    Chicken is fully cooked when it reaches an internal temperature of 165°F.

    The potatoes should be fork tender with crispy, caramelized edges.

    For additional browning, switch the oven to broil during the last two to three minutes.


    Step 6: Rest and Serve

    Allow the chicken to rest for five minutes before slicing.

    Garnish with fresh parsley or chives and serve immediately.


    Tips for Perfect Results Every Time

    Dry the Chicken First

    Removing excess moisture helps create better browning.

    Don’t Skip the Butter

    Butter adds richness while helping the potatoes develop a beautiful golden crust.

    Use Fresh Garlic

    Fresh garlic provides a deeper, sweeter flavor than garlic powder alone.

    Flip the Potatoes Once

    Halfway through baking, stir the potatoes so every side becomes evenly browned.

    Use a Meat Thermometer

    This guarantees juicy chicken without overcooking.


    Delicious Variations

    One of the reasons this recipe is so versatile is that it’s easy to customize based on your family’s preferences.

    Cheesy Ranch Chicken

    During the last five minutes of baking, sprinkle shredded cheddar, Monterey Jack, mozzarella, or Parmesan over the chicken and potatoes.

    The cheese melts into a bubbly topping that makes the dish even more comforting.


    Bacon Ranch Version

    Top the finished dish with:

    • Crispy bacon
    • Green onions
    • Cheddar cheese

    The flavors resemble a loaded baked potato combined with juicy roasted chicken.


    Spicy Ranch Chicken

    Add:

    • Cayenne pepper
    • Crushed red pepper flakes
    • Chipotle seasoning
    • Hot sauce

    This version adds a pleasant kick without overpowering the ranch flavor.


    Lemon Herb Ranch

    Before serving, squeeze fresh lemon juice over the chicken and sprinkle with additional parsley.

    The citrus brightens the richness of the butter and ranch seasoning.


    Vegetable-Packed Version

    Turn this into a complete sheet-pan dinner by adding vegetables such as:

    • Broccoli florets
    • Green beans
    • Brussels sprouts
    • Carrots
    • Bell peppers
    • Zucchini
    • Asparagus
    • Mushrooms

    Quick-cooking vegetables should be added during the final 20 minutes.


    Make It Healthier

    If you’re looking for a lighter version:

    • Use skinless chicken breasts.
    • Reduce the butter slightly and increase the olive oil.
    • Choose baby potatoes for naturally smaller portions.
    • Add extra vegetables to increase fiber and nutrients.
    • Use a reduced-sodium ranch seasoning packet.
    • Finish with fresh herbs instead of cheese.

    You’ll still enjoy all the classic ranch flavor while creating a lighter meal.


    Perfect Side Dishes

    Although this recipe is a complete meal, these sides pair wonderfully with it.

    Fresh Salads

    • Caesar Salad
    • Garden Salad
    • Spinach Salad
    • Cucumber Tomato Salad

    Vegetables

    • Roasted asparagus
    • Green beans
    • Steamed broccoli
    • Honey-glazed carrots
    • Roasted Brussels sprouts

    Bread

    • Garlic bread
    • Dinner rolls
    • Buttermilk biscuits
    • Homemade cornbread

    Great for Meal Prep

    Baked Ranch Chicken and Potatoes stores exceptionally well.

    Prepare several servings on Sunday and enjoy quick lunches throughout the week.

    Simply divide the chicken and potatoes into meal prep containers with roasted vegetables or a side salad.

    The flavors continue to develop overnight, making leftovers just as delicious.


    Storage

    Store leftovers in an airtight container in the refrigerator for up to 4 days.

    To maintain the best texture, store the chicken and potatoes together.


    Reheating

    Oven

    Bake at 350°F for 10–15 minutes until warmed through.

    Air Fryer

    Heat at 350°F for 5–7 minutes for crispy potatoes.

    Microwave

    Heat individual servings for 2–3 minutes, stirring the potatoes halfway through.


    Freezing Instructions

    This meal freezes surprisingly well.

    Allow everything to cool completely before transferring portions to freezer-safe containers.

    Freeze for up to 3 months.

    Thaw overnight in the refrigerator before reheating.


    Frequently Asked Questions

    Can I use frozen chicken?

    It’s best to thaw chicken completely before baking to ensure even cooking and proper food safety.


    Can I make this ahead of time?

    Yes. Assemble everything in the baking dish several hours ahead, cover, and refrigerate. When ready to cook, let the dish sit at room temperature for about 20 minutes before placing it in the oven.


    Can I use homemade ranch seasoning?

    Absolutely. A homemade blend of dried parsley, dill, garlic powder, onion powder, dried chives, salt, pepper, and paprika works wonderfully.


    Can I cook this on a sheet pan?

    Yes. A large sheet pan allows the ingredients to spread out, encouraging even more browning and crispier potatoes.


    Can I use sweet potatoes?

    Certainly. Sweet potatoes add a touch of natural sweetness that pairs surprisingly well with the savory ranch seasoning.


    Final Thoughts

    Baked Ranch Chicken and Potatoes is the kind of comforting recipe that quickly earns a permanent place in your meal rotation. It delivers everything you want from a homemade dinner—tender chicken, crispy roasted potatoes, rich garlic butter, and the familiar, savory taste of ranch seasoning—all while keeping preparation simple and cleanup easy.

    Its versatility means you can customize it with your favorite vegetables, cheeses, herbs, or spices, making it feel like a brand-new meal every time you prepare it. Whether you’re feeding a hungry family, meal prepping for the week, or hosting friends for a casual dinner, this dish offers dependable flavor with minimal effort.

    Sometimes the best recipes aren’t the most complicated—they’re the ones everyone requests again and again. With its hearty ingredients, comforting aroma, and irresistible flavor, Baked Ranch Chicken and Potatoes is sure to become one of those recipes in your own kitchen.

    Read More Recipes

  • Breakfast of the Day: Ham & Swiss Breakfast Croissants

    Breakfast of the Day: Ham & Swiss Breakfast Croissants

    Breakfast is often called the most important meal of the day, and for good reason. A nourishing, satisfying breakfast provides the energy and nutrients your body needs to stay focused, productive, and energized throughout the morning. While cereal or toast may work on rushed weekdays, sometimes you want a breakfast that feels a little more indulgent without requiring hours in the kitchen.

    That’s where Ham & Swiss Breakfast Croissants shine.

    This classic breakfast sandwich combines flaky, buttery croissants with savory ham, creamy melted Swiss cheese, and soft scrambled eggs to create a breakfast that’s both comforting and elegant. Whether you’re preparing breakfast for your family, hosting a brunch gathering, celebrating a holiday morning, or simply treating yourself on the weekend, this recipe delivers restaurant-quality flavor using simple ingredients.

    It’s rich without being overwhelming, filling without feeling heavy, and versatile enough to customize with your favorite breakfast ingredients.


    Why Ham & Swiss Is a Perfect Pairing

    Some ingredient combinations become classics because they simply work.

    Ham offers a slightly smoky, salty flavor that pairs beautifully with the mild nuttiness of Swiss cheese. Unlike sharper cheeses, Swiss melts smoothly while maintaining its creamy texture, allowing the buttery croissant to remain the star of the sandwich.

    Adding fluffy scrambled eggs brings everything together by providing richness, protein, and a light texture that balances the crisp layers of the croissant.

    The result is a breakfast sandwich with multiple textures in every bite:

    • Crisp, flaky pastry
    • Creamy melted cheese
    • Tender slices of ham
    • Soft scrambled eggs

    Every layer complements the next, making this breakfast both comforting and satisfying.


    Ingredients

    For Four Breakfast Croissants

    • 4 large buttery croissants
    • 8 large eggs
    • 2 tablespoons butter
    • 8 slices Black Forest or honey ham
    • 4 slices Swiss cheese
    • Salt and freshly cracked black pepper
    • 1 tablespoon chopped fresh chives
    • Fresh parsley for garnish

    Optional Additions

    Customize your croissants with:

    • Fresh spinach
    • Sliced avocado
    • Tomato
    • Caramelized onions
    • Sautéed mushrooms
    • Crispy bacon
    • Dijon mustard
    • Garlic herb aioli
    • Hot honey
    • Roasted red peppers
    • Fresh arugula

    Step-by-Step Instructions

    Step 1: Prepare the Eggs

    Crack the eggs into a bowl and whisk until the yolks and whites are completely combined.

    Season lightly with salt and pepper.

    Heat butter in a nonstick skillet over medium-low heat.

    Pour in the eggs and gently stir with a silicone spatula.

    Rather than constantly stirring, slowly fold the eggs over themselves. This creates large, fluffy curds instead of tiny dry pieces.

    Remove from the heat while they’re still slightly glossy, as they’ll continue cooking from the residual heat.


    Step 2: Warm the Ham

    Place the ham slices in the same skillet for about one minute on each side.

    This enhances the flavor while allowing the edges to caramelize slightly.


    Step 3: Prepare the Croissants

    Slice each croissant horizontally without cutting completely through.

    If desired, lightly toast the inside under the broiler for one or two minutes.

    This helps prevent the croissant from becoming soggy while adding extra crispness.


    Step 4: Assemble

    Layer each croissant with:

    • One slice of Swiss cheese
    • Two slices of warm ham
    • A generous scoop of scrambled eggs
    • Chopped chives

    Close the croissant gently.


    Step 5: Bake

    Place assembled croissants on a baking sheet lined with parchment paper.

    Bake at 350°F (175°C) for 6–8 minutes.

    The cheese should melt beautifully while the croissant becomes warm and lightly crisp.

    Serve immediately.


    Why Croissants Make Amazing Breakfast Sandwiches

    Unlike traditional sandwich bread, croissants offer multiple layers of buttery pastry that create a luxurious texture.

    As they warm, the outside becomes lightly crisp while the inside stays tender and airy.

    The buttery flavor complements both savory and sweet ingredients, making croissants one of the most versatile breakfast breads available.

    Their light texture also keeps the sandwich from feeling overly dense despite its hearty filling.


    Nutrition Highlights

    Eggs

    Eggs are one of nature’s most complete proteins.

    They provide:

    • High-quality protein
    • Vitamin D
    • Choline for brain health
    • Vitamin B12
    • Selenium

    Protein helps keep you fuller longer while supporting muscle maintenance and repair.


    Ham

    Lean ham provides:

    • Protein
    • Iron
    • Zinc
    • Vitamin B6
    • Vitamin B12

    Choosing lower-sodium ham can reduce salt while maintaining excellent flavor.


    Swiss Cheese

    Swiss cheese contributes:

    • Calcium
    • Protein
    • Vitamin A
    • Phosphorus

    Swiss cheese also tends to contain slightly less sodium than many other cheeses.


    Croissants

    Although buttery croissants are an indulgence, they provide satisfying carbohydrates that fuel your body throughout the morning.

    Pairing them with protein-rich eggs helps create a more balanced meal.


    Delicious Variations

    Bacon & Swiss

    Replace ham with crispy bacon for extra crunch and smoky flavor.


    Turkey Breakfast Croissant

    Use smoked turkey for a lighter option that’s equally delicious.


    Veggie Croissant

    Fill with:

    • Spinach
    • Mushrooms
    • Bell peppers
    • Onions
    • Swiss cheese

    Perfect for meatless mornings.


    Southwest Breakfast

    Add:

    • Pepper Jack cheese
    • Salsa
    • Jalapeños
    • Avocado

    A spicy twist that’s packed with flavor.


    French Breakfast Croissant

    Use Gruyère cheese instead of Swiss and finish with fresh herbs for a café-style breakfast.


    Perfect Brunch Menu Pairings

    Ham & Swiss Breakfast Croissants pair wonderfully with:

    Fresh Fruit

    • Strawberries
    • Blueberries
    • Pineapple
    • Grapes
    • Melon

    Breakfast Potatoes

    Crispy roasted potatoes seasoned with garlic and herbs provide a hearty side.


    Yogurt

    Greek yogurt topped with honey and granola balances the richness of the croissant.


    Fresh Juice

    Orange juice

    Apple juice

    Fresh lemonade


    Coffee

    Freshly brewed coffee

    Cold brew

    Latte

    Cappuccino


    Entertaining Made Easy

    These breakfast croissants are ideal for:

    • Mother’s Day brunch
    • Father’s Day breakfast
    • Easter morning
    • Christmas breakfast
    • Baby showers
    • Bridal showers
    • Weekend brunch parties
    • Family gatherings

    Simply prepare multiple sandwiches and bake them together just before serving.


    Make-Ahead Tips

    One reason these croissants are so popular is how well they work for meal prep.

    Refrigerate

    Assemble the sandwiches completely.

    Wrap each one tightly in foil or plastic wrap.

    Store for up to three days.


    Freeze

    Wrap individually in plastic wrap and place inside freezer bags.

    Freeze for up to two months.

    Thaw overnight in the refrigerator before reheating.


    Reheating

    Oven:
    350°F for 10–12 minutes

    Air Fryer:
    320°F for 5–6 minutes

    Microwave:
    45–60 seconds (softer texture)


    Helpful Cooking Tips

    • Use bakery-quality croissants whenever possible.
    • Cook eggs over low heat to keep them creamy.
    • Avoid overfilling the sandwich.
    • Bake just long enough to melt the cheese.
    • Let the croissants cool for two minutes before serving.
    • Fresh herbs brighten the richness of the sandwich.
    • Add a light spread of Dijon mustard for extra flavor.

    Frequently Asked Questions

    Can I use crescent rolls instead?

    Yes. Crescent rolls make a budget-friendly alternative, although traditional croissants provide a richer, flakier texture.


    Can I make these vegetarian?

    Absolutely. Replace the ham with sautéed mushrooms, spinach, tomatoes, or a plant-based breakfast protein.


    What’s the best Swiss cheese?

    Traditional Swiss, baby Swiss, or Gruyère all melt beautifully and complement the ham.


    Can I prepare them the night before?

    Yes. Assemble the sandwiches, refrigerate overnight, and bake fresh the next morning.


    Are they kid-friendly?

    Definitely. Their mild flavors make them a favorite with both children and adults.


    Final Thoughts

    Ham & Swiss Breakfast Croissants are proof that a simple breakfast can feel truly special. Their buttery, flaky croissants, savory ham, creamy melted Swiss cheese, and fluffy scrambled eggs create a comforting meal that’s perfect for everyday breakfasts, leisurely weekend brunches, or memorable holiday mornings.

    Easy to prepare, endlessly customizable, and ideal for meal prep, these croissants bring together classic ingredients in a way that’s both satisfying and elegant. Whether you’re serving one sandwich with a cup of coffee or preparing a tray for family and friends, this recipe is sure to become a breakfast favorite you’ll return to again and again.

    Read More Recipes

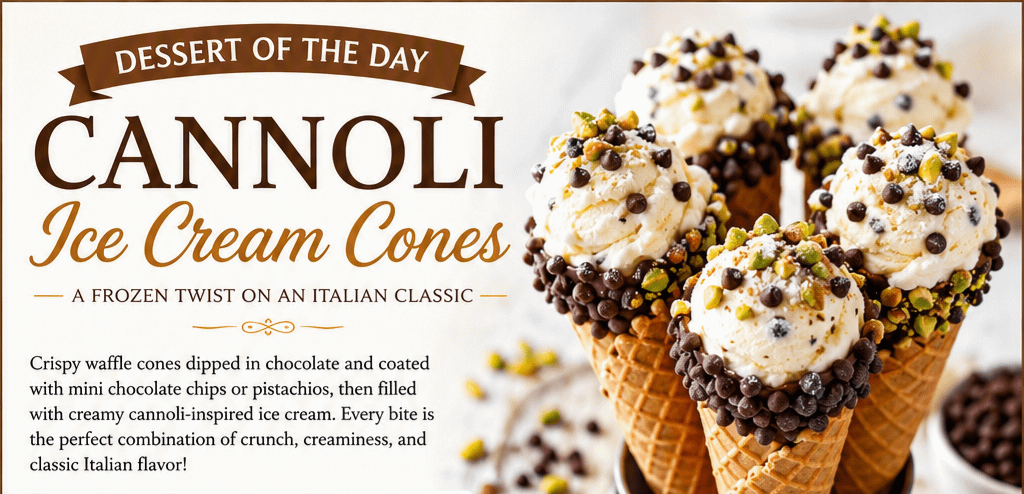
  • Dessert of the Day: Cannoli Ice Cream Cones – A Frozen Twist on an Italian Classic

    Dessert of the Day: Cannoli Ice Cream Cones – A Frozen Twist on an Italian Classic

    Few desserts capture the perfect balance of creamy, crunchy, and sweet quite like Cannoli Ice Cream Cones. Inspired by the famous Sicilian cannoli, this frozen treat combines the rich flavors of sweet ricotta, chocolate, vanilla, and crisp pastry with everyone’s favorite summertime indulgence—ice cream. Instead of a traditional fried cannoli shell, crispy waffle cones are dipped in chocolate, coated with mini chocolate chips or chopped pistachios, and filled with a luscious cannoli-inspired ice cream mixture.

    The result is a dessert that’s elegant enough for dinner parties, fun enough for kids, and easy enough to make in your own kitchen. Whether you’re looking for the perfect summer dessert, a creative party treat, or simply a new way to enjoy ice cream, Cannoli Ice Cream Cones deliver flavor, texture, and visual appeal in every bite.


    The History Behind Cannoli

    Cannoli have been one of Italy’s most beloved desserts for centuries. Originating in Sicily, these crispy pastry tubes were traditionally filled with a sweetened ricotta cheese mixture flavored with vanilla, citrus zest, cinnamon, and chocolate chips. While their exact origins are debated, many historians believe cannoli first appeared during the Arab rule of Sicily over 1,000 years ago.

    Over time, Italian immigrants brought cannoli recipes to America, where they quickly became a favorite in Italian bakeries across the country. Today, cannoli are enjoyed around the world and are considered one of Italy’s most iconic desserts.

    Cannoli Ice Cream Cones pay tribute to that rich tradition while adding a modern twist that’s perfect for warm weather.


    Why You’ll Love Cannoli Ice Cream Cones

    One of the biggest reasons these desserts have become so popular is their incredible combination of flavors and textures.

    Every bite includes:

    • Crispy waffle cone crunch
    • Rich chocolate coating
    • Creamy cannoli-inspired filling
    • Mini chocolate chips
    • Optional crunchy pistachios
    • Smooth vanilla ice cream
    • Sweet powdered sugar finish

    Unlike many elaborate desserts, these require very little baking and can be prepared ahead of time, making them ideal for entertaining guests.


    Ingredients

    For the Chocolate-Dipped Cones

    • 8 waffle cones
    • 1½ cups semi-sweet chocolate chips
    • 2 teaspoons coconut oil or shortening
    • ¾ cup mini chocolate chips
    • ½ cup finely chopped pistachios
    • Optional colorful sprinkles for kids

    For the Cannoli Ice Cream Filling

    • 1 quart premium vanilla ice cream
    • ¾ cup whole milk ricotta cheese
    • ¼ cup mascarpone cheese
    • ⅓ cup powdered sugar
    • 1 teaspoon vanilla extract
    • ½ teaspoon cinnamon
    • ¼ teaspoon almond extract
    • ½ teaspoon orange zest
    • ½ cup mini chocolate chips

    Optional Garnishes

    • Powdered sugar
    • Chocolate syrup
    • Caramel drizzle
    • Melted white chocolate
    • Chopped pistachios
    • Fresh strawberries
    • Maraschino cherries
    • Whipped cream

    Step-by-Step Instructions

    Step 1: Prepare the Chocolate Rim

    Melt the chocolate chips with the coconut oil in the microwave using 20-second intervals, stirring frequently until silky smooth.

    Dip each waffle cone into the melted chocolate, coating about one inch of the rim.

    Immediately roll the rim into:

    • Mini chocolate chips
    • Pistachios
    • Crushed cookies
    • Colorful sprinkles

    Stand the cones upright in glasses until the chocolate hardens.


    Step 2: Make the Cannoli Filling

    Allow the vanilla ice cream to soften for approximately 10 minutes.

    In a mixing bowl combine:

    • Ricotta
    • Mascarpone
    • Powdered sugar
    • Vanilla
    • Cinnamon
    • Almond extract
    • Orange zest

    Mix until smooth.

    Gently fold the ricotta mixture into the softened vanilla ice cream.

    Fold in the mini chocolate chips.

    Freeze for 20–30 minutes until firm enough to scoop.


    Step 3: Fill the Cones

    Using either:

    • An ice cream scoop
    • A piping bag
    • A large spoon

    Fill each waffle cone generously.

    Pile the filling slightly above the cone for a bakery-style presentation.


    Step 4: Decorate

    Top with:

    • Extra chocolate chips
    • Crushed pistachios
    • Chocolate drizzle
    • Powdered sugar
    • Whipped cream
    • Fresh berries

    Serve immediately or freeze until ready.


    Tips for Perfect Results

    Use Premium Ice Cream

    Higher-quality ice cream contains less air and melts more slowly, creating a richer dessert.


    Don’t Skip the Chocolate Coating

    The chocolate inside and around the rim acts as a moisture barrier, helping keep the waffle cone crispy.


    Freeze Before Serving

    Freezing filled cones for 15–20 minutes helps everything stay firm and makes them easier to eat.


    Pipe the Filling

    Using a piping bag creates beautiful swirls that look like they came from an Italian bakery.


    Fun Flavor Variations

    Chocolate Lovers

    Use chocolate ice cream with dark chocolate chips and chocolate drizzle.


    Salted Caramel Cannoli

    Add caramel swirl ice cream and sprinkle with flaky sea salt.


    Cookies & Cream Cannoli

    Mix crushed chocolate sandwich cookies into the filling.


    Strawberry Cannoli

    Fold diced strawberries into vanilla ice cream and garnish with strawberry syrup.


    Lemon Cannoli

    Add lemon zest and use lemon ice cream for a refreshing citrus dessert.


    Pistachio Cannoli

    Replace vanilla ice cream with pistachio ice cream and top generously with chopped pistachios.


    Espresso Cannoli

    Mix espresso powder into the ricotta filling for a coffeehouse-inspired dessert.


    Birthday Cannoli

    Use birthday cake ice cream and colorful sprinkles for parties.


    Perfect Occasions

    Cannoli Ice Cream Cones are ideal for:

    • Summer barbecues
    • Fourth of July celebrations
    • Birthday parties
    • Graduation parties
    • Baby showers
    • Bridal showers
    • Family reunions
    • Italian-themed dinners
    • Pool parties
    • Holiday gatherings

    Guests love having a dessert that’s both familiar and unique.


    Make It a Dessert Bar

    Hosting a party? Create a Cannoli Ice Cream Cone station where guests can customize their own dessert.

    Offer toppings such as:

    • Mini chocolate chips
    • White chocolate chips
    • Crushed Oreos
    • Heath toffee bits
    • Crushed pistachios
    • Pecans
    • Rainbow sprinkles
    • Chocolate syrup
    • Caramel sauce
    • Raspberry sauce
    • Fresh strawberries
    • Blueberries
    • Bananas
    • Coconut flakes
    • Whipped cream

    Kids and adults alike will enjoy creating their own masterpiece.


    Nutritional Information (Approximate)

    Per serving:

    • Calories: 450
    • Fat: 24g
    • Carbohydrates: 52g
    • Protein: 8g
    • Sugar: 36g
    • Fiber: 2g

    Values vary depending on the brand of ice cream and toppings used.


    Frequently Asked Questions

    Can I make them ahead of time?

    Yes. Prepare the chocolate-coated cones a day or two in advance. Fill them just before serving or freeze the filled cones for up to one week.


    Can I use store-bought cannoli filling?

    Absolutely. Store-bought cannoli filling works well and saves time. Simply fold it into softened vanilla ice cream.


    Can I use sugar cones?

    Yes, although waffle cones provide a sturdier base and more closely resemble the crisp shell of a traditional cannoli.


    Can I make these without ricotta?

    Yes. Substitute mascarpone, cream cheese, or even Greek yogurt for a different but still creamy filling.


    Are they kid-friendly?

    Definitely. Children especially enjoy decorating the cones with colorful sprinkles, candies, and chocolate sauces.


    Serving Suggestions

    Cannoli Ice Cream Cones pair beautifully with:

    • Fresh espresso
    • Cappuccino
    • Cold brew coffee
    • Italian soda
    • Iced latte
    • Hot chocolate
    • Sparkling lemonade
    • Fresh berries
    • Biscotti
    • Chocolate-covered strawberries

    For an authentic Italian dessert experience, serve alongside espresso after dinner.


    Storage Tips

    If preparing ahead:

    • Store empty chocolate-coated cones in an airtight container for up to three days.
    • Freeze filled cones individually before wrapping them in plastic wrap.
    • Store in a freezer-safe container for up to one week.
    • Let sit at room temperature for 3–5 minutes before serving for the creamiest texture.

    Why This Dessert Is So Popular

    Cannoli Ice Cream Cones have become increasingly popular because they combine two universally loved desserts into one unforgettable treat. They offer the nostalgic comfort of ice cream with the sophisticated flavors of an authentic Italian cannoli. Their eye-catching appearance also makes them a favorite for social media, special occasions, and celebrations.

    Unlike many elaborate desserts that require baking, frying, or advanced decorating skills, these cones are simple enough for beginners while looking impressive enough to serve at elegant gatherings.


    Final Thoughts

    Cannoli Ice Cream Cones are proof that classic desserts can be reinvented in exciting new ways. With their crispy chocolate-dipped waffle cones, creamy cannoli-inspired filling, bursts of mini chocolate chips, and endless topping possibilities, they’re a dessert that delights both the eyes and the taste buds.

    Whether you’re cooling off on a hot summer afternoon, hosting friends for a backyard barbecue, celebrating a birthday, or ending an Italian-inspired dinner on a sweet note, these frozen treats are guaranteed to impress. They’re easy to customize, fun to assemble, and impossible to resist.

    One bite is all it takes to understand why Cannoli Ice Cream Cones deserve the spotlight as today’s Dessert of the Day. Bring a taste of Sicily to your table with this playful frozen creation, and enjoy a dessert that’s as memorable as it is delicious.

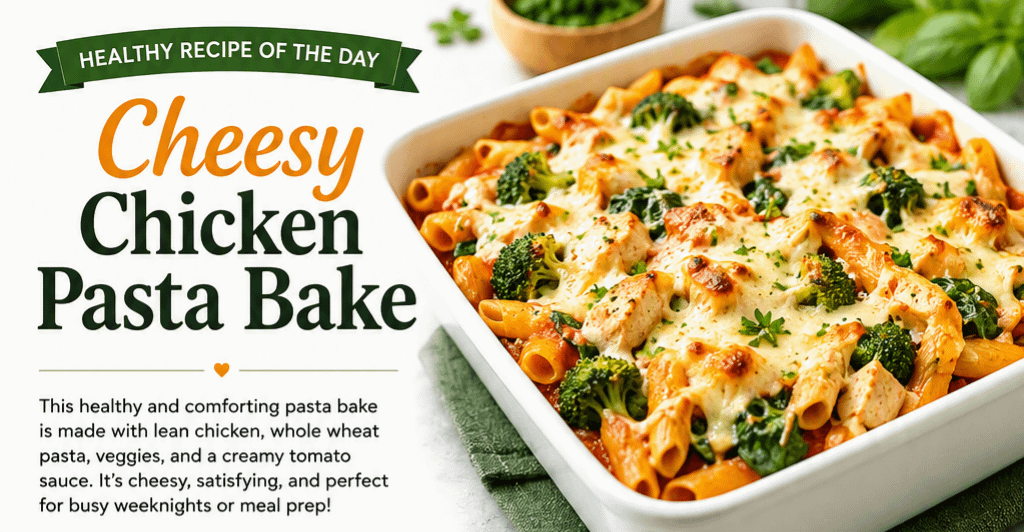
  • Healthy Recipe of the Day: Cheesy Chicken Pasta Bake

    Healthy Recipe of the Day: Cheesy Chicken Pasta Bake

    When comfort food calls, it’s easy to think that healthy eating has to take a back seat. Fortunately, that’s not the case with this Healthy Cheesy Chicken Pasta Bake. This lighter take on a classic baked pasta dish combines tender chicken breast, whole wheat pasta, colorful vegetables, a creamy tomato sauce made with Greek yogurt, and just the right amount of melted cheese to create a satisfying meal that’s both nutritious and delicious.

    Perfect for busy weeknights, meal prepping, or feeding a crowd, this casserole offers all the warmth and comfort of traditional baked pasta without the excess calories, fat, and sodium often found in restaurant or boxed versions. Every forkful is packed with lean protein, fiber, vitamins, and comforting cheesy goodness that makes healthy eating feel like an indulgence.

    Whether you’re trying to eat healthier, cook more meals at home, or simply add another reliable dinner to your weekly rotation, this recipe checks every box.


    Why You’ll Love This Healthy Pasta Bake

    Healthy meals are easier to stick with when they taste amazing, and this recipe proves that nutritious food can still satisfy your comfort food cravings.

    Here are just a few reasons you’ll want to make this recipe again and again:

    • Rich, creamy, and cheesy without being overly heavy
    • High in lean protein to keep you feeling full
    • Whole wheat pasta adds fiber and long-lasting energy
    • Loaded with vegetables for extra nutrition
    • Uses Greek yogurt instead of heavy cream
    • Easy to customize with your favorite vegetables
    • Perfect for meal prep and freezer meals
    • Family-friendly and kid-approved
    • Great way to use leftover chicken
    • Reheats beautifully for lunch the next day

    This dish is hearty enough for a filling dinner while still fitting into a balanced lifestyle.


    What Makes This Recipe Healthier?

    Traditional chicken pasta bakes often rely on heavy cream, butter, and large amounts of full-fat cheese. While delicious, those ingredients can quickly increase calories, saturated fat, and sodium.

    This healthier version makes a few smart substitutions without sacrificing flavor.

    Greek Yogurt

    Plain Greek yogurt creates a creamy sauce while adding protein and reducing fat compared to heavy cream.

    Whole Wheat Pasta

    Whole wheat pasta contains more fiber than regular pasta, helping you stay satisfied longer while supporting digestive health.

    Lean Chicken Breast

    Chicken breast is an excellent source of lean protein that helps maintain muscle while keeping calories lower than fattier cuts of meat.

    Plenty of Vegetables

    Broccoli, spinach, onions, mushrooms, and garlic boost the nutritional value while adding texture, flavor, vitamins, minerals, and antioxidants.

    Reduced-Fat Cheese

    Using reduced-fat mozzarella still provides that irresistible melted cheese topping while lowering saturated fat.


    Ingredients

    Pasta Bake

    • 12 ounces whole wheat penne pasta
    • 2 cups cooked chicken breast, shredded or cubed
    • 2 cups broccoli florets
    • 1 cup chopped spinach
    • 1 cup sliced mushrooms
    • 1 small onion, diced
    • 3 cloves garlic, minced
    • 2 cups low-sodium marinara sauce
    • ½ cup plain nonfat Greek yogurt
    • ½ cup low-fat milk
    • 1 teaspoon Italian seasoning
    • ½ teaspoon paprika
    • ½ teaspoon onion powder
    • Salt and pepper to taste

    Cheese Topping

    • 1 cup reduced-fat mozzarella cheese
    • ¼ cup grated Parmesan cheese
    • 2 tablespoons chopped parsley

    Optional garnish:

    • Fresh basil
    • Cracked black pepper
    • Red pepper flakes

    Kitchen Equipment

    You’ll only need a few basic kitchen tools:

    • Large pasta pot
    • Colander
    • Large skillet
    • Mixing bowl
    • Wooden spoon
    • 9×13-inch baking dish
    • Measuring cups and spoons

    Step-by-Step Instructions

    Step 1: Cook the Pasta

    Bring a large pot of lightly salted water to a boil.

    Cook the whole wheat penne until it’s just shy of fully cooked—about one to two minutes less than the package directions recommend.

    The pasta will finish cooking in the oven, preventing it from becoming mushy.

    Drain and set aside.


    Step 2: Prepare the Vegetables

    Heat a large skillet over medium heat.

    Lightly coat with olive oil cooking spray or use one teaspoon of olive oil.

    Add:

    • Onion
    • Mushrooms

    Cook for about five minutes until softened.

    Stir in the garlic and cook another minute until fragrant.

    Add broccoli florets and cook for another three to four minutes.

    Finally, stir in the spinach until wilted.

    Your kitchen should already smell amazing.


    Step 3: Prepare the Creamy Sauce

    Lower the heat.

    Mix together:

    • Marinara sauce
    • Greek yogurt
    • Low-fat milk
    • Italian seasoning
    • Onion powder
    • Paprika

    Whisk until completely smooth.

    Allow the sauce to gently warm but do not let it boil.


    Step 4: Mix Everything Together

    In a large bowl combine:

    • Cooked pasta
    • Chicken
    • Vegetables
    • Creamy sauce

    Fold everything together until every piece of pasta is coated.


    Step 5: Assemble the Casserole

    Preheat the oven to 375°F (190°C).

    Spray a 9×13-inch baking dish with nonstick cooking spray.

    Spread the pasta mixture evenly into the baking dish.

    Top with:

    • Mozzarella
    • Parmesan

    Cover loosely with foil.


    Step 6: Bake

    Bake covered for 20 minutes.

    Remove the foil.

    Bake another 10 to 15 minutes until the cheese is bubbly and lightly browned.

    For an extra golden topping, broil for one to two minutes while watching carefully.

    Allow the casserole to rest for about 10 minutes before serving.


    Nutrition Spotlight

    Chicken Breast

    Chicken breast is packed with lean protein that helps repair muscles, supports metabolism, and keeps you satisfied for hours.


    Broccoli

    Broccoli is one of the most nutrient-dense vegetables available.

    It provides:

    • Vitamin C
    • Vitamin K
    • Potassium
    • Fiber
    • Antioxidants

    These nutrients support immune health, bone strength, and heart health.


    Spinach

    Spinach delivers:

    • Iron
    • Magnesium
    • Folate
    • Vitamin A
    • Vitamin K

    Adding spinach is an easy way to boost nutrition without changing the flavor significantly.


    Mushrooms

    Mushrooms contribute:

    • B vitamins
    • Selenium
    • Copper
    • Antioxidants

    They also provide a rich, savory flavor while remaining low in calories.


    Whole Wheat Pasta

    Unlike refined pasta, whole wheat pasta contains the entire grain.

    Benefits include:

    • More fiber
    • Better blood sugar control
    • Longer-lasting fullness
    • More vitamins and minerals

    Greek Yogurt

    Greek yogurt adds creaminess while increasing protein.

    It also contains calcium and beneficial probiotics that support digestive health.


    Delicious Variations

    One of the best things about this recipe is how versatile it is.

    Try adding:

    Vegetables

    • Bell peppers
    • Zucchini
    • Cauliflower
    • Peas
    • Kale
    • Cherry tomatoes
    • Carrots
    • Asparagus

    Protein Options

    Replace chicken with:

    • Ground turkey
    • Rotisserie chicken
    • Lean ground beef
    • Shrimp
    • Salmon
    • Turkey sausage

    Vegetarians can substitute:

    • Chickpeas
    • White beans
    • Lentils
    • Extra mushrooms

    Cheese Ideas

    Experiment with different cheeses such as:

    • Sharp cheddar
    • Monterey Jack
    • Gouda
    • Swiss
    • Provolone
    • Pepper Jack

    Just remember that stronger cheeses often allow you to use less while still getting plenty of flavor.


    Make It Gluten-Free

    Simply substitute your favorite gluten-free pasta.

    Cook it slightly under the package directions so it holds together during baking.


    Make It Lower Carb

    Replace some or all of the pasta with:

    • Cauliflower florets
    • Zucchini noodles
    • Spaghetti squash
    • Hearts of palm pasta

    Meal Prep Instructions

    This casserole is ideal for meal planning.

    Refrigerator

    Store leftovers in an airtight container for up to four days.

    Freezer

    Freeze individual portions or the entire casserole for up to three months.

    Thaw overnight in the refrigerator before reheating.

    Reheating

    Microwave individual servings for two to three minutes.

    Or reheat in a 350°F oven for about 20 minutes until warmed through.


    What to Serve with Cheesy Chicken Pasta Bake

    Complete your meal with healthy side dishes such as:

    • Garden salad
    • Caesar salad made with light dressing
    • Roasted Brussels sprouts
    • Steamed green beans
    • Garlic roasted asparagus
    • Fresh fruit
    • Whole grain garlic bread
    • Cucumber tomato salad

    Tips for Success

    • Slightly undercook your pasta before baking.
    • Use freshly shredded cheese for the smoothest melt.
    • Let the casserole rest before serving.
    • Don’t skip the vegetables—they add moisture and nutrition.
    • Season each layer rather than only the sauce.
    • Taste the sauce before baking and adjust seasoning if needed.
    • Fresh herbs added after baking brighten the entire dish.

    Frequently Asked Questions

    Can I use rotisserie chicken?

    Absolutely. Rotisserie chicken is a convenient time-saving option that works perfectly in this recipe.

    Can I make this ahead of time?

    Yes. Assemble the casserole up to 24 hours in advance, cover, refrigerate, and bake when ready.

    Can I freeze it before baking?

    Yes. Assemble the casserole, wrap tightly, and freeze. Thaw overnight before baking.

    Can I use leftover vegetables?

    Definitely. This recipe is an excellent way to use leftover cooked vegetables from previous meals.


    Final Thoughts

    This Healthy Cheesy Chicken Pasta Bake proves that comfort food and healthy eating can go hand in hand. By combining lean chicken, whole wheat pasta, fresh vegetables, Greek yogurt, and a moderate amount of cheese, you create a balanced meal that’s nourishing, filling, and packed with flavor.

    Whether you’re feeding a growing family, meal prepping for a busy week, or simply looking for a healthier alternative to traditional casseroles, this recipe is sure to become a favorite. It’s warm, comforting, customizable, and easy enough for cooks of any skill level.

    The next time you’re craving something cheesy and satisfying, skip the takeout and enjoy this homemade pasta bake. You’ll love knowing that every delicious bite is helping you stay on track with your healthy eating goals—without sacrificing the flavors you love.

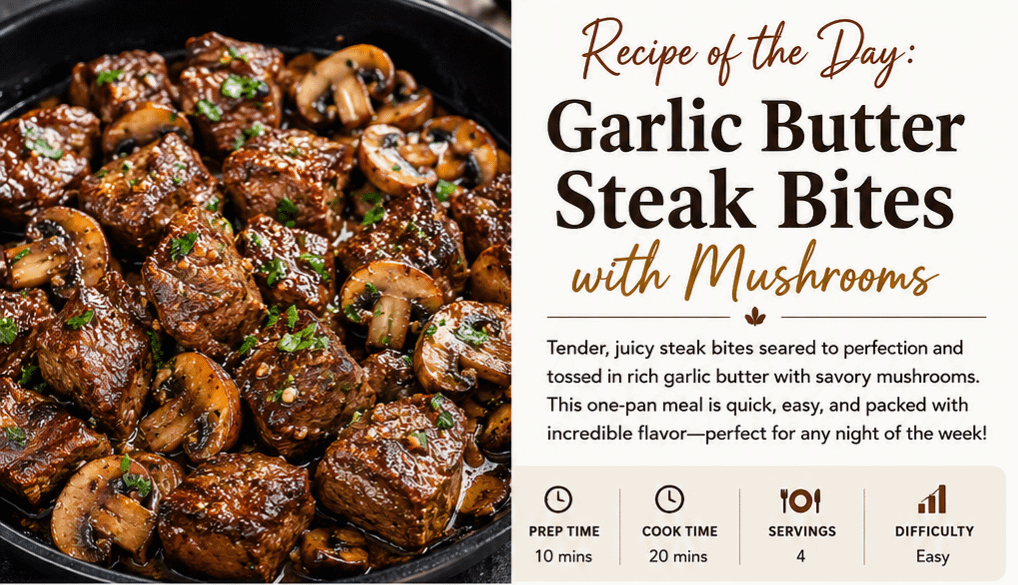
  • Recipe of the Day: Garlic Butter Steak Bites with Mushrooms

    Recipe of the Day: Garlic Butter Steak Bites with Mushrooms

    If you’re searching for a dinner that’s packed with flavor, quick to prepare, and impressive enough for guests, Garlic Butter Steak Bites with Mushrooms deserves a place on your weekly menu. This easy one-pan recipe combines tender, juicy steak with perfectly browned mushrooms in a rich garlic butter sauce that’s impossible to resist. Every bite is loaded with savory goodness, making it the perfect comfort food while still feeling elegant enough for a special occasion.

    One of the best things about this recipe is its versatility. Whether you’re serving it over creamy mashed potatoes, fluffy rice, buttered noodles, roasted vegetables, or enjoying it as a low-carb meal with a side salad, it adapts beautifully to almost any dining style. Best of all, it comes together in about 30 minutes, making it ideal for busy weeknights when you want a homemade meal without spending hours in the kitchen.

    Unlike expensive steakhouse dinners, this recipe delivers premium flavor using simple ingredients and a single skillet. With the right cooking technique, you’ll achieve beautifully caramelized steak bites that remain juicy on the inside while mushrooms soak up the rich garlic butter sauce, creating an unforgettable combination.

    Why You’ll Love This Recipe

    There are countless reasons why Garlic Butter Steak Bites with Mushrooms has become a favorite among home cooks.

    Quick and Easy

    Dinner is ready in about 30 minutes, making it perfect for busy evenings.

    One-Pan Cleanup

    Everything cooks in one skillet, meaning less time washing dishes and more time enjoying your meal.

    Incredible Flavor

    Butter, garlic, herbs, Worcestershire sauce, and mushrooms create layers of savory flavor that perfectly complement the steak.

    Restaurant-Quality at Home

    This dish tastes like something you’d order at an upscale steakhouse but costs a fraction of the price to make.

    Family Friendly

    Kids and adults alike love tender steak bites, and the recipe can easily be customized for picky eaters.

    Great for Meal Prep

    Leftovers reheat well and make excellent lunches throughout the week.

    The Secret to Perfect Steak Bites

    Many people overcook steak because they’re afraid of undercooking it. The key to juicy steak bites is using high heat for a short amount of time.

    The goal is to develop a flavorful crust while keeping the inside tender and juicy.

    A cast-iron skillet is ideal because it retains heat exceptionally well, allowing the steak to sear instead of steam.

    Another important tip is avoiding overcrowding the pan. If too many pieces of steak are added at once, the temperature drops, moisture builds up, and the meat begins steaming instead of browning.

    Cooking in batches is well worth the extra few minutes.

    Ingredients

    Steak

    • 2 pounds sirloin steak, cut into 1-inch cubes
    • Salt and freshly cracked black pepper
    • 1 teaspoon garlic powder
    • 1 teaspoon smoked paprika
    • 2 tablespoons olive oil

    Mushrooms

    • 16 ounces baby bella mushrooms, sliced
    • 2 tablespoons butter
    • 4 cloves garlic, minced
    • 1 teaspoon fresh thyme (or ½ teaspoon dried)

    Garlic Butter Sauce

    • 3 tablespoons butter
    • 2 cloves garlic, minced
    • 1 tablespoon Worcestershire sauce
    • 1 tablespoon chopped fresh parsley
    • Optional squeeze of fresh lemon juice

    Choosing the Best Cut of Steak

    While this recipe works with several cuts of beef, choosing the right one makes a noticeable difference.

    Sirloin

    Sirloin is one of the most popular choices because it offers an excellent balance of tenderness, flavor, and affordability.

    Ribeye

    Ribeye has more marbling, resulting in extra juicy and flavorful steak bites.

    New York Strip

    A firm, beefy cut that develops an outstanding crust.

    Tenderloin

    The most tender option available, though also the most expensive.

    Avoid tougher cuts like chuck unless they are slow cooked, as they won’t become tender with quick searing.

    Step-by-Step Instructions

    Step 1: Prepare the Steak

    Remove the steak from the refrigerator about 20 minutes before cooking.

    Allowing the meat to come closer to room temperature promotes even cooking.

    Pat every piece dry using paper towels.

    Season generously with:

    • Salt
    • Black pepper
    • Garlic powder
    • Smoked paprika

    Let the seasoning rest while preparing the mushrooms.

    Step 2: Cook the Mushrooms

    Heat a large cast-iron skillet over medium-high heat.

    Add:

    • Butter
    • Mushrooms

    Allow the mushrooms to cook undisturbed for several minutes before stirring.

    This helps them develop a beautiful golden-brown color.

    Once browned, add:

    • Garlic
    • Thyme

    Cook for another minute until fragrant.

    Transfer mushrooms to a plate.

    Step 3: Sear the Steak

    Increase the skillet to high heat.

    Add olive oil.

    Place steak cubes into the pan in a single layer.

    Avoid moving them immediately.

    Allow each piece to sear for about two minutes before turning.

    Cook another two minutes for medium-rare.

    Adjust cooking time according to your preferred doneness.

    Repeat with remaining steak if necessary.

    Step 4: Build the Garlic Butter Sauce

    Reduce heat to medium.

    Add:

    • Butter
    • Garlic

    Cook just until fragrant.

    Stir in Worcestershire sauce.

    Return mushrooms and steak to the skillet.

    Gently toss everything together until evenly coated.

    Finish with chopped parsley and fresh lemon juice for brightness.

    Serve immediately while hot.

    Why Mushrooms Work So Well

    Mushrooms naturally absorb the garlic butter while releasing their own earthy flavor into the pan.

    Baby bella mushrooms are especially delicious because they have:

    • Richer flavor
    • Firmer texture
    • Meatier bite
    • Better browning than white mushrooms

    Other excellent choices include:

    • Cremini
    • Shiitake
    • Portobello
    • Wild mushroom blends

    Flavor Variations

    This recipe is wonderfully customizable.

    Cajun Style

    Season the steak with Cajun seasoning instead of smoked paprika.

    Creamy Garlic Parmesan

    After adding the butter, stir in:

    • ½ cup heavy cream
    • ½ cup grated Parmesan cheese

    The sauce becomes rich, creamy, and luxurious.

    Spicy Version

    Add:

    • Red pepper flakes
    • Cayenne pepper
    • Chipotle powder

    Herb Butter

    Mix fresh:

    • Rosemary
    • Thyme
    • Parsley
    • Chives

    into the butter for an aromatic finish.

    Bacon Lovers

    Cook chopped bacon first.

    Reserve some bacon grease for searing the steak.

    Crumble crispy bacon over the finished dish.

    Best Side Dishes

    This meal pairs beautifully with countless side dishes.

    Potatoes

    • Creamy mashed potatoes
    • Garlic mashed potatoes
    • Roasted baby potatoes
    • Loaded baked potatoes

    Vegetables

    • Roasted asparagus
    • Green beans
    • Brussels sprouts
    • Broccoli
    • Honey glazed carrots

    Pasta

    • Buttered egg noodles
    • Garlic parmesan pasta
    • Fettuccine Alfredo

    Rice

    • Garlic rice
    • Herb rice
    • Wild rice blend

    Low-Carb Options

    • Cauliflower mash
    • Roasted zucchini
    • Steamed broccoli
    • Mixed green salad

    Wine Pairings

    If you’re serving this dish for a dinner party, consider pairing it with:

    Red Wines

    • Cabernet Sauvignon
    • Merlot
    • Malbec
    • Syrah

    White Wines

    If you prefer white wine, choose a rich Chardonnay with buttery notes.

    Nutritional Benefits

    Steak provides several important nutrients, including:

    • High-quality protein
    • Iron
    • Zinc
    • Vitamin B12
    • Selenium

    Mushrooms contribute:

    • B vitamins
    • Potassium
    • Antioxidants
    • Fiber
    • Vitamin D (when exposed to sunlight)

    Garlic has long been appreciated for its potential health benefits, while fresh herbs add vitamins and vibrant flavor.

    Common Mistakes to Avoid

    Overcrowding the Pan

    This prevents proper browning.

    Cook in batches if needed.

    Cooking Cold Steak

    Room-temperature steak cooks more evenly.

    Constantly Stirring

    Leave the steak alone long enough to develop a crust.

    Burning the Garlic

    Garlic cooks quickly.

    Add it near the end so it becomes fragrant without becoming bitter.

    Overcooking

    Steak continues cooking after being removed from the heat.

    Pull it slightly before reaching your desired doneness.

    Storage Instructions

    Refrigerate leftovers in an airtight container for up to three days.

    For best results, reheat gently in a skillet with a tablespoon of butter over medium-low heat.

    Microwaving is convenient but can make steak slightly tougher.

    Meal Prep Tips

    This recipe is excellent for meal prepping.

    Store steak and mushrooms separately from rice or vegetables.

    Portion into meal prep containers for easy lunches.

    The leftovers are also fantastic inside:

    • Wraps
    • Quesadillas
    • Pasta dishes
    • Salads
    • Loaded baked potatoes

    Frequently Asked Questions

    Can I use frozen steak?

    Fresh steak is recommended, but frozen steak can be used if completely thawed and patted dry before cooking.

    Can I substitute another protein?

    Yes. Chicken breast, pork tenderloin, or shrimp all work wonderfully with the same garlic butter sauce.

    Can I make it dairy-free?

    Absolutely. Replace butter with dairy-free butter or olive oil.

    Can I prepare it ahead?

    You can cube and season the steak several hours ahead of time and slice the mushrooms in advance, making dinner even faster.

    Final Thoughts

    Garlic Butter Steak Bites with Mushrooms is proof that incredible meals don’t require complicated ingredients or hours in the kitchen. Tender steak, earthy mushrooms, aromatic garlic, and rich butter come together in a single skillet to create a meal that’s comforting, satisfying, and bursting with flavor.

    Whether you’re preparing a quick family dinner, entertaining friends, or simply treating yourself to a steakhouse-inspired meal at home, this recipe delivers every single time. Its versatility means you can customize it with different herbs, spices, sauces, or side dishes, making it a recipe you’ll return to again and again.

    Once you experience the juicy steak bites coated in silky garlic butter alongside perfectly browned mushrooms, you’ll understand why this simple skillet meal has become a favorite in kitchens everywhere.

    Read More Recipes

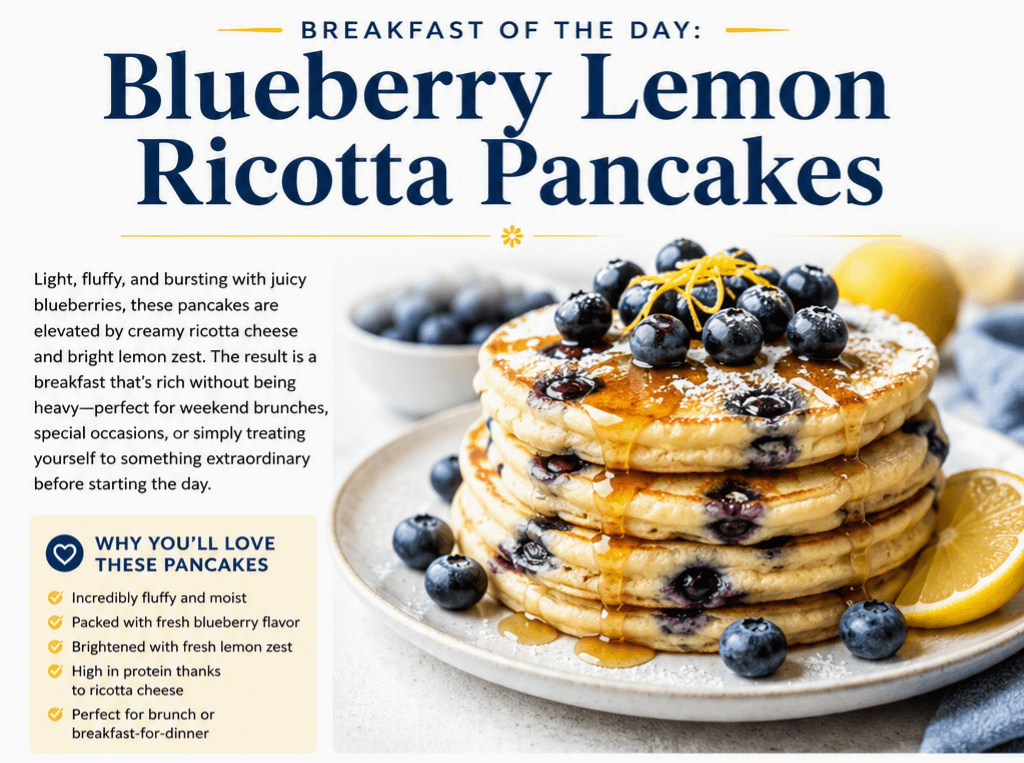
  • Breakfast of the Day: Blueberry Lemon Ricotta Pancakes

    Breakfast of the Day: Blueberry Lemon Ricotta Pancakes

    Few breakfasts strike the perfect balance between comfort and elegance quite like Blueberry Lemon Ricotta Pancakes. With their light, fluffy texture, bursts of sweet blueberries, creamy ricotta cheese, and the bright citrus flavor of fresh lemon, these pancakes transform an ordinary morning into something truly special.

    Whether you’re preparing a leisurely weekend brunch, celebrating a holiday morning, or simply looking to elevate your breakfast routine, Blueberry Lemon Ricotta Pancakes deliver restaurant-quality flavor from the comfort of your own kitchen. They are soft, moist, and rich without feeling overly heavy, making them a favorite among both pancake lovers and brunch enthusiasts.

    The combination of blueberries and lemon has long been celebrated for its refreshing flavor profile. Add creamy ricotta to the mix, and you have pancakes that are tender, airy, and packed with deliciousness in every bite.


    Why Ricotta Makes Pancakes Better

    Unlike traditional pancake recipes that rely solely on milk, ricotta cheese creates a wonderfully soft texture while adding richness and protein. Because ricotta contains moisture and small curds, it melts beautifully into the batter, producing pancakes that remain fluffy and tender even after they’ve cooled slightly.

    Benefits of ricotta include:

    • Creates incredibly fluffy pancakes
    • Adds extra protein
    • Provides calcium for bone health
    • Gives pancakes a creamy texture
    • Keeps pancakes moist longer

    Many brunch restaurants use ricotta in their pancake recipes because it consistently produces a softer, more luxurious result than standard pancake batter alone.


    The Perfect Flavor Combination

    Blueberries and lemons naturally complement one another.

    The blueberries contribute:

    • Natural sweetness
    • Juicy bursts of flavor
    • Beautiful color
    • Mild tartness

    Fresh lemons provide:

    • Bright citrus aroma
    • Fresh acidity
    • Natural balance to the sweetness
    • A clean finish that keeps every bite tasting light

    Together, these ingredients create a pancake that feels fresh, vibrant, and satisfying.


    Ingredients

    Dry Ingredients

    • 1 cup all-purpose flour
    • 1 tablespoon granulated sugar
    • 1 teaspoon baking powder
    • ½ teaspoon baking soda
    • ¼ teaspoon salt

    Wet Ingredients

    • ¾ cup whole milk ricotta cheese
    • 2 large eggs
    • ½ cup milk
    • 1 teaspoon vanilla extract
    • 1 tablespoon fresh lemon zest
    • 1 tablespoon fresh lemon juice

    Add-Ins

    • 1 cup fresh blueberries

    For Cooking

    • Butter or neutral cooking oil

    Optional Toppings

    Take your pancakes to the next level with your favorite toppings.

    Popular choices include:

    • Pure maple syrup
    • Fresh blueberries
    • Lemon slices
    • Powdered sugar
    • Whipped cream
    • Greek yogurt
    • Honey
    • Lemon glaze
    • Blueberry compote
    • Toasted almonds
    • Chopped pecans
    • Fresh mint

    Step-by-Step Instructions

    Step 1: Prepare the Dry Ingredients

    In a large mixing bowl, whisk together:

    • Flour
    • Sugar
    • Baking powder
    • Baking soda
    • Salt

    Mix thoroughly to evenly distribute the leavening agents.


    Step 2: Mix the Wet Ingredients

    In a separate bowl combine:

    • Ricotta cheese
    • Eggs
    • Milk
    • Vanilla extract
    • Lemon zest
    • Lemon juice

    Whisk until smooth and creamy.


    Step 3: Combine the Batter

    Pour the wet mixture into the dry ingredients.

    Stir gently until just combined.

    The batter should remain slightly lumpy.

    Overmixing develops gluten, resulting in tougher pancakes.


    Step 4: Fold in the Blueberries

    Using a spatula, gently fold in the blueberries.

    Avoid stirring aggressively to keep the berries intact.


    Step 5: Cook the Pancakes

    Heat a buttered nonstick skillet or griddle over medium heat.

    Pour approximately ¼ cup batter for each pancake.

    Cook until:

    • Small bubbles form across the surface
    • The edges begin setting
    • Bottom becomes golden brown

    Flip carefully.

    Cook another 2–3 minutes until fully cooked through.

    Repeat until all batter has been used.


    Tips for Perfect Pancakes

    Don’t Overmix

    One of the biggest pancake mistakes is mixing until perfectly smooth.

    Small lumps create softer pancakes.

    Use Fresh Lemons

    Fresh zest contains essential oils that bottled lemon juice simply cannot match.

    Medium Heat Works Best

    Cooking too quickly burns the outside while leaving the inside undercooked.

    Rest the Batter

    Allow the batter to sit for 5–10 minutes before cooking.

    This helps hydrate the flour and produces fluffier pancakes.

    Don’t Press Them Down

    Avoid flattening pancakes with your spatula.

    Doing so pushes out the air that creates their light texture.


    Nutritional Benefits

    These pancakes don’t just taste amazing—they also provide several nutritional advantages.

    Blueberries

    Blueberries are among the most nutrient-dense fruits available.

    They contain:

    • Antioxidants
    • Vitamin C
    • Vitamin K
    • Fiber
    • Manganese

    Research suggests blueberries may help support:

    • Brain health
    • Heart health
    • Healthy aging
    • Reduced inflammation

    Lemons

    Fresh lemons provide:

    • Vitamin C
    • Antioxidants
    • Natural citrus oils
    • Refreshing flavor

    Their bright acidity balances richer ingredients beautifully.


    Ricotta Cheese

    Ricotta offers:

    • High-quality protein
    • Calcium
    • Phosphorus
    • Vitamin A

    Protein helps increase fullness, making these pancakes more satisfying than many traditional breakfast options.


    Delicious Variations

    Once you’ve mastered the classic recipe, try these creative twists.

    Lemon Poppy Seed

    Add:

    • 1 tablespoon poppy seeds

    Perfect for spring breakfasts.


    Triple Berry Pancakes

    Mix:

    • Blueberries
    • Raspberries
    • Blackberries

    An explosion of berry flavor.


    White Chocolate Blueberry

    Fold in:

    • White chocolate chips

    Creates an indulgent brunch favorite.


    Almond Lemon

    Add:

    • Almond extract
    • Toasted sliced almonds

    Perfect with maple syrup.


    Cinnamon Blueberry

    Add:

    • 1 teaspoon cinnamon

    Creates a warm, comforting flavor.


    Protein Boost

    Mix in:

    • Vanilla protein powder
    • Additional Greek yogurt

    Ideal after workouts.


    What to Serve with Blueberry Lemon Ricotta Pancakes

    Create a complete breakfast by serving them alongside:

    Breakfast Meats

    • Bacon
    • Sausage
    • Turkey sausage
    • Canadian bacon

    Fresh Fruit

    • Strawberries
    • Pineapple
    • Grapes
    • Kiwi
    • Orange slices
    • Melon

    Drinks

    • Coffee
    • Cold brew
    • Cappuccino
    • Fresh orange juice
    • Lemonade
    • Hot tea
    • Iced coffee

    Great for Special Occasions

    These pancakes are ideal for:

    • Mother’s Day
    • Father’s Day
    • Easter brunch
    • Christmas morning
    • Baby showers
    • Bridal brunches
    • Birthday breakfasts
    • Weekend family gatherings

    Their beautiful presentation makes them worthy of any celebration.


    Storage Tips

    Refrigerator

    Store leftovers in an airtight container for up to 3 days.

    Freezer

    Freeze individual pancakes with parchment paper between each layer.

    Store for up to 2 months.

    Reheating

    Warm in:

    • Toaster
    • Oven
    • Microwave
    • Air fryer

    They retain their fluffy texture surprisingly well.


    Why This Recipe Is a Crowd Favorite

    Blueberry Lemon Ricotta Pancakes have become increasingly popular because they combine everything people love about breakfast into one dish.

    They’re:

    • Soft
    • Fluffy
    • Creamy
    • Fruity
    • Bright
    • Comforting
    • Beautifully colorful
    • Easy to prepare
    • Family-friendly
    • Restaurant-worthy

    Children love the juicy blueberries, while adults appreciate the sophisticated balance of lemon and ricotta.


    Final Thoughts

    Blueberry Lemon Ricotta Pancakes are more than just another pancake recipe—they’re a breakfast experience that brings together fresh fruit, creamy cheese, and vibrant citrus in every bite. Their irresistible texture and balanced flavors make them perfect for everything from a relaxing Sunday morning to a festive holiday brunch.

    Whether you drizzle them with warm maple syrup, top them with fresh berries and whipped cream, or enjoy them with a simple dusting of powdered sugar, these pancakes are guaranteed to brighten your morning. If you’re looking for a breakfast that’s both comforting and impressive, Blueberry Lemon Ricotta Pancakes deserve a place in your regular breakfast rotation. One stack is all it takes to turn an ordinary morning into a memorable one.

    Read More Recipes

  • Dessert of the Day: Extreme Oreo Cupcakes

    Dessert of the Day: Extreme Oreo Cupcakes

    Extreme Oreo Cupcakes: The Ultimate Cookies-and-Cream Dessert That Everyone Will Love

    When it comes to desserts, few treats have achieved the iconic status of the Oreo cookie. With its crisp chocolate wafers and sweet vanilla cream filling, Oreos have become a favorite for generations. From dunking them in milk to blending them into milkshakes and cheesecakes, these classic cookies can transform almost any dessert into something unforgettable.

    Today’s Dessert of the Day: Extreme Oreo Cupcakes takes that love for Oreos to the next level. These aren’t your average chocolate cupcakes. They’re loaded from top to bottom with Oreo goodness, featuring a whole Oreo hidden beneath the cupcake, crushed cookies folded into the batter, fluffy cookies-and-cream buttercream frosting, and an eye-catching mountain of Oreo toppings.

    Whether you’re baking for a birthday, holiday gathering, office party, bake sale, or simply because you’re craving something sweet, these cupcakes are guaranteed to impress. Every bite combines moist chocolate cake, crunchy cookie pieces, creamy frosting, and rich chocolate flavor into one unforgettable dessert.


    Why Everyone Loves Oreo Desserts

    Oreos have remained one of America’s favorite cookies for over a century, and it’s easy to understand why. Their combination of crunchy chocolate cookies and creamy vanilla filling works perfectly in nearly every type of dessert imaginable.

    They pair wonderfully with:

    • Chocolate
    • Vanilla
    • Cheesecake
    • Peanut butter
    • Mint
    • Coffee
    • Caramel
    • White chocolate

    Because Oreos add both flavor and texture, they create desserts that feel rich without being overly complicated to make.

    Extreme Oreo Cupcakes celebrate everything that makes Oreos so popular while adding the richness of homemade cupcakes and buttery frosting.


    Why You’ll Love These Cupcakes

    These cupcakes are much more than chocolate cake with frosting.

    Each cupcake includes:

    • A whole Oreo cookie baked into the bottom
    • Moist chocolate cupcake batter
    • Oreo cookie chunks throughout
    • Rich cookies-and-cream buttercream
    • Crushed Oreo topping
    • Chocolate drizzle
    • Mini Oreo cookie garnish

    The result is multiple layers of texture and flavor in every bite.

    You’ll experience:

    • Soft cake
    • Crunchy cookies
    • Creamy frosting
    • Rich chocolate
    • Sweet vanilla filling

    Every bite offers something different, making these cupcakes incredibly satisfying.


    Ingredients

    For the Cupcakes

    • 18 Oreo cookies
    • 1 box chocolate cake mix (or homemade batter)
    • Ingredients listed on the cake mix

    Homemade Chocolate Batter

    • 1¾ cups all-purpose flour
    • ¾ cup unsweetened cocoa powder
    • 2 cups granulated sugar
    • 2 teaspoons baking powder
    • 1 teaspoon baking soda
    • ½ teaspoon salt
    • 2 large eggs
    • 1 cup whole milk
    • ½ cup vegetable oil
    • 2 teaspoons vanilla extract
    • 1 cup hot coffee or hot water

    Coffee deepens the chocolate flavor without making the cupcakes taste like coffee.


    Oreo Buttercream Frosting

    • 1 cup unsalted butter, softened
    • 4 cups powdered sugar
    • 2 teaspoons vanilla extract
    • 2–3 tablespoons heavy cream
    • 12 Oreo cookies, finely crushed

    Toppings

    • Crushed Oreo cookies
    • Mini Oreos
    • Whole Oreo halves
    • Chocolate syrup
    • White chocolate drizzle
    • Chocolate sprinkles
    • Chocolate curls (optional)

    Step-by-Step Instructions

    Step 1: Prepare Your Oven

    Preheat the oven to 350°F (175°C).

    Line a muffin pan with cupcake liners.

    Place one whole Oreo cookie flat in the bottom of each liner.

    This creates a delicious surprise waiting underneath every cupcake.


    Step 2: Mix the Batter

    Prepare your chocolate batter according to the recipe or cake mix instructions.

    Before filling the cupcake liners, roughly chop several Oreos and gently fold them into the batter.

    This ensures cookie pieces are found throughout every cupcake.


    Step 3: Fill the Cupcake Liners

    Fill each liner approximately two-thirds full.

    Avoid overfilling, as the cupcakes need room to rise.


    Step 4: Bake

    Bake for 18–22 minutes, or until a toothpick inserted into the cake comes out with only a few moist crumbs.

    Allow cupcakes to cool in the pan for five minutes before transferring them to a wire rack.

    Let them cool completely before frosting.


    Making the Perfect Oreo Buttercream

    Cream the softened butter until smooth and fluffy.

    Gradually add powdered sugar one cup at a time.

    Mix in:

    • Vanilla extract
    • Heavy cream

    Beat until the frosting becomes light and airy.

    Finally, stir in finely crushed Oreo cookies.

    For the smoothest frosting, use very fine Oreo crumbs so they pipe easily through your decorating tip.


    Decorating Your Extreme Oreo Cupcakes

    This is where the fun begins.

    Pipe a generous swirl of Oreo buttercream onto each cupcake.

    Then add layers of toppings:

    • Crushed Oreos
    • Mini Oreo cookie
    • Oreo half
    • Chocolate drizzle
    • White chocolate drizzle
    • Chocolate sprinkles
    • Cookie crumbs around the frosting

    The more dramatic the topping, the more “extreme” the cupcakes become.


    Tips for Bakery-Style Cupcakes

    Use Room Temperature Ingredients

    Room-temperature butter and eggs create a smoother batter and fluffier frosting.


    Don’t Overmix

    Overmixing develops too much gluten, making cupcakes dense instead of soft.

    Mix until ingredients are just combined.


    Cool Completely

    Even slightly warm cupcakes can melt buttercream.

    Patience produces better results.


    Pipe Tall Frosting Swirls

    Professional bakeries often use large piping tips to create dramatic frosting towers.

    More frosting means more cookies-and-cream flavor.


    Fun Variations

    Peanut Butter Oreo Cupcakes

    Mix creamy peanut butter into the frosting and drizzle with melted peanut butter.


    Mint Oreo Cupcakes

    Use Mint Oreos and add a few drops of peppermint extract to the frosting.


    Double Chocolate Oreo

    Add chocolate chips to the batter for even more chocolate richness.


    Cookies & Cream Cheesecake Cupcakes

    Add a spoonful of cheesecake filling before baking.

    The creamy center creates an extra surprise.


    Salted Caramel Oreo Cupcakes

    Drizzle warm caramel sauce over the frosting and sprinkle lightly with sea salt.

    The sweet-and-salty combination is incredible.


    Birthday Oreo Cupcakes

    Add colorful sprinkles to both the batter and frosting for a festive celebration.


    Serving Suggestions

    Serve these cupcakes with:

    • Cold milk
    • Fresh coffee
    • Hot chocolate
    • Vanilla ice cream
    • Chocolate milkshakes
    • Cookies-and-cream ice cream

    They also make a beautiful centerpiece for dessert tables because of their impressive appearance.


    Perfect for Every Celebration

    Extreme Oreo Cupcakes fit almost every occasion.

    They’re perfect for:

    • Birthday parties
    • Graduation celebrations
    • Baby showers
    • Family reunions
    • School bake sales
    • Potlucks
    • Holiday gatherings
    • Game nights
    • Office celebrations
    • Weekend baking projects

    Kids love decorating them, while adults appreciate their rich cookies-and-cream flavor.


    How to Store Them

    Store cupcakes in an airtight container.

    • Room temperature: Up to 3 days
    • Refrigerator: Up to 5 days
    • Freezer (unfrosted): Up to 3 months

    If refrigerated, let them sit at room temperature for about 20 minutes before serving so the frosting becomes soft and creamy again.


    Make Them Ahead

    These cupcakes are ideal for preparing in advance.

    • Bake the cupcakes one day early.
    • Store them covered overnight.
    • Prepare the frosting the same day or refrigerate it separately.
    • Frost and decorate just before serving for the freshest presentation.

    This makes them an excellent dessert for parties and special occasions where you want to reduce last-minute work.


    Frequently Asked Questions

    Can I use Golden Oreos?

    Absolutely! Golden Oreos create a delicious vanilla version with a lighter flavor while maintaining the same crunchy texture.

    Can I use homemade chocolate cupcakes?

    Yes. Homemade batter often results in an even richer flavor and allows you to customize the sweetness and cocoa intensity.

    Can I make mini cupcakes?

    Yes. Simply use mini muffin pans, place mini Oreos in the bottom, and reduce the baking time to about 10–12 minutes.

    How do I keep the frosting smooth?

    Crush the Oreo cookies into very fine crumbs using a food processor or by placing them in a zip-top bag and crushing them thoroughly with a rolling pin. This prevents the piping tip from clogging.


    Final Thoughts

    If you’re searching for a dessert that’s guaranteed to impress, Extreme Oreo Cupcakes deliver on every level. They’re rich, decadent, visually stunning, and packed with the irresistible cookies-and-cream flavor that Oreo fans adore.

    From the hidden Oreo baked into the base to the creamy buttercream loaded with cookie crumbs and the towering decorations on top, every element of these cupcakes is designed to delight. They’re easy enough for home bakers to make yet impressive enough to rival cupcakes from a professional bakery.

    Whether you’re celebrating a special occasion or simply treating yourself to something indulgent, these cupcakes are sure to become a favorite recipe you’ll return to again and again. After all, when it comes to Oreo desserts, there’s no such thing as too much—and these Extreme Oreo Cupcakes prove it with every delicious bite.

  • Healthy Recipe of the Day: Cheesy Beef & Black Bean Skillet Casserole

    Healthy Recipe of the Day: Cheesy Beef & Black Bean Skillet Casserole

    There is something incredibly satisfying about gathering around the table for a warm, homemade meal that is both comforting and nourishing. This Cheesy Beef & Black Bean Skillet Casserole checks all the boxes. It’s hearty enough to satisfy even the biggest appetites, yet it’s packed with wholesome ingredients that make it a healthier alternative to many traditional casseroles.

    Unlike many casserole recipes loaded with heavy cream, excessive cheese, or processed ingredients, this version focuses on lean protein, fiber-rich beans, colorful vegetables, and just enough cheese to create that irresistible golden topping. Everything comes together in one skillet, making cleanup simple while delivering layers of flavor that taste like the meal has been cooking all day.

    Whether you’re looking for an easy weeknight dinner, a meal prep favorite, or a healthy comfort food recipe the whole family will enjoy, this skillet casserole deserves a permanent place in your recipe collection.


    Why You’ll Love This Recipe

    Healthy recipes don’t have to be boring. This casserole proves that nutritious meals can also be rich, cheesy, and satisfying.

    Here’s why you’ll love making it:

    • Ready in about 35 minutes.
    • Uses simple pantry staples.
    • One-pan recipe means less cleanup.
    • High in protein and fiber.
    • Budget-friendly ingredients.
    • Great for meal prep.
    • Freezer-friendly.
    • Easily customizable for different tastes.
    • Naturally gluten-free when served on its own.
    • Family-approved comfort food.

    Every bite offers a balance of savory beef, creamy black beans, sweet corn, juicy tomatoes, tender peppers, and melted cheddar cheese.


    Why This Is a Healthy Comfort Food

    Many casseroles rely heavily on cream soups, butter, or large amounts of cheese. While delicious, they can also be high in calories, saturated fat, and sodium.

    This healthier version focuses on nutrient-dense ingredients that provide lasting energy while still delivering incredible flavor.

    The combination of lean beef and black beans creates a meal that’s rich in protein and fiber—two nutrients that help you stay fuller longer and support stable blood sugar levels.

    Fresh vegetables add vitamins, minerals, antioxidants, and natural sweetness, while a moderate amount of cheese creates the perfect finishing touch without overwhelming the dish.

    Instead of relying on processed ingredients, this casserole lets wholesome foods shine.


    Ingredients

    Protein

    • 1 pound lean ground beef (90% lean)

    Vegetables

    • 1 tablespoon olive oil
    • 1 small onion, diced
    • 1 bell pepper, diced
    • 3 cloves garlic, minced
    • 1 cup frozen corn

    Pantry Staples

    • 1 (15-ounce) can black beans, drained and rinsed
    • 1 (14.5-ounce) can diced tomatoes with green chilies

    Seasonings

    • 1 teaspoon chili powder
    • 1 teaspoon smoked paprika
    • ½ teaspoon cumin
    • Salt and black pepper to taste

    Cheese

    • 1 cup reduced-fat shredded cheddar cheese

    Garnish

    • Fresh cilantro

    Optional toppings include:

    • Greek yogurt
    • Fresh avocado
    • Green onions
    • Salsa
    • Jalapeños
    • Fresh lime wedges

    Step-by-Step Directions

    Step 1: Brown the Beef

    Heat olive oil in a large oven-safe skillet over medium-high heat.

    Add the ground beef and cook until browned, breaking it into small crumbles with a wooden spoon.

    If there’s excess grease, carefully drain it before moving to the next step.

    Using lean beef keeps the casserole flavorful while reducing unnecessary fat.


    Step 2: Sauté the Vegetables

    Add the diced onion and bell pepper directly into the skillet.

    Cook for about five minutes until softened.

    Add the minced garlic and stir for another minute until fragrant.

    This creates the aromatic base that gives the casserole its rich homemade flavor.


    Step 3: Build the Filling

    Add:

    • Black beans
    • Corn
    • Diced tomatoes
    • Chili powder
    • Smoked paprika
    • Cumin
    • Salt
    • Pepper

    Mix everything thoroughly.

    Allow the mixture to simmer for 5–7 minutes.

    During this time the tomatoes release their juices while the spices blend together into a rich, slightly smoky sauce.


    Step 4: Melt the Cheese

    Sprinkle the shredded cheddar evenly across the top.

    Place the skillet under your oven’s broiler for about 2–3 minutes.

    Watch carefully until the cheese becomes bubbly and lightly browned.

    If your skillet isn’t oven-safe, simply place a lid over the pan until the cheese melts.


    Step 5: Garnish

    Finish with:

    • Fresh cilantro
    • Green onions
    • Avocado
    • Greek yogurt
    • Lime juice

    The fresh toppings brighten the rich flavors and add another layer of nutrition.

    Serve immediately while the cheese is hot and gooey.


    Nutrition Highlights

    One serving provides an excellent balance of nutrients.

    Lean Ground Beef

    Lean beef is one of the best sources of complete protein.

    It supplies all nine essential amino acids your body needs while also providing:

    • Iron
    • Zinc
    • Selenium
    • Vitamin B12
    • Niacin

    These nutrients help support:

    • Muscle repair
    • Healthy red blood cells
    • Immune function
    • Energy production

    Black Beans

    Black beans are one of the healthiest pantry staples available.

    They’re naturally rich in:

    • Fiber
    • Plant protein
    • Magnesium
    • Folate
    • Potassium

    Fiber helps:

    • Improve digestion
    • Lower cholesterol
    • Promote fullness
    • Stabilize blood sugar

    Combining beans with lean beef creates a meal that’s both satisfying and nutritionally balanced.


    Bell Peppers

    Bell peppers provide:

    • Vitamin C
    • Vitamin A
    • Vitamin B6
    • Folate
    • Antioxidants

    One bell pepper contains more vitamin C than an orange, helping support your immune system and healthy skin.


    Tomatoes

    Tomatoes are naturally rich in lycopene, a powerful antioxidant associated with heart health.

    They also provide:

    • Vitamin C
    • Potassium
    • Vitamin K

    Cooking tomatoes actually increases the availability of lycopene, making this casserole even more nutritious.


    Corn

    Corn contributes:

    • Fiber
    • B vitamins
    • Magnesium
    • Carotenoids

    Its natural sweetness balances the smoky spices beautifully.


    Cheese

    Cheddar cheese provides:

    • Calcium
    • Protein
    • Phosphorus

    Using reduced-fat cheese keeps calories lower while still giving the casserole its creamy finish.


    Ways to Customize This Recipe

    One of the best things about skillet casseroles is how flexible they are.

    Try adding:

    • Mushrooms
    • Spinach
    • Zucchini
    • Chopped kale
    • Sweet potatoes
    • Diced carrots

    You can also replace the beef with:

    • Ground turkey
    • Ground chicken
    • Lean ground pork
    • Plant-based meat alternatives

    Want more heat?

    Add:

    • Cayenne pepper
    • Diced jalapeños
    • Chipotle powder
    • Hot sauce

    Need extra protein?

    Mix in:

    • Pinto beans
    • Kidney beans
    • Extra black beans

    Serving Suggestions

    This casserole is filling enough to serve by itself, but it also pairs wonderfully with healthy side dishes.

    Some great options include:

    • Brown rice
    • Cauliflower rice
    • Quinoa
    • Roasted broccoli
    • Steamed green beans
    • Garden salad
    • Roasted Brussels sprouts
    • Whole wheat tortillas

    For extra freshness, top each serving with sliced avocado and a squeeze of fresh lime.


    Meal Prep Favorite

    This recipe is ideal for meal prepping.

    Simply divide the casserole into airtight containers and refrigerate.

    It reheats beautifully for quick lunches throughout the week.

    Because the flavors continue to blend overnight, many people find the leftovers taste even better the next day.


    Freezer Instructions

    Allow the casserole to cool completely.

    Place individual portions into freezer-safe containers.

    Freeze for up to three months.

    To reheat:

    • Thaw overnight in the refrigerator.
    • Microwave until hot.
    • Or warm gently in a skillet over medium heat.

    Add a small sprinkle of fresh cheese before serving for a freshly made taste.


    Tips for Success

    • Drain and rinse canned beans to reduce sodium.
    • Don’t overcook the vegetables—they should still have a little texture.
    • Use freshly shredded cheese for smoother melting.
    • Taste before adding extra salt, as canned tomatoes may already contain sodium.
    • Broil only until the cheese is lightly browned to prevent burning.
    • Garnish with fresh herbs just before serving for maximum flavor.

    Frequently Asked Questions

    Can I make this recipe ahead of time?

    Yes. Prepare the casserole, refrigerate it, and simply reheat before serving.


    Can I use ground turkey?

    Absolutely. Ground turkey makes an excellent lean substitute while keeping the recipe high in protein.


    Is this recipe gluten-free?

    Yes. The casserole itself is naturally gluten-free. Just verify that your canned ingredients and seasonings are certified gluten-free if needed.


    Can I make it vegetarian?

    Yes. Replace the beef with lentils, extra beans, or your favorite plant-based meat substitute.


    Can kids enjoy this recipe?

    Definitely. The mild spices create plenty of flavor without being overly spicy. You can always leave out the green chilies if your family prefers a milder version.


    Final Thoughts

    Comfort food and healthy eating don’t have to be opposites. This Healthy Recipe of the Day: Cheesy Beef & Black Bean Skillet Casserole combines the hearty flavors of a traditional casserole with wholesome ingredients that fuel your body and satisfy your appetite. With lean ground beef, protein-packed black beans, colorful vegetables, and a golden layer of melted cheddar cheese, every bite delivers comfort, nutrition, and delicious flavor.

    Whether you’re cooking for your family, preparing meals for the week, or simply craving a healthier version of a classic casserole, this one-skillet recipe is sure to become a favorite. It’s easy enough for busy weeknights, hearty enough for weekend dinners, and versatile enough to customize with your favorite ingredients. Enjoy a meal that brings comfort to the table while supporting your healthy lifestyle—one cheesy, satisfying bite at a time.