Category: Recipes

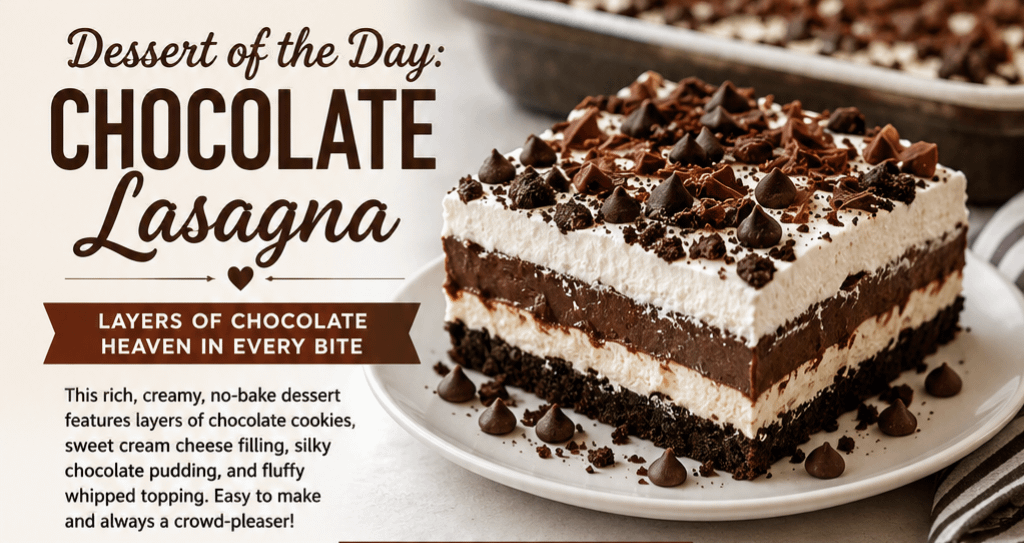
  • Dessert of the Day: Chocolate Lasagna

    Dessert of the Day: Chocolate Lasagna

    Layers of Chocolate Heaven in Every Bite

    If you’re looking for a dessert that always impresses without requiring advanced baking skills, Chocolate Lasagna is the perfect choice. This rich, creamy, no-bake dessert combines layers of chocolate cookies, sweet cream cheese filling, silky chocolate pudding, and fluffy whipped topping into one irresistible treat.

    Despite its name, Chocolate Lasagna contains no pasta. Instead, it gets its name from its beautiful layers that resemble a traditional lasagna. Every bite delivers a delicious combination of crunchy, creamy, and chocolatey goodness, making it a favorite for potlucks, birthdays, holidays, and family gatherings.

    Whether you’re preparing dessert for a crowd or simply satisfying your chocolate cravings, Chocolate Lasagna is guaranteed to disappear quickly.


    What Is Chocolate Lasagna?

    Chocolate Lasagna is a chilled layered dessert that starts with a chocolate cookie crust, followed by a sweet cream cheese layer, chocolate pudding, whipped topping, and chocolate garnish.

    The dessert originated as one of those classic family recipes shared at church gatherings and neighborhood potlucks. Over time, it became popular across the country because it’s easy to make, requires no baking after the crust, and can be prepared well in advance.

    Its smooth texture and rich chocolate flavor have made it one of America’s favorite no-bake desserts.


    Why You’ll Love This Dessert

    Chocolate Lasagna has earned its popularity for many reasons.

    • No complicated baking
    • Perfect make-ahead dessert
    • Rich chocolate flavor
    • Light, creamy texture
    • Great for parties
    • Easy to customize
    • Kid-friendly
    • Beautiful presentation

    Because it’s served cold, it’s especially refreshing during warmer months while still being rich enough for holiday celebrations.


    Ingredients

    Cookie Crust

    • 36 chocolate sandwich cookies (such as Oreos)
    • ½ cup melted butter

    Cream Cheese Layer

    • 8 ounces cream cheese, softened
    • ¼ cup granulated sugar
    • 2 tablespoons milk
    • 1 teaspoon vanilla extract
    • 1 cup whipped topping

    Chocolate Layer

    • Two 3.9-ounce packages instant chocolate pudding
    • 3 cups cold milk

    Topping

    • Remaining whipped topping
    • Mini chocolate chips
    • Chocolate curls
    • Crushed chocolate cookies
    • Chocolate syrup (optional)

    How to Make Chocolate Lasagna

    Step 1: Prepare the Crust

    Crush the chocolate cookies into fine crumbs using a food processor.

    Mix with melted butter until evenly coated.

    Press firmly into the bottom of a 9×13-inch baking dish.

    Refrigerate for 15–20 minutes until firm.


    Step 2: Make the Cream Cheese Filling

    Beat together:

    • Cream cheese
    • Sugar
    • Vanilla
    • Milk

    Fold in whipped topping until smooth and fluffy.

    Spread evenly over the chilled crust.

    Return to the refrigerator.


    Step 3: Prepare the Chocolate Pudding

    Whisk instant pudding with cold milk for about two minutes.

    Allow it to thicken slightly.

    Spread evenly over the cream cheese layer.


    Step 4: Add the Final Layer

    Spread the remaining whipped topping over the pudding.

    Smooth the surface with a spatula.


    Step 5: Decorate

    Sprinkle with:

    • Chocolate curls
    • Mini chocolate chips
    • Cookie crumbs
    • Chocolate shavings

    Drizzle lightly with chocolate syrup if desired.


    Step 6: Chill

    Refrigerate for at least 4 hours, though overnight produces the best texture.

    Serve cold.


    Tips for Perfect Chocolate Lasagna

    • Allow cream cheese to soften completely.
    • Use cold milk for the pudding.
    • Chill each layer briefly before adding the next.
    • Don’t rush the refrigeration time.
    • Slice with a clean knife for neat layers.
    • Freeze for 20 minutes before slicing if serving on a warm day.

    Delicious Variations

    Peanut Butter Chocolate Lasagna

    Add a layer of peanut butter mixed with cream cheese and top with chopped peanut butter cups.

    Mint Chocolate

    Use mint sandwich cookies and garnish with crushed peppermint candies.

    Cookies and Cream

    Mix crushed cookies into the cream cheese layer and top with extra cookie crumbs.

    Salted Caramel

    Drizzle caramel sauce between the pudding and whipped topping.

    Mocha Chocolate

    Add a teaspoon of espresso powder to the pudding for a rich coffee flavor.

    Triple Chocolate

    Use chocolate pudding, chocolate whipped topping, and dark chocolate shavings for an extra indulgent version.


    Serving Suggestions

    Chocolate Lasagna pairs wonderfully with:

    • Fresh strawberries
    • Raspberries
    • Vanilla ice cream
    • Fresh whipped cream
    • Hot coffee
    • Cold milk
    • Espresso
    • Chocolate drizzle

    Storage

    Keep refrigerated in an airtight container for up to 4 days.

    Chocolate Lasagna also freezes well for up to 2 months. Thaw overnight in the refrigerator before serving.


    Nutrition (Approximate Per Serving)

    • Calories: 420
    • Carbohydrates: 40g
    • Fat: 26g
    • Protein: 6g
    • Sugar: 29g

    Values will vary depending on brands used.


    Frequently Asked Questions

    Does Chocolate Lasagna contain noodles?

    No. The name comes from its layered appearance.

    Can I make it ahead of time?

    Absolutely. In fact, it’s even better after chilling overnight.

    Can I use homemade whipped cream?

    Yes. Homemade whipped cream creates an even richer flavor.

    Can I freeze Chocolate Lasagna?

    Yes. It freezes beautifully and can even be enjoyed partially frozen for an ice cream cake-like texture.

    Can I use different pudding flavors?

    Certainly. Chocolate fudge, white chocolate, cheesecake, or even peanut butter pudding all work well.


    Why Chocolate Lasagna Is So Popular

    Chocolate Lasagna has become a staple dessert because it combines simplicity with incredible flavor. Every layer offers a different texture—from the crunchy cookie crust to the silky pudding and airy whipped topping—creating a dessert that’s both satisfying and visually impressive.

    Since it can be made in advance and serves a crowd, it’s a favorite for family reunions, birthdays, holiday dinners, summer barbecues, and potluck gatherings. Best of all, no one can resist its rich chocolate goodness.

    Whether you’re making it for a special occasion or simply treating yourself after a long day, Chocolate Lasagna is a dessert that’s sure to earn rave reviews and requests for the recipe.
    Read More Recipes

  • Recipe of the Day: Hearty Beef and Potato Stew

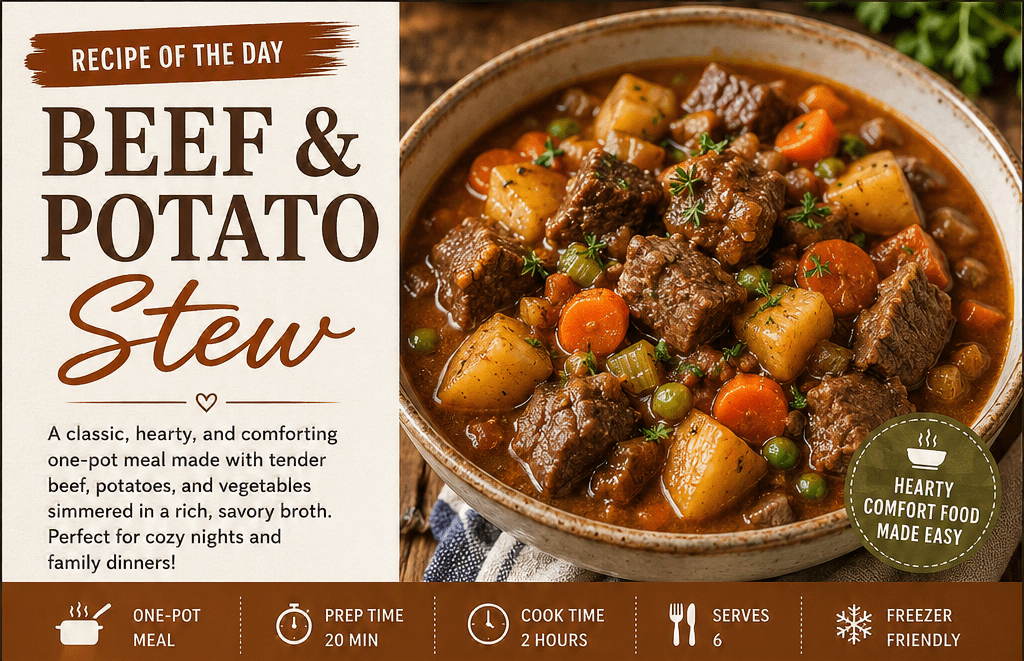
    Recipe of the Day: Hearty Beef and Potato Stew

    Nothing says comfort quite like a steaming bowl of homemade Beef and Potato Stew. This timeless recipe combines tender chunks of slow-cooked beef, hearty potatoes, sweet carrots, onions, and a rich, savory broth into a meal that’s perfect for chilly evenings or whenever you need a little comfort food. Best of all, it’s a one-pot recipe that’s easy to prepare and tastes even better the next day.

    Whether you’re cooking for your family or preparing meals for the week ahead, this classic stew is filling, flavorful, and sure to become a favorite.


    Why You’ll Love This Recipe

    • Rich, hearty comfort food
    • Perfect for meal prep
    • One-pot meal with easy cleanup
    • Great for slow cooking or stovetop
    • Packed with protein and vegetables
    • Freezer-friendly

    Ingredients

    For the Stew

    • 2 pounds beef chuck roast, cut into 1½-inch cubes
    • 2 tablespoons olive oil
    • 1 teaspoon salt
    • 1 teaspoon black pepper
    • 2 tablespoons all-purpose flour
    • 1 large onion, diced
    • 3 cloves garlic, minced
    • 4 cups beef broth
    • 2 tablespoons tomato paste
    • 1 tablespoon Worcestershire sauce
    • 1 teaspoon dried thyme
    • 1 teaspoon dried rosemary
    • 2 bay leaves

    Vegetables

    • 4 large Yukon Gold potatoes, cubed
    • 3 carrots, sliced
    • 2 celery stalks, chopped
    • 1 cup frozen peas
    • 2 tablespoons fresh parsley, chopped

    Optional Additions

    • Mushrooms
    • Green beans
    • Corn
    • Sweet potatoes
    • Red wine (½ cup for extra depth)
    • Fresh thyme sprigs

    Instructions

    Step 1: Brown the Beef

    Pat the beef dry with paper towels.

    Season with salt and pepper.

    Toss lightly with flour.

    Heat olive oil in a large Dutch oven over medium-high heat.

    Brown the beef in batches for about 3–4 minutes per side.

    Remove and set aside.


    Step 2: Cook the Vegetables

    In the same pot, add:

    • Onion
    • Carrots
    • Celery

    Cook for 5–6 minutes.

    Add garlic and cook for another minute.


    Step 3: Build the Broth

    Stir in:

    • Tomato paste
    • Worcestershire sauce
    • Thyme
    • Rosemary

    Pour in beef broth while scraping the browned bits from the bottom of the pot.

    Return beef to the pot.

    Add bay leaves.


    Step 4: Simmer

    Cover and simmer on low heat for:

    1½ to 2 hours

    The beef should become fork tender.


    Step 5: Add Potatoes

    Stir in the potatoes.

    Cook another 30–40 minutes until tender.


    Step 6: Finish

    Add frozen peas during the final 5 minutes.

    Remove bay leaves.

    Taste and adjust seasoning.

    Sprinkle with fresh parsley.

    Serve hot.


    Slow Cooker Directions

    1. Brown the beef first.
    2. Add everything except peas and parsley to the slow cooker.
    3. Cook:
      • Low: 8 hours
      • High: 4–5 hours
    4. Stir in peas during the last 20 minutes.
    5. Garnish with parsley before serving.

    Instant Pot Directions

    1. Use the Sauté function to brown the beef.
    2. Cook onions and garlic.
    3. Add broth and seasonings.
    4. Pressure cook for 35 minutes.
    5. Quick release.
    6. Add potatoes and pressure cook another 5 minutes.
    7. Stir in peas and parsley.

    Tips for the Best Beef Stew

    • Use beef chuck roast for the most tender results.
    • Brown the meat well to develop deep flavor.
    • Simmer slowly rather than boiling.
    • Yukon Gold potatoes hold their shape beautifully.
    • Make it a day ahead—the flavors deepen overnight.
    • If the stew is too thin, whisk 2 tablespoons of cornstarch with 2 tablespoons of cold water and stir it into the simmering stew until thickened.

    Serving Suggestions

    This hearty stew pairs wonderfully with:

    • Crusty artisan bread
    • Buttery dinner rolls
    • Homemade biscuits
    • Cornbread
    • Side salad
    • Roasted vegetables

    Storage

    Refrigerator: Store in an airtight container for up to 4 days.

    Freezer: Freeze for up to 3 months.

    Reheating: Warm gently on the stovetop or microwave until heated through.


    Nutritional Information (Approximate Per Serving)

    • Calories: 465
    • Protein: 34g
    • Carbohydrates: 26g
    • Fat: 24g
    • Fiber: 4g
    • Sodium: 760mg

    Recipe Variations

    Irish Beef Stew

    Add Guinness stout and parsnips for a rich Irish-inspired version.

    Rustic Vegetable Stew

    Increase the vegetables and reduce the beef for a lighter meal.

    Spicy Beef Stew

    Add diced jalapeños, smoked paprika, and crushed red pepper flakes.

    Herb Garden Stew

    Finish with fresh rosemary, thyme, and parsley for vibrant flavor.


    Final Thoughts

    Beef and Potato Stew is the definition of classic comfort food. Slow-cooked until the beef is melt-in-your-mouth tender and the vegetables are infused with a rich, savory broth, it’s a satisfying meal that brings warmth to any table. Whether served with fresh bread on a cold evening or enjoyed as leftovers the next day, this hearty stew is a timeless recipe worth making again and again.

  • Recipe of the Day: Chicken Bacon Onion Chowder

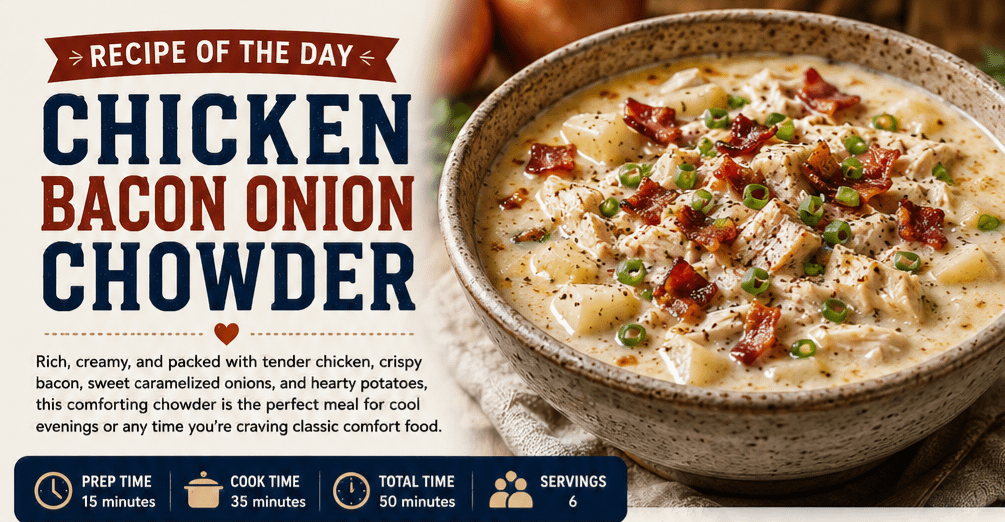
    Recipe of the Day: Chicken Bacon Onion Chowder

    There’s something undeniably comforting about a steaming bowl of Chicken Bacon Onion Chowder. Rich, creamy, and loaded with tender chicken, crispy bacon, sweet caramelized onions, and hearty potatoes, this satisfying soup is the perfect meal for cool evenings or whenever you’re craving classic comfort food.

    The smoky flavor of bacon blends beautifully with the sweetness of slow-cooked onions, while juicy chicken adds protein and heartiness. Every spoonful delivers creamy goodness that tastes like it simmered all day, yet it’s simple enough to prepare in under an hour.

    Why You’ll Love This Recipe

    • Thick, rich, and creamy texture
    • Loaded with chicken, bacon, onions, and potatoes
    • One-pot comfort meal
    • Perfect for meal prep
    • Family-friendly and filling
    • Great for cold weather dinners

    Ingredients

    For the Chowder

    • 8 slices bacon, chopped
    • 1 pound boneless skinless chicken breasts, diced
    • 2 tablespoons butter
    • 2 large yellow onions, thinly sliced
    • 3 cloves garlic, minced
    • ¼ cup all-purpose flour
    • 4 cups chicken broth
    • 2 cups whole milk
    • 1 cup heavy cream
    • 4 medium Yukon Gold potatoes, peeled and diced
    • 1 teaspoon dried thyme
    • ½ teaspoon smoked paprika
    • Salt and freshly ground black pepper to taste

    Optional Garnishes

    • Shredded cheddar cheese
    • Green onions
    • Fresh parsley
    • Extra bacon crumbles
    • Cracked black pepper

    Instructions

    Step 1: Cook the Bacon

    In a large Dutch oven or soup pot, cook the chopped bacon over medium heat until crispy.

    Remove the bacon with a slotted spoon and place it on a paper towel-lined plate. Leave about 2 tablespoons of bacon grease in the pot.

    Step 2: Cook the Chicken

    Season the diced chicken lightly with salt and pepper.

    Cook it in the bacon grease until lightly browned and cooked through, about 6–8 minutes.

    Remove the chicken and set aside.

    Step 3: Caramelize the Onions

    Add butter to the pot.

    Cook the sliced onions over medium-low heat for 12–15 minutes until soft and golden brown.

    Stir in the garlic and cook for another minute.

    Step 4: Make the Base

    Sprinkle the flour over the onions.

    Cook for 2 minutes while stirring continuously.

    Gradually whisk in the chicken broth until smooth.

    Step 5: Add Remaining Ingredients

    Stir in:

    • Milk
    • Heavy cream
    • Potatoes
    • Thyme
    • Smoked paprika

    Bring to a gentle simmer.

    Cook for about 15–20 minutes until the potatoes are fork tender.

    Step 6: Finish the Chowder

    Return the cooked chicken and most of the bacon to the pot.

    Simmer another 5 minutes.

    Taste and season with additional salt and pepper if needed.

    Serve hot topped with cheddar cheese, bacon, parsley, and green onions.

    Tips for the Best Chowder

    • Caramelizing the onions adds incredible depth of flavor.
    • Yukon Gold potatoes create a naturally creamy texture.
    • Rotisserie chicken works great as a shortcut.
    • For an even thicker chowder, mash a few potatoes into the broth before serving.
    • Freshly grated cheese melts better than pre-shredded cheese.

    Delicious Variations

    Spicy Version

    Add diced jalapeños and a pinch of cayenne pepper.

    Vegetable Loaded

    Mix in carrots, celery, corn, or mushrooms.

    Extra Smoky

    Use smoked bacon and smoked paprika for a richer flavor.

    Cheese Lover’s Chowder

    Stir in 2 cups shredded sharp cheddar before serving.

    Low-Carb Option

    Replace potatoes with cauliflower florets for a lighter version.

    What to Serve with Chicken Bacon Onion Chowder

    This chowder pairs wonderfully with:

    • Crusty artisan bread
    • Garlic bread
    • Buttery biscuits
    • Cornbread
    • Caesar salad
    • Mixed green salad
    • Grilled cheese sandwiches

    Storage Tips

    Refrigerator: Store in an airtight container for up to 4 days.

    Freezer: Freeze for up to 2 months. Because dairy-based soups can separate, thaw overnight in the refrigerator and reheat gently while stirring.

    Reheating

    Warm slowly over medium-low heat, stirring frequently. Add a splash of milk or chicken broth if the chowder has thickened too much.

    Nutrition (Approximate Per Serving)

    • Calories: 540
    • Protein: 34g
    • Carbohydrates: 26g
    • Fat: 34g
    • Fiber: 3g
    • Sugar: 6g

    Final Thoughts

    Chicken Bacon Onion Chowder is the ultimate comfort food that combines everything you love in one hearty bowl. The savory bacon, tender chicken, sweet onions, creamy broth, and perfectly cooked potatoes create a meal that’s both satisfying and memorable. Whether you’re feeding your family, meal prepping for the week, or simply looking for a cozy dinner, this chowder is sure to become a favorite you’ll make again and again.

  • Breakfast of the Day: Bagel and Lox – A Timeless Breakfast Favorite

    Breakfast of the Day: Bagel and Lox – A Timeless Breakfast Favorite

    Few breakfast dishes have earned the legendary status of a Bagel and Lox. Rich, savory, creamy, and satisfying, this classic combination has been a staple in delicatessens and breakfast tables for generations. Whether you’re enjoying it during a leisurely weekend brunch or grabbing a quick breakfast before work, a well-made bagel and lox delivers incredible flavor with surprisingly little effort.

    Simple ingredients come together to create a breakfast that feels both elegant and comforting. Every bite offers the perfect balance of chewy bagel, silky smoked salmon, tangy cream cheese, crisp vegetables, and fresh herbs.

    What Is a Bagel and Lox?

    A traditional bagel and lox consists of:

    • A freshly baked bagel
    • Cream cheese
    • Thinly sliced smoked salmon (commonly called lox)
    • Red onion
    • Capers
    • Tomato slices

    Some people also enjoy adding cucumber, fresh dill, avocado, or everything bagel seasoning for extra flavor.

    While often associated with New York delicatessens, this breakfast has become popular throughout North America and beyond thanks to its delicious taste and versatility.

    The History Behind Bagel and Lox

    The story of bagel and lox begins with Eastern European Jewish immigrants who brought bagel-making traditions to North America during the late 19th and early 20th centuries.

    Lox originally referred to salmon cured in a salt brine, making it an ideal food before refrigeration became common. Over time, smoked salmon became the more widely available option, though many people still use the word “lox” to describe both.

    As Jewish bakeries and delicatessens flourished in cities like New York, Montreal, and Chicago, the combination of bagels, cream cheese, and cured salmon became one of America’s most recognizable breakfast traditions.

    Today, it remains a brunch favorite enjoyed by people from all backgrounds.

    Why Bagel and Lox Is So Popular

    There are several reasons this breakfast continues to stand the test of time.

    Rich, Balanced Flavor

    Every ingredient contributes something unique:

    • Creamy cream cheese
    • Smoky salmon
    • Salty capers
    • Sweet tomatoes
    • Crisp onions
    • Chewy bagel

    Together they create a combination that satisfies every bite.

    High in Protein

    Smoked salmon is naturally rich in protein, helping keep you full longer than many sugary breakfast options.

    Heart-Healthy Omega-3 Fatty Acids

    Salmon provides omega-3 fatty acids, which support:

    • Heart health
    • Brain function
    • Eye health
    • Reduced inflammation

    Quick to Prepare

    No cooking is required.

    Simply slice, spread, layer, and enjoy.

    It’s one of the easiest gourmet breakfasts you can make at home.

    Classic Bagel and Lox Recipe

    Ingredients

    • 2 fresh bagels (plain, sesame, or everything)
    • 8 ounces smoked salmon (lox)
    • 4 ounces cream cheese
    • 1 small tomato, sliced
    • ¼ red onion, thinly sliced
    • 2 tablespoons capers
    • Fresh dill
    • Lemon wedges
    • Fresh cracked black pepper

    Instructions

    1. Slice and toast the bagels if desired.
    2. Spread a generous layer of cream cheese on each half.
    3. Layer smoked salmon evenly.
    4. Add tomato slices.
    5. Top with red onion.
    6. Sprinkle with capers.
    7. Garnish with fresh dill.
    8. Finish with cracked black pepper and a squeeze of fresh lemon juice.

    Serve immediately.

    Delicious Variations

    One of the best things about bagel and lox is how customizable it is.

    Avocado Lox Bagel

    Add sliced avocado for extra creaminess and healthy fats.

    Cucumber Delight

    Thin cucumber slices provide freshness and crunch.

    Everything Bagel

    Using an everything bagel adds garlic, onion, sesame, and poppy seed flavors.

    Spicy Kick

    Add sliced jalapeños or a drizzle of hot honey.

    Mediterranean Style

    Top with feta cheese, cucumbers, olives, and fresh herbs.

    Best Bagels to Use

    While plain bagels work beautifully, several varieties pair exceptionally well with smoked salmon:

    • Everything bagel
    • Sesame bagel
    • Onion bagel
    • Poppy seed bagel
    • Plain bagel
    • Whole wheat bagel

    Fresh bakery bagels usually provide the best texture and flavor.

    Choosing Quality Smoked Salmon

    Not all smoked salmon is the same.

    Look for salmon that is:

    • Bright in color
    • Thinly sliced
    • Moist, not dry
    • Mildly smoky
    • Fresh smelling

    Both cold-smoked and traditional lox work wonderfully for this breakfast.

    Nutritional Benefits

    Although rich and indulgent, bagel and lox offers several nutritional advantages.

    Salmon Provides

    • Protein
    • Vitamin D
    • Vitamin B12
    • Selenium
    • Omega-3 fatty acids

    Tomatoes Offer

    • Vitamin C
    • Potassium
    • Lycopene antioxidants

    Onions Contain

    • Antioxidants
    • Fiber
    • Vitamin C

    Capers Add

    • Flavor with very few calories
    • Antioxidants

    For a lighter version, choose reduced-fat cream cheese or a whole-grain bagel.

    Perfect Pairings

    Complete your breakfast with:

    • Fresh fruit
    • Greek yogurt
    • Fresh berries
    • Orange juice
    • Coffee
    • Tea
    • Sparkling water with lemon

    Tips for the Best Bagel and Lox

    • Use fresh bagels whenever possible.
    • Let the cream cheese soften before spreading.
    • Slice onions very thin.
    • Don’t overload the bagel—balance is key.
    • Serve immediately after assembling.
    • Finish with fresh lemon juice just before eating.

    Why This Breakfast Never Goes Out of Style

    Some breakfast recipes become trendy and disappear. Bagel and lox has remained popular for generations because it combines simplicity with outstanding flavor.

    It’s elegant enough for brunch guests, quick enough for busy mornings, and satisfying enough to become a weekly favorite. Whether you’re continuing a family tradition or trying it for the first time, this classic breakfast proves that great food doesn’t have to be complicated.

    Final Thoughts

    Bagel and lox is more than just a breakfast—it’s a culinary tradition that has delighted generations with its perfect combination of textures and flavors. The creamy richness of cream cheese, the smoky tenderness of salmon, the crisp bite of onions, and the tangy pop of capers come together on a fresh bagel to create a meal that feels both comforting and refined.

    If you’re looking for a breakfast that’s easy to prepare, packed with protein, and bursting with classic flavor, a bagel and lox deserves a place at your table. One bite is all it takes to understand why this timeless favorite continues to be one of the world’s most beloved breakfast dishes.

    Read More Recipes

  • Breakfast of the Day: Apple Pie Cinnamon Rolls

    Breakfast of the Day: Apple Pie Cinnamon Rolls

    There’s something magical about waking up to the aroma of cinnamon, baked apples, and fresh bread. Apple Pie Cinnamon Rolls combine two beloved comfort foods into one unforgettable breakfast. Imagine soft, fluffy cinnamon rolls wrapped around a sweet apple pie filling, then baked until golden brown and drizzled with a creamy vanilla cream cheese frosting.

    Whether you’re serving them for a weekend brunch, holiday breakfast, or simply treating your family to something special, these cinnamon rolls are guaranteed to become a favorite.


    Why You’ll Love This Recipe

    Apple Pie Cinnamon Rolls bring together everything people love about fall baking while being delicious enough to enjoy all year long.

    Reasons to make them:

    • Soft, fluffy homemade dough
    • Sweet cinnamon apple filling
    • Rich cream cheese glaze
    • Perfect make-ahead breakfast
    • Great for holidays and family gatherings
    • Tastes like apple pie wrapped inside a cinnamon roll

    Every bite offers buttery layers filled with tender apples, brown sugar, cinnamon, and warm spices.


    Ingredients

    For the Dough

    • 3¾ cups all-purpose flour
    • ¼ cup granulated sugar
    • 2¼ teaspoons instant yeast
    • 1 teaspoon salt
    • ¾ cup warm milk
    • ¼ cup melted butter
    • 1 egg

    Apple Pie Filling

    • 2 large apples, peeled and diced
    • 2 tablespoons butter
    • ⅓ cup brown sugar
    • 2 teaspoons cinnamon
    • ¼ teaspoon nutmeg
    • 1 tablespoon cornstarch
    • 2 teaspoons lemon juice
    • 1 teaspoon vanilla extract

    Cinnamon Sugar Filling

    • ½ cup softened butter
    • ¾ cup brown sugar
    • 2 tablespoons cinnamon

    Cream Cheese Frosting

    • 4 ounces cream cheese, softened
    • 2 tablespoons butter
    • 1½ cups powdered sugar
    • 1 teaspoon vanilla
    • 2–3 tablespoons milk

    Directions

    Step 1: Prepare the Dough

    Mix flour, sugar, yeast, and salt.

    Add warm milk, melted butter, and egg. Knead until smooth and elastic, about 8–10 minutes.

    Place in a greased bowl, cover, and let rise for about 1 hour until doubled.


    Step 2: Make the Apple Filling

    Melt butter in a skillet.

    Add diced apples, brown sugar, cinnamon, nutmeg, lemon juice, and vanilla.

    Cook for 6–8 minutes until apples soften.

    Stir in cornstarch and cook another minute until thickened.

    Allow filling to cool completely.


    Step 3: Roll the Dough

    Roll dough into a large rectangle approximately 16×12 inches.

    Spread softened butter over the surface.

    Mix brown sugar and cinnamon together and sprinkle evenly across the dough.

    Spread the cooled apple filling over the cinnamon sugar.


    Step 4: Roll and Slice

    Roll tightly from the long side into one log.

    Slice into 12 equal rolls.

    Arrange in a greased 9×13-inch baking dish.

    Cover and let rise another 30–45 minutes.


    Step 5: Bake

    Bake at 350°F (175°C) for 25–30 minutes, or until golden brown.


    Step 6: Frost

    Beat together cream cheese, butter, powdered sugar, vanilla, and milk until smooth.

    Spread frosting over warm cinnamon rolls so it melts into every layer.


    Tips for the Best Apple Pie Cinnamon Rolls

    • Use Honeycrisp, Granny Smith, or Fuji apples.
    • Let the apple filling cool before spreading.
    • Avoid overfilling to prevent leaks.
    • Bake until just golden to keep the rolls soft.
    • Frost while warm for the perfect texture.

    Delicious Variations

    Caramel Apple

    Drizzle warm caramel sauce over the frosting.

    Maple Pecan

    Top with toasted pecans and maple glaze.

    Apple Walnut

    Add chopped walnuts inside the filling.

    Salted Caramel

    Finish with caramel sauce and flaky sea salt.

    Cranberry Apple

    Mix dried cranberries with the apples for a holiday twist.


    Serving Suggestions

    These cinnamon rolls pair wonderfully with:

    • Fresh fruit salad
    • Scrambled eggs
    • Crispy bacon or sausage
    • Greek yogurt
    • Vanilla latte
    • Hot apple cider
    • Fresh coffee
    • Chai tea

    Storage

    Store covered in the refrigerator for up to 5 days.

    Reheat individual rolls in the microwave for about 20–30 seconds.

    They also freeze beautifully for up to 3 months.


    Nutritional Information (Approximate Per Roll)

    • Calories: 430
    • Protein: 7g
    • Carbohydrates: 58g
    • Fat: 18g
    • Fiber: 2g
    • Sugar: 30g

    Perfect for Every Occasion

    Apple Pie Cinnamon Rolls are ideal for:

    • Holiday breakfasts
    • Thanksgiving morning
    • Christmas brunch
    • Weekend family breakfasts
    • Mother’s Day
    • Fall gatherings
    • Potluck brunches
    • Special celebrations

    They can even be prepared the night before, refrigerated overnight, and baked fresh in the morning.


    Final Thoughts

    Apple Pie Cinnamon Rolls are everything you could want in a comforting breakfast. They combine the warm nostalgia of homemade apple pie with the irresistible softness of freshly baked cinnamon rolls, creating a bakery-worthy treat that’s surprisingly simple to make at home.

    Whether shared around the breakfast table on a crisp autumn morning or enjoyed as a sweet weekend indulgence, these rolls are sure to bring smiles with every gooey, cinnamon-filled bite. Once you’ve tried them, they may become your new signature breakfast recipe.

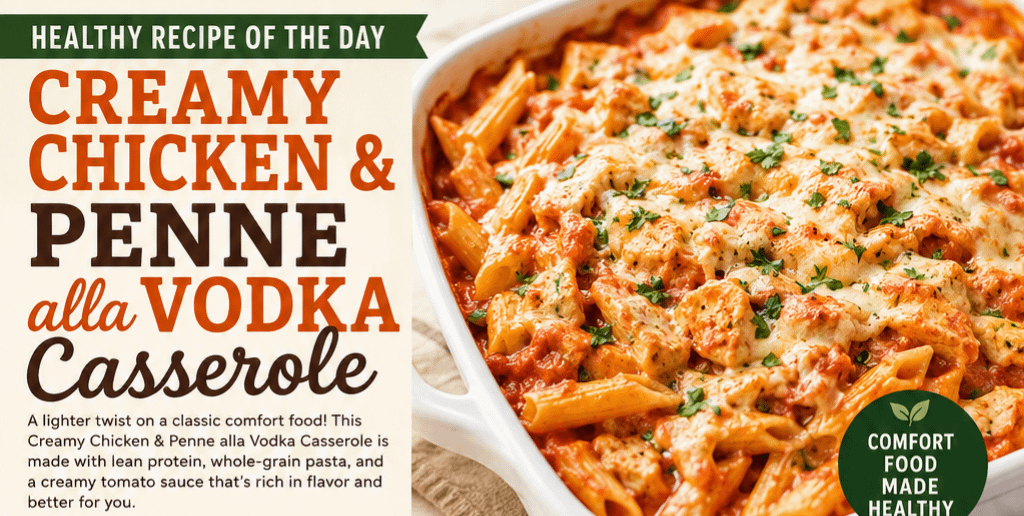
  • Healthy Recipe of the Day: Creamy Chicken & Penne alla Vodka Casserole

    Healthy Recipe of the Day: Creamy Chicken & Penne alla Vodka Casserole

    When comfort food meets wholesome ingredients, you get a meal that’s both satisfying and nourishing. This Creamy Chicken & Penne alla Vodka Casserole takes inspiration from the beloved Italian-American pasta dish while making a few healthier swaps. Instead of relying on heavy cream and excessive cheese, this version uses Greek yogurt and reduced-fat dairy to create a rich, velvety sauce without sacrificing flavor.

    Whether you’re preparing dinner for the family or meal prepping for the week, this casserole delivers hearty goodness with lean protein, fiber-rich whole wheat pasta, and plenty of savory tomato flavor.


    Why You’ll Love This Recipe

    • High in lean protein from chicken breast.
    • Uses whole wheat penne for extra fiber.
    • Lightened-up creamy sauce.
    • Great for meal prep and leftovers.
    • Bakes in one casserole dish for easy cleanup.
    • Comfort food without the guilt.

    Ingredients

    For the Casserole

    • 12 ounces whole wheat penne pasta
    • 2 cups cooked chicken breast, diced
    • 1 tablespoon olive oil
    • 3 cloves garlic, minced
    • 1 small onion, diced
    • 1 teaspoon Italian seasoning
    • ½ teaspoon crushed red pepper flakes (optional)
    • 1 can (15 oz) tomato sauce
    • ½ cup crushed tomatoes
    • ¼ cup chicken broth
    • 2 tablespoons tomato paste

    For the Creamy Sauce

    • ½ cup plain non-fat Greek yogurt
    • ¼ cup light cream cheese, softened
    • ¼ cup grated Parmesan cheese
    • ¼ cup skim milk
    • 2 tablespoons vodka (optional—it cooks off during baking)

    Topping

    • ½ cup shredded part-skim mozzarella
    • 2 tablespoons grated Parmesan
    • Fresh parsley, chopped

    Directions

    1. Cook the Pasta

    Bring a large pot of salted water to a boil. Cook the whole wheat penne until just al dente according to package directions. Drain and set aside.

    2. Prepare the Sauce

    Heat olive oil in a large skillet over medium heat.

    Add:

    • Onion
    • Garlic

    Cook for 3–4 minutes until softened.

    Stir in:

    • Italian seasoning
    • Red pepper flakes
    • Tomato paste

    Cook for one minute.

    Add:

    • Tomato sauce
    • Crushed tomatoes
    • Chicken broth

    Allow the sauce to simmer for about 10 minutes.

    3. Make It Creamy

    Reduce heat to low.

    Whisk together:

    • Greek yogurt
    • Cream cheese
    • Milk
    • Parmesan
    • Vodka (if using)

    Slowly stir into the tomato sauce until smooth and creamy.

    4. Assemble

    Preheat oven to 375°F (190°C).

    Combine:

    • Cooked pasta
    • Chicken
    • Sauce

    Transfer to a lightly greased 9×13-inch baking dish.

    Top with mozzarella and Parmesan cheese.

    5. Bake

    Bake uncovered for 20–25 minutes, until bubbly and lightly golden.

    Sprinkle with fresh parsley before serving.


    Nutrition Highlights

    Approximate per serving (6 servings):

    • Calories: 390
    • Protein: 34g
    • Carbohydrates: 35g
    • Fiber: 6g
    • Fat: 12g
    • Saturated Fat: 4g
    • Calcium: 20% DV

    Healthy Ingredient Swaps

    This casserole keeps all the comfort while trimming unnecessary calories.

    Whole Wheat Pasta

    • More fiber than traditional pasta.
    • Helps keep you feeling full longer.

    Greek Yogurt

    • Adds creaminess with extra protein.
    • Lower in fat than heavy cream.

    Chicken Breast

    • Lean protein that supports muscle health.
    • Keeps the casserole filling without excess fat.

    Reduced-Fat Cheese

    • Provides rich flavor while reducing saturated fat.

    Serving Suggestions

    Pair this casserole with:

    • Steamed broccoli
    • Roasted asparagus
    • Mixed green salad with balsamic vinaigrette
    • Garlic roasted green beans
    • Whole grain dinner rolls

    Storage Tips

    • Refrigerate in an airtight container for up to 4 days.
    • Freeze individual portions for up to 3 months.
    • Reheat in the microwave or oven until heated through.

    Variations

    Add More Vegetables

    Mix in:

    • Spinach
    • Mushrooms
    • Zucchini
    • Bell peppers
    • Broccoli florets

    Make It Spicier

    Add:

    • Cayenne pepper
    • Extra crushed red pepper
    • Hot Italian seasoning

    Lower Carb

    Replace half the pasta with:

    • Cauliflower florets
    • Zucchini noodles
    • Hearts of palm pasta

    Tips for Success

    • Don’t overcook the pasta—it will continue cooking in the oven.
    • Stir the yogurt mixture into the sauce over low heat to prevent curdling.
    • Rotisserie chicken is a great time-saving option.
    • Let the casserole rest for 5–10 minutes before serving so it sets properly.

    Final Thoughts

    This Creamy Chicken & Penne alla Vodka Casserole proves that healthy eating doesn’t mean giving up rich, comforting flavors. With lean chicken, whole wheat pasta, a lightened-up creamy tomato sauce, and just enough melted cheese to satisfy, it’s the perfect balance of indulgence and nutrition. Whether you’re feeding a hungry family, preparing lunches for the week, or simply craving a cozy homemade meal, this casserole is one you’ll come back to again and again.

    Read More Recipes

  • Dessert of the Day: Hawaiian Poke Cake

    Dessert of the Day: Hawaiian Poke Cake

    Hawaiian Poke Cake: A Tropical Dessert Everyone Will Love

    If you’re looking for a dessert that’s light, refreshing, and packed with tropical flavor, Hawaiian Poke Cake deserves a place at the top of your baking list. This easy-to-make cake combines soft yellow cake, sweet pineapple, creamy vanilla pudding, whipped topping, and shredded coconut into a dessert that tastes like a vacation in every bite.

    Perfect for summer gatherings, birthdays, potlucks, barbecues, or simply satisfying your sweet tooth, Hawaiian Poke Cake is one of those recipes that gets even better after chilling in the refrigerator.


    What Is a Poke Cake?

    A poke cake is exactly what its name suggests. After baking, holes are poked throughout the cake, allowing delicious fillings to soak deep inside. Instead of frosting simply sitting on top, every bite becomes incredibly moist and flavorful.

    For this Hawaiian version, pineapple juice and creamy pudding seep into the cake, creating layers of tropical sweetness.


    Why You’ll Love Hawaiian Poke Cake

    • Moist and incredibly soft
    • Easy enough for beginner bakers
    • Tropical pineapple and coconut flavors
    • Great make-ahead dessert
    • Perfect for parties and family gatherings
    • Better after chilling overnight

    Ingredients

    For the Cake

    • 1 box yellow cake mix
    • Ingredients required on the box (typically eggs, oil, and water)

    Filling

    • 1 package (3.4 oz) instant vanilla pudding
    • 1½ cups cold milk
    • 1 can (20 oz) crushed pineapple with juice

    Topping

    • 1 container (8 oz) whipped topping, thawed
    • 1 cup sweetened shredded coconut
    • Maraschino cherries (optional)
    • Chopped macadamia nuts (optional)

    Instructions

    Step 1: Bake the Cake

    Prepare the yellow cake according to the package directions in a 9×13-inch baking pan.

    Allow it to cool for about 10 minutes.


    Step 2: Poke the Cake

    Using the handle of a wooden spoon or a large straw, poke holes evenly across the entire cake.

    Make plenty of holes so the filling reaches every bite.


    Step 3: Prepare the Filling

    Mix together:

    • Instant vanilla pudding
    • Cold milk

    Whisk until it begins to thicken.

    Stir in the crushed pineapple with all of its juice.


    Step 4: Fill the Cake

    Pour the pineapple pudding mixture over the warm cake.

    Use a spatula to spread evenly, gently pressing the filling into the holes.


    Step 5: Chill

    Place the cake in the refrigerator for at least 2 hours.

    Overnight is even better.


    Step 6: Frost

    Spread the whipped topping evenly over the cake.

    Sprinkle generously with shredded coconut.

    Decorate with cherries and chopped macadamia nuts if desired.


    Tips for the Best Hawaiian Poke Cake

    Chill Overnight

    The flavors become richer after several hours in the refrigerator.

    Toast the Coconut

    Lightly toast the coconut before sprinkling it over the cake for extra flavor and crunch.

    Add More Fruit

    Try adding:

    • Diced mango
    • Sliced bananas
    • Kiwi
    • Fresh strawberries

    Make It Extra Tropical

    Mix a teaspoon of coconut extract into the whipped topping.


    Variations

    Piña Colada Hawaiian Cake

    Add coconut pudding instead of vanilla and garnish with pineapple wedges.


    Hawaiian Cheesecake Poke Cake

    Blend softened cream cheese into the pudding before filling the cake.


    Tropical Orange Version

    Replace vanilla pudding with cheesecake pudding and add mandarin oranges.


    Hawaiian Banana Cake

    Layer sliced bananas between the pudding and whipped topping.


    Storage

    Store covered in the refrigerator for up to 4 days.

    Because of the pudding and whipped topping, this dessert should always remain refrigerated.

    Freezing is possible, though the whipped topping may change texture slightly after thawing.


    Serving Suggestions

    Hawaiian Poke Cake pairs wonderfully with:

    • Fresh pineapple slices
    • Tropical fruit salad
    • Coconut ice cream
    • Vanilla ice cream
    • Fresh whipped cream
    • Iced coffee
    • Sweet tea
    • Tropical punch

    Why This Dessert Is So Popular

    Poke cakes have remained favorites for decades because they’re incredibly forgiving and consistently delicious. Hawaiian Poke Cake stands out by combining the bright flavors of pineapple and coconut with creamy pudding, resulting in a dessert that’s rich without being overly heavy.

    Its vibrant appearance and refreshing taste make it especially popular during warm-weather celebrations, family reunions, and backyard cookouts.


    Final Thoughts

    Hawaiian Poke Cake is the perfect combination of simplicity and tropical indulgence. Every forkful is moist, creamy, and bursting with pineapple-coconut goodness. Whether you’re serving it at a summer barbecue, a birthday celebration, or simply enjoying a slice after dinner, this easy dessert is guaranteed to impress family and friends.

    With minimal effort and maximum flavor, Hawaiian Poke Cake is a sweet reminder that sometimes the best desserts are the ones that transport you to paradise with every bite.

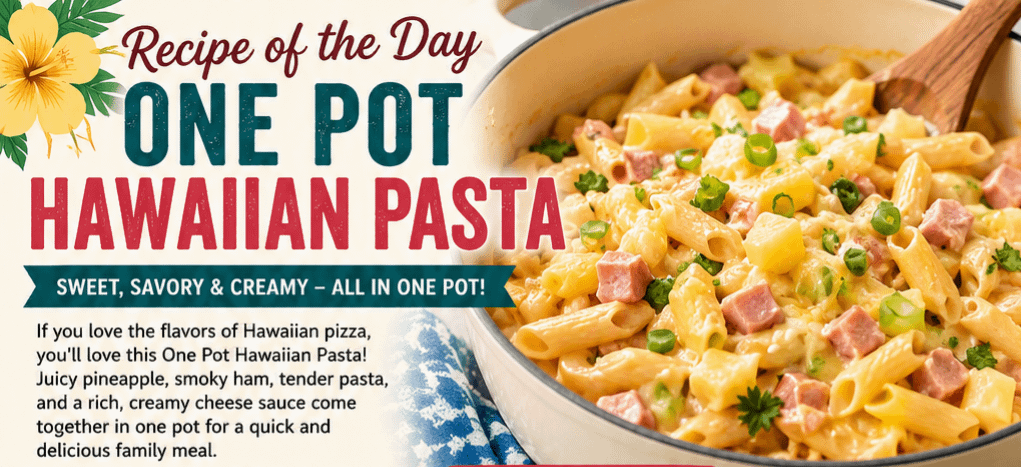
  • Recipe of the Day: One Pot Hawaiian Pasta

    Recipe of the Day: One Pot Hawaiian Pasta

    If you love the sweet and savory flavors of Hawaiian pizza, you’ll love this comforting One Pot Hawaiian Pasta. This easy dinner combines juicy pineapple, smoky ham, tender pasta, and a rich, creamy cheese sauce—all cooked in a single pot. The result is a hearty meal that’s packed with flavor while keeping cleanup to a minimum.

    Perfect for busy weeknights, this recipe is ready in about 30 minutes and is sure to become a family favorite.


    Why You’ll Love This Recipe

    • One pot means less cleanup.
    • Ready in around 30 minutes.
    • Sweet and savory flavors everyone enjoys.
    • Kid-friendly and budget-friendly.
    • Great for leftovers.
    • Easily customizable with your favorite proteins and vegetables.

    Ingredients

    • 2 tablespoons butter
    • 1 tablespoon olive oil
    • 1 small onion, diced
    • 3 cloves garlic, minced
    • 2 cups diced cooked ham
    • 1 teaspoon Italian seasoning
    • ½ teaspoon smoked paprika
    • Salt and black pepper, to taste
    • 3 cups chicken broth
    • 1 cup milk
    • 12 ounces penne or rotini pasta
    • 1 cup pineapple chunks, drained
    • 1½ cups shredded mozzarella cheese
    • ½ cup shredded cheddar cheese
    • ¼ cup grated Parmesan cheese
    • 2 tablespoons cream cheese (optional for extra creaminess)
    • 2 green onions, sliced
    • Fresh parsley for garnish

    Instructions

    Step 1: Cook the Ham

    In a large deep skillet or Dutch oven, melt the butter with the olive oil over medium heat.

    Add the diced onion and cook for about 3–4 minutes until softened.

    Stir in the garlic and cook for another 30 seconds.

    Add the diced ham and cook until lightly browned.


    Step 2: Add the Liquids

    Pour in the chicken broth and milk.

    Stir in:

    • Italian seasoning
    • Smoked paprika
    • Salt
    • Pepper

    Bring everything to a gentle boil.


    Step 3: Cook the Pasta

    Add the uncooked pasta.

    Reduce the heat to medium-low.

    Cover and simmer for 12–15 minutes, stirring occasionally until the pasta is tender and most of the liquid has been absorbed.


    Step 4: Add the Hawaiian Flavor

    Stir in the pineapple chunks.

    Mix in:

    • Cream cheese (if using)
    • Mozzarella
    • Cheddar
    • Parmesan

    Continue stirring until the cheese melts into a creamy sauce.


    Step 5: Garnish

    Top with:

    • Green onions
    • Fresh parsley
    • Extra Parmesan if desired

    Serve immediately while hot.


    Tips for Success

    • Use fresh pineapple for a brighter flavor.
    • Don’t overcook the pasta; it will continue softening in the sauce.
    • Freshly shredded cheese melts much smoother than pre-shredded varieties.
    • Stir frequently near the end to prevent sticking.

    Delicious Variations

    Bacon Hawaiian Pasta

    Replace some of the ham with crispy bacon for even more smoky flavor.

    Chicken Hawaiian Pasta

    Swap the ham for grilled chicken breast.

    Spicy Hawaiian

    Add diced jalapeños or crushed red pepper flakes for a spicy kick.

    Veggie Hawaiian

    Mix in:

    • Red bell peppers
    • Peas
    • Spinach
    • Mushrooms

    What to Serve With It

    This creamy pasta pairs wonderfully with:

    • Garlic bread
    • Caesar salad
    • Steamed broccoli
    • Roasted asparagus
    • Hawaiian rolls
    • Fresh fruit salad

    Storage

    Store leftovers in an airtight container in the refrigerator for up to 4 days.

    To reheat, add a splash of milk before warming on the stovetop or in the microwave to restore the creamy texture.


    Can You Freeze It?

    Yes. Freeze portions for up to 2 months.

    Thaw overnight in the refrigerator and reheat gently with a little milk or chicken broth.


    Nutritional Information (Approximate)

    Per serving:

    • Calories: 560
    • Protein: 29g
    • Carbohydrates: 48g
    • Fat: 28g
    • Fiber: 3g
    • Sugar: 8g
    • Sodium: 980mg

    Frequently Asked Questions

    Can I use canned pineapple?

    Yes. Just be sure to drain it well to prevent the sauce from becoming watery.

    What pasta works best?

    Penne, rotini, shells, and bowtie pasta all work well because they hold onto the creamy sauce.

    Can I make it gluten-free?

    Absolutely. Substitute your favorite gluten-free pasta, but monitor the cooking time since it may vary.

    Can I make it vegetarian?

    Yes. Omit the ham and use vegetable broth. Add extra vegetables like mushrooms, bell peppers, or broccoli for a satisfying meat-free version.


    Final Thoughts

    One Pot Hawaiian Pasta is proof that comfort food doesn’t have to be complicated. The combination of creamy cheese, smoky ham, sweet pineapple, and perfectly cooked pasta creates a satisfying meal that brings tropical-inspired flavors to your dinner table with very little effort.

    Whether you’re looking for a quick weeknight dinner, a crowd-pleasing potluck dish, or simply something new to add to your recipe collection, this one-pot meal delivers delicious results every time. With endless customization options and minimal cleanup, it’s a recipe you’ll find yourself making again and again.

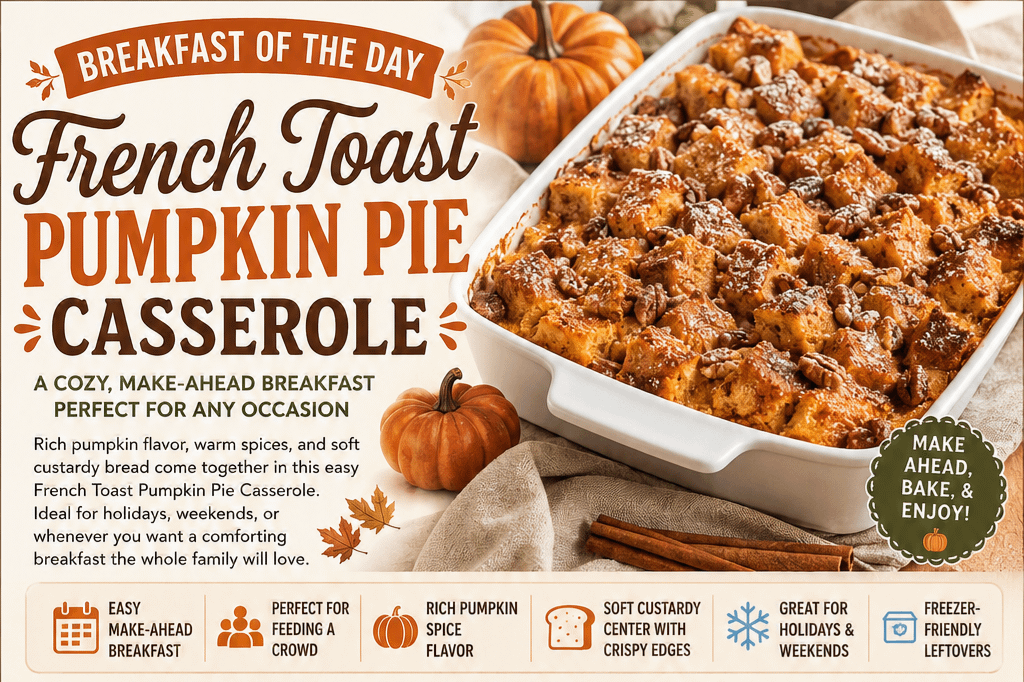
  • Breakfast of the Day: French Toast Pumpkin Pie Casserole

    Breakfast of the Day: French Toast Pumpkin Pie Casserole

    When crisp mornings arrive and comfort food calls your name, few breakfasts are as satisfying as French Toast Pumpkin Pie Casserole. Combining the creamy richness of pumpkin pie filling with the comforting texture of baked French toast, this casserole transforms simple pantry ingredients into a warm, crowd-pleasing meal.

    Whether you’re hosting Thanksgiving brunch, celebrating a special occasion, or simply looking for a make-ahead breakfast the whole family will enjoy, this recipe delivers classic autumn flavors in every bite.


    Why You’ll Love This Recipe

    French Toast Pumpkin Pie Casserole has become a favorite because it offers everything people love about pumpkin pie without waiting until dessert.

    Highlights include:

    • Easy make-ahead breakfast
    • Perfect for feeding a crowd
    • Rich pumpkin spice flavor
    • Soft custardy center with crispy golden edges
    • Great for holidays and weekend brunches
    • Freezer-friendly leftovers

    It’s one of those recipes that fills your kitchen with an irresistible aroma long before breakfast is served.


    Ingredients

    For the Casserole

    • 1 loaf brioche or French bread, cut into cubes
    • 1 (15-ounce) can pumpkin puree
    • 8 large eggs
    • 2 cups whole milk
    • ½ cup heavy cream
    • ¾ cup brown sugar
    • ¼ cup granulated sugar
    • 2 teaspoons vanilla extract
    • 2 teaspoons pumpkin pie spice
    • 1 teaspoon cinnamon
    • ¼ teaspoon nutmeg
    • Pinch of salt

    Optional Streusel Topping

    • ½ cup flour
    • ½ cup brown sugar
    • ½ teaspoon cinnamon
    • ¼ cup cold butter, cubed
    • ½ cup chopped pecans

    Instructions

    Step 1: Prepare the Bread

    Grease a 9×13-inch baking dish.

    Spread the bread cubes evenly inside.


    Step 2: Mix the Custard

    In a large bowl whisk together:

    • Pumpkin puree
    • Eggs
    • Milk
    • Heavy cream
    • Brown sugar
    • Granulated sugar
    • Vanilla
    • Pumpkin pie spice
    • Cinnamon
    • Nutmeg
    • Salt

    Whisk until smooth.


    Step 3: Assemble

    Pour the pumpkin custard over the bread.

    Press the bread down gently so every piece absorbs the mixture.

    Cover and refrigerate for at least 4 hours, preferably overnight.


    Step 4: Make the Streusel

    Mix together:

    • Flour
    • Brown sugar
    • Cinnamon

    Cut in the butter until crumbly.

    Fold in chopped pecans.

    Sprinkle over the casserole before baking.


    Step 5: Bake

    Bake at 350°F (175°C) for 45–55 minutes, until the center is set and the top is golden brown.

    Allow to rest for 10 minutes before serving.


    Delicious Toppings

    Take your casserole to the next level with:

    • Warm maple syrup
    • Powdered sugar
    • Whipped cream
    • Candied pecans
    • Toasted walnuts
    • Caramel sauce
    • Vanilla glaze
    • Fresh cranberries
    • Fresh apple slices

    Each topping brings its own unique flavor while complementing the pumpkin spice beautifully.


    Tips for Success

    Use Day-Old Bread

    Slightly stale bread absorbs the custard much better than fresh bread.

    Don’t Skip the Overnight Rest

    Giving the casserole time to soak allows the bread to become incredibly soft and flavorful.

    Use Pure Pumpkin

    Be sure to use pumpkin puree, not pumpkin pie filling, which already contains added sugar and spices.

    Check for Doneness

    The center should no longer jiggle when gently shaken.


    Make-Ahead Breakfast Perfection

    One of the biggest advantages of this casserole is convenience.

    Simply assemble everything the night before and refrigerate.

    The next morning:

    • Remove from refrigerator while the oven preheats.
    • Add streusel topping.
    • Bake.
    • Serve.

    This makes holiday mornings far less stressful.


    Storage

    Refrigerator

    Store covered for up to 4 days.

    Freezer

    Freeze individual portions for up to 2 months.

    Reheat in the microwave or oven until warmed through.


    Variations

    Try adding your own twist:

    • White chocolate chips
    • Cream cheese cubes
    • Chopped apples
    • Dried cranberries
    • Pecans or walnuts
    • Salted caramel drizzle
    • Cinnamon swirl bread instead of brioche
    • Raisins for extra sweetness

    There are endless ways to customize this comforting breakfast.


    What to Serve With It

    French Toast Pumpkin Pie Casserole pairs wonderfully with:

    • Crispy bacon
    • Breakfast sausage
    • Fresh fruit salad
    • Greek yogurt
    • Hash browns
    • Hot coffee
    • Pumpkin spice latte
    • Apple cider
    • Fresh orange juice

    These sides create a complete brunch everyone will remember.


    Nutrition (Approximate Per Serving)

    • Calories: 430
    • Protein: 12g
    • Carbohydrates: 49g
    • Fat: 21g
    • Fiber: 3g
    • Sugar: 25g

    Nutritional values will vary depending on toppings and portion size.


    Final Thoughts

    French Toast Pumpkin Pie Casserole is everything a comforting breakfast should be—warm, creamy, flavorful, and easy to prepare. With the nostalgic taste of pumpkin pie and the satisfying texture of baked French toast, it’s a recipe that’s perfect for cozy weekends, holiday gatherings, or any morning when you want to serve something extra special.

    Prepare it the night before, bake it fresh in the morning, and enjoy a breakfast that fills your home with the inviting aroma of cinnamon, pumpkin, and vanilla. It’s a simple dish that feels like a celebration, bringing family and friends together around the table one delicious bite at a time.

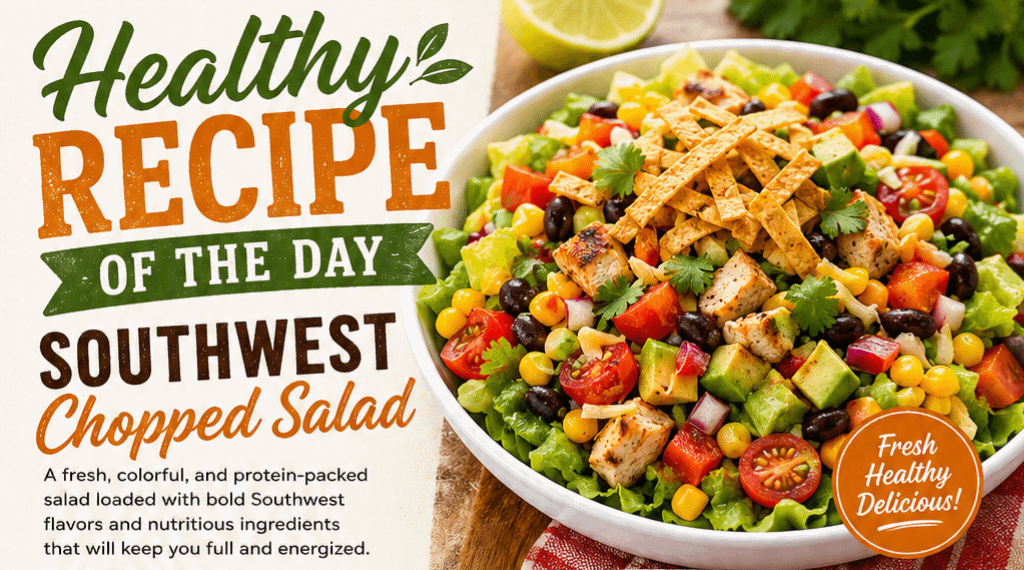
  • Healthy Recipe of the Day: Southwest Chopped Salad

    Healthy Recipe of the Day: Southwest Chopped Salad

    When you’re looking for a meal that’s colorful, satisfying, and packed with nutrients, it’s hard to beat a Southwest Chopped Salad. This vibrant salad combines crisp vegetables, fiber-rich beans, lean protein, creamy avocado, and a tangy homemade dressing inspired by the bold flavors of the American Southwest.

    Whether you’re meal prepping for the week, enjoying a light summer dinner, or searching for a healthy lunch that actually keeps you full, this recipe delivers everything you need without sacrificing flavor.


    Why You’ll Love This Salad

    Southwest Chopped Salad is one of those recipes that’s easy to customize while remaining incredibly nutritious.

    It offers:

    • High protein to keep you satisfied
    • Plenty of fresh vegetables
    • Heart-healthy fats from avocado
    • Fiber-rich black beans
    • Bright, refreshing flavors
    • Naturally gluten-free
    • Easy meal prep for busy weekdays

    The combination of crunchy vegetables and creamy avocado makes every bite exciting.


    Ingredients

    For the Salad

    • 1 head romaine lettuce, chopped
    • 2 cups chopped iceberg lettuce
    • 1 cup cherry tomatoes, halved
    • 1 cup corn kernels (fresh or grilled)
    • 1 cup black beans, rinsed and drained
    • 1 red bell pepper, diced
    • 1 orange bell pepper, diced
    • ½ red onion, finely diced
    • 1 avocado, diced
    • 2 cups grilled chicken breast, chopped
    • ¼ cup chopped cilantro
    • ¼ cup shredded reduced-fat cheddar cheese (optional)
    • Tortilla strips for garnish (optional)

    Creamy Southwest Lime Dressing

    • ¼ cup plain Greek yogurt
    • 2 tablespoons olive oil
    • Juice of 2 fresh limes
    • 1 tablespoon apple cider vinegar
    • 1 teaspoon honey
    • 1 teaspoon chili powder
    • ½ teaspoon cumin
    • ½ teaspoon garlic powder
    • Salt and pepper to taste

    Whisk until smooth and creamy.


    Instructions

    Step 1

    Prepare and chop all vegetables into bite-sized pieces.

    Step 2

    Season chicken breast with chili powder, cumin, garlic powder, paprika, salt, and pepper. Grill until fully cooked, then dice.

    Step 3

    Whisk together all dressing ingredients until smooth.

    Step 4

    Combine lettuce, tomatoes, peppers, corn, beans, onion, avocado, cilantro, and chicken in a large serving bowl.

    Step 5

    Pour dressing over the salad just before serving and toss gently.

    Step 6

    Top with a small sprinkle of cheddar cheese and tortilla strips if desired.

    Serve immediately.


    Nutrition Highlights

    This healthy salad is packed with nutrients your body loves.

    Romaine Lettuce

    Rich in vitamins A, K, and folate while adding satisfying crunch.

    Black Beans

    Loaded with plant protein, fiber, iron, and antioxidants.

    Grilled Chicken

    Provides lean protein to support muscle health and keep you feeling full longer.

    Avocados

    Contain heart-healthy monounsaturated fats, potassium, and nearly 20 vitamins and minerals.

    Bell Peppers

    Excellent source of Vitamin C and antioxidants that support immune health.

    Greek Yogurt Dressing

    Offers protein and probiotics while keeping the dressing lighter than traditional creamy dressings.


    Make It Your Own

    One of the best things about Southwest Chopped Salad is its versatility.

    Try adding:

    • Grilled shrimp
    • Steak strips
    • Turkey breast
    • Roasted sweet potatoes
    • Quinoa
    • Brown rice
    • Jalapeños for extra heat
    • Fresh mango or pineapple for sweetness
    • Pepitas or sunflower seeds for crunch

    Vegetarians can simply skip the chicken and add extra black beans or grilled tofu.


    Meal Prep Tips

    This salad is excellent for meal prep.

    Keep the dressing separate until ready to eat.

    Store ingredients in airtight containers for up to four days.

    For best freshness, add avocado just before serving.


    Healthy Serving Ideas

    Southwest Chopped Salad pairs wonderfully with:

    • Fresh fruit
    • Whole-grain rolls
    • Vegetable soup
    • Grilled corn on the cob
    • Fresh salsa
    • Sparkling water with lime

    It also makes an excellent side dish for grilled chicken, fish, or steak.


    Final Thoughts

    Healthy eating doesn’t have to be boring, and this Southwest Chopped Salad proves it. Every bite is packed with crisp vegetables, lean protein, creamy avocado, and bold Southwestern flavors that make healthy meals something to look forward to.

    Whether you’re trying to eat lighter, increase your vegetable intake, or simply enjoy a delicious homemade meal, this colorful salad is an easy recipe you’ll find yourself making again and again. Fresh, filling, and bursting with flavor, it’s a healthy recipe worthy of becoming a regular part of your weekly menu.