Category: Recipes

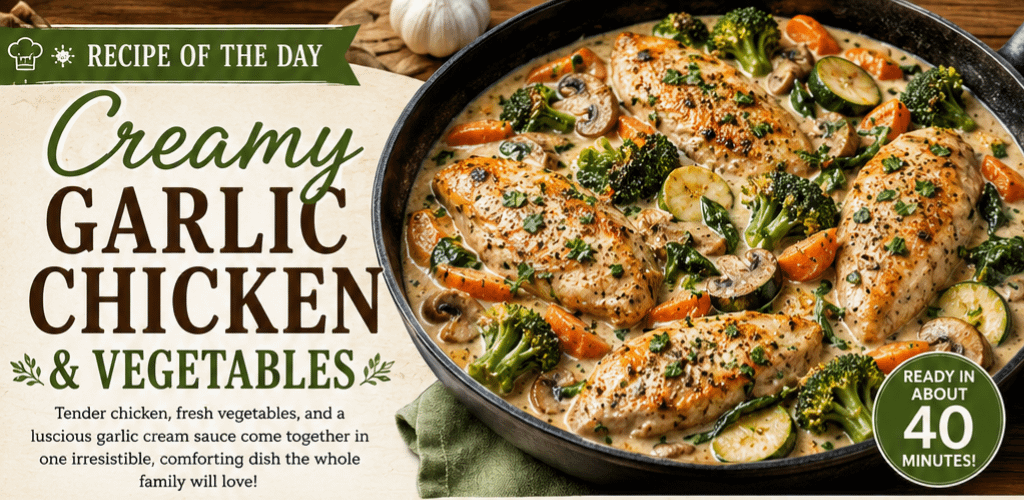
  • Recipe of the Day: Creamy Garlic Chicken & Vegetables

    Recipe of the Day: Creamy Garlic Chicken & Vegetables

    Few meals strike the perfect balance between comfort food and wholesome eating quite like Creamy Garlic Chicken & Vegetables. Tender, juicy chicken is seared until golden, then simmered in a rich garlic cream sauce alongside colorful vegetables that soak up every bit of flavor. The result is a satisfying meal that’s elegant enough for guests yet simple enough for a busy weeknight.

    Whether you’re cooking for your family or preparing a cozy dinner for two, this recipe delivers restaurant-quality flavor with everyday ingredients.

    Why You’ll Love This Recipe

    • Ready in about 40 minutes
    • One skillet means fewer dishes
    • Packed with protein and vegetables
    • Rich, creamy garlic sauce without being overly heavy
    • Easily customizable with your favorite vegetables
    • Great for meal prep and leftovers

    Ingredients

    For the Chicken

    • 4 boneless, skinless chicken breasts (or thighs)
    • 2 tablespoons olive oil
    • 1 teaspoon paprika
    • 1 teaspoon Italian seasoning
    • Salt and freshly ground black pepper to taste

    Vegetables

    • 2 cups broccoli florets
    • 1 cup baby carrots, halved
    • 1 cup sliced mushrooms
    • 1 cup zucchini, sliced
    • 1 cup fresh spinach

    Creamy Garlic Sauce

    • 4 tablespoons butter
    • 6 garlic cloves, minced
    • 2 tablespoons all-purpose flour
    • 2 cups chicken broth
    • 1 cup heavy cream
    • ½ cup grated Parmesan cheese
    • 1 teaspoon Dijon mustard (optional)
    • ½ teaspoon onion powder
    • Fresh parsley for garnish

    Instructions

    1. Season the Chicken

    Pat the chicken dry and season both sides with paprika, Italian seasoning, salt, and pepper.

    2. Sear the Chicken

    Heat olive oil in a large skillet over medium-high heat.

    Cook the chicken for 5–6 minutes per side until beautifully browned. Remove from the skillet and set aside.

    3. Cook the Vegetables

    Add the carrots and broccoli first since they require a little longer to cook.

    After about 4 minutes, stir in the mushrooms and zucchini. Cook another 3–4 minutes until just tender.

    Remove vegetables and set aside.

    4. Make the Garlic Cream Sauce

    Reduce heat to medium.

    Melt the butter and sauté the garlic for about one minute until fragrant.

    Whisk in the flour and cook for another minute.

    Slowly whisk in the chicken broth until smooth.

    Add the heavy cream, Parmesan cheese, Dijon mustard, and onion powder.

    Simmer for 3–5 minutes until the sauce thickens.

    5. Finish the Dish

    Return the chicken and vegetables to the skillet.

    Add the spinach and allow it to wilt into the sauce.

    Simmer everything together for 5–8 minutes until the chicken reaches an internal temperature of 165°F (74°C).

    Sprinkle with fresh parsley before serving.

    Serving Suggestions

    This creamy chicken pairs wonderfully with:

    • Garlic mashed potatoes
    • Buttered egg noodles
    • Steamed white or brown rice
    • Cauliflower rice for a lower-carb option
    • Warm crusty bread to soak up the creamy garlic sauce

    Recipe Tips

    • Pound thick chicken breasts to an even thickness for quicker cooking.
    • Freshly grated Parmesan melts much smoother than pre-shredded cheese.
    • Don’t overcook the vegetables—they should remain slightly crisp.
    • Add a pinch of red pepper flakes for a little heat.
    • A squeeze of fresh lemon juice before serving brightens the entire dish.

    Make It Your Own

    One of the best things about this recipe is its versatility.

    Try adding:

    • Asparagus
    • Green beans
    • Bell peppers
    • Brussels sprouts
    • Sun-dried tomatoes
    • Fresh basil
    • Crispy bacon pieces

    You can even substitute shrimp or salmon for the chicken for a delicious seafood variation.

    Storage

    Store leftovers in an airtight container in the refrigerator for up to 3 days.

    Reheat gently over low heat, adding a splash of chicken broth or cream to restore the sauce’s silky texture.

    Freezing is possible, although cream sauces may separate slightly when thawed.

    Final Thoughts

    Creamy Garlic Chicken & Vegetables is the kind of recipe that quickly becomes a household favorite. The combination of juicy chicken, colorful vegetables, and a velvety garlic-Parmesan cream sauce creates a comforting meal that’s both hearty and satisfying. Whether it’s a weeknight dinner, a family gathering, or a special weekend meal, this one-pan recipe offers incredible flavor with minimal effort.

    Simple ingredients, timeless flavors, and easy preparation make this a recipe you’ll find yourself returning to again and again.

  • Breakfast of the Day: Sloppy Joe Eggs

    Breakfast of the Day: Sloppy Joe Eggs

    A Hearty Breakfast That Brings Comfort to Your Morning

    If you’re looking for a breakfast that’s filling, flavorful, and a little different from the ordinary, Sloppy Joe Eggs deserve a place on your table. This creative breakfast combines the bold, savory flavors of a classic Sloppy Joe with perfectly cooked eggs, creating a satisfying meal that’s packed with protein and guaranteed to keep you energized throughout the day.

    Whether you’re feeding a hungry family, preparing brunch for friends, or simply craving a comforting breakfast with a twist, Sloppy Joe Eggs deliver everything you love about comfort food in one skillet.


    What Are Sloppy Joe Eggs?

    Sloppy Joe Eggs take the familiar sweet-and-savory seasoned ground beef mixture found in a traditional Sloppy Joe sandwich and pair it with eggs instead of hamburger buns. The result is a rich, hearty breakfast that balances savory meat, flavorful tomato sauce, onions, peppers, and creamy egg yolks in every bite.

    Serve it with toasted sourdough, biscuits, English muffins, or crispy hash browns for a complete breakfast that feels both rustic and satisfying.


    Why You’ll Love This Breakfast

    There are plenty of reasons Sloppy Joe Eggs have become a favorite among home cooks.

    • Ready in about 30 minutes
    • High in protein
    • Great use for leftover ground beef
    • One-pan meal for easy cleanup
    • Family-friendly and filling
    • Easy to customize with vegetables or cheese

    It’s comfort food without requiring hours in the kitchen.


    Ingredients

    For the Sloppy Joe Mixture

    • 1 pound lean ground beef
    • 1 small onion, diced
    • ½ green bell pepper, diced
    • 2 cloves garlic, minced
    • 1 cup tomato sauce
    • 2 tablespoons ketchup
    • 1 tablespoon tomato paste
    • 1 tablespoon Worcestershire sauce
    • 1 tablespoon brown sugar
    • 1 teaspoon yellow mustard
    • ½ teaspoon smoked paprika
    • Salt and black pepper to taste

    For the Eggs

    • 4–6 large eggs
    • 1 tablespoon butter or olive oil
    • Fresh parsley for garnish
    • Shredded cheddar cheese (optional)

    How to Make Sloppy Joe Eggs

    Step 1: Brown the Beef

    Heat a large skillet over medium heat. Cook the ground beef until browned. Drain excess grease if necessary.


    Step 2: Cook the Vegetables

    Add the diced onion and bell pepper to the skillet.

    Cook for about 5 minutes until softened.

    Stir in the garlic and cook for another minute.


    Step 3: Make the Sauce

    Add:

    • Tomato sauce
    • Ketchup
    • Tomato paste
    • Worcestershire sauce
    • Brown sugar
    • Mustard
    • Smoked paprika

    Mix well and simmer for 8–10 minutes until thick and flavorful.


    Step 4: Add the Eggs

    Using a spoon, make small wells in the meat mixture.

    Crack one egg into each well.

    Cover the skillet with a lid.

    Cook 5–8 minutes until the egg whites are set while the yolks remain runny, or longer if you prefer firmer yolks.


    Step 5: Finish and Serve

    Sprinkle with parsley and shredded cheddar cheese if desired.

    Serve immediately with toasted bread or breakfast potatoes.


    Serving Ideas

    Sloppy Joe Eggs pair wonderfully with:

    • Buttered sourdough toast
    • Homemade biscuits
    • Hash browns
    • Breakfast potatoes
    • Fresh fruit
    • Avocado slices
    • Crispy bacon
    • Fresh orange juice or coffee

    The runny yolks create a rich sauce that’s perfect for dipping toast.


    Delicious Variations

    Tex-Mex Style

    Add:

    • Jalapeños
    • Pepper Jack cheese
    • Taco seasoning
    • Fresh cilantro

    Serve with warm tortillas.


    Cheesy Version

    Top the skillet with:

    • Sharp cheddar
    • Mozzarella
    • Monterey Jack

    Broil for two minutes before adding the eggs or sprinkle on after the eggs are cooked.


    Low-Carb Option

    Skip the bread and serve over:

    • Cauliflower hash
    • Sautéed spinach
    • Roasted vegetables
    • Avocado halves

    Spicy Breakfast

    Increase the heat with:

    • Hot sauce
    • Red pepper flakes
    • Cayenne pepper
    • Chipotle peppers in adobo sauce

    Tips for Success

    • Use lean ground beef for less grease.
    • Don’t overcook the eggs—the runny yolk adds incredible richness.
    • Let the sauce simmer until thick before adding the eggs.
    • Fresh garlic creates deeper flavor than garlic powder.
    • Covering the skillet helps cook the eggs evenly.
    • Garnish with fresh herbs just before serving.

    Nutrition Highlights

    Sloppy Joe Eggs offer a balanced breakfast that combines protein, healthy fats, and vegetables.

    A typical serving provides:

    • Excellent source of protein
    • Iron from ground beef
    • Vitamin B12
    • Zinc
    • Vitamin C from peppers
    • Lycopene from tomatoes

    Pairing the dish with fruit or whole-grain toast creates an even more balanced meal.


    Make-Ahead Tips

    The Sloppy Joe mixture can be prepared up to three days ahead and refrigerated.

    When you’re ready to eat:

    1. Reheat the beef mixture.
    2. Make wells for the eggs.
    3. Crack the eggs directly into the skillet.
    4. Cover and cook until done.

    This makes weekday breakfasts incredibly simple.


    Perfect for Brunch

    Sloppy Joe Eggs make an impressive brunch centerpiece because everything cooks in one pan.

    Serve alongside:

    • Fresh fruit salad
    • Cinnamon rolls
    • Coffee
    • Mimosas
    • Hash browns

    Guests can scoop the hearty mixture onto toast or biscuits for a satisfying meal.


    Final Thoughts

    Sloppy Joe Eggs prove that breakfast doesn’t have to be ordinary. By combining the nostalgic flavors of a classic Sloppy Joe with perfectly cooked eggs, this recipe creates a hearty, protein-packed meal that’s ideal for busy mornings, weekend brunches, or breakfast-for-dinner nights.

    Simple ingredients, one-pan preparation, and bold comfort-food flavor make this recipe one you’ll want to keep in your regular breakfast rotation. Whether you enjoy it with crispy toast, flaky biscuits, or breakfast potatoes, Sloppy Joe Eggs offer a delicious way to start the day with warmth, flavor, and plenty of satisfaction.

    Read More Recipes

  • Healthy Recipe of the Day: Cheesy Ground Beef & Rice Casserole

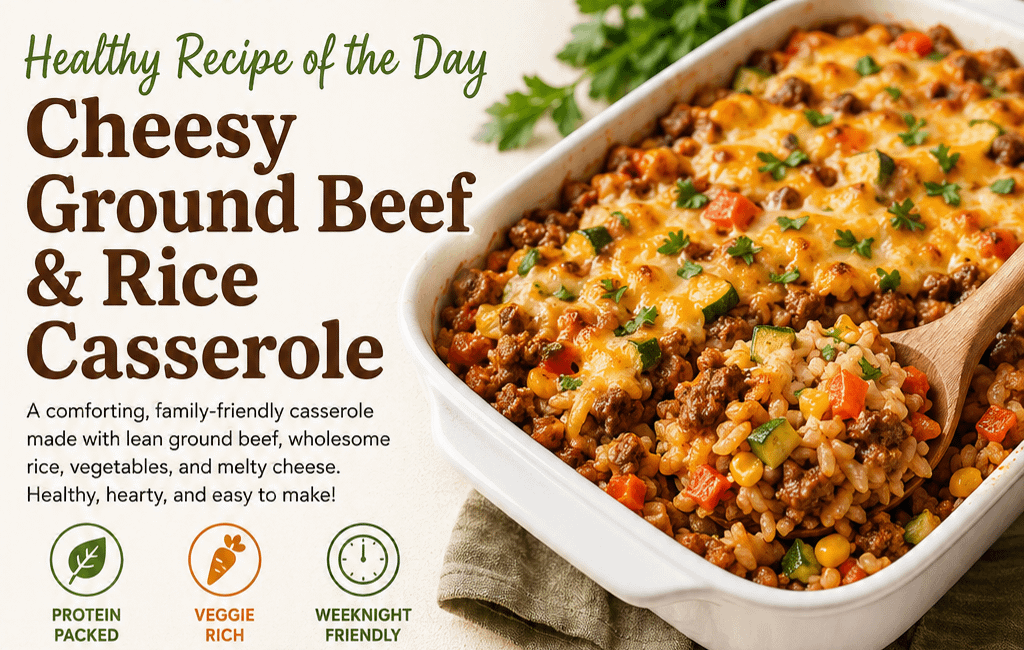
    Healthy Recipe of the Day: Cheesy Ground Beef & Rice Casserole

    When you are craving warm, cheesy comfort food but still want to serve a balanced meal, this Cheesy Ground Beef & Rice Casserole is an excellent choice. It combines lean ground beef, tender rice, colorful vegetables, a savory tomato-based sauce, and melted cheese in one satisfying dish.

    Traditional casseroles can be heavy in saturated fat, sodium, and processed ingredients. This healthier version keeps everything people love about a classic beef-and-rice casserole while using leaner meat, wholesome vegetables, controlled portions of cheese, and simple seasonings.

    It is comforting enough for a relaxing family dinner, practical enough for meal preparation, and easy enough to make on a busy weeknight.

    Why You’ll Love This Healthy Casserole

    This recipe proves that healthier eating does not have to mean giving up rich flavor or comforting meals. Every serving offers a satisfying combination of protein, carbohydrates, vegetables, and cheese.

    You will love this casserole because it is:

    • Made with affordable, everyday ingredients
    • High in protein and satisfying enough for dinner
    • Filled with vegetables
    • Easy to prepare in one skillet and one baking dish
    • Family-friendly and customizable
    • Ideal for leftovers and weekly meal preparation
    • Comforting without being excessively heavy

    The combination of seasoned ground beef, tomatoes, rice, vegetables, and melted cheese creates a complete meal in every serving.

    Ingredients

    For the Casserole

    • 1 pound lean ground beef, preferably 90% lean or higher
    • 1 cup uncooked brown rice or long-grain white rice
    • 2 cups low-sodium beef broth
    • 1 tablespoon olive oil
    • 1 small yellow onion, diced
    • 1 bell pepper, diced
    • 2 cloves garlic, minced
    • 1 medium zucchini, diced
    • 1 cup frozen corn
    • 1 can diced tomatoes, about 14.5 ounces, drained
    • 1 can tomato sauce, about 8 ounces
    • 1 teaspoon Italian seasoning
    • 1 teaspoon smoked paprika
    • ½ teaspoon ground cumin
    • ½ teaspoon salt, or to taste
    • ¼ teaspoon black pepper
    • 1 cup shredded reduced-fat cheddar cheese
    • ½ cup shredded mozzarella cheese
    • Chopped fresh parsley or green onions for garnish

    Instructions

    1. Cook the Rice

    Place the rice and low-sodium beef broth in a medium saucepan. Bring the mixture to a boil, then reduce the heat to low and cover.

    Cook according to the package directions until the rice is tender and has absorbed the broth. Brown rice may require approximately 35 to 45 minutes, while white rice will usually cook more quickly.

    Remove the rice from the heat and set it aside.

    2. Prepare the Oven and Baking Dish

    Preheat the oven to 375°F.

    Lightly coat a 9-by-13-inch baking dish with nonstick cooking spray or a small amount of olive oil.

    3. Brown the Ground Beef

    Heat one tablespoon of olive oil in a large skillet over medium heat.

    Add the diced onion and bell pepper. Cook for three to four minutes, stirring occasionally, until the vegetables begin to soften.

    Add the garlic and cook for approximately 30 seconds, just until fragrant.

    Place the lean ground beef in the skillet. Break it apart with a wooden spoon and cook until it is browned and no longer pink. Drain any excess grease when necessary.

    4. Add the Vegetables and Seasonings

    Add the diced zucchini, corn, drained tomatoes, tomato sauce, Italian seasoning, smoked paprika, cumin, salt, and black pepper.

    Stir everything together and allow the mixture to simmer for approximately five minutes. The zucchini should begin to soften, but it does not need to be completely cooked because it will continue cooking in the oven.

    5. Combine the Beef and Rice

    Add the cooked rice to the skillet and stir until it is evenly mixed with the beef, vegetables, and tomato sauce.

    Taste the mixture and adjust the seasonings as needed.

    6. Assemble the Casserole

    Transfer the beef-and-rice mixture to the prepared baking dish. Spread it into an even layer.

    Sprinkle the cheddar and mozzarella cheese evenly over the top.

    7. Bake Until Hot and Cheesy

    Cover the dish loosely with aluminum foil and bake for 15 minutes.

    Remove the foil and bake for another 10 to 15 minutes, or until the casserole is bubbling around the edges and the cheese is completely melted.

    For a lightly browned top, place the casserole under the broiler for one or two minutes. Watch it carefully to prevent the cheese from burning.

    8. Rest and Serve

    Allow the casserole to rest for five to ten minutes before serving. This helps the ingredients settle and makes it easier to divide into portions.

    Garnish with chopped parsley or green onions.

    What Makes This Casserole Healthier?

    A healthy recipe is not defined by one ingredient. It is created through thoughtful choices that improve the overall balance of the meal.

    Lean Ground Beef

    Using beef that is at least 90% lean provides plenty of protein while reducing the amount of excess fat in the casserole. You can drain the meat after browning it to reduce the fat further.

    More Vegetables

    Onions, bell peppers, zucchini, tomatoes, and corn add color, flavor, texture, vitamins, minerals, and fiber. They also increase the volume of the meal, helping each serving feel generous and satisfying.

    Brown Rice Option

    Brown rice contains more fiber than traditional white rice. The additional fiber may help make the meal more filling and support digestive health.

    White rice can still be used when that is what you have available. Portion size and the overall balance of the meal matter more than relying on one specific ingredient.

    Reduced-Fat Cheese

    Reduced-fat cheddar provides the familiar cheesy flavor people expect from a casserole while helping limit saturated fat. Combining cheddar with mozzarella creates a flavorful, melty topping without needing an excessive amount.

    Lower-Sodium Ingredients

    Using low-sodium broth, no-salt-added tomatoes, and carefully measured seasonings gives you greater control over the casserole’s sodium content.

    Healthy Ingredient Substitutions

    This recipe can easily be adjusted to match your family’s dietary preferences or the ingredients already in your kitchen.

    Ground Turkey or Chicken

    Replace the ground beef with lean ground turkey or chicken for an even lighter casserole. Because poultry is milder in flavor, you may want to add a little more smoked paprika, cumin, garlic, or Italian seasoning.

    Cauliflower Rice

    For a lower-carbohydrate version, replace some or all of the cooked rice with cauliflower rice.

    Sauté the cauliflower rice briefly before adding it to the casserole so that excess moisture does not make the dish watery.

    Quinoa

    Cooked quinoa can replace the rice and provides additional protein and fiber. Its slightly nutty flavor works well with the beef, tomatoes, and cheese.

    Additional Vegetables

    Try adding:

    • Chopped spinach
    • Mushrooms
    • Broccoli
    • Green beans
    • Carrots
    • Peas
    • Diced yellow squash
    • Chopped kale

    Spinach and kale should be stirred into the hot beef mixture and allowed to wilt before the casserole is assembled.

    Black Beans

    Adding a drained and rinsed can of black beans increases the fiber and stretches the casserole into additional servings. You can also reduce the amount of ground beef when adding beans.

    Tips for the Best Ground Beef and Rice Casserole

    Cook the Rice Before Baking

    Using fully cooked rice helps ensure that the casserole has the correct texture. Uncooked rice may absorb too much liquid or remain firm unless the recipe has been specifically designed for it.

    Drain the Tomatoes

    Draining the diced tomatoes prevents the casserole from becoming overly watery. The tomato sauce provides enough moisture to hold everything together.

    Do Not Overcook the Vegetables

    The vegetables will continue cooking in the oven. Sauté them only until they begin to soften so that they retain some texture.

    Let the Casserole Rest

    Allowing the finished casserole to sit for several minutes helps the sauce thicken slightly and prevents the servings from falling apart.

    Shred Your Own Cheese

    Pre-shredded cheese is convenient, but freshly shredded cheese often melts more smoothly because it does not contain the same anti-caking ingredients.

    What to Serve with Cheesy Ground Beef & Rice Casserole

    This recipe already contains protein, grains, vegetables, and dairy, so it can be served as a complete meal.

    For a little additional freshness, pair it with:

    • A simple green salad
    • Steamed broccoli
    • Roasted asparagus
    • Green beans with garlic
    • Sliced tomatoes and cucumbers
    • Fresh fruit
    • Roasted Brussels sprouts

    A crisp salad with a light vinaigrette provides a refreshing contrast to the warm, cheesy casserole.

    Storage Instructions

    Allow the casserole to cool before placing leftovers in an airtight container.

    Store it in the refrigerator for up to three or four days.

    Individual portions can be reheated in the microwave. Add a teaspoon of water or broth before reheating to help prevent the rice from drying out.

    To reheat a larger portion in the oven, cover the dish with foil and warm it at 350°F until heated through.

    Freezing Instructions

    This casserole can also be frozen for future meals.

    Allow it to cool completely, then transfer individual portions to freezer-safe containers. Freeze for up to two or three months.

    Thaw the casserole in the refrigerator overnight before reheating. You may need to add a small amount of broth, tomato sauce, or water to restore moisture.

    For convenient lunches, freeze the casserole in individual portions.

    Meal-Preparation Benefits

    Cheesy Ground Beef & Rice Casserole is an excellent meal-preparation recipe because it stores well, reheats easily, and provides a complete meal in one container.

    Prepare the casserole on the weekend and divide it into portions for several lunches or dinners. Add a side salad, fresh fruit, or steamed vegetables when serving.

    Having a homemade meal ready can make it easier to avoid relying on takeout or highly processed convenience foods during a busy week.

    Estimated Nutrition

    The exact nutritional values will depend on the ingredients, brands, cheese, rice, and serving sizes used.

    Based on approximately eight servings, each portion may contain:

    • 350 to 450 calories
    • 25 to 30 grams of protein
    • 30 to 40 grams of carbohydrates
    • 12 to 18 grams of fat
    • 4 to 6 grams of fiber

    Using brown rice, lean beef, reduced-fat cheese, and additional vegetables can improve the casserole’s overall nutritional balance.

    A Comforting Dinner with Better Balance

    Healthy eating does not require eliminating every comforting family favorite. In many cases, small changes—such as choosing leaner protein, including more vegetables, reducing sodium, and using a reasonable amount of cheese—can transform a traditional recipe into a more balanced meal.

    This Cheesy Ground Beef & Rice Casserole is warm, flavorful, filling, and easy to prepare. It delivers all the familiar comfort of a cheesy baked casserole while providing protein, vegetables, and wholesome ingredients in every serving.

    Whether you are feeding a family, preparing meals for the week, or simply looking for an easy dinner, this casserole deserves a place on your menu.

    Healthy Recipe of the Day

    Today’s healthy recipe reminds us that nutritious meals can still be comforting, affordable, and full of flavor. Gather your ingredients, heat the oven, and enjoy a warm serving of Cheesy Ground Beef & Rice Casserole with the people you love.

    Read More Recipes
  • Dessert of the Day: Cold Brew Icebox Cake

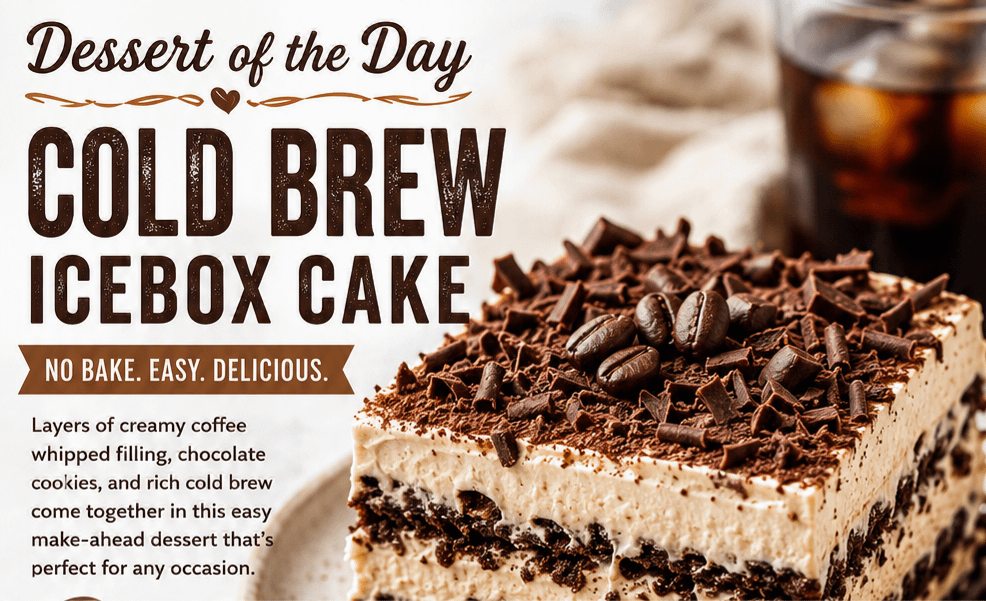
    Dessert of the Day: Cold Brew Icebox Cake

    Rich coffee flavor, creamy layers, and no oven required—Cold Brew Icebox Cake is the ultimate make-ahead dessert for coffee lovers.

    When the weather is warm or you’re craving a dessert that’s both elegant and effortless, few treats compare to a Cold Brew Icebox Cake. This chilled dessert combines the bold, smooth taste of cold brew coffee with fluffy whipped cream and tender cookie layers that soften into a cake-like texture as they rest in the refrigerator.

    It’s simple enough for a weekday dessert yet impressive enough to serve at dinner parties, holidays, or special celebrations. Best of all, you don’t need to turn on the oven.


    What Is a Cold Brew Icebox Cake?

    An icebox cake is a classic no-bake dessert made by layering cookies or crackers with whipped cream or another creamy filling. As the dessert chills overnight, the cookies absorb moisture from the filling and transform into soft, cake-like layers.

    In this version, smooth cold brew coffee is blended into the whipped cream, creating rich coffee flavor without bitterness. The result is a dessert that’s light, creamy, refreshing, and perfect for anyone who enjoys coffee.


    Why You’ll Love This Dessert

    • No baking required
    • Smooth coffee flavor without harsh bitterness
    • Perfect make-ahead dessert
    • Light and refreshing
    • Great for summer gatherings
    • Elegant enough for entertaining
    • Easy to customize with chocolate or caramel

    Ingredients

    Coffee Whipped Cream

    • 2 cups heavy whipping cream
    • 8 ounces mascarpone cheese, softened
    • 1/3 cup powdered sugar
    • 1/4 cup strong cold brew coffee
    • 1 teaspoon vanilla extract
    • Pinch of salt

    Layers

    • 2 packages chocolate wafer cookies or graham crackers
    • 2 tablespoons cold brew coffee for brushing cookies (optional)

    Topping

    • Chocolate curls
    • Cocoa powder
    • Chocolate-covered espresso beans
    • Shaved dark chocolate

    Instructions

    Step 1: Make the Filling

    In a large mixing bowl, beat the mascarpone until smooth.

    Add:

    • Heavy cream
    • Powdered sugar
    • Vanilla
    • Cold brew coffee
    • Salt

    Whip until medium-stiff peaks form.


    Step 2: Build the Cake

    Spread a thin layer of whipped cream onto the bottom of an 8×8-inch baking dish.

    Arrange a layer of cookies over the cream.

    If desired, lightly brush the cookies with additional cold brew for an extra coffee kick.

    Spread another layer of coffee whipped cream.

    Repeat until all ingredients are used, finishing with whipped cream on top.


    Step 3: Chill

    Cover tightly.

    Refrigerate for at least 8 hours, preferably overnight.

    The cookies will soften into beautiful cake-like layers.


    Step 4: Decorate

    Before serving, garnish with:

    • Chocolate curls
    • Cocoa powder
    • Espresso beans
    • Chocolate shavings

    Serve cold.


    Tips for the Best Cold Brew Icebox Cake

    Use Quality Cold Brew

    Cold brew is naturally smoother and less acidic than traditional coffee, making it perfect for desserts.

    Don’t Skip the Chill Time

    This dessert improves dramatically overnight.

    The longer it chills, the softer and more cake-like the layers become.

    Use Real Whipping Cream

    Fresh whipped cream creates a richer, lighter texture than frozen whipped topping.

    Slice with a Warm Knife

    Run a knife under warm water and wipe dry before slicing for clean, beautiful layers.


    Delicious Variations

    Mocha Icebox Cake

    Add:

    • 2 tablespoons cocoa powder
    • Mini chocolate chips

    Salted Caramel Coffee Cake

    Drizzle salted caramel sauce between layers.

    Top with flaky sea salt.


    Cookies and Cream Version

    Use chocolate sandwich cookies instead of wafers.


    Irish Cream Dessert

    Add a splash of Irish cream liqueur for an adults-only version.


    Chocolate Hazelnut

    Spread a thin layer of chocolate hazelnut spread between cookie layers.


    Serving Suggestions

    Cold Brew Icebox Cake pairs beautifully with:

    • Fresh berries
    • Vanilla ice cream
    • Chocolate-covered strawberries
    • Espresso
    • Cappuccino
    • Iced coffee
    • Cold brew with sweet cream

    Storage

    Store covered in the refrigerator for up to 4 days.

    Because the cake continues softening over time, many people think it’s even better on the second day.

    Freezing is also possible for up to one month. Thaw overnight in the refrigerator before serving.


    Nutritional Information (Approximate Per Serving)

    • Calories: 360
    • Protein: 5g
    • Carbohydrates: 27g
    • Fat: 27g
    • Saturated Fat: 16g
    • Sugar: 15g
    • Fiber: 1g

    Values vary depending on ingredients used.


    Why Cold Brew Makes Such a Great Dessert Ingredient

    Unlike traditionally brewed coffee, cold brew is steeped slowly in cold water over many hours. This process produces a smoother, naturally sweeter flavor with lower acidity, making it ideal for desserts.

    Its mellow coffee notes complement cream, chocolate, vanilla, and caramel without overpowering them, creating a balanced dessert that’s rich without being heavy.


    Final Thoughts

    Cold Brew Icebox Cake proves that incredible desserts don’t have to be complicated. With just a handful of ingredients and a little patience while it chills, you can create a dessert that looks bakery-worthy and tastes even better.

    The silky coffee-infused whipped cream, tender cookie layers, and rich chocolate garnish come together in every bite to create a refreshing, elegant treat that’s perfect for coffee lovers. Whether you’re serving it at a summer barbecue, holiday gathering, or simply enjoying a slice with your afternoon coffee, this no-bake dessert is sure to become a favorite in your recipe collection.

    Read More Recipes

  • Recipe of the Day: Honey BBQ Garlic Chicken Wings

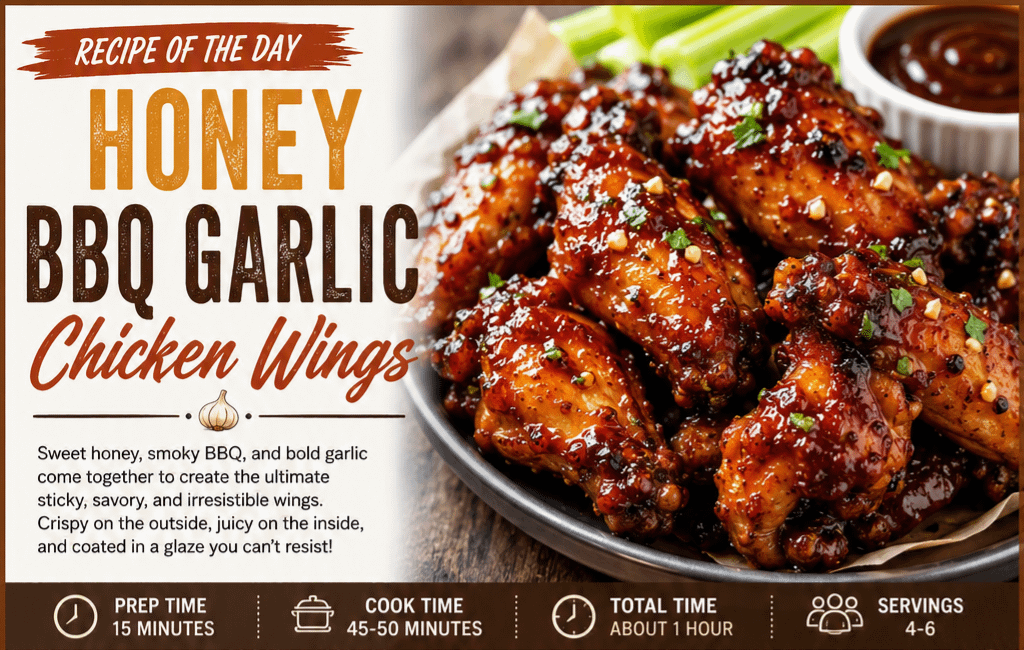
    Recipe of the Day: Honey BBQ Garlic Chicken Wings

    There are few foods that bring people together quite like chicken wings. Whether you’re hosting a game-day party, enjoying a family dinner, or simply craving a satisfying meal, Honey BBQ Garlic Chicken Wings deliver the perfect combination of sweet, smoky, savory, and garlicky flavors. Every bite is coated in a sticky glaze that’s impossible to resist, making these wings a guaranteed crowd favorite.

    The beauty of this recipe lies in its balance. Sweet honey caramelizes beautifully while tangy barbecue sauce adds smoky depth. Fresh garlic provides bold flavor that complements the rich sauce without overpowering it. The result is crispy wings covered in a glossy glaze that tastes like it came straight from your favorite restaurant.


    Why You’ll Love These Wings

    Honey BBQ Garlic Chicken Wings are everything great wings should be:

    • Crispy on the outside
    • Juicy and tender inside
    • Sweet with just the right amount of smoky flavor
    • Loaded with rich garlic goodness
    • Easy enough for weeknight dinners
    • Perfect for parties, tailgates, and family gatherings

    Unlike deep-fried wings, these are baked until crispy, making them a little lighter while still delivering fantastic texture.


    Honey BBQ Garlic Chicken Wings Recipe

    Prep Time: 15 minutes

    Cook Time: 45-50 minutes

    Total Time: About 1 hour

    Servings: 4-6


    Ingredients

    For the Wings

    • 2 pounds chicken wings, split into drumettes and flats
    • 2 tablespoons olive oil
    • 1 teaspoon salt
    • 1 teaspoon black pepper
    • 1 teaspoon garlic powder
    • 1 teaspoon onion powder
    • 1 teaspoon smoked paprika
    • ½ teaspoon cayenne pepper (optional)

    For the Honey BBQ Garlic Sauce

    • 1 cup barbecue sauce
    • ⅓ cup honey
    • 4 cloves garlic, minced
    • 2 tablespoons butter
    • 1 tablespoon Worcestershire sauce
    • 1 tablespoon apple cider vinegar
    • 1 teaspoon Dijon mustard
    • ½ teaspoon smoked paprika
    • Pinch of black pepper

    Instructions

    Step 1: Prepare the Wings

    Preheat your oven to 425°F (220°C).

    Pat the wings completely dry using paper towels. Dry wings become much crispier during baking.

    Place the wings in a large bowl and toss with:

    • Olive oil
    • Salt
    • Pepper
    • Garlic powder
    • Onion powder
    • Smoked paprika
    • Cayenne (if using)

    Arrange the wings on a wire rack placed over a baking sheet lined with foil.


    Step 2: Bake Until Crispy

    Bake for 25 minutes.

    Flip each wing.

    Continue baking another 20-25 minutes until golden brown and crispy.

    For extra crispy wings, broil for the last 2-3 minutes while watching carefully.


    Step 3: Make the Sauce

    While the wings bake, melt butter in a saucepan over medium heat.

    Add:

    • Minced garlic

    Cook for about one minute until fragrant.

    Stir in:

    • Barbecue sauce
    • Honey
    • Worcestershire sauce
    • Apple cider vinegar
    • Dijon mustard
    • Smoked paprika
    • Black pepper

    Allow the sauce to simmer gently for 5-7 minutes until slightly thickened.


    Step 4: Coat the Wings

    Transfer the hot wings to a large mixing bowl.

    Pour the warm Honey BBQ Garlic sauce over the wings.

    Toss until every wing is completely coated in the sticky glaze.


    Optional Finishing Touch

    Sprinkle with:

    • Chopped parsley
    • Sesame seeds
    • Extra minced garlic
    • Cracked black pepper

    Serve immediately while hot.


    Serving Suggestions

    These wings pair wonderfully with:

    • Ranch dressing
    • Blue cheese dressing
    • Celery sticks
    • Carrot sticks
    • Crispy French fries
    • Sweet potato fries
    • Macaroni salad
    • Coleslaw
    • Cornbread
    • Potato wedges

    For a complete meal, serve them alongside grilled corn and a fresh garden salad.


    Tips for the Best Wings

    Dry the Wings Well

    Moisture is the enemy of crispy skin. Pat them dry thoroughly before seasoning.

    Use a Wire Rack

    Elevating the wings allows hot air to circulate all around, creating even crispiness.

    Fresh Garlic Matters

    Fresh minced garlic provides a richer, more vibrant flavor than garlic powder in the sauce.

    Don’t Sauce Too Early

    Adding sauce before baking can burn the sugars. Toss the wings only after they’re fully cooked.

    Make Extra Sauce

    Many people enjoy dipping their wings into extra Honey BBQ Garlic sauce.


    Delicious Variations

    Spicy Honey BBQ

    Add:

    • 1 tablespoon hot sauce
    • Extra cayenne pepper
    • Crushed red pepper flakes

    Bourbon Honey BBQ

    Stir in:

    • 2 tablespoons bourbon while making the sauce.

    Smoky Chipotle

    Add:

    • Chipotle peppers in adobo sauce
    • Smoked chili powder

    Citrus Twist

    Mix in:

    • Fresh orange juice
    • Orange zest

    The citrus brightens the sweetness beautifully.


    Storage

    Store leftover wings in an airtight container in the refrigerator for up to 4 days.

    Reheat in a 375°F oven for 10-15 minutes to restore their crispiness.

    Avoid microwaving if possible, as it softens the skin.


    Final Thoughts

    Honey BBQ Garlic Chicken Wings are everything a great wing recipe should be—crispy, sticky, sweet, smoky, and packed with bold garlic flavor. They’re easy enough for a weeknight dinner yet impressive enough to serve at parties, barbecues, or holiday gatherings. Once you taste the rich homemade glaze coating perfectly baked wings, you’ll understand why this recipe quickly becomes a family favorite.

    Whether you’re feeding a crowd or treating yourself to comfort food, these Honey BBQ Garlic Chicken Wings are guaranteed to disappear fast. So grab plenty of napkins, gather your favorite people around the table, and enjoy every delicious bite of this irresistible recipe.

  • Healthy Recipe of the Day: Parmesan Chicken with Caesar and Apple Salad

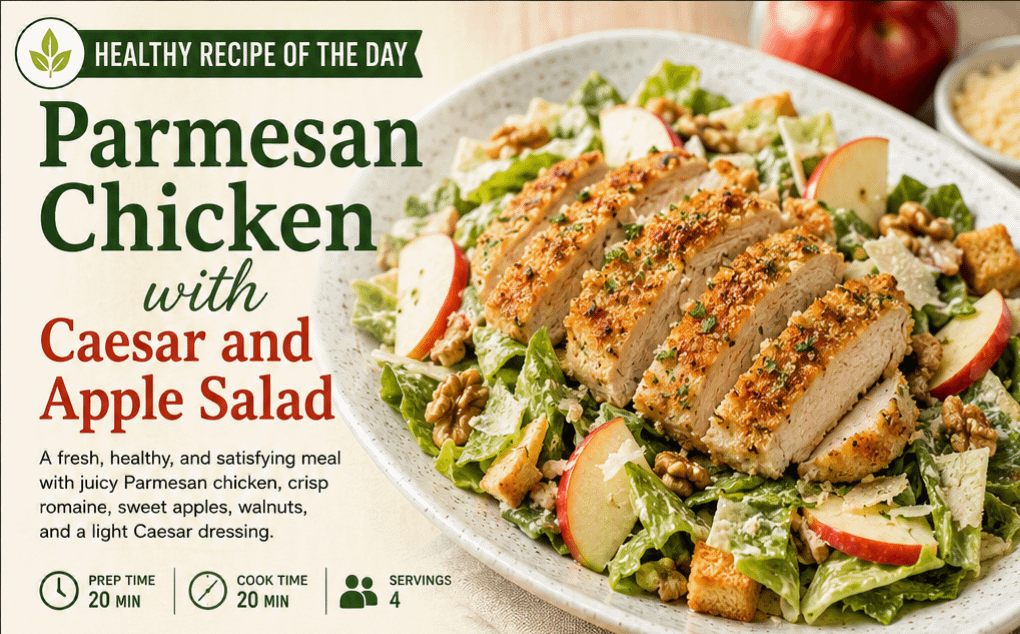
    Healthy Recipe of the Day: Parmesan Chicken with Caesar and Apple Salad

    Prep Time: 20 minutes
    Cook Time: 20 minutes
    Total Time: 40 minutes
    Servings: 4

    A Fresh and Flavorful Meal That’s Both Healthy and Satisfying

    If you’re looking for a meal that is packed with lean protein, crisp vegetables, fresh fruit, and incredible flavor, Parmesan Chicken with Caesar and Apple Salad is an excellent choice. This healthy recipe combines juicy oven-baked Parmesan chicken with a lighter Caesar salad featuring crisp romaine lettuce, sweet apples, crunchy walnuts, and a homemade Greek yogurt Caesar dressing.

    The combination of savory Parmesan, tender chicken, tangy dressing, and naturally sweet apples creates a meal that’s satisfying without feeling heavy. It’s perfect for lunch, dinner, meal prep, or even serving guests.


    Why You’ll Love This Recipe

    Unlike traditional fried Parmesan chicken and calorie-heavy Caesar salads, this healthier version offers all the flavor while cutting back on unnecessary fats and calories.

    Benefits include:

    • High in lean protein
    • Rich in vitamins and antioxidants
    • Excellent source of fiber
    • Lower in saturated fat
    • Naturally filling
    • Great for meal prep
    • Ready in under 45 minutes

    Ingredients

    For the Parmesan Chicken

    • 4 boneless, skinless chicken breasts
    • 1 tablespoon olive oil
    • ½ cup grated Parmesan cheese
    • ½ cup whole wheat breadcrumbs
    • 1 teaspoon garlic powder
    • 1 teaspoon Italian seasoning
    • ½ teaspoon paprika
    • Salt and black pepper to taste

    For the Caesar Apple Salad

    • 2 large heads romaine lettuce, chopped
    • 1 Honeycrisp apple, thinly sliced
    • ¼ cup shaved Parmesan
    • ¼ cup chopped walnuts
    • ½ cup whole wheat croutons (optional)
    • Fresh cracked pepper

    Healthy Caesar Dressing

    • ½ cup plain Greek yogurt
    • 2 tablespoons grated Parmesan
    • 1 tablespoon Dijon mustard
    • 1 tablespoon lemon juice
    • 1 teaspoon Worcestershire sauce
    • 1 garlic clove, minced
    • 1 teaspoon olive oil
    • Salt and pepper to taste

    Directions

    Step 1: Prepare the Chicken

    Preheat oven to 400°F (200°C).

    Lightly brush the chicken breasts with olive oil.

    In a shallow bowl combine:

    • Parmesan cheese
    • Whole wheat breadcrumbs
    • Garlic powder
    • Italian seasoning
    • Paprika
    • Salt
    • Pepper

    Press each chicken breast firmly into the Parmesan mixture until evenly coated.

    Place on a parchment-lined baking sheet.

    Bake for 18–22 minutes, or until the internal temperature reaches 165°F.

    For extra crispiness, broil for the final 2 minutes.


    Step 2: Make the Dressing

    Whisk together:

    • Greek yogurt
    • Parmesan
    • Dijon mustard
    • Lemon juice
    • Worcestershire sauce
    • Garlic
    • Olive oil
    • Salt and pepper

    Refrigerate until ready to serve.


    Step 3: Assemble the Salad

    In a large bowl combine:

    • Romaine lettuce
    • Apple slices
    • Walnuts
    • Parmesan
    • Croutons (optional)

    Add the dressing and gently toss until coated.


    Step 4: Serve

    Slice the warm Parmesan chicken.

    Place over the Caesar apple salad.

    Top with additional shaved Parmesan and fresh black pepper.

    Serve immediately.


    Nutritional Highlights

    This meal provides an excellent balance of nutrients.

    Chicken provides:

    • Lean protein
    • Vitamin B12
    • Niacin
    • Selenium
    • Phosphorus

    Apples contribute:

    • Dietary fiber
    • Vitamin C
    • Potassium
    • Natural antioxidants

    Romaine lettuce adds:

    • Vitamin A
    • Vitamin K
    • Folate
    • Hydration

    Walnuts provide:

    • Healthy omega-3 fats
    • Protein
    • Magnesium
    • Heart-healthy nutrients

    Greek yogurt dressing contains:

    • Probiotics
    • Calcium
    • Extra protein
    • Less fat than traditional Caesar dressing

    Tips for Success

    • Pound chicken breasts to an even thickness for consistent cooking.
    • Toss apple slices with a little lemon juice to prevent browning.
    • Use freshly grated Parmesan for the best flavor.
    • Chill the dressing for 15 minutes before serving to let the flavors develop.
    • Add grilled asparagus or roasted broccoli for even more vegetables.

    Delicious Variations

    Mediterranean Style

    Add cherry tomatoes, cucumbers, and olives.

    Extra Crunch

    Include sliced almonds or roasted pumpkin seeds.

    Low-Carb Version

    Skip the breadcrumbs and croutons.

    Extra Protein

    Top with hard-boiled eggs.

    Sweet & Savory

    Add dried cranberries or fresh grapes.


    Meal Prep Friendly

    This recipe is ideal for weekly meal prep.

    Store the chicken, salad, and dressing separately in airtight containers. Assemble just before serving to keep the lettuce crisp and the chicken fresh. The dressing stays fresh in the refrigerator for up to five days.


    Perfect Side Dishes

    Pair this healthy meal with:

    • Roasted asparagus
    • Garlic green beans
    • Fresh fruit salad
    • Whole grain dinner rolls
    • Lemon-infused sparkling water
    • Iced green tea

    Healthy Recipe Tips

    For even more nutrition:

    • Choose organic apples when possible.
    • Use homemade whole wheat croutons.
    • Add spinach or kale to the romaine.
    • Reduce the Parmesan slightly to lower sodium.
    • Finish with fresh herbs like parsley or basil.

    Final Thoughts

    Parmesan Chicken with Caesar and Apple Salad proves that healthy eating doesn’t have to be boring. Every bite offers a delicious combination of crispy baked chicken, crisp romaine, juicy apples, crunchy walnuts, and creamy homemade Caesar dressing. It’s a wholesome meal that delivers satisfying flavors, balanced nutrition, and an elegant presentation suitable for any day of the week.

    Whether you’re cooking for your family, preparing meals for a busy week, or simply trying to eat a little healthier, this recipe is one you’ll want to keep in regular rotation.

    Read More Recipes

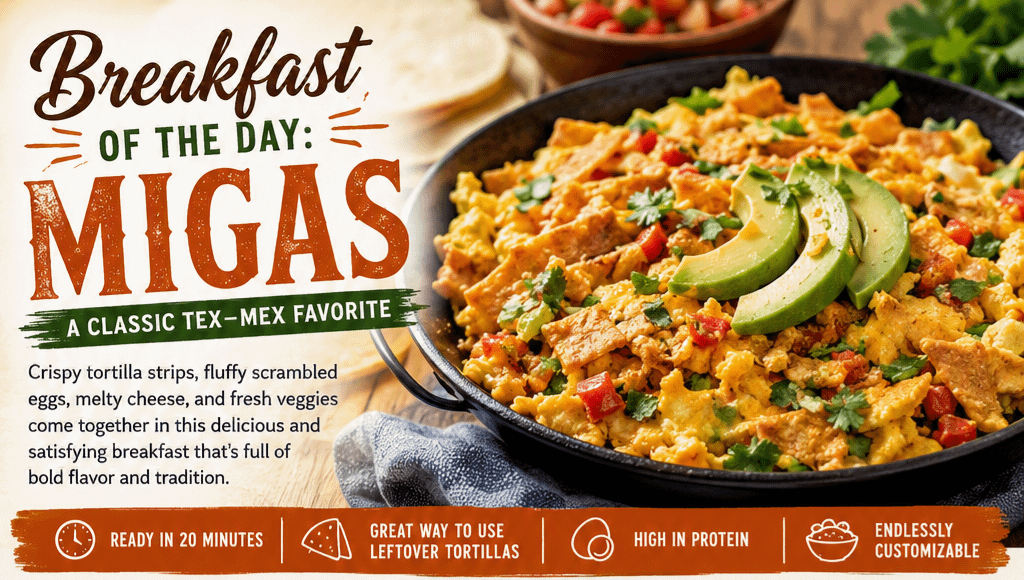
  • Breakfast of the Day: Migas – A Hearty Breakfast Packed with Flavor

    Breakfast of the Day: Migas – A Hearty Breakfast Packed with Flavor

    If you’re looking for a breakfast that’s comforting, filling, and bursting with flavor, Migas deserves a place at your table. This beloved Tex-Mex classic transforms simple pantry staples into a satisfying meal that has been enjoyed for generations. Combining crispy tortilla strips, fluffy scrambled eggs, melted cheese, and colorful vegetables, Migas offers the perfect balance of texture and taste.

    Whether you’re preparing a quick weekday breakfast or a leisurely weekend brunch, Migas is an easy dish that’s endlessly customizable.

    What Are Migas?

    Migas, which means “crumbs” in Spanish, has roots in both Spain and Mexico. While the Spanish version traditionally uses stale bread, the Mexican and Tex-Mex versions substitute crispy corn tortillas, creating a dish that’s become a breakfast favorite throughout Texas and the Southwest.

    The beauty of Migas lies in its simplicity. Leftover tortillas are fried until crisp, then folded into scrambled eggs along with sautéed onions, peppers, tomatoes, cheese, and your favorite seasonings.

    The result is a hearty breakfast that’s both economical and incredibly delicious.

    Why You’ll Love Migas

    There are plenty of reasons Migas has remained popular for decades.

    • Ready in about 20 minutes
    • Great way to use leftover tortillas
    • Packed with protein
    • Easily customizable
    • Perfect for breakfast, brunch, or even dinner
    • Full of bold Tex-Mex flavor

    Every bite combines creamy eggs with crunchy tortilla strips and melted cheese for a satisfying texture.

    Traditional Migas Recipe

    Ingredients

    • 6 large eggs
    • 4 corn tortillas, cut into strips
    • 2 tablespoons vegetable oil
    • ½ onion, diced
    • 1 jalapeño, diced (optional)
    • 1 tomato, diced
    • ½ cup shredded cheddar or Monterey Jack cheese
    • Salt and pepper to taste
    • ½ teaspoon garlic powder
    • Fresh cilantro for garnish

    Optional Toppings

    • Sliced avocado
    • Salsa
    • Sour cream
    • Pico de gallo
    • Hot sauce
    • Green onions
    • Fresh lime wedges

    Directions

    Step 1: Fry the Tortillas

    Heat the oil in a large skillet over medium heat. Fry the tortilla strips until golden brown and crispy. Remove and drain on paper towels.

    Step 2: Cook the Vegetables

    In the same skillet, sauté the onions and jalapeños for about 3–4 minutes. Add the tomatoes and cook for another minute.

    Step 3: Scramble the Eggs

    Whisk together the eggs, salt, pepper, and garlic powder. Pour them into the skillet and gently stir until they begin to set.

    Step 4: Add the Tortillas

    Fold the crispy tortilla strips into the eggs. Stir gently to combine while maintaining some crunch.

    Step 5: Melt the Cheese

    Sprinkle the cheese over the eggs and allow it to melt before serving.

    Step 6: Garnish

    Top with cilantro, avocado, salsa, and a squeeze of fresh lime.

    Serve immediately.

    Delicious Variations

    One of the best things about Migas is how easy it is to customize.

    Chorizo Migas

    Cook Mexican chorizo before adding the vegetables for a smoky, spicy breakfast.

    Bacon Migas

    Add crispy bacon pieces for extra crunch and savory flavor.

    Sausage Migas

    Breakfast sausage makes this version especially hearty.

    Veggie Migas

    Include spinach, mushrooms, zucchini, or bell peppers for added nutrition.

    Spicy Migas

    Use serrano peppers, chipotle peppers, or your favorite hot sauce.

    Southwest Migas

    Add black beans, corn, diced green chiles, and pepper jack cheese.

    Tips for Perfect Migas

    • Use corn tortillas instead of flour tortillas.
    • Fry tortillas until crispy but not overly browned.
    • Don’t overcook the eggs—they should stay soft and creamy.
    • Add tortilla strips near the end so they retain some crunch.
    • Fresh toppings brighten every bite.
    • Serve immediately for the best texture.

    What to Serve with Migas

    Migas pairs wonderfully with a variety of breakfast favorites.

    • Refried beans
    • Breakfast potatoes
    • Fresh fruit
    • Homemade salsa
    • Flour tortillas
    • Avocado slices
    • Fresh orange juice
    • Coffee

    For brunch, pair Migas with a Bloody Mary or a sparkling citrus mocktail.

    Nutritional Benefits

    Migas provides a satisfying combination of protein, healthy fats, and carbohydrates.

    Eggs supply high-quality protein and essential vitamins, while tomatoes and peppers contribute antioxidants and vitamin C. Adding avocado increases healthy fats and fiber, making the meal even more filling.

    You can make Migas lighter by using reduced-fat cheese, adding more vegetables, or cooking with minimal oil.

    A Breakfast That Brings People Together

    Migas is often served at family breakfasts, neighborhood diners, and weekend brunches where everyone gathers around the table. Its comforting flavors and easy preparation make it ideal for feeding a crowd without spending hours in the kitchen.

    Because every family has its own version, Migas has become a dish filled with tradition and personal touches. Some recipes emphasize spice, while others focus on cheese or fresh vegetables. No matter how you prepare it, the heart of Migas remains the same: simple ingredients transformed into something warm, comforting, and memorable.

    Final Thoughts

    Migas is proof that some of the best breakfasts come from humble beginnings. Crispy tortillas, fluffy eggs, melted cheese, and fresh vegetables come together to create a meal that’s hearty, flavorful, and easy to make.

    Whether you’re enjoying it as a quick weekday breakfast or serving it as the centerpiece of a weekend brunch, Migas offers a satisfying combination of comfort and bold Tex-Mex flavor that never goes out of style.

    Tomorrow morning, skip the ordinary and give Migas a try—you may discover your new favorite breakfast.

  • Dessert of the Day: Classic Cherry Pie

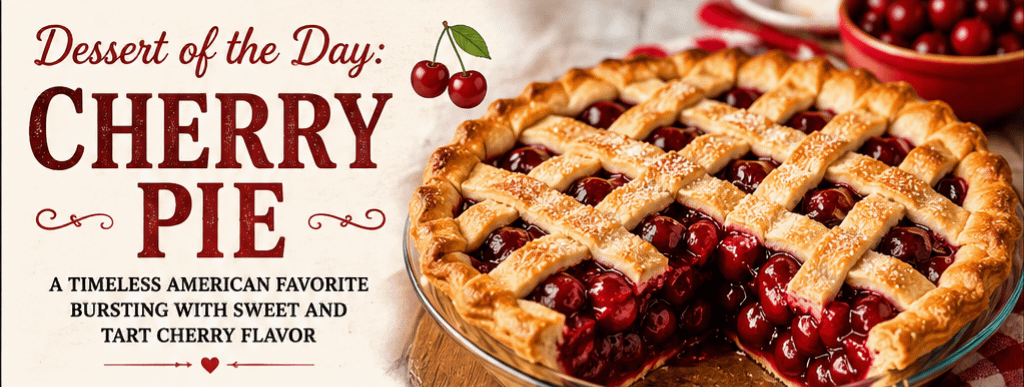
    Dessert of the Day: Classic Cherry Pie

    A Timeless American Favorite Bursting with Sweet and Tart Cherry Flavor

    Few desserts are as comforting and nostalgic as a freshly baked Cherry Pie. With its flaky, golden crust and juicy cherry filling, this classic dessert has been a staple at family gatherings, holiday celebrations, and summer picnics for generations. Every bite delivers the perfect balance of tart cherries, sweet syrup, and buttery pastry that makes it one of America’s most beloved pies.

    Whether served warm with a scoop of vanilla ice cream or enjoyed chilled the next morning, Cherry Pie is a dessert that never goes out of style.


    Why You’ll Love Cherry Pie

    Cherry Pie combines simple ingredients into something truly memorable. The rich, buttery crust complements the bright, fruity filling, creating layers of flavor and texture that are impossible to resist.

    It’s:

    • Perfect for holidays and celebrations
    • Easy to prepare with fresh or frozen cherries
    • Delicious warm or cold
    • Beautiful enough for special occasions
    • A true comfort food dessert

    Ingredients

    For the Pie Crust

    • 2 prepared pie crusts (homemade or refrigerated)
    • 1 egg
    • 1 tablespoon water
    • 1 tablespoon coarse sugar (optional)

    For the Cherry Filling

    • 5 cups pitted sweet or tart cherries (fresh or frozen)
    • ¾ cup granulated sugar
    • ¼ cup brown sugar
    • ¼ cup cornstarch
    • 1 tablespoon lemon juice
    • 1 teaspoon vanilla extract
    • ½ teaspoon almond extract
    • ¼ teaspoon salt
    • 1 tablespoon butter

    Directions

    Step 1: Prepare the Filling

    In a large saucepan, combine the cherries, sugars, cornstarch, lemon juice, vanilla, almond extract, and salt.

    Cook over medium heat, stirring frequently, until the mixture thickens and becomes glossy, about 8–10 minutes.

    Remove from the heat and allow the filling to cool slightly.


    Step 2: Prepare the Pie

    Preheat the oven to 400°F (200°C).

    Place one pie crust into a 9-inch pie pan.

    Pour the cherry filling into the crust and dot the top with butter.

    Cover with the second crust or create a lattice top.

    Trim and crimp the edges.

    Cut a few slits in the top crust if not using a lattice.


    Step 3: Egg Wash

    Whisk together the egg and water.

    Brush the top crust with the egg wash and sprinkle with coarse sugar if desired.


    Step 4: Bake

    Bake for 20 minutes at 400°F.

    Reduce the temperature to 375°F (190°C) and bake another 35–45 minutes, until the crust is golden brown and the filling is bubbling.

    If the crust begins browning too quickly, loosely cover the edges with foil.

    Allow the pie to cool for at least 2 hours before slicing.


    Tips for the Best Cherry Pie

    • Fresh cherries provide incredible flavor during summer.
    • Frozen cherries work perfectly year-round.
    • Almond extract enhances the natural cherry flavor.
    • Let the pie cool completely so the filling sets properly.
    • A lattice crust allows steam to escape while creating a beautiful presentation.

    Delicious Variations

    Cherry Crumble Pie

    Replace the top crust with a buttery oat streusel topping.

    Cherry Berry Pie

    Mix in blueberries, raspberries, or blackberries.

    Chocolate Cherry Pie

    Add mini chocolate chips to the filling for a decadent twist.

    Bourbon Cherry Pie

    Stir a tablespoon of bourbon into the filling for a rich, sophisticated flavor.

    Cherry Cheesecake Pie

    Spread a layer of sweetened cream cheese beneath the cherry filling.


    What to Serve with Cherry Pie

    Cherry Pie is wonderful on its own but becomes even more irresistible when paired with:

    • Vanilla ice cream
    • Fresh whipped cream
    • Cinnamon ice cream
    • Hot coffee
    • Cold milk
    • Fresh cherries for garnish

    Storage

    Store covered at room temperature for up to two days or refrigerate for up to five days.

    Cherry Pie also freezes beautifully for up to three months. Simply thaw overnight in the refrigerator and warm in the oven before serving.


    Fun Cherry Pie Facts

    • Cherry Pie has been an American favorite since the early colonial era.
    • Tart cherries are traditionally preferred because they balance sweetness perfectly.
    • National Cherry Pie Day is celebrated every year on February 20.
    • A lattice crust not only looks beautiful but also helps release steam while baking.

    Final Thoughts

    Classic Cherry Pie is more than just dessert—it’s a tradition passed down through generations. From its flaky, buttery crust to its vibrant cherry filling, every slice offers a taste of home and a reminder that the simplest recipes often become the most treasured. Whether you’re baking for a holiday, a family dinner, or simply craving an old-fashioned treat, Cherry Pie is a timeless dessert that’s sure to bring smiles to the table.

    One slice is rarely enough, especially when it’s served warm with a generous scoop of vanilla ice cream melting over the top.

  • Recipe of the Day: Italian Cherry Pound Cake

    Recipe of the Day: Italian Cherry Pound Cake

    Rich, buttery, and filled with sweet cherries, Italian Cherry Pound Cake is a timeless dessert that’s perfect for any occasion. Whether you’re serving it with coffee, bringing it to a family gathering, or enjoying a slice after dinner, this moist and flavorful cake delivers a delicious taste of classic Italian baking.


    Why You’ll Love Italian Cherry Pound Cake

    Pound cakes have been loved for generations because of their simple ingredients and incredible texture. This Italian-inspired version takes the traditional recipe to another level by folding in juicy maraschino cherries, a hint of almond, and a touch of vanilla for a bakery-style dessert that’s both elegant and comforting.

    The result is a dense yet tender cake with bursts of sweet cherry in every bite. It’s beautiful enough for holidays and celebrations while being easy enough to make for a weekend treat.


    Ingredients

    For the Cake

    • 1 cup unsalted butter, softened
    • 2 cups granulated sugar
    • 5 large eggs
    • 3 cups all-purpose flour
    • 1 teaspoon baking powder
    • ½ teaspoon salt
    • 1 cup sour cream
    • 1 teaspoon vanilla extract
    • 1 teaspoon almond extract
    • 1 cup chopped maraschino cherries, well drained
    • 2 tablespoons flour (for coating cherries)

    Optional Glaze

    • 1 cup powdered sugar
    • 2–3 tablespoons cherry juice or milk
    • ¼ teaspoon almond extract

    Directions

    Step 1: Prepare the Oven

    Preheat your oven to 325°F (163°C).

    Grease and flour a 10-inch Bundt pan or tube pan thoroughly.


    Step 2: Cream Butter and Sugar

    Using a stand mixer or hand mixer, beat the butter until smooth.

    Gradually add the sugar and continue beating for 4–5 minutes until light and fluffy.


    Step 3: Add the Eggs

    Add the eggs one at a time, mixing well after each addition.

    This helps create the cake’s rich texture.


    Step 4: Combine Dry Ingredients

    In a separate bowl, whisk together:

    • Flour
    • Baking powder
    • Salt

    Step 5: Mix the Batter

    Alternate adding the flour mixture and sour cream to the butter mixture.

    Begin and end with the flour mixture.

    Stir in:

    • Vanilla extract
    • Almond extract

    Mix only until combined.


    Step 6: Add the Cherries

    Pat the cherries dry with paper towels.

    Toss them with 2 tablespoons of flour to prevent sinking.

    Fold the cherries gently into the batter.


    Step 7: Bake

    Pour the batter into the prepared pan.

    Bake for 70–80 minutes, or until a toothpick inserted into the center comes out clean.

    Allow the cake to cool in the pan for about 15 minutes before transferring it to a wire rack.


    Step 8: Add the Glaze

    Whisk together:

    • Powdered sugar
    • Cherry juice or milk
    • Almond extract

    Drizzle over the cooled cake.

    Garnish with whole maraschino cherries if desired.


    Tips for the Perfect Pound Cake

    • Always use room-temperature butter, eggs, and sour cream.
    • Drain cherries extremely well to avoid excess moisture.
    • Coat cherries in flour to keep them evenly distributed.
    • Don’t overmix after adding the flour.
    • Let the cake cool completely before glazing.

    Delicious Serving Ideas

    Italian Cherry Pound Cake pairs wonderfully with:

    • Fresh whipped cream
    • Vanilla bean ice cream
    • Fresh cherries
    • Espresso
    • Cappuccino
    • Hot tea
    • Fresh berries
    • Sweet dessert wine

    It’s equally delicious served at brunch, birthdays, holidays, baby showers, or afternoon coffee breaks.


    Storage

    Store covered at room temperature for up to 4 days.

    Refrigerate for up to one week.

    Freeze slices individually for up to 3 months. Simply thaw at room temperature before serving.


    Variations

    Chocolate Cherry Pound Cake

    Fold in 1 cup mini chocolate chips for a rich chocolate-cherry combination.

    Lemon Cherry

    Add the zest of one lemon for a bright citrus flavor.

    Pistachio Cherry

    Mix in ½ cup chopped pistachios for extra crunch and a beautiful color contrast.

    Cream Cheese Version

    Replace half the sour cream with softened cream cheese for an even richer texture.


    Why This Recipe Works

    The combination of butter, sour cream, and eggs creates a moist, tender crumb that stays fresh for days. Almond extract enhances the flavor of the cherries without overpowering them, while the simple glaze adds just the right amount of sweetness and gives the cake a bakery-quality finish.

    This recipe is easy enough for beginner bakers yet impressive enough to serve to guests.


    Final Thoughts

    Italian Cherry Pound Cake is a classic dessert that brings together rich buttery flavor, sweet cherries, and a soft, velvety texture in every slice. It’s the kind of recipe that becomes a family favorite—perfect for holidays, Sunday dinners, or whenever you’re craving a homemade treat that feels both comforting and special.

    Whether served with a cup of coffee in the morning or enjoyed as an elegant dessert after dinner, this beautiful cherry-filled pound cake is sure to become a recipe you’ll return to again and again.

    Read More Recipes

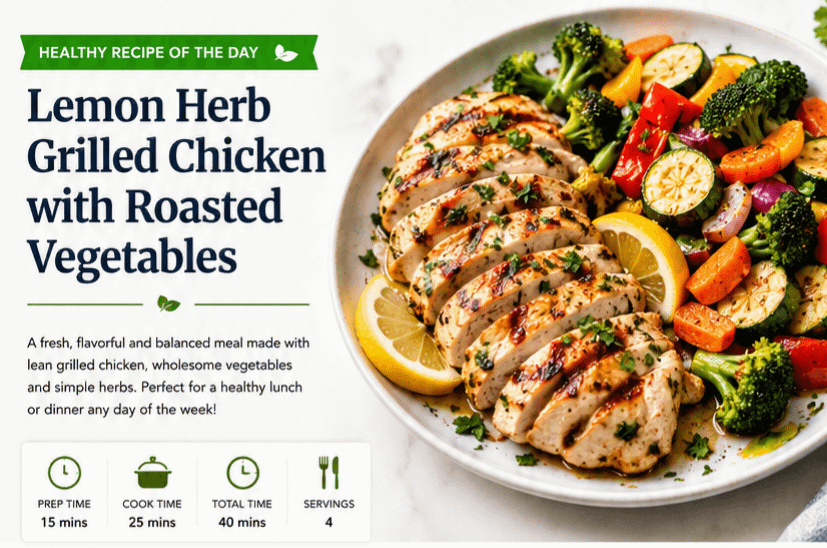
  • Healthy Recipe of the Day: Lemon Herb Grilled Chicken with Roasted Vegetables

    Healthy Recipe of the Day: Lemon Herb Grilled Chicken with Roasted Vegetables

    Making healthier food choices doesn’t mean sacrificing flavor. Some of the most satisfying meals are built around simple, fresh ingredients that allow natural flavors to shine. Today’s Healthy Recipe of the Day is a perfect example of how wholesome cooking can be delicious, filling, and easy enough for any night of the week.

    Lemon Herb Grilled Chicken with Roasted Vegetables combines lean chicken breast with a vibrant assortment of oven-roasted vegetables seasoned with garlic, herbs, olive oil, and fresh lemon. Every bite delivers a balance of savory flavors, satisfying textures, and valuable nutrients that support a healthy lifestyle.

    Whether you’re trying to eat cleaner, lose weight, build muscle, improve your heart health, or simply enjoy more home-cooked meals, this recipe is one you’ll come back to time and time again.


    Why Healthy Meals Matter

    Healthy eating is about nourishing your body with foods that provide lasting energy, support your immune system, and help you feel your best. Instead of relying on heavily processed meals that are often loaded with sodium, added sugars, and unhealthy fats, preparing meals at home gives you complete control over what goes onto your plate.

    Meals built around lean proteins, colorful vegetables, healthy fats, and natural seasonings can:

    • Help maintain a healthy weight
    • Support heart health
    • Improve digestion
    • Increase energy levels
    • Promote muscle recovery
    • Reduce inflammation
    • Help stabilize blood sugar
    • Keep you feeling full longer

    The best part is that healthy meals don’t have to be expensive or complicated. Many of the healthiest dishes use affordable ingredients that are readily available at your local grocery store.


    Why You’ll Love This Recipe

    There are countless reasons this meal deserves a place in your weekly rotation.

    • Ready in about 40 minutes
    • High in lean protein
    • Rich in vitamins and minerals
    • Naturally gluten-free
    • Low in processed ingredients
    • Great for meal prep
    • Easy to customize
    • Family-friendly
    • Beautiful presentation
    • Incredible fresh flavor

    The Nutritional Benefits

    Chicken Breast

    Chicken breast is one of the best lean protein sources available. Protein helps repair muscles, supports metabolism, and keeps you feeling satisfied longer after meals.

    Chicken also contains:

    • Niacin
    • Vitamin B6
    • Phosphorus
    • Selenium
    • Potassium

    These nutrients contribute to healthy metabolism, immune support, and overall wellness.


    Olive Oil

    Extra virgin olive oil provides heart-healthy monounsaturated fats and antioxidants that may help reduce inflammation.

    It also adds rich flavor without relying on heavy sauces or butter.


    Broccoli

    Broccoli is often called a nutritional powerhouse.

    It contains:

    • Vitamin C
    • Vitamin K
    • Fiber
    • Folate
    • Potassium
    • Antioxidants

    Broccoli supports immune health, digestion, and bone strength while adding satisfying texture to the meal.


    Carrots

    Carrots provide natural sweetness while supplying:

    • Beta-carotene
    • Vitamin A
    • Vitamin K
    • Potassium
    • Fiber

    Vitamin A is especially important for healthy vision and immune function.


    Bell Peppers

    Colorful bell peppers are loaded with Vitamin C and antioxidants while adding beautiful color and crunch.

    Red peppers contain even more Vitamin C than oranges by weight.


    Zucchini

    Zucchini is low in calories but high in nutrients.

    It contains:

    • Vitamin C
    • Potassium
    • Magnesium
    • Fiber

    Its mild flavor pairs perfectly with grilled chicken and fresh herbs.


    Ingredients

    Chicken

    • 4 boneless skinless chicken breasts
    • 2 tablespoons extra virgin olive oil
    • Juice of one fresh lemon
    • 2 cloves garlic, minced
    • 1 teaspoon oregano
    • 1 teaspoon thyme
    • 1 teaspoon parsley
    • ½ teaspoon paprika
    • Salt
    • Fresh cracked pepper

    Vegetables

    • 2 cups broccoli florets
    • 2 carrots, sliced
    • 1 zucchini, sliced
    • 1 red bell pepper
    • 1 yellow bell pepper
    • 1 tablespoon olive oil
    • Garlic powder
    • Onion powder
    • Salt
    • Pepper

    Optional garnish:

    • Fresh parsley
    • Lemon slices
    • Parmesan cheese

    Step-by-Step Directions

    Step 1 – Prepare the Marinade

    Combine olive oil, lemon juice, garlic, oregano, thyme, parsley, paprika, salt, and pepper in a bowl.

    Whisk until fully blended.


    Step 2 – Marinate the Chicken

    Place chicken into a resealable bag or shallow dish.

    Pour the marinade over the chicken.

    Allow it to marinate for at least 20 minutes.

    For maximum flavor, refrigerate for 2 to 8 hours.


    Step 3 – Prepare the Vegetables

    Preheat the oven to 425°F.

    Wash and chop all vegetables into similar-sized pieces for even cooking.

    Toss with olive oil and seasonings until evenly coated.

    Spread vegetables across a baking sheet in a single layer.


    Step 4 – Roast the Vegetables

    Roast for approximately 20–25 minutes.

    Halfway through cooking, stir the vegetables to promote even browning.

    The vegetables should be slightly caramelized while remaining tender.


    Step 5 – Grill the Chicken

    Heat your grill or grill pan over medium-high heat.

    Cook chicken about 6–7 minutes per side.

    Always verify an internal temperature of 165°F using a meat thermometer.

    Allow chicken to rest for five minutes before slicing.


    Step 6 – Plate the Meal

    Arrange roasted vegetables on one side of the plate.

    Slice the grilled chicken and place alongside the vegetables.

    Garnish with fresh parsley and lemon wedges.

    Serve immediately.


    Nutrition Information

    Approximate values per serving:

    • Calories: 425
    • Protein: 42 grams
    • Carbohydrates: 20 grams
    • Fat: 17 grams
    • Fiber: 6 grams
    • Sugar: 7 grams
    • Sodium: Varies depending on seasoning

    Healthy Cooking Tips

    Simple cooking habits can dramatically improve the nutritional value of your meals.

    Choose fresh herbs whenever possible because they add incredible flavor without extra calories.

    Roast vegetables at higher temperatures to develop natural sweetness instead of adding sugar-based glazes.

    Use fresh lemon juice rather than bottled versions for brighter flavor.

    Cook extra vegetables and store them for quick lunches throughout the week.

    Measure oils instead of pouring freely to better manage calories.


    Delicious Variations

    This recipe is incredibly flexible.

    Mediterranean Style

    Top with crumbled feta cheese, olives, cucumber, and cherry tomatoes.


    Southwest Version

    Season the chicken with chili powder and cumin.

    Serve alongside corn, black beans, avocado, and fresh salsa.


    Italian Inspired

    Add roasted cherry tomatoes, basil, mozzarella pearls, and balsamic glaze.


    Low-Carb Option

    Replace carrots with cauliflower and asparagus.


    High-Protein Version

    Serve with cottage cheese or add a side of quinoa for additional protein.


    Perfect for Meal Prep

    This recipe is one of the easiest meals to prepare ahead of time.

    Store individual servings in airtight containers for up to four days.

    Reheat gently in the microwave or oven to preserve moisture.

    Add fresh lemon juice just before serving to brighten the flavors.

    It’s ideal for healthy lunches, busy weeknights, or post-workout meals.


    Frequently Asked Questions

    Can I bake the chicken instead?

    Absolutely. Bake at 400°F for approximately 22 to 25 minutes, or until the internal temperature reaches 165°F.

    Can I use chicken thighs?

    Yes. Boneless, skinless chicken thighs provide a richer flavor while still being a nutritious option.

    Can I freeze leftovers?

    Yes. Freeze cooked chicken and vegetables separately for up to three months. Thaw overnight in the refrigerator before reheating.

    What sides pair well with this meal?

    Brown rice, quinoa, wild rice, cauliflower rice, whole-grain pasta, or a crisp green salad all complement this recipe.


    Final Thoughts

    Healthy eating isn’t about following strict diets or giving up the foods you love—it’s about making consistent choices that nourish your body and leave you feeling energized. Meals like Lemon Herb Grilled Chicken with Roasted Vegetables show that nutritious food can be colorful, satisfying, and full of incredible flavor.

    By combining lean protein, vibrant vegetables, heart-healthy olive oil, and fresh herbs, you’ve created a meal that’s as enjoyable as it is wholesome. Whether you’re cooking for your family, preparing meals for the week ahead, or simply looking for a healthier dinner option, this recipe delivers both nutrition and comfort.

    Today’s Healthy Recipe of the Day is a reminder that every healthy meal is an investment in your well-being. One delicious plate at a time, you can build habits that support a stronger body, greater energy, and a healthier future.

    Read More Recipes