Blog

  • Grief of the Day: How to Take Care of Someone Who Has Lost a Child

    Grief of the Day: How to Take Care of Someone Who Has Lost a Child

    There are losses that change a person’s life, and then there is the loss of a child.

    When a parent loses a child, the world they knew no longer exists in quite the same way. Their child was part of their identity, their daily routine, their memories, their hopes, and the future they imagined. Love does not disappear when a child dies, but suddenly there is nowhere for so much of that love to go.

    If someone you care about has lost a child, you may desperately want to help while having absolutely no idea what to do.

    You may be afraid of saying the wrong thing.

    You may wonder whether mentioning their child will make them cry.

    You may feel helpless because nothing you can say will bring their child back.

    The truth is that you cannot fix this kind of grief.

    But you can help someone carry it.

    Sometimes taking care of a grieving parent isn’t about finding extraordinary words. It is about being willing to remain beside them when there are no words at all.

    Don’t Try to Take Their Grief Away

    One of the first things to understand is that grief after losing a child isn’t something that needs to be fixed.

    The grieving parent isn’t waiting for someone to give them the perfect advice that will suddenly make everything better. Their grief exists because their love exists.

    You don’t have to solve it.

    You don’t have to explain it.

    You don’t have to find a reason why it happened.

    Sometimes the most compassionate thing you can say is simply:

    “I’m here.”

    And then prove it.

    Sit beside them.

    Listen when they want to talk.

    Let silence exist when they don’t.

    Allow tears without immediately trying to stop them.

    Grief makes many people uncomfortable because we naturally want suffering to end. But sometimes caring for someone means becoming comfortable sitting beside pain you cannot remove.

    Say Their Child’s Name

    Many grieving parents fear that eventually everyone will stop talking about their child.

    People sometimes avoid mentioning the child because they are afraid of reminding the parent of what happened.

    But the parent hasn’t forgotten.

    They wake up knowing.

    They go to sleep knowing.

    They carry that absence through birthdays, holidays, grocery stores, songs, photographs, family gatherings, quiet evenings, and ordinary Tuesday mornings.

    Mentioning their child’s name usually isn’t creating their grief.

    The grief is already there.

    Instead, hearing their child’s name can remind them that their child mattered to other people too.

    Say their name.

    Share a memory.

    Tell the parent something you remember about their child’s personality, kindness, humor, accomplishments, or quirks.

    A simple sentence like:

    “I was thinking about him today.”

    can mean more than you realize.

    Because one of the greatest fears after losing someone you love is that the rest of the world will eventually forget them.

    Listen More Than You Speak

    You don’t need to have experienced child loss to listen compassionately to someone who has.

    Let them tell their story.

    Even if you’ve heard it before.

    Grieving people sometimes need to repeat memories because those memories are among the few things they still physically possess from the life they once shared with their child.

    They may tell you about the day their child was born.

    They may tell you about childhood vacations.

    They may talk about arguments, funny moments, school, sports, birthdays, favorite foods, inside jokes, or ordinary moments that suddenly became priceless.

    They may also talk about the day their child died.

    Listen.

    Don’t rush them toward a happier subject because their pain makes you uncomfortable.

    Sometimes telling the story is part of carrying the story.

    Don’t Put a Timeline on Their Grief

    There is no expiration date for loving your child.

    Therefore, there is no expiration date for grieving them.

    After several months, people may expect the parent to “start getting back to normal.”

    After a year, some may assume they should have “moved on.”

    But what exactly are they supposed to move on from?

    Their child?

    Grief changes over time, but that doesn’t mean it disappears.

    A parent may laugh again.

    They may work.

    They may travel.

    They may fall in love.

    They may celebrate birthdays.

    They may build a meaningful life.

    And they may still miss their child every single day.

    Those things can exist together.

    Healing does not require forgetting.

    Moving forward does not mean leaving their child behind.

    Remember the Difficult Dates

    The first weeks after a death often bring tremendous support.

    People call.

    They bring food.

    They send cards.

    They attend services.

    They check in.

    Then slowly, everyone returns to their own lives.

    But the grieving parent doesn’t get to return to the life they had before.

    This is when support becomes especially important.

    Remember their child’s birthday.

    Remember the anniversary of their death.

    Remember Mother’s Day and Father’s Day.

    Remember holidays.

    Send a simple message.

    “Thinking about you and your child today.”

    You don’t need an elaborate speech.

    Remembering matters.

    And don’t assume only the first anniversary is difficult.

    The second can hurt.

    The fifth can hurt.

    The tenth can hurt.

    Twenty years later, a birthday can still bring tears.

    Love keeps counting the years even when someone is no longer physically here.

    Help With Ordinary Life

    Grief is exhausting.

    Something as simple as cooking dinner, doing laundry, answering messages, cleaning the house, or going grocery shopping can feel overwhelming.

    Instead of saying:

    “Let me know if you need anything.”

    consider offering something specific.

    Bring dinner.

    Offer to pick up groceries.

    Mow the lawn.

    Walk the dog.

    Drive them somewhere.

    Help with household chores.

    Drop off coffee.

    Sit with them while they handle paperwork.

    Small acts can remove one responsibility from a person whose emotional energy is already depleted.

    And don’t be offended if they say no.

    Continue caring without applying pressure.

    Understand That Grief Can Be Unpredictable

    A grieving parent may seem okay one day and devastated the next.

    That doesn’t necessarily mean they are going backward.

    Grief doesn’t move in a straight line.

    A song might suddenly bring back a memory.

    A child laughing in a restaurant might trigger tears.

    Walking through a store and seeing their child’s favorite snack may hurt.

    A photograph can create both joy and heartbreak.

    Sometimes the biggest triggers are unexpected.

    Give them permission to experience whatever comes.

    They don’t always need someone asking:

    “What’s wrong?”

    Sometimes they simply need someone who understands that grief arrived unexpectedly.

    Don’t Compare Their Loss

    When someone shares their grief, resist the urge to immediately respond with another loss.

    Every loss matters, but every relationship is different.

    Instead of trying to prove that you understand exactly how they feel, acknowledge that you may not fully understand.

    You can say:

    “I can’t imagine everything you’re carrying, but I’m here to listen.”

    That gives them space to describe their own experience without having it compared to someone else’s.

    Let Them Laugh Without Guilt

    There may eventually be moments when the grieving parent laughs again.

    Encourage those moments without treating them as evidence that grief is over.

    Sometimes grieving parents feel guilty for experiencing happiness.

    They may wonder:

    How can I laugh when my child is gone?

    But love doesn’t demand permanent suffering.

    A parent can miss their child desperately and still experience joy.

    They can laugh and grieve.

    They can smile and remember.

    They can build new memories while cherishing old ones.

    Support both sides of that reality.

    Don’t Disappear Because You Don’t Know What to Say

    One of the loneliest parts of grief can be watching people disappear.

    Sometimes friends stop calling because they don’t know what to say.

    But silence can feel like abandonment.

    You don’t need perfect words.

    Send a message:

    “I’m thinking about you.”

    Invite them for coffee.

    Ask if they want company.

    Check in months later.

    Continue showing up.

    Consistency is often more valuable than eloquence.

    Allow Them to Talk About Who They Were Before

    Child loss can change a person’s identity.

    They may look at photographs from years earlier and barely recognize the person smiling back at them.

    Their priorities may change.

    Friendships may change.

    Faith may change.

    Relationships may change.

    Their understanding of life itself may change.

    Give them space to talk about who they were, who they are now, and who they are becoming.

    They may never become the person they were before.

    That doesn’t mean life cannot still contain meaning.

    It means they are learning how to live while carrying something they never wanted to carry.

    Don’t Tell Them How They Should Feel

    Avoid statements such as:

    “You need to be strong.”

    “Everything happens for a reason.”

    “At least they’re in a better place.”

    “You have other children.”

    “You need to move on.”

    Even when intended as comfort, these words can unintentionally minimize the person’s grief.

    Instead, acknowledge the reality.

    “I am so sorry.”

    “I miss them too.”

    “I’m here whenever you need someone.”

    Sometimes simple compassion is enough.

    Keep Supporting Them When Everyone Else Has Gone Home

    Perhaps one of the greatest gifts you can give a grieving parent is long-term presence.

    Not only during the funeral.

    Not only during the first month.

    Not only during the first year.

    Stay.

    Check in occasionally.

    Remember important dates.

    Share memories.

    Invite them places even if they sometimes decline.

    Allow them to talk about their child.

    Celebrate their progress without expecting their grief to disappear.

    Grief can become especially lonely when everyone else assumes enough time has passed.

    Your continued presence tells them:

    You don’t have to carry this completely alone.

    Remember That Their Child Will Always Be Their Child

    Death changes many things.

    It does not erase parenthood.

    A mother remains a mother.

    A father remains a father.

    Their child’s story remains part of their story.

    Their love continues.

    That is why one of the most compassionate things you can do is recognize the relationship rather than pretending it disappeared.

    Talk about their child.

    Remember their child.

    Honor their child.

    Let the parent know that their child’s life mattered.

    Sometimes Taking Care of Them Means Simply Staying

    There isn’t a perfect formula for supporting someone who has lost a child.

    Some days they may want to talk.

    Some days they may want silence.

    Some days they may need practical help.

    Some days they may need space.

    Some days they may desperately need someone to sit beside them and remind them they are not alone.

    You don’t need to understand everything they are experiencing.

    You just need to care enough to remain present.

    Because grief is heavy.

    And while you cannot carry it for them, sometimes you can stand beside them and help make the weight feel a little less lonely.

    That matters more than you may ever know.

    Final Thoughts

    If someone you love has lost a child, don’t worry about finding the perfect words.

    There probably aren’t any.

    Instead, give them something much more valuable:

    Your presence.

    Your patience.

    Your compassion.

    Your willingness to listen.

    Your willingness to remember.

    And your willingness to keep showing up long after everyone else has returned to their normal lives.

    Their world has changed forever.

    They don’t need someone telling them how to get over it.

    They need people who understand that they are learning how to live with it.

    And sometimes the greatest act of love is simply sitting beside someone in their darkest moments and quietly reminding them:

    You don’t have to walk through this alone.

    If someone you care about has lost a child, what is one small thing you can do today to remind them that both they—and their child—are remembered?


  • Inspiration of the Day: What You Give Is Who You Are

    Inspiration of the Day: What You Give Is Who You Are

    There is an old truth that becomes more meaningful the longer we live: what you give to the world says a great deal about who you are.

    Not what you own.

    Not the title beside your name.

    Not how many people follow you.

    Not how much money you have accumulated.

    Not even what other people think about you.

    What matters is what you give.

    You give pieces of yourself every single day, sometimes without realizing it. You give through your words, your attitude, your time, your patience, your kindness, your forgiveness, your encouragement, and your willingness to help someone who needs you.

    Those choices reveal your character.

    You don’t have to be wealthy to be generous. You don’t have to have everything figured out before you can encourage somebody else. You don’t have to live a perfect life before your life can make a difference.

    Sometimes the people who have been through the most are the ones who have the most compassion to give.

    You Are More Than What You Have

    We live in a world that often measures people by possessions, accomplishments, careers, popularity, appearance, and status.

    But those things don’t tell the complete story of a person.

    Someone can have very little materially and still possess an incredibly generous heart. Another person can have everything money can buy and still have very little they are willing to give emotionally.

    Character isn’t measured by what sits in your bank account.

    It is revealed in what comes from your heart.

    When you give someone your time when they are lonely, you are showing who you are.

    When you encourage somebody who is ready to give up, you are showing who you are.

    When you forgive someone even though holding onto anger would be easier, you are showing who you are.

    When you help somebody without expecting recognition, you are showing who you are.

    When you choose kindness even after life has been unkind to you, you are showing who you are.

    These moments may seem small, but they can leave lasting impressions.

    Give What You Wish You Had Received

    Sometimes life teaches us generosity through absence.

    Maybe there was a time when you desperately needed someone to listen, but nobody did.

    Maybe you needed encouragement and received criticism instead.

    Maybe you needed someone to stay, but people walked away.

    Maybe you needed compassion and were met with judgment.

    Maybe you experienced grief, heartbreak, loneliness, disappointment, or failure and discovered how quickly some people disappear when life becomes uncomfortable.

    Those experiences can make you bitter.

    But they can also make you compassionate.

    You can decide to become the person you once needed.

    Give someone the encouragement you wish you had received.

    Offer the patience you once needed.

    Listen the way you wish somebody had listened to you.

    Be present for someone walking through a difficult season.

    You cannot rewrite yesterday, but you can allow yesterday to teach you how to make somebody else’s tomorrow a little easier.

    That is one of the most beautiful ways pain can be transformed into purpose.

    Kindness Is Never Small

    We sometimes underestimate what a simple act of kindness can accomplish.

    A genuine compliment can change someone’s day.

    A phone call can remind somebody they haven’t been forgotten.

    A message saying, “I’m thinking about you” can arrive at exactly the moment someone needs it.

    Helping someone carry something, buying a stranger a meal, supporting a friend’s dream, checking on somebody who is grieving, thanking a worker who rarely hears appreciation—these aren’t necessarily dramatic acts.

    But kindness doesn’t need to be dramatic to matter.

    You may never know what someone is carrying internally.

    The person smiling at you could be fighting a battle they haven’t told anyone about.

    The person who seems strong might be exhausted.

    The person who always helps everyone else might desperately need someone to ask how they are doing.

    Your kindness might be one small moment in your day while becoming one of the most meaningful moments in theirs.

    Never underestimate what you can give simply by treating another human being with compassion.

    Give Without Keeping Score

    Giving becomes something different when every act comes with an expectation attached.

    “I helped you, so now you owe me.”

    “I was there for you, so you have to be there for me.”

    “I gave you something, so you should give something back.”

    Healthy relationships should involve mutual care, but genuine generosity isn’t a transaction.

    Sometimes you give because giving is simply the right thing to do.

    You help because someone needs help.

    You encourage because someone needs encouragement.

    You love because love is part of who you choose to be.

    That doesn’t mean allowing people to take advantage of you. Generosity and boundaries can exist together. You can have a giving heart while still knowing when to say no.

    Giving doesn’t require sacrificing your entire well-being.

    It means choosing to bring something good into the world whenever you reasonably can.

    Give Even When Life Has Taken From You

    One of the hardest things about life is that sometimes it takes far more than it seems to give back.

    Life can take relationships.

    It can take opportunities.

    It can take dreams.

    It can take people we love.

    It can change everything in a moment and leave us wondering how we’re supposed to keep moving forward.

    After enough loss, it can be tempting to close your heart.

    You might think, “Why should I keep giving when life keeps taking?”

    Because what happened to you doesn’t have to decide what comes from you.

    You can still choose compassion.

    You can still choose love.

    You can still choose hope.

    You can still choose to help someone else.

    There is extraordinary strength in refusing to let pain turn your heart cold.

    Sometimes giving becomes part of healing. Helping someone else doesn’t erase your pain, but it can remind you that your life still has meaning and that you can still make a difference.

    Your wounds may even help you recognize wounds in others that everyone else overlooks.

    Give Your Time

    Money can be replaced.

    Time cannot.

    That makes time one of the most valuable things you can ever give someone.

    Sit with someone.

    Have the conversation.

    Make the phone call.

    Visit the person you’ve been meaning to visit.

    Listen to the story you’ve heard before.

    Spend time with the people you love while you still have the opportunity.

    Life moves incredibly fast.

    One day, you may realize the ordinary moments were actually some of the most important moments of your life.

    The laughter around a dinner table.

    The drive where you talked about nothing important.

    The random phone call.

    The afternoon spent together.

    The hug before someone walked out the door.

    We often don’t realize we’re living a precious memory while it’s happening.

    Give people your time.

    Someday, those moments may mean more than anything money could have purchased.

    Give Encouragement

    There are enough voices telling people they aren’t good enough.

    Be a different voice.

    Tell someone you believe in them.

    Celebrate their progress.

    Remind them how far they’ve come.

    Encourage them after they fail.

    Sometimes people don’t need another lecture about what they did wrong. They already know.

    They need somebody to remind them that one mistake doesn’t define their entire life.

    Your words carry power.

    They can tear someone down, or they can help someone stand again.

    Use them carefully.

    A few sincere words of encouragement can stay with someone for years.

    Give Love While You Can

    Don’t assume people know how much they mean to you.

    Tell them.

    Say, “I love you.”

    Say, “I’m proud of you.”

    Say, “Thank you.”

    Say, “I’m glad you’re in my life.”

    We often postpone important words because we assume there will always be another opportunity.

    Life doesn’t guarantee that.

    Love should not remain trapped inside us because we were embarrassed, distracted, stubborn, or waiting for the perfect moment.

    The perfect moment might simply be today.

    Give people their flowers while they can still smell them.

    Tell people what they mean to you while they can still hear you.

    Love people while you still have the opportunity to show them.

    What You Give Lives Beyond the Moment

    You may never fully understand the impact you’ve had on another person’s life.

    Someone may remember something kind you said years ago.

    A child may grow up remembering that you believed in them.

    A friend may remember that you stayed when everyone else disappeared.

    Someone grieving may remember that you weren’t afraid to sit beside them in their sadness.

    A stranger may remember the kindness you showed them during one of the worst days of their life.

    We leave pieces of ourselves everywhere we go.

    The question is: What kind of pieces are we leaving behind?

    Anger?

    Judgment?

    Bitterness?

    Or kindness?

    Compassion?

    Encouragement?

    Love?

    Every day gives us another opportunity to decide.

    You Don’t Need to Change the Whole World

    Sometimes we think making a difference requires doing something enormous.

    It doesn’t.

    You may never change the entire world.

    But you can change someone’s world.

    Help one person.

    Encourage one person.

    Feed one person.

    Listen to one person.

    Forgive one person.

    Support one person.

    Love one person.

    And then do it again when you get another opportunity.

    A meaningful life is often built from thousands of seemingly ordinary acts of goodness.

    You don’t need applause.

    You don’t need recognition.

    You don’t need everyone to know what you did.

    Some of the greatest things you will ever do may happen quietly.

    Today’s Inspiration

    When you walk into the world today, think about what you are giving.

    Give kindness where you find cruelty.

    Give patience where you find frustration.

    Give encouragement where you find doubt.

    Give compassion where you find pain.

    Give hope where you find despair.

    Give love wherever you possibly can.

    You won’t always get the same things back.

    Some people won’t appreciate what you give.

    Some may misunderstand your heart.

    Others may take your kindness for granted.

    Don’t allow their response to determine your character.

    Give because generosity, compassion, and love represent the person you have chosen to become.

    At the end of life, people may forget many of the things you owned and many of the accomplishments you considered important.

    But they will remember how you made them feel.

    They will remember whether you showed up.

    They will remember whether you cared.

    They will remember the kindness you gave when they needed it most.

    Because ultimately, what you give is who you are.

    So ask yourself today:

    What piece of yourself will you give to someone who needs it?

  • Motivation of the Day: Rise Up Like a Phoenix

    Motivation of the Day: Rise Up Like a Phoenix

    There are moments in life when it feels like everything has burned to the ground.

    Plans fall apart. Relationships change. Dreams disappear. People leave. Mistakes catch up with us. Grief enters our lives without permission. Sometimes we lose the version of ourselves we once recognized.

    And when enough things go wrong, we can begin wondering whether we will ever feel strong again.

    But destruction does not always mean the end.

    Sometimes the fire becomes the beginning of something completely different.

    That is why the image of the phoenix has survived for generations. The legendary bird is consumed by flames, yet from the ashes it rises again—renewed, transformed, and ready to begin another chapter.

    Life can feel exactly like that.

    You may have walked through circumstances that burned away your confidence, your plans, your relationships, your security, or even your sense of identity.

    But the ashes do not have to become your permanent home.

    You can rise again.

    Your Hardest Chapter Does Not Have to Be Your Final Chapter

    When we are experiencing hardship, it is easy to believe that the moment we are living through will last forever.

    Pain has a way of narrowing our vision.

    We stop thinking about next year.

    Sometimes we stop thinking about next month.

    We simply try to survive today.

    And there is nothing wrong with surviving.

    Some seasons are not about accomplishing enormous goals. They are about getting out of bed, taking another breath, eating something, answering one phone call, finishing one responsibility, or simply choosing not to give up.

    Those small victories matter.

    Every time you keep moving while life is heavy, you are proving that the fire has not defeated you.

    You may not see the transformation yet.

    But something is happening.

    Strength is developing.

    Perspective is changing.

    Priorities are becoming clearer.

    You are discovering what matters, who matters, and what you are capable of surviving.

    The chapter may be painful, but it does not have to be the final chapter of your story.

    There are still pages waiting to be written.

    The Fire Changes You

    People often talk about becoming the person they used to be after hardship.

    Sometimes that is impossible.

    And sometimes it is not even necessary.

    Certain experiences change us permanently.

    Loss changes us.

    Heartbreak changes us.

    Failure changes us.

    Betrayal changes us.

    Starting over changes us.

    Surviving something we once thought would destroy us changes us.

    The goal does not always have to be returning to who you were before everything happened.

    Maybe the goal is becoming someone new.

    Someone wiser.

    Someone more compassionate.

    Someone who understands pain but still chooses kindness.

    Someone who has been knocked down but refuses to stay there.

    Someone who no longer takes ordinary moments for granted.

    Transformation can be uncomfortable because it requires releasing the belief that everything must return to exactly how it once was.

    Sometimes life does not return to normal.

    Sometimes you create a new normal.

    And inside that new life, you may discover strength you never knew you possessed.

    You Are More Than What Happened to You

    One of the most dangerous things about painful experiences is that they can slowly become our identity.

    A failure becomes:

    “I am a failure.”

    A rejection becomes:

    “I am unwanted.”

    A betrayal becomes:

    “I cannot trust anyone.”

    A loss becomes:

    “My life is over.”

    A mistake becomes:

    “I ruined everything.”

    But something that happened to you is not the complete definition of who you are.

    You are more than your worst day.

    You are more than the relationship that ended.

    You are more than the job you lost.

    You are more than the mistake you made.

    You are more than the person who walked away.

    You are more than the dream that did not happen.

    You are more than the pain you carry.

    Those experiences may always remain part of your story, but they do not get to write every chapter that follows.

    You still have choices.

    You still have potential.

    You still have something to give.

    You still have reasons to keep going.

    Rising Does Not Mean Pretending You Were Never Hurt

    Sometimes motivational messages make healing sound simple.

    “Just move on.”

    “Stay positive.”

    “Forget the past.”

    “Everything happens for a reason.”

    Real life is rarely that simple.

    Rising does not mean pretending the fire never burned you.

    It means acknowledging the scars and continuing anyway.

    You can still miss someone and move forward.

    You can still feel sadness and experience joy.

    You can still remember what happened without allowing it to control every decision.

    You can still have difficult days while making progress.

    Healing is not the absence of pain.

    Often, healing means the pain no longer controls the entire direction of your life.

    There may still be moments when memories return unexpectedly.

    There may still be days when confidence disappears.

    There may still be nights when everything feels heavy again.

    That does not mean you have failed.

    It means you are human.

    Keep rising.

    Stop Waiting Until You Feel Completely Ready

    Many people spend years waiting for the perfect moment to start again.

    They say:

    “I will try when I feel confident.”

    “I will start when I have everything figured out.”

    “I will take the chance when I know I will succeed.”

    “I will open my heart when I know I cannot get hurt.”

    “I will pursue the dream when life settles down.”

    But confidence often comes after action, not before it.

    Sometimes courage looks like taking the first step while your hands are still shaking.

    Apply for the opportunity.

    Start writing the book.

    Go back to school.

    Start exercising.

    Make the phone call.

    Create the business.

    Ask for help.

    Try the hobby.

    Visit somewhere new.

    Meet new people.

    Set the boundary.

    Walk away from what keeps destroying your peace.

    You do not need the entire path illuminated before taking the first step.

    Sometimes one small step reveals the next one.

    Your Comeback May Start Quietly

    People imagine comebacks as dramatic moments.

    But most transformations happen quietly.

    Nobody applauds when you finally clean your room after weeks of struggling.

    Nobody sees you choosing water instead of another unhealthy drink.

    Nobody witnesses the moment you delete the message you were about to send.

    Nobody knows how difficult it was to get out of bed.

    Nobody sees you reading instead of scrolling.

    Nobody celebrates the five-minute walk you took because twenty minutes felt impossible.

    Nobody realizes how much courage it took to attend something alone.

    Nobody understands the internal battle behind the smile.

    But those moments count.

    Your comeback does not need an audience.

    You are rebuilding your life one decision at a time.

    Small decisions eventually become habits.

    Habits become patterns.

    Patterns change lives.

    Never underestimate what can happen when you repeatedly choose progress.

    Let the Past Teach You Without Imprisoning You

    The past can be a powerful teacher.

    It can show you what relationships were unhealthy.

    It can reveal which warning signs you ignored.

    It can expose habits that were holding you back.

    It can remind you how quickly life can change.

    It can show you which people stayed beside you when everything fell apart.

    Learn those lessons.

    Carry the wisdom.

    But do not build a prison out of yesterday.

    There comes a point when repeatedly replaying the past stops teaching you anything new.

    Eventually, the question changes from:

    “Why did this happen?”

    to:

    “What do I do now?”

    You cannot rewrite yesterday.

    But you still influence tomorrow through what you decide today.

    Sometimes Rising Means Starting Over

    Starting over can feel humiliating.

    Especially when you thought you would be further ahead by now.

    Maybe you are rebuilding financially.

    Maybe you are learning how to live alone.

    Maybe you are starting a new career.

    Maybe you are rebuilding your health.

    Maybe you are trying to trust again.

    Maybe you are learning how to live after losing someone you deeply loved.

    Maybe you are rediscovering who you are.

    Starting over does not erase everything you have learned.

    You are not beginning from zero.

    You are beginning with experience.

    You know more now.

    You recognize things you once overlooked.

    You understand your limits better.

    You know what matters more.

    You know what you are willing to tolerate and what you are no longer willing to accept.

    Starting again with wisdom is different from starting for the first time.

    Some People Will Not Understand Your Transformation

    When you begin changing your life, some people will celebrate you.

    Others may become uncomfortable.

    They became familiar with the old version of you.

    The version who never said no.

    The version who accepted disrespect.

    The version who stayed quiet.

    The version who abandoned personal dreams to keep everyone else comfortable.

    The version who doubted themselves.

    Growth changes relationships.

    You may begin protecting your time.

    You may set stronger boundaries.

    You may stop explaining every decision.

    You may spend less time around negativity.

    You may become more intentional about who gets access to your life.

    That does not necessarily mean you think you are better than anyone.

    Sometimes it simply means you finally understand that peace requires protection.

    Your Scars Can Become Evidence of Survival

    A scar tells a story.

    It says something happened here.

    Something hurt.

    Something broke.

    But healing occurred.

    Emotional scars work similarly.

    You may wish certain chapters had never happened.

    You may still wonder how different your life could have been.

    But the scars can also remind you:

    You survived.

    You kept going.

    You found strength when you thought you had none.

    You learned how to live through days you never imagined facing.

    There is power in realizing that you already survived moments you once believed would destroy you.

    Remember that the next time life becomes difficult.

    You have evidence that you can endure hard things.

    Build Something Beautiful From the Ashes

    One of the most powerful things you can do with painful experiences is allow them to create something meaningful.

    Maybe your struggle makes you more compassionate.

    Maybe your grief allows you to comfort someone who feels alone.

    Maybe your failure gives you wisdom that helps someone avoid the same mistake.

    Maybe your heartbreak teaches you how important honesty and communication are.

    Maybe your difficult childhood motivates you to create a healthier environment for your own family.

    Maybe your lowest moment becomes the reason you reach back and help someone else climb.

    Pain does not automatically create purpose.

    But we can sometimes choose what we build after the pain.

    The ashes can become soil for something new.

    Do Not Measure Your Progress Against Someone Else’s Life

    Nothing destroys motivation faster than constant comparison.

    You see someone else’s success and wonder why you are behind.

    But you do not know everything they have experienced.

    And they do not know everything you have survived.

    Your journey is yours.

    Maybe your greatest achievement this year was simply staying alive emotionally through an unbelievably difficult season.

    Maybe someone else built a business.

    Maybe someone bought a house.

    Maybe someone got married.

    Maybe someone traveled the world.

    Good for them.

    Their milestone does not diminish yours.

    Sometimes the bravest accomplishment is rebuilding yourself when nobody realizes you fell apart.

    Your timeline does not need to match anyone else’s.

    Wake Up and Try Again

    There will be mornings when motivation disappears.

    There will be days when you question whether anything is changing.

    There will be setbacks.

    Old habits may return.

    Old emotions may resurface.

    Plans may fail.

    You might take three steps forward and two steps backward.

    Keep going.

    You do not need perfect progress.

    You need persistence.

    Every sunrise gives you another opportunity to make one better decision.

    You can apologize.

    You can restart.

    You can change direction.

    You can forgive yourself.

    You can learn.

    You can try again.

    As long as you are still here, your story is still being written.

    Rise Up Like a Phoenix

    Maybe life burned down something you thought would last forever.

    Maybe you are standing in the ashes wondering what comes next.

    You do not need every answer today.

    You only need enough courage for the next step.

    Stand up.

    Shake off what you can.

    Carry the lessons.

    Honor the scars.

    Release what you cannot change.

    Protect your peace.

    Rebuild slowly.

    Dream again when you are ready.

    Trust yourself again when you can.

    And whenever life knocks you down, remember that falling is not the same thing as being defeated.

    Some of the strongest people you will ever meet are people who once believed they could not survive another day.

    Yet they did.

    And eventually they began living again.

    You can too.

    Rise from what tried to destroy you.

    Rise from disappointment.

    Rise from failure.

    Rise from heartbreak.

    Rise from fear.

    Rise from grief.

    Rise from every moment that convinced you your best days were behind you.

    You may not become the person you once were.

    You may become someone stronger.

    Someone wiser.

    Someone who understands how fragile life is and refuses to waste it.

    The fire may have changed you.

    But it did not finish you.

    Rise up like a phoenix.

    Your next chapter is still waiting to be written.

    What part of your life are you ready to rise from and begin rebuilding today?

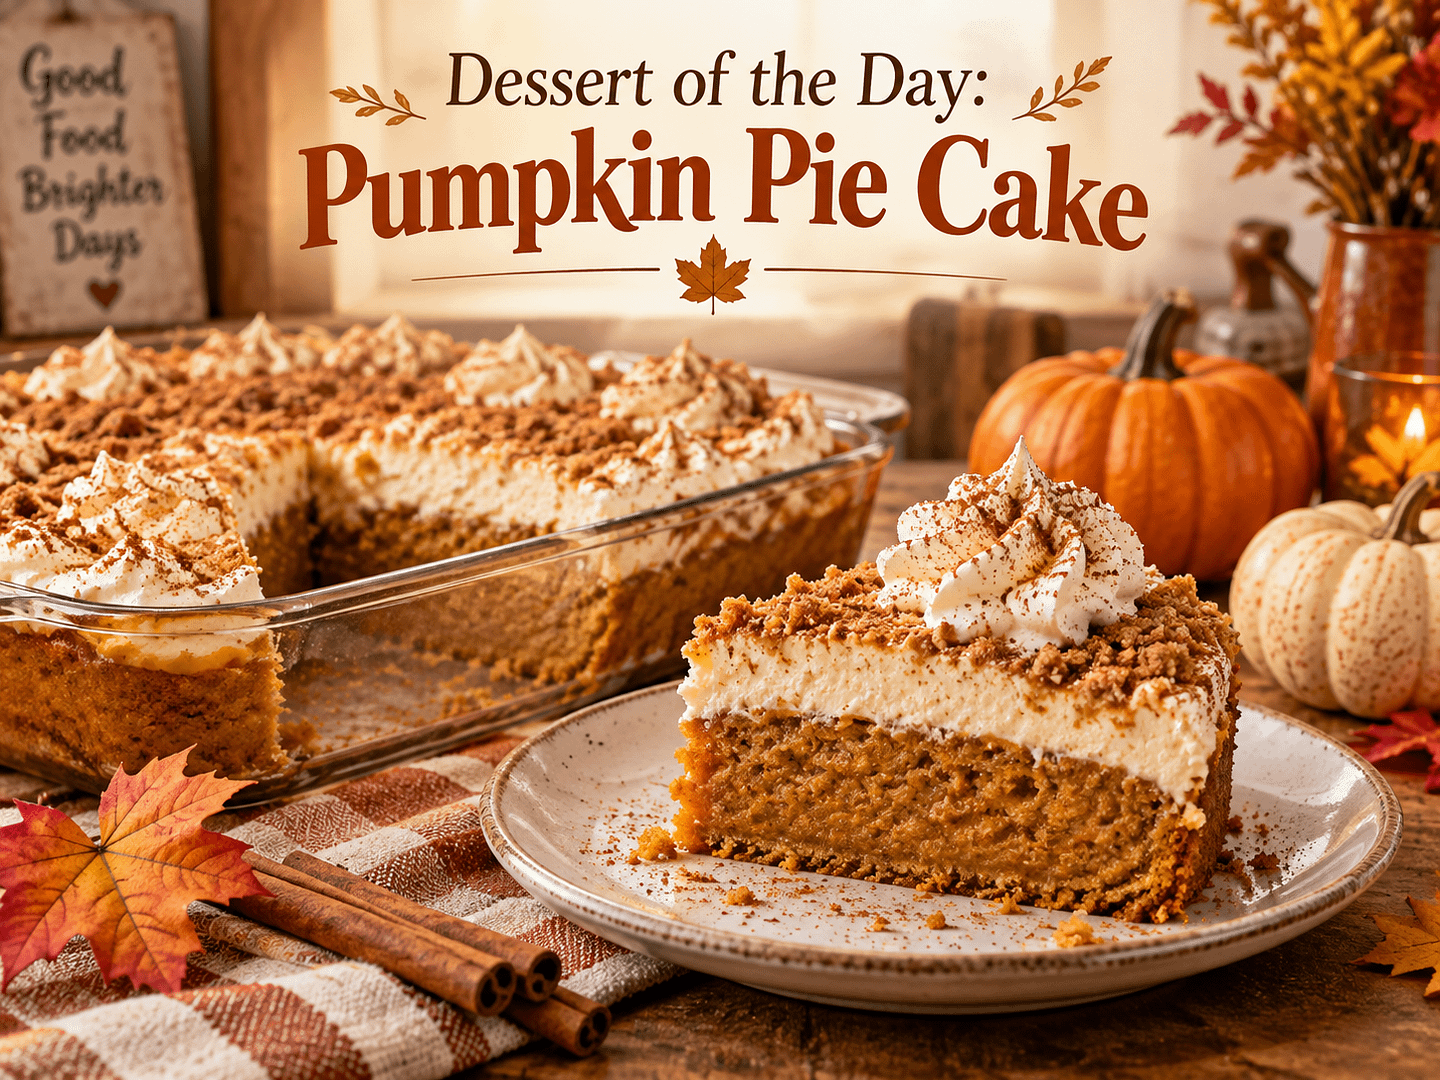
  • Dessert of the Day: Pumpkin Pie Cake

    Dessert of the Day: Pumpkin Pie Cake

    There are certain desserts that instantly make a kitchen feel warmer, and Pumpkin Pie Cake is one of them. It brings together the creamy, spiced flavor of traditional pumpkin pie with the rich, buttery texture of cake, creating a dessert that feels perfect for fall gatherings, holiday dinners, potlucks, or simply a cozy evening at home.

    If you love pumpkin pie but also enjoy the soft, crumbly sweetness of cake, this recipe gives you the best of both worlds. A smooth pumpkin filling forms the base while a buttery cake topping bakes into a golden, slightly crisp layer above it.

    The result is a dessert that is easy to prepare, wonderfully comforting, and almost impossible to resist.

    Why Pumpkin Pie Cake Is So Good

    Pumpkin pie is already one of the most recognizable desserts of the fall season. Add cake to the equation, and it becomes something even more indulgent.

    Pumpkin Pie Cake has several layers of texture working together. The pumpkin portion remains creamy and custard-like, while the cake mix topping becomes rich, buttery, and slightly crunchy around the edges.

    Every bite gives you warm pumpkin spice, sweetness, butter, and just enough texture to keep you coming back for another spoonful.

    Another reason this dessert is so appealing is how easy it is to make. Unlike traditional homemade pie, there is no crust to roll out, shape, or worry about tearing.

    You simply mix, layer, bake, and serve.

    Ingredients

    Pumpkin Layer

    • 1 can pumpkin puree, about 15 ounces
    • 1 can evaporated milk, about 12 ounces
    • 3 large eggs
    • 1 cup granulated sugar
    • 1 teaspoon ground cinnamon
    • 1/2 teaspoon ground ginger
    • 1/4 teaspoon ground nutmeg
    • 1/4 teaspoon ground cloves
    • 1 teaspoon vanilla extract
    • 1/2 teaspoon salt

    Cake Topping

    • 1 box yellow cake mix
    • 1 cup unsalted butter, melted
    • 1 cup chopped pecans or walnuts, optional

    For Serving

    • Whipped cream
    • Vanilla ice cream
    • Caramel sauce
    • Ground cinnamon or pumpkin pie spice

    How to Make Pumpkin Pie Cake

    Step 1: Preheat the Oven

    Preheat your oven to 350°F.

    Lightly grease a 9-by-13-inch baking dish with butter or nonstick cooking spray.

    Step 2: Prepare the Pumpkin Filling

    In a large mixing bowl, combine the pumpkin puree, evaporated milk, eggs, sugar, cinnamon, ginger, nutmeg, cloves, vanilla, and salt.

    Whisk everything together until the mixture becomes smooth and evenly blended.

    Pour the pumpkin mixture into the prepared baking dish and spread it evenly.

    Step 3: Add the Cake Mix

    Sprinkle the dry yellow cake mix evenly across the surface of the pumpkin mixture.

    Try to distribute it across the entire pan so every serving gets some of the buttery cake topping.

    Do not stir the cake mix into the pumpkin layer.

    The separate layers are what give this dessert its distinctive texture.

    Step 4: Add the Butter

    Slowly drizzle the melted butter over the dry cake mix.

    Try to cover as much of the cake mix as possible.

    If you are using chopped pecans or walnuts, sprinkle them evenly over the top.

    The nuts add extra crunch and work beautifully with the pumpkin and cinnamon flavors.

    Step 5: Bake

    Bake for approximately 50 to 60 minutes, or until the top is golden brown and the pumpkin filling is set.

    The center may still have a slight jiggle when the cake first comes out of the oven, but it will continue setting as it cools.

    Allow the Pumpkin Pie Cake to cool for at least 20 to 30 minutes before serving.

    Serve It Warm or Cold

    One of the great things about Pumpkin Pie Cake is that it tastes delicious at several temperatures.

    Serve it warm shortly after baking for a soft and comforting dessert. Add vanilla ice cream and let it begin melting over the buttery topping.

    You can also refrigerate the cake and serve it chilled. Once cold, the pumpkin layer becomes firmer and tastes even more like traditional pumpkin pie.

    Room temperature works beautifully as well, especially if you’re bringing the dessert to a family gathering or potluck.

    Top It With Whipped Cream

    Pumpkin desserts and whipped cream are practically made for each other.

    Add a generous spoonful of whipped cream to each serving and sprinkle a little cinnamon or pumpkin pie spice over the top.

    For something richer, drizzle caramel sauce over the whipped cream.

    You could even add chopped pecans for extra crunch.

    Make It Even More Decadent

    Although Pumpkin Pie Cake is delicious exactly as written, there are plenty of ways to personalize it.

    Try adding:

    • Toffee bits
    • White chocolate chips
    • Chopped walnuts
    • Chopped pecans
    • Caramel sauce
    • Maple syrup
    • Cinnamon sugar
    • Cream cheese frosting
    • Vanilla ice cream
    • Butter pecan ice cream

    A little maple syrup drizzled over the top can be especially good because maple and pumpkin naturally complement one another.

    Try a Spice Cake Version

    For even more fall flavor, replace the yellow cake mix with spice cake mix.

    The additional cinnamon, cloves, nutmeg, and other spices make the dessert taste even richer.

    This version is particularly good for Thanksgiving or autumn gatherings.

    Pumpkin Pie Cake for Thanksgiving

    If you’re looking for an alternative to traditional pumpkin pie at Thanksgiving, this dessert is an excellent option.

    You still get the familiar pumpkin flavor people expect during the holiday, but the buttery cake topping gives everyone something a little different.

    It is also easier to serve to a crowd.

    Instead of cutting narrow pie slices, simply scoop or cut portions directly from the baking dish.

    Place whipped cream nearby and let everyone customize their own serving.

    Perfect for Fall Gatherings

    Pumpkin Pie Cake works wonderfully for:

    • Thanksgiving dinner
    • Halloween parties
    • Fall potlucks
    • Family dinners
    • Football watch parties
    • Friendsgiving celebrations
    • Harvest festivals
    • Church gatherings
    • Office parties
    • Weekend baking

    Because it is prepared in one large baking dish, it is especially convenient when you’re feeding several people.

    Can You Make Pumpkin Pie Cake Ahead of Time?

    Absolutely.

    Pumpkin Pie Cake can be baked the day before you plan to serve it.

    Once it has cooled, cover the baking dish and refrigerate it overnight.

    You can serve it directly from the refrigerator or allow it to sit at room temperature for approximately 20 to 30 minutes beforehand.

    If you prefer it warm, individual servings can be reheated briefly in the microwave.

    How to Store Leftovers

    Cover leftover Pumpkin Pie Cake tightly and store it in the refrigerator.

    Because the pumpkin layer contains eggs and evaporated milk, refrigeration is important.

    For the best flavor and texture, enjoy leftovers within approximately three to four days.

    You may discover that the dessert tastes even better the next day because the pumpkin spices have had more time to develop.

    Why Pumpkin Desserts Feel Like Fall

    Pumpkin itself has a mild flavor, but when combined with cinnamon, nutmeg, ginger, and cloves, it creates the unmistakable flavor we associate with autumn.

    Those warm spices remind many people of cooler weather, family gatherings, Thanksgiving dinners, falling leaves, and holiday baking.

    That is part of what makes Pumpkin Pie Cake such a satisfying seasonal dessert.

    It doesn’t just taste good.

    It feels like fall.

    A Dessert That Fills the House With an Amazing Aroma

    Another bonus of making Pumpkin Pie Cake is the way your home smells while it is baking.

    Pumpkin, cinnamon, butter, vanilla, nutmeg, and toasted nuts fill the kitchen with an aroma that makes it difficult to wait for dessert.

    Sometimes half the enjoyment of baking is simply experiencing those smells coming from the oven.

    Simple Enough for Beginner Bakers

    You do not need advanced baking skills to make this dessert.

    There is no complicated decorating, no homemade pie crust, and no special equipment required.

    A mixing bowl, whisk, baking dish, and oven are really all you need.

    That makes Pumpkin Pie Cake a great recipe for beginner bakers or anyone who wants a homemade dessert without spending hours in the kitchen.

    Dessert of the Day

    Today’s Dessert of the Day: Pumpkin Pie Cake combines everything people love about classic pumpkin pie with the buttery richness of cake.

    It is creamy underneath, golden and slightly crisp on top, filled with warm fall spices, and delicious with whipped cream or vanilla ice cream.

    Whether you’re making it for Thanksgiving, bringing it to a fall gathering, or simply craving something sweet on a cool evening, this is one dessert worth adding to your recipe collection.

    Sometimes the best desserts aren’t complicated.

    They’re warm, comforting, easy to share, and filled with flavors that remind us of our favorite seasons.

    Would you serve your Pumpkin Pie Cake with whipped cream, vanilla ice cream, or both?

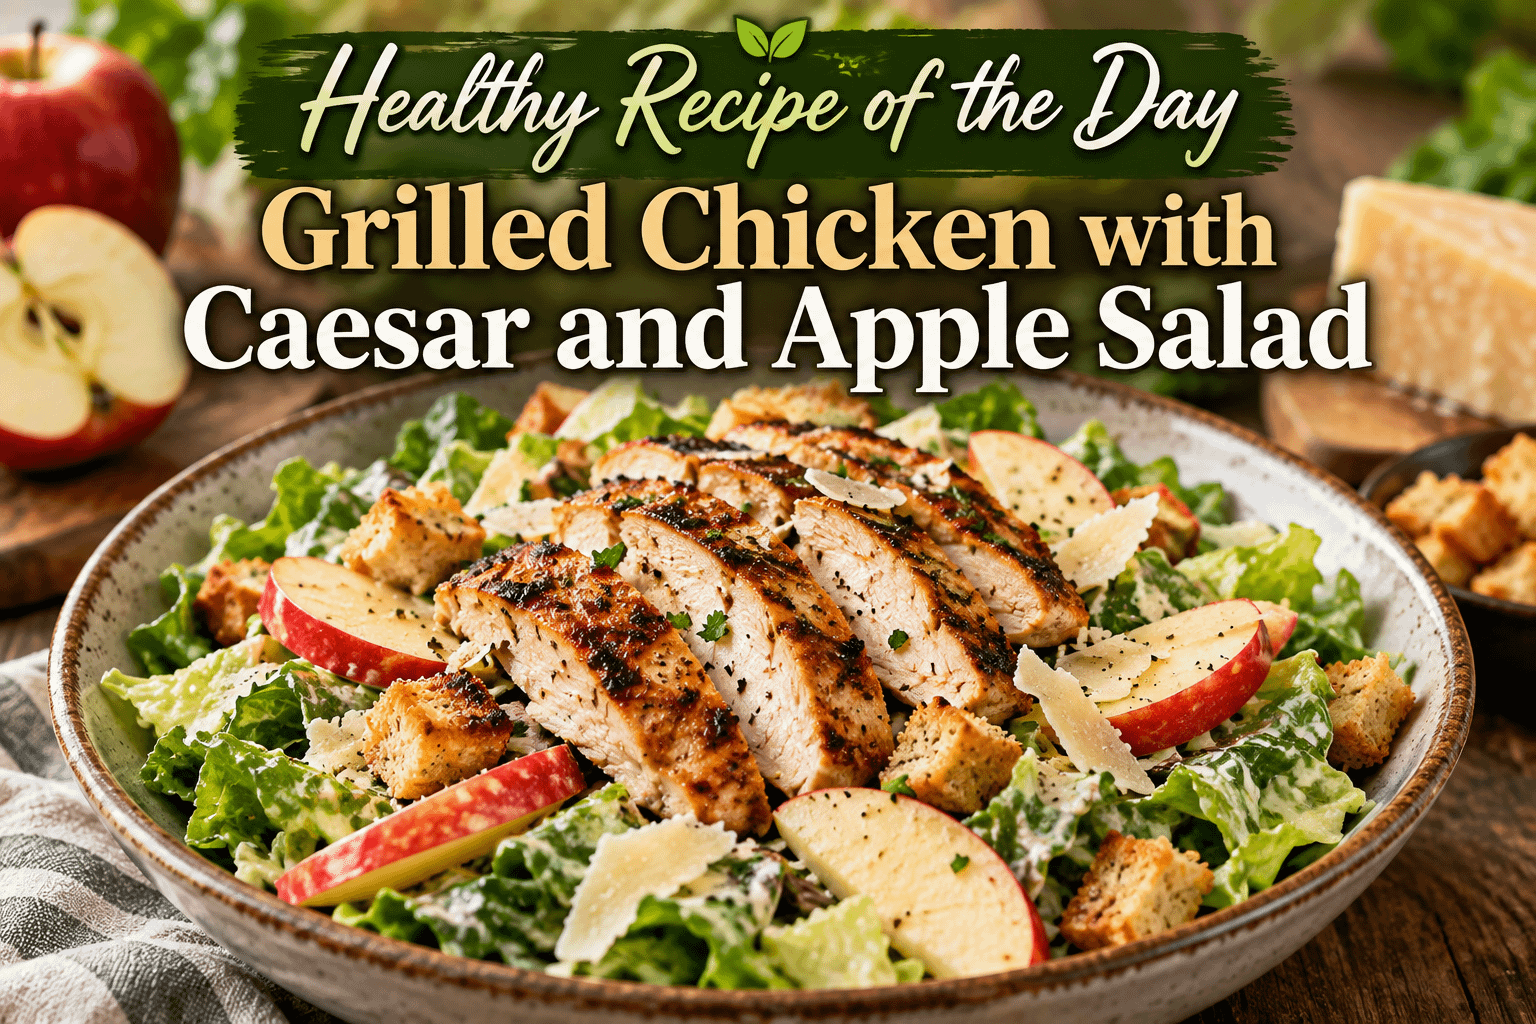
  • Healthy Recipe of the Day: Grilled Chicken with Caesar and Apple Salad

    Healthy Recipe of the Day: Grilled Chicken with Caesar and Apple Salad

    There is something satisfying about a meal that manages to be fresh, filling, flavorful, and simple at the same time. Today’s Healthy Recipe of the Day — Grilled Chicken with Caesar and Apple Salad — brings all of those qualities together in one delicious dish.

    Classic Caesar salad is already known for its crisp romaine lettuce, Parmesan cheese, creamy dressing, and bold flavor. Adding juicy grilled chicken turns it into a protein-packed meal, while fresh apple slices introduce sweetness and crunch that give the familiar Caesar salad a refreshing twist.

    The combination may sound simple, but it works beautifully. You get smoky chicken, crisp lettuce, sweet apple, salty Parmesan, and tangy Caesar dressing in almost every bite.

    Best of all, this is the kind of healthy meal that doesn’t feel like you’re sacrificing flavor just to make a better choice.

    Why You’ll Love This Chicken Caesar and Apple Salad

    Healthy eating becomes much easier when the food you prepare is something you actually look forward to eating.

    This salad checks plenty of boxes. The chicken provides protein, romaine lettuce gives the meal plenty of fresh crunch, apples bring natural sweetness, and a reasonable amount of Caesar dressing delivers the rich flavor people expect from a Caesar salad.

    It is also incredibly versatile.

    Serve it for lunch, prepare it for a quick weeknight dinner, or make several portions for meal prep. You can even grill extra chicken and save it for another meal later in the week.

    The apple is what really makes this version stand apart. Traditional Caesar salads are savory from beginning to end. Apple interrupts that richness with a bright, slightly sweet flavor that pairs surprisingly well with Parmesan and Caesar dressing.

    Ingredients

    For the grilled chicken:

    • 2 boneless, skinless chicken breasts
    • 1 tablespoon olive oil
    • 1 teaspoon garlic powder
    • 1 teaspoon Italian seasoning
    • 1/2 teaspoon smoked paprika
    • 1/2 teaspoon black pepper
    • 1/4 teaspoon salt
    • Juice of 1/2 lemon

    For the salad:

    • 1 large head romaine lettuce, chopped
    • 1 crisp apple, thinly sliced
    • 1/4 cup freshly grated or shaved Parmesan cheese
    • 1/4 cup whole-grain croutons, optional
    • 1/4 cup sliced almonds or chopped walnuts, optional
    • 1/3 cup Caesar dressing, or enough to lightly coat the salad
    • Freshly ground black pepper
    • Lemon wedges for serving

    Choosing the Right Apple

    You can use almost any apple you enjoy, but crisp varieties work especially well because they hold their texture after being sliced.

    Honeycrisp is an excellent choice when you want noticeable sweetness. Pink Lady offers a nice balance between sweet and tart, while Granny Smith provides a sharper contrast against the creamy Caesar dressing.

    If you’re preparing the salad ahead of time, toss the apple slices with a little lemon juice. This helps slow browning while adding another layer of brightness.

    How to Make Grilled Chicken with Caesar and Apple Salad

    Step 1: Season the Chicken

    Pat the chicken breasts dry with a paper towel.

    Place them in a bowl and drizzle with olive oil and lemon juice. Sprinkle both sides with garlic powder, Italian seasoning, smoked paprika, black pepper, and salt.

    Rub the seasonings over the chicken so everything is evenly coated.

    For even more flavor, allow the chicken to sit for about 15 to 30 minutes before grilling.

    Step 2: Grill the Chicken

    Preheat your grill or grill pan over medium-high heat.

    Place the chicken on the hot grill and cook until browned on the outside and completely cooked through. Cooking time will depend on the thickness of your chicken breasts.

    Chicken should reach an internal temperature of 165°F (74°C) at its thickest point.

    Remove the chicken from the grill and allow it to rest for about five minutes before slicing.

    Resting is important because cutting chicken immediately after cooking can cause more of its juices to escape.

    Step 3: Prepare the Salad

    While the chicken rests, wash and thoroughly dry the romaine lettuce.

    Chop the lettuce into bite-sized pieces and place it in a large bowl.

    Thinly slice your apple and add it to the lettuce.

    Add Parmesan cheese and, if desired, a small amount of whole-grain croutons, almonds, or walnuts.

    Step 4: Add the Caesar Dressing

    Drizzle Caesar dressing over the salad.

    Start with a small amount and toss everything together. You can always add more dressing afterward.

    Using just enough dressing to lightly coat the lettuce allows the flavors of the grilled chicken and apple to remain noticeable instead of becoming overwhelmed.

    Step 5: Add the Chicken

    Slice the rested grilled chicken into strips.

    Divide the salad between plates or bowls and arrange the chicken over the top.

    Finish with additional Parmesan, freshly ground black pepper, and a squeeze of fresh lemon if desired.

    Your Grilled Chicken with Caesar and Apple Salad is ready to enjoy.

    What Makes This a Balanced Meal?

    One of the advantages of turning a salad into a complete meal is that you can combine several food groups in a single bowl.

    The grilled chicken provides a substantial source of protein, which can help make the salad more satisfying.

    Romaine lettuce provides vegetables and contributes nutrients while adding plenty of volume and crunch.

    Fresh apple provides carbohydrates, fiber, and natural sweetness.

    Olive oil and Caesar dressing contribute fats, while nuts can add additional unsaturated fats, protein, and texture if you choose to include them.

    The result is much more substantial than a bowl of lettuce alone.

    Make Your Caesar Salad Lighter

    Caesar salad can vary considerably nutritionally depending on how much dressing, cheese, and croutons are used.

    If you’re looking for a lighter version, you don’t have to eliminate everything that makes Caesar salad taste good.

    Instead, focus on portions.

    Use enough dressing to coat the lettuce rather than saturating it. A strongly flavored Parmesan can provide plenty of taste without requiring a huge amount.

    You can also skip the croutons or use a smaller portion.

    Another option is making a lighter Caesar-style dressing with Greek yogurt, lemon juice, Dijon mustard, Parmesan, garlic, black pepper, and a small amount of olive oil.

    The goal doesn’t have to be making the lowest-calorie salad possible. It can simply be creating a meal that gives you plenty of nutrition while remaining enjoyable and satisfying.

    Easy Homemade Greek Yogurt Caesar Dressing

    If you’d rather make your own dressing, try this quick version.

    Combine:

    • 1/2 cup plain Greek yogurt
    • 2 tablespoons grated Parmesan
    • 1 tablespoon olive oil
    • 1 tablespoon fresh lemon juice
    • 1 teaspoon Dijon mustard
    • 1 small garlic clove, finely minced
    • 1/2 teaspoon Worcestershire sauce
    • Black pepper to taste
    • A little water as needed for consistency

    Whisk everything together until smooth.

    Add water about one teaspoon at a time until the dressing reaches your preferred consistency.

    Taste and adjust the lemon, pepper, or Parmesan as necessary.

    Don’t Overlook the Nuts

    Walnuts or almonds are optional, but they can completely change the texture of this salad.

    Think about everything happening in one forkful: juicy grilled chicken, crisp romaine, crunchy apple, creamy dressing, Parmesan, and toasted nuts.

    That variety keeps the salad interesting from beginning to end.

    If you have time, lightly toast your nuts in a dry skillet before adding them. Toasting can intensify their flavor and make them even crunchier.

    Meal Prep Tips

    This recipe can also make a convenient meal-prep lunch.

    The trick is storing the ingredients separately.

    Keep your washed and chopped romaine in one container. Store the grilled chicken separately or place it in a divided meal-prep container.

    Keep the dressing in a small sealed container and don’t add it until you’re ready to eat.

    Apples are best freshly sliced, but if you need to prepare them in advance, lightly coat them with lemon juice before refrigerating.

    Croutons and nuts should also remain separate so they stay crunchy.

    When lunchtime arrives, combine everything and toss.

    Easy Variations

    Once you have the basic recipe, there are countless ways to change it.

    Try adding avocado for extra creaminess. Toss in cucumber or cherry tomatoes for more vegetables. Add dried cranberries for another sweet element, or use pears instead of apples when they’re in season.

    You can also swap the chicken for grilled salmon or shrimp.

    If you want additional whole grains, serve the salad with quinoa, farro, or a slice of whole-grain bread.

    The basic idea stays the same: start with fresh vegetables, add a quality protein source, incorporate fruit or another flavorful ingredient, and finish with a dressing you enjoy.

    Perfect for Lunch or Dinner

    Some salads work best as side dishes.

    This one is designed to be the meal.

    The chicken gives it enough substance for dinner, while the lettuce and apples keep everything fresh enough for lunch.

    It can be particularly enjoyable when the seasons begin changing and apples are abundant. The fruit brings a subtle fall-inspired element without turning the dish into a heavy cold-weather meal.

    Serve it with sparkling water and lemon, unsweetened iced tea, or another refreshing drink for a simple lunch or dinner.

    Healthy Eating Doesn’t Have to Be Complicated

    People sometimes assume that healthier meals require unusual ingredients, expensive specialty foods, or hours spent preparing recipes.

    They don’t.

    Sometimes a good meal is simply familiar ingredients prepared thoughtfully.

    Chicken.

    Romaine.

    Apple.

    Parmesan.

    Lemon.

    A flavorful dressing.

    Put them together and you have something that is colorful, satisfying, and easy enough to prepare on an ordinary weeknight.

    More importantly, it tastes like something you’d actually want to eat again.

    Final Thoughts

    Today’s Healthy Recipe of the Day: Grilled Chicken with Caesar and Apple Salad proves that a salad doesn’t have to be boring or leave you hungry an hour later.

    Juicy grilled chicken provides the hearty centerpiece. Crisp romaine creates the classic Caesar foundation. Fresh apples deliver sweetness and crunch, while Parmesan and Caesar dressing provide the savory flavors that bring everything together.

    It is simple enough for a quick lunch, satisfying enough for dinner, and adaptable enough to make differently every time.

    Healthy eating is easier to maintain when meals aren’t treated like punishment. Make food that is nourishing, flavorful, colorful, and enjoyable.

    Sometimes something as simple as adding fresh apple to a grilled chicken Caesar salad is enough to turn an everyday meal into one you’ll want to make again.

    Would you add sweet Honeycrisp apples, tart Granny Smith apples, or another favorite apple to your chicken Caesar salad?

  • Recipe of the Day: Honey Garlic BBQ Chicken with Roasted Vegetables

    Recipe of the Day: Honey Garlic BBQ Chicken with Roasted Vegetables

    There are some dinners that immediately earn a place in the regular rotation. They are easy enough for a busy weeknight, flavorful enough that everyone looks forward to them, and satisfying enough that you do not feel like you need to make three different side dishes.

    Honey Garlic BBQ Chicken with Roasted Vegetables is exactly that kind of meal.

    Tender, juicy chicken is coated in a sticky combination of barbecue sauce, honey, garlic, and seasonings, then paired with colorful vegetables roasted until tender and caramelized around the edges. The result is a complete dinner packed with sweet, smoky, savory, and slightly tangy flavors.

    Even better, most of the cooking happens on one sheet pan.

    Whether you need an easy family dinner, a meal-prep recipe, or simply something different to make with chicken tonight, this recipe delivers plenty of flavor without requiring complicated ingredients.

    Why You’ll Love Honey Garlic BBQ Chicken

    The star of this recipe is the sauce.

    Traditional barbecue sauce already brings together sweetness, acidity, smokiness, and spices. Adding honey gives the sauce an extra layer of sweetness while helping it develop that beautiful sticky glaze as it cooks.

    Fresh garlic balances that sweetness with its unmistakable savory flavor.

    Put everything together and you get a sauce that clings to the chicken instead of simply sitting on top of it.

    The roasted vegetables are equally important. As vegetables roast at high heat, their natural sugars begin to caramelize. Their edges become browned while their centers remain tender.

    Every bite gives you something different—juicy chicken, sweet peppers, tender zucchini, roasted broccoli, onions, and that irresistible honey-garlic barbecue glaze.

    Ingredients

    For the Chicken

    • 4 boneless, skinless chicken breasts or 6 boneless chicken thighs
    • 1 tablespoon olive oil
    • 1 teaspoon smoked paprika
    • 1 teaspoon garlic powder
    • 1/2 teaspoon onion powder
    • 1/2 teaspoon salt
    • 1/4 teaspoon black pepper

    For the Honey Garlic BBQ Sauce

    • 3/4 cup barbecue sauce
    • 1/4 cup honey
    • 3 cloves garlic, minced
    • 1 tablespoon soy sauce
    • 1 tablespoon apple cider vinegar
    • 1 teaspoon Dijon mustard
    • 1/2 teaspoon smoked paprika
    • Pinch of crushed red pepper flakes, optional

    For the Roasted Vegetables

    • 2 cups broccoli florets
    • 1 red bell pepper, chopped
    • 1 yellow or orange bell pepper, chopped
    • 1 medium zucchini, sliced into thick half-moons
    • 1 small red onion, cut into chunks
    • 1 cup baby carrots or sliced carrots
    • 2 tablespoons olive oil
    • 1/2 teaspoon garlic powder
    • 1/2 teaspoon Italian seasoning
    • Salt and black pepper to taste

    Optional Garnishes

    • Chopped fresh parsley
    • Sliced green onions
    • Sesame seeds
    • Extra warmed honey garlic BBQ sauce

    How to Make Honey Garlic BBQ Chicken with Roasted Vegetables

    Step 1: Preheat the Oven

    Preheat your oven to 425°F.

    Line a large rimmed baking sheet with parchment paper or lightly grease it with cooking spray.

    Using a large pan is important because overcrowding the vegetables can cause them to steam instead of roast.

    Step 2: Prepare the Honey Garlic BBQ Sauce

    In a small bowl, combine the barbecue sauce, honey, minced garlic, soy sauce, apple cider vinegar, Dijon mustard, smoked paprika, and optional red pepper flakes.

    Whisk everything together until completely combined.

    Taste the sauce and adjust it according to your preference. Add a little more honey for sweetness, vinegar for tanginess, or red pepper flakes for heat.

    Set the sauce aside.

    Food-safety tip: Keep the sauce that will be used for serving separate from any sauce that comes into contact with raw chicken.

    Step 3: Season the Chicken

    Pat the chicken dry with paper towels.

    Drizzle it lightly with olive oil and season both sides with smoked paprika, garlic powder, onion powder, salt, and black pepper.

    Place the chicken on the prepared baking sheet.

    Brush a generous layer of honey garlic BBQ sauce over the top.

    Do not use all of the sauce yet. Reserve some clean sauce for glazing later.

    Step 4: Prepare the Vegetables

    Place the broccoli, bell peppers, zucchini, red onion, and carrots in a large bowl.

    Drizzle with olive oil.

    Sprinkle with garlic powder, Italian seasoning, salt, and black pepper.

    Toss until the vegetables are evenly coated.

    Arrange them around the chicken in a single layer.

    Try to leave a little space between the vegetables whenever possible. That extra room allows hot air to circulate and gives you better browning.

    Step 5: Roast

    Place the sheet pan in the oven.

    Roast until the vegetables are tender and browned and the chicken reaches a safe internal temperature of 165°F in its thickest portion.

    Cooking time will vary depending on the thickness and type of chicken you use. Boneless thighs may cook differently from large chicken breasts, so an instant-read thermometer is the best way to determine when the chicken is finished.

    During the final portion of cooking, brush the chicken with another layer of the reserved honey garlic BBQ sauce.

    This creates the sticky, glossy coating that makes this recipe especially good.

    Step 6: Caramelize the Glaze

    For even more caramelization, switch the oven to broil for approximately 1–3 minutes at the end.

    Watch the chicken closely.

    Because the sauce contains honey and barbecue sauce, it can go from beautifully caramelized to burned very quickly.

    You are looking for slightly darkened, bubbling edges—not blackened sauce.

    Step 7: Rest and Serve

    Remove the pan from the oven and allow the chicken to rest for about 5 minutes.

    Resting gives the juices inside the chicken time to redistribute instead of immediately running out when you slice it.

    Brush with a final layer of clean reserved sauce if desired.

    Garnish with parsley, green onions, or sesame seeds and serve with the roasted vegetables.

    What Makes the Sauce So Good?

    The honey garlic BBQ sauce works because several different flavors are happening at the same time.

    Barbecue sauce provides the smoky and tangy foundation.

    Honey adds sweetness and helps create the sticky glaze.

    Garlic provides a savory bite that prevents the sauce from becoming overwhelmingly sweet.

    Soy sauce adds saltiness and umami.

    Apple cider vinegar provides acidity.

    Dijon mustard gives the sauce additional tang and complexity.

    Finally, smoked paprika reinforces the smoky barbecue flavor.

    The result tastes more complex than simply pouring bottled barbecue sauce over chicken, yet the homemade glaze takes only a few minutes to prepare.

    Chicken Breasts or Chicken Thighs?

    Either works.

    Chicken breasts are lean and mild, making them a great canvas for the bold honey garlic BBQ sauce.

    Chicken thighs contain more fat and tend to remain especially juicy during roasting. Their richer flavor also works extremely well with sweet and smoky sauces.

    Whichever you choose, cook according to temperature rather than relying solely on a timer.

    Chicken is safely cooked when the thickest part reaches 165°F.

    Vegetable Variations

    One of the best things about this recipe is how easily you can change the vegetables.

    Try combinations including:

    • Brussels sprouts
    • Cauliflower
    • Green beans
    • Asparagus
    • Sweet potatoes
    • Mushrooms
    • Yellow squash
    • Cherry tomatoes
    • Red potatoes

    Keep cooking times in mind when making substitutions.

    Dense vegetables such as potatoes, sweet potatoes, and thick carrots generally take longer to cook than zucchini, peppers, or asparagus. Cut harder vegetables into smaller pieces or give them a head start in the oven.

    Make It Spicy

    Prefer barbecue chicken with some heat?

    Add extra crushed red pepper flakes to the sauce or mix in a little hot sauce.

    You can also add cayenne pepper to the chicken seasoning.

    For a sweet-heat combination, drizzle the finished chicken with hot honey.

    The sweetness hits first, followed by a little kick of heat.

    Make It Extra Smoky

    If you love smoky barbecue flavors, increase the smoked paprika or choose a smoky-style barbecue sauce.

    You could also add a tiny amount of liquid smoke to the sauce. A little goes a long way, so start with only a few drops.

    What to Serve With Honey Garlic BBQ Chicken

    Because the recipe already includes plenty of vegetables, you can serve it exactly as it is.

    For a larger meal, try serving it with:

    • Steamed white or brown rice
    • Garlic mashed potatoes
    • Roasted potatoes
    • Macaroni and cheese
    • Quinoa
    • Couscous
    • Cornbread
    • Dinner rolls
    • Coleslaw
    • Green salad

    Rice is especially good because it absorbs any extra honey garlic BBQ sauce from the plate.

    Turn It Into a Rice Bowl

    This chicken also makes an excellent BBQ chicken bowl.

    Add cooked rice to a bowl and top it with sliced honey garlic chicken and roasted vegetables.

    Drizzle additional sauce over everything.

    Finish with sliced green onions and sesame seeds.

    You can also add avocado, roasted corn, black beans, shredded cabbage, or pickled onions.

    It is an easy way to transform the same recipe into something that feels completely different.

    Meal Prep Idea

    Honey Garlic BBQ Chicken with Roasted Vegetables works wonderfully for meal prep.

    Divide cooked rice, quinoa, or potatoes among meal-prep containers. Add sliced chicken and roasted vegetables.

    Keep a small amount of extra sauce separately if you want to add it after reheating.

    Store the cooked meal promptly in airtight containers in the refrigerator and reheat leftovers thoroughly before serving.

    Tips for the Best Roasted Vegetables

    The vegetables might sound like the supporting cast, but properly roasting them can make a huge difference.

    First, cut everything into reasonably similar sizes.

    Second, coat the vegetables lightly with oil rather than drowning them in it.

    Third, give them room.

    Vegetables packed tightly together release moisture and begin steaming. Spreading them across the pan encourages those delicious browned edges.

    If necessary, use two sheet pans.

    Finally, do not be afraid of a little browning. Those caramelized edges provide some of the best flavor in the entire dish.

    Tips for Juicy Chicken

    Chicken breasts sometimes have a reputation for becoming dry, but a few simple techniques can help.

    Try to use pieces that are relatively similar in thickness. If one end of a chicken breast is dramatically thicker than the other, gently pounding it to a more even thickness can promote more consistent cooking.

    Avoid unnecessarily overcooking the chicken.

    A meat thermometer removes the guesswork.

    Once the chicken reaches the appropriate temperature, remove it from the oven and allow it to rest before slicing.

    Easy Cleanup

    Another reason to love this dinner is cleanup.

    You have one bowl for the sauce, one bowl for tossing the vegetables, and one sheet pan for cooking.

    Line the sheet pan with parchment paper or foil and cleanup becomes even easier.

    That matters on nights when you want homemade food but do not want a sink filled with dishes afterward.

    Sweet, Smoky and Savory in Every Bite

    Honey Garlic BBQ Chicken with Roasted Vegetables is proof that an easy chicken dinner does not have to be boring.

    The chicken comes out juicy and covered in a sticky, sweet-and-smoky glaze. The garlic adds savory depth, while the roasted vegetables provide color, texture, and plenty of caramelized flavor.

    Everything comes together in one satisfying meal.

    You can keep the original recipe simple, turn up the heat, change the vegetables, serve it over rice, or prepare extra portions for lunch later in the week.

    Most importantly, it is approachable.

    You do not need complicated techniques or hard-to-find ingredients. You just need chicken, vegetables, a handful of pantry staples, and a hot oven.

    Sometimes the best Recipe of the Day is not something elaborate.

    It is the kind of meal you make once, everyone enjoys, and before long you find yourself making it again.

    Would you make your Honey Garlic BBQ Chicken extra sweet, extra smoky, or give it a spicy kick?

  • Breakfast of the Day: Pizza Omelette

    Breakfast of the Day: Pizza Omelette

    There are mornings when you want a traditional breakfast, and then there are mornings when you look at the eggs in the refrigerator and start thinking about pizza.

    Why choose between the two?

    Today’s Breakfast of the Day is the Pizza Omelette, a fun and satisfying combination that brings together fluffy eggs, melted cheese, savory pizza toppings, and rich tomato sauce in one skillet.

    Think of it as everything you love about a loaded omelette crossed with some of the best parts of a pizza. Instead of using pizza dough as the base, eggs create a soft, protein-packed foundation. Add mozzarella, pepperoni, sausage, vegetables, or whatever pizza toppings you enjoy, and breakfast suddenly becomes a lot more interesting.

    Even better, this is one of those recipes that can easily be customized for everyone at the table.

    Why Make a Pizza Omelette?

    Omelettes are already one of the most versatile breakfast foods. Once you know how to make the basic version, you can fill them with practically anything.

    Cheese.

    Ham.

    Bacon.

    Sausage.

    Peppers.

    Mushrooms.

    Spinach.

    Onions.

    Tomatoes.

    A Pizza Omelette simply takes that flexibility in a different direction.

    Instead of treating the eggs like a traditional breakfast dish, you season and top them with pizza-inspired ingredients. Mozzarella replaces or joins the usual cheddar. Pizza sauce adds a tangy tomato flavor. Pepperoni, Italian sausage, mushrooms, bell peppers, olives, and onions turn the whole thing into something that feels like breakfast and pizza at the same time.

    And because there is no dough to prepare, you can have it on the table surprisingly quickly.

    Pizza Omelette Recipe

    Prep Time: 10 minutes
    Cook Time: 10 minutes
    Total Time: About 20 minutes
    Servings: 1 large omelette

    Ingredients

    • 3 large eggs
    • 1 tablespoon milk or water
    • Salt, to taste
    • Black pepper, to taste
    • 1 teaspoon butter or olive oil
    • 2 tablespoons pizza or marinara sauce
    • 1/2 cup shredded mozzarella cheese
    • 8–10 pepperoni slices
    • 1/4 cup cooked Italian sausage, crumbled
    • 2 tablespoons diced bell pepper
    • 2 tablespoons diced onion
    • 2 tablespoons sliced mushrooms
    • 1 tablespoon sliced black olives, optional
    • 1 tablespoon grated Parmesan cheese
    • 1/4 teaspoon Italian seasoning
    • Pinch of crushed red pepper flakes, optional
    • Fresh basil or parsley for garnish, optional

    You don’t need every topping listed here. Consider them a starting point and build your omelette around your favorite pizza.

    How to Make a Pizza Omelette

    Step 1: Prepare the Toppings

    Because eggs cook quickly, prepare all your toppings before putting the omelette in the skillet.

    If you’re using Italian sausage, cook it completely and drain away excess grease.

    Dice the peppers and onions, slice the mushrooms, and have the cheese, pepperoni, and sauce ready.

    If you prefer softer vegetables, sauté the onions, peppers, and mushrooms for a few minutes before making the omelette.

    Step 2: Beat the Eggs

    Crack the eggs into a bowl.

    Add the milk or water along with a small pinch of salt and black pepper.

    Whisk until the yolks and whites are completely combined and the mixture is slightly frothy.

    Adding a small amount of liquid can help create a lighter omelette, but don’t add too much. You still want the eggs sturdy enough to hold all those delicious pizza toppings.

    Step 3: Heat the Skillet

    Place a nonstick skillet over medium to medium-low heat.

    Add the butter or olive oil and allow it to coat the bottom of the pan.

    Once the butter has melted, pour in the egg mixture.

    Allow the eggs to cook undisturbed for approximately 30 seconds.

    Step 4: Cook the Eggs Gently

    As the edges begin to set, gently lift them with a spatula and tilt the skillet so some of the uncooked egg runs underneath.

    Continue until the omelette is mostly set but still slightly moist across the top.

    Avoid using extremely high heat. Cooking eggs too quickly can leave the bottom browned and rubbery before the center has finished cooking.

    Step 5: Add the Pizza Sauce

    Spread a thin layer of pizza sauce across one half of the omelette.

    Don’t overload it.

    Too much sauce can make the omelette watery and difficult to fold.

    Two tablespoons should provide plenty of pizza flavor without overwhelming the eggs.

    Step 6: Add the Cheese and Toppings

    Sprinkle mozzarella over the sauced half.

    Add the pepperoni, sausage, peppers, onions, mushrooms, olives, or whatever combination you’ve chosen.

    Sprinkle Parmesan and Italian seasoning over the filling.

    For extra heat, add a pinch of crushed red pepper flakes.

    Step 7: Fold the Omelette

    Using a spatula, carefully fold the uncovered half over the toppings.

    Reduce the heat to low and allow the omelette to cook for another minute or two.

    The goal is to warm the fillings and melt the mozzarella without overcooking the eggs.

    Step 8: Serve

    Slide the Pizza Omelette onto a plate.

    Spoon a little additional warm pizza sauce over the top if desired.

    Finish with Parmesan, Italian seasoning, fresh basil, or parsley.

    Serve immediately while the cheese is still hot and melted.

    Make It a Meat Lover’s Pizza Omelette

    If your favorite pizza is loaded with meat, breakfast gives you plenty of possibilities.

    Try combining:

    • Pepperoni
    • Italian sausage
    • Bacon
    • Ham
    • Canadian bacon

    You don’t need huge amounts of each ingredient. A little of several different meats can give you plenty of flavor without making the omelette impossible to fold.

    Cook all raw meats completely before adding them to the eggs.

    Try a Supreme Pizza Omelette

    For the classic supreme pizza experience, combine pepperoni and Italian sausage with onions, bell peppers, mushrooms, and black olives.

    Mozzarella is the obvious cheese choice, but a little Parmesan adds another layer of flavor.

    You can even add chopped banana peppers or jalapeños if you like a little kick.

    Veggie Pizza Omelette

    You don’t need meat to make a great Pizza Omelette.

    Try filling yours with:

    • Mushrooms
    • Bell peppers
    • Onions
    • Spinach
    • Tomatoes
    • Black olives
    • Jalapeños
    • Fresh basil

    Sauté vegetables that contain a lot of moisture before putting them inside the omelette. Mushrooms and fresh tomatoes, in particular, can release water while cooking.

    Removing some of that moisture first helps keep the omelette from becoming soggy.

    Hawaiian-Inspired Pizza Omelette

    Yes, we’re entering the pineapple-on-pizza debate.

    If you’re on the pineapple side, try a Pizza Omelette with diced ham, mozzarella, and small pieces of pineapple.

    The sweet and salty combination works surprisingly well with eggs.

    Just drain the pineapple thoroughly before adding it.

    Buffalo Chicken Pizza Omelette

    Here’s another variation that takes the basic idea in an entirely different direction.

    Replace the pizza sauce with a small amount of buffalo sauce and fill the omelette with cooked shredded chicken and mozzarella.

    Finish it with green onions and a light drizzle of ranch or blue cheese dressing.

    It may not be traditional pizza, but that’s part of the fun.

    Breakfast Pizza Omelette

    You can also take the Pizza Omelette in the opposite direction by making it even more breakfast-focused.

    Instead of pepperoni and Italian sausage, use:

    • Bacon
    • Breakfast sausage
    • Ham
    • Diced potatoes
    • Green onions
    • Cheddar and mozzarella

    Add a thin layer of tomato sauce if you still want that pizza flavor, or leave the sauce out entirely.

    You essentially end up with a breakfast pizza without the crust.

    The Secret Is Not Overfilling It

    One of the biggest mistakes when making any omelette is adding too much filling.

    It’s especially tempting with a Pizza Omelette because there are so many good toppings.

    But there is only so much three eggs can hold.

    When you add excessive cheese, meat, vegetables, and sauce, the omelette can tear when you try to fold it.

    Use smaller portions than you would put on an actual pizza.

    You can always serve extra toppings on the side.

    Don’t Overcook Your Eggs

    The other key to a great Pizza Omelette is controlling the heat.

    Eggs don’t need extremely high temperatures.

    Medium or medium-low heat gives you more control and produces a softer texture.

    Remember that the eggs will continue cooking briefly after you fold the omelette, especially while you’re waiting for the cheese to melt.

    If you wait until the eggs look completely dry before adding the fillings, there’s a good chance they’ll be overcooked by the time you serve them.

    What to Serve With a Pizza Omelette

    A Pizza Omelette is hearty enough to stand on its own, but you can turn it into a full breakfast with a few simple sides.

    Try serving it with crispy breakfast potatoes or hash browns.

    Fresh fruit provides a lighter contrast to the rich cheese and meat.

    Toast, garlic toast, or an English muffin works well if you want something for dipping into extra pizza sauce.

    For brunch, you could serve Pizza Omelettes alongside a large fruit salad and roasted potatoes and let everyone choose their own toppings.

    Create a Pizza Omelette Bar

    If you’re feeding several people, turn breakfast into an activity.

    Prepare bowls containing different toppings and allow everyone to design their own omelette.

    Set out mozzarella, cheddar, Parmesan, pepperoni, sausage, bacon, ham, peppers, onions, mushrooms, olives, jalapeños, spinach, tomatoes, and several sauces.

    Then cook each omelette individually.

    It takes a little longer than making one large breakfast casserole, but everyone gets exactly what they want.

    It’s especially fun when you have people who strongly disagree about what belongs on pizza.

    Pineapple fans can have pineapple.

    Olive haters don’t have to look at an olive.

    Pepperoni lovers can load theirs up.

    Everybody wins.

    Use Your Leftover Pizza Toppings

    The Pizza Omelette is also a great refrigerator-cleanout breakfast.

    Maybe you made homemade pizza the night before and have small amounts of mozzarella, pepperoni, peppers, mushrooms, or sausage remaining.

    Instead of putting everything back in the refrigerator and eventually forgetting about it, turn those leftovers into breakfast.

    You only need small amounts of each topping for an omelette.

    It’s an easy way to reduce food waste while creating something completely different from the previous night’s dinner.

    Can You Put Actual Leftover Pizza in an Omelette?

    Technically, yes.

    It sounds unusual, but you can remove the toppings and cheese from a leftover slice, chop everything into smaller pieces, warm it slightly, and use it as omelette filling.

    You can even chop a small amount of the crust into tiny pieces and crisp them in the skillet first.

    Is it traditional?

    Absolutely not.

    But neither is putting pepperoni pizza inside an omelette.

    Sometimes breakfast should simply be fun.

    Why This Breakfast Works

    Eggs are relatively mild, which makes them an excellent base for stronger flavors.

    Tomato sauce brings acidity.

    Mozzarella brings creaminess.

    Pepperoni and sausage bring saltiness and savory flavor.

    Vegetables add freshness and texture.

    Italian seasoning ties everything together.

    You end up with familiar pizza flavors presented in an entirely different form.

    And unlike homemade pizza dough, which requires considerably more preparation, an omelette can go from refrigerator to plate in around 20 minutes.

    Breakfast Doesn’t Have to Be Boring

    It’s easy to fall into the same breakfast routine.

    Eggs and toast.

    Cereal.

    Oatmeal.

    Pancakes.

    Breakfast sandwiches.

    There is nothing wrong with the classics, but sometimes changing one familiar dish is enough to make breakfast feel new again.

    The Pizza Omelette does exactly that.

    You’re still making eggs.

    You’re simply approaching them with the mentality of building a pizza.

    Choose a sauce.

    Choose a cheese.

    Choose your toppings.

    Then make it exactly the way you want it.

    Final Thoughts

    The Pizza Omelette is proof that two comfort-food favorites can come together to create a breakfast that’s simple, customizable, and packed with flavor.

    Start with fluffy eggs, add a small amount of pizza sauce and plenty of melted mozzarella, and then make the rest your own.

    Keep it classic with pepperoni.

    Load it with sausage and bacon.

    Turn it into a supreme with vegetables.

    Make it meatless.

    Add jalapeños for heat.

    Or raid the refrigerator and see what you can create.

    There really isn’t one correct way to make a Pizza Omelette—and that’s exactly what makes it such a fun Breakfast of the Day.

    If you could turn your favorite pizza into an omelette, what toppings would you put inside?

  • National Hot Mulled Cider Day: Warm Up With the Flavors of Fall

    National Hot Mulled Cider Day: Warm Up With the Flavors of Fall

    As cooler weather begins to settle in and the leaves start changing colors, few drinks capture the feeling of autumn quite like a steaming mug of hot mulled cider. That makes September 30 — National Hot Mulled Cider Day — a perfect opportunity to slow down, enjoy the season, and fill your home with the comforting aromas of apples and warm spices.

    Hot mulled cider is more than a seasonal beverage. It is an experience. The smell of cinnamon, cloves, citrus, and simmering apple cider can instantly make a kitchen feel warmer and more inviting. Whether you’re sitting outside on a crisp evening, gathering around a fire, watching football with friends, or simply relaxing at home, a mug of hot cider feels like autumn in your hands.

    National Hot Mulled Cider Day celebrates this classic drink and gives us another reason to appreciate one of fall’s simplest pleasures.

    What Is Hot Mulled Cider?

    Hot mulled cider is traditionally made by gently heating apple cider with aromatic spices and sometimes fresh fruit.

    Common ingredients include cinnamon sticks, cloves, allspice, nutmeg, star anise, orange slices, and fresh apples. Recipes vary considerably, which is part of what makes the drink so enjoyable.

    Some people prefer their cider sweet and heavily spiced, while others keep the recipe simple so the natural apple flavor remains the star.

    The word “mulled” generally refers to heating and flavoring a beverage with spices. Although mulled wine may be one of the best-known examples, apple cider is an excellent nonalcoholic base for the same technique.

    As the cider slowly heats, the spices release their aromas and flavors into the drink. The result is warm, fragrant, slightly sweet, and perfect for a chilly day.

    A Drink Made for Autumn

    There are certain foods and drinks that seem inseparable from a particular season.

    Watermelon reminds us of summer.

    Hot chocolate brings winter evenings to mind.

    And hot apple cider belongs to fall.

    Apples are harvested in abundance during late summer and autumn, making cider a natural seasonal tradition. Apple orchards, pumpkin patches, harvest festivals, hayrides, and farmers markets frequently serve fresh cider as part of the experience.

    Heating that cider with spices takes it one step further.

    Suddenly, a simple apple drink becomes something that smells like the entire season.

    Cinnamon provides warmth.

    Cloves bring a deep aromatic flavor.

    Orange adds brightness.

    Nutmeg adds another layer of comforting spice.

    And underneath everything is the familiar sweetness and tartness of apples.

    It is difficult to imagine a better drink for welcoming fall.

    The Long History of Mulled Drinks

    People have been warming and seasoning beverages for centuries.

    Before modern refrigeration and food preservation, spices were often used to improve the flavor and aroma of drinks. Across Europe, traditions developed around heating wine, ale, cider, and other beverages with combinations of spices, fruit, and sweeteners.

    One related tradition is wassail, a warm beverage historically associated with winter celebrations in England. Different versions of wassail appeared over time, with some made from ale or wine and later variations incorporating apples and cider.

    As apple growing became established in North America, cider became an important beverage as well.

    Over generations, warm spiced apple cider became closely connected with autumn gatherings and holiday celebrations.

    Today, you don’t need a historical recipe or elaborate preparation to enjoy it.

    A pot of cider, a handful of spices, and a little time are enough.

    Homemade Hot Mulled Cider

    One of the best ways to celebrate National Hot Mulled Cider Day is to make a batch at home.

    Ingredients

    • 8 cups apple cider
    • 2 cinnamon sticks
    • 6 whole cloves
    • 3 whole allspice berries
    • 2 star anise pods
    • 1 orange, sliced
    • 1 apple, sliced
    • 2 tablespoons brown sugar or maple syrup, optional
    • Small pinch of ground nutmeg
    • Additional cinnamon sticks for serving

    Directions

    Pour the apple cider into a large saucepan or pot.

    Add the cinnamon sticks, cloves, allspice, star anise, orange slices, apple slices, and nutmeg.

    Heat the cider over medium heat until it begins to steam.

    Reduce the heat to low and allow everything to gently simmer for approximately 20 to 30 minutes. Avoid rapidly boiling the cider. Slow heating gives the spices time to release their flavors without reducing the liquid too quickly.

    Taste the cider.

    If you prefer something sweeter, stir in a little brown sugar or maple syrup.

    Strain the cider to remove the whole spices and fruit pieces, then carefully pour it into mugs.

    Add a cinnamon stick or fresh apple slice as a garnish and serve warm.

    Make It in a Slow Cooker

    Hot mulled cider is also ideal for a slow cooker, especially when you’re serving a crowd.

    Add the cider, spices, oranges, and apples to your slow cooker and cook on low for several hours.

    Not only does this require very little attention, but it also makes your home smell incredible.

    Leave the slow cooker on its warm setting during a party or family gathering so guests can serve themselves throughout the evening.

    You can even create a small cider station with mugs and different garnishes.

    Offer cinnamon sticks, apple slices, orange wedges, cranberries, and additional spices so everyone can customize their drink.

    Ways to Customize Your Cider

    There isn’t one correct way to make mulled cider.

    Experimenting with the recipe is part of the fun.

    For stronger cinnamon flavor, add another cinnamon stick.

    For more citrus, add orange and lemon slices.

    For extra spice, include additional cloves or star anise.

    Fresh ginger can add a little bite, while vanilla provides a softer and sweeter aroma.

    You could also add cranberries for a festive touch as the holiday season approaches.

    Another option is caramel. A small drizzle of caramel can transform traditional hot cider into a dessert-like drink.

    Just remember that cider is naturally sweet, so start with a small amount and add more if necessary.

    Turn It Into a Fall Gathering

    National Hot Mulled Cider Day doesn’t have to be celebrated alone.

    Invite a few friends or relatives over for an informal fall gathering.

    Make a large batch of cider and serve it alongside seasonal snacks and desserts.

    Apple pie, cinnamon doughnuts, pumpkin bread, oatmeal cookies, caramel apples, roasted nuts, ginger cookies, and warm pastries all pair wonderfully with cider.

    If the weather is nice, take everything outside.

    Set up chairs around a fire pit, hand everyone a warm mug, and enjoy the cooler evening.

    Sometimes the best celebrations aren’t complicated.

    Good drinks.

    Good food.

    Good conversation.

    And people you enjoy spending time with.

    That’s enough.

    Visit a Local Apple Orchard

    Another way to celebrate is by visiting an apple orchard or farm.

    September and October are prime apple seasons in many parts of the United States, and orchards often offer much more than apple picking.

    Depending on where you live, you might find hayrides, pumpkin patches, corn mazes, farm stands, cider doughnuts, baked goods, and freshly pressed cider.

    Buy a gallon of fresh cider and bring it home to make your own mulled version.

    It’s a simple way to support local growers while enjoying the season.

    Hot Cider and Fall Memories

    Perhaps one reason hot cider remains so popular is because it isn’t only about flavor.

    It’s connected with experiences.

    A certain smell can bring back memories surprisingly quickly.

    The aroma of apples and cinnamon might remind someone of visiting an orchard as a child, walking through a pumpkin patch with their family, sitting around a campfire, celebrating Thanksgiving, or decorating their home for autumn.

    Food and drinks become part of our traditions because we associate them with people and moments.

    Years later, making the same recipe can bring those memories rushing back.

    And we can create new traditions at the same time.

    Maybe National Hot Mulled Cider Day becomes the evening when your family makes the first batch of cider each fall.

    Maybe you invite friends over every September 30.

    Or perhaps your tradition is simply sitting outside with a warm mug and enjoying a quiet autumn evening.

    Traditions don’t need to be elaborate to become meaningful.

    A Simple Moment to Slow Down

    Modern life moves quickly.

    There is always another task, another notification, another appointment, or another responsibility demanding our attention.

    A warm drink won’t solve everything.

    But sometimes something as simple as sitting down with a hot mug can remind us to slow down for a few minutes.

    Watch the steam rise.

    Notice the cinnamon and apple aroma.

    Step outside and feel the cooler air.

    Talk with someone you care about.

    Enjoy the moment instead of rushing toward the next one.

    Seasonal celebrations like National Hot Mulled Cider Day can be reminders that some of life’s best moments are remarkably simple.

    Celebrate National Hot Mulled Cider Day on September 30

    National Hot Mulled Cider Day arrives at exactly the right time.

    Summer has ended, fall has begun, and cooler evenings are starting to return. Apples are in season, autumn decorations are appearing, and kitchens everywhere are beginning to fill with cinnamon, pumpkin, caramel, and other familiar fall flavors.

    So on September 30, pour some apple cider into a pot.

    Add cinnamon sticks, cloves, oranges, apples, and your favorite spices.

    Let everything slowly simmer.

    Allow the aroma to fill your home.

    Then pour yourself a mug, find somewhere comfortable to sit, and enjoy one of the simplest tastes of autumn.

    Whether you’re sharing a pot with family and friends or enjoying a peaceful cup by yourself, National Hot Mulled Cider Day is a wonderful excuse to appreciate the season.

    Sometimes happiness can be as simple as cool weather, a warm mug, and the smell of apples and cinnamon drifting through the house.

    How do you like your hot mulled cider — traditional with cinnamon and cloves, extra spicy, citrusy, or with your own special twist?

  • World Stroopwafel Day: Celebrating the Sweet Dutch Treat We Can’t Resist

    World Stroopwafel Day: Celebrating the Sweet Dutch Treat We Can’t Resist

    There are plenty of reasons to celebrate food, but some treats deserve a day all their own. World Stroopwafel Day celebrates one of the Netherlands’ most beloved creations: the stroopwafel.

    Thin, crisp, sweet, and filled with a rich caramel-like syrup, stroopwafels have gone from a traditional Dutch specialty to a snack enjoyed by people around the world. They pair beautifully with coffee or tea, make an easy afternoon treat, and can even be transformed into decadent desserts.

    Whether you have loved stroopwafels for years or have never tried one, World Stroopwafel Day is the perfect excuse to discover what makes these little waffle cookies so special.

    What Is a Stroopwafel?

    The word stroopwafel roughly translates from Dutch as “syrup waffle.”

    At first glance, a stroopwafel may look like a thin waffle cookie. But bite into one and you discover the part that makes it memorable.

    A traditional stroopwafel consists of two thin waffle-like layers with a sweet syrup filling sandwiched between them. The filling commonly has a caramel-like flavor, often enhanced with ingredients and spices such as brown sugar, butter, cinnamon, or similar warm flavors depending on the recipe.

    The result is a combination of textures and flavors: slightly crisp on the outside, soft and chewy toward the middle, buttery, sweet, and wonderfully comforting.

    A Dutch Tradition

    Stroopwafels are closely associated with the Dutch city of Gouda, a place many people outside the Netherlands recognize because of its famous cheese.

    The treat developed during the 19th century and eventually became a popular Dutch specialty.

    Like many beloved traditional foods, stroopwafels were relatively simple. Basic baking ingredients could be turned into something that tasted far more luxurious than the ingredients might suggest.

    Over time, their popularity spread beyond Gouda.

    They could be found at markets, bakeries, cafés, and shops throughout the Netherlands. Eventually, packaged stroopwafels helped introduce the treat to international consumers.

    Today, you don’t have to travel to the Netherlands to enjoy one.

    Stroopwafels can be found in supermarkets, specialty food shops, cafés, online stores, and international markets around the world.

    The Coffee Cup Stroopwafel Tradition

    One of the best ways to enjoy a stroopwafel involves something many people already have nearby: a hot cup of coffee or tea.

    Instead of immediately eating your stroopwafel, place it over the top of your mug.

    The stroopwafel should be large enough to rest across the opening without falling into your drink.

    Leave it there briefly.

    The warmth and steam from the drink gently soften the waffle and warm the syrup filling inside. What started as a relatively firm cookie becomes softer, warmer, and gooier.

    Then take a bite.

    The difference can be remarkable.

    You get the warmth of the waffle, the softened syrup filling, and your favorite hot drink all at once.

    It is a simple ritual, but it turns an ordinary snack into an experience.

    Why Stroopwafels Work So Well With Coffee

    There is a reason coffee and stroopwafels make such a satisfying combination.

    Coffee often has bitter, roasted, nutty, chocolatey, or slightly acidic characteristics. A stroopwafel brings sweetness, butteriness, caramel notes, and warm spice.

    The sweetness of the stroopwafel can balance some of coffee’s bitterness, while coffee keeps the dessert from feeling overwhelmingly sweet.

    It works particularly well with:

    • Freshly brewed coffee
    • Espresso
    • Cappuccino
    • Café latte
    • Americano
    • Cold brew
    • Hot chocolate
    • Black tea
    • Chai
    • Herbal tea

    You can certainly eat a stroopwafel by itself, but pairing one with your favorite drink makes World Stroopwafel Day even better.

    Fresh Stroopwafels Are Something Special

    Packaged stroopwafels are convenient and delicious, but freshly prepared stroopwafels offer another experience entirely.

    At Dutch markets and specialty stands, fresh stroopwafels may be served warm.

    Imagine watching a thin waffle come off the iron before it is carefully prepared and filled with warm syrup. When eaten fresh, the waffle is warm, fragrant, and slightly crisp while the filling remains wonderfully gooey.

    It is easy to understand why the treat has remained popular for generations.

    If you ever visit the Netherlands, finding a freshly made stroopwafel should probably be somewhere on your food list.

    Make Homemade Stroopwafels

    World Stroopwafel Day can also be an opportunity to try making them yourself.

    Traditional stroopwafels require a special waffle iron capable of creating their distinctive thin waffle pattern, but home cooks can purchase stroopwafel or pizzelle-style irons designed for similar thin cookies.

    The waffle dough typically contains ingredients such as flour, butter, sugar, eggs, yeast, milk, and spices, although recipes vary.

    The syrup filling can include ingredients such as:

    Brown sugar or syrup for sweetness and caramel flavor.

    Butter for richness.

    Cinnamon for the characteristic warm spice.

    The filling is cooked until smooth and thick enough to remain between the waffle layers.

    Making stroopwafels can take some patience, especially the first time. But that is also part of the fun.

    World Stroopwafel Day doesn’t have to be about grabbing something from a package. It can become an afternoon baking project with friends or family.

    Create a Stroopwafel Dessert

    You don’t have to stop at eating a plain stroopwafel.

    They can become an ingredient in all kinds of desserts.

    Crumble stroopwafels over vanilla ice cream and drizzle everything with warm caramel sauce. Suddenly, a simple bowl of ice cream feels like something you would order at a dessert shop.

    Break them into pieces and mix them into a cheesecake crust.

    Use crushed stroopwafels as a topping for pudding.

    Dip half of a stroopwafel into melted chocolate and allow it to cool.

    Sandwich a scoop of ice cream between two stroopwafels for an incredibly indulgent ice cream sandwich.

    Chop them into small pieces and mix them into brownies or blondies.

    Add pieces to a milkshake.

    Use mini stroopwafels as cupcake decorations.

    Or create a dessert board filled with stroopwafels, fruit, chocolate, caramel, nuts, cookies, and other sweets.

    There is plenty of room to experiment.

    Try Different Stroopwafel Flavors

    Traditional stroopwafels are difficult to beat, but modern versions have expanded considerably.

    Depending on where you shop, you may encounter stroopwafels featuring chocolate, vanilla, maple, coffee, honey, different spices, or other creative flavors.

    Some are partially or completely covered in chocolate.

    Others are decorated with toppings.

    You may also find miniature versions that are perfect for snacking.

    World Stroopwafel Day gives you an excellent reason to buy several varieties and conduct your own taste test.

    Get friends or family involved and see which version everyone prefers.

    Host a Stroopwafel Coffee Break

    Not every celebration needs to be complicated.

    Invite a few people over and create a small coffee and stroopwafel bar.

    Prepare coffee, tea, and hot chocolate. Set out several types of stroopwafels along with chocolate, whipped cream, caramel sauce, fruit, and other toppings.

    Show everyone how to warm a stroopwafel over their mug.

    Then sit down together.

    Sometimes food celebrations are less about the food itself and more about what happens around the table.

    A cup of coffee, something sweet, and a good conversation can turn an ordinary afternoon into a memory.

    Learn Something About Dutch Culture

    Food can also be a doorway into another culture.

    World Stroopwafel Day is an opportunity to learn more about the Netherlands beyond this famous treat.

    Read about Gouda and its history.

    Explore other Dutch foods and desserts.

    Learn about Dutch markets and cafés.

    Try making a Dutch-inspired meal before serving stroopwafels for dessert.

    Food traditions often tell stories about places, families, available ingredients, migration, economics, and changing tastes.

    A small waffle cookie can have a much bigger story behind it.

    Share Stroopwafels With Someone

    One of the easiest ways to celebrate World Stroopwafel Day is also one of the nicest.

    Share.

    Bring a package of stroopwafels to work.

    Put some in the break room.

    Give a few to your neighbors.

    Send some to a friend who loves coffee.

    Enjoy them with your family after dinner.

    Or introduce someone to their first stroopwafel.

    Food has always had a remarkable ability to bring people together, and sharing something sweet doesn’t require a special occasion.

    World Stroopwafel Day simply gives us another reason to do it.

    A Little Treat That Traveled the World

    One of the fascinating things about food is how a regional specialty can eventually become internationally recognized.

    Stroopwafels began as a Dutch treat and became something enjoyed far beyond the Netherlands.

    People encounter them in cafés, supermarkets, airports, gift shops, international food sections, and specialty stores. Some discover them while traveling. Others receive them as gifts. Plenty of people simply notice an interesting-looking package at the grocery store and decide to give them a try.

    Then comes that first bite.

    The crisp waffle.

    The chewy syrup.

    The caramel sweetness.

    And suddenly you understand why people have been enjoying them for generations.

    Celebrate the Simple Things

    World Stroopwafel Day doesn’t require decorations, expensive reservations, or elaborate plans.

    Sometimes celebrating can be as simple as making yourself a cup of coffee, placing a stroopwafel over the mug, and giving yourself a few quiet minutes to enjoy it.

    Life moves quickly.

    Our days become filled with responsibilities, schedules, work, errands, and things that need our attention. Small traditions can remind us that enjoyment doesn’t always have to come from something enormous.

    Sometimes happiness is hiding inside a warm cookie and a cup of coffee.

    Happy World Stroopwafel Day!

    Whether you enjoy yours straight from the package, warmed over coffee, freshly made at a market, dipped in chocolate, crumbled over ice cream, or transformed into an elaborate dessert, World Stroopwafel Day is a celebration of one of the world’s most delicious little treats.

    Try one you’ve never tasted before.

    Make a batch at home.

    Share some with friends.

    Learn about their Dutch origins.

    And, most importantly, take a moment to enjoy the experience.

    Because sometimes the best celebrations are the simplest ones: good food, a warm drink, and someone to share them with.

    How do you like your stroopwafel—straight from the package, warmed over coffee, dipped in chocolate, or turned into a dessert?

  • National Extra Virgin Olive Oil Day: Celebrating the Golden Ingredient of the Kitchen

    National Extra Virgin Olive Oil Day: Celebrating the Golden Ingredient of the Kitchen

    There are some ingredients that seem almost magical in their simplicity. They can transform an ordinary meal, bring different flavors together, and become a staple you reach for almost every day. Extra virgin olive oil is one of those ingredients.

    National Extra Virgin Olive Oil Day, celebrated each year on September 30, gives food lovers an opportunity to appreciate one of the world’s most beloved culinary ingredients.

    From drizzling it over warm bread to whisking it into salad dressing, using it in marinades, or finishing roasted vegetables with a splash of golden oil, extra virgin olive oil has earned a permanent place in kitchens around the world.

    But this day isn’t simply about cooking with olive oil. It’s also an opportunity to learn what makes extra virgin olive oil different, appreciate the long tradition behind olive cultivation, and experiment with new ways to use it.

    What Is Extra Virgin Olive Oil?

    Extra virgin olive oil—often shortened to EVOO—is the highest recognized grade of virgin olive oil.

    Unlike refined oils that undergo substantial chemical or heat processing, virgin olive oils are obtained from olives through mechanical or other physical means under conditions that do not alter the oil.

    The result is an oil that can retain the natural aromas and flavors of the olives from which it was produced.

    Depending on the olives, growing region, harvest timing, and production methods, extra virgin olive oil can taste remarkably different from bottle to bottle.

    Some oils are mild and buttery.

    Others are grassy, fruity, peppery, bitter, or even slightly spicy.

    That variety is part of what makes extra virgin olive oil so interesting. Much like coffee, chocolate, cheese, or wine, its flavor can reflect the agricultural product and the way it was produced.

    A Tradition Thousands of Years Old

    Olive trees have played an important role in Mediterranean civilizations for thousands of years.

    Olive oil historically served purposes extending far beyond the kitchen. It was used for food, lighting, religious ceremonies, cosmetics, medicines, and everyday household needs.

    Ancient Mediterranean societies placed tremendous value on the olive tree.

    Over generations, olive cultivation became deeply connected with the cuisines and cultures of countries including Greece, Italy, Spain, Portugal, Turkey, and others throughout the Mediterranean region.

    Today, olive oil is enjoyed far beyond the Mediterranean.

    You can find it in restaurants, grocery stores, bakeries, home kitchens, and professional kitchens around the world.

    National Extra Virgin Olive Oil Day celebrates both that remarkable history and the ingredient’s continuing role in modern cooking.

    What Makes Extra Virgin Olive Oil Special?

    One of the greatest qualities of extra virgin olive oil is versatility.

    You don’t need complicated techniques to enjoy it.

    Sometimes the simplest preparation is the best.

    Pour a small amount into a shallow dish, add freshly cracked black pepper and herbs, and serve it alongside crusty bread.

    Drizzle it over tomatoes with fresh mozzarella and basil.

    Add it to pasta.

    Use it to roast vegetables.

    Whisk it with vinegar or lemon juice for a homemade dressing.

    A good extra virgin olive oil can contribute flavor rather than simply acting as cooking fat.

    That is especially noticeable when the oil is used as a finishing ingredient.

    A small drizzle over soup, grilled vegetables, pasta, beans, pizza, or toasted bread can add another layer of flavor to the finished dish.

    Extra Virgin Olive Oil and the Mediterranean Diet

    Olive oil is famously associated with Mediterranean-style eating patterns.

    The Mediterranean diet generally emphasizes foods such as vegetables, fruits, legumes, whole grains, nuts, seeds, fish, and olive oil while limiting some highly processed foods.

    Extra virgin olive oil is particularly notable because it is rich in monounsaturated fat and also contains naturally occurring compounds such as polyphenols.

    That doesn’t mean olive oil should be treated as a miracle food. It is still calorie-dense, and overall eating patterns matter more than any single ingredient.

    However, replacing certain sources of saturated fat with unsaturated fats can be part of a heart-conscious eating pattern.

    National Extra Virgin Olive Oil Day can therefore be more than an excuse to cook something delicious. It can also encourage people to think about the ingredients they regularly use in their kitchens.

    Easy Ways to Celebrate National Extra Virgin Olive Oil Day

    The easiest celebration is also the most obvious:

    Cook with extra virgin olive oil.

    You don’t need to prepare an elaborate Mediterranean feast. Try incorporating EVOO into something you already enjoy.

    You could roast potatoes with olive oil, garlic, rosemary, salt, and pepper.

    You could prepare bruschetta with toasted bread, tomatoes, basil, garlic, and a generous drizzle of extra virgin olive oil.

    Make a simple vinaigrette by combining olive oil with vinegar or lemon juice, herbs, and seasonings.

    You could even create an olive oil tasting.

    Pour several varieties into separate dishes and taste them with small pieces of bread. Pay attention to differences in aroma, fruitiness, bitterness, and pepperiness.

    You may be surprised by how different two bottles of extra virgin olive oil can taste.

    Try a Simple Olive Oil Bread Dip

    One of the easiest ways to appreciate extra virgin olive oil is with fresh bread.

    Ingredients

    • 1/4 cup extra virgin olive oil
    • 1 small garlic clove, finely minced
    • 1/2 teaspoon dried oregano
    • 1/2 teaspoon dried basil
    • Pinch of crushed red pepper flakes
    • Freshly ground black pepper
    • Small pinch of salt
    • Optional grated Parmesan cheese
    • Crusty bread for dipping

    Directions

    Pour the extra virgin olive oil into a shallow serving dish.

    Add the garlic, oregano, basil, red pepper flakes, black pepper, and salt.

    Allow the mixture to sit for several minutes so the flavors begin blending into the oil.

    Sprinkle Parmesan over the top if desired.

    Serve with slices of warm, crusty bread.

    It’s incredibly simple, but that’s exactly the point. Extra virgin olive oil doesn’t always need to be hidden inside a complicated recipe. Sometimes it deserves to be the main flavor.

    Make Homemade Salad Dressing

    National Extra Virgin Olive Oil Day is also a perfect excuse to skip bottled dressing and make your own.

    A basic vinaigrette can begin with approximately three parts olive oil to one part vinegar, although you can adjust the proportions to your taste.

    Try combining:

    Extra virgin olive oil, balsamic vinegar, Dijon mustard, garlic, black pepper, and a small amount of honey.

    Shake everything together in a jar until emulsified.

    Within minutes, you have a flavorful homemade dressing that works beautifully with leafy greens, tomatoes, cucumbers, grilled vegetables, or grain bowls.

    Use It as a Finishing Oil

    Many people think of olive oil primarily as something used during cooking.

    Don’t forget about using it afterward.

    A drizzle of flavorful extra virgin olive oil can finish dishes such as:

    Pizza, pasta, tomato soup, hummus, roasted vegetables, grilled chicken, grilled fish, beans, mashed potatoes, avocado toast, bruschetta, and fresh salads.

    The key is moderation.

    You don’t need to drown the dish in oil. Sometimes a teaspoon or small drizzle is enough to provide noticeable flavor.

    Can You Cook With Extra Virgin Olive Oil?

    One persistent misconception is that extra virgin olive oil should never be heated.

    In reality, extra virgin olive oil can be used for many everyday cooking techniques, including sautéing, roasting, and baking.

    As with any cooking fat, however, temperature matters. Avoid unnecessarily overheating oil until it smokes heavily.

    For most ordinary home-cooking applications, extra virgin olive oil can be a practical and flavorful choice.

    And don’t overlook baking.

    Olive oil can replace other fats in certain cakes, muffins, breads, and desserts while contributing moisture and, depending on the oil, a subtle fruity character.

    How to Store Extra Virgin Olive Oil

    Buying good olive oil is only half the battle.

    You also need to store it properly.

    Three major enemies of olive oil are light, heat, and oxygen.

    Keep your bottle somewhere cool and dark rather than directly beside a hot stove or in bright sunlight.

    Dark glass bottles and tins can help protect oil from light.

    Close the container tightly after using it.

    And remember that olive oil isn’t something that necessarily improves by sitting around for years.

    Freshness matters.

    Instead of buying an enormous container that takes forever to finish, consider purchasing an amount you’ll realistically use while it’s still fresh and flavorful.

    Explore Different Olive Oils

    If you usually purchase whichever olive oil happens to be on sale, National Extra Virgin Olive Oil Day provides a good opportunity to experiment.

    Try oils made from different olive varieties or regions.

    Taste them side by side.

    One might taste grassy and peppery.

    Another might seem smoother and fruitier.

    You may discover that you prefer different oils for different purposes.

    A bold, peppery oil might be fantastic over grilled vegetables or hearty bread, while a milder oil could work beautifully in baking or delicate dishes.

    There isn’t necessarily one perfect olive oil for everything.

    Part of the fun is discovering what you enjoy.

    Host an Olive Oil Tasting

    Want to turn the celebration into something social?

    Invite friends or family members to participate in a blind olive oil tasting.

    Choose three or four extra virgin olive oils and place them in numbered dishes without revealing the brands.

    Provide bread or another simple tasting food.

    Have everyone smell and taste each oil before describing what they notice.

    Is it fruity?

    Peppery?

    Grassy?

    Smooth?

    Bitter?

    Mild?

    You don’t have to be an olive oil expert. The goal is simply to pay attention to flavor.

    At the end, reveal the bottles and compare everyone’s favorites.

    It can turn an ordinary ingredient into a surprisingly entertaining food experience.

    Celebrate the People Behind the Bottle

    National Extra Virgin Olive Oil Day can also remind us that every bottle begins with agriculture.

    Olives must be grown, harvested, transported, crushed, processed, stored, bottled, and distributed before the oil reaches your kitchen.

    Weather conditions, olive varieties, harvest timing, farming practices, and production techniques can all influence the final product.

    Whenever possible, learn about the producer behind the olive oil you’re purchasing.

    Look at where the olives were grown and where the oil was produced.

    Food becomes more interesting when we understand where it comes from.

    A Golden Ingredient Worth Celebrating

    Extra virgin olive oil proves that some of the best ingredients don’t need to be complicated.

    Olives are harvested and transformed into an ingredient that has been valued across civilizations for thousands of years.

    Today, that golden oil continues appearing on kitchen counters and restaurant tables around the world.

    It can help roast vegetables.

    It can become salad dressing.

    It can add richness to pasta.

    It can transform bread into an appetizer.

    It can finish pizza, soup, hummus, or grilled food with a simple drizzle.

    And sometimes, all you need is a good piece of bread and a small dish of flavorful olive oil.

    On September 30, celebrate National Extra Virgin Olive Oil Day by opening a bottle, trying something new, and appreciating an ingredient that connects modern kitchens with thousands of years of culinary tradition.

    What’s your favorite way to use extra virgin olive oil—cooking, dipping bread, salad dressing, roasting vegetables, or something completely different?