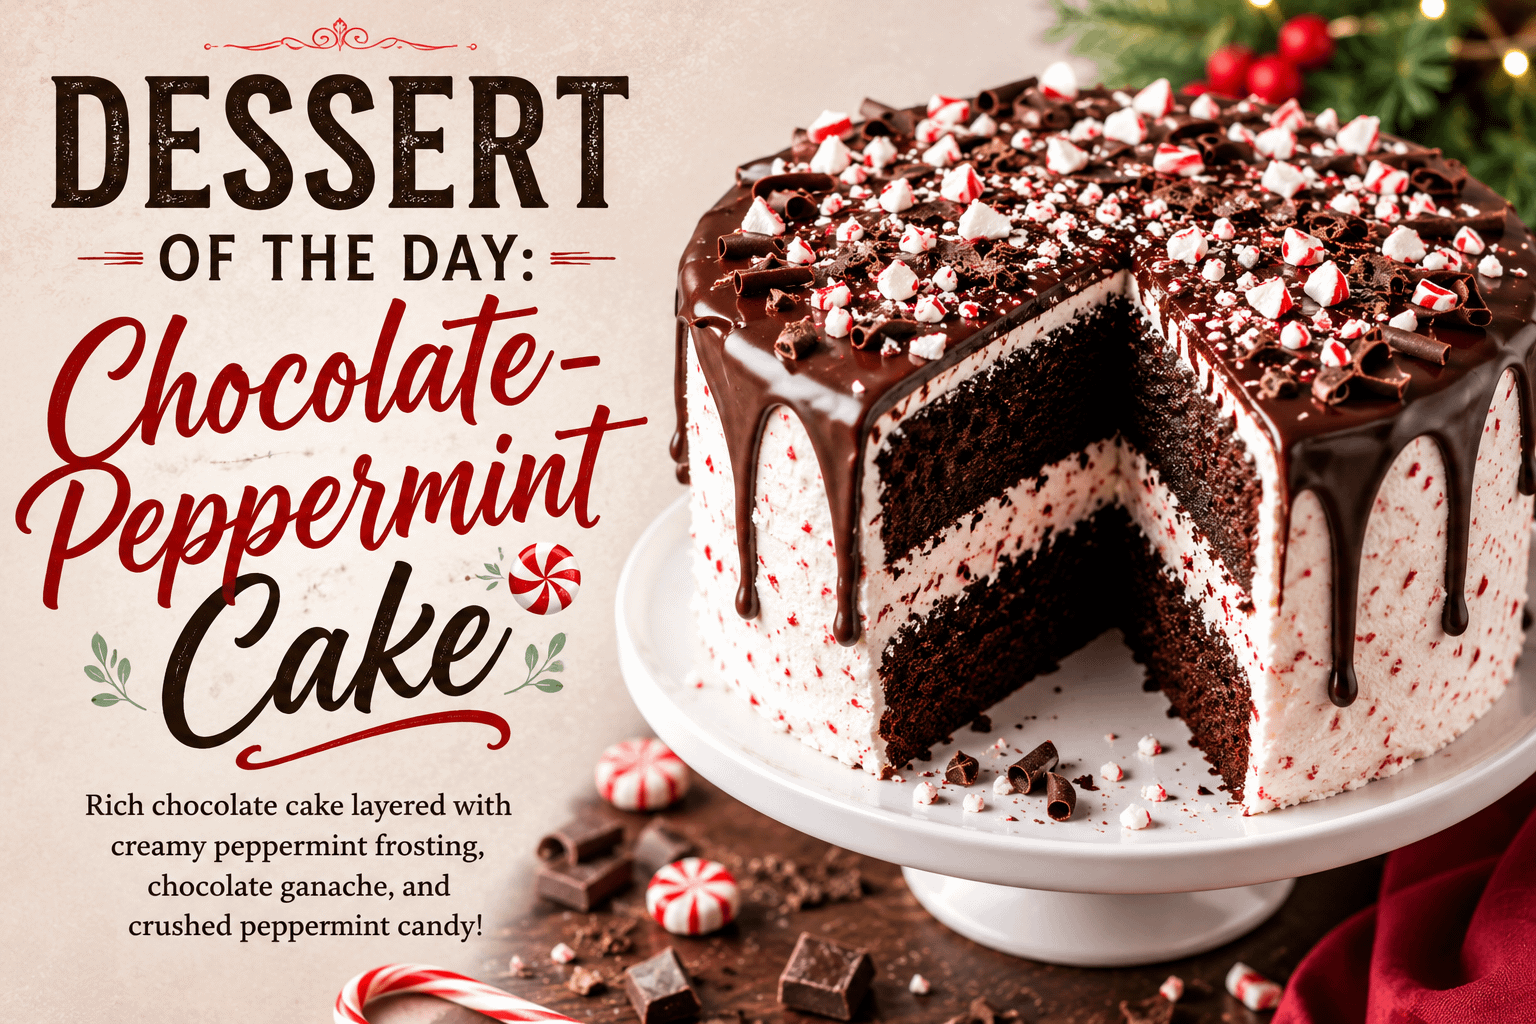
There are certain dessert combinations that never seem to lose their magic, and chocolate and peppermint are high on that list. Deep, rich chocolate paired with the cool, refreshing flavor of peppermint creates a dessert that feels indulgent, festive, and comforting all at once.
Today’s Dessert of the Day: Chocolate-Peppermint Cake takes that classic combination and transforms it into a beautiful homemade layer cake.
Imagine cutting into two layers of moist chocolate cake covered with fluffy peppermint buttercream. Add a silky chocolate ganache dripping over the edges, sprinkle crushed peppermint candies across the top, and you have a cake that looks impressive enough for a holiday celebration while remaining approachable enough for the home baker.
While chocolate-peppermint desserts are especially popular around Christmas, there’s no rule saying this cake needs to stay on the holiday table.
If you love chocolate and mint, this is a dessert worth enjoying any time of year.
The Perfect Combination of Chocolate and Peppermint
Chocolate is rich, earthy, sweet, and slightly bitter.
Peppermint is bright, cooling, and refreshing.
Individually, both flavors are delicious. Together, they balance each other beautifully.
The peppermint provides a refreshing contrast to the richness of the chocolate, while the chocolate keeps the peppermint from becoming too sharp.
It’s the same reason chocolate-covered peppermint candies have remained popular for generations.
The trick when baking with peppermint is finding the right balance.
Peppermint extract is extremely concentrated. You want enough peppermint flavor that people immediately recognize it, but not so much that it overwhelms the chocolate.
When properly balanced, you’ll taste rich chocolate first, followed by a refreshing peppermint finish.
Why You’ll Love This Chocolate-Peppermint Cake
There are plenty of reasons to add this recipe to your dessert collection.
It’s incredibly chocolatey. Cocoa powder and optional coffee give the cake a deep chocolate flavor.
It’s moist and tender. Oil helps the cake retain moisture even after refrigeration.
The peppermint is customizable. You control exactly how strong you want the peppermint flavor.
It looks impressive. Chocolate ganache and crushed peppermint candies turn a simple layer cake into a centerpiece.
It can be prepared ahead of time. Bake the cake layers one day and decorate them the next.
It’s perfect for celebrations. Christmas may immediately come to mind, but this cake works beautifully for birthdays, dinners, parties, and other special occasions.
Best of all, you don’t need professional cake-decorating skills to make it look beautiful.
A few swirls of frosting, a chocolate drip, and crushed peppermint candy can hide plenty of imperfections.
Chocolate-Peppermint Cake Recipe
Prep Time: 25 minutes
Bake Time: 28–35 minutes
Cooling Time: About 1 hour
Decorating Time: 20–30 minutes
Total Time: Approximately 2 hours
Servings: 10–12 slices
Ingredients
For the Chocolate Cake
- 2 cups all-purpose flour
- 2 cups granulated sugar
- 3/4 cup unsweetened cocoa powder
- 2 teaspoons baking powder
- 1 1/2 teaspoons baking soda
- 1 teaspoon salt
- 2 large eggs
- 1 cup whole milk
- 1/2 cup vegetable or canola oil
- 2 teaspoons vanilla extract
- 1/2 teaspoon peppermint extract
- 1 cup hot coffee or hot water
For the Peppermint Buttercream
- 1 cup unsalted butter, softened
- 4 cups powdered sugar
- 3–4 tablespoons heavy cream or whole milk
- 1 teaspoon vanilla extract
- 1/4–1/2 teaspoon peppermint extract
- Pinch of salt
For the Chocolate Ganache
- 1/2 cup semi-sweet chocolate chips or finely chopped chocolate
- 1/3 cup heavy cream
For Decorating
- Crushed candy canes or peppermint candies
- Chocolate curls, optional
- Chocolate shavings, optional
- Mini chocolate chips, optional
- Peppermint candies, optional
How to Make Chocolate-Peppermint Cake
Step 1: Prepare Your Oven and Cake Pans
Preheat your oven to 350°F.
Grease two 9-inch round cake pans.
For easier removal, cut parchment paper circles to fit the bottoms of the pans. Place the parchment inside and lightly grease it.
This little extra step can make a big difference when you’re trying to remove delicate chocolate cake layers without breaking them.
Step 2: Mix the Dry Ingredients
In a large mixing bowl, whisk together:
- Flour
- Sugar
- Cocoa powder
- Baking powder
- Baking soda
- Salt
Spend a few extra seconds whisking everything together.
You want the cocoa powder, baking soda, and baking powder evenly distributed throughout the flour.
Step 3: Add the Wet Ingredients
Add the eggs, milk, vegetable oil, vanilla extract, and peppermint extract.
Beat everything together with an electric mixer on medium speed for approximately 2 minutes.
Scrape down the sides and bottom of the bowl as needed.
The batter should become smooth and chocolatey.
Step 4: Add the Hot Coffee
Slowly pour one cup of hot coffee into the batter while mixing on low speed.
Your batter will become thin.
That’s normal.
Don’t add additional flour because you think something went wrong. The thinner batter contributes to the cake’s soft, moist texture.
Why Put Coffee in Chocolate Cake?
Coffee enhances the natural flavor of chocolate.
You generally won’t bite into the finished cake and think, “This tastes like coffee.”
Instead, the chocolate simply tastes deeper and richer.
If you don’t drink coffee or prefer not to use it, replace it with an equal amount of hot water.
Step 5: Divide the Batter
Pour the batter evenly between your prepared cake pans.
If you want especially even layers, you can use a kitchen scale to make sure each pan contains approximately the same amount of batter.
Otherwise, estimating by eye works perfectly well.
Gently tap each cake pan against the counter a couple of times to release large air bubbles.
Step 6: Bake
Bake the cakes for approximately 28–35 minutes.
Begin checking them around the 28-minute mark.
Insert a toothpick into the center. The cakes are ready when the toothpick comes out clean or with a few moist crumbs.
Avoid baking them until the toothpick is completely dry if possible. Overbaking is one of the easiest ways to turn a moist chocolate cake into a dry one.
Step 7: Cool Completely
Allow the cakes to cool in their pans for about 10 minutes.
Carefully run a knife around the outside edge if necessary.
Turn each cake onto a wire cooling rack and remove the parchment paper.
Let the layers cool completely.
This part requires patience.
Frosting a warm cake can quickly turn your beautiful buttercream into a melted mess.
How to Make Peppermint Buttercream
While the cakes cool, prepare your frosting.
Place the softened butter into a large mixing bowl.
Beat it for approximately 2–3 minutes until creamy.
Gradually add the powdered sugar, about one cup at a time, mixing well after each addition.
Add the vanilla extract, peppermint extract, pinch of salt, and 3 tablespoons of heavy cream.
Beat for another 2–3 minutes until the frosting becomes light and fluffy.
If the frosting seems too thick, add another tablespoon of cream.
If it’s too thin, gradually add additional powdered sugar.
The Most Important Peppermint Rule
Start small.
Peppermint extract is extremely strong.
Begin with 1/4 teaspoon in the frosting.
Taste it.
If you want more peppermint flavor, add a tiny amount at a time until you’re happy with it.
Remember that the cake itself already contains peppermint and crushed peppermint candy will eventually be added on top.
The finished cake should taste like chocolate and peppermint—not toothpaste.
How to Assemble the Cake
Once your cake layers are completely cool, it’s time for the fun part.
Place your first chocolate cake layer on a cake plate, serving platter, or cake stand.
Spread a generous layer of peppermint buttercream across the top.
You can make the frosting layer as thick or thin as you prefer.
Carefully place the second chocolate cake layer on top.
Check the cake from several angles to make sure the layers are reasonably centered.
Spread frosting over the top and sides.
Don’t worry if your frosting isn’t perfectly smooth.
Rustic frosting swirls look fantastic on this cake, especially once you add the chocolate ganache and peppermint topping.
Optional Crumb Coat
If you want a cleaner-looking cake, apply a thin layer of frosting over the entire cake first.
This is called a crumb coat.
The purpose is to trap loose chocolate crumbs so they don’t get mixed into the final white frosting.
Refrigerate the crumb-coated cake for approximately 20 minutes.
Then apply the remaining frosting.
You’ll have a much cleaner white exterior.
Make the Chocolate Ganache
Place the chocolate chips or finely chopped chocolate in a heat-safe bowl.
Heat the heavy cream in a small saucepan or microwave until hot but not boiling.
Pour the cream over the chocolate.
Don’t stir immediately.
Let the mixture sit for approximately 2–3 minutes.
Then slowly stir until the chocolate melts completely and the ganache becomes smooth and glossy.
Allow it to cool slightly before pouring it over the cake.
If the ganache is too hot, it could melt the buttercream.
Creating the Chocolate Drip
For the classic drip-cake appearance, use a spoon to carefully place small amounts of ganache around the outer edge of the cake.
Gently encourage some of the chocolate to drip down the sides.
Once you’ve created the drips, spread additional ganache across the center of the cake.
Don’t worry about making every drip identical.
Different lengths often make the cake look more natural and homemade.
Decorate With Peppermint
Now comes the finishing touch.
Crush candy canes or peppermint candies and sprinkle them across the top.
You can add as much or as little as you like.
For additional decoration, try:
- Chocolate curls
- Chocolate shavings
- Mini chocolate chips
- Whole peppermint candies
- Peppermint bark pieces
- Chocolate-covered peppermint candies
- Small candy cane pieces
You could even arrange miniature candy canes around the top edge for an especially festive Christmas presentation.
A Note About Crushed Candy Canes
Crushed peppermint candies can absorb moisture from frosting and refrigeration.
Over time, they may become sticky or begin dissolving.
If appearance matters, add your crushed peppermint candy shortly before serving.
What Does Chocolate-Peppermint Cake Taste Like?
The experience begins with moist, rich chocolate cake.
Then you get the sweetness and creaminess of peppermint buttercream.
Next comes the silky chocolate ganache.
Finally, crushed peppermint candies provide a refreshing mint flavor and satisfying crunch.
It’s a dessert with multiple flavors and textures happening at once:
Rich. Creamy. Chocolatey. Refreshing. Crunchy. Sweet.
That’s what makes each bite interesting.
How to Get Moist Chocolate Cake Every Time
Dry chocolate cake can ruin an otherwise wonderful dessert.
Fortunately, a few simple techniques can help prevent it.
Measure Flour Correctly
Adding too much flour is a common baking mistake.
If you don’t have a kitchen scale, fluff the flour with a spoon, gently spoon it into your measuring cup, and level it with a knife.
Avoid packing flour tightly into the measuring cup.
Don’t Overmix
Once your ingredients are combined, stop mixing.
Excessive mixing can develop too much gluten and affect the cake’s texture.
Don’t Overbake
Check the cakes early.
Ovens vary, and yours may bake faster than another person’s oven.
Use Oil
Butter adds wonderful flavor, but oil generally helps cakes stay moist longer.
That’s why this recipe uses vegetable or canola oil.
Let the Cake Cool Properly
Give your cake enough time to cool before decorating.
A rushed cake is much harder to frost and assemble.
Troubleshooting Your Chocolate-Peppermint Cake
Even experienced bakers occasionally encounter problems.
My Cake Sank in the Middle
Possible causes include opening the oven too early, underbaking, expired baking powder or baking soda, or inaccurate ingredient measurements.
Avoid opening the oven door during the early stages of baking.
My Cake Is Dry
It was likely baked too long or contained too much flour.
Begin checking for doneness several minutes before the maximum recommended baking time.
My Frosting Is Too Thick
Add heavy cream or milk one teaspoon at a time until you reach your desired consistency.
My Frosting Is Too Thin
Add powdered sugar gradually.
You can also refrigerate the frosting for 10–15 minutes if your kitchen is particularly warm.
My Ganache Is Too Thick
Add a small amount of warm cream and stir.
My Ganache Is Too Thin
Let it cool longer.
Ganache naturally thickens as it cools.
Delicious Chocolate-Peppermint Cake Variations
Once you master the basic recipe, there are plenty of ways to make it your own.
Peppermint Mocha Cake
Use strong coffee in the chocolate cake batter and add a small amount of espresso powder for an even stronger mocha flavor.
You’ll get a dessert inspired by the classic peppermint mocha.
Triple Chocolate Peppermint Cake
Add chocolate chips between the cake layers, use chocolate ganache on top, and decorate with chocolate curls.
Chocolate lovers won’t complain.
Dark Chocolate Peppermint Cake
Replace regular cocoa powder with dark cocoa powder and use dark chocolate in your ganache.
The stronger chocolate flavor contrasts beautifully with sweet peppermint frosting.
White Chocolate Peppermint Cake
Drizzle melted white chocolate over the finished cake instead of dark chocolate ganache.
White chocolate and peppermint create a sweeter, creamier flavor combination.
Peppermint Bark Cake
Break peppermint bark into pieces and arrange them across the top of the cake.
You can also chop peppermint bark and sprinkle it between the layers.
Chocolate-Peppermint Cupcakes
This recipe can also inspire individual cupcakes.
Fill lined muffin cups approximately two-thirds full and begin checking them around 18 minutes.
Once cooled, pipe peppermint buttercream on top.
Finish each cupcake with chocolate ganache and crushed peppermint candy.
They’re perfect for parties because guests don’t need plates or cake knives.
Turn It Into a Christmas Showstopper
Chocolate-Peppermint Cake practically begs to be served at Christmas.
For a holiday presentation, cover the cake with bright white frosting and create dark chocolate ganache drips.
Pile crushed red-and-white candy canes in the center.
Add miniature candy canes around the outside.
You could even add chocolate Christmas trees, edible snowflakes, or festive sprinkles.
Place the cake on a decorative holiday cake stand and suddenly dessert becomes part of your Christmas decorations.
Make a Chocolate-Peppermint Sheet Cake
Don’t want to deal with stacking cake layers?
No problem.
Bake the chocolate cake in a 9-by-13-inch pan instead.
Once it’s completely cool, spread peppermint frosting across the top.
Drizzle with chocolate ganache and sprinkle with crushed candy canes.
You get essentially the same delicious flavor without assembling a layer cake.
It’s an especially good option for potlucks and large family gatherings.
Make Mini Chocolate-Peppermint Cakes
For dinner parties, consider making miniature individual cakes.
Use small cake rings or cut circles from a sheet cake.
Layer chocolate cake with peppermint frosting and drizzle chocolate ganache over each miniature cake.
Individual desserts can make an ordinary dinner feel like a special occasion.
What to Serve With Chocolate-Peppermint Cake
This cake is rich, so simple drinks pair especially well with it.
Try serving it with:
- Hot coffee
- Espresso
- Hot chocolate
- Cold milk
- Peppermint tea
- Vanilla latte
- Mocha
- Decaffeinated coffee
If you want to make dessert even more indulgent, add a scoop of vanilla, chocolate, or peppermint ice cream.
A spoonful of whipped cream also works beautifully.
How to Serve Chocolate-Peppermint Cake
For the cleanest slices, refrigerate the decorated cake for approximately 20–30 minutes before slicing.
Use a long, sharp knife.
Dip the knife into hot water, wipe it dry, and make your first cut.
Clean the blade between slices.
This helps create those beautiful bakery-style slices where you can clearly see the layers of dark chocolate cake and white peppermint frosting.
How to Store Chocolate-Peppermint Cake
Place leftover cake in an airtight cake container.
You can keep it at room temperature for a short period if your kitchen is cool.
For longer storage, refrigerate it.
Properly covered, the cake should stay fresh for approximately 4–5 days.
Cold buttercream becomes firm, so allow refrigerated slices to sit at room temperature for about 20–30 minutes before eating.
The cake will soften and the flavors will become more pronounced.
Can You Freeze Chocolate-Peppermint Cake?
Yes.
The undecorated chocolate cake layers freeze especially well.
Allow the layers to cool completely.
Wrap each one tightly in plastic wrap and then aluminum foil.
Freeze for up to approximately 2–3 months.
Thaw overnight in the refrigerator before decorating.
You can also freeze individual slices of the finished cake, although crushed peppermint candies may lose some of their original texture.
Can You Make Chocolate-Peppermint Cake Ahead of Time?
Definitely.
In fact, splitting the work across two days can make baking a layer cake considerably easier.
Day One
Bake the chocolate cake layers.
Allow them to cool completely.
Wrap them tightly and refrigerate overnight.
Day Two
Prepare the peppermint buttercream.
Frost and assemble the cake.
Prepare the chocolate ganache.
Decorate the cake.
Add crushed peppermint candy shortly before serving.
Breaking the recipe into stages makes the process much more relaxed.
Perfect Occasions for Chocolate-Peppermint Cake
This dessert is particularly well suited for:
- Christmas dinner
- Christmas Eve
- Holiday parties
- Winter birthdays
- Family gatherings
- Office holiday celebrations
- Potlucks
- Cookie exchanges
- New Year’s Eve
- Winter dinner parties
- Holiday bake sales
But you certainly don’t need a special occasion.
Sometimes the best reason to bake chocolate cake is simply because you want chocolate cake.
Turn Leftovers Into Another Dessert
If you somehow end up with leftover cake, don’t let it go to waste.
Chocolate-Peppermint Cake can be transformed into several other desserts.
Chocolate-Peppermint Trifle
Layer chunks of leftover cake with whipped cream, chocolate pudding, and crushed peppermint candies.
Chocolate-Peppermint Cake Pops
Crumble leftover cake, combine it with a small amount of frosting, roll it into balls, and coat with melted chocolate.
Sprinkle crushed peppermint over the chocolate before it sets.
Chocolate-Peppermint Sundae
Place a small piece of cake in a bowl.
Add vanilla ice cream, warm chocolate sauce, whipped cream, and crushed peppermint.
Suddenly yesterday’s cake becomes tonight’s ice cream sundae.
Homemade Cake Is About More Than Perfection
It’s easy to look at professionally decorated cakes online and think your homemade version needs to look flawless.
It doesn’t.
A homemade cake doesn’t need perfectly straight layers.
The frosting doesn’t need to be completely smooth.
The chocolate drips don’t need to be identical.
What makes homemade cake special is that somebody took the time to make it.
You measured the ingredients.
You mixed the batter.
You waited for the cake to bake.
You made the frosting.
You assembled the layers.
And eventually, you placed it on a table for other people to enjoy.
Those little imperfections are part of what makes homemade desserts memorable.
The Joy of Sharing Dessert
Dessert has a way of bringing people together.
Someone announces that cake is ready, plates appear, coffee gets poured, and suddenly people gather around the table.
Conversations continue a little longer.
Someone asks for another small slice.
Someone else wants the recipe.
Kids wait for the piece with the most frosting.
Those simple moments are often what we remember.
Chocolate-Peppermint Cake is especially suited for those occasions because it feels celebratory from the moment you place it on the table.
The combination of dark chocolate cake, snowy white peppermint frosting, glossy ganache, and bright peppermint candy immediately catches everyone’s attention.
Then comes the best part—cutting that first slice.
Dessert of the Day
Today’s Dessert of the Day: Chocolate-Peppermint Cake proves that two classic flavors can create something truly special.
Rich chocolate cake provides the decadent foundation.
Fluffy peppermint buttercream adds sweetness and a refreshing mint flavor.
Silky chocolate ganache makes every bite even more indulgent.
And crushed peppermint candy provides the final burst of flavor and crunch.
It’s festive enough for Christmas, beautiful enough for a birthday, easy enough for a weekend baking project, and delicious enough to deserve a place in your dessert collection year-round.
Whether you decorate it perfectly or embrace a more rustic homemade appearance, the result is the same: a rich chocolate dessert made for sharing.
So brew a pot of coffee, gather everyone around the table, and cut into that first beautiful slice.
Because sometimes the best ending to the day is simple:
Good company, a warm drink, and a generous slice of Chocolate-Peppermint Cake.
Leave a Reply