Few desserts can compete with the simple pleasure of a freshly baked brownie. That rich chocolate aroma filling the kitchen, the slightly crisp edges, the soft and fudgy center, and the temptation to cut into the pan before it has even cooled make brownies one of those timeless desserts that never seem to go out of style.
But today’s Dessert of the Day: Homemade Chocolate Marble Brownies takes the classic brownie and gives it an extra layer of decadence.
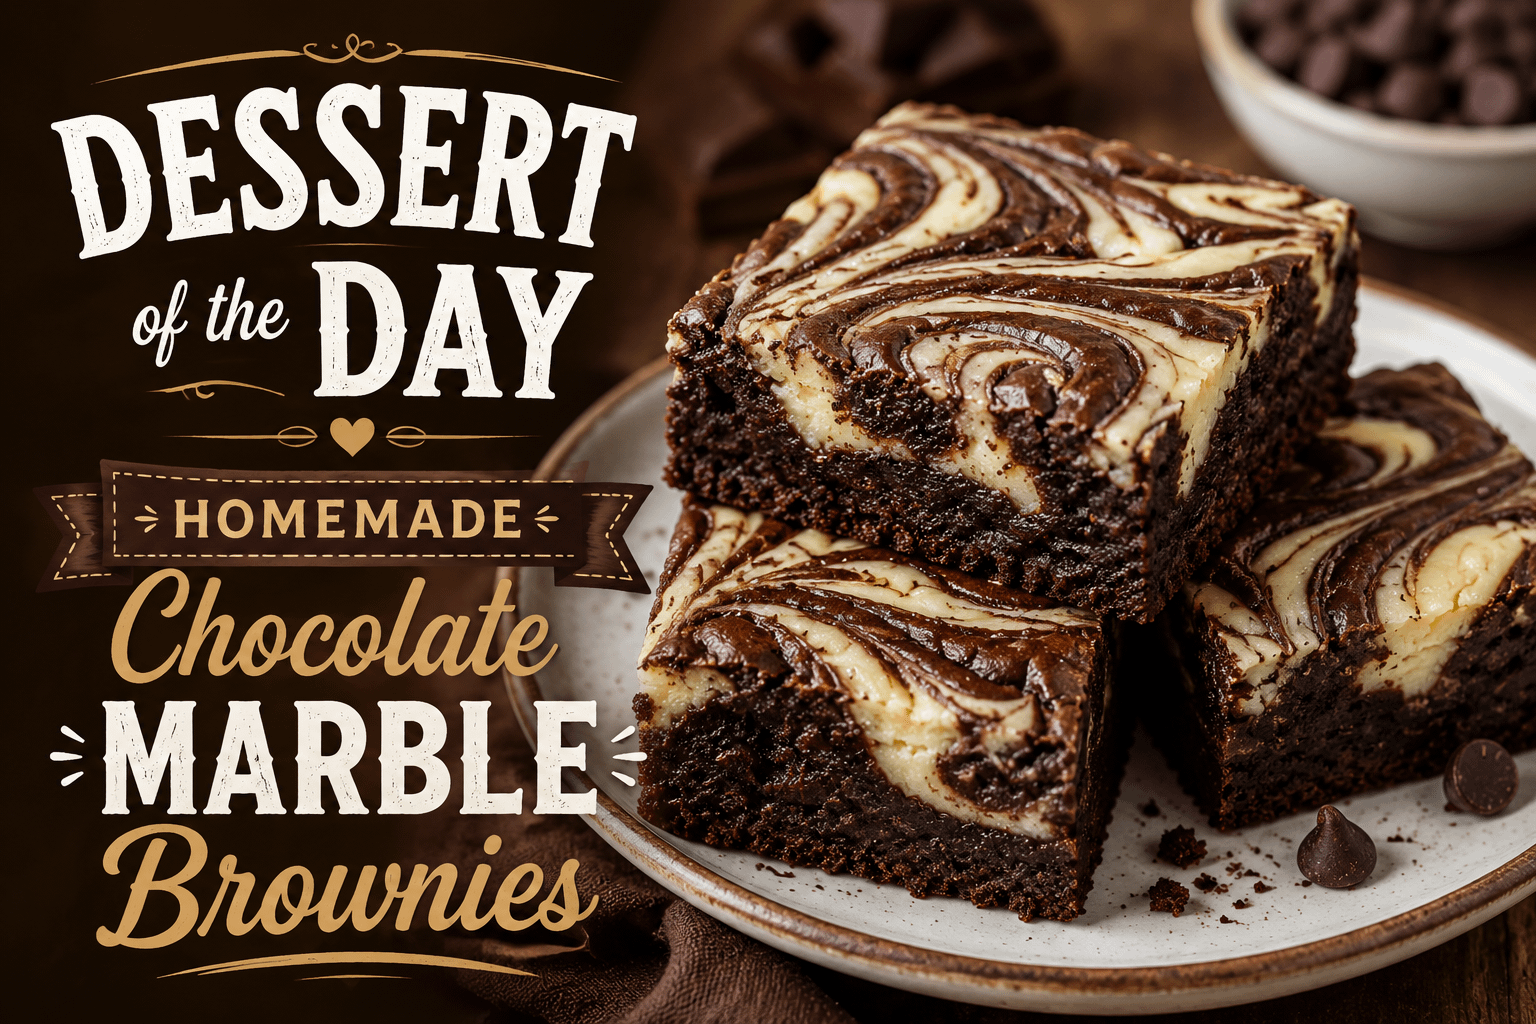
Imagine a deeply chocolatey homemade brownie combined with ribbons of smooth, creamy vanilla cheesecake. The two batters are gently swirled together before baking, producing a beautiful marble pattern across the top and throughout every square.
The finished dessert gives you everything you could want from a brownie: rich chocolate flavor, a moist and fudgy texture, creamy cheesecake, and an impressive appearance that makes these brownies look like they came straight from a bakery.
The best part?
Creating that beautiful marble effect is much easier than it looks.
You don’t need professional decorating equipment or advanced baking skills. All you need is a knife, skewer, or toothpick and a few gentle swirls through the batter.
Whether you’re baking for your family, bringing dessert to a potluck, preparing treats for a party, or simply craving chocolate, these homemade chocolate marble brownies are worth turning on the oven for.
Why Homemade Brownies Are So Good
Boxed brownie mixes are convenient, but there is something special about making brownies from scratch.
Homemade brownies allow you to control everything from the sweetness and chocolate intensity to the final texture.
Want them extra chocolatey?
Add chocolate chips.
Want a deeper flavor?
Add a little espresso powder.
Want some crunch?
Fold in walnuts or pecans.
Making brownies from scratch also fills your kitchen with one of the best baking aromas imaginable.
Butter, cocoa, vanilla, and chocolate baking together create a smell that makes waiting for the brownies to cool nearly impossible.
And with this recipe, that familiar chocolate aroma is joined by a creamy cheesecake layer.
Why You’ll Love Chocolate Marble Brownies
These brownies aren’t only delicious—they’re also beautiful.
Every brownie has its own unique combination of chocolate and cream cheese swirls, which means no two pieces look exactly alike.
Here are a few reasons this dessert deserves a place in your recipe collection.
Rich Chocolate Flavor
Cocoa powder creates a deep chocolate base without making the recipe overly complicated.
Adding chocolate chips takes that flavor even further.
Creamy Cheesecake Swirls
The cream cheese mixture adds a smooth, slightly tangy contrast to the sweet chocolate brownie.
Fudgy Texture
When baked correctly, the brownie portion stays moist, dense, and wonderfully fudgy.
Beautiful Presentation
The swirling technique makes these brownies look much more complicated than they actually are.
Easy to Customize
Chocolate chips, nuts, caramel, peanut butter, espresso, and other ingredients can easily be incorporated.
Perfect for Sharing
A single pan produces enough brownies for family dessert night, parties, bake sales, potlucks, and holiday gatherings.
Homemade Chocolate Marble Brownies Recipe
Prep Time: 20 minutes
Bake Time: 30–35 minutes
Cooling Time: 1 hour
Total Time: About 1 hour 55 minutes
Servings: Approximately 16 brownies
Ingredients
For the Chocolate Brownie Batter
- 1/2 cup unsalted butter, melted
- 1 cup granulated sugar
- 2 large eggs
- 1 teaspoon vanilla extract
- 1/3 cup unsweetened cocoa powder
- 1/2 cup all-purpose flour
- 1/4 teaspoon salt
- 1/4 teaspoon baking powder
- 1/2 cup semi-sweet chocolate chips, optional
For the Cream Cheese Marble Swirl
- 8 ounces cream cheese, softened
- 1/4 cup granulated sugar
- 1 large egg
- 1/2 teaspoon vanilla extract
Step-by-Step Instructions
Step 1: Preheat Your Oven
Preheat your oven to 350°F.
Giving your oven enough time to fully preheat helps the brownies bake more evenly.
Prepare an 8-by-8-inch baking pan by lightly greasing it or lining it with parchment paper.
If using parchment paper, leave a little extra hanging over two sides of the pan. Once the brownies have cooled, you can use the parchment as handles to lift the entire batch from the pan.
This makes cutting clean brownie squares much easier.
Step 2: Melt the Butter
Melt the unsalted butter and allow it to cool slightly.
You want it warm and liquid, but not extremely hot.
If the butter is too hot when the eggs are added, it can affect the texture of the batter.
Step 3: Combine the Butter and Sugar
Pour the melted butter into a large mixing bowl.
Add the granulated sugar and whisk until thoroughly combined.
The mixture may look slightly grainy, which is completely normal.
Step 4: Add the Eggs and Vanilla
Add the eggs one at a time, mixing well after each addition.
Stir in the vanilla extract.
Continue whisking until the mixture looks smooth and glossy.
Vanilla may seem like a minor ingredient in a chocolate dessert, but it helps round out and enhance the chocolate flavor.
Step 5: Add the Dry Ingredients
Add the cocoa powder, all-purpose flour, salt, and baking powder.
Gently stir the ingredients together until just combined.
Once you add the flour, avoid aggressively mixing the batter.
Overmixing develops more gluten in the flour, which can make your brownies tougher or more cake-like.
For dense and fudgy brownies, mix only until you no longer see streaks of dry flour.
Step 6: Add Chocolate Chips
If you’re using chocolate chips, gently fold them into the batter.
Semi-sweet chocolate chips work especially well because they add additional chocolate flavor without making the brownies overwhelmingly sweet.
Dark chocolate chips are another excellent option.
Making the Cream Cheese Swirl
Now it’s time to prepare the creamy portion that transforms ordinary brownies into chocolate marble brownies.
Step 7: Beat the Cream Cheese
Place the softened cream cheese in a medium bowl.
Beat until smooth.
Starting with properly softened cream cheese is important because cold cream cheese can create lumps.
If possible, allow your cream cheese to sit at room temperature for about 30–60 minutes before preparing the recipe.
Step 8: Add Sugar
Add the granulated sugar and continue mixing until smooth and creamy.
Scrape down the sides of the bowl as needed.
Step 9: Add Egg and Vanilla
Add the egg and vanilla extract.
Beat just until everything is incorporated.
You should now have a smooth, creamy cheesecake mixture that’s easy to spoon over the brownie batter.
Assembling Your Chocolate Marble Brownies
Step 10: Add the First Brownie Layer
Spread approximately three-quarters of the chocolate brownie batter into your prepared baking pan.
Use a spatula or the back of a spoon to gently spread it into an even layer.
Don’t worry if it isn’t perfectly smooth.
Step 11: Add the Cream Cheese Mixture
Spoon dollops of cream cheese mixture across the brownie batter.
Try to distribute the dollops throughout the pan instead of concentrating everything in the center.
This will help create a more even marble pattern.
Step 12: Add the Remaining Chocolate Batter
Drop spoonfuls of the remaining chocolate brownie batter between and over the cream cheese dollops.
At this point, the surface should look like patches of chocolate and vanilla.
Now you’re ready to create the marble effect.
How to Create the Perfect Marble Swirl
Take a butter knife, skewer, or toothpick and gently drag it through the chocolate and cream cheese mixtures.
Use large S-shaped motions, circles, or loose figure-eight patterns.
You want the two batters to flow into each other without completely combining.
The key word is gently.
A few swirls create dramatic ribbons of chocolate and cream cheese.
Too much swirling can blend everything together, causing the distinctive marble pattern to disappear.
There’s no need to make the design perfect.
In fact, the irregular swirls are part of what makes marble brownies so beautiful.
Every batch will look slightly different.
Baking Your Brownies
Place the pan in your preheated oven and bake for approximately 30–35 minutes.
Start checking the brownies near the 30-minute mark.
Insert a toothpick into the chocolate portion near the center.
You’re looking for a toothpick with a few moist crumbs attached—not wet batter, but not completely clean either.
A completely clean toothpick can sometimes mean you’ve gone slightly too far if your goal is a fudgy brownie.
The brownies will continue setting as they cool.
Don’t Overbake Your Brownies
This is one of the most important tips for making incredible brownies.
Brownies can go from perfectly fudgy to dry surprisingly quickly.
The edges should appear set, while the center may still look slightly soft.
That’s okay.
As the brownies cool, residual heat continues cooking the center.
Pulling them from the oven at the right moment helps preserve that moist, dense interior.
Let Them Cool
Fresh brownies smell incredible.
That makes this next step difficult.
Wait before cutting them.
The brownies need time to set, especially because they contain a cream cheese swirl.
Allow the pan to cool at room temperature for approximately one hour.
For even cleaner slices, refrigerate the cooled brownies for another 30 minutes before cutting.
How to Cut Perfect Brownie Squares
If presentation matters, there are a few tricks that can help you get cleaner cuts.
First, make sure the brownies are completely cool.
Use the parchment paper to lift the entire brownie slab from the baking pan.
Place it on a cutting board.
Use a large, sharp knife to make each cut.
After every slice, wipe the knife clean.
A warm knife can also help. Carefully run the knife under warm water, dry it completely, and then make your cut.
Repeat as necessary.
This technique is particularly helpful because the cheesecake portion can stick to the knife.
Fudgy vs. Cakey Brownies
Brownie lovers often fall into two camps.
Some want a light, cakey brownie.
Others want a dense, almost truffle-like fudgy brownie.
These chocolate marble brownies are designed to lean toward the fudgy side.
A fudgy brownie generally contains more fat compared with flour, while cakey brownies typically contain more flour and leavening.
The melted butter in this recipe contributes richness, while the relatively small amount of flour helps maintain the dense texture.
The cheesecake swirl makes the finished dessert even richer.
Make Your Brownies Even More Chocolatey
If you’re someone who believes there is no such thing as too much chocolate, there are several ways to intensify this recipe.
Add Dark Chocolate Chips
Fold 1/2 cup of dark chocolate chips into the batter.
Use Chocolate Chunks
Chocolate chunks create larger pockets of melted chocolate throughout each brownie.
Add Mini Chocolate Chips
Mini chips distribute chocolate more evenly throughout the batter.
Sprinkle Chocolate on Top
Scatter a small handful of chocolate chips over the brownies immediately before baking.
Add Espresso Powder
Add approximately 1 teaspoon of instant espresso powder to the brownie batter.
Coffee naturally enhances chocolate flavor.
You don’t necessarily end up with coffee-flavored brownies—the chocolate simply tastes deeper and more intense.
Chocolate Marble Brownie Variations
Once you’ve mastered the basic recipe, there are plenty of ways to experiment.
Peanut Butter Marble Brownies
Add small spoonfuls of creamy peanut butter alongside the cream cheese mixture before swirling.
Chocolate, peanut butter, and cheesecake make an incredibly rich combination.
Salted Caramel Marble Brownies
Drizzle caramel sauce lightly across the batter before swirling.
After baking, add a tiny sprinkle of flaky sea salt.
Raspberry Chocolate Marble Brownies
Add small spoonfuls of raspberry preserves throughout the batter.
Raspberry’s tartness pairs beautifully with dark chocolate and cream cheese.
Mint Chocolate Marble Brownies
Add a small amount of peppermint extract to the cream cheese mixture.
This variation works especially well during the holidays.
Triple Chocolate Marble Brownies
Use cocoa powder in the batter and fold in both semi-sweet and white chocolate chips.
Walnut Marble Brownies
Fold chopped walnuts into the chocolate batter before assembling.
Pecan Marble Brownies
Chopped pecans add a buttery crunch that contrasts nicely with the creamy cheesecake layer.
Turn Them Into a Brownie Sundae
Chocolate marble brownies are already rich enough to stand alone.
But sometimes you want dessert to be completely over the top.
Warm one brownie for approximately 10–15 seconds in the microwave.
Place it in a dessert bowl.
Top with:
- Vanilla ice cream
- Hot fudge
- Whipped cream
- Chopped nuts
- Chocolate shavings
- Caramel sauce
- Fresh strawberries
- A maraschino cherry
Now you’ve turned a simple brownie square into a full chocolate marble brownie sundae.
What to Serve With Chocolate Marble Brownies
Because these brownies are rich, simple accompaniments work particularly well.
Cold Milk
Chocolate brownies and cold milk remain a classic combination for good reason.
Coffee
A cup of freshly brewed coffee helps balance the sweetness of the dessert.
Vanilla Ice Cream
The cold vanilla ice cream slowly melting against a slightly warm brownie is difficult to beat.
Fresh Berries
Strawberries, raspberries, and blackberries provide a fresh, slightly tart contrast.
Whipped Cream
A small spoonful of lightly sweetened whipped cream adds another creamy texture without overwhelming the brownie.
Make Them for Your Next Party
One advantage of brownies is how easy they are to serve to a crowd.
There’s no need for plates and forks if you cut them into smaller squares.
Arrange bite-sized chocolate marble brownies on a large dessert tray and guests can simply grab one.
They’re a great choice for:
- Birthday celebrations
- Family gatherings
- Potlucks
- Bake sales
- Office parties
- School events
- Game-day gatherings
- Holiday dessert tables
- Valentine’s Day
- Christmas
- Thanksgiving
- Weekend cookouts
For larger gatherings, double the recipe and use a larger baking pan, adjusting the baking time as needed.
A Beautiful Holiday Dessert
Chocolate marble brownies can easily be adapted for different holidays.
Valentine’s Day
Top with red and pink sprinkles or serve with fresh strawberries.
Easter
Decorate with pastel-colored chocolate candies.
Halloween
Add orange and black sprinkles after baking.
Thanksgiving
Add caramel and chopped pecans for a fall-inspired variation.
Christmas
Add crushed peppermint candy or festive sprinkles.
The chocolate-and-cream marble pattern already makes the brownies attractive, so you don’t need much decoration.
Can You Make Chocolate Marble Brownies Ahead of Time?
Absolutely.
In fact, these brownies are an excellent make-ahead dessert because allowing them to cool and chill gives the cheesecake layer plenty of time to set.
Prepare them the evening before your gathering.
Bake and cool completely, then cover and refrigerate overnight.
The next day, slice them shortly before serving.
This can make party preparation much easier because dessert is already finished.
How to Store Chocolate Marble Brownies
Because the recipe contains cream cheese, it’s best to store leftover brownies in the refrigerator.
Place them in an airtight container and refrigerate for approximately 4–5 days.
You can enjoy them directly from the refrigerator for a firmer, cheesecake-like texture.
For softer brownies, allow them to sit at room temperature for about 15–20 minutes before eating.
Can You Freeze Marble Brownies?
Yes.
Chocolate marble brownies freeze surprisingly well.
Allow the brownies to cool completely before freezing.
Cut them into individual squares and wrap each brownie tightly.
Place the wrapped brownies in a freezer-safe container or freezer bag.
They can be frozen for approximately 2 months.
When you’re ready for dessert, transfer a brownie to the refrigerator and allow it to thaw overnight.
Individual freezing also means you can pull out one brownie whenever a chocolate craving appears.
Common Brownie Mistakes to Avoid
Even a simple brownie recipe can go wrong if you’re not careful.
Overmixing the Batter
Once the flour is added, mix only until combined.
Overbaking
Remember that brownies continue setting after leaving the oven.
Using Cold Cream Cheese
Cold cream cheese can leave lumps in your cheesecake mixture.
Over-Swirling
Too much swirling blends the batters instead of creating distinct ribbons.
Cutting Too Soon
Warm brownies are delicious but notoriously difficult to slice neatly.
Measuring Flour Incorrectly
Too much flour can produce dry brownies. Spoon flour into your measuring cup and level it rather than packing it tightly.
Why Chocolate and Cream Cheese Work So Well Together
Chocolate is rich, sweet, slightly bitter, and intense.
Cream cheese is smooth, creamy, tangy, and mildly sweet.
Those contrasting qualities complement one another.
The cream cheese helps cut through some of the chocolate’s richness while simultaneously making the dessert feel even more decadent.
It’s the same reason chocolate cheesecake is such a popular combination.
With marble brownies, however, you get both textures instead of completely blending the flavors together.
One bite might contain mostly fudgy chocolate brownie.
The next might have a generous ribbon of creamy cheesecake.
And the best bite may have the perfect balance of both.
A Dessert That Looks Harder Than It Is
One of my favorite things about marble desserts is their presentation.
People see those intricate swirls and assume you spent a tremendous amount of time creating them.
In reality, the design takes only a minute or two.
That’s why chocolate marble brownies are such a good choice when you want something homemade that feels a little more special than an ordinary pan of brownies.
They’re approachable enough for everyday baking but attractive enough for a celebration.
The Ultimate Chocolate Marble Brownie Experience
For an especially decadent dessert, serve one brownie slightly warm.
Add a scoop of vanilla bean ice cream.
Drizzle warm chocolate fudge over the top.
Add several fresh raspberries or strawberries.
Finish with whipped cream and shaved dark chocolate.
Then grab a spoon.
The warm brownie softens the ice cream. The chocolate sauce mixes with the creamy cheesecake ribbons. The berries provide just enough freshness to balance everything.
It’s simple comfort food transformed into a dessert worthy of a special occasion.
Dessert of the Day: Homemade Chocolate Marble Brownies
Today’s Dessert of the Day: Homemade Chocolate Marble Brownies brings together two desserts that are already incredible on their own.
Chocolate brownies and cheesecake.
The brownie layer provides the deep chocolate flavor and dense, fudgy texture.
The cream cheese swirl brings smoothness, richness, and just enough tang to balance the sweetness.
Then there is that beautiful marble pattern.
No two brownies come out exactly alike, making every square look homemade and unique.
Make a batch for your family.
Bring them to your next party.
Add them to your holiday dessert table.
Or make them on a quiet evening when you simply want something chocolatey waiting in the kitchen.
Serve them chilled for a firmer cheesecake texture, at room temperature for maximum fudginess, or slightly warmed with vanilla ice cream when you want the full dessert experience.
However you serve them, Homemade Chocolate Marble Brownies are proof that sometimes combining two classic desserts creates something even better.
How would you eat your Homemade Chocolate Marble Brownies—plain and fudgy, topped with vanilla ice cream, drizzled with hot fudge, or loaded with all the toppings?
Leave a Reply