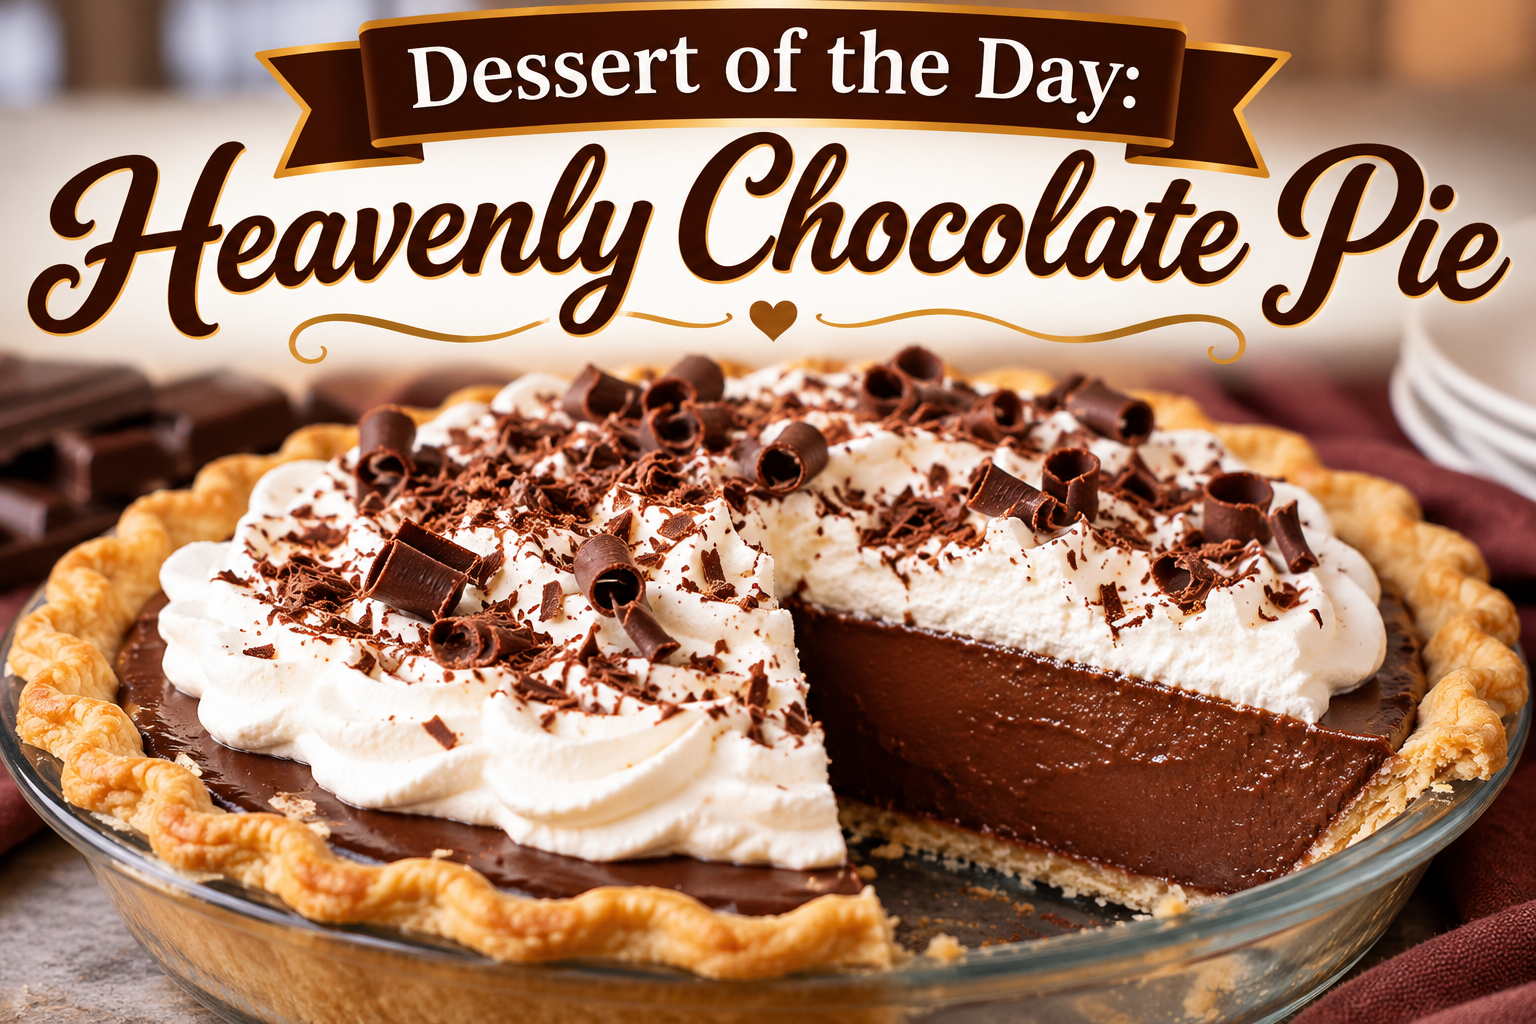
There is something truly special about a homemade chocolate pie. From its smooth, velvety chocolate filling to its buttery crust and fluffy whipped cream topping, every bite delivers a little taste of heaven. If you love chocolate desserts that are rich, creamy, and comforting, today’s Dessert of the Day, Heavenly Chocolate Pie, deserves a place in your recipe collection.
This delicious dessert combines a silky chocolate custard filling with a flaky, buttery pie crust and a generous layer of homemade whipped cream. Finished with delicate chocolate shavings, it is the kind of dessert that looks impressive but is surprisingly simple to prepare.
Whether you are planning a holiday gathering, celebrating a birthday, preparing a Sunday family dinner, or simply craving something sweet, Heavenly Chocolate Pie is a wonderful choice.
The best part? You do not need to be an experienced baker to make it. With a few everyday ingredients, a little patience, and some simple techniques, you can create a chocolate pie that tastes like it came straight from a bakery.
What Is Heavenly Chocolate Pie?
Heavenly Chocolate Pie is a classic chocolate cream pie featuring a rich, homemade chocolate custard filling nestled inside a baked pie crust. Once chilled, the filling becomes thick, smooth, and perfectly sliceable while maintaining its creamy texture.
The pie is traditionally finished with freshly whipped cream and chocolate curls or shavings, creating a beautiful contrast between the deep chocolate filling and the light, airy topping.
Unlike a dense chocolate fudge pie, Heavenly Chocolate Pie has a softer, more delicate consistency. It is rich without being overly heavy, making it an excellent dessert after a satisfying meal.
Its combination of chocolate, cream, and buttery pastry creates a dessert that feels indulgent yet familiar.
Why You Will Love This Heavenly Chocolate Pie Recipe
There are plenty of reasons this homemade chocolate pie deserves a permanent spot in your dessert rotation.
Rich Chocolate Flavor: Unsweetened cocoa powder and semisweet chocolate create a deep, satisfying chocolate flavor.
Smooth and Creamy Texture: The homemade custard filling is velvety, silky, and wonderfully rich.
Easy-to-Find Ingredients: Most of the ingredients are common baking staples you may already have in your kitchen.
Perfect for Special Occasions: This chocolate pie is beautiful enough for holidays, birthdays, anniversaries, and dinner parties.
Make-Ahead Friendly: Preparing the pie ahead of time allows the filling to set properly and makes entertaining easier.
Customizable: You can add different toppings, change the crust, or incorporate additional flavors.
A Crowd-Pleasing Dessert: Chocolate lovers of all ages will appreciate this classic homemade treat.
Heavenly Chocolate Pie Recipe
Total Time: Approximately 4 hours 50 minutes
Servings: 8 slices
Difficulty: Easy to moderate
Course: Dessert
Ingredients
This Heavenly Chocolate Pie recipe is divided into three simple components: the crust, the chocolate filling, and the whipped cream topping.
For the Pie Crust
-
1 prepared 9-inch pie crust, homemade or store-bought
-
1 tablespoon melted butter (optional, for brushing)
For the Chocolate Filling
-
2 cups whole milk
-
½ cup heavy whipping cream
-
¾ cup granulated sugar
-
¼ cup unsweetened cocoa powder
-
¼ cup cornstarch
-
¼ teaspoon salt
-
4 large egg yolks
-
4 ounces semisweet chocolate, finely chopped
-
2 tablespoons unsalted butter
-
2 teaspoons pure vanilla extract
For the Whipped Cream Topping
-
1½ cups cold heavy whipping cream
-
3 tablespoons powdered sugar
-
1 teaspoon vanilla extract
Optional Garnishes
-
Chocolate shavings
-
Mini chocolate chips
-
Chocolate curls
-
Cocoa powder
-
Chocolate syrup
-
Fresh raspberries or strawberries
Step-by-Step Instructions
Making Heavenly Chocolate Pie is easier than you might expect. Follow these instructions to create a perfectly creamy filling and a beautiful finished dessert.
Step 1: Prepare the Pie Crust
Preheat your oven to 375°F (190°C), or follow the temperature recommended on your packaged crust.
Place the pie crust into a 9-inch pie dish, pressing it gently against the bottom and sides.
Trim any excess dough and crimp the edges for a decorative finish.
Line the crust with parchment paper and fill it with pie weights or dried beans to prevent puffing.
Bake for approximately 15 minutes, then carefully remove the parchment and weights. Continue baking for another 5–10 minutes, or until the crust is golden brown and fully baked.
Remove the crust from the oven and allow it to cool completely.
Helpful Tip: Because the chocolate filling is cooked separately, the crust must be fully baked before adding the filling.
Step 2: Combine the Dry Ingredients
In a medium saucepan, whisk together the granulated sugar, unsweetened cocoa powder, cornstarch, and salt.
Mixing these ingredients before adding the liquid helps distribute the cornstarch evenly and prevents lumps from forming.
The cocoa powder gives the pie its deep chocolate flavor, while the cornstarch helps the filling thicken into a smooth custard.
Step 3: Add the Milk and Cream
Gradually pour the whole milk and heavy whipping cream into the saucepan, whisking continuously.
Continue whisking until the mixture is smooth and the dry ingredients have dissolved.
Place the saucepan over medium heat and cook, stirring frequently, until the mixture becomes hot and begins to steam.
Do not allow it to boil vigorously at this stage.
Step 4: Temper the Egg Yolks
Place the egg yolks in a separate heatproof bowl and whisk until smooth.
Slowly add approximately ½ cup of the hot chocolate mixture to the egg yolks while whisking constantly.
This process, called tempering, gently raises the temperature of the eggs and helps prevent them from scrambling.
Gradually pour the tempered egg mixture back into the saucepan, whisking continuously.
Step 5: Cook the Chocolate Custard
Return the saucepan to medium heat.
Continue cooking while whisking constantly, paying particular attention to the bottom and corners of the pan.
As the mixture heats, it will begin to thicken.
Once the custard reaches a gentle boil, continue whisking for approximately 1 minute to cook the cornstarch fully.
The finished mixture should be thick, glossy, and smooth.
Avoid leaving the saucepan unattended, as custard can scorch quickly.
Step 6: Add the Chocolate, Butter, and Vanilla
Remove the saucepan from the heat.
Add the chopped semisweet chocolate and unsalted butter.
Stir until the chocolate and butter have completely melted into the custard.
Add the vanilla extract and mix thoroughly.
At this point, the chocolate filling should have a rich color, a glossy appearance, and a beautifully creamy consistency.
For an especially silky filling, you can pour the custard through a fine-mesh strainer before transferring it to the pie crust.
Step 7: Fill the Pie Crust
Carefully pour the warm chocolate custard into the cooled pie crust.
Use a spatula to spread the filling evenly and smooth the surface.
Place a piece of plastic wrap directly against the surface of the filling to prevent a skin from forming.
Allow the pie to cool briefly, then refrigerate promptly.
Step 8: Chill the Pie
Refrigerate the chocolate pie for at least 4 hours, or until the filling is completely chilled and firm enough to slice.
For the best results, prepare the pie the evening before you plan to serve it.
Overnight chilling gives the custard additional time to set and makes cutting clean slices easier.
Step 9: Prepare the Whipped Cream
In a large chilled mixing bowl, combine the cold heavy whipping cream, powdered sugar, and vanilla extract.
Using an electric mixer, beat the ingredients on medium-high speed until medium to stiff peaks form.
The whipped cream should be fluffy and hold its shape without becoming grainy.
Be careful not to overmix, as excessive whipping can cause the cream to separate.
Step 10: Decorate and Serve
Remove the chilled pie from the refrigerator.
Spread the whipped cream evenly over the chocolate filling, or use a piping bag to create decorative swirls.
Sprinkle chocolate shavings or curls over the whipped cream.
For an extra-special presentation, add a light dusting of cocoa powder or a few fresh berries.
Slice the pie using a sharp knife, wiping the blade clean between cuts.
Serve chilled and enjoy!
Tips for Making the Perfect Heavenly Chocolate Pie
Although this recipe is straightforward, a few simple techniques can make a noticeable difference in the finished dessert.
1. Use Quality Chocolate
Chocolate is the main flavor in this recipe, so the quality of your chocolate matters.
Choose a semisweet chocolate that you enjoy eating on its own.
Good-quality chocolate melts smoothly and produces a richer flavor than many inexpensive baking substitutes.
2. Whisk the Custard Constantly
Custard requires attention while cooking.
Continuous whisking helps prevent lumps, scorching, and uneven thickening.
A heavy-bottomed saucepan is especially useful because it distributes heat more evenly.
3. Do Not Rush the Chilling Process
One of the most common mistakes when making chocolate cream pie is slicing it before the filling has fully set.
Even when the surface looks firm, the center may still be soft.
Allow at least 4 hours of refrigeration, and preferably overnight, for the best texture.
4. Use Cold Cream for the Topping
Cold heavy whipping cream produces a lighter, more stable whipped topping.
For even better results, refrigerate your mixing bowl and beaters for approximately 10–15 minutes before whipping.
5. Let the Crust Cool Completely
Adding hot filling to a warm crust can contribute to a soggy bottom.
Make sure the baked crust has cooled before pouring in the chocolate custard.
6. Add the Whipped Cream Shortly Before Serving
Freshly whipped cream looks and tastes best when added close to serving time.
If preparing the pie in advance, keep the filling chilled and add the topping later.
Delicious Heavenly Chocolate Pie Variations
One of the best things about this recipe is how easily it can be customized.
Double Chocolate Heavenly Pie
Replace the traditional pastry crust with a chocolate cookie crust.
Crush chocolate sandwich cookies, combine them with melted butter, and press the mixture into a pie dish.
Bake briefly according to your cookie-crust recipe and cool before filling.
The result is an intensely chocolatey dessert that is perfect for serious chocolate lovers.
Chocolate Peanut Butter Pie
Spread a thin layer of creamy peanut butter over the cooled crust before adding the chocolate custard.
You can also fold a small amount of peanut butter into the warm filling.
Finish with chopped peanut butter cups for an extra indulgent dessert.
Chocolate Mint Pie
Add ¼ teaspoon peppermint extract to the chocolate filling, adjusting to taste.
Top with whipped cream and crushed chocolate mint candies.
This variation is especially delicious during the Christmas season.
Mocha Chocolate Pie
Dissolve 1–2 teaspoons of instant espresso powder in the milk before cooking the custard.
Coffee enhances the chocolate flavor and creates a sophisticated mocha dessert.
Salted Caramel Chocolate Pie
Drizzle a thin layer of salted caramel sauce over the baked crust before adding the chocolate filling.
Finish with whipped cream, caramel drizzle, and a light sprinkle of flaky sea salt.
The combination of sweet caramel, rich chocolate, and salt creates an irresistible contrast.
Chocolate Raspberry Pie
Add a thin layer of raspberry preserves to the cooled crust before pouring in the chocolate filling.
Decorate the finished pie with fresh raspberries.
The tart fruit flavor balances the richness of the chocolate beautifully.
The Secret to a Rich and Creamy Chocolate Filling
The filling is what truly makes Heavenly Chocolate Pie special.
A great chocolate cream pie should be thick enough to hold its shape when sliced but soft enough to melt smoothly in your mouth.
Achieving this texture depends on several ingredients working together.
Whole Milk: Provides the liquid foundation and creates a smooth, creamy consistency.
Heavy Cream: Adds richness and gives the custard a luxurious mouthfeel.
Egg Yolks: Contribute richness, color, and a delicate custard texture.
Cornstarch: Thickens the filling so it becomes firm enough to slice after chilling.
Semisweet Chocolate: Adds concentrated chocolate flavor and helps create a silky finish.
Butter: Gives the filling additional richness and a glossy appearance.
When these ingredients are combined properly, the result is a chocolate custard that is smooth, rich, and incredibly satisfying.
How to Make Heavenly Chocolate Pie Ahead of Time
Heavenly Chocolate Pie is an excellent make-ahead dessert because it needs several hours to chill.
You can prepare the crust and chocolate filling one day before serving.
Once the pie has cooled sufficiently, cover it carefully and store it in the refrigerator overnight.
The following day, prepare the whipped cream and decorate the pie shortly before serving.
This approach is particularly helpful when hosting a holiday meal or dinner party because it reduces the amount of preparation required on the day of your event.
If you want to prepare the pie even earlier, you can bake the crust up to two days ahead and store it in an airtight container at room temperature, provided it contains no perishable filling.
How to Store Leftover Heavenly Chocolate Pie
Because this dessert contains milk, cream, and eggs, proper refrigeration is important.
Refrigerator Storage: Keep leftover pie covered in the refrigerator at 40°F (4°C) or below for up to 3–4 days.
Freezer Storage: Freezing is not recommended for the best texture. Custard fillings can become watery or grainy after thawing, and whipped cream may lose its fluffy consistency.
Serving Temperature: Heavenly Chocolate Pie tastes best when served chilled.
Do not leave the pie at room temperature for more than 2 hours, or more than 1 hour when temperatures exceed 90°F (32°C).
What to Serve with Heavenly Chocolate Pie
Although Heavenly Chocolate Pie is delicious on its own, pairing it with complementary flavors can make the experience even more enjoyable.
Fresh Strawberries
The natural sweetness and slight tartness of fresh strawberries provide a refreshing contrast to the rich chocolate filling.
Vanilla Ice Cream
A small scoop of vanilla ice cream adds another creamy element and creates a classic chocolate-and-vanilla combination.
Freshly Brewed Coffee
A cup of hot coffee pairs beautifully with chocolate desserts.
The slight bitterness of coffee helps balance the sweetness of the pie.
Raspberry Sauce
A drizzle of homemade raspberry sauce adds a bright fruit flavor and makes each slice look elegant.
Chocolate-Covered Strawberries
For birthdays, anniversaries, or Valentine’s Day, serve each slice with a chocolate-covered strawberry for an extra-special presentation.
When to Serve Heavenly Chocolate Pie
This dessert is versatile enough for nearly any occasion.
Thanksgiving: A wonderful chocolate alternative to traditional pumpkin or pecan pie.
Christmas: A rich, festive dessert that looks beautiful on a holiday table.
Easter: A creamy chocolate treat that complements a spring celebration.
Birthdays: An excellent alternative to birthday cake for chocolate lovers.
Valentine’s Day: A romantic dessert when served with strawberries or raspberries.
Family Dinners: A comforting homemade dessert to share after Sunday dinner.
Potlucks: A crowd-pleasing option that can be prepared in advance and transported in a chilled container.
Special Celebrations: A beautiful dessert for anniversaries, graduations, and other memorable occasions.
You do not need a special occasion, however. Sometimes an ordinary evening becomes a little more enjoyable with a homemade slice of chocolate pie.
Common Mistakes to Avoid
Even simple desserts can have problems if certain steps are overlooked.
Filling That Does Not Set
If your chocolate pie remains runny after chilling, the custard may not have been cooked long enough.
Cornstarch must reach a sufficient temperature to activate its thickening properties.
Bring the custard to a gentle boil while whisking and cook for approximately 1 minute before removing it from the heat.
Also, measure the cornstarch accurately.
Lumpy Chocolate Filling
Lumps can develop when the dry ingredients are not mixed properly or when the eggs heat too quickly.
Whisk the sugar, cocoa powder, and cornstarch together before adding the liquids.
Temper the egg yolks slowly and continue whisking during cooking.
If small lumps appear, strain the custard while it is still warm.
Soggy Pie Crust
A soggy crust usually results from insufficient baking or excess moisture.
Bake the crust completely and allow it to cool before filling.
For additional protection, brush the cooled crust with a thin layer of melted chocolate and let it harden before adding the custard.
Whipped Cream That Becomes Watery
Whipped cream may lose its structure if it is underwhipped, stored too long, or exposed to excessive warmth.
Use cold cream, whip it until it holds its shape, and keep the finished pie refrigerated.
Chocolate Filling That Tastes Too Sweet
Chocolate desserts should have a balance of sweetness and cocoa flavor.
If you prefer a darker chocolate taste, use bittersweet chocolate instead of semisweet chocolate.
You can also slightly reduce the sugar, although significant changes may affect the final texture.
Frequently Asked Questions About Heavenly Chocolate Pie
Can I use a store-bought pie crust?
Yes. A store-bought pie crust works perfectly and saves preparation time. Just make sure to fully bake and cool it before adding the filling.
Can I make Heavenly Chocolate Pie without eggs?
Yes, but the recipe will need some adjustments. You can make an egg-free chocolate pudding filling using milk, sugar, cocoa powder, cornstarch, chocolate, and butter. The texture will be slightly different from the traditional custard.
Can I use dark chocolate instead of semisweet chocolate?
Absolutely. Dark chocolate creates a deeper, less sweet flavor. Choose a chocolate with approximately 60–70% cocoa content if you prefer a more intense chocolate dessert.
How long does Heavenly Chocolate Pie need to chill?
The pie should chill for at least 4 hours. Overnight refrigeration is recommended for cleaner slices and a firmer filling.
Can I use a graham cracker crust?
Yes. A graham cracker crust is a delicious alternative to traditional pastry. It adds a lightly sweet, crunchy texture that complements the creamy chocolate filling.
Why is my chocolate pie filling grainy?
Graininess may result from overheating the eggs, scorching the custard, or using chocolate that has not melted completely.
Cook over moderate heat, whisk continuously, and remove the saucepan from the heat before adding the chopped chocolate.
Can I make individual chocolate pies?
Yes. Divide the baked crust and filling among small tart shells or individual dessert cups. Adjust the crust baking time as needed, and refrigerate until the filling is set.
Is Heavenly Chocolate Pie better the next day?
Many people prefer chocolate cream pie after it has chilled overnight. The filling has more time to set, the flavors become well blended, and slicing becomes easier.
Approximate Nutrition Information
The following estimates are based on one slice when the pie is divided into eight servings, including the pastry crust and whipped cream topping.
| Nutrient | Approximate Amount |
|---|---|
| Calories | 490–560 |
| Carbohydrates | 48–58 g |
| Protein | 6–8 g |
| Total Fat | 32–38 g |
| Saturated Fat | 18–23 g |
| Sugar | 32–40 g |
| Fiber | 2–3 g |
Actual nutritional values will vary depending on the crust, chocolate brand, portion sizes, and toppings used.
Why Homemade Chocolate Pie Is Worth the Effort
There is something rewarding about creating a dessert from scratch.
Homemade chocolate pie allows you to control the ingredients, adjust the sweetness, and choose the quality of the chocolate.
Unlike some packaged desserts, a homemade pie offers the fresh flavor of real cream, butter, vanilla, and chocolate.
The process itself can also be enjoyable.
Whisking the chocolate custard, watching it gradually thicken, filling the golden crust, and adding the finishing touches create a sense of accomplishment.
And when you finally cut into the chilled pie and reveal that beautiful, creamy chocolate center, the effort feels worthwhile.
Homemade desserts are not simply about satisfying a sweet tooth. They can also become part of family traditions, celebrations, and memories.
A favorite pie recipe may be passed down through generations, prepared for birthdays, or brought to holiday gatherings year after year.
That is part of what makes a classic dessert like Heavenly Chocolate Pie so special.
Final Thoughts: A Little Slice of Chocolate Heaven
Heavenly Chocolate Pie is everything a great homemade dessert should be: rich, creamy, comforting, and absolutely delicious.
The buttery crust provides the perfect foundation for the silky chocolate filling, while the fluffy whipped cream adds a light finishing touch.
Whether you are making it for a family gathering, a holiday celebration, or a quiet evening at home, this recipe offers a wonderful way to enjoy one of the most beloved flavors in the world.
With simple ingredients, easy-to-follow instructions, and plenty of opportunities for customization, Heavenly Chocolate Pie is a dessert you will want to make again and again.
Sometimes the best desserts are not the most complicated. They are the ones that bring people together, create lasting memories, and make ordinary moments feel special.
And with its rich chocolate flavor and irresistible creamy texture, this homemade pie certainly lives up to its heavenly name.
Have you ever made a homemade chocolate cream pie, and do you prefer yours with a traditional buttery crust, a graham cracker crust, or a chocolate cookie crust? Share your favorite way to enjoy this classic dessert!


Leave a Reply